
1. מבוא
סקירה כללית
במעבדה הזו תבנו ותפרסו אפליקציית צ'אט מבוססת-AI עם סט מלא של טכנולוגיות (full-stack) ב-Google Kubernetes Engine (GKE). האפליקציה ה "היברידית" הזו מדגימה דפוס ארכיטקטוני רב עוצמה: היכולת לעבור בצורה חלקה בין מודל פתוח באירוח עצמי (Gemma 3 12B) שפועל ישירות באשכול שלכם לבין שירות AI מנוהל (Gemini 2.5 Flash דרך Vertex AI).
                                   +----------------------+
                                   |   User (Web Browser) |
                                   +-----------+----------+
                                               |
                                               v
+----------------------------------------------+---------------------------------------------+
| Google Cloud Platform                        |                                             |
|   |                                  +-------+-------+                                     |
|   |                                  | Load Balancer |                                     |
|   |                                  +-------+-------+                                     |
|   |                                          v                                             |
|   +------------------------------------------+-----------------------------------------+   |
|   |  Google Kubernetes Engine (GKE)          |                                         |   |
|   |                                          v                                         |   |
|   |                              +-----------+-----------+                             |   |
|   |                              |    Gradio Chat App    |                             |   |
|   |                              +--+-----------------+--+                             |   |
|   |                                 |                 |                                |   |
|   |                   (Self-hosted) |                 | (Managed via SDK)              |   |
|   |                                 v                 |                                |   |
|   |                  +--------------+---+             |                                |   |
|   |                  | Gemma 3 Model    |             |                                |   |
|   |                  | (GPU Node)       |             |                                |   |
|   |                  +------------------+             |                                |   |
|   +---------------------------------------------------|--------------------------------+   |
|                                                       |                                    |
|                                                       v                                    |
|                                            +----------+-----------+                        |
|                                            | Vertex AI (Gemini)   |                        |
|                                            +----------------------+                        |
|                                                       | (Save History)                     |
|                                                       v                                    |
|                                            +----------+-----------+                        |
|                                            | Firestore Database   |                        |
|                                            +----------------------+                        |
+--------------------------------------------------------------------------------------------+
תשתמשו ב-Terraform כדי להקצות את התשתית, כולל אשכול GKE Autopilot ומסד נתונים של Firestore כדי לשמור את היסטוריית שיחת הצ'אט. לאחר מכן תמלאו את קוד האפליקציה ב-Python כדי לנהל שיחות מרובות, ליצור ממשק עם שני מודלים של AI ולפרוס את האפליקציה הסופית באמצעות Cloud Build ו-Skaffold.
מה תלמדו
- הקצאת תשתית של GKE ו-Firestore באמצעות Terraform.
- פריסת מודל שפה גדול (Gemma) ב-GKE Autopilot באמצעות מניפסטים של Kubernetes.
- הטמעה של ממשק צ'אט של Gradio ב-Python, שיכול לעבור בין מנועי AI שונים.
- שימוש ב-Firestore לאחסון ולאחזור של היסטוריית שיחות צ'אט.
- מגדירים את Workload Identity כדי להעניק לעומסי העבודה ב-GKE גישה מאובטחת לשירותי Google Cloud (Vertex AI, Firestore).
דרישות מוקדמות
- פרויקט ב-Google Cloud שהחיוב בו מופעל.
- היכרות בסיסית עם Python, Kubernetes וכלי שורת פקודה רגילים.
- טוקן של Hugging Face עם גישה למודלים של Gemma.
2. הגדרת הפרויקט
- אם עדיין אין לכם חשבון Google, אתם צריכים ליצור חשבון Google.
- משתמשים בחשבון לשימוש אישי במקום בחשבון לצורכי עבודה או בחשבון בית ספרי. יכול להיות שבחשבונות לצורכי עבודה או בחשבונות בית ספריים יש הגבלות שימנעו מכם להפעיל את ממשקי ה-API שנדרשים למעבדה הזו.
- נכנסים למסוף Google Cloud.
- מפעילים את החיוב במסוף Cloud.
- העלות של השלמת ה-Lab הזה במשאבי Cloud צריכה להיות פחות מ-1$.
- כדי למחוק משאבים ולמנוע חיובים נוספים, אפשר לבצע את השלבים בסוף ה-Lab הזה.
- משתמשים חדשים זכאים לתקופת ניסיון בחינם בשווי 300$.
- יוצרים פרויקט חדש או בוחרים להשתמש מחדש בפרויקט קיים.
פתיחת Cloud Shell Editor
- כדי לעבור ישירות אל Cloud Shell Editor, לוחצים על הקישור הזה.
- אם תתבקשו לאשר בשלב כלשהו היום, תצטרכו ללחוץ על אישור כדי להמשיך.
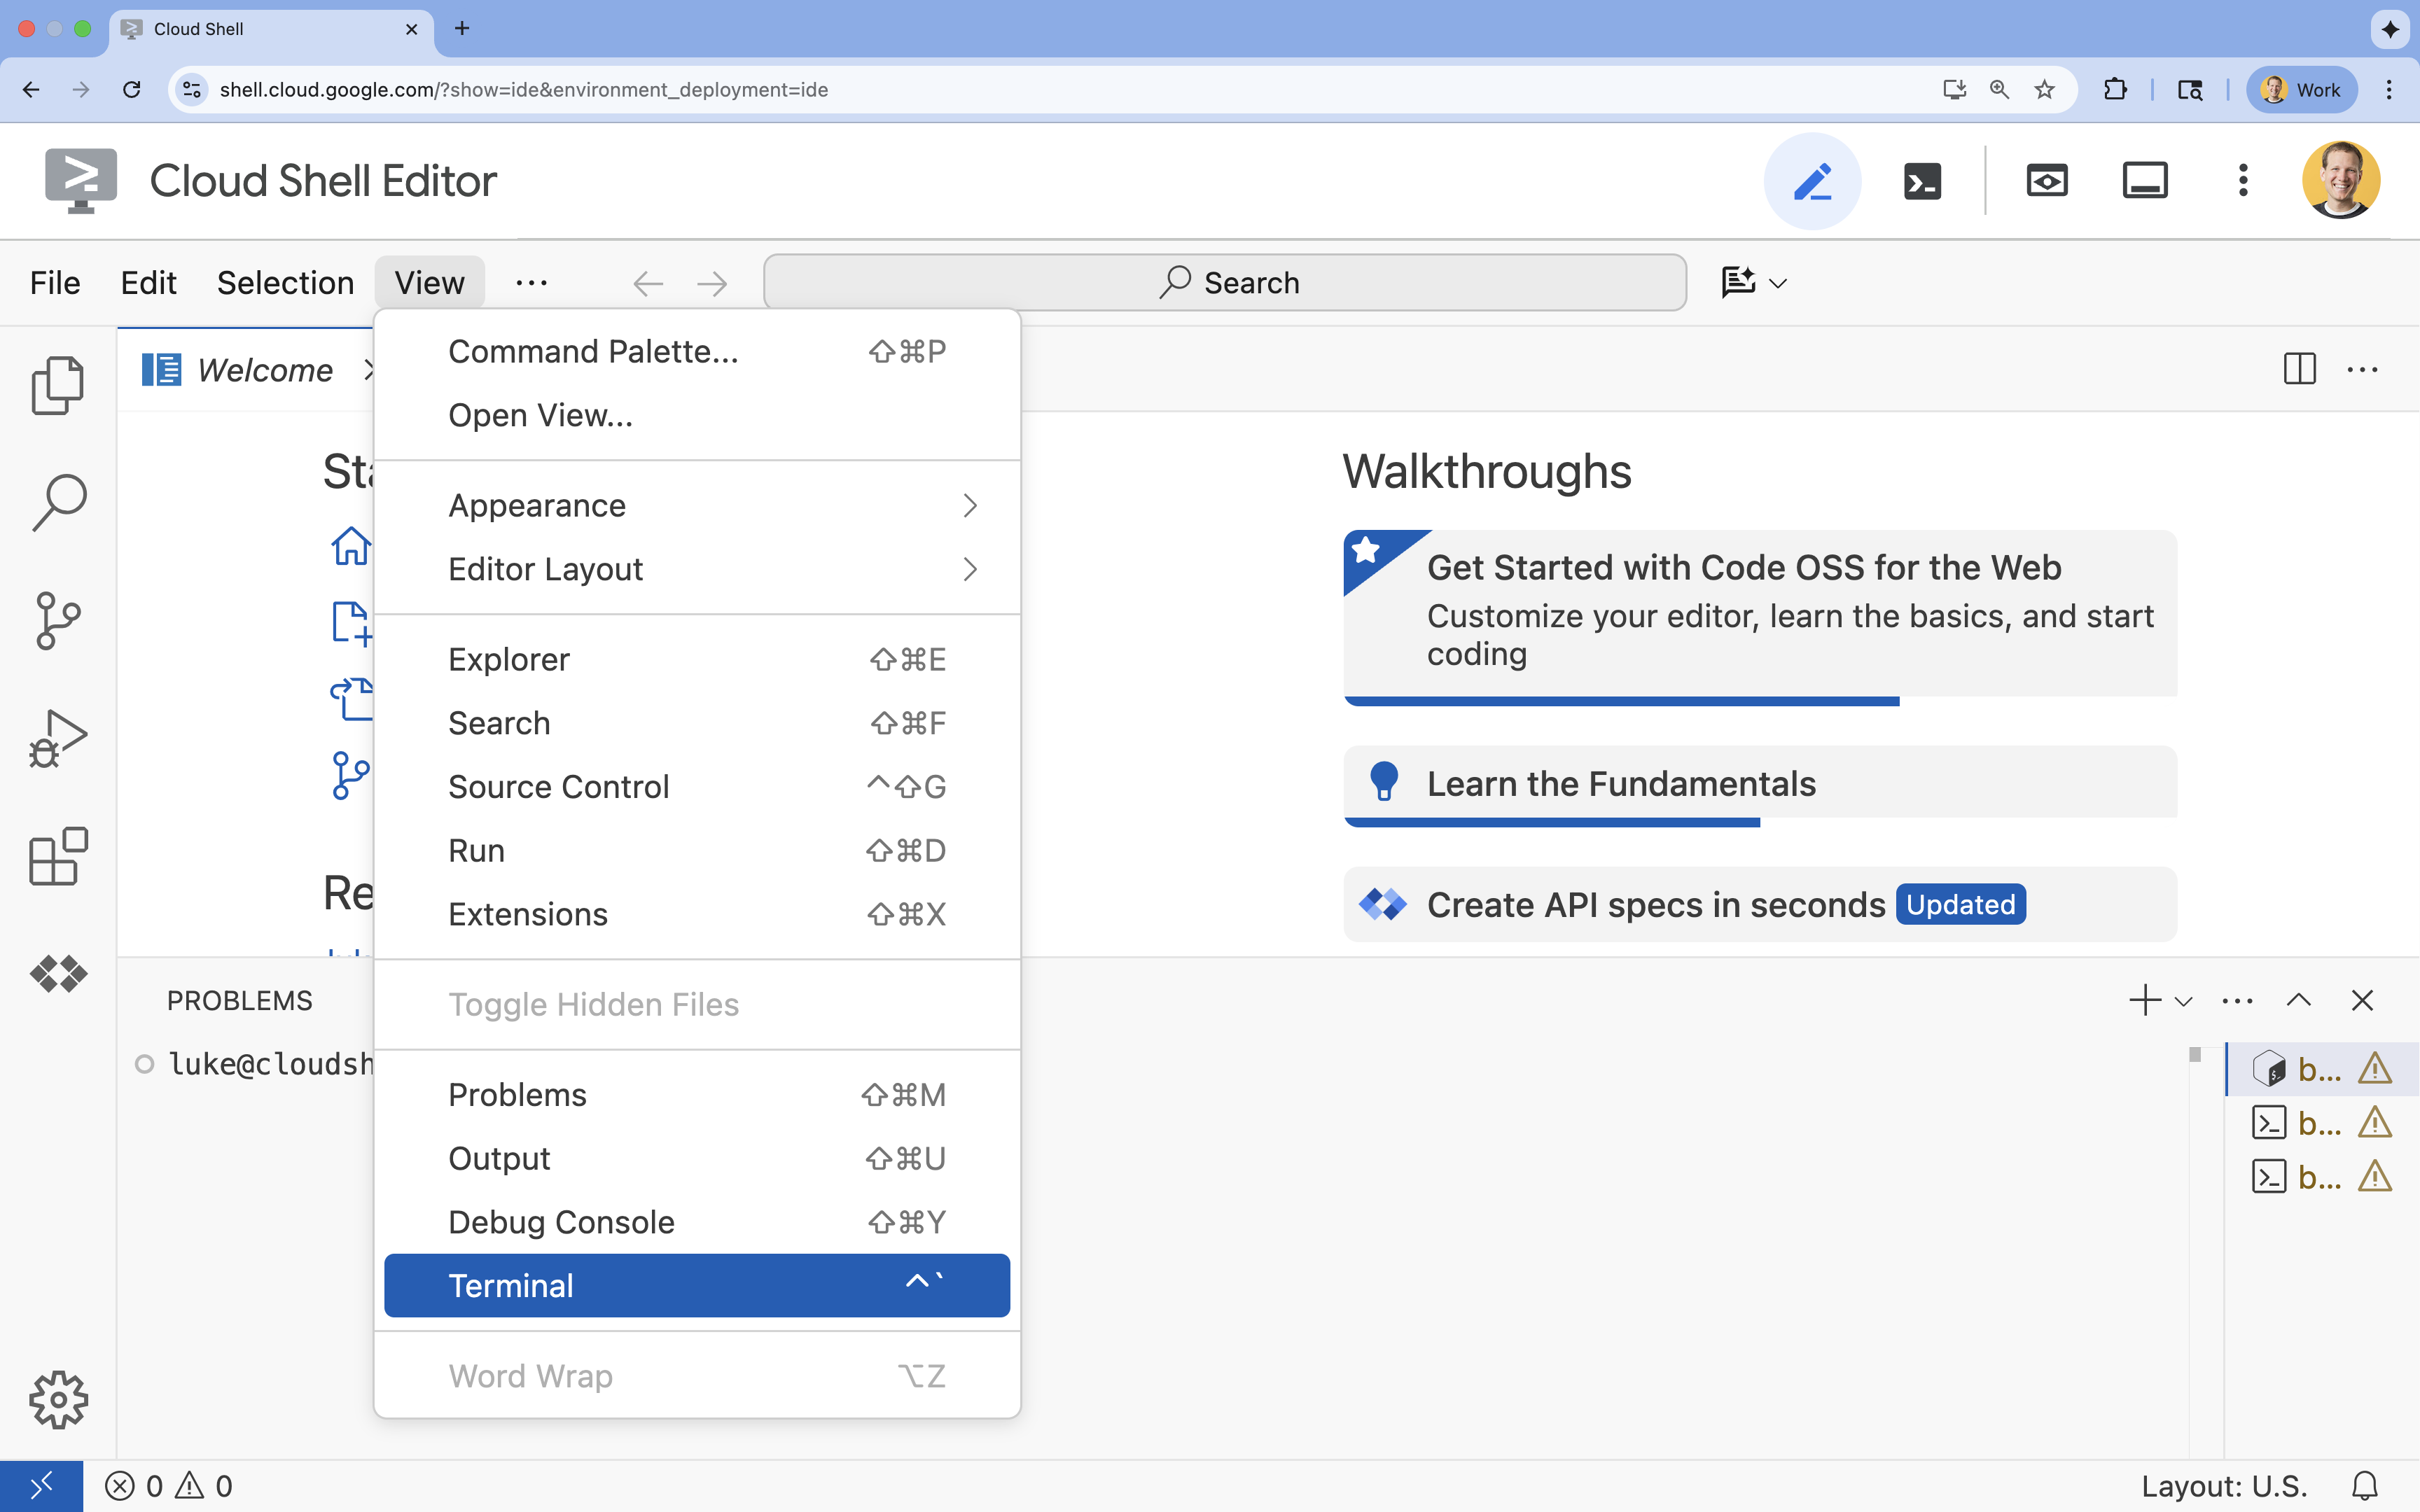
- אם הטרמינל לא מופיע בתחתית המסך, פותחים אותו:
- לוחצים על הצגה.
- לוחצים על Terminal (מסוף)
 .
.
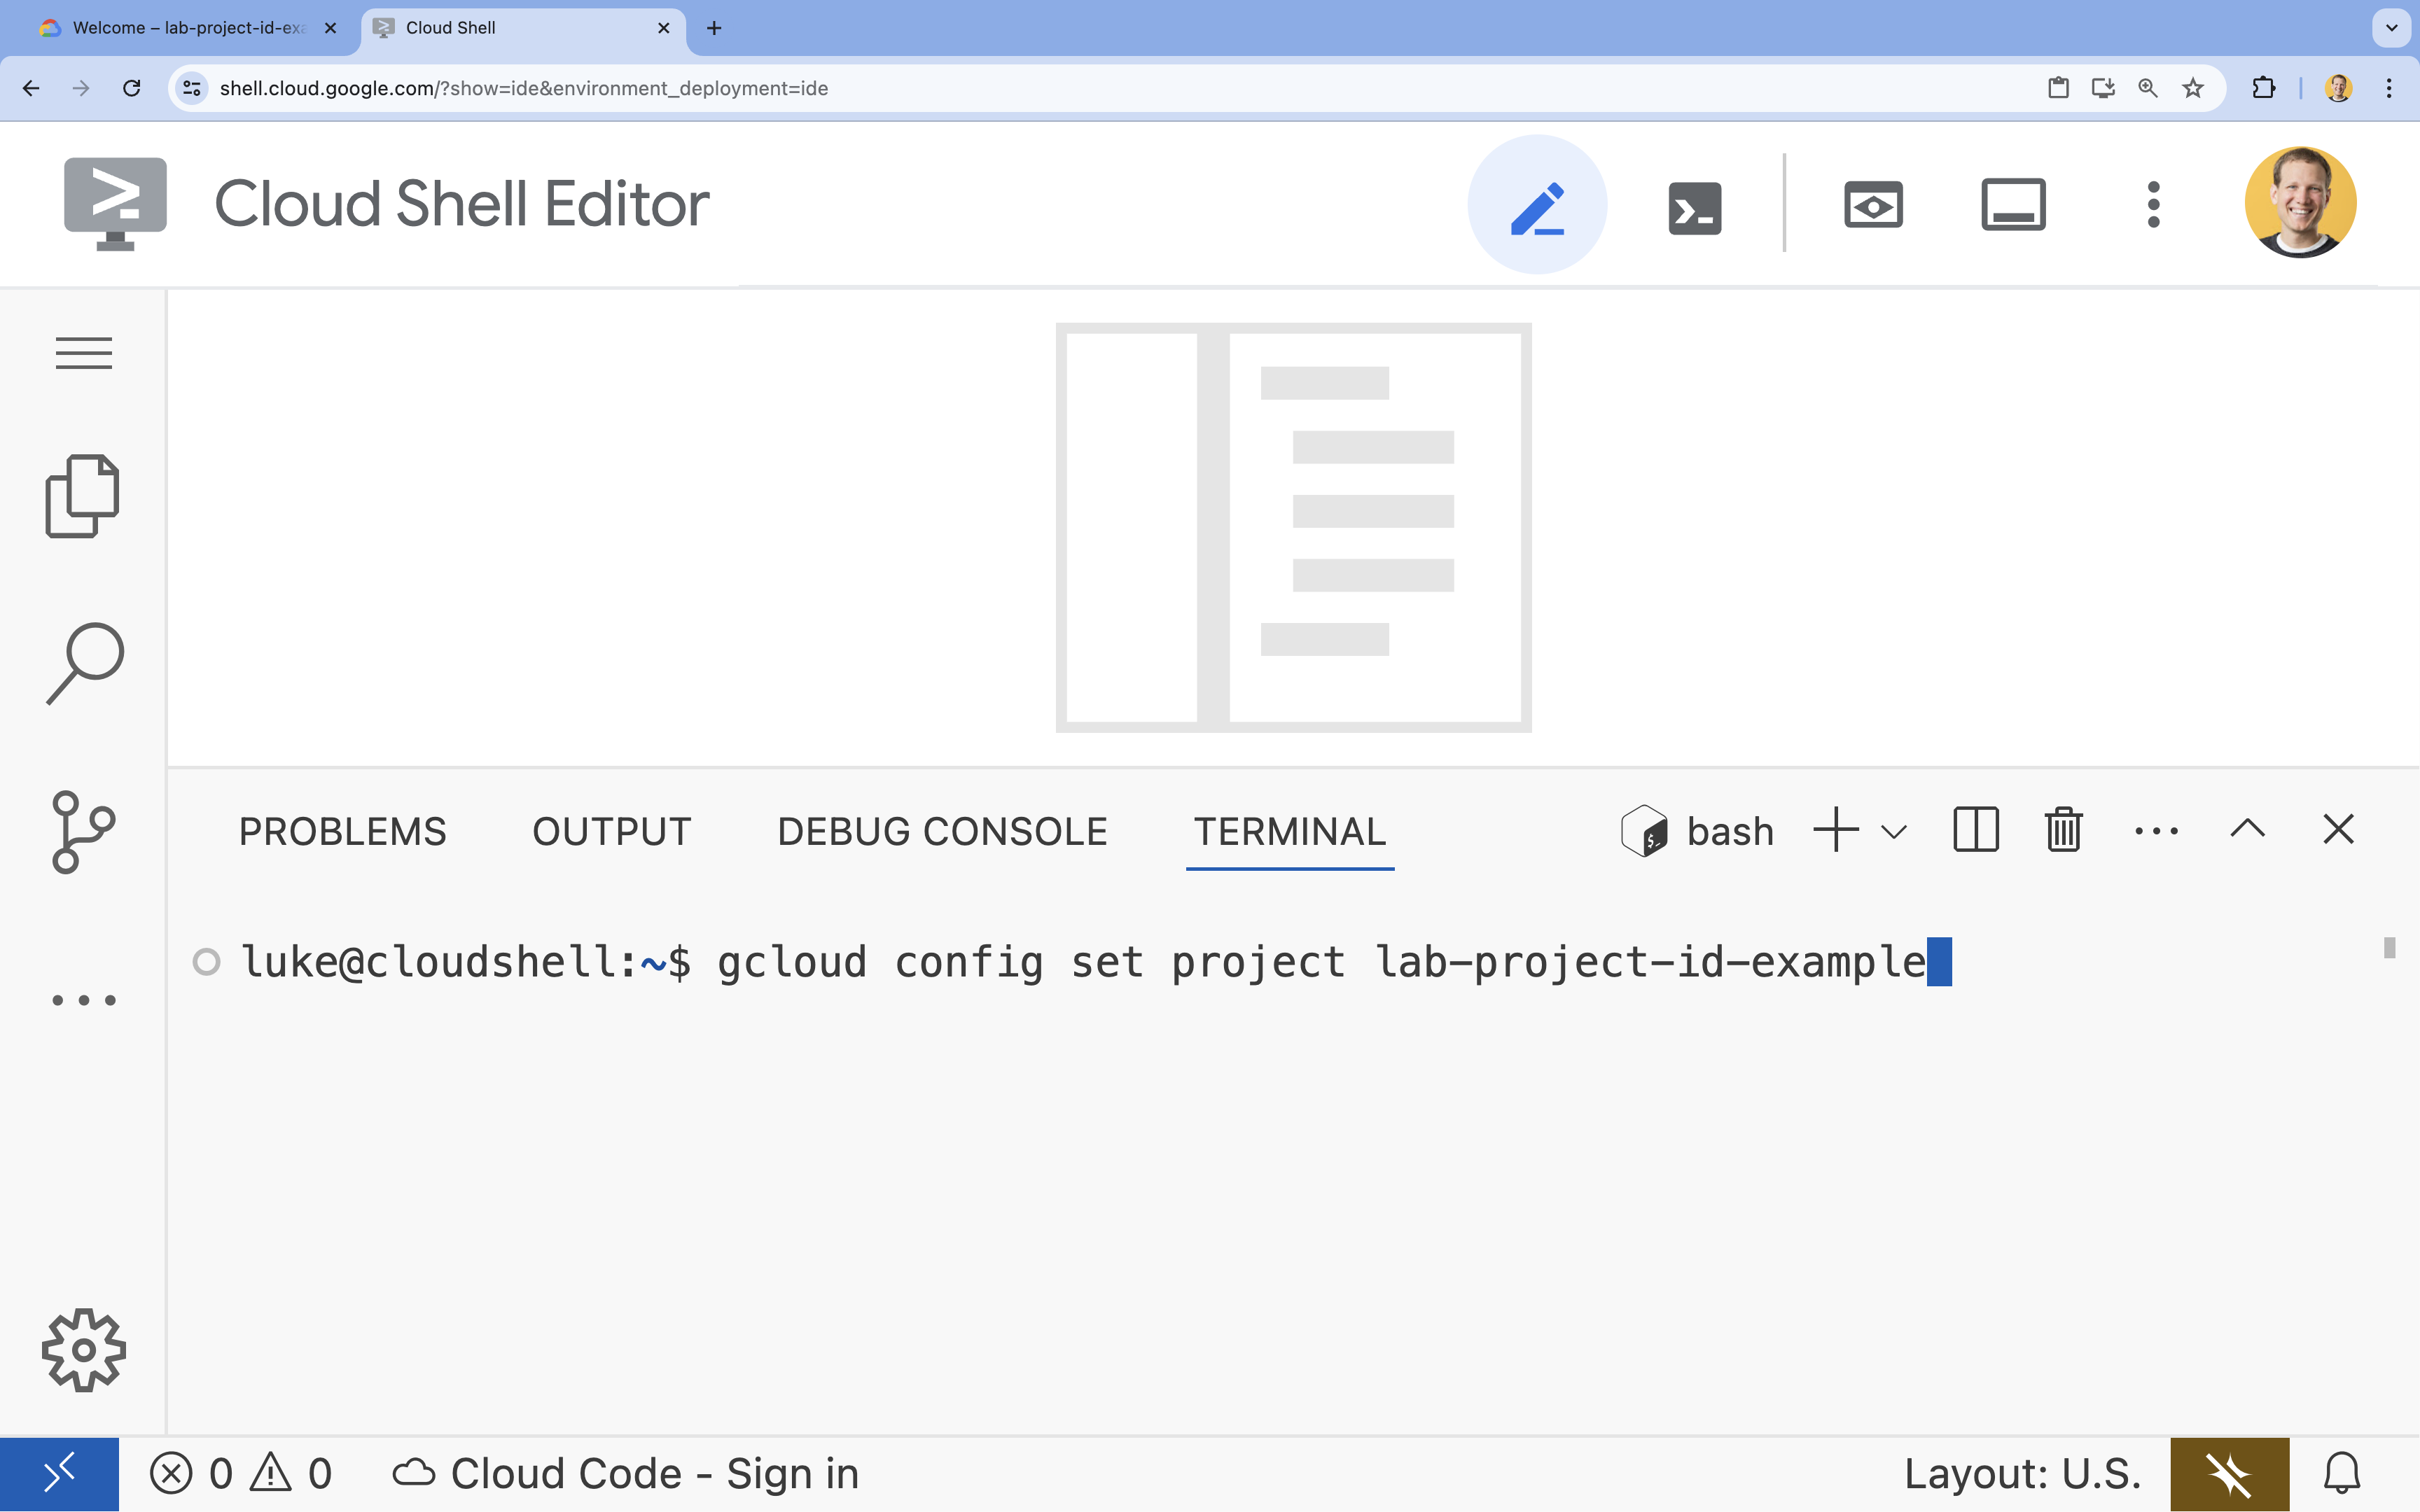
- בטרמינל, מגדירים את הפרויקט באמצעות הפקודה הבאה:
- פורמט:
gcloud config set project [PROJECT_ID] - דוגמה:
gcloud config set project lab-project-id-example - אם אתם לא זוכרים את מזהה הפרויקט:
- כדי לראות את כל מזהי הפרויקטים, מריצים את הפקודה:
gcloud projects list | awk '/PROJECT_ID/{print $2}'
- כדי לראות את כל מזהי הפרויקטים, מריצים את הפקודה:
- פורמט:
- תוצג ההודעה הבאה:
Updated property [core/project].
WARNINGומוצגת השאלהDo you want to continue (Y/n)?, כנראה שהזנתם את מזהה הפרויקט בצורה שגויה. לוחצים עלn, לוחצים עלEnterומנסים להריץ שוב את הפקודהgcloud config set project.
שכפול המאגר
בטרמינל של Cloud Shell, משכפלים את מאגר הפרויקט ועוברים לספריית הפרויקט:
git clone https://github.com/GoogleCloudPlatform/devrel-demos.git
cd devrel-demos/containers/gradio-chat-gke
כדאי להקדיש רגע כדי לבדוק את מבנה הפרויקט:
gradio-chat-gke/
├── app/
│   ├── app.py                # Main application logic (you will edit this)
│   ├── requirements.txt      # Python dependencies
│   └── themes.py             # UI theming
├── deploy/
│   ├── chat-deploy.yaml      # Kubernetes deployment for the chat app
│   ├── Dockerfile            # Container definition for the chat app
│   └── gemma3-12b-deploy.yaml# Kubernetes deployment for Gemma model
├── infra/
│   └── main.tf               # Terraform infrastructure definition
└── skaffold.yaml             # Skaffold configuration for building/deploying
הגדרה של משתני סביבה
מגדירים משתני סביבה למזהה הפרויקט ולמספר הפרויקט. הם ישמשו את Terraform ואת הפקודות הבאות.
export GOOGLE_CLOUD_PROJECT=$(gcloud config get-value project)
export PROJECT_NUMBER=$(gcloud projects describe $GOOGLE_CLOUD_PROJECT --format="value(projectNumber)")
export REGION=us-central1
הפעלת Cloud Resource Manager API
כדי ש-Terraform יוכל לנהל את המשאבים של הפרויקט, צריך להפעיל את Cloud Resource Manager API. לכן, קודם צריך להפעיל אותו. בהמשך נשתמש ב-Skaffold כדי לפרוס את אפליקציית הצ'אט שלנו, שמשתמשת ב-Cloud Build כדי ליצור את קובץ האימג' של הקונטיינר. עכשיו נפעיל את Storage API וניצור את הקטגוריה שנדרשת ל-Cloud Build. נשתמש ב-Terraform עצמו כדי להפעיל את שאר ממשקי ה-API שנדרשים לפרויקט הזה.
gcloud services enable cloudresourcemanager.googleapis.com storage-api.googleapis.com
יצירת קטגוריית Staging ב-Cloud Build
Skaffold משתמש ב-Google Cloud Build, שדורש קטגוריה של Cloud Storage כדי להכין את קוד המקור.
כדאי ליצור אותו עכשיו כדי לוודא שהוא קיים:
gcloud storage buckets create gs://${GOOGLE_CLOUD_PROJECT}_cloudbuild
(אם מופיעה הודעת שגיאה שאומרת שהקטגוריה כבר קיימת, אפשר להתעלם ממנה).
3. הקצאת תשתית באמצעות Terraform
נשתמש ב-Terraform כדי להגדיר את המשאבים הנדרשים ב-Google Cloud. כך אפשר להבטיח סביבה עקבית שניתן לשחזר.
- עוברים לספריית התשתית:
cd infra
בקובץ הזה מוגדרים ממשקי ה-API הנוספים שנצטרך לפרויקט הזה: cloudbuild, artifactregistry, container (gke), firestore ו-aiplatform (vertexai). כדי לראות איך מפעילים את ממשקי ה-API באמצעות Terraform, אפשר לעיין בקובץ או בקטע הבא:
resource "google_project_service" "cloudbuild" {
  service            = "cloudbuild.googleapis.com"
  disable_on_destroy = false
  project            = var.project_id
}

resource "google_project_service" "artifactregistry" {
  service            = "artifactregistry.googleapis.com"
  disable_on_destroy = false
  project            = var.project_id
}

resource "google_project_service" "container" {
  service            = "container.googleapis.com"
  disable_on_destroy = false
  project            = var.project_id
}

resource "google_project_service" "firestore" {
  service            = "firestore.googleapis.com"
  disable_on_destroy = false
  project            = var.project_id
}

resource "google_project_service" "vertexai" {
  service            = "aiplatform.googleapis.com"
  disable_on_destroy = false
  project            = var.project_id
}
הגדרת אשכול GKE
פותחים את infra/main.tf בעורך. יוצגו כמה תגובות של # TODO. אפשר לפתוח אותו באופן ידני או להשתמש בפקודה הזו כדי לפתוח את הקובץ בכלי העריכה:
cloudshell edit main.tf
קודם כול, צריך להגדיר את אשכול Kubernetes. נשתמש ב-GKE Autopilot, שמתאים באופן אידיאלי לעומסי עבודה של AI כי הוא מטפל בניהול הצמתים באופן אוטומטי.
מוצאים את # TODO: Create a GKE Autopilot Cluster ומוסיפים את הבלוק הבא מתחתיו:
# Create a GKE Autopilot Cluster
resource "google_container_cluster" "primary" {
  name     = var.cluster_name
  location = var.region
  project  = var.project_id

  # Enable Autopilot mode
  enable_autopilot = true

  deletion_protection = false

  # Networking
  network    = "default"
  subnetwork = "projects/${var.project_id}/regions/${var.region}/subnetworks/default"

  # Timeout for cluster creation
  timeouts {
    create = "30m"
    update = "30m"
  }

  depends_on = [google_project_service.container]
}
הודעה enable_autopilot = true. השורה הזו חוסכת לנו את הצורך לנהל מאגרי צמתים, התאמה אוטומטית לעומס וסידור בקונטיינרים של עומסי העבודה של ה-GPU.
הגדרת מסד הנתונים ב-Firestore
בשלב הבא, צריך מקום לאחסון היסטוריית הצ'אט. Firestore הוא מסד נתונים NoSQL בלי שרת (serverless), שמתאים בדיוק לצורך הזה.
מחפשים את # TODO: Create a Firestore Database ומוסיפים:
resource "google_firestore_database" "database" {
  project     = var.project_id
  name        = "chat-app-db"
  location_id = "nam5"
  type        = "FIRESTORE_NATIVE"

  depends_on = [google_project_service.firestore]
}
אחרי שמוסיפים את משאב מסד הנתונים, מאתרים את # TODO: Create an initial Firestore Document ומוסיפים את הבלוק הבא. המשאב הזה יוצר מסמך placeholder ראשוני באוסף שלנו, וזה עוזר לאתחל את מבנה מסד הנתונים.
resource "google_firestore_document" "initial_document" {
  project     = var.project_id
  collection  = "chat_sessions"
  document_id = "initialize"
  fields = <<EOF
  EOF

  depends_on = [google_firestore_database.database]
}
הגדרת Workload Identity
לבסוף, צריך להגדיר את האבטחה. אנחנו רוצים שה-Pods של Kubernetes יוכלו לגשת ל-Vertex AI ול-Firestore בלי שנצטרך לנהל סודות או מפתחות API. אנחנו עושים את זה באמצעות Workload Identity.
אנחנו נקצה את תפקידי ה-IAM הנדרשים לחשבון השירות ב-Kubernetes (KSA) שהאפליקציה שלנו תשתמש בו.
הערה: חשבון השירות של Kubernetes (gradio-chat-ksa) שאליו יש הפניה בהתאמות האלה עדיין לא קיים. הוא ייווצר בהמשך כשנפרוס את האפליקציה שלנו באשכול. אין שום בעיה (וזה אפילו נפוץ) להקצות מראש את הקישורים האלה ב-IAM.
מחפשים את # TODO: Configure Workload Identity IAM bindings ומוסיפים:
locals {
  ksa_principal = "principal://iam.googleapis.com/projects/${var.project_number}/locations/global/workloadIdentityPools/${var.project_id}.svc.id.goog/subject/ns/default/sa/gradio-chat-ksa"
}

resource "google_project_iam_member" "ksa_token_creator" {
  project = var.project_id
  role    = "roles/iam.serviceAccountTokenCreator"
  member  = local.ksa_principal
}

resource "google_project_iam_member" "ksa_vertex_user" {
  project = var.project_id
  role    = "roles/aiplatform.user"
  member  = local.ksa_principal
}

resource "google_project_iam_member" "ksa_datastore_user" {
  project = var.project_id
  role    = "roles/datastore.user"
  member  = local.ksa_principal
}
החלת ההגדרה
אחרי שהגדרנו את התשתית, נבצע הקצאה שלה.
- קודם צריך להגדיר כמה משתנים לשימוש ב-Terraform. נעשה זאת באמצעות משתני סביבה:
export TF_VAR_project_id=$(gcloud config get-value project)
export TF_VAR_project_number=$(gcloud projects describe $TF_VAR_project_id --format="value(projectNumber)")
export TF_VAR_region="us-central1"
- מאתחלים את Terraform:
terraform init
- אפשר להשתמש ב-
terraform planכדי לראות תצוגה מקדימה של המשאבים שייווצרו.
terraform plan
- מחילים את ההגדרה. כשמופיעה בקשה, מקלידים
yesכדי לאשר.
terraform apply
הערה: יכול להיות שיחלפו 10-15 דקות עד שהקצאת משאבים לאשכול GKE תושלם. בזמן ההמתנה, אפשר לעבור לקטע הבא כדי לבדוק את קוד האפליקציה.
- אחרי שמסיימים, מגדירים את
kubectlלתקשורת עם האשכול החדש:
gcloud container clusters get-credentials gradio-chat-cluster --region us-central1 --project $TF_VAR_project_id
4. פריסת Gemma באירוח עצמי ב-GKE
בשלב הבא נבצע פריסה של מודל Gemma 3 12B ישירות באשכול GKE שלכם. כך אפשר להסיק מסקנות עם זמן אחזור נמוך ולקבל שליטה מלאה בסביבת ההפעלה של המודל.
הגדרת פרטי הכניסה של Hugging Face
כדי להוריד את מודל Gemma, צריך לאמת את האשכול באמצעות Hugging Face.
- מוודאים שיש לכם טוקן של Hugging Face.
- יוצרים סוד של Kubernetes עם האסימון שלכם – מחליפים את [YOUR_HF_TOKEN] באסימון בפועל:
kubectl create secret generic hf-secret --from-literal=hf_api_token=[YOUR_HF_TOKEN]
פריסת המודל
נשתמש בפריסת Kubernetes רגילה כדי להפעיל את המודל. קובץ המניפסט נמצא במיקום deploy/gemma3-12b-deploy.yaml. אפשר לפתוח אותו באופן ידני או להשתמש בפקודה הזו כדי לפתוח את הקובץ בכלי העריכה:
cd ../deploy
cloudshell edit gemma3-12b-deploy.yaml
כדאי להקדיש רגע לבדיקת הקובץ הזה. שימו לב לקטע resources:
        resources:
          requests:
            nvidia.com/gpu: 4
      nodeSelector:
        cloud.google.com/gke-accelerator: nvidia-l4
זוהי תשתית AI דקלרטיבית. אנחנו אומרים ל-GKE Autopilot שה-Pod הספציפי הזה דורש 4 GPUs מסוג NVIDIA L4. התכונה Autopilot תמצא או תקצה צומת שעומד בדיוק בדרישות האלה. אם צומת מסוים לא זמין להקצאה, המערכת תמשיך לנסות עד שצומת שעומד בדרישות יהיה זמין.
- מחילים את מניפסט הפריסה:
cd .. kubectl apply -f deploy/gemma3-12b-deploy.yamlkubectl get podsgemmaעדיין לא פועל. אפליקציית הצ'אט תתחבר לשירות Gemma בכל פעם שהוא יהיה זמין. חשוב לדעת שלא תוכלו לקיים אינטראקציה עם Gemma דרך אפליקציית הצ'אט עד שהסטטוס של הפודgemmaיהיהRunningושל1/1. אבל בינתיים אפשר לשוחח עם Gemini.
5. פיתוח אפליקציית Chat
עכשיו נשלים את אפליקציית Python. פותחים את הקובץ app/app.py ב-Cloud Shell Editor. יש כמה בלוקים של # TODO שצריך למלא כדי שהאפליקציה תפעל.
cloudshell edit app/app.py
שלב 1: עיבוד היסטוריית השיחות
מודלים גדולים של שפה (LLM) דורשים שפורמט היסטוריית השיחות יהיה ספציפי כדי שהם יוכלו להבין מי אמר מה.
תבנית 'מתרגם אוניברסלי': שימו לב שאנחנו עומדים לכתוב שתי פונקציות שונות כדי לעבד את אותה היסטוריית צ'אט. זהו דפוס מרכזי באפליקציות מרובות מודלים.
- מקור האמת (Gradio): האפליקציה שלנו שומרת את ההיסטוריה בפורמט פשוט וכללי:
[[user_msg1, bot_msg1], ...]. - יעד 1 (Gemma): צריך להמיר את הטקסט הזה למחרוזת גולמית אחת עם טוקנים מיוחדים ספציפיים.
- יעד 2 (Gemini): צריך להמיר את זה לרשימה מובנית של אובייקטים של API.
על ידי עיצוב מחדש של ההיסטוריה הגנרית לפורמט היעד בכל תור, אנחנו יכולים לעבור בצורה חלקה בין מודלים. כדי להוסיף מודל אחר בהמשך, תצטרכו לכתוב פונקציית עיבוד חדשה לפורמט הספציפי שלו.
Gemma (אירוח עצמי)
הסבר על תבניות צ'אט: כשמארחים מודלים פתוחים משלכם, בדרך כלל צריך לעצב את ההנחיה באופן ידני למחרוזת ספציפית שהמודל אומן לזהות כשיחה. התכונה הזו נקראת 'תבנית צ'אט'.
מחפשים את הפונקציה process_message_gemma ב-app.py ומחליפים אותה בקוד הבא:
# This function takes a user's message and the conversation history as input.
#   Its job is to format these elements into a single,
#   structured prompt that can be understood by the language model (LLM).
#   This structured format helps the LLM maintain context and generate more relevant responses.
def process_message_gemma(message, history):
    user_prompt_format = "User's Turn:\n>>> {prompt}\n"
    assistant_prompt_format = "Assistant's Turn:\n>>> {prompt}\n"

    history_message = ""
    for user_turn, assistant_turn in history:
        history_message += user_prompt_format.format(prompt=user_turn)
        history_message += assistant_prompt_format.format(prompt=assistant_turn)

    # Format the new user message
    new_user_message = user_prompt_format.format(prompt=message)
    # Create a new aggregated message to be used as a single flat string in a json object sent to the LLM
    aggregated_message = (
        history_message + new_user_message + assistant_prompt_format.format(prompt="")
    )
    return aggregated_message
ל-Gemini (מנוהל)
שירותים מנוהלים מעדיפים בדרך כלל אובייקטים מובנים על פני מחרוזות גולמיות. אנחנו צריכים פונקציה נפרדת כדי לעצב את ההיסטוריה לאובייקטים של types.Content בשביל Gemini SDK.
מחפשים את process_message_gemini ומחליפים אותו ב:
def process_message_gemini(message, history):
    contents = []
    for user_turn, model_turn in history:
        contents.append(
            types.Content(role="user", parts=[types.Part.from_text(text=user_turn)])
        )
        contents.append(
            types.Content(role="model", parts=[types.Part.from_text(text=model_turn)])
        )

    contents.append(
        types.Content(role="user", parts=[types.Part.from_text(text=message)])
    )
    return contents
שלב 2: קוראים למודל Gemma באירוח עצמי
אנחנו צריכים לשלוח את ההנחיה המעוצבת שלנו לשירות Gemma שפועל באשכול שלנו. נשתמש בבקשת HTTP POST רגילה לשם ה-DNS הפנימי של השירות.
מחפשים את הפונקציה call_gemma_model ומחליפים אותה בפונקציה:
# Construct the request, send it to Gemma, return the model's response
# aggregated_message = current user message + history
def call_gemma_model(aggregated_message, model_temperature, top_p, max_tokens):
    json_message = {
        "prompt": aggregated_message,
        "temperature": model_temperature,
        "top_p": top_p,
        "max_tokens": max_tokens,
        "stop": ["User's Turn:"],
    }

    # Log what will be sent to the LLM
    print("*** JSON request: " + str(json_message))

    # Send the constructed json with the user prompt to the model and put the model's response in the json_data variable
    json_data = post_request(json_message)

    # The response from the model is a list of predictions. We'll take the first result.
    raw_output = json_data["predictions"][0]

    # The vLLM server returns the full prompt in the response. We need to extract
    # just the newly generated text from the model.
    assistant_turn_marker = "Assistant's Turn:\n>>>"
    marker_pos = raw_output.rfind(assistant_turn_marker)

    if marker_pos != -1:
        output = raw_output[marker_pos + len(assistant_turn_marker) :]
    else:
        output = raw_output

    # Clean up potential over-generation
    stop_marker = "User's Turn:"
    stop_pos = output.lower().find(stop_marker.lower())
    if stop_pos != -1:
        output = output[:stop_pos]

    return output.strip()
שלב 3: קריאה למודל Vertex AI Gemini
למודל המנוהל, נשתמש ב-Google GenAI SDK. השיטה הזו פשוטה יותר כי היא מטפלת בקריאות לרשת בשבילנו.
מחפשים את הפונקציה call_gemini_model ומחליפים אותה בפונקציה:
# Send a request to Gemini via the VertexAI API. Return the model's response
# contents = list of types.Content objects
def call_gemini_model(contents, model_temperature, top_p, max_tokens):
    gemini_model = "gemini-2.5-flash"

    response = client.models.generate_content(
        model=gemini_model,
        contents=contents,
        config={
            "temperature": model_temperature,
            "max_output_tokens": max_tokens,
            "top_p": top_p,
        },
    )
    return response.text
שלב 4: הטמעה של ממשק ההסקה הראשי
לבסוף, אנחנו צריכים את פונקציית האורקסטרציה הראשית ש-Gradio קוראת לה. הפונקציה צריכה:
- אם ההיסטוריה ריקה, מאתחלים אותה.
- מעבדים את ההודעה.
- הבקשה מנותבת למודל שנבחר (Gemma או Gemini).
- שומרים את האינטראקציה ב-Firestore.
- החזרת התשובה לממשק המשתמש.
Gradio וניהול מצב: Gradio ChatInterface מטפל אוטומטית במצב ברמת הסשן (הצגת הודעות בדפדפן). עם זאת, אין לו תמיכה מובנית במסדי נתונים חיצוניים.
כדי לשמור את היסטוריית הצ'אט לטווח הארוך, אנחנו משתמשים בתבנית סטנדרטית: אנחנו מתחברים לפונקציה inference_interface. כשמקבלים את request: gr.Request כארגומנט, פרטי הסשן הנוכחי של המשתמש מועברים אלינו באופן אוטומטי על ידי Gradio. אנחנו משתמשים בזה כדי ליצור מסמך ייחודי ב-Firestore לכל משתמש, וכך מוודאים שהשיחות לא יתערבבו בסביבת משתמשים מרובים.
מחפשים את הפונקציה inference_interface ומחליפים אותה בפונקציה:
# This is the primary chat function. Every time a user sends a message, gradio calls this function,
# which sends the user's input to the appropriate AI (as indicated on the user interface), updates
# the chat history for future use during this session, and records the chat history in Firestore.
def inference_interface(
    message,
    history,
    model_name,
    model_temperature,
    top_p,
    max_tokens,
    request: gr.Request,
):

    # set history to empty array
    if history is None:
        history = []

    # Get or create session document
    session_hash = request.session_hash
    doc_id = f"session-{session_hash}"
    doc_ref = db.collection("chat_sessions").document(doc_id)

    # Create the session document if it doesn't exist
    if not doc_ref.get().exists:
        doc_ref.set({"Session start": datetime.datetime.now()})

    # Log info
    print("Model: " + model_name)
    print("LLM Engine: " + llm_engine)
    print("* History: " + str(history))

    # Pass the message and history to the appropriate model, as indicated by the user via the ui
    if model_name == "Gemma3 12b it":
        aggregated_message = process_message_gemma(message, history)
        output = call_gemma_model(
            aggregated_message, model_temperature, top_p, max_tokens
        )

    elif model_name == "Gemini":
        gemini_contents = process_message_gemini(message, history)
        output = call_gemini_model(
            gemini_contents, model_temperature, top_p, max_tokens
        )

    else:
        # Handle the case where no valid model is selected
        output = "Error: Invalid model selected."

    interaction = {"user": message, model_name: output}

    # Log the updated chat history
    print("* History: " + str(history) + " " + str(interaction))

    # Save the updated history to Firestore
    save_chat_history(interaction, doc_ref)

    return output
6. בדיקת הקובץ app.py
בשלב הזה, אפליקציית הצ'אט שלכם שמבוססת על gradio אמורה להיות מוכנה לפריסה. חשוב לוודא שהקובץ זהה בדיוק לקובץ המלא הבא.
פתרון בעיות: אם אתם פורסים את האפליקציה ומופיעה השגיאה 'החיבור נדחה' או 'לא ניתן לגשת לאתר הזה' כשאתם מנסים להתחבר אליה, נסו לחזור על השלבים מהנקודה הזו, החל מהעתקת הקובץ כולו והדבקתו בקובץ app.py.
# Copyright 2024 Google LLC
#
# Licensed under the Apache License, Version 2.0 (the "License");
# you may not use this file except in compliance with the License.
# You may obtain a copy of the License at
#
#      http://www.apache.org/licenses/LICENSE-2.0
#
# Unless required by applicable law or agreed to in writing, software
# distributed under the License is distributed on an "AS IS" BASIS,
# WITHOUT WARRANTIES OR CONDITIONS OF ANY KIND, either express or implied.
# See the License for the specific language governing permissions and
# limitations under the License.

import datetime

import google.auth
import google.cloud
import gradio as gr
import requests
import themes
from google import genai

from google.cloud import firestore
from google.genai import types

## Do one-time initialization things

## grab the project id from google auth
_, project = google.auth.default()
print(f"Project: {project}")

# Set initial values for model
llm_engine = "vllm"
host = "http://gemma-service:8000"
context_path = "/generate"

# initialize vertex for interacting with Gemini
client = genai.Client(
    vertexai=True,
    project=project,
    location="global",
)

# Initialize Firestore client
db = firestore.Client(database="chat-app-db")


# This is the primary chat function. Every time a user sends a message, gradio calls this function,
# which sends the user's input to the appropriate AI (as indicated on the user interface), updates
# the chat history for future use during this session, and records the chat history in Firestore.
def inference_interface(
    message,
    history,
    model_name,
    model_temperature,
    top_p,
    max_tokens,
    request: gr.Request,
):

    # set history to empty array
    if history is None:
        history = []

    # Get or create session document
    session_hash = request.session_hash
    doc_id = f"session-{session_hash}"
    doc_ref = db.collection("chat_sessions").document(doc_id)

    # Create the session document if it doesn't exist
    if not doc_ref.get().exists:
        doc_ref.set({"Session start": datetime.datetime.now()})

    # Log info
    print("Model: " + model_name)
    print("LLM Engine: " + llm_engine)
    print("* History: " + str(history))

    # Pass the message and history to the appropriate model, as indicated by the user via the ui
    if model_name == "Gemma3 12b it":
        aggregated_message = process_message_gemma(message, history)
        output = call_gemma_model(
            aggregated_message, model_temperature, top_p, max_tokens
        )

    elif model_name == "Gemini":
        gemini_contents = process_message_gemini(message, history)
        output = call_gemini_model(
            gemini_contents, model_temperature, top_p, max_tokens
        )

    else:
        # Handle the case where no valid model is selected
        output = "Error: Invalid model selected."

    interaction = {"user": message, model_name: output}

    # Log the updated chat history
    print("* History: " + str(history) + " " + str(interaction))

    # Save the updated history to Firestore
    save_chat_history(interaction, doc_ref)

    return output


# Construct the request, send it to Gemma, return the model's response
# aggregated_message = current user message + history
def call_gemma_model(aggregated_message, model_temperature, top_p, max_tokens):
    json_message = {
        "prompt": aggregated_message,
        "temperature": model_temperature,
        "top_p": top_p,
        "max_tokens": max_tokens,
        "stop": ["User's Turn:"],
    }

    # Log what will be sent to the LLM
    print("*** JSON request: " + str(json_message))  # Log the JSON request

    # Send the constructed json with the user prompt to the model and put the model's response in the json_data variable
    json_data = post_request(json_message)

    # The response from the model is a list of predictions.
    # We'll take the first result.
    raw_output = json_data["predictions"][0]

    # The vLLM server returns the full prompt in the response. We need to extract
    # just the newly generated text from the model. The prompt ends with
    # "Assistant's Turn:\n>>>", so we find the last occurrence of that and
    # take everything after it.
    assistant_turn_marker = "Assistant's Turn:\n>>>"
    marker_pos = raw_output.rfind(assistant_turn_marker)

    if marker_pos != -1:
        # Get the text generated by the assistant
        output = raw_output[marker_pos + len(assistant_turn_marker) :]
    else:
        # Fallback in case the marker isn't found
        output = raw_output

    # The model sometimes continues the conversation and includes the next user's turn.
    # The 'stop' parameter is a good hint, but we parse the output as a safeguard.
    stop_marker = "User's Turn:"
    stop_pos = output.lower().find(stop_marker.lower())
    if stop_pos != -1:
        output = output[:stop_pos]

    # The model also sometimes prefixes its response with "Output:". We'll remove this.
    output = output.lstrip()
    prefix_marker = "Output:"
    if output.lower().startswith(prefix_marker.lower()):
        output = output[len(prefix_marker) :]

    return output.strip()


# Send a request to Gemini via the VertexAI API. Return the model's response
# contents = list of types.Content objects
def call_gemini_model(contents, model_temperature, top_p, max_tokens):
    gemini_model = "gemini-2.5-flash"

    response = client.models.generate_content(
        model=gemini_model,
        contents=contents,
        config={
            "temperature": model_temperature,
            "max_output_tokens": max_tokens,
            "top_p": top_p,
        },
    )
    output = response.text  # Extract the generated text
    # Consider handling additional response attributes (safety, usage, etc.)
    return output


def process_message_gemini(message, history):
    contents = []
    for user_turn, model_turn in history:
        contents.append(
            types.Content(role="user", parts=[types.Part.from_text(text=user_turn)])
        )
        contents.append(
            types.Content(role="model", parts=[types.Part.from_text(text=model_turn)])
        )

    contents.append(
        types.Content(role="user", parts=[types.Part.from_text(text=message)])
    )
    return contents


# This function takes a user's message and the conversation history as input.
#   Its job is to format these elements into a single,
#   structured prompt that can be understood by the language model (LLM).
#   This structured format helps the LLM maintain context and generate more relevant responses.
def process_message_gemma(message, history):
    user_prompt_format = "User's Turn:\n>>> {prompt}\n"
    assistant_prompt_format = "Assistant's Turn:\n>>> {prompt}\n"

    history_message = ""
    for user_turn, assistant_turn in history:
        history_message += user_prompt_format.format(prompt=user_turn)
        history_message += assistant_prompt_format.format(prompt=assistant_turn)

    # Format the new user message
    new_user_message = user_prompt_format.format(prompt=message)
    # Create a new aggregated message to be used as a single flat string in a json object sent to the LLM
    aggregated_message = (
        history_message + new_user_message + assistant_prompt_format.format(prompt="")
    )
    return aggregated_message


# Function to save chat history to Firestore
def save_chat_history(interaction, doc_ref):
    timestamp_str = str(datetime.datetime.now())

    # Save the chat history, merging with existing data
    doc_ref.update({timestamp_str: interaction})

    print("Chat history saved successfully!")  # Optional: Log success


# Send the json message to the model and return the model's response. This is used for Gemma but not Gemini. It could also be used for other models.
def post_request(json_message):
    print("*** Request" + str(json_message), flush=True)
    # Set a timeout and check for HTTP errors. This will raise an exception on a bad status code (4xx or 5xx).
    response = requests.post(host + context_path, json=json_message, timeout=60)
    response.raise_for_status()
    json_data = response.json()
    print("*** Output: " + str(json_data), flush=True)
    return json_data


# custom css to hide default footer
css = """
footer {display: none !important;} .gradio-container {min-height: 0px !important;}
"""

# Add a dropdown to select the model to chat with
model_dropdown = gr.Dropdown(
    ["Gemma3 12b it", "Gemini"],
    label="Model",
    info="Select the model you would like to chat with.",
    value="Gemma3 12b it",
)

# Make the model temperature, top_p, and max tokents modifiable via sliders in the GUI
model_temperature = gr.Slider(
    minimum=0.1, maximum=1.0, value=0.9, label="Temperature", render=False
)
top_p = gr.Slider(minimum=0.1, maximum=1.0, value=0.95, label="Top_p", render=False)
max_tokens = gr.Slider(
    minimum=1, maximum=4096, value=1024, label="Max Tokens", render=False
)

# Call gradio to create the chat interface
app = gr.ChatInterface(
    inference_interface,
    additional_inputs=[model_dropdown, model_temperature, top_p, max_tokens],
    theme=themes.google_theme(),
    css=css,
    title="Chat with AI",
)

app.launch(server_name="0.0.0.0", allowed_paths=["images"])
7. פריסת אפליקציית Chat
נשתמש ב-Skaffold כדי ליצור את קובץ אימג' של קונטיינר ולפרוס אותו באשכול. Skaffold הוא כלי שורת פקודה שמארגן ומבצע אוטומטית את התהליך של בנייה, שליחה ופריסה של אפליקציות ב-Kubernetes. הוא מפשט את תהליך הפיתוח בכך שהוא מאפשר להפעיל את התהליך כולו באמצעות פקודה אחת, ולכן הוא אידיאלי לביצוע איטרציות באפליקציה.
הערה: הפעולה הזו תפרוס גם את חשבון השירות של Kubernetes שדרוש ל-Workload Identity. ההגדרה שלו מופיעה בקובץ deploy/chat-deploy.yaml. הנה הגדרה של המונח הזה:
apiVersion: v1
kind: ServiceAccount
metadata:
  name: gradio-chat-ksa
מריצים את Skaffold כדי לבצע build ופריסה:
skaffold run --default-repo=us-central1-docker.pkg.dev/$GOOGLE_CLOUD_PROJECT/chat-app-repo
Skaffold ישתמש ב-Cloud Build כדי ליצור את קובץ אימג' של קונטיינר, להעביר אותו בדחיפה ל-Artifact Registry שנוצר על ידי Terraform, ואז להחיל את המניפסטים של Kubernetes על האשכול.
8. בדיקת האפליקציה
- מחכים עד ששירות אפליקציית הצ'אט יקבל כתובת IP חיצונית:
kubectl get svc gradio-chat-service --watchEXTERNAL-IPמשתנה מ-pendingלכתובת IP בפועל, לוחצים עלCtrl+Cכדי להפסיק את הצפייה. - פותחים דפדפן אינטרנט ועוברים לכתובת
http://[EXTERNAL-IP]:7860. - נסו ליצור אינטראקציה עם המודל! האפליקציה מוגדרת כך שברירת המחדל היא צ'אט עם מודל Gemma שמתארח באופן מקומי. אם רוצים לשוחח עם Gemini, צריך לשנות את המודל בתפריט הנפתח 'קלט נוסף'. לדוגמה, אפשר לשאול את ה-AI: "Tell me a Kubernetes joke".
פתרון בעיות:
- אם מופיעה שגיאה כמו "לא ניתן לגשת לאתר הזה" או "[EXTERNAL-IP] דחה את החיבור", יכול להיות שמשהו השתבש בקובץ app.py. חוזרים לשלב שכותרתו 'בדיקת הקובץ app.py' וחוזרים על השלבים משם.
- ברירת המחדל בממשק המשתמש היא המודל Gemma3 12b it. אם מופיעה שגיאה באופן מיידי, כנראה שה-pod של Gemma עדיין לא מוכן. כדאי לדעת: אפשר לשנות את התפריט הנפתח ל-Gemini כדי לבדוק את האינטראקציה עם אפליקציית הצ'אט בזמן שמחכים לאתחול של Gemma.
בדיקת Gemma: מוודאים שהאפשרות Gemma3 12b it נבחרה בתפריט הנפתח ושולחים הודעה (לדוגמה, "תספר לי בדיחה על Kubernetes").
בדיקת Gemini: משנים את התפריט הנפתח ל-Gemini ושואלים שאלה אחרת (למשל, "מה ההבדל בין פוד לבין נוד?").
בדיקת ההיסטוריה: אחרי שמשוחחים עם מודל (Gemma או Gemini) באפליקציית הצ'אט, אפשר לבדוק את מסד הנתונים chat-app-db ב-Firestore כדי לראות את יומני הצ'אט. אם הצלחתם לשוחח עם שני המודלים, שימו לב שהיסטוריית השיחה נשמרת גם כשעוברים בין מודלים.
9. להגיע רחוק יותר
עכשיו, כשיש לכם אפליקציית צ'אט היברידית שפועלת, כדאי להתעמק באתגרים הבאים כדי להבין טוב יותר את הנושא:
- פרסונה מותאמת אישית: אפשר לנסות לשנות את הפונקציות
process_message_gemmaו-process_message_geminiכדי לכלול "הנחיית מערכת" בהתחלה. לדוגמה, אפשר להגיד למודלים "אתה עוזר פיראט" ולראות איך זה משנה את התשובות שלהם. - זהות משתמש קבועה: בשלב הזה, האפליקציה יוצרת UUID אקראי חדש לכל סשן. איך אפשר לשלב מערכת אימות אמיתית (כמו כניסה באמצעות חשבון Google) כדי שמשתמש יוכל לראות את היסטוריית השיחות הקודמות שלו במכשירים שונים?
- ניסויים במודלים: אפשר לנסות לשנות את פס ההזזה
temperatureבממשק המשתמש. איך רמת אקראיות גבוהה (קרוב ל-1.0) משפיעה על היצירתיות לעומת הדיוק של התשובות בהשוואה לרמת אקראיות נמוכה (קרוב ל-0.1)?
10. סיכום
מעולה! יצרת בהצלחה אפליקציית AI היברידית. למדתם איך:
- שימוש ב-Terraform לתשתית כקוד ב-Google Cloud.
- אתם יכולים לארח מודלים גדולים של שפה (LLM) בקוד פתוח ב-GKE כדי לקבל שליטה מלאה.
- שילוב של שירותי AI מנוהלים כמו Vertex AI כדי להשיג גמישות.
- פיתוח אפליקציה עם שמירת מצב באמצעות Firestore.
- אבטחת עומסי העבודה באמצעות Workload Identity.
הסרת המשאבים
כדי להימנע מחיובים, צריך להשמיד את המשאבים שיצרתם:
cd infra
terraform destroy -var="project_id=$GOOGLE_CLOUD_PROJECT" -var="project_number=$PROJECT_NUMBER" -var="region=$REGION"