
1. はじめに
概要
このラボでは、Google Kubernetes Engine(GKE)でフルスタックの AI 搭載チャット アプリケーションを構築してデプロイします。この「ハイブリッド」アプリケーションは、強力なアーキテクチャ パターンを示しています。クラスタで直接実行されるセルフホストのオープンモデル(Gemma 3 12B)とマネージド AI サービス(Vertex AI 経由の Gemini 2.5 Flash)をシームレスに切り替えることができます。
                                   +----------------------+
                                   |   User (Web Browser) |
                                   +-----------+----------+
                                               |
                                               v
+----------------------------------------------+---------------------------------------------+
| Google Cloud Platform                        |                                             |
|   |                                  +-------+-------+                                     |
|   |                                  | Load Balancer |                                     |
|   |                                  +-------+-------+                                     |
|   |                                          v                                             |
|   +------------------------------------------+-----------------------------------------+   |
|   |  Google Kubernetes Engine (GKE)          |                                         |   |
|   |                                          v                                         |   |
|   |                              +-----------+-----------+                             |   |
|   |                              |    Gradio Chat App    |                             |   |
|   |                              +--+-----------------+--+                             |   |
|   |                                 |                 |                                |   |
|   |                   (Self-hosted) |                 | (Managed via SDK)              |   |
|   |                                 v                 |                                |   |
|   |                  +--------------+---+             |                                |   |
|   |                  | Gemma 3 Model    |             |                                |   |
|   |                  | (GPU Node)       |             |                                |   |
|   |                  +------------------+             |                                |   |
|   +---------------------------------------------------|--------------------------------+   |
|                                                       |                                    |
|                                                       v                                    |
|                                            +----------+-----------+                        |
|                                            | Vertex AI (Gemini)   |                        |
|                                            +----------------------+                        |
|                                                       | (Save History)                     |
|                                                       v                                    |
|                                            +----------+-----------+                        |
|                                            | Firestore Database   |                        |
|                                            +----------------------+                        |
+--------------------------------------------------------------------------------------------+
Terraform を使用して、GKE Autopilot クラスタやチャット セッション履歴を永続化するための Firestore データベースなどのインフラストラクチャをプロビジョニングします。次に、Python アプリケーション コードを完成させて、マルチターンの会話を処理し、両方の AI モデルと連携させ、Cloud Build と Skaffold を使用して最終的なアプリケーションをデプロイします。
学習内容
- Terraform を使用して GKE と Firestore のインフラストラクチャをプロビジョニングします。
- Kubernetes マニフェストを使用して、GKE Autopilot に大規模言語モデル(Gemma)をデプロイします。
- さまざまな AI バックエンドを切り替えることができる Gradio チャット インターフェースを Python で実装します。
- Firestore を使用してチャット セッションの履歴を保存および取得します。
- GKE ワークロードに Google Cloud サービス(Vertex AI、Firestore)へのアクセス権を安全に付与するように Workload Identity を構成します。
前提条件
- 課金を有効にした Google Cloud プロジェクト
- Python、Kubernetes、標準のコマンドライン ツールに関する基本的な知識。
- Gemma モデルにアクセスできる Hugging Face トークン。
2. プロジェクトの設定
- Google アカウントをまだお持ちでない場合は、Google アカウントを作成する必要があります。
- 仕事用または学校用アカウントではなく、個人アカウントを使用します。職場用アカウントと学校用アカウントには、このラボに必要な API を有効にできない制限が設定されている場合があります。
- Google Cloud コンソールにログインします。
- Cloud コンソールで課金を有効にします。
- このラボを完了するのにかかる Cloud リソースの費用は 1 米ドル未満です。
- このラボの最後の手順に沿ってリソースを削除すると、それ以上の料金は発生しません。
- 新規ユーザーは、300 米ドル分の無料トライアルをご利用いただけます。
- 新しいプロジェクトを作成するか、既存のプロジェクトを再利用します。
Cloud Shell エディタを開く
- このリンクをクリックすると、Cloud Shell エディタに直接移動します。
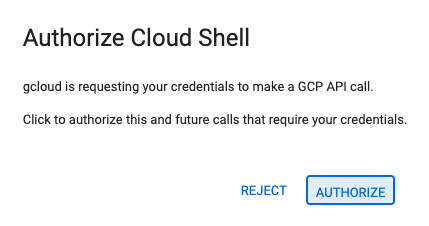
- 本日、承認を求めるメッセージがどこかの時点で表示された場合は、[承認] をクリックして続行します。
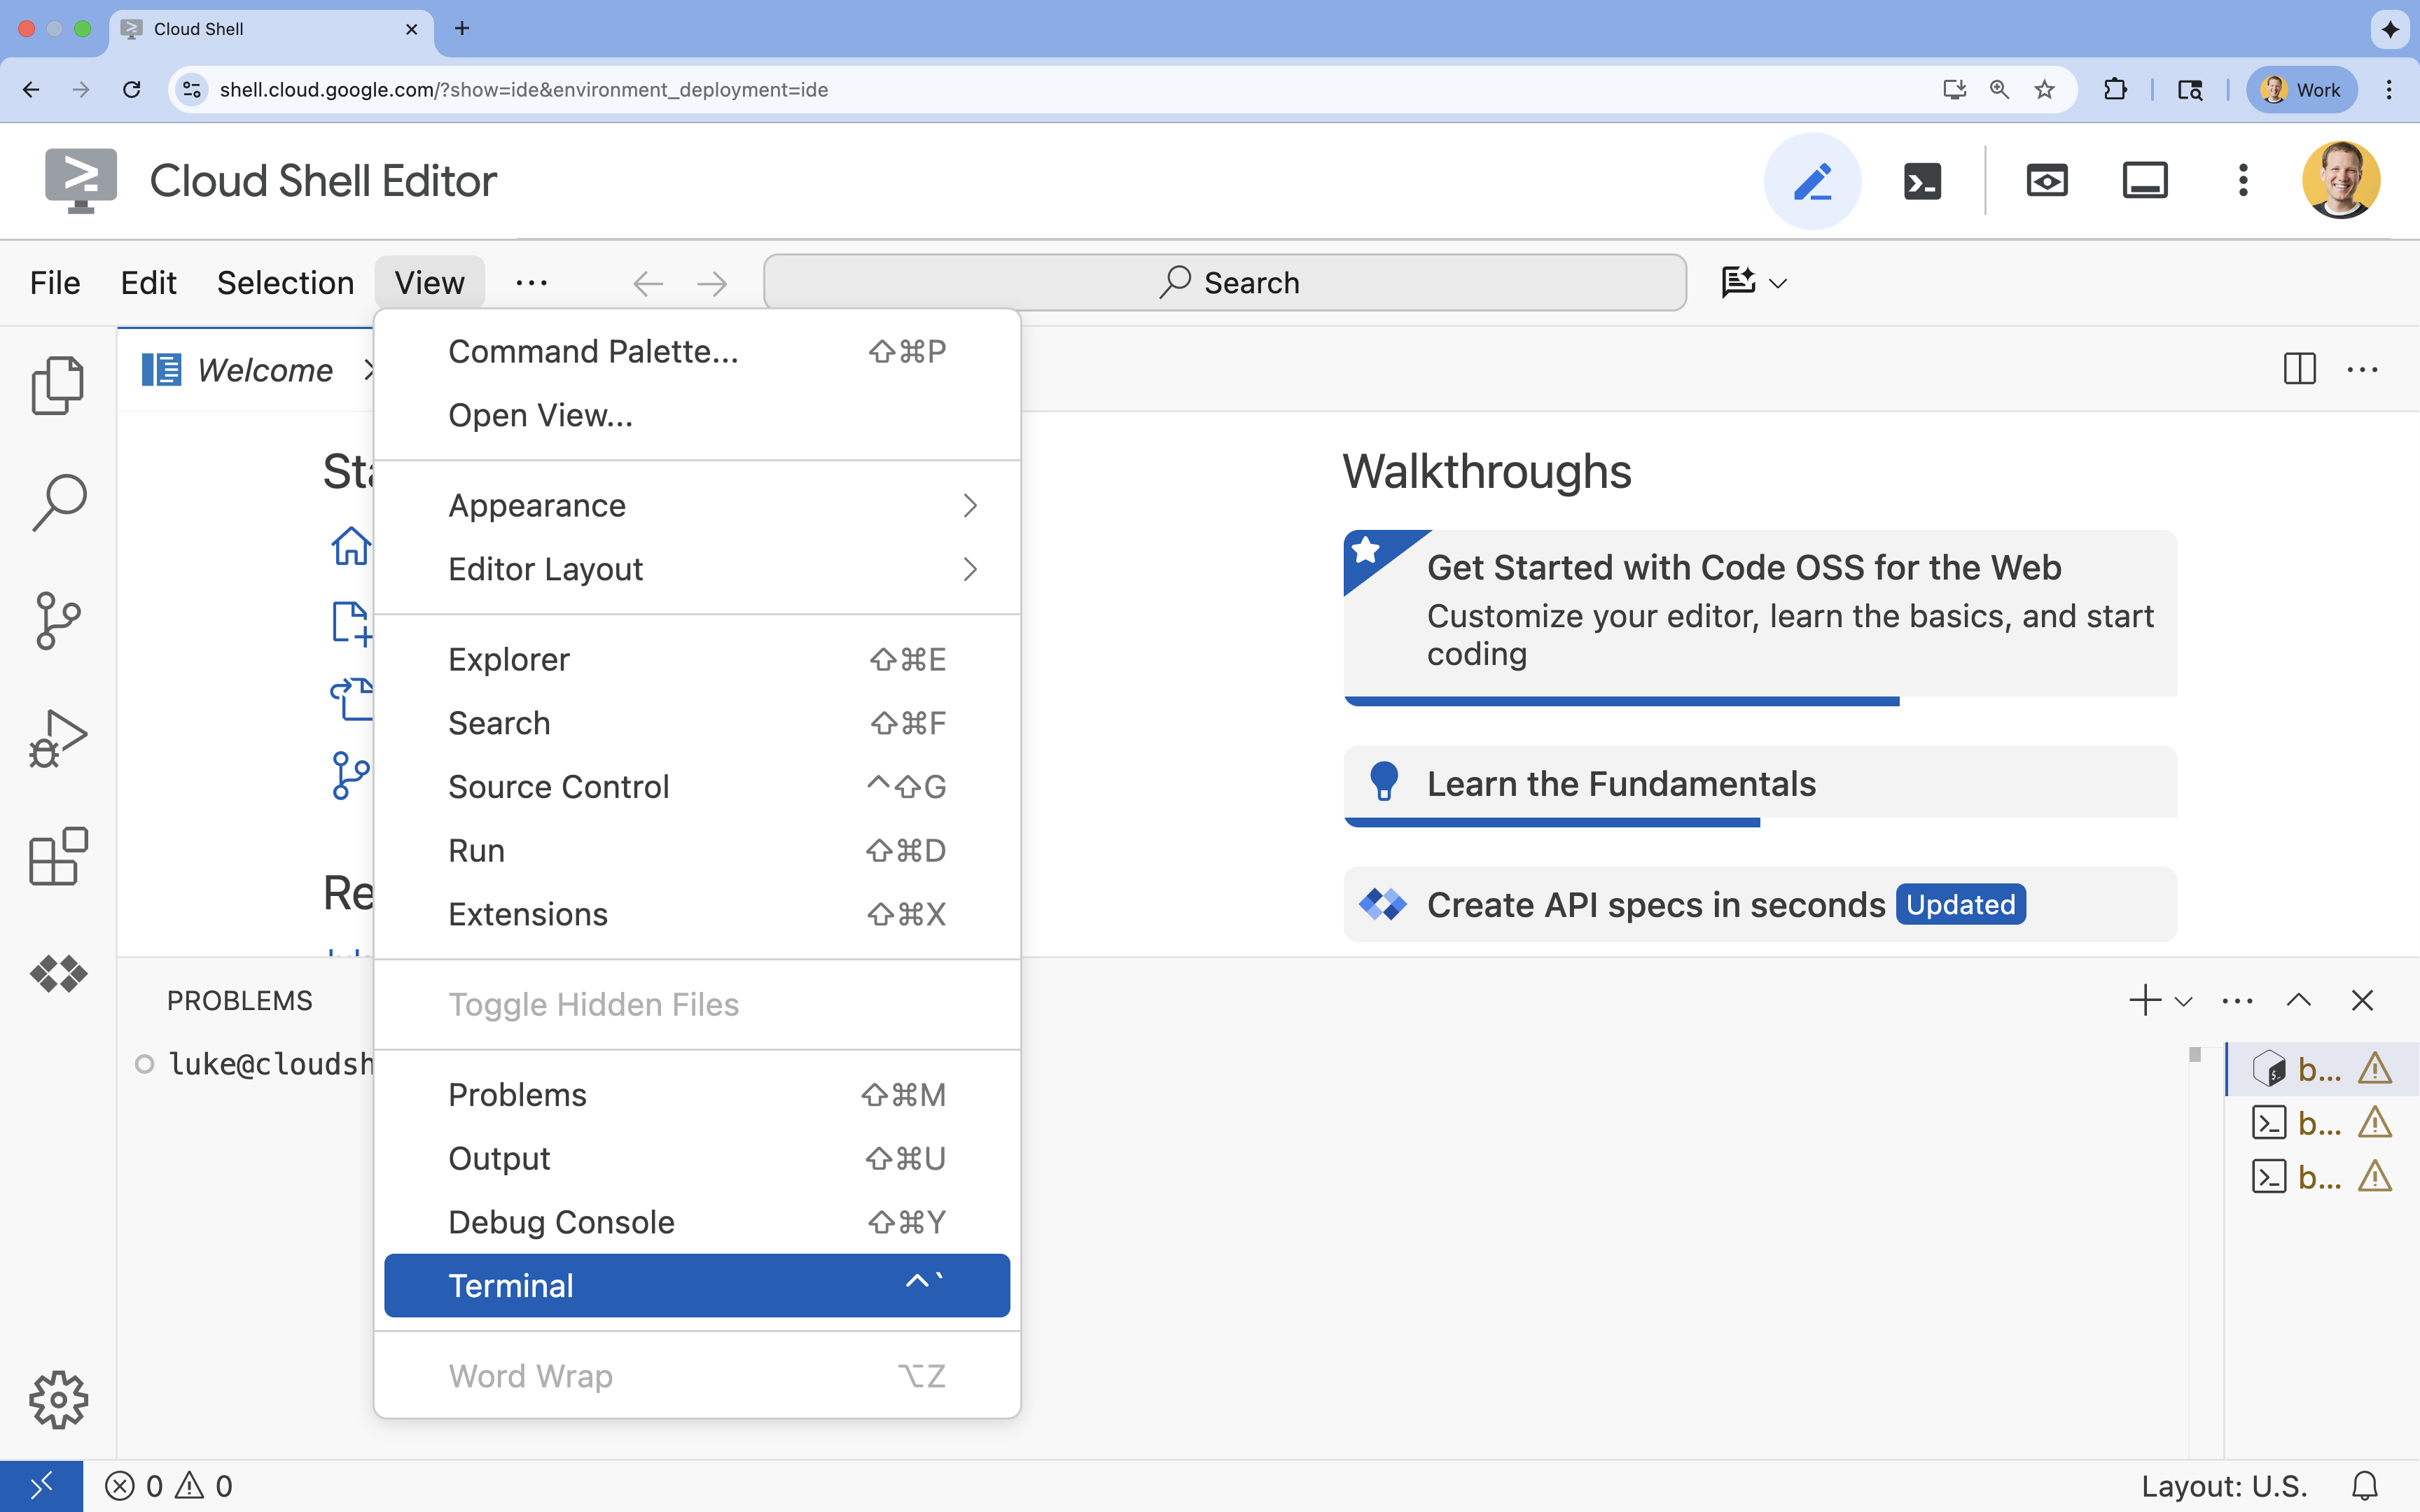
- ターミナルが画面の下部に表示されない場合は、ターミナルを開きます。
- [表示] をクリックします。
- [ターミナル] をクリックします。
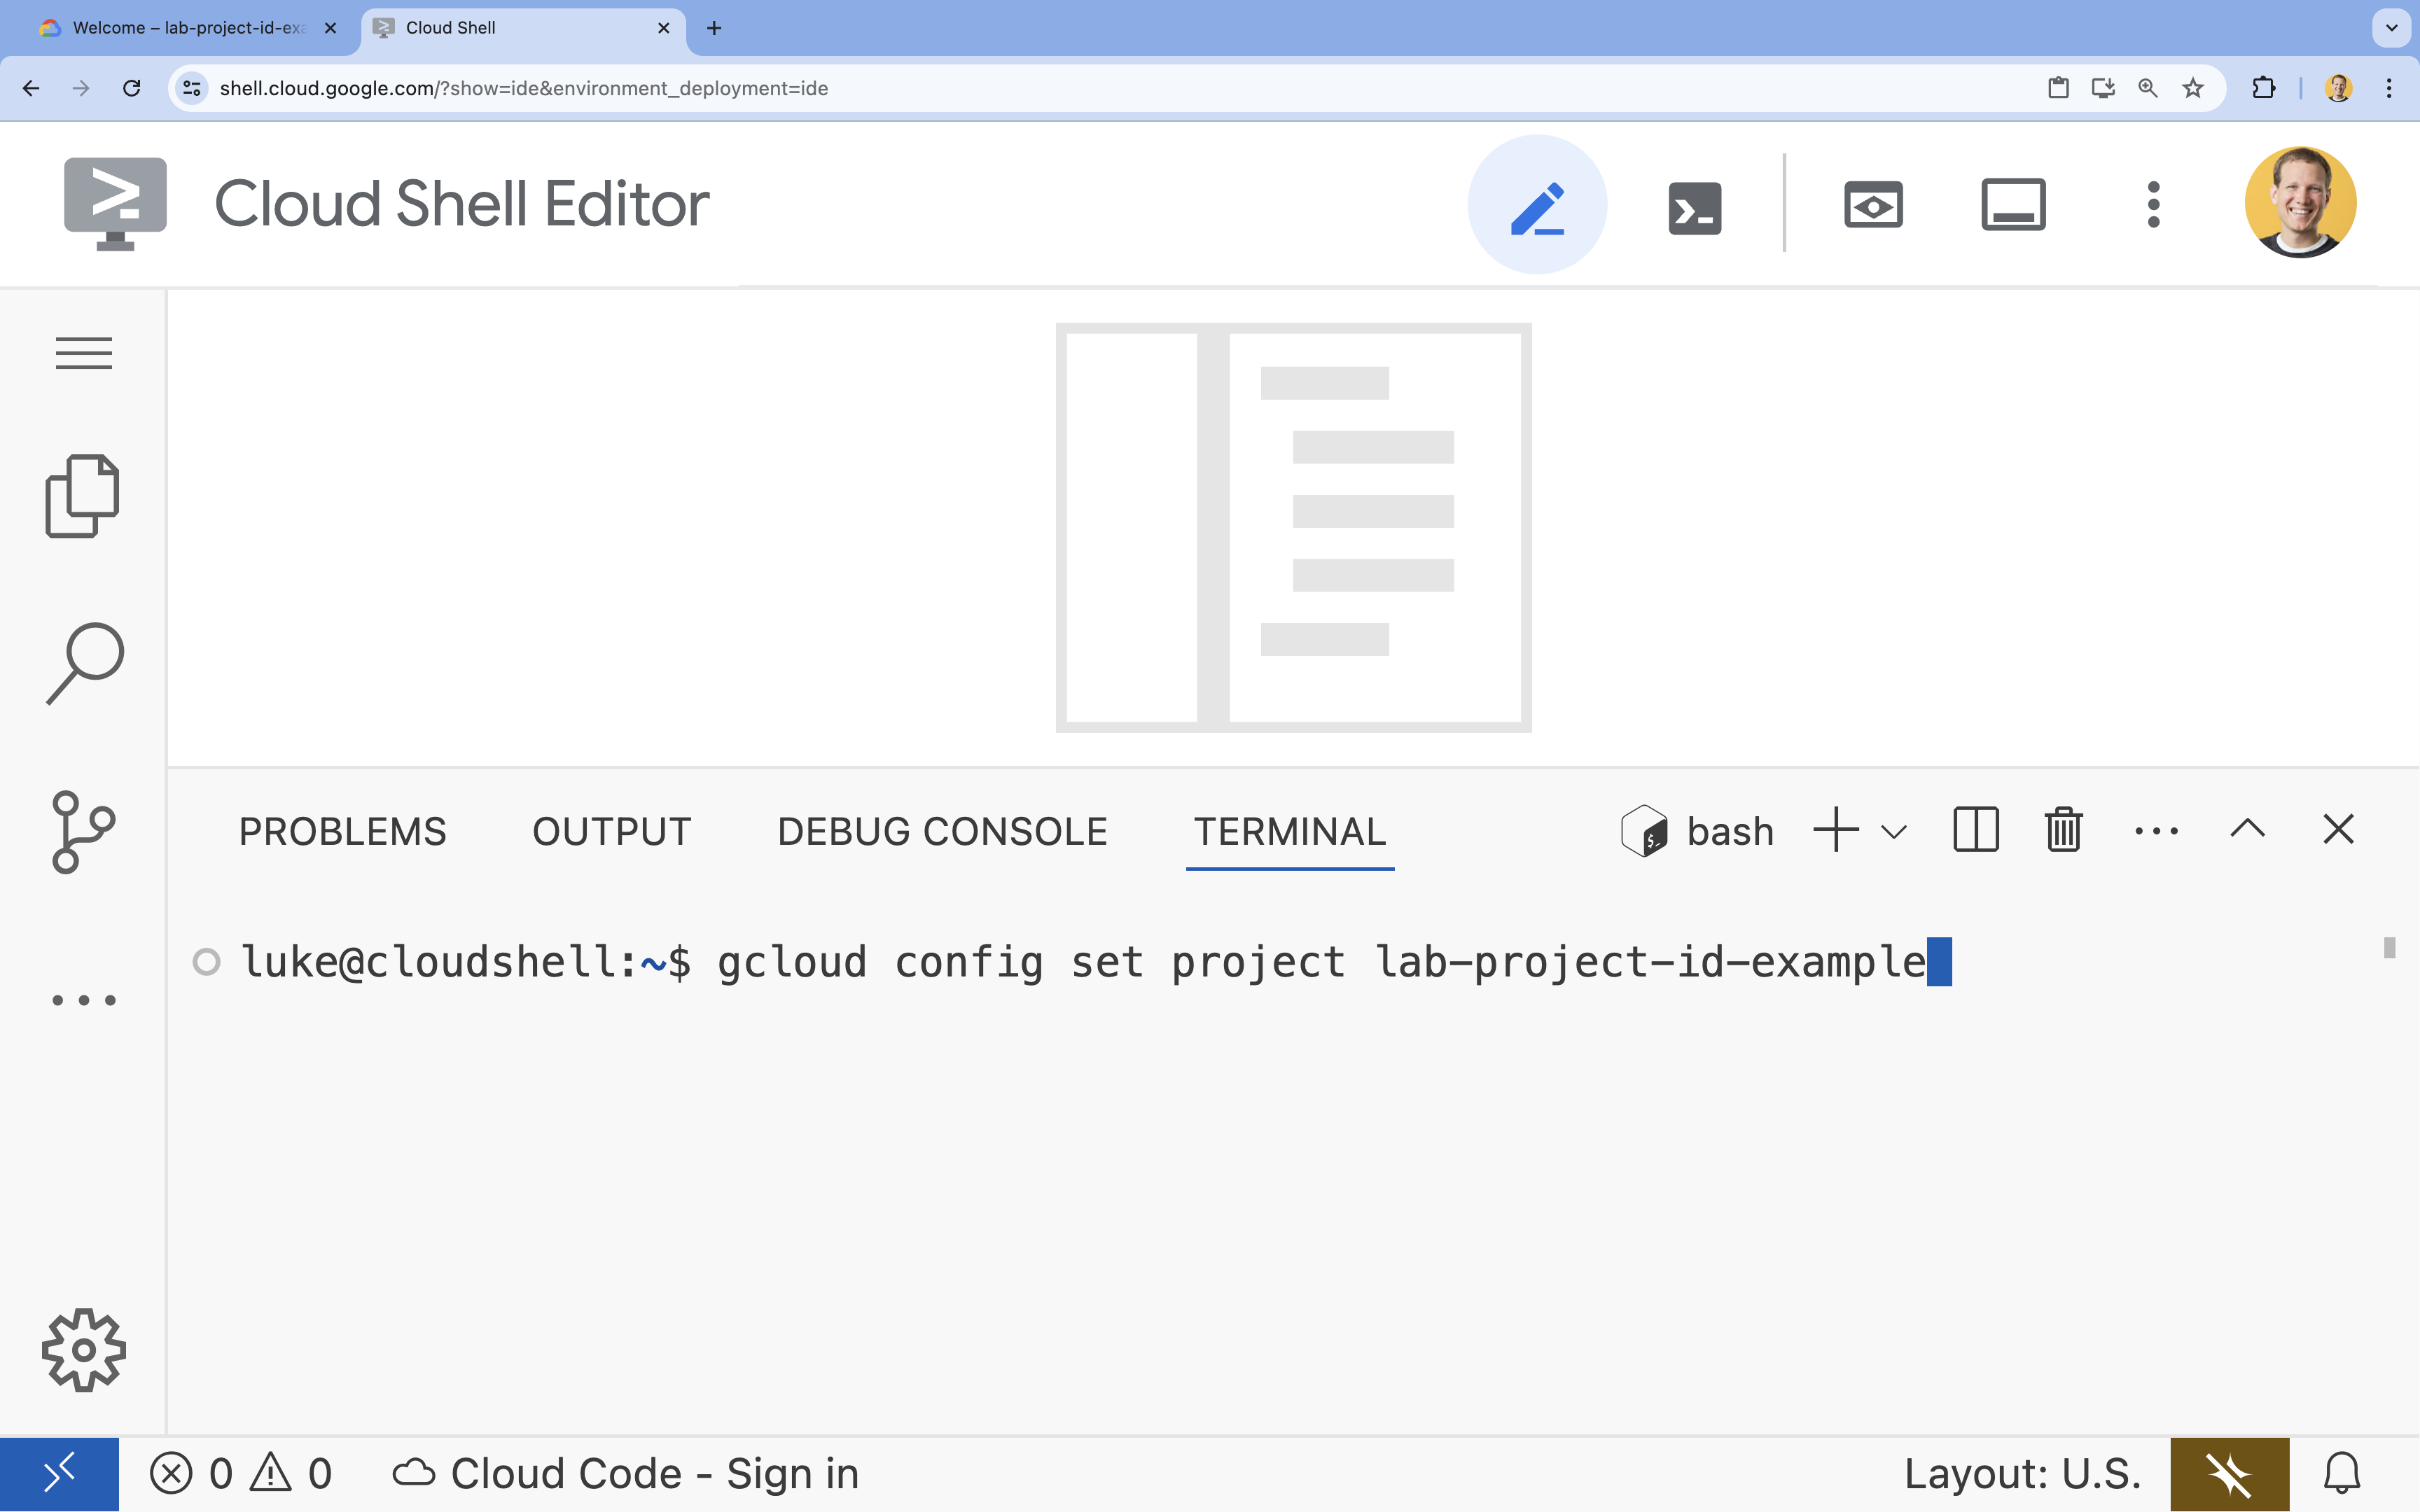
- ターミナルで、次のコマンドを使用してプロジェクトを設定します。
- 形式:
gcloud config set project [PROJECT_ID] - 例:
gcloud config set project lab-project-id-example - プロジェクト ID を忘れた場合:
- 次のコマンドを使用すると、すべてのプロジェクト ID を一覧表示できます。
gcloud projects list | awk '/PROJECT_ID/{print $2}'
- 次のコマンドを使用すると、すべてのプロジェクト ID を一覧表示できます。
- 形式:
- 次のようなメッセージが表示されます。
Updated property [core/project].
WARNINGが表示され、Do you want to continue (Y/n)?と表示された場合は、プロジェクト ID が正しく入力されていない可能性があります。nを押してEnterを押し、gcloud config set projectコマンドをもう一度実行してみてください。
リポジトリのクローンを作成する
Cloud Shell ターミナルで、プロジェクト リポジトリのクローンを作成し、プロジェクト ディレクトリに移動します。
git clone https://github.com/GoogleCloudPlatform/devrel-demos.git
cd devrel-demos/containers/gradio-chat-gke
プロジェクトの構造を確認してみましょう。
gradio-chat-gke/
├── app/
│   ├── app.py                # Main application logic (you will edit this)
│   ├── requirements.txt      # Python dependencies
│   └── themes.py             # UI theming
├── deploy/
│   ├── chat-deploy.yaml      # Kubernetes deployment for the chat app
│   ├── Dockerfile            # Container definition for the chat app
│   └── gemma3-12b-deploy.yaml# Kubernetes deployment for Gemma model
├── infra/
│   └── main.tf               # Terraform infrastructure definition
└── skaffold.yaml             # Skaffold configuration for building/deploying
環境変数の設定
プロジェクト ID とプロジェクト番号の環境変数を設定します。これらは、Terraform と後続のコマンドで使用されます。
export GOOGLE_CLOUD_PROJECT=$(gcloud config get-value project)
export PROJECT_NUMBER=$(gcloud projects describe $GOOGLE_CLOUD_PROJECT --format="value(projectNumber)")
export REGION=us-central1
Cloud Resource Manager API を有効にする
Terraform でプロジェクトのリソースを管理するには、Cloud Resource Manager API を有効にする必要があります。まず、この API を有効にします。後で、Skaffold を使用してチャット アプリケーションをデプロイします。Skaffold は Cloud Build を使用してコンテナ イメージをビルドします。ストレージ API を有効にして、Cloud Build に必要なバケットを作成します。Terraform 自体を使用して、このプロジェクトに必要な残りの API を有効にします。
gcloud services enable cloudresourcemanager.googleapis.com storage-api.googleapis.com
Cloud Build ステージング バケットを作成する
Skaffold は Google Cloud Build を使用します。これには、ソースコードをステージングするための Cloud Storage バケットが必要です。
今すぐ作成して、存在することを確認します。
gcloud storage buckets create gs://${GOOGLE_CLOUD_PROJECT}_cloudbuild
(バケットがすでに存在するというエラーが表示された場合は、無視してかまいません)。
3. Terraform を使用してインフラストラクチャをプロビジョニングする
Terraform を使用して、必要な Google Cloud リソースを設定します。これにより、再現可能で一貫性のある環境が確保されます。
- インフラストラクチャ ディレクトリに移動します。
cd infra
このファイルは、このプロジェクトに必要な追加の API(cloudbuild、artifactregistry、container(gke)、firestore、aiplatform(vertexai))を定義します。ファイルまたは以下の内容で、Terraform を介して API が有効になっていることを確認します。
resource "google_project_service" "cloudbuild" {
  service            = "cloudbuild.googleapis.com"
  disable_on_destroy = false
  project            = var.project_id
}

resource "google_project_service" "artifactregistry" {
  service            = "artifactregistry.googleapis.com"
  disable_on_destroy = false
  project            = var.project_id
}

resource "google_project_service" "container" {
  service            = "container.googleapis.com"
  disable_on_destroy = false
  project            = var.project_id
}

resource "google_project_service" "firestore" {
  service            = "firestore.googleapis.com"
  disable_on_destroy = false
  project            = var.project_id
}

resource "google_project_service" "vertexai" {
  service            = "aiplatform.googleapis.com"
  disable_on_destroy = false
  project            = var.project_id
}
GKE クラスタを定義する
エディタで infra/main.tf を開きます。いくつかの # TODO コメントが表示されます。手動で開くことも、次のコマンドを使用してエディタでファイルを開くこともできます。
cloudshell edit main.tf
まず、Kubernetes クラスタを定義する必要があります。ノード管理を自動的に処理するため、AI ワークロードに最適な GKE Autopilot を使用します。
# TODO: Create a GKE Autopilot Cluster を検索して、その下に次のブロックを追加します。
# Create a GKE Autopilot Cluster
resource "google_container_cluster" "primary" {
  name     = var.cluster_name
  location = var.region
  project  = var.project_id

  # Enable Autopilot mode
  enable_autopilot = true

  deletion_protection = false

  # Networking
  network    = "default"
  subnetwork = "projects/${var.project_id}/regions/${var.region}/subnetworks/default"

  # Timeout for cluster creation
  timeouts {
    create = "30m"
    update = "30m"
  }

  depends_on = [google_project_service.container]
}
enable_autopilot = true に注意してください。この 1 行で、ノードプールの管理、自動スケーリング、GPU ワークロードのビンパッキングを行う必要がなくなります。
Firestore データベースを定義する
次に、チャットの履歴を保存する場所が必要です。Firestore は、このニーズに最適なサーバーレスの NoSQL データベースです。
# TODO: Create a Firestore Database を見つけて、次のコードを追加します。
resource "google_firestore_database" "database" {
  project     = var.project_id
  name        = "chat-app-db"
  location_id = "nam5"
  type        = "FIRESTORE_NATIVE"

  depends_on = [google_project_service.firestore]
}
データベース リソースを追加したら、# TODO: Create an initial Firestore Document を見つけて次のブロックを追加します。このリソースは、コレクションに初期プレースホルダ ドキュメントを作成します。これは、データベース構造の初期化に役立ちます。
resource "google_firestore_document" "initial_document" {
  project     = var.project_id
  collection  = "chat_sessions"
  document_id = "initialize"
  fields = <<EOF
  EOF

  depends_on = [google_firestore_database.database]
}
Workload Identity を定義する
最後に、セキュリティを構成する必要があります。シークレットや API キーを管理することなく、Kubernetes Pod から Vertex AI と Firestore にアクセスできるようにしたい。これは Workload Identity を使用して行います。
アプリが使用する Kubernetes サービス アカウント(KSA)に必要な IAM ロールを付与します。
注: これらのバインディングで参照されている Kubernetes サービス アカウント(gradio-chat-ksa)はまだ存在しません。これは、アプリケーションをクラスタにデプロイするときに作成されます。これらの IAM バインディングを事前プロビジョニングすることは、まったく問題ありません(一般的な方法です)。
# TODO: Configure Workload Identity IAM bindings を見つけて、次のコードを追加します。
locals {
  ksa_principal = "principal://iam.googleapis.com/projects/${var.project_number}/locations/global/workloadIdentityPools/${var.project_id}.svc.id.goog/subject/ns/default/sa/gradio-chat-ksa"
}

resource "google_project_iam_member" "ksa_token_creator" {
  project = var.project_id
  role    = "roles/iam.serviceAccountTokenCreator"
  member  = local.ksa_principal
}

resource "google_project_iam_member" "ksa_vertex_user" {
  project = var.project_id
  role    = "roles/aiplatform.user"
  member  = local.ksa_principal
}

resource "google_project_iam_member" "ksa_datastore_user" {
  project = var.project_id
  role    = "roles/datastore.user"
  member  = local.ksa_principal
}
構成を適用する
インフラストラクチャが定義されたので、プロビジョニングしましょう。
- まず、Terraform で使用する変数をいくつか設定する必要があります。環境変数を使用してこれを行います。
export TF_VAR_project_id=$(gcloud config get-value project)
export TF_VAR_project_number=$(gcloud projects describe $TF_VAR_project_id --format="value(projectNumber)")
export TF_VAR_region="us-central1"
- Terraform を初期化します。
terraform init
terraform planを使用して、作成されるリソースをプレビューします。
terraform plan
- 構成を適用します。プロンプトが表示されたら、「
yes」と入力して確定します。
terraform apply
注: GKE クラスタのプロビジョニングには 10 ~ 15 分ほどかかることがあります。待機している間に、次のセクションでアプリケーション コードの確認に進むことができます。
- 完了したら、新しいクラスタと通信するように
kubectlを構成します。
gcloud container clusters get-credentials gradio-chat-cluster --region us-central1 --project $TF_VAR_project_id
4. GKE にセルフホスト Gemma をデプロイする
次に、Gemma 3 12B モデルを GKE クラスタに直接デプロイします。これにより、低レイテンシの推論と、モデル実行環境の完全な制御が可能になります。
Hugging Face 認証情報を構成する
Gemma モデルをダウンロードするには、クラスタで Hugging Face の認証が必要です。
- Hugging Face トークンがあることを確認します。
- トークンを使用して Kubernetes Secret を作成します。[YOUR_HF_TOKEN] は実際のトークンに置き換えます。
kubectl create secret generic hf-secret --from-literal=hf_api_token=[YOUR_HF_TOKEN]
モデルをデプロイする
標準の Kubernetes Deployment を使用してモデルを実行します。マニフェストは deploy/gemma3-12b-deploy.yaml にあります。手動で開くことも、次のコマンドを使用してエディタでファイルを開くこともできます。
cd ../deploy
cloudshell edit gemma3-12b-deploy.yaml
このファイルを確認してみましょう。resources セクションに注目してください。
        resources:
          requests:
            nvidia.com/gpu: 4
      nodeSelector:
        cloud.google.com/gke-accelerator: nvidia-l4
これは宣言型 AI インフラストラクチャです。これは、この特定の Pod に 4 つの NVIDIA L4 GPU が必要であることを GKE Autopilot に伝えています。Autopilot は、これらの要件を正確に満たすノードを検索またはプロビジョニングします。プロビジョニングに使用できるノードがない場合、要件を満たすノードが使用可能になるまで試行が繰り返されます。
- Deployment マニフェストを適用します。
cd .. kubectl apply -f deploy/gemma3-12b-deploy.yamlkubectl get podsgemmaPod がまだ稼働していない場合でも、アプリケーションのデプロイに進むことができます。チャットアプリは、利用可能になるとすぐに gemma サービスに接続します。gemmaPod のステータスがRunningと1/1になるまで、チャットアプリで Gemma とやり取りすることはできません。それまでの間、Gemini とチャットできます。
5. Chat アプリケーションを構築する
次に、Python アプリケーションを完成させます。Cloud Shell エディタで app/app.py を開きます。アプリケーションを機能させるために記入する必要がある # TODO ブロックがいくつかあります。
cloudshell edit app/app.py
ステップ 1: 会話履歴を処理する
LLM は、誰が何を言ったかを理解するために、会話履歴を特定の形式でフォーマットする必要があります。
「ユニバーサル トランスレータ」パターン: 同じチャット履歴を処理するために、2 つの異なる関数を記述しようとしています。これは、マルチモデル アプリケーションの重要なパターンです。
- 信頼できる情報源(Gradio): アプリは履歴を
[[user_msg1, bot_msg1], ...]というシンプルな汎用形式で保存します。 - ターゲット 1(Gemma): 特定の特別なトークンを含む単一の未加工文字列に変換する必要があります。
- ターゲット 2(Gemini): API オブジェクトの構造化されたリストに変換する必要があります。
ターンごとに汎用履歴をターゲット形式に再フォーマットすることで、モデルをシームレスに切り替えることができます。後で別のモデルを追加するには、その特定の形式の新しい処理関数を作成する必要があります。
Gemma(セルフホスト型)の場合
チャット テンプレートについて: 独自のオープンモデルをホストする場合、通常は、モデルが会話として認識するようにトレーニングされた特定の文字列にプロンプトを手動でフォーマットする必要があります。これは「チャット テンプレート」と呼ばれます。
app.py で process_message_gemma 関数を見つけて、次のコードに置き換えます。
# This function takes a user's message and the conversation history as input.
#   Its job is to format these elements into a single,
#   structured prompt that can be understood by the language model (LLM).
#   This structured format helps the LLM maintain context and generate more relevant responses.
def process_message_gemma(message, history):
    user_prompt_format = "User's Turn:\n>>> {prompt}\n"
    assistant_prompt_format = "Assistant's Turn:\n>>> {prompt}\n"

    history_message = ""
    for user_turn, assistant_turn in history:
        history_message += user_prompt_format.format(prompt=user_turn)
        history_message += assistant_prompt_format.format(prompt=assistant_turn)

    # Format the new user message
    new_user_message = user_prompt_format.format(prompt=message)
    # Create a new aggregated message to be used as a single flat string in a json object sent to the LLM
    aggregated_message = (
        history_message + new_user_message + assistant_prompt_format.format(prompt="")
    )
    return aggregated_message
Gemini(マネージド)の場合
マネージド サービスでは、多くの場合、未加工の文字列よりも構造化されたオブジェクトが優先されます。Gemini SDK 用に履歴を types.Content オブジェクトにフォーマットする別の関数が必要です。
process_message_gemini を見つけて、次のように置き換えます。
def process_message_gemini(message, history):
    contents = []
    for user_turn, model_turn in history:
        contents.append(
            types.Content(role="user", parts=[types.Part.from_text(text=user_turn)])
        )
        contents.append(
            types.Content(role="model", parts=[types.Part.from_text(text=model_turn)])
        )

    contents.append(
        types.Content(role="user", parts=[types.Part.from_text(text=message)])
    )
    return contents
ステップ 2: セルフホスト Gemma モデルを呼び出す
フォーマットされたプロンプトをクラスタで実行されている Gemma サービスに送信する必要があります。サービスの内部 DNS 名に標準の HTTP POST リクエストを使用します。
call_gemma_model 関数を見つけて、次のように置き換えます。
# Construct the request, send it to Gemma, return the model's response
# aggregated_message = current user message + history
def call_gemma_model(aggregated_message, model_temperature, top_p, max_tokens):
    json_message = {
        "prompt": aggregated_message,
        "temperature": model_temperature,
        "top_p": top_p,
        "max_tokens": max_tokens,
        "stop": ["User's Turn:"],
    }

    # Log what will be sent to the LLM
    print("*** JSON request: " + str(json_message))

    # Send the constructed json with the user prompt to the model and put the model's response in the json_data variable
    json_data = post_request(json_message)

    # The response from the model is a list of predictions. We'll take the first result.
    raw_output = json_data["predictions"][0]

    # The vLLM server returns the full prompt in the response. We need to extract
    # just the newly generated text from the model.
    assistant_turn_marker = "Assistant's Turn:\n>>>"
    marker_pos = raw_output.rfind(assistant_turn_marker)

    if marker_pos != -1:
        output = raw_output[marker_pos + len(assistant_turn_marker) :]
    else:
        output = raw_output

    # Clean up potential over-generation
    stop_marker = "User's Turn:"
    stop_pos = output.lower().find(stop_marker.lower())
    if stop_pos != -1:
        output = output[:stop_pos]

    return output.strip()
ステップ 3: Vertex AI Gemini モデルを呼び出す
マネージド モデルには、Google GenAI SDK を使用します。ネットワーク呼び出しを処理してくれるため、はるかに簡単です。
call_gemini_model 関数を見つけて、次のように置き換えます。
# Send a request to Gemini via the VertexAI API. Return the model's response
# contents = list of types.Content objects
def call_gemini_model(contents, model_temperature, top_p, max_tokens):
    gemini_model = "gemini-2.5-flash"

    response = client.models.generate_content(
        model=gemini_model,
        contents=contents,
        config={
            "temperature": model_temperature,
            "max_output_tokens": max_tokens,
            "top_p": top_p,
        },
    )
    return response.text
ステップ 4: メイン推論インターフェースを実装する
最後に、Gradio が呼び出すメインのオーケストレーター関数が必要です。この関数は、次の処理を行う必要があります。
- 履歴が空の場合は初期化します。
- メッセージを処理します。
- リクエストを選択したモデル(Gemma または Gemini)に転送します。
- インタラクションを Firestore に保存します。
- レスポンスを UI に返します。
Gradio と状態管理: Gradio の ChatInterface は、セッションレベルの状態(ブラウザにメッセージを表示する)を自動的に処理します。ただし、外部データベースのサポートは組み込まれていません。
チャットの履歴を長期的に保持するために、標準パターンを使用します。inference_interface 関数にフックします。request: gr.Request を引数として受け入れることで、Gradio は現在のユーザーのセッションの詳細を自動的に渡します。これは、各ユーザーに一意の Firestore ドキュメントを作成するために使用され、マルチユーザー環境で会話が混同されないようにします。
inference_interface 関数を見つけて、次のように置き換えます。
# This is the primary chat function. Every time a user sends a message, gradio calls this function,
# which sends the user's input to the appropriate AI (as indicated on the user interface), updates
# the chat history for future use during this session, and records the chat history in Firestore.
def inference_interface(
    message,
    history,
    model_name,
    model_temperature,
    top_p,
    max_tokens,
    request: gr.Request,
):

    # set history to empty array
    if history is None:
        history = []

    # Get or create session document
    session_hash = request.session_hash
    doc_id = f"session-{session_hash}"
    doc_ref = db.collection("chat_sessions").document(doc_id)

    # Create the session document if it doesn't exist
    if not doc_ref.get().exists:
        doc_ref.set({"Session start": datetime.datetime.now()})

    # Log info
    print("Model: " + model_name)
    print("LLM Engine: " + llm_engine)
    print("* History: " + str(history))

    # Pass the message and history to the appropriate model, as indicated by the user via the ui
    if model_name == "Gemma3 12b it":
        aggregated_message = process_message_gemma(message, history)
        output = call_gemma_model(
            aggregated_message, model_temperature, top_p, max_tokens
        )

    elif model_name == "Gemini":
        gemini_contents = process_message_gemini(message, history)
        output = call_gemini_model(
            gemini_contents, model_temperature, top_p, max_tokens
        )

    else:
        # Handle the case where no valid model is selected
        output = "Error: Invalid model selected."

    interaction = {"user": message, model_name: output}

    # Log the updated chat history
    print("* History: " + str(history) + " " + str(interaction))

    # Save the updated history to Firestore
    save_chat_history(interaction, doc_ref)

    return output
6. app.py ファイルを確認する
この時点で、gradio ベースのチャット アプリケーションをデプロイする準備が整っているはずです。次の完全なファイルと正確に一致していることを確認します。
トラブルシューティング: アプリケーションをデプロイして、接続しようとしたときに「接続を拒否しました」または「このサイトにアクセスできません」というエラーが表示された場合は、この時点から手順を繰り返してみてください。まず、このファイル全体をコピーして app.py に貼り付けます。
# Copyright 2024 Google LLC
#
# Licensed under the Apache License, Version 2.0 (the "License");
# you may not use this file except in compliance with the License.
# You may obtain a copy of the License at
#
#      http://www.apache.org/licenses/LICENSE-2.0
#
# Unless required by applicable law or agreed to in writing, software
# distributed under the License is distributed on an "AS IS" BASIS,
# WITHOUT WARRANTIES OR CONDITIONS OF ANY KIND, either express or implied.
# See the License for the specific language governing permissions and
# limitations under the License.

import datetime

import google.auth
import google.cloud
import gradio as gr
import requests
import themes
from google import genai

from google.cloud import firestore
from google.genai import types

## Do one-time initialization things

## grab the project id from google auth
_, project = google.auth.default()
print(f"Project: {project}")

# Set initial values for model
llm_engine = "vllm"
host = "http://gemma-service:8000"
context_path = "/generate"

# initialize vertex for interacting with Gemini
client = genai.Client(
    vertexai=True,
    project=project,
    location="global",
)

# Initialize Firestore client
db = firestore.Client(database="chat-app-db")


# This is the primary chat function. Every time a user sends a message, gradio calls this function,
# which sends the user's input to the appropriate AI (as indicated on the user interface), updates
# the chat history for future use during this session, and records the chat history in Firestore.
def inference_interface(
    message,
    history,
    model_name,
    model_temperature,
    top_p,
    max_tokens,
    request: gr.Request,
):

    # set history to empty array
    if history is None:
        history = []

    # Get or create session document
    session_hash = request.session_hash
    doc_id = f"session-{session_hash}"
    doc_ref = db.collection("chat_sessions").document(doc_id)

    # Create the session document if it doesn't exist
    if not doc_ref.get().exists:
        doc_ref.set({"Session start": datetime.datetime.now()})

    # Log info
    print("Model: " + model_name)
    print("LLM Engine: " + llm_engine)
    print("* History: " + str(history))

    # Pass the message and history to the appropriate model, as indicated by the user via the ui
    if model_name == "Gemma3 12b it":
        aggregated_message = process_message_gemma(message, history)
        output = call_gemma_model(
            aggregated_message, model_temperature, top_p, max_tokens
        )

    elif model_name == "Gemini":
        gemini_contents = process_message_gemini(message, history)
        output = call_gemini_model(
            gemini_contents, model_temperature, top_p, max_tokens
        )

    else:
        # Handle the case where no valid model is selected
        output = "Error: Invalid model selected."

    interaction = {"user": message, model_name: output}

    # Log the updated chat history
    print("* History: " + str(history) + " " + str(interaction))

    # Save the updated history to Firestore
    save_chat_history(interaction, doc_ref)

    return output


# Construct the request, send it to Gemma, return the model's response
# aggregated_message = current user message + history
def call_gemma_model(aggregated_message, model_temperature, top_p, max_tokens):
    json_message = {
        "prompt": aggregated_message,
        "temperature": model_temperature,
        "top_p": top_p,
        "max_tokens": max_tokens,
        "stop": ["User's Turn:"],
    }

    # Log what will be sent to the LLM
    print("*** JSON request: " + str(json_message))  # Log the JSON request

    # Send the constructed json with the user prompt to the model and put the model's response in the json_data variable
    json_data = post_request(json_message)

    # The response from the model is a list of predictions.
    # We'll take the first result.
    raw_output = json_data["predictions"][0]

    # The vLLM server returns the full prompt in the response. We need to extract
    # just the newly generated text from the model. The prompt ends with
    # "Assistant's Turn:\n>>>", so we find the last occurrence of that and
    # take everything after it.
    assistant_turn_marker = "Assistant's Turn:\n>>>"
    marker_pos = raw_output.rfind(assistant_turn_marker)

    if marker_pos != -1:
        # Get the text generated by the assistant
        output = raw_output[marker_pos + len(assistant_turn_marker) :]
    else:
        # Fallback in case the marker isn't found
        output = raw_output

    # The model sometimes continues the conversation and includes the next user's turn.
    # The 'stop' parameter is a good hint, but we parse the output as a safeguard.
    stop_marker = "User's Turn:"
    stop_pos = output.lower().find(stop_marker.lower())
    if stop_pos != -1:
        output = output[:stop_pos]

    # The model also sometimes prefixes its response with "Output:". We'll remove this.
    output = output.lstrip()
    prefix_marker = "Output:"
    if output.lower().startswith(prefix_marker.lower()):
        output = output[len(prefix_marker) :]

    return output.strip()


# Send a request to Gemini via the VertexAI API. Return the model's response
# contents = list of types.Content objects
def call_gemini_model(contents, model_temperature, top_p, max_tokens):
    gemini_model = "gemini-2.5-flash"

    response = client.models.generate_content(
        model=gemini_model,
        contents=contents,
        config={
            "temperature": model_temperature,
            "max_output_tokens": max_tokens,
            "top_p": top_p,
        },
    )
    output = response.text  # Extract the generated text
    # Consider handling additional response attributes (safety, usage, etc.)
    return output


def process_message_gemini(message, history):
    contents = []
    for user_turn, model_turn in history:
        contents.append(
            types.Content(role="user", parts=[types.Part.from_text(text=user_turn)])
        )
        contents.append(
            types.Content(role="model", parts=[types.Part.from_text(text=model_turn)])
        )

    contents.append(
        types.Content(role="user", parts=[types.Part.from_text(text=message)])
    )
    return contents


# This function takes a user's message and the conversation history as input.
#   Its job is to format these elements into a single,
#   structured prompt that can be understood by the language model (LLM).
#   This structured format helps the LLM maintain context and generate more relevant responses.
def process_message_gemma(message, history):
    user_prompt_format = "User's Turn:\n>>> {prompt}\n"
    assistant_prompt_format = "Assistant's Turn:\n>>> {prompt}\n"

    history_message = ""
    for user_turn, assistant_turn in history:
        history_message += user_prompt_format.format(prompt=user_turn)
        history_message += assistant_prompt_format.format(prompt=assistant_turn)

    # Format the new user message
    new_user_message = user_prompt_format.format(prompt=message)
    # Create a new aggregated message to be used as a single flat string in a json object sent to the LLM
    aggregated_message = (
        history_message + new_user_message + assistant_prompt_format.format(prompt="")
    )
    return aggregated_message


# Function to save chat history to Firestore
def save_chat_history(interaction, doc_ref):
    timestamp_str = str(datetime.datetime.now())

    # Save the chat history, merging with existing data
    doc_ref.update({timestamp_str: interaction})

    print("Chat history saved successfully!")  # Optional: Log success


# Send the json message to the model and return the model's response. This is used for Gemma but not Gemini. It could also be used for other models.
def post_request(json_message):
    print("*** Request" + str(json_message), flush=True)
    # Set a timeout and check for HTTP errors. This will raise an exception on a bad status code (4xx or 5xx).
    response = requests.post(host + context_path, json=json_message, timeout=60)
    response.raise_for_status()
    json_data = response.json()
    print("*** Output: " + str(json_data), flush=True)
    return json_data


# custom css to hide default footer
css = """
footer {display: none !important;} .gradio-container {min-height: 0px !important;}
"""

# Add a dropdown to select the model to chat with
model_dropdown = gr.Dropdown(
    ["Gemma3 12b it", "Gemini"],
    label="Model",
    info="Select the model you would like to chat with.",
    value="Gemma3 12b it",
)

# Make the model temperature, top_p, and max tokents modifiable via sliders in the GUI
model_temperature = gr.Slider(
    minimum=0.1, maximum=1.0, value=0.9, label="Temperature", render=False
)
top_p = gr.Slider(minimum=0.1, maximum=1.0, value=0.95, label="Top_p", render=False)
max_tokens = gr.Slider(
    minimum=1, maximum=4096, value=1024, label="Max Tokens", render=False
)

# Call gradio to create the chat interface
app = gr.ChatInterface(
    inference_interface,
    additional_inputs=[model_dropdown, model_temperature, top_p, max_tokens],
    theme=themes.google_theme(),
    css=css,
    title="Chat with AI",
)

app.launch(server_name="0.0.0.0", allowed_paths=["images"])
7. Chat アプリケーションをデプロイする
Skaffold を使用してコンテナ イメージをビルドし、クラスタにデプロイします。Skaffold は、Kubernetes へのアプリケーションのビルド、push、デプロイのプロセスをオーケストレートして自動化するコマンドライン ツールです。このプロセス全体を 1 つのコマンドでトリガーできるため、開発ワークフローが簡素化され、アプリケーションの反復処理に最適です。
注: これにより、Workload Identity に必要な Kubernetes サービス アカウントもデプロイされます。定義は deploy/chat-deploy.yaml ファイルで確認できます。参考として、その定義を以下に示します。
apiVersion: v1
kind: ServiceAccount
metadata:
  name: gradio-chat-ksa
Skaffold を実行してビルドとデプロイを行います。
skaffold run --default-repo=us-central1-docker.pkg.dev/$GOOGLE_CLOUD_PROJECT/chat-app-repo
Skaffold は Cloud Build を使用してコンテナ イメージをビルドし、Terraform で作成された Artifact Registry に push してから、Kubernetes マニフェストをクラスタに適用します。
8. アプリケーションをテストする
- チャット アプリケーション サービスが外部 IP アドレスを取得するまで待ちます。
kubectl get svc gradio-chat-service --watchEXTERNAL-IPがpendingから実際の IP アドレスに変わったら、Ctrl+Cを押して監視を停止します。 - ウェブブラウザを開いて
http://[EXTERNAL-IP]:7860に移動します。 - モデルを操作してみてください。このアプリは、デフォルトでローカルでホストされている Gemma モデルとチャットするように構成されています。Gemini とチャットする場合は、[追加の入力] プルダウンでモデルを変更します。たとえば、「Kubernetes のジョークを教えて」と AI に尋ねてみてください。
トラブルシューティング:
- 「このサイトにアクセスできません」や「[外部 IP] が接続を拒否しました」などのエラーが表示された場合は、app.py ファイルで問題が発生している可能性があります。「app.py ファイルを確認する」というタイトルのステップに戻り、そこから手順を繰り返します。
- UI のデフォルトは「Gemma3 12b it」モデルです。すぐにエラーが発生した場合は、Gemma Pod の準備がまだできていない可能性があります。ヒント: プルダウンを [Gemini] に切り替えると、Gemma の初期化を待っている間にチャット アプリケーションの操作をテストできます。
Gemma をテストする: プルダウンで [Gemma3 12b it] が選択されていることを確認し、メッセージ(「Kubernetes についてのジョークを教えて」など)を送信します。
Gemini をテストする: プルダウンを [Gemini] に切り替えて、別の質問(「Pod とノードの違いは何ですか?」など)をします。
履歴を確認する: チャットアプリでモデル(Gemma または Gemini)とのチャットが正常に完了したら、Firestore の「chat-app-db」データベースでチャットログを確認します。両方のモデルとチャットできた場合は、モデルを切り替えても会話履歴が保持されることに注意してください。
9. さらに詳しく
ハイブリッド チャット アプリケーションが完成したので、次の課題を検討して理解を深めてください。
- カスタム ペルソナ:
process_message_gemma関数とprocess_message_gemini関数を変更して、先頭に「システム プロンプト」を含めてみてください。たとえば、「あなたは役に立つ海賊のアシスタントです」とモデルに指示して、回答がどのように変化するかを確認します。 - 永続的なユーザー ID: 現在、アプリケーションはセッションごとに新しいランダムな UUID を生成しています。ユーザーがさまざまなデバイスで過去の会話履歴を確認できるように、実際の認証システム(Google ログインなど)を統合するにはどうすればよいですか?
- モデルのテスト: UI で
temperatureスライダーを変更してみてください。温度が高い(1.0 に近い)場合、温度が低い(0.1 に近い)場合と比較して、回答の創造性と精度にどのような影響がありますか?
10. まとめ
おめでとうございます!ハイブリッド AI アプリケーションが正常にビルドされました。ここでは、以下の方法を学びました。
- Google Cloud でインフラストラクチャをコードとして管理するには、Terraform を使用します。
- GKE で独自のオープンウェイト LLM をホストして、完全に制御します。
- 柔軟性を高めるために、Vertex AI などのマネージド AI サービスを統合します。
- 永続性に Firestore を使用してステートフル アプリケーションを構築する。
- Workload Identity を使用してワークロードを保護します。
クリーンアップ
課金されないようにするには、作成したリソースを破棄します。
cd infra
terraform destroy -var="project_id=$GOOGLE_CLOUD_PROJECT" -var="project_number=$PROJECT_NUMBER" -var="region=$REGION"