
1. บทนำ
ภาพรวม
ในแล็บนี้ คุณจะได้สร้างและทำให้แอปพลิเคชันแชทแบบฟูลสแต็กที่ทำงานด้วยระบบ AI ใช้งานได้ใน Google Kubernetes Engine (GKE) แอปพลิเคชัน "ไฮบริด" นี้แสดงให้เห็นรูปแบบสถาปัตยกรรมที่ทรงพลัง นั่นคือความสามารถในการสลับไปมาระหว่างโมเดลโอเพนซอร์สที่โฮสต์ด้วยตนเอง (Gemma 3 12B) ซึ่งทำงานในคลัสเตอร์ของคุณโดยตรง และบริการ AI ที่มีการจัดการ (Gemini 2.5 Flash ผ่าน Vertex AI) ได้อย่างราบรื่น
                                   +----------------------+
                                   |   User (Web Browser) |
                                   +-----------+----------+
                                               |
                                               v
+----------------------------------------------+---------------------------------------------+
| Google Cloud Platform                        |                                             |
|   |                                  +-------+-------+                                     |
|   |                                  | Load Balancer |                                     |
|   |                                  +-------+-------+                                     |
|   |                                          v                                             |
|   +------------------------------------------+-----------------------------------------+   |
|   |  Google Kubernetes Engine (GKE)          |                                         |   |
|   |                                          v                                         |   |
|   |                              +-----------+-----------+                             |   |
|   |                              |    Gradio Chat App    |                             |   |
|   |                              +--+-----------------+--+                             |   |
|   |                                 |                 |                                |   |
|   |                   (Self-hosted) |                 | (Managed via SDK)              |   |
|   |                                 v                 |                                |   |
|   |                  +--------------+---+             |                                |   |
|   |                  | Gemma 3 Model    |             |                                |   |
|   |                  | (GPU Node)       |             |                                |   |
|   |                  +------------------+             |                                |   |
|   +---------------------------------------------------|--------------------------------+   |
|                                                       |                                    |
|                                                       v                                    |
|                                            +----------+-----------+                        |
|                                            | Vertex AI (Gemini)   |                        |
|                                            +----------------------+                        |
|                                                       | (Save History)                     |
|                                                       v                                    |
|                                            +----------+-----------+                        |
|                                            | Firestore Database   |                        |
|                                            +----------------------+                        |
+--------------------------------------------------------------------------------------------+
คุณจะใช้ Terraform เพื่อจัดสรรโครงสร้างพื้นฐาน ซึ่งรวมถึงคลัสเตอร์ GKE Autopilot และฐานข้อมูล Firestore สำหรับการคงประวัติเซสชันแชท จากนั้นคุณจะเขียนโค้ดแอปพลิเคชัน Python ให้เสร็จสมบูรณ์เพื่อจัดการการสนทนาแบบหลายรอบ เชื่อมต่อกับโมเดล AI ทั้ง 2 โมเดล และทำให้แอปพลิเคชันสุดท้ายใช้งานได้โดยใช้ Cloud Build และ Skaffold
สิ่งที่คุณจะได้เรียนรู้
- จัดสรรโครงสร้างพื้นฐานของ GKE และ Firestore โดยใช้ Terraform
- ติดตั้งใช้งานโมเดลภาษาขนาดใหญ่ (Gemma) ใน GKE Autopilot โดยใช้ไฟล์ Manifest ของ Kubernetes
- ใช้แชทอินเทอร์เฟซ Gradio ใน Python ที่สลับไปมาระหว่างแบ็กเอนด์ AI ต่างๆ ได้
- ใช้ Firestore เพื่อจัดเก็บและเรียกประวัติเซสชันแชท
- กำหนดค่า Workload Identity เพื่อให้สิทธิ์เข้าถึงบริการ Google Cloud (Vertex AI, Firestore) แก่ภาระงาน GKE อย่างปลอดภัย
ข้อกำหนดเบื้องต้น
- โปรเจ็กต์ Google Cloud ที่เปิดใช้การเรียกเก็บเงิน
- มีความคุ้นเคยพื้นฐานกับ Python, Kubernetes และเครื่องมือบรรทัดคำสั่งมาตรฐาน
- โทเค็น Hugging Face ที่มีสิทธิ์เข้าถึงโมเดล Gemma
2. การตั้งค่าโปรเจ็กต์
- หากยังไม่มีบัญชี Google คุณต้องสร้างบัญชี Google
- ใช้บัญชีส่วนตัวแทนบัญชีงานหรือบัญชีโรงเรียน บัญชีงานและบัญชีโรงเรียนอาจมีข้อจำกัดที่ทำให้คุณเปิดใช้ API ที่จำเป็นสำหรับ Lab นี้ไม่ได้
- ลงชื่อเข้าใช้ Google Cloud Console
- เปิดใช้การเรียกเก็บเงินใน Cloud Console
- การทำ Lab นี้ควรมีค่าใช้จ่ายน้อยกว่า $1 USD ในทรัพยากรระบบคลาวด์
- คุณสามารถทำตามขั้นตอนที่ส่วนท้ายของแล็บนี้เพื่อลบทรัพยากรเพื่อหลีกเลี่ยงการเรียกเก็บเงินเพิ่มเติม
- ผู้ใช้ใหม่มีสิทธิ์ใช้ช่วงทดลองใช้ฟรีมูลค่า$300 USD
- สร้างโปรเจ็กต์ใหม่หรือเลือกใช้โปรเจ็กต์ที่มีอยู่ซ้ำ
เปิดเครื่องมือแก้ไข Cloud Shell
- คลิกลิงก์นี้เพื่อไปยัง Cloud Shell Editor โดยตรง
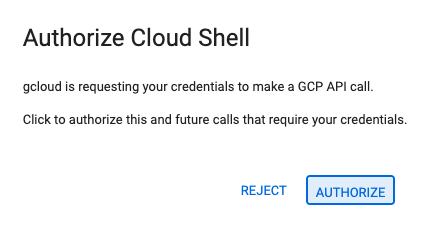
- หากระบบแจ้งให้ให้สิทธิ์ในวันนี้ ให้คลิกให้สิทธิ์เพื่อดำเนินการต่อ
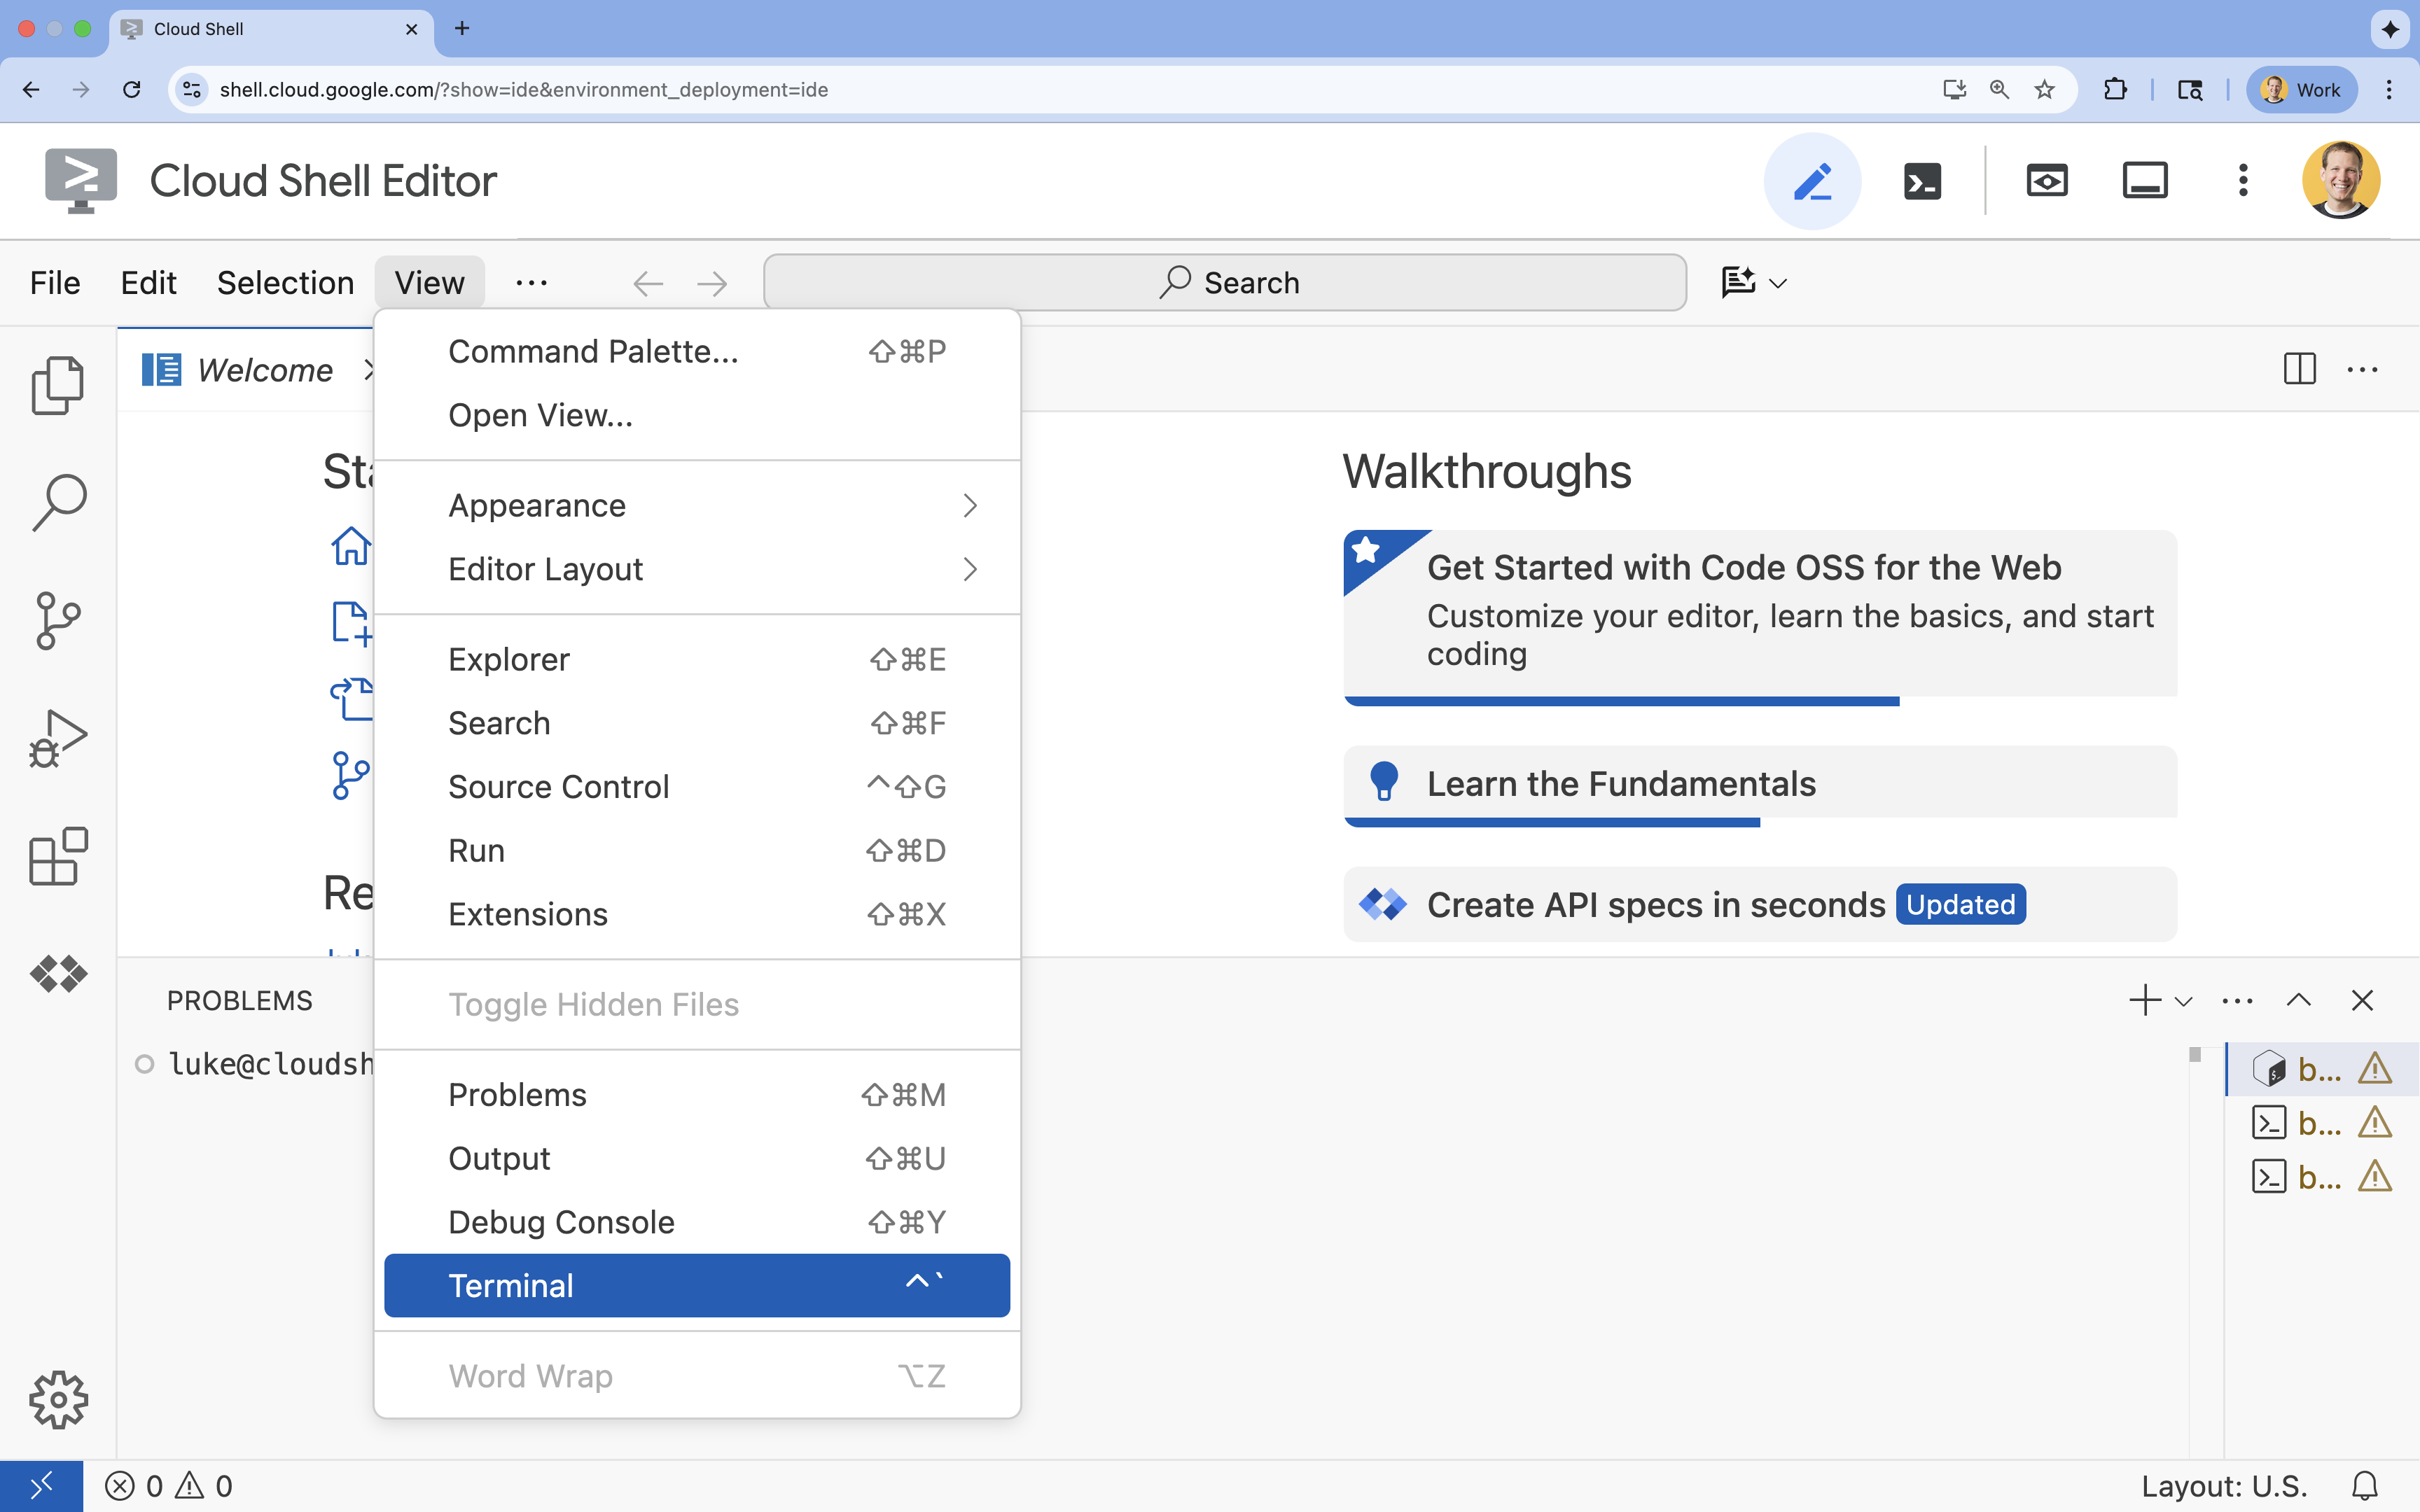
- หากเทอร์มินัลไม่ปรากฏที่ด้านล่างของหน้าจอ ให้เปิดโดยทำดังนี้
- คลิกดู
- คลิก Terminal
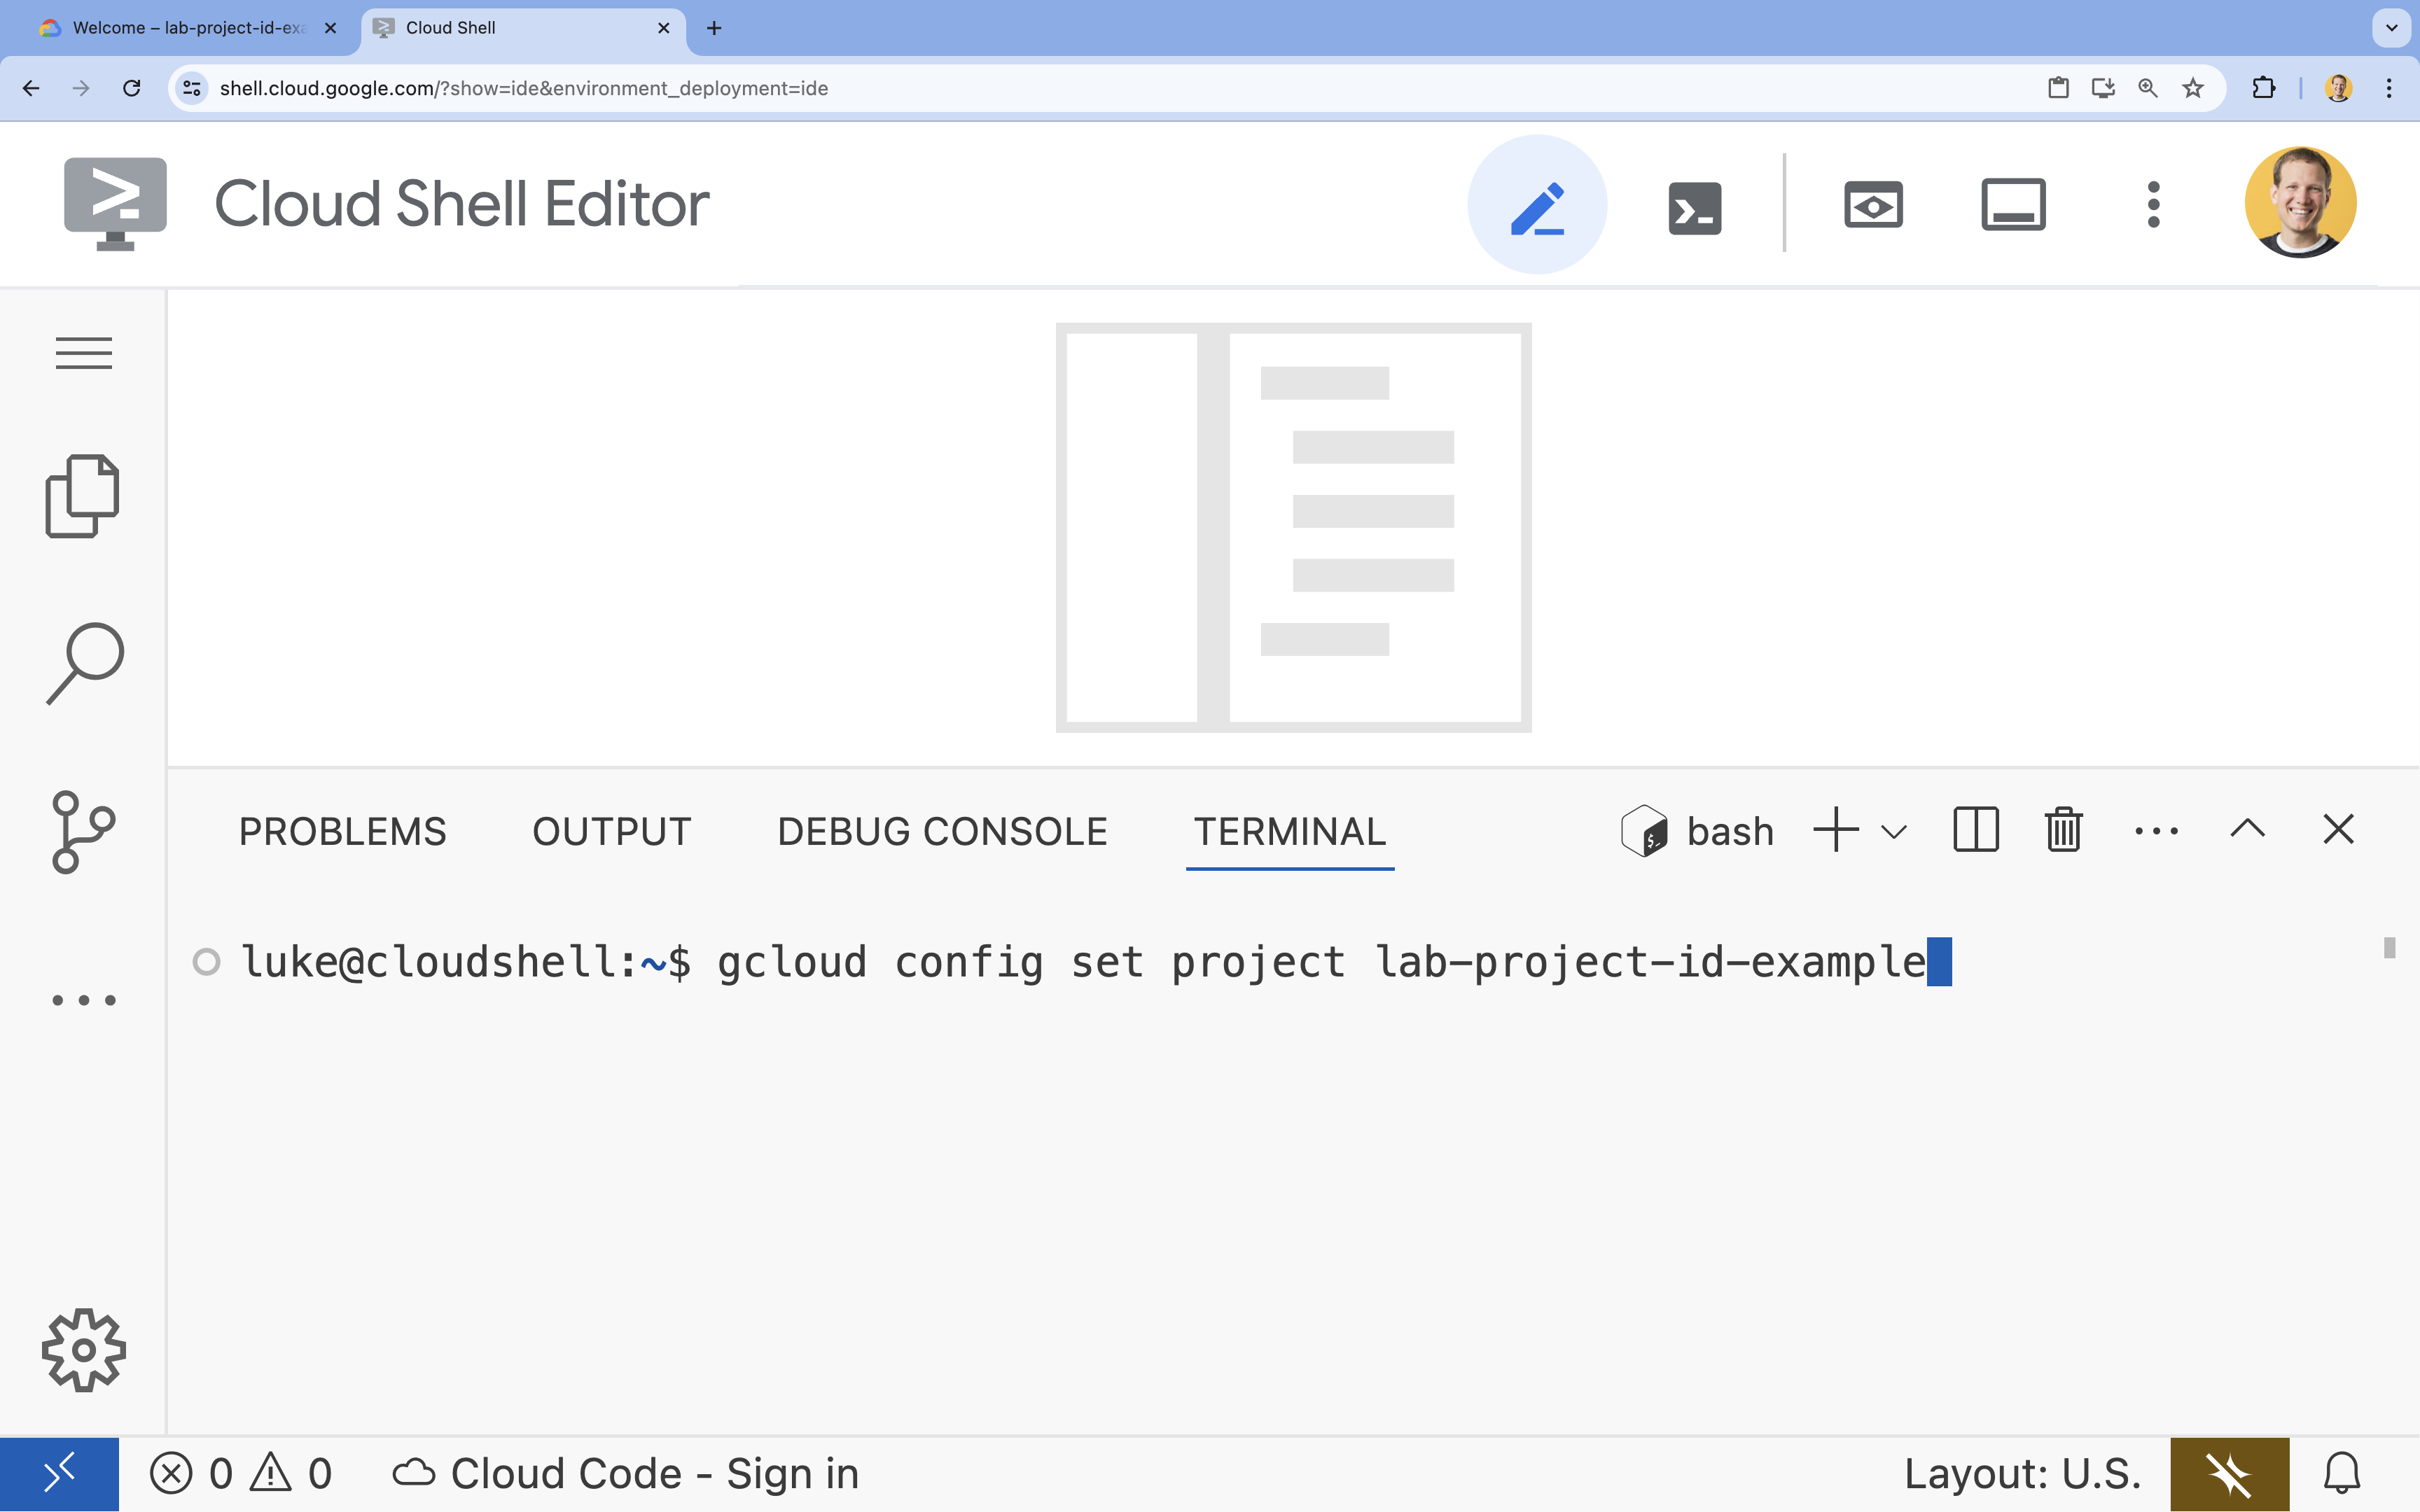
- ในเทอร์มินัล ให้ตั้งค่าโปรเจ็กต์ด้วยคำสั่งนี้
- รูปแบบ:
gcloud config set project [PROJECT_ID] - ตัวอย่าง
gcloud config set project lab-project-id-example - หากจำรหัสโปรเจ็กต์ไม่ได้ ให้ทำดังนี้
- คุณแสดงรหัสโปรเจ็กต์ทั้งหมดได้โดยใช้คำสั่งต่อไปนี้
gcloud projects list | awk '/PROJECT_ID/{print $2}'
- คุณแสดงรหัสโปรเจ็กต์ทั้งหมดได้โดยใช้คำสั่งต่อไปนี้
- รูปแบบ:
- คุณควรเห็นข้อความต่อไปนี้
Updated property [core/project].
WARNINGและระบบขอให้คุณDo you want to continue (Y/n)?แสดงว่าคุณอาจป้อนรหัสโปรเจ็กต์ไม่ถูกต้อง กดnกดEnterแล้วลองเรียกใช้คำสั่งgcloud config set projectอีกครั้ง
โคลนที่เก็บ
ในเทอร์มินัล Cloud Shell ให้โคลนที่เก็บโปรเจ็กต์แล้วไปที่ไดเรกทอรีโปรเจ็กต์
git clone https://github.com/GoogleCloudPlatform/devrel-demos.git
cd devrel-demos/containers/gradio-chat-gke
โปรดใช้เวลาสักครู่เพื่อสำรวจโครงสร้างโปรเจ็กต์
gradio-chat-gke/
├── app/
│   ├── app.py                # Main application logic (you will edit this)
│   ├── requirements.txt      # Python dependencies
│   └── themes.py             # UI theming
├── deploy/
│   ├── chat-deploy.yaml      # Kubernetes deployment for the chat app
│   ├── Dockerfile            # Container definition for the chat app
│   └── gemma3-12b-deploy.yaml# Kubernetes deployment for Gemma model
├── infra/
│   └── main.tf               # Terraform infrastructure definition
└── skaffold.yaml             # Skaffold configuration for building/deploying
ตั้งค่าตัวแปรสภาพแวดล้อม
ตั้งค่าตัวแปรสภาพแวดล้อมสำหรับรหัสโปรเจ็กต์และหมายเลขโปรเจ็กต์ Terraform และคำสั่งที่ตามมาจะใช้ข้อมูลเหล่านี้
export GOOGLE_CLOUD_PROJECT=$(gcloud config get-value project)
export PROJECT_NUMBER=$(gcloud projects describe $GOOGLE_CLOUD_PROJECT --format="value(projectNumber)")
export REGION=us-central1
เปิดใช้ Cloud Resource Manager API
Terraform กำหนดให้ต้องเปิดใช้ Cloud Resource Manager API เพื่อจัดการทรัพยากรของโปรเจ็กต์ ดังนั้นเราจึงต้องเปิดใช้ API ดังกล่าวก่อน ต่อมาเราจะทำให้แอปพลิเคชันแชทใช้งานได้ด้วย Skaffold ซึ่งใช้ Cloud Build เพื่อสร้างอิมเมจคอนเทนเนอร์ เราจะเปิดใช้ Storage API และสร้าง Bucket ที่จำเป็นสำหรับ Cloud Build ในตอนนี้ เราจะใช้ Terraform เองเพื่อเปิดใช้ API อื่นๆ ที่จำเป็นสำหรับโปรเจ็กต์นี้
gcloud services enable cloudresourcemanager.googleapis.com storage-api.googleapis.com
สร้าง Bucket พื้นที่งานของ Cloud Build
Skaffold ใช้ Google Cloud Build ซึ่งต้องใช้ที่เก็บข้อมูล Cloud Storage เพื่อจัดเตรียมซอร์สโค้ด
สร้างเลยเพื่อให้แน่ใจว่ามีอยู่
gcloud storage buckets create gs://${GOOGLE_CLOUD_PROJECT}_cloudbuild
(หากได้รับข้อผิดพลาดที่ระบุว่ามีที่เก็บข้อมูลอยู่แล้ว คุณไม่ต้องสนใจข้อผิดพลาดนี้)
3. จัดสรรโครงสร้างพื้นฐานด้วย Terraform
เราจะใช้ Terraform เพื่อตั้งค่าทรัพยากร Google Cloud ที่จำเป็น ซึ่งจะช่วยให้มั่นใจได้ว่าสภาพแวดล้อมจะสอดคล้องกันและทำซ้ำได้
- ไปที่ไดเรกทอรีโครงสร้างพื้นฐาน
cd infra
ไฟล์นี้กำหนด API เพิ่มเติมที่เราจะต้องใช้สำหรับโปรเจ็กต์นี้ ได้แก่ cloudbuild, artifactregistry, container (gke), firestore และ aiplatform (vertexai) ดูวิธีเปิดใช้ API ผ่าน Terraform ได้ในไฟล์หรือด้านล่าง
resource "google_project_service" "cloudbuild" {
  service            = "cloudbuild.googleapis.com"
  disable_on_destroy = false
  project            = var.project_id
}

resource "google_project_service" "artifactregistry" {
  service            = "artifactregistry.googleapis.com"
  disable_on_destroy = false
  project            = var.project_id
}

resource "google_project_service" "container" {
  service            = "container.googleapis.com"
  disable_on_destroy = false
  project            = var.project_id
}

resource "google_project_service" "firestore" {
  service            = "firestore.googleapis.com"
  disable_on_destroy = false
  project            = var.project_id
}

resource "google_project_service" "vertexai" {
  service            = "aiplatform.googleapis.com"
  disable_on_destroy = false
  project            = var.project_id
}
กำหนดคลัสเตอร์ GKE
เปิด infra/main.tf ในเครื่องมือแก้ไข คุณจะเห็นความคิดเห็น # TODO หลายรายการ คุณสามารถเปิดไฟล์ด้วยตนเองหรือใช้คำสั่งนี้เพื่อเปิดไฟล์ในเครื่องมือแก้ไข
cloudshell edit main.tf
ก่อนอื่นเราต้องกำหนดคลัสเตอร์ Kubernetes เราจะใช้ GKE Autopilot ซึ่งเหมาะสำหรับภาระงาน AI เนื่องจากจะจัดการโหนดโดยอัตโนมัติ
ค้นหา # TODO: Create a GKE Autopilot Cluster แล้วเพิ่มบล็อกต่อไปนี้ไว้ด้านล่าง
# Create a GKE Autopilot Cluster
resource "google_container_cluster" "primary" {
  name     = var.cluster_name
  location = var.region
  project  = var.project_id

  # Enable Autopilot mode
  enable_autopilot = true

  deletion_protection = false

  # Networking
  network    = "default"
  subnetwork = "projects/${var.project_id}/regions/${var.region}/subnetworks/default"

  # Timeout for cluster creation
  timeouts {
    create = "30m"
    update = "30m"
  }

  depends_on = [google_project_service.container]
}
ประกาศ enable_autopilot = true บรรทัดเดียวนี้ช่วยให้เราไม่ต้องจัดการกลุ่มโหนด การปรับขนาดอัตโนมัติ และการจัดสรรภาระงาน GPU
กำหนดฐานข้อมูล Firestore
จากนั้นเราต้องมีที่เก็บประวัติการแชท Firestore เป็นฐานข้อมูล NoSQL แบบ Serverless ที่ตอบโจทย์ความต้องการนี้ได้อย่างสมบูรณ์
ค้นหา # TODO: Create a Firestore Database แล้วเพิ่มข้อมูลต่อไปนี้
resource "google_firestore_database" "database" {
  project     = var.project_id
  name        = "chat-app-db"
  location_id = "nam5"
  type        = "FIRESTORE_NATIVE"

  depends_on = [google_project_service.firestore]
}
หลังจากเพิ่มทรัพยากรฐานข้อมูลแล้ว ให้ค้นหา # TODO: Create an initial Firestore Document แล้วเพิ่มบล็อกต่อไปนี้ ทรัพยากรนี้จะสร้างเอกสารตัวยึดตำแหน่งเริ่มต้นในคอลเล็กชัน ซึ่งมีประโยชน์ในการเริ่มต้นโครงสร้างฐานข้อมูล
resource "google_firestore_document" "initial_document" {
  project     = var.project_id
  collection  = "chat_sessions"
  document_id = "initialize"
  fields = <<EOF
  EOF

  depends_on = [google_firestore_database.database]
}
กำหนด Workload Identity
สุดท้าย เราต้องกำหนดค่าความปลอดภัย เราต้องการให้พ็อด Kubernetes เข้าถึง Vertex AI และ Firestore ได้โดยไม่ต้องจัดการข้อมูลลับหรือคีย์ API เราทำเช่นนี้ได้ด้วย Workload Identity
เราจะมอบบทบาท IAM ที่จำเป็นให้กับบัญชีบริการ Kubernetes (KSA) ที่แอปของเราจะใช้
หมายเหตุ: บัญชีบริการ Kubernetes (gradio-chat-ksa) ที่อ้างอิงในการเชื่อมโยงเหล่านี้ยังไม่มีอยู่ ระบบจะสร้างภายหลังเมื่อเราติดตั้งใช้งานแอปพลิเคชันกับคลัสเตอร์ คุณสามารถจัดสรรการเชื่อมโยง IAM เหล่านี้ล่วงหน้าได้ (และเป็นแนวทางปฏิบัติทั่วไป)
ค้นหา # TODO: Configure Workload Identity IAM bindings แล้วเพิ่มข้อมูลต่อไปนี้
locals {
  ksa_principal = "principal://iam.googleapis.com/projects/${var.project_number}/locations/global/workloadIdentityPools/${var.project_id}.svc.id.goog/subject/ns/default/sa/gradio-chat-ksa"
}

resource "google_project_iam_member" "ksa_token_creator" {
  project = var.project_id
  role    = "roles/iam.serviceAccountTokenCreator"
  member  = local.ksa_principal
}

resource "google_project_iam_member" "ksa_vertex_user" {
  project = var.project_id
  role    = "roles/aiplatform.user"
  member  = local.ksa_principal
}

resource "google_project_iam_member" "ksa_datastore_user" {
  project = var.project_id
  role    = "roles/datastore.user"
  member  = local.ksa_principal
}
ใช้การกำหนดค่า
เมื่อกำหนดโครงสร้างพื้นฐานแล้ว เรามาจัดสรรกัน
- ก่อนอื่นเราต้องตั้งค่าตัวแปร 2-3 ตัวเพื่อให้ Terraform ใช้ เราจะดำเนินการนี้โดยใช้ตัวแปรสภาพแวดล้อมดังนี้
export TF_VAR_project_id=$(gcloud config get-value project)
export TF_VAR_project_number=$(gcloud projects describe $TF_VAR_project_id --format="value(projectNumber)")
export TF_VAR_region="us-central1"
- เริ่มต้น Terraform
terraform init
- ใช้
terraform planเพื่อดูตัวอย่างทรัพยากรที่จะสร้าง
terraform plan
- ใช้การกำหนดค่า เมื่อได้รับข้อความแจ้ง ให้พิมพ์
yesเพื่อยืนยัน
terraform apply
หมายเหตุ: การจัดสรรคลัสเตอร์ GKE อาจใช้เวลา 10-15 นาที ในระหว่างรอ คุณสามารถไปที่ส่วนถัดไปเพื่อตรวจสอบโค้ดแอปพลิเคชันได้
- เมื่อเสร็จแล้ว ให้กำหนดค่า
kubectlเพื่อสื่อสารกับคลัสเตอร์ใหม่
gcloud container clusters get-credentials gradio-chat-cluster --region us-central1 --project $TF_VAR_project_id
4. ติดตั้งใช้งาน Gemma ที่โฮสต์ด้วยตนเองใน GKE
จากนั้นเราจะติดตั้งใช้งานโมเดล Gemma 3 12B ในคลัสเตอร์ GKE โดยตรง ซึ่งช่วยให้การอนุมานมีเวลาในการตอบสนองต่ำและควบคุมสภาพแวดล้อมการดำเนินการของโมเดลได้อย่างสมบูรณ์
กำหนดค่าข้อมูลเข้าสู่ระบบของ Hugging Face
หากต้องการดาวน์โหลดโมเดล Gemma คลัสเตอร์ของคุณต้องมีการตรวจสอบสิทธิ์กับ Hugging Face
- ตรวจสอบว่าคุณมีโทเค็น Hugging Face
- สร้างข้อมูลลับ Kubernetes ด้วยโทเค็นของคุณ - แทนที่ [YOUR_HF_TOKEN] ด้วยโทเค็นจริง:
kubectl create secret generic hf-secret --from-literal=hf_api_token=[YOUR_HF_TOKEN]
ทำให้โมเดลใช้งานได้
เราจะใช้การติดตั้งใช้งาน Kubernetes มาตรฐานเพื่อเรียกใช้โมเดล ไฟล์ Manifest อยู่ที่ deploy/gemma3-12b-deploy.yaml คุณสามารถเปิดไฟล์ด้วยตนเองหรือใช้คำสั่งนี้เพื่อเปิดไฟล์ในเครื่องมือแก้ไข
cd ../deploy
cloudshell edit gemma3-12b-deploy.yaml
โปรดใช้เวลาสักครู่เพื่อตรวจสอบไฟล์นี้ สังเกตส่วน resources
        resources:
          requests:
            nvidia.com/gpu: 4
      nodeSelector:
        cloud.google.com/gke-accelerator: nvidia-l4
นี่คือโครงสร้างพื้นฐาน AI แบบประกาศ เรากำลังบอก GKE Autopilot ว่าพ็อดนี้ต้องการ GPU ของ NVIDIA L4 จำนวน 4 ตัว Autopilot จะค้นหาหรือจัดสรรโหนดที่ตรงตามข้อกำหนดเหล่านี้ทุกประการ หากโหนดไม่พร้อมใช้งานสำหรับการจัดสรร ระบบจะพยายามต่อไปจนกว่าจะมีโหนดที่ตรงตามข้อกำหนด
- ใช้ไฟล์ Manifest การติดตั้งใช้งาน
cd .. kubectl apply -f deploy/gemma3-12b-deploy.yamlkubectl get podsgemmaจะยังไม่พร้อมใช้งาน แอปแชทจะเชื่อมต่อกับบริการ Gemma ทุกครั้งที่พร้อมใช้งาน โปรดทราบว่าคุณจะโต้ตอบกับ Gemma ผ่านแอปแชทไม่ได้จนกว่าพ็อดgemmaจะแสดงสถานะเป็นRunningและ1/1แต่คุณสามารถแชทกับ Gemini แทนได้ในระหว่างนี้
5. สร้างแอปพลิเคชัน Chat
ตอนนี้มาเขียนแอปพลิเคชัน Python ให้เสร็จกัน เปิด app/app.py ใน Cloud Shell Editor คุณจะเห็นบล็อก # TODO หลายบล็อกที่ต้องกรอกข้อมูลเพื่อให้แอปพลิเคชันทำงานได้
cloudshell edit app/app.py
ขั้นตอนที่ 1: ประมวลผลประวัติการสนทนา
LLM ต้องใช้ประวัติการสนทนาในรูปแบบเฉพาะเพื่อให้เข้าใจว่าใครพูดอะไร
รูปแบบ "ตัวแปลภาษาอเนกประสงค์": โปรดสังเกตว่าเรากำลังจะเขียนฟังก์ชันที่แตกต่างกัน 2 ฟังก์ชันเพื่อประมวลผลประวัติการแชทเดียวกัน นี่เป็นรูปแบบสำคัญในแอปพลิเคชันแบบหลายโมเดล
- แหล่งข้อมูลที่เชื่อถือได้ (Gradio): แอปของเราจะเก็บประวัติในรูปแบบทั่วไปที่เรียบง่าย
[[user_msg1, bot_msg1], ...] - เป้าหมาย 1 (Gemma): ต้องแปลงเป็นสตริงดิบเดียวที่มีโทเค็นพิเศษที่เฉพาะเจาะจง
- เป้าหมาย 2 (Gemini): ต้องแปลงเป็นรายการออบเจ็กต์ API ที่มีโครงสร้าง
การจัดรูปแบบประวัติทั่วไปเป็นรูปแบบเป้าหมายในทุกๆ รอบจะช่วยให้เราสลับไปมาระหว่างโมเดลได้อย่างราบรื่น หากต้องการเพิ่มโมเดลอื่นในภายหลัง คุณจะต้องเขียนฟังก์ชันการประมวลผลใหม่สำหรับรูปแบบเฉพาะของโมเดลนั้น
สำหรับ Gemma (โฮสต์ด้วยตนเอง)
ทำความเข้าใจเทมเพลตแชท: เมื่อโฮสต์โมเดลแบบเปิดของคุณเอง โดยปกติแล้วคุณจะต้องจัดรูปแบบพรอมต์เป็นสตริงที่เฉพาะเจาะจงด้วยตนเอง ซึ่งโมเดลได้รับการฝึกให้จดจำเป็นการสนทนา ซึ่งเรียกว่า "เทมเพลตแชท"
ค้นหาฟังก์ชัน process_message_gemma ใน app.py แล้วแทนที่ด้วยโค้ดต่อไปนี้
# This function takes a user's message and the conversation history as input.
#   Its job is to format these elements into a single,
#   structured prompt that can be understood by the language model (LLM).
#   This structured format helps the LLM maintain context and generate more relevant responses.
def process_message_gemma(message, history):
    user_prompt_format = "User's Turn:\n>>> {prompt}\n"
    assistant_prompt_format = "Assistant's Turn:\n>>> {prompt}\n"

    history_message = ""
    for user_turn, assistant_turn in history:
        history_message += user_prompt_format.format(prompt=user_turn)
        history_message += assistant_prompt_format.format(prompt=assistant_turn)

    # Format the new user message
    new_user_message = user_prompt_format.format(prompt=message)
    # Create a new aggregated message to be used as a single flat string in a json object sent to the LLM
    aggregated_message = (
        history_message + new_user_message + assistant_prompt_format.format(prompt="")
    )
    return aggregated_message
สำหรับ Gemini (มีการจัดการ)
บริการที่มีการจัดการมักจะชอบออบเจ็กต์ที่มีโครงสร้างมากกว่าสตริงดิบ เราต้องมีฟังก์ชันแยกต่างหากเพื่อจัดรูปแบบประวัติเป็นออบเจ็กต์ types.Content สำหรับ Gemini SDK
ค้นหา process_message_gemini แล้วแทนที่ด้วย
def process_message_gemini(message, history):
    contents = []
    for user_turn, model_turn in history:
        contents.append(
            types.Content(role="user", parts=[types.Part.from_text(text=user_turn)])
        )
        contents.append(
            types.Content(role="model", parts=[types.Part.from_text(text=model_turn)])
        )

    contents.append(
        types.Content(role="user", parts=[types.Part.from_text(text=message)])
    )
    return contents
ขั้นตอนที่ 2: เรียกใช้โมเดล Gemma ที่โฮสต์ด้วยตนเอง
เราต้องส่งพรอมต์ที่จัดรูปแบบแล้วไปยังบริการ Gemma ที่ทำงานในคลัสเตอร์ เราจะใช้คำขอ HTTP POST มาตรฐานกับชื่อ DNS ภายในของบริการ
ค้นหาฟังก์ชัน call_gemma_model แล้วแทนที่ด้วย
# Construct the request, send it to Gemma, return the model's response
# aggregated_message = current user message + history
def call_gemma_model(aggregated_message, model_temperature, top_p, max_tokens):
    json_message = {
        "prompt": aggregated_message,
        "temperature": model_temperature,
        "top_p": top_p,
        "max_tokens": max_tokens,
        "stop": ["User's Turn:"],
    }

    # Log what will be sent to the LLM
    print("*** JSON request: " + str(json_message))

    # Send the constructed json with the user prompt to the model and put the model's response in the json_data variable
    json_data = post_request(json_message)

    # The response from the model is a list of predictions. We'll take the first result.
    raw_output = json_data["predictions"][0]

    # The vLLM server returns the full prompt in the response. We need to extract
    # just the newly generated text from the model.
    assistant_turn_marker = "Assistant's Turn:\n>>>"
    marker_pos = raw_output.rfind(assistant_turn_marker)

    if marker_pos != -1:
        output = raw_output[marker_pos + len(assistant_turn_marker) :]
    else:
        output = raw_output

    # Clean up potential over-generation
    stop_marker = "User's Turn:"
    stop_pos = output.lower().find(stop_marker.lower())
    if stop_pos != -1:
        output = output[:stop_pos]

    return output.strip()
ขั้นตอนที่ 3: เรียกใช้โมเดล Vertex AI Gemini
สำหรับโมเดลที่มีการจัดการ เราจะใช้ Google GenAI SDK ซึ่งจะง่ายกว่ามากเนื่องจากจัดการการเรียกเครือข่ายให้เรา
ค้นหาฟังก์ชัน call_gemini_model แล้วแทนที่ด้วย
# Send a request to Gemini via the VertexAI API. Return the model's response
# contents = list of types.Content objects
def call_gemini_model(contents, model_temperature, top_p, max_tokens):
    gemini_model = "gemini-2.5-flash"

    response = client.models.generate_content(
        model=gemini_model,
        contents=contents,
        config={
            "temperature": model_temperature,
            "max_output_tokens": max_tokens,
            "top_p": top_p,
        },
    )
    return response.text
ขั้นตอนที่ 4: ใช้เมนเทอร์เฟซการอนุมาน
สุดท้าย เราต้องมีฟังก์ชันตัวจัดสรรหลักที่ Gradio เรียกใช้ ฟังก์ชันนี้ต้องมีคุณสมบัติดังนี้
- เริ่มต้นประวัติหากว่างเปล่า
- ประมวลผลข้อความ
- ส่งคำขอไปยังโมเดลที่เลือก (Gemma หรือ Gemini)
- บันทึกการโต้ตอบไปยัง Firestore
- ส่งคำตอบกลับไปยัง UI
Gradio และการจัดการสถานะ: ChatInterface ของ Gradio จะจัดการสถานะระดับเซสชัน (การแสดงข้อความในเบราว์เซอร์) โดยอัตโนมัติ แต่ไม่มีการรองรับฐานข้อมูลภายนอกในตัว
หากต้องการเก็บประวัติการแชทไว้ในระยะยาว เราจะใช้รูปแบบมาตรฐานโดยเชื่อมต่อกับฟังก์ชัน inference_interface เมื่อยอมรับ request: gr.Request เป็นอาร์กิวเมนต์ Gradio จะส่งรายละเอียดเซสชันของผู้ใช้ปัจจุบันให้เราโดยอัตโนมัติ เราใช้ข้อมูลนี้เพื่อสร้างเอกสาร Firestore ที่ไม่ซ้ำกันสำหรับผู้ใช้แต่ละราย เพื่อให้มั่นใจว่าการสนทนาจะไม่ปะปนกันในสภาพแวดล้อมแบบหลายผู้ใช้
ค้นหาฟังก์ชัน inference_interface แล้วแทนที่ด้วย
# This is the primary chat function. Every time a user sends a message, gradio calls this function,
# which sends the user's input to the appropriate AI (as indicated on the user interface), updates
# the chat history for future use during this session, and records the chat history in Firestore.
def inference_interface(
    message,
    history,
    model_name,
    model_temperature,
    top_p,
    max_tokens,
    request: gr.Request,
):

    # set history to empty array
    if history is None:
        history = []

    # Get or create session document
    session_hash = request.session_hash
    doc_id = f"session-{session_hash}"
    doc_ref = db.collection("chat_sessions").document(doc_id)

    # Create the session document if it doesn't exist
    if not doc_ref.get().exists:
        doc_ref.set({"Session start": datetime.datetime.now()})

    # Log info
    print("Model: " + model_name)
    print("LLM Engine: " + llm_engine)
    print("* History: " + str(history))

    # Pass the message and history to the appropriate model, as indicated by the user via the ui
    if model_name == "Gemma3 12b it":
        aggregated_message = process_message_gemma(message, history)
        output = call_gemma_model(
            aggregated_message, model_temperature, top_p, max_tokens
        )

    elif model_name == "Gemini":
        gemini_contents = process_message_gemini(message, history)
        output = call_gemini_model(
            gemini_contents, model_temperature, top_p, max_tokens
        )

    else:
        # Handle the case where no valid model is selected
        output = "Error: Invalid model selected."

    interaction = {"user": message, model_name: output}

    # Log the updated chat history
    print("* History: " + str(history) + " " + str(interaction))

    # Save the updated history to Firestore
    save_chat_history(interaction, doc_ref)

    return output
6. ตรวจสอบไฟล์ app.py
ตอนนี้แอปพลิเคชันแชทที่ใช้ Gradio ของคุณควรพร้อมใช้งานแล้ว โปรดตรวจสอบว่าตรงกับไฟล์ที่สมบูรณ์ต่อไปนี้อย่างแม่นยำ
การแก้ปัญหา: หากคุณติดตั้งใช้งานแอปพลิเคชันและได้รับข้อผิดพลาด "ปฏิเสธการเชื่อมต่อ" หรือ "เข้าถึงเว็บไซต์นี้ไม่ได้" เมื่อพยายามเชื่อมต่อ ให้ลองทำซ้ำขั้นตอนจากจุดนี้ โดยเริ่มจากการคัดลอกทั้งไฟล์นี้และวางลงใน app.py
# Copyright 2024 Google LLC
#
# Licensed under the Apache License, Version 2.0 (the "License");
# you may not use this file except in compliance with the License.
# You may obtain a copy of the License at
#
#      http://www.apache.org/licenses/LICENSE-2.0
#
# Unless required by applicable law or agreed to in writing, software
# distributed under the License is distributed on an "AS IS" BASIS,
# WITHOUT WARRANTIES OR CONDITIONS OF ANY KIND, either express or implied.
# See the License for the specific language governing permissions and
# limitations under the License.

import datetime

import google.auth
import google.cloud
import gradio as gr
import requests
import themes
from google import genai

from google.cloud import firestore
from google.genai import types

## Do one-time initialization things

## grab the project id from google auth
_, project = google.auth.default()
print(f"Project: {project}")

# Set initial values for model
llm_engine = "vllm"
host = "http://gemma-service:8000"
context_path = "/generate"

# initialize vertex for interacting with Gemini
client = genai.Client(
    vertexai=True,
    project=project,
    location="global",
)

# Initialize Firestore client
db = firestore.Client(database="chat-app-db")


# This is the primary chat function. Every time a user sends a message, gradio calls this function,
# which sends the user's input to the appropriate AI (as indicated on the user interface), updates
# the chat history for future use during this session, and records the chat history in Firestore.
def inference_interface(
    message,
    history,
    model_name,
    model_temperature,
    top_p,
    max_tokens,
    request: gr.Request,
):

    # set history to empty array
    if history is None:
        history = []

    # Get or create session document
    session_hash = request.session_hash
    doc_id = f"session-{session_hash}"
    doc_ref = db.collection("chat_sessions").document(doc_id)

    # Create the session document if it doesn't exist
    if not doc_ref.get().exists:
        doc_ref.set({"Session start": datetime.datetime.now()})

    # Log info
    print("Model: " + model_name)
    print("LLM Engine: " + llm_engine)
    print("* History: " + str(history))

    # Pass the message and history to the appropriate model, as indicated by the user via the ui
    if model_name == "Gemma3 12b it":
        aggregated_message = process_message_gemma(message, history)
        output = call_gemma_model(
            aggregated_message, model_temperature, top_p, max_tokens
        )

    elif model_name == "Gemini":
        gemini_contents = process_message_gemini(message, history)
        output = call_gemini_model(
            gemini_contents, model_temperature, top_p, max_tokens
        )

    else:
        # Handle the case where no valid model is selected
        output = "Error: Invalid model selected."

    interaction = {"user": message, model_name: output}

    # Log the updated chat history
    print("* History: " + str(history) + " " + str(interaction))

    # Save the updated history to Firestore
    save_chat_history(interaction, doc_ref)

    return output


# Construct the request, send it to Gemma, return the model's response
# aggregated_message = current user message + history
def call_gemma_model(aggregated_message, model_temperature, top_p, max_tokens):
    json_message = {
        "prompt": aggregated_message,
        "temperature": model_temperature,
        "top_p": top_p,
        "max_tokens": max_tokens,
        "stop": ["User's Turn:"],
    }

    # Log what will be sent to the LLM
    print("*** JSON request: " + str(json_message))  # Log the JSON request

    # Send the constructed json with the user prompt to the model and put the model's response in the json_data variable
    json_data = post_request(json_message)

    # The response from the model is a list of predictions.
    # We'll take the first result.
    raw_output = json_data["predictions"][0]

    # The vLLM server returns the full prompt in the response. We need to extract
    # just the newly generated text from the model. The prompt ends with
    # "Assistant's Turn:\n>>>", so we find the last occurrence of that and
    # take everything after it.
    assistant_turn_marker = "Assistant's Turn:\n>>>"
    marker_pos = raw_output.rfind(assistant_turn_marker)

    if marker_pos != -1:
        # Get the text generated by the assistant
        output = raw_output[marker_pos + len(assistant_turn_marker) :]
    else:
        # Fallback in case the marker isn't found
        output = raw_output

    # The model sometimes continues the conversation and includes the next user's turn.
    # The 'stop' parameter is a good hint, but we parse the output as a safeguard.
    stop_marker = "User's Turn:"
    stop_pos = output.lower().find(stop_marker.lower())
    if stop_pos != -1:
        output = output[:stop_pos]

    # The model also sometimes prefixes its response with "Output:". We'll remove this.
    output = output.lstrip()
    prefix_marker = "Output:"
    if output.lower().startswith(prefix_marker.lower()):
        output = output[len(prefix_marker) :]

    return output.strip()


# Send a request to Gemini via the VertexAI API. Return the model's response
# contents = list of types.Content objects
def call_gemini_model(contents, model_temperature, top_p, max_tokens):
    gemini_model = "gemini-2.5-flash"

    response = client.models.generate_content(
        model=gemini_model,
        contents=contents,
        config={
            "temperature": model_temperature,
            "max_output_tokens": max_tokens,
            "top_p": top_p,
        },
    )
    output = response.text  # Extract the generated text
    # Consider handling additional response attributes (safety, usage, etc.)
    return output


def process_message_gemini(message, history):
    contents = []
    for user_turn, model_turn in history:
        contents.append(
            types.Content(role="user", parts=[types.Part.from_text(text=user_turn)])
        )
        contents.append(
            types.Content(role="model", parts=[types.Part.from_text(text=model_turn)])
        )

    contents.append(
        types.Content(role="user", parts=[types.Part.from_text(text=message)])
    )
    return contents


# This function takes a user's message and the conversation history as input.
#   Its job is to format these elements into a single,
#   structured prompt that can be understood by the language model (LLM).
#   This structured format helps the LLM maintain context and generate more relevant responses.
def process_message_gemma(message, history):
    user_prompt_format = "User's Turn:\n>>> {prompt}\n"
    assistant_prompt_format = "Assistant's Turn:\n>>> {prompt}\n"

    history_message = ""
    for user_turn, assistant_turn in history:
        history_message += user_prompt_format.format(prompt=user_turn)
        history_message += assistant_prompt_format.format(prompt=assistant_turn)

    # Format the new user message
    new_user_message = user_prompt_format.format(prompt=message)
    # Create a new aggregated message to be used as a single flat string in a json object sent to the LLM
    aggregated_message = (
        history_message + new_user_message + assistant_prompt_format.format(prompt="")
    )
    return aggregated_message


# Function to save chat history to Firestore
def save_chat_history(interaction, doc_ref):
    timestamp_str = str(datetime.datetime.now())

    # Save the chat history, merging with existing data
    doc_ref.update({timestamp_str: interaction})

    print("Chat history saved successfully!")  # Optional: Log success


# Send the json message to the model and return the model's response. This is used for Gemma but not Gemini. It could also be used for other models.
def post_request(json_message):
    print("*** Request" + str(json_message), flush=True)
    # Set a timeout and check for HTTP errors. This will raise an exception on a bad status code (4xx or 5xx).
    response = requests.post(host + context_path, json=json_message, timeout=60)
    response.raise_for_status()
    json_data = response.json()
    print("*** Output: " + str(json_data), flush=True)
    return json_data


# custom css to hide default footer
css = """
footer {display: none !important;} .gradio-container {min-height: 0px !important;}
"""

# Add a dropdown to select the model to chat with
model_dropdown = gr.Dropdown(
    ["Gemma3 12b it", "Gemini"],
    label="Model",
    info="Select the model you would like to chat with.",
    value="Gemma3 12b it",
)

# Make the model temperature, top_p, and max tokents modifiable via sliders in the GUI
model_temperature = gr.Slider(
    minimum=0.1, maximum=1.0, value=0.9, label="Temperature", render=False
)
top_p = gr.Slider(minimum=0.1, maximum=1.0, value=0.95, label="Top_p", render=False)
max_tokens = gr.Slider(
    minimum=1, maximum=4096, value=1024, label="Max Tokens", render=False
)

# Call gradio to create the chat interface
app = gr.ChatInterface(
    inference_interface,
    additional_inputs=[model_dropdown, model_temperature, top_p, max_tokens],
    theme=themes.google_theme(),
    css=css,
    title="Chat with AI",
)

app.launch(server_name="0.0.0.0", allowed_paths=["images"])
7. ติดตั้งใช้งานแอปพลิเคชัน Chat
เราจะใช้ Skaffold เพื่อสร้างอิมเมจคอนเทนเนอร์และทําให้ใช้งานได้ในคลัสเตอร์ Skaffold เป็นเครื่องมือบรรทัดคำสั่งที่จัดระเบียบและทำให้กระบวนการสร้าง พุช และทำให้แอปพลิเคชันใช้งานได้กับ Kubernetes เป็นแบบอัตโนมัติ ซึ่งช่วยลดความซับซ้อนของเวิร์กโฟลว์การพัฒนาโดยให้คุณทริกเกอร์กระบวนการทั้งหมดนี้ได้ด้วยคำสั่งเดียว จึงเหมาะอย่างยิ่งสำหรับการทำซ้ำในแอปพลิเคชัน
หมายเหตุ: การดำเนินการนี้จะทําให้บัญชีบริการ Kubernetes ที่เราต้องการสําหรับ Workload Identity ใช้งานได้ด้วย คุณดูคำจำกัดความได้ในไฟล์ deploy/chat-deploy.yaml ดูคำจำกัดความได้ที่นี่เพื่อเป็นข้อมูลอ้างอิง
apiVersion: v1
kind: ServiceAccount
metadata:
  name: gradio-chat-ksa
เรียกใช้ Skaffold เพื่อสร้างและติดตั้งใช้งาน
skaffold run --default-repo=us-central1-docker.pkg.dev/$GOOGLE_CLOUD_PROJECT/chat-app-repo
Skaffold จะใช้ Cloud Build เพื่อสร้างอิมเมจคอนเทนเนอร์ พุชไปยัง Artifact Registry ที่สร้างโดย Terraform แล้วใช้ไฟล์ Manifest ของ Kubernetes กับคลัสเตอร์
8. ทดสอบแอปพลิเคชัน
- รอให้บริการแอปพลิเคชันแชทรับที่อยู่ IP ภายนอก
kubectl get svc gradio-chat-service --watchEXTERNAL-IPเปลี่ยนจากpendingเป็นที่อยู่ IP จริง ให้กดCtrl+Cเพื่อหยุดดู - เปิดเว็บเบราว์เซอร์แล้วไปที่
http://[EXTERNAL-IP]:7860 - ลองโต้ตอบกับโมเดล แอปได้รับการกำหนดค่าให้คุณแชทกับโมเดล Gemma ที่โฮสต์ในเครื่องโดยค่าเริ่มต้น หากต้องการแชทกับ Gemini ให้เปลี่ยนโมเดลในเมนูแบบเลื่อนลง "ข้อมูลเพิ่มเติม" ตัวอย่างเช่น ลองถาม AI ว่า "เล่าเรื่องตลกเกี่ยวกับ Kubernetes ให้ฟังหน่อย"
การแก้ปัญหา:
- หากคุณได้รับข้อผิดพลาด เช่น "เข้าถึงเว็บไซต์นี้ไม่ได้" หรือ "[EXTERNAL-IP] ปฏิเสธการเชื่อมต่อ" แสดงว่าอาจมีข้อผิดพลาดเกิดขึ้นกับไฟล์ app.py กลับไปที่ขั้นตอนที่มีชื่อว่า "ตรวจสอบไฟล์ app.py" แล้วทำซ้ำขั้นตอนจากตรงนั้น
- UI จะใช้โมเดล "Gemma3 12b it" โดยค่าเริ่มต้น หากได้รับข้อผิดพลาดทันที แสดงว่าพ็อด Gemma อาจยังไม่พร้อมใช้งาน เคล็ดลับ: คุณสามารถเปลี่ยนเมนูแบบเลื่อนลงเป็น "Gemini" เพื่อทดสอบการโต้ตอบกับแอปพลิเคชันแชทขณะรอให้ Gemma เริ่มต้นได้
ทดสอบ Gemma: ตรวจสอบว่าได้เลือก "Gemma3 12b it" ในเมนูแบบเลื่อนลงแล้ว และส่งข้อความ (เช่น "เล่าเรื่องตลกเกี่ยวกับ Kubernetes ให้ฟังหน่อย")
ทดสอบ Gemini: เปลี่ยนเมนูแบบเลื่อนลงเป็น "Gemini" แล้วถามคำถามอื่น (เช่น "Pod กับ Node แตกต่างกันอย่างไร")
ตรวจสอบประวัติ: เมื่อแชทกับโมเดล (Gemma หรือ Gemini) ในแอปแชทเรียบร้อยแล้ว ให้ไปที่ฐานข้อมูล "chat-app-db" ใน Firestore เพื่อดูบันทึกการแชท หากคุณแชทกับทั้ง 2 โมเดลได้ โปรดทราบว่าระบบจะเก็บประวัติการสนทนาไว้แม้ว่าจะเปลี่ยนโมเดลก็ตาม
9. ก้าวไปอีกขั้น
ตอนนี้คุณมีแอปพลิเคชันแชทแบบไฮบริดที่ใช้งานได้แล้ว ลองพิจารณาความท้าทายต่อไปนี้เพื่อทำความเข้าใจให้ลึกซึ้งยิ่งขึ้น
- ลักษณะตัวตนที่กำหนดเอง: ลองแก้ไขฟังก์ชัน
process_message_gemmaและprocess_message_geminiเพื่อรวม "พรอมต์ของระบบ" ไว้ที่ตอนต้น เช่น บอกโมเดลว่า "คุณเป็นผู้ช่วยโจรสลัดที่แสนรู้" แล้วดูว่าโมเดลจะเปลี่ยนคำตอบอย่างไร - ข้อมูลประจำตัวผู้ใช้แบบถาวร: ปัจจุบันแอปพลิเคชันจะสร้าง UUID แบบสุ่มใหม่สำหรับทุกเซสชัน คุณจะผสานรวมระบบการตรวจสอบสิทธิ์จริง (เช่น การลงชื่อเข้าใช้ด้วย Google) อย่างไรเพื่อให้ผู้ใช้ดูประวัติการสนทนาที่ผ่านมาในอุปกรณ์ต่างๆ ได้
- การทดลองโมเดล: ลองเปลี่ยนแถบเลื่อน
temperatureใน UI อุณหภูมิสูง (ใกล้ 1.0) ส่งผลต่อความคิดสร้างสรรค์เทียบกับความถูกต้องของคำตอบอย่างไรเมื่อเทียบกับอุณหภูมิต่ำ (ใกล้ 0.1)
10. บทสรุป
ยินดีด้วย คุณสร้างแอปพลิเคชัน AI แบบไฮบริดเรียบร้อยแล้ว คุณได้เรียนรู้วิธีต่อไปนี้
- ใช้ Terraform สำหรับโครงสร้างพื้นฐานเป็นโค้ดใน Google Cloud
- โฮสต์ LLM แบบโอเพนเวทของคุณเองใน GKE เพื่อการควบคุมที่สมบูรณ์
- ผสานรวมบริการ AI ที่มีการจัดการ เช่น Vertex AI เพื่อความยืดหยุ่น
- สร้างแอปพลิเคชันแบบมีสถานะโดยใช้ Firestore เพื่อความคงทน
- รักษาความปลอดภัยให้ภาระงานโดยใช้ Workload Identity
ล้าง
หากต้องการหลีกเลี่ยงการเรียกเก็บเงิน ให้ทำลายทรัพยากรที่คุณสร้างขึ้นโดยทำดังนี้
cd infra
terraform destroy -var="project_id=$GOOGLE_CLOUD_PROJECT" -var="project_number=$PROJECT_NUMBER" -var="region=$REGION"