
1. Giới thiệu
Tổng quan
Trong phòng thí nghiệm này, bạn sẽ xây dựng và triển khai một ứng dụng trò chuyện dựa trên AI toàn diện trên Google Kubernetes Engine (GKE). Ứng dụng "kết hợp" này minh hoạ một mẫu kiến trúc mạnh mẽ: khả năng chuyển đổi liền mạch giữa một mô hình nguồn mở tự lưu trữ (Gemma 3 12B) chạy trực tiếp trong cụm của bạn và một dịch vụ AI được quản lý (Gemini 2.5 Flash thông qua Vertex AI).
                                   +----------------------+
                                   |   User (Web Browser) |
                                   +-----------+----------+
                                               |
                                               v
+----------------------------------------------+---------------------------------------------+
| Google Cloud Platform                        |                                             |
|   |                                  +-------+-------+                                     |
|   |                                  | Load Balancer |                                     |
|   |                                  +-------+-------+                                     |
|   |                                          v                                             |
|   +------------------------------------------+-----------------------------------------+   |
|   |  Google Kubernetes Engine (GKE)          |                                         |   |
|   |                                          v                                         |   |
|   |                              +-----------+-----------+                             |   |
|   |                              |    Gradio Chat App    |                             |   |
|   |                              +--+-----------------+--+                             |   |
|   |                                 |                 |                                |   |
|   |                   (Self-hosted) |                 | (Managed via SDK)              |   |
|   |                                 v                 |                                |   |
|   |                  +--------------+---+             |                                |   |
|   |                  | Gemma 3 Model    |             |                                |   |
|   |                  | (GPU Node)       |             |                                |   |
|   |                  +------------------+             |                                |   |
|   +---------------------------------------------------|--------------------------------+   |
|                                                       |                                    |
|                                                       v                                    |
|                                            +----------+-----------+                        |
|                                            | Vertex AI (Gemini)   |                        |
|                                            +----------------------+                        |
|                                                       | (Save History)                     |
|                                                       v                                    |
|                                            +----------+-----------+                        |
|                                            | Firestore Database   |                        |
|                                            +----------------------+                        |
+--------------------------------------------------------------------------------------------+
Bạn sẽ sử dụng Terraform để cung cấp cơ sở hạ tầng, bao gồm một cụm Tự vận hành GKE và một cơ sở dữ liệu Firestore để duy trì nhật ký phiên trò chuyện. Sau đó, bạn sẽ hoàn tất mã xử lý ứng dụng Python để xử lý các cuộc trò chuyện nhiều lượt, tương tác với cả hai mô hình AI và triển khai ứng dụng cuối cùng bằng Cloud Build và Skaffold.
Kiến thức bạn sẽ học được
- Cung cấp cơ sở hạ tầng GKE và Firestore bằng Terraform.
- Triển khai một mô hình ngôn ngữ lớn (Gemma) trên chế độ tự động vận hành GKE bằng cách sử dụng các tệp kê khai Kubernetes.
- Triển khai giao diện trò chuyện Gradio bằng Python có thể chuyển đổi giữa nhiều phần phụ trợ AI.
- Sử dụng Firestore để lưu trữ và truy xuất nhật ký phiên trò chuyện.
- Định cấu hình Workload Identity để cấp quyền truy cập an toàn cho các khối lượng công việc GKE của bạn vào các dịch vụ của Google Cloud (Vertex AI, Firestore).
Điều kiện tiên quyết
- Một dự án trên Google Cloud đã bật tính năng thanh toán.
- Hiểu biết cơ bản về Python, Kubernetes và các công cụ dòng lệnh tiêu chuẩn.
- Một mã thông báo Hugging Face có quyền truy cập vào các mô hình Gemma.
2. Thiết lập dự án
- Nếu chưa có Tài khoản Google, bạn phải tạo một Tài khoản Google.
- Sử dụng tài khoản cá nhân thay vì tài khoản trường học hoặc tài khoản do nơi làm việc cấp. Tài khoản do nơi làm việc hoặc trường học cấp có thể có các hạn chế khiến bạn không bật được những API cần thiết cho lớp học này.
- Đăng nhập vào Google Cloud Console.
- Bật tính năng thanh toán trong Cloud Console.
- Việc hoàn thành bài tập thực hành này sẽ tốn ít hơn 1 USD cho các tài nguyên trên đám mây.
- Bạn có thể làm theo các bước ở cuối bài thực hành này để xoá tài nguyên nhằm tránh bị tính thêm phí.
- Người dùng mới đủ điều kiện dùng thử miễn phí trị giá 300 USD.
- Tạo một dự án mới hoặc chọn sử dụng lại một dự án hiện có.
Mở Trình chỉnh sửa Cloud Shell
- Nhấp vào đường liên kết này để chuyển trực tiếp đến Cloud Shell Editor
- Nếu được nhắc uỷ quyền vào bất kỳ thời điểm nào trong hôm nay, hãy nhấp vào Uỷ quyền để tiếp tục.
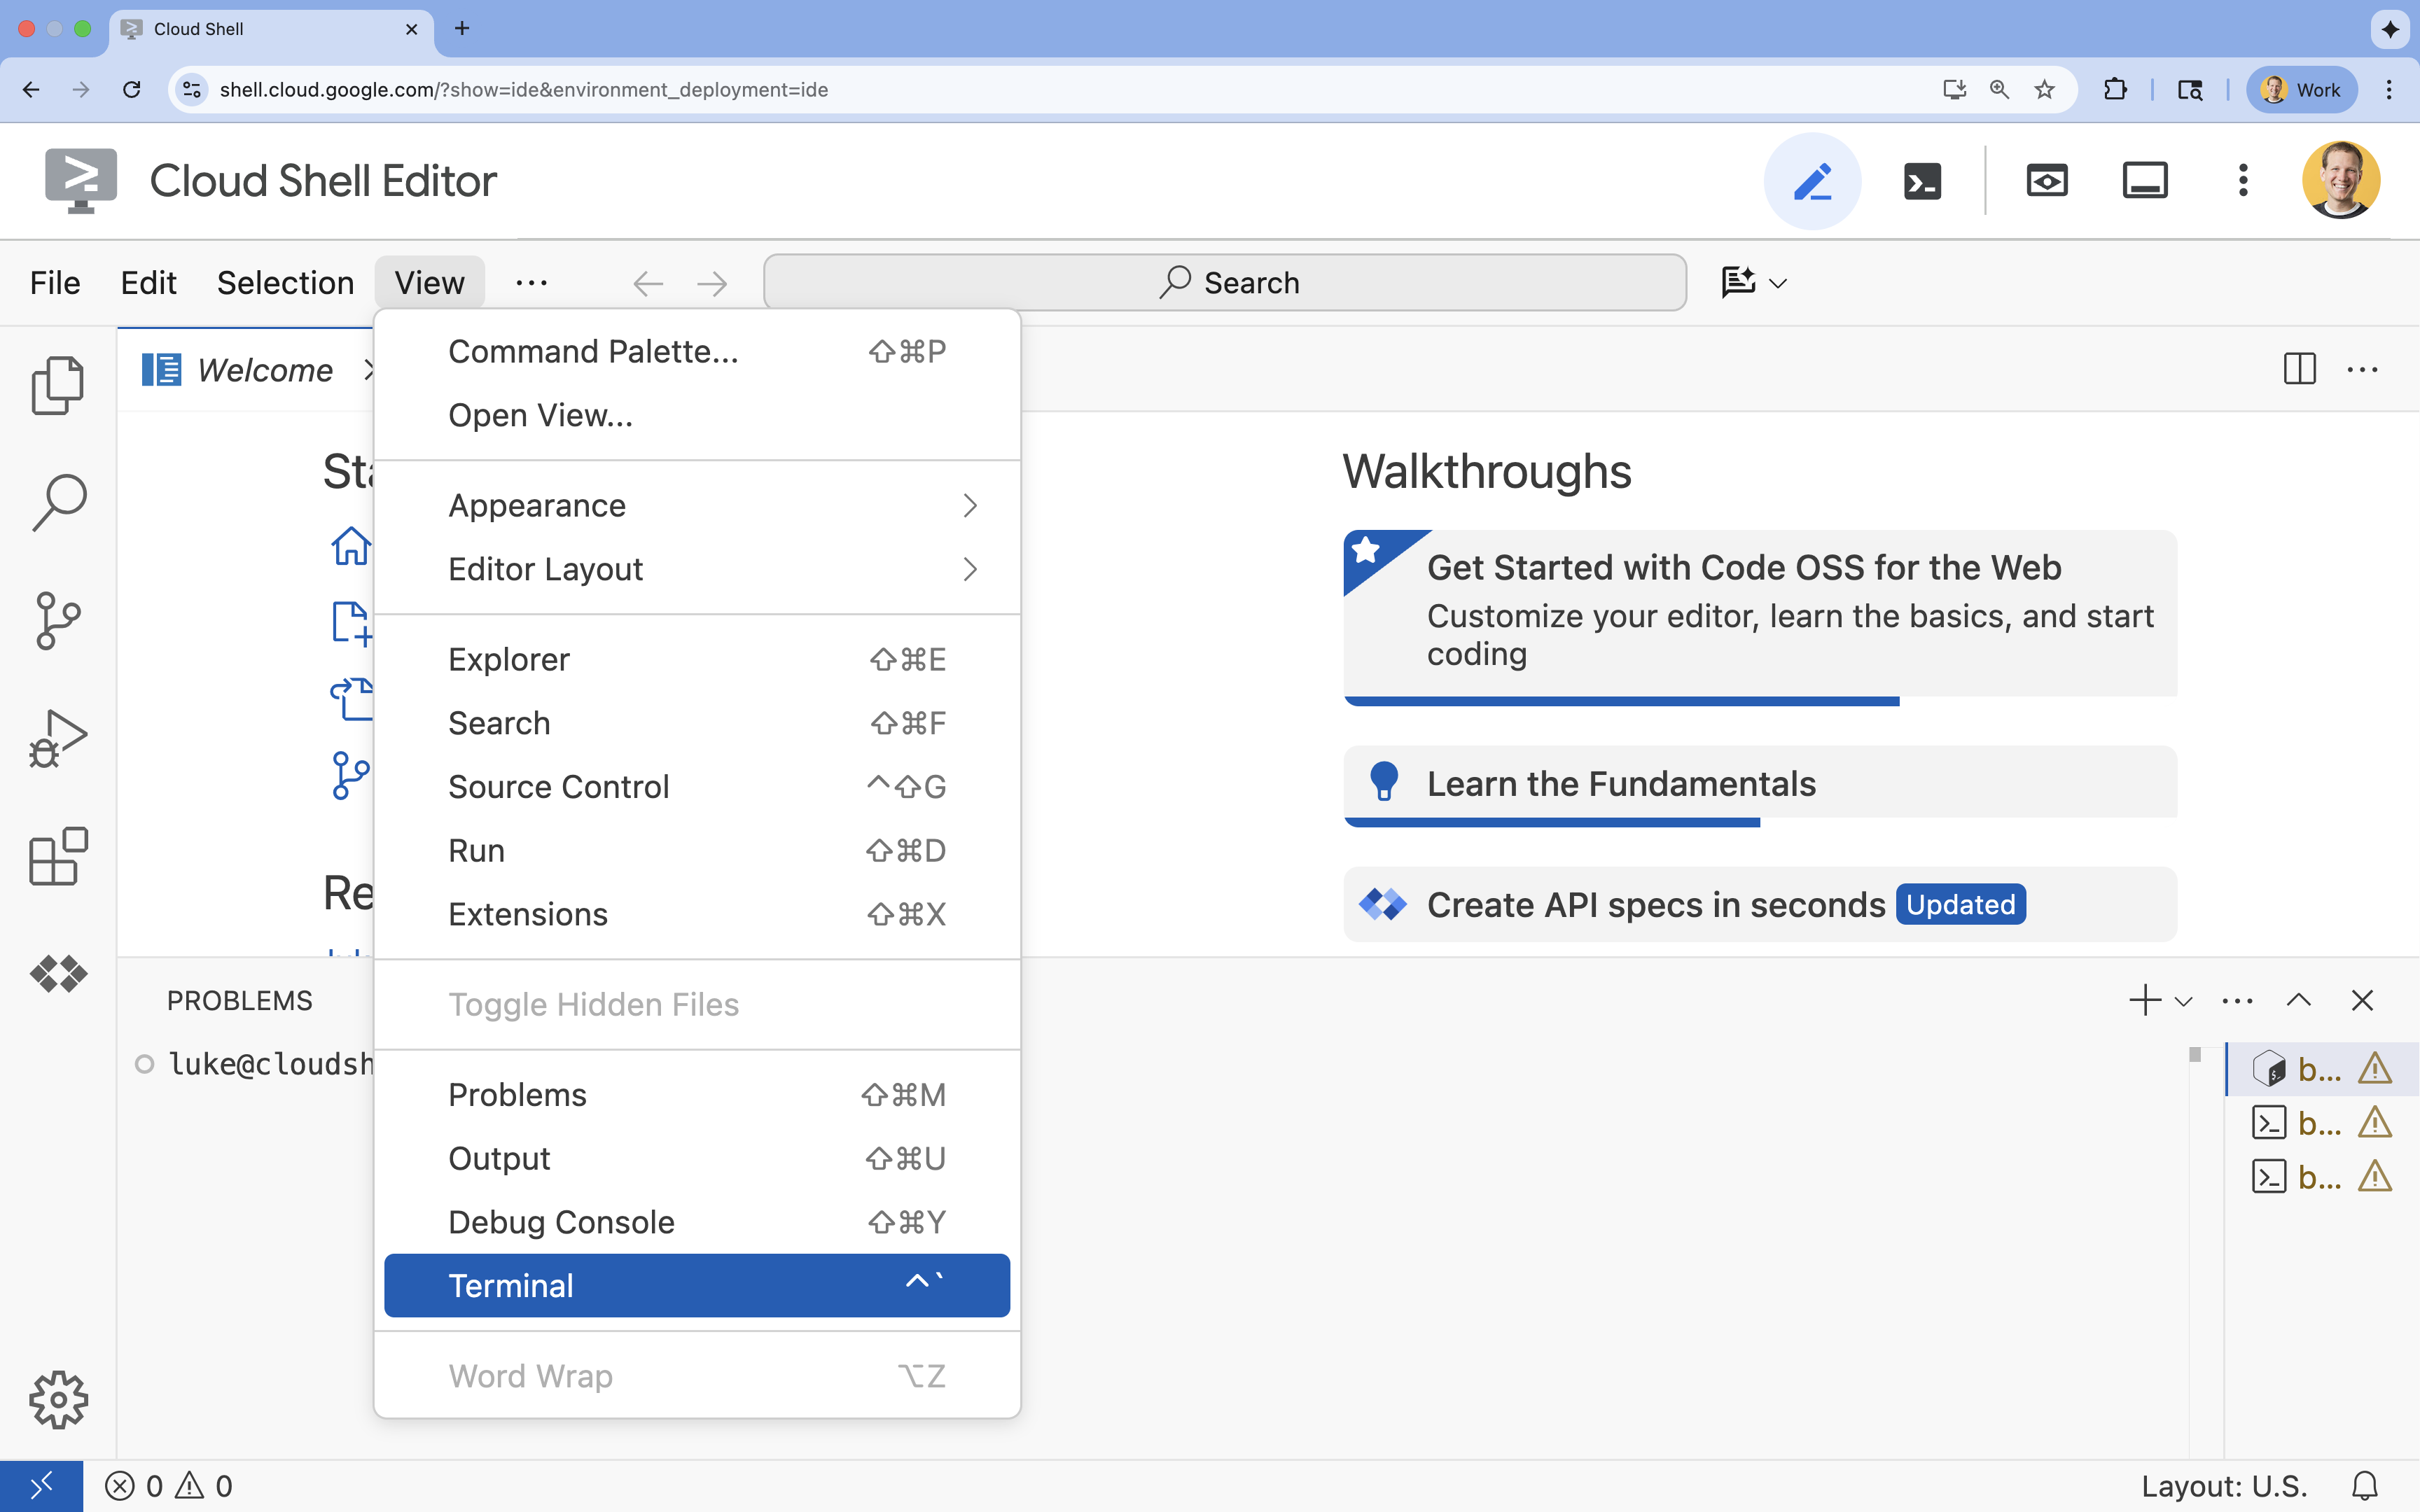
- Nếu thiết bị đầu cuối không xuất hiện ở cuối màn hình, hãy mở thiết bị đầu cuối:
- Nhấp vào Xem
- Nhấp vào Terminal (Thiết bị đầu cuối)
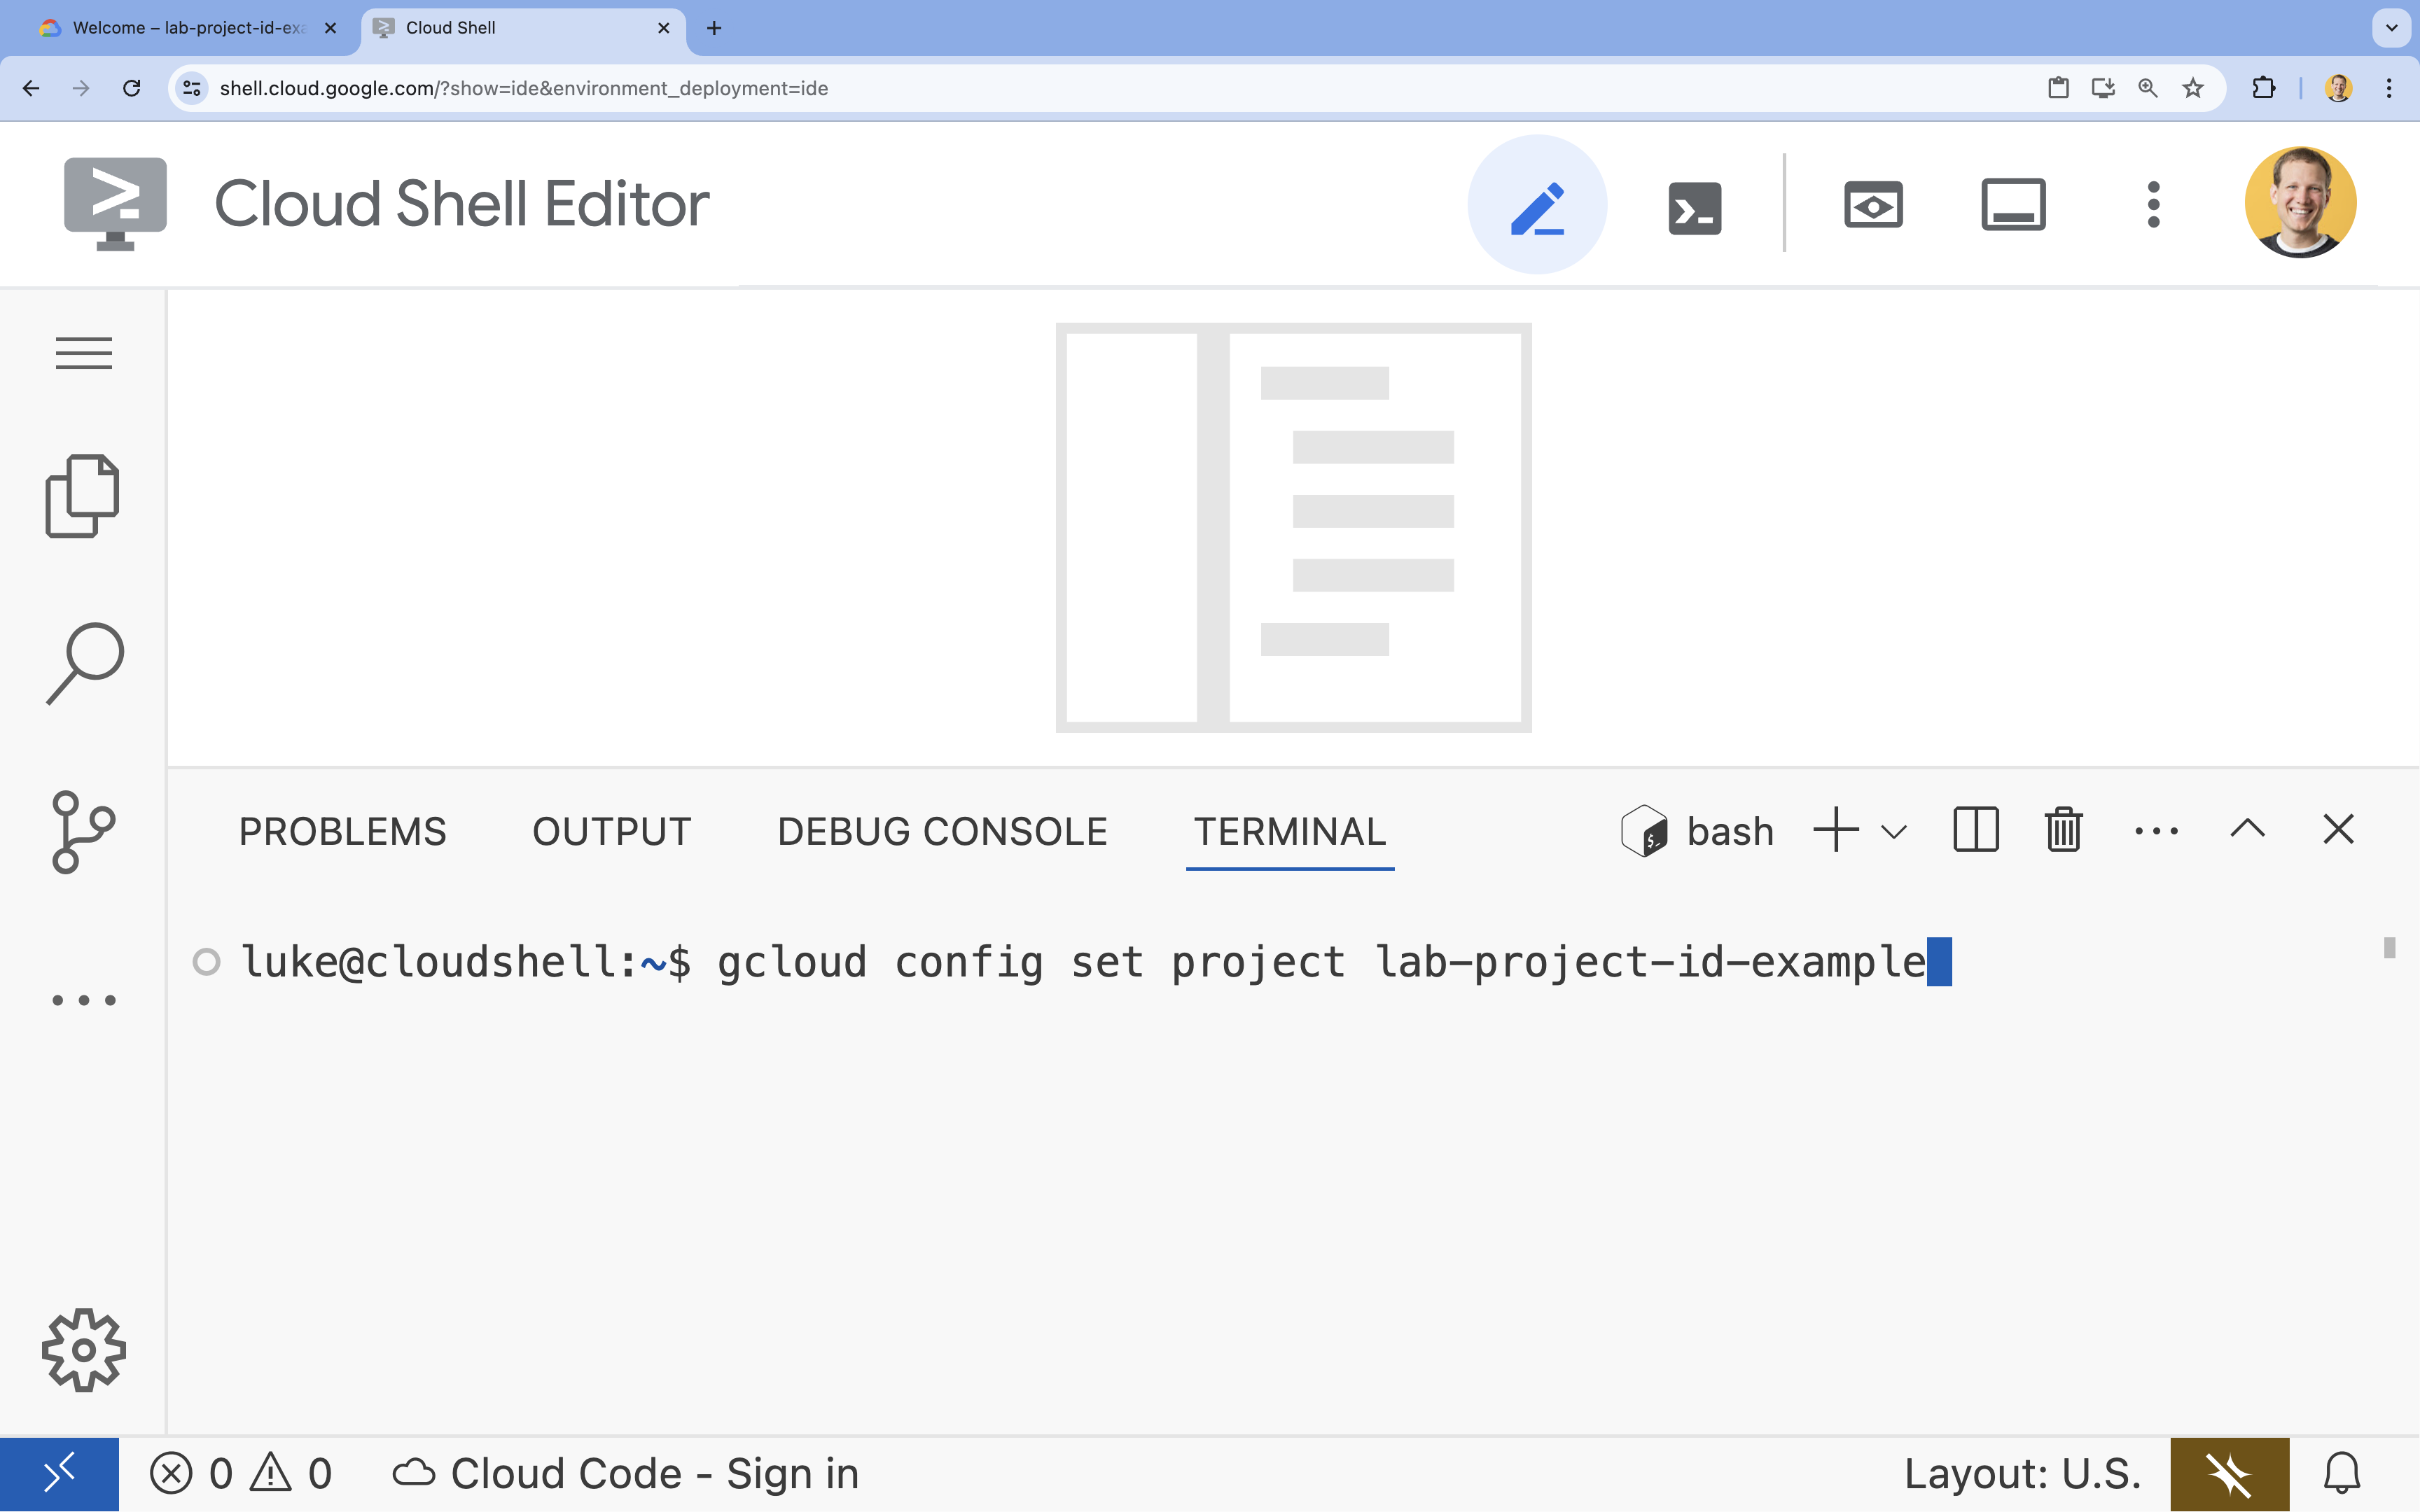
- Trong thiết bị đầu cuối, hãy thiết lập dự án bằng lệnh sau:
- Định dạng:
gcloud config set project [PROJECT_ID] - Ví dụ:
gcloud config set project lab-project-id-example - Nếu bạn không nhớ mã dự án của mình, hãy làm như sau:
- Bạn có thể liệt kê tất cả mã dự án bằng cách sử dụng:
gcloud projects list | awk '/PROJECT_ID/{print $2}'
- Bạn có thể liệt kê tất cả mã dự án bằng cách sử dụng:
- Định dạng:
- Bạn sẽ thấy thông báo sau:
Updated property [core/project].
WARNINGvà được yêu cầuDo you want to continue (Y/n)?, thì có thể bạn đã nhập sai mã dự án. Nhấnn, nhấnEnterrồi thử chạy lại lệnhgcloud config set project.
Sao chép Kho lưu trữ
Trong thiết bị đầu cuối Cloud Shell, hãy sao chép kho lưu trữ dự án và chuyển đến thư mục dự án:
git clone https://github.com/GoogleCloudPlatform/devrel-demos.git
cd devrel-demos/containers/gradio-chat-gke
Hãy dành chút thời gian tìm hiểu cấu trúc dự án:
gradio-chat-gke/
├── app/
│   ├── app.py                # Main application logic (you will edit this)
│   ├── requirements.txt      # Python dependencies
│   └── themes.py             # UI theming
├── deploy/
│   ├── chat-deploy.yaml      # Kubernetes deployment for the chat app
│   ├── Dockerfile            # Container definition for the chat app
│   └── gemma3-12b-deploy.yaml# Kubernetes deployment for Gemma model
├── infra/
│   └── main.tf               # Terraform infrastructure definition
└── skaffold.yaml             # Skaffold configuration for building/deploying
Đặt các biến môi trường
Thiết lập các biến môi trường cho mã dự án và số dự án. Terraform và các lệnh tiếp theo sẽ sử dụng những khoá này.
export GOOGLE_CLOUD_PROJECT=$(gcloud config get-value project)
export PROJECT_NUMBER=$(gcloud projects describe $GOOGLE_CLOUD_PROJECT --format="value(projectNumber)")
export REGION=us-central1
Bật Cloud Resource Manager API
Terraform yêu cầu bạn bật Cloud Resource Manager API để quản lý các tài nguyên của dự án. Vì vậy, trước tiên, chúng ta cần bật API này. Sau đó, chúng ta sẽ triển khai ứng dụng trò chuyện bằng Skaffold, ứng dụng này sử dụng Cloud Build để tạo hình ảnh vùng chứa. Chúng ta sẽ bật Storage API và tạo bộ chứa cần thiết cho Cloud Build ngay bây giờ. Chúng ta sẽ sử dụng chính Terraform để bật các API còn lại cần thiết cho dự án này.
gcloud services enable cloudresourcemanager.googleapis.com storage-api.googleapis.com
Tạo bộ chứa dàn dựng Cloud Build
Skaffold sử dụng Google Cloud Build. Nền tảng này yêu cầu một bộ chứa Cloud Storage để dàn dựng mã nguồn của bạn.
Hãy tạo ngay để đảm bảo rằng tệp này tồn tại:
gcloud storage buckets create gs://${GOOGLE_CLOUD_PROJECT}_cloudbuild
(Nếu gặp lỗi cho biết nhóm đã tồn tại, bạn có thể yên tâm bỏ qua lỗi này).
3. Cung cấp cơ sở hạ tầng bằng Terraform
Chúng ta sẽ sử dụng Terraform để thiết lập các tài nguyên cần thiết trên Google Cloud. Điều này đảm bảo một môi trường nhất quán và có thể tái tạo.
- Chuyển đến thư mục cơ sở hạ tầng:
cd infra
Tệp này xác định các API bổ sung mà chúng ta sẽ cần cho dự án này: cloudbuild, artifactregistry, container (gke), firestore và aiplatform (vertexai). Hãy xem trong tệp hoặc bên dưới để biết cách bật các API thông qua Terraform:
resource "google_project_service" "cloudbuild" {
  service            = "cloudbuild.googleapis.com"
  disable_on_destroy = false
  project            = var.project_id
}

resource "google_project_service" "artifactregistry" {
  service            = "artifactregistry.googleapis.com"
  disable_on_destroy = false
  project            = var.project_id
}

resource "google_project_service" "container" {
  service            = "container.googleapis.com"
  disable_on_destroy = false
  project            = var.project_id
}

resource "google_project_service" "firestore" {
  service            = "firestore.googleapis.com"
  disable_on_destroy = false
  project            = var.project_id
}

resource "google_project_service" "vertexai" {
  service            = "aiplatform.googleapis.com"
  disable_on_destroy = false
  project            = var.project_id
}
Xác định Cụm GKE
Mở infra/main.tf trong trình chỉnh sửa. Bạn sẽ thấy một số bình luận # TODO. Bạn có thể mở tệp này theo cách thủ công hoặc dùng lệnh sau để mở tệp trong trình chỉnh sửa:
cloudshell edit main.tf
Trước tiên, chúng ta cần xác định cụm Kubernetes. Chúng tôi sẽ sử dụng GKE Autopilot. Đây là lựa chọn lý tưởng cho các khối lượng công việc AI vì tính năng này tự động xử lý việc quản lý nút.
Tìm # TODO: Create a GKE Autopilot Cluster rồi thêm khối sau bên dưới:
# Create a GKE Autopilot Cluster
resource "google_container_cluster" "primary" {
  name     = var.cluster_name
  location = var.region
  project  = var.project_id

  # Enable Autopilot mode
  enable_autopilot = true

  deletion_protection = false

  # Networking
  network    = "default"
  subnetwork = "projects/${var.project_id}/regions/${var.region}/subnetworks/default"

  # Timeout for cluster creation
  timeouts {
    create = "30m"
    update = "30m"
  }

  depends_on = [google_project_service.container]
}
Thông báo enable_autopilot = true. Một dòng duy nhất này giúp chúng tôi không phải quản lý các bộ nút, phương thức tự động cấp tài nguyên bổ sung và tính năng đóng gói bin cho khối lượng công việc GPU.
Xác định Cơ sở dữ liệu Firestore
Tiếp theo, chúng ta cần một nơi để lưu trữ nhật ký trò chuyện. Firestore là một cơ sở dữ liệu NoSQL không máy chủ, hoàn toàn phù hợp với nhu cầu này.
Tìm # TODO: Create a Firestore Database rồi thêm:
resource "google_firestore_database" "database" {
  project     = var.project_id
  name        = "chat-app-db"
  location_id = "nam5"
  type        = "FIRESTORE_NATIVE"

  depends_on = [google_project_service.firestore]
}
Sau khi thêm tài nguyên cơ sở dữ liệu, hãy tìm # TODO: Create an initial Firestore Document rồi thêm khối sau. Tài nguyên này tạo một tài liệu giữ chỗ ban đầu trong bộ sưu tập của chúng tôi, rất hữu ích cho việc khởi tạo cấu trúc cơ sở dữ liệu.
resource "google_firestore_document" "initial_document" {
  project     = var.project_id
  collection  = "chat_sessions"
  document_id = "initialize"
  fields = <<EOF
  EOF

  depends_on = [google_firestore_database.database]
}
Xác định Workload Identity
Cuối cùng, chúng ta cần định cấu hình tính năng bảo mật. Chúng tôi muốn các pod Kubernetes có thể truy cập vào Vertex AI và Firestore mà chúng tôi không cần quản lý bất kỳ khoá bí mật hoặc khoá API nào. Chúng tôi thực hiện việc này bằng Workload Identity.
Chúng tôi sẽ cấp các vai trò IAM cần thiết cho Tài khoản dịch vụ Kubernetes (KSA) mà ứng dụng của chúng tôi sẽ sử dụng.
Lưu ý: Tài khoản dịch vụ Kubernetes (gradio-chat-ksa) được tham chiếu trong các liên kết này hiện chưa tồn tại! Thao tác này sẽ được tạo sau khi chúng ta triển khai ứng dụng vào cụm. Bạn hoàn toàn có thể (và nên) chuẩn bị trước các liên kết IAM này.
Tìm # TODO: Configure Workload Identity IAM bindings rồi thêm:
locals {
  ksa_principal = "principal://iam.googleapis.com/projects/${var.project_number}/locations/global/workloadIdentityPools/${var.project_id}.svc.id.goog/subject/ns/default/sa/gradio-chat-ksa"
}

resource "google_project_iam_member" "ksa_token_creator" {
  project = var.project_id
  role    = "roles/iam.serviceAccountTokenCreator"
  member  = local.ksa_principal
}

resource "google_project_iam_member" "ksa_vertex_user" {
  project = var.project_id
  role    = "roles/aiplatform.user"
  member  = local.ksa_principal
}

resource "google_project_iam_member" "ksa_datastore_user" {
  project = var.project_id
  role    = "roles/datastore.user"
  member  = local.ksa_principal
}
Áp dụng cấu hình
Bây giờ, khi cơ sở hạ tầng đã được xác định, hãy cung cấp cơ sở hạ tầng đó.
- Trước tiên, chúng ta cần thiết lập một số biến để Terraform sử dụng. Chúng ta sẽ thực hiện việc này bằng cách sử dụng các biến môi trường:
export TF_VAR_project_id=$(gcloud config get-value project)
export TF_VAR_project_number=$(gcloud projects describe $TF_VAR_project_id --format="value(projectNumber)")
export TF_VAR_region="us-central1"
- Khởi chạy Terraform:
terraform init
- Sử dụng
terraform planđể xem trước những tài nguyên sẽ được tạo.
terraform plan
- Áp dụng cấu hình. Khi được nhắc, hãy nhập
yesđể xác nhận.
terraform apply
Lưu ý: Quá trình cung cấp một cụm GKE có thể mất từ 10 đến 15 phút. Trong khi chờ đợi, bạn có thể chuyển sang xem xét mã xử lý ứng dụng trong phần tiếp theo.
- Sau khi hoàn tất, hãy định cấu hình
kubectlđể giao tiếp với cụm mới:
gcloud container clusters get-credentials gradio-chat-cluster --region us-central1 --project $TF_VAR_project_id
4. Triển khai Gemma tự lưu trữ trên GKE
Tiếp theo, chúng ta sẽ triển khai mô hình Gemma 3 12B trực tiếp trên cụm GKE của bạn. Điều này cho phép suy luận có độ trễ thấp và kiểm soát hoàn toàn môi trường thực thi mô hình.
Định cấu hình thông tin đăng nhập Hugging Face
Để tải mô hình Gemma xuống, cụm của bạn cần được xác thực bằng Hugging Face.
- Đảm bảo bạn có mã thông báo Hugging Face.
- Tạo một Kubernetes Secret bằng mã thông báo của bạn – Thay thế [YOUR_HF_TOKEN] bằng mã thông báo thực tế của bạn:
kubectl create secret generic hf-secret --from-literal=hf_api_token=[YOUR_HF_TOKEN]
Triển khai mô hình
Chúng ta sẽ sử dụng một Kubernetes Deployment tiêu chuẩn để chạy mô hình. Tệp kê khai nằm ở deploy/gemma3-12b-deploy.yaml. Bạn có thể mở tệp này theo cách thủ công hoặc dùng lệnh sau để mở tệp trong trình chỉnh sửa:
cd ../deploy
cloudshell edit gemma3-12b-deploy.yaml
Hãy dành chút thời gian để kiểm tra tệp này. Lưu ý phần resources:
        resources:
          requests:
            nvidia.com/gpu: 4
      nodeSelector:
        cloud.google.com/gke-accelerator: nvidia-l4
Đây là cơ sở hạ tầng AI khai báo. Chúng ta đang cho GKE Autopilot biết rằng pod cụ thể này cần 4 GPU NVIDIA L4. Autopilot sẽ tìm hoặc cung cấp một nút đáp ứng chính xác các yêu cầu này. Nếu không có nút nào để cung cấp, thì nút đó sẽ tiếp tục thử cho đến khi có một nút đáp ứng các yêu cầu.
- Áp dụng tệp kê khai triển khai:
cd .. kubectl apply -f deploy/gemma3-12b-deploy.yamlkubectl get podsgemmachưa hoạt động. Ứng dụng nhắn tin sẽ kết nối với dịch vụ gemma bất cứ khi nào dịch vụ này ra mắt. Xin lưu ý rằng bạn sẽ không thể tương tác với Gemma thông qua ứng dụng nhắn tin cho đến khi nhómgemmacó trạng tháiRunningvà1/1. Nhưng trong thời gian chờ đợi, bạn có thể trò chuyện với Gemini!
5. Tạo ứng dụng Chat
Bây giờ, hãy hoàn tất ứng dụng Python. Mở app/app.py trong Trình chỉnh sửa Cloud Shell. Bạn sẽ thấy một số khối # TODO cần được điền thông tin để ứng dụng hoạt động.
cloudshell edit app/app.py
Bước 1: Xử lý Nhật ký trò chuyện
Các LLM yêu cầu nhật ký trò chuyện phải được định dạng cụ thể để chúng hiểu được ai đã nói gì.
Mẫu "Trình dịch đa năng": Lưu ý rằng chúng ta sắp viết hai hàm khác nhau để xử lý cùng một nhật ký trò chuyện. Đây là một mẫu khoá trong các ứng dụng đa mô hình.
- Nguồn thông tin đáng tin cậy (Gradio): Ứng dụng của chúng tôi lưu giữ nhật ký ở định dạng đơn giản, chung chung:
[[user_msg1, bot_msg1], ...]. - Mục tiêu 1 (Gemma): Cần chuyển đổi mục tiêu này thành một chuỗi thô duy nhất có các mã thông báo đặc biệt cụ thể.
- Mục tiêu 2 (Gemini): Cần chuyển đổi mục tiêu này thành một danh sách có cấu trúc gồm các đối tượng API.
Bằng cách định dạng lại nhật ký chung thành định dạng mục tiêu ở mỗi lượt, chúng ta có thể chuyển đổi liền mạch giữa các mô hình. Để thêm một mô hình khác sau này, bạn sẽ cần viết một hàm xử lý mới cho định dạng cụ thể của mô hình đó.
Đối với Gemma (Tự lưu trữ)
Tìm hiểu về Mẫu trò chuyện: Khi lưu trữ các mô hình mở của riêng mình, bạn thường cần định dạng câu lệnh theo cách thủ công thành một chuỗi cụ thể mà mô hình được huấn luyện để nhận dạng là một cuộc trò chuyện. Đây được gọi là "mẫu trò chuyện".
Tìm hàm process_message_gemma trong app.py rồi thay thế bằng mã sau:
# This function takes a user's message and the conversation history as input.
#   Its job is to format these elements into a single,
#   structured prompt that can be understood by the language model (LLM).
#   This structured format helps the LLM maintain context and generate more relevant responses.
def process_message_gemma(message, history):
    user_prompt_format = "User's Turn:\n>>> {prompt}\n"
    assistant_prompt_format = "Assistant's Turn:\n>>> {prompt}\n"

    history_message = ""
    for user_turn, assistant_turn in history:
        history_message += user_prompt_format.format(prompt=user_turn)
        history_message += assistant_prompt_format.format(prompt=assistant_turn)

    # Format the new user message
    new_user_message = user_prompt_format.format(prompt=message)
    # Create a new aggregated message to be used as a single flat string in a json object sent to the LLM
    aggregated_message = (
        history_message + new_user_message + assistant_prompt_format.format(prompt="")
    )
    return aggregated_message
Đối với Gemini (Được quản lý)
Các dịch vụ được quản lý thường ưu tiên các đối tượng có cấu trúc hơn là các chuỗi thô. Chúng ta cần một hàm riêng để định dạng nhật ký thành các đối tượng types.Content cho Gemini SDK.
Tìm process_message_gemini rồi thay thế bằng:
def process_message_gemini(message, history):
    contents = []
    for user_turn, model_turn in history:
        contents.append(
            types.Content(role="user", parts=[types.Part.from_text(text=user_turn)])
        )
        contents.append(
            types.Content(role="model", parts=[types.Part.from_text(text=model_turn)])
        )

    contents.append(
        types.Content(role="user", parts=[types.Part.from_text(text=message)])
    )
    return contents
Bước 2: Gọi Mô hình Gemma tự lưu trữ
Chúng ta cần gửi câu lệnh đã định dạng đến dịch vụ Gemma đang chạy trong cụm của mình. Chúng ta sẽ sử dụng một yêu cầu HTTP POST tiêu chuẩn cho tên DNS nội bộ của dịch vụ.
Tìm hàm call_gemma_model rồi thay thế bằng:
# Construct the request, send it to Gemma, return the model's response
# aggregated_message = current user message + history
def call_gemma_model(aggregated_message, model_temperature, top_p, max_tokens):
    json_message = {
        "prompt": aggregated_message,
        "temperature": model_temperature,
        "top_p": top_p,
        "max_tokens": max_tokens,
        "stop": ["User's Turn:"],
    }

    # Log what will be sent to the LLM
    print("*** JSON request: " + str(json_message))

    # Send the constructed json with the user prompt to the model and put the model's response in the json_data variable
    json_data = post_request(json_message)

    # The response from the model is a list of predictions. We'll take the first result.
    raw_output = json_data["predictions"][0]

    # The vLLM server returns the full prompt in the response. We need to extract
    # just the newly generated text from the model.
    assistant_turn_marker = "Assistant's Turn:\n>>>"
    marker_pos = raw_output.rfind(assistant_turn_marker)

    if marker_pos != -1:
        output = raw_output[marker_pos + len(assistant_turn_marker) :]
    else:
        output = raw_output

    # Clean up potential over-generation
    stop_marker = "User's Turn:"
    stop_pos = output.lower().find(stop_marker.lower())
    if stop_pos != -1:
        output = output[:stop_pos]

    return output.strip()
Bước 3: Gọi Mô hình Gemini trên Vertex AI
Đối với mô hình được quản lý, chúng ta sẽ sử dụng Google GenAI SDK. Điều này đơn giản hơn nhiều vì nó xử lý các lệnh gọi mạng cho chúng ta.
Tìm hàm call_gemini_model rồi thay thế bằng:
# Send a request to Gemini via the VertexAI API. Return the model's response
# contents = list of types.Content objects
def call_gemini_model(contents, model_temperature, top_p, max_tokens):
    gemini_model = "gemini-2.5-flash"

    response = client.models.generate_content(
        model=gemini_model,
        contents=contents,
        config={
            "temperature": model_temperature,
            "max_output_tokens": max_tokens,
            "top_p": top_p,
        },
    )
    return response.text
Bước 4: Triển khai Giao diện suy luận chính
Cuối cùng, chúng ta cần hàm điều phối chính mà Gradio gọi. Hàm này cần:
- Khởi tạo nhật ký nếu nhật ký trống.
- Xử lý thông báo.
- Định tuyến yêu cầu đến mô hình đã chọn (Gemma hoặc Gemini).
- Lưu lượt tương tác vào Firestore.
- Trả về phản hồi cho giao diện người dùng.
Gradio và Quản lý trạng thái: ChatInterface của Gradio tự động xử lý trạng thái cấp phiên (hiển thị thông báo trong trình duyệt). Tuy nhiên, công cụ này không có tính năng hỗ trợ tích hợp cho cơ sở dữ liệu bên ngoài.
Để duy trì nhật ký trò chuyện trong thời gian dài, chúng tôi sử dụng một mẫu tiêu chuẩn: chúng tôi kết nối với hàm inference_interface. Bằng cách chấp nhận request: gr.Request làm đối số, Gradio sẽ tự động chuyển cho chúng ta thông tin chi tiết về phiên hiện tại của người dùng. Chúng tôi sử dụng mã này để tạo một tài liệu Firestore riêng biệt cho mỗi người dùng, đảm bảo rằng các cuộc trò chuyện không bị lẫn lộn trong môi trường nhiều người dùng.
Tìm hàm inference_interface rồi thay thế bằng:
# This is the primary chat function. Every time a user sends a message, gradio calls this function,
# which sends the user's input to the appropriate AI (as indicated on the user interface), updates
# the chat history for future use during this session, and records the chat history in Firestore.
def inference_interface(
    message,
    history,
    model_name,
    model_temperature,
    top_p,
    max_tokens,
    request: gr.Request,
):

    # set history to empty array
    if history is None:
        history = []

    # Get or create session document
    session_hash = request.session_hash
    doc_id = f"session-{session_hash}"
    doc_ref = db.collection("chat_sessions").document(doc_id)

    # Create the session document if it doesn't exist
    if not doc_ref.get().exists:
        doc_ref.set({"Session start": datetime.datetime.now()})

    # Log info
    print("Model: " + model_name)
    print("LLM Engine: " + llm_engine)
    print("* History: " + str(history))

    # Pass the message and history to the appropriate model, as indicated by the user via the ui
    if model_name == "Gemma3 12b it":
        aggregated_message = process_message_gemma(message, history)
        output = call_gemma_model(
            aggregated_message, model_temperature, top_p, max_tokens
        )

    elif model_name == "Gemini":
        gemini_contents = process_message_gemini(message, history)
        output = call_gemini_model(
            gemini_contents, model_temperature, top_p, max_tokens
        )

    else:
        # Handle the case where no valid model is selected
        output = "Error: Invalid model selected."

    interaction = {"user": message, model_name: output}

    # Log the updated chat history
    print("* History: " + str(history) + " " + str(interaction))

    # Save the updated history to Firestore
    save_chat_history(interaction, doc_ref)

    return output
6. Kiểm tra tệp app.py
Đến đây, ứng dụng trò chuyện dựa trên gradio của bạn đã sẵn sàng triển khai. Đảm bảo rằng tệp này khớp chính xác với tệp hoàn chỉnh sau đây.
Khắc phục sự cố: Nếu bạn triển khai ứng dụng và gặp lỗi "từ chối kết nối" hoặc "Không truy cập được trang web này" khi cố gắng kết nối với ứng dụng, hãy thử lặp lại các bước từ thời điểm này, bắt đầu bằng cách sao chép toàn bộ tệp này và dán vào app.py.
# Copyright 2024 Google LLC
#
# Licensed under the Apache License, Version 2.0 (the "License");
# you may not use this file except in compliance with the License.
# You may obtain a copy of the License at
#
#      http://www.apache.org/licenses/LICENSE-2.0
#
# Unless required by applicable law or agreed to in writing, software
# distributed under the License is distributed on an "AS IS" BASIS,
# WITHOUT WARRANTIES OR CONDITIONS OF ANY KIND, either express or implied.
# See the License for the specific language governing permissions and
# limitations under the License.

import datetime

import google.auth
import google.cloud
import gradio as gr
import requests
import themes
from google import genai

from google.cloud import firestore
from google.genai import types

## Do one-time initialization things

## grab the project id from google auth
_, project = google.auth.default()
print(f"Project: {project}")

# Set initial values for model
llm_engine = "vllm"
host = "http://gemma-service:8000"
context_path = "/generate"

# initialize vertex for interacting with Gemini
client = genai.Client(
    vertexai=True,
    project=project,
    location="global",
)

# Initialize Firestore client
db = firestore.Client(database="chat-app-db")


# This is the primary chat function. Every time a user sends a message, gradio calls this function,
# which sends the user's input to the appropriate AI (as indicated on the user interface), updates
# the chat history for future use during this session, and records the chat history in Firestore.
def inference_interface(
    message,
    history,
    model_name,
    model_temperature,
    top_p,
    max_tokens,
    request: gr.Request,
):

    # set history to empty array
    if history is None:
        history = []

    # Get or create session document
    session_hash = request.session_hash
    doc_id = f"session-{session_hash}"
    doc_ref = db.collection("chat_sessions").document(doc_id)

    # Create the session document if it doesn't exist
    if not doc_ref.get().exists:
        doc_ref.set({"Session start": datetime.datetime.now()})

    # Log info
    print("Model: " + model_name)
    print("LLM Engine: " + llm_engine)
    print("* History: " + str(history))

    # Pass the message and history to the appropriate model, as indicated by the user via the ui
    if model_name == "Gemma3 12b it":
        aggregated_message = process_message_gemma(message, history)
        output = call_gemma_model(
            aggregated_message, model_temperature, top_p, max_tokens
        )

    elif model_name == "Gemini":
        gemini_contents = process_message_gemini(message, history)
        output = call_gemini_model(
            gemini_contents, model_temperature, top_p, max_tokens
        )

    else:
        # Handle the case where no valid model is selected
        output = "Error: Invalid model selected."

    interaction = {"user": message, model_name: output}

    # Log the updated chat history
    print("* History: " + str(history) + " " + str(interaction))

    # Save the updated history to Firestore
    save_chat_history(interaction, doc_ref)

    return output


# Construct the request, send it to Gemma, return the model's response
# aggregated_message = current user message + history
def call_gemma_model(aggregated_message, model_temperature, top_p, max_tokens):
    json_message = {
        "prompt": aggregated_message,
        "temperature": model_temperature,
        "top_p": top_p,
        "max_tokens": max_tokens,
        "stop": ["User's Turn:"],
    }

    # Log what will be sent to the LLM
    print("*** JSON request: " + str(json_message))  # Log the JSON request

    # Send the constructed json with the user prompt to the model and put the model's response in the json_data variable
    json_data = post_request(json_message)

    # The response from the model is a list of predictions.
    # We'll take the first result.
    raw_output = json_data["predictions"][0]

    # The vLLM server returns the full prompt in the response. We need to extract
    # just the newly generated text from the model. The prompt ends with
    # "Assistant's Turn:\n>>>", so we find the last occurrence of that and
    # take everything after it.
    assistant_turn_marker = "Assistant's Turn:\n>>>"
    marker_pos = raw_output.rfind(assistant_turn_marker)

    if marker_pos != -1:
        # Get the text generated by the assistant
        output = raw_output[marker_pos + len(assistant_turn_marker) :]
    else:
        # Fallback in case the marker isn't found
        output = raw_output

    # The model sometimes continues the conversation and includes the next user's turn.
    # The 'stop' parameter is a good hint, but we parse the output as a safeguard.
    stop_marker = "User's Turn:"
    stop_pos = output.lower().find(stop_marker.lower())
    if stop_pos != -1:
        output = output[:stop_pos]

    # The model also sometimes prefixes its response with "Output:". We'll remove this.
    output = output.lstrip()
    prefix_marker = "Output:"
    if output.lower().startswith(prefix_marker.lower()):
        output = output[len(prefix_marker) :]

    return output.strip()


# Send a request to Gemini via the VertexAI API. Return the model's response
# contents = list of types.Content objects
def call_gemini_model(contents, model_temperature, top_p, max_tokens):
    gemini_model = "gemini-2.5-flash"

    response = client.models.generate_content(
        model=gemini_model,
        contents=contents,
        config={
            "temperature": model_temperature,
            "max_output_tokens": max_tokens,
            "top_p": top_p,
        },
    )
    output = response.text  # Extract the generated text
    # Consider handling additional response attributes (safety, usage, etc.)
    return output


def process_message_gemini(message, history):
    contents = []
    for user_turn, model_turn in history:
        contents.append(
            types.Content(role="user", parts=[types.Part.from_text(text=user_turn)])
        )
        contents.append(
            types.Content(role="model", parts=[types.Part.from_text(text=model_turn)])
        )

    contents.append(
        types.Content(role="user", parts=[types.Part.from_text(text=message)])
    )
    return contents


# This function takes a user's message and the conversation history as input.
#   Its job is to format these elements into a single,
#   structured prompt that can be understood by the language model (LLM).
#   This structured format helps the LLM maintain context and generate more relevant responses.
def process_message_gemma(message, history):
    user_prompt_format = "User's Turn:\n>>> {prompt}\n"
    assistant_prompt_format = "Assistant's Turn:\n>>> {prompt}\n"

    history_message = ""
    for user_turn, assistant_turn in history:
        history_message += user_prompt_format.format(prompt=user_turn)
        history_message += assistant_prompt_format.format(prompt=assistant_turn)

    # Format the new user message
    new_user_message = user_prompt_format.format(prompt=message)
    # Create a new aggregated message to be used as a single flat string in a json object sent to the LLM
    aggregated_message = (
        history_message + new_user_message + assistant_prompt_format.format(prompt="")
    )
    return aggregated_message


# Function to save chat history to Firestore
def save_chat_history(interaction, doc_ref):
    timestamp_str = str(datetime.datetime.now())

    # Save the chat history, merging with existing data
    doc_ref.update({timestamp_str: interaction})

    print("Chat history saved successfully!")  # Optional: Log success


# Send the json message to the model and return the model's response. This is used for Gemma but not Gemini. It could also be used for other models.
def post_request(json_message):
    print("*** Request" + str(json_message), flush=True)
    # Set a timeout and check for HTTP errors. This will raise an exception on a bad status code (4xx or 5xx).
    response = requests.post(host + context_path, json=json_message, timeout=60)
    response.raise_for_status()
    json_data = response.json()
    print("*** Output: " + str(json_data), flush=True)
    return json_data


# custom css to hide default footer
css = """
footer {display: none !important;} .gradio-container {min-height: 0px !important;}
"""

# Add a dropdown to select the model to chat with
model_dropdown = gr.Dropdown(
    ["Gemma3 12b it", "Gemini"],
    label="Model",
    info="Select the model you would like to chat with.",
    value="Gemma3 12b it",
)

# Make the model temperature, top_p, and max tokents modifiable via sliders in the GUI
model_temperature = gr.Slider(
    minimum=0.1, maximum=1.0, value=0.9, label="Temperature", render=False
)
top_p = gr.Slider(minimum=0.1, maximum=1.0, value=0.95, label="Top_p", render=False)
max_tokens = gr.Slider(
    minimum=1, maximum=4096, value=1024, label="Max Tokens", render=False
)

# Call gradio to create the chat interface
app = gr.ChatInterface(
    inference_interface,
    additional_inputs=[model_dropdown, model_temperature, top_p, max_tokens],
    theme=themes.google_theme(),
    css=css,
    title="Chat with AI",
)

app.launch(server_name="0.0.0.0", allowed_paths=["images"])
7. Triển khai ứng dụng Chat
Chúng ta sẽ dùng Skaffold để tạo hình ảnh vùng chứa và triển khai hình ảnh đó vào cụm. Skaffold là một công cụ dòng lệnh điều phối và tự động hoá quy trình tạo, đẩy và triển khai các ứng dụng vào Kubernetes. Công cụ này đơn giản hoá quy trình phát triển bằng cách cho phép bạn kích hoạt toàn bộ quy trình này bằng một lệnh duy nhất, giúp quy trình này trở nên lý tưởng để lặp lại trên ứng dụng của bạn.
Lưu ý: thao tác này cũng sẽ triển khai tài khoản Dịch vụ Kubernetes mà chúng ta cần cho Workload Identity. Bạn có thể xem định nghĩa của nó trong tệp deploy/chat-deploy.yaml. Để tham khảo, bạn có thể xem định nghĩa của chỉ số này tại đây:
apiVersion: v1
kind: ServiceAccount
metadata:
  name: gradio-chat-ksa
Chạy Skaffold để tạo và triển khai:
skaffold run --default-repo=us-central1-docker.pkg.dev/$GOOGLE_CLOUD_PROJECT/chat-app-repo
Skaffold sẽ dùng Cloud Build để tạo hình ảnh vùng chứa, đẩy hình ảnh đó vào Artifact Registry do Terraform tạo, rồi áp dụng các tệp kê khai Kubernetes cho cụm của bạn.
8. Kiểm thử ứng dụng
- Chờ dịch vụ ứng dụng trò chuyện nhận được địa chỉ IP ngoài:
kubectl get svc gradio-chat-service --watchEXTERNAL-IPthay đổi từpendingthành một địa chỉ IP thực tế, hãy nhấnCtrl+Cđể dừng theo dõi. - Mở trình duyệt web rồi truy cập vào
http://[EXTERNAL-IP]:7860. - Hãy thử tương tác với mô hình này! Theo mặc định, ứng dụng được định cấu hình để bạn trò chuyện với mô hình Gemma được lưu trữ cục bộ. Nếu bạn muốn trò chuyện với Gemini, hãy thay đổi mô hình trong trình đơn thả xuống "Thông tin đầu vào bổ sung". Ví dụ: hãy thử hỏi AI: "Kể cho tôi nghe một câu chuyện cười về Kubernetes."
Khắc phục sự cố:
- Nếu bạn gặp lỗi như "Không truy cập được trang web này" hoặc "[EXTERNAL-IP] từ chối kết nối", thì có thể tệp app.py của bạn đã gặp sự cố. Quay lại bước có tiêu đề "Kiểm tra tệp app.py" và lặp lại các bước từ đó.
- Giao diện người dùng mặc định là mô hình "Gemma3 12b it". Nếu bạn gặp lỗi ngay lập tức, thì có thể là do Gemma pod chưa sẵn sàng. Lưu ý: Bạn có thể chuyển trình đơn thả xuống thành "Gemini" để thử tương tác với ứng dụng trò chuyện trong khi chờ Gemma khởi động!
Thử nghiệm Gemma: Đảm bảo bạn đã chọn "Gemma3 12b it" trong trình đơn thả xuống và gửi một tin nhắn (ví dụ: "Kể cho tôi một câu chuyện cười về Kubernetes").
Thử nghiệm Gemini: Chuyển trình đơn thả xuống thành "Gemini" rồi đặt một câu hỏi khác (ví dụ: "Sự khác biệt giữa một nhóm và một nút là gì?").
Xác minh nhật ký: Sau khi bạn trò chuyện thành công với một mô hình (Gemma hoặc Gemini) trong ứng dụng nhắn tin, hãy kiểm tra cơ sở dữ liệu "chat-app-db" của bạn trong Firestore để xem nhật ký trò chuyện. Nếu bạn có thể trò chuyện với cả hai mô hình, hãy lưu ý rằng nhật ký cuộc trò chuyện vẫn được duy trì ngay cả khi bạn chuyển đổi mô hình.
9. Vươn xa hơn
Giờ đây, bạn đã có một ứng dụng trò chuyện kết hợp đang hoạt động. Hãy cân nhắc những thử thách sau để hiểu rõ hơn:
- Persona tuỳ chỉnh: Thử sửa đổi các hàm
process_message_gemmavàprocess_message_geminiđể thêm "lời nhắc hệ thống" vào đầu. Ví dụ: hãy nói với các mô hình "Bạn là một trợ lý cướp biển hữu ích" và xem cách câu trả lời của chúng thay đổi. - Danh tính người dùng cố định: Hiện tại, ứng dụng tạo một UUID ngẫu nhiên mới cho mỗi phiên. Bạn sẽ tích hợp một hệ thống xác thực thực (chẳng hạn như Đăng nhập bằng Google) như thế nào để người dùng có thể xem nhật ký trò chuyện trước đây trên nhiều thiết bị?
- Thử nghiệm mô hình: Thử thay đổi thanh trượt
temperaturetrong giao diện người dùng. Nhiệt độ cao (gần 1.0) ảnh hưởng như thế nào đến tính sáng tạo so với độ chính xác của các câu trả lời so với nhiệt độ thấp (gần 0.1)?
10. Kết luận
Xin chúc mừng! Bạn đã tạo thành công một ứng dụng AI kết hợp. Bạn đã tìm hiểu cách:
- Sử dụng Terraform cho cơ sở hạ tầng dưới dạng mã trên Google Cloud.
- Lưu trữ các LLM có trọng số mở của riêng bạn trên GKE để có toàn quyền kiểm soát.
- Tích hợp các dịch vụ AI được quản lý như Vertex AI để có tính linh hoạt.
- Tạo một ứng dụng có trạng thái bằng cách sử dụng Firestore để duy trì dữ liệu.
- Bảo mật khối lượng công việc bằng Workload Identity.
Dọn dẹp
Để tránh bị tính phí, hãy huỷ các tài nguyên mà bạn đã tạo:
cd infra
terraform destroy -var="project_id=$GOOGLE_CLOUD_PROJECT" -var="project_number=$PROJECT_NUMBER" -var="region=$REGION"