
1. 事前準備
瞭解如何使用 Google 地圖平台的 Maps API 和 Places API,建立本地商家搜尋,藉此為使用者進行地理定位,並在附近顯示有趣的地點。這個應用程式整合了地理位置、地點詳細資料、地點相片和其他更多功能。
事前準備
- HTML、CSS 和 JavaScript 基礎知識
- 含有帳單帳戶的專案 (如果沒有,請按照下一步說明進行操作)。
- 在下方啟用啟用步驟時,您必須啟用 Maps JavaScript API 和 Places API。
- 上述專案的 API 金鑰。
開始使用 Google 地圖平台
如果您未曾使用過 Google 地圖平台,請按照開始使用 Google 地圖平台指南或觀看 Google 地圖平台入門指南完成下列步驟:
- 建立帳單帳戶。
- 建立專案。
- 啟用 Google 地圖平台的 API 和 SDK (如上一節所示)。
- 產生 API 金鑰。
要執行的步驟
- 建立顯示 Google 地圖的網頁
- 根據使用者所在位置將地圖置中
- 尋找附近地點,並以可點擊標記的形式顯示搜尋結果
- 擷取並顯示每個地點的詳細資訊
軟硬體需求
- 網路瀏覽器,例如 Google Chrome (建議使用)、Firefox、Safari 或 Internet Explorer
- 您最喜愛的文字或程式碼編輯器
取得範例程式碼
- 開啟指令列介面 (MacOS 的終端機或 Windows 上的命令提示字元),並使用下列指令下載範例程式碼:
git clone https://github.com/googlecodelabs/google-maps-nearby-search-js/
如果這個方法無效,請按一下下方按鈕,下載此程式碼研究室的所有程式碼,然後解壓縮檔案:
- 變更為你剛才複製或下載的目錄。
cd google-maps-nearby-search-js
stepN 資料夾包含這個程式碼研究室每個步驟的結束狀態。這些資料僅供參考。請在 work 目錄中執行所有程式設計工作。
2. 建立設有預設中心的地圖
在網頁上建立 Google 地圖有三個步驟:
- 建立 HTML 網頁
- 新增地圖
- 貼上您的 API 金鑰
1. 建立 HTML 網頁
以下是此步驟中建立的地圖。這張地圖以澳洲雪梨的雪梨歌劇院為中心。如果使用者拒絕取得其位置資訊的權限,則地圖會預設顯示該位置,並提供相關的搜尋結果。
- 將目錄變更為
work/資料夾。在程式碼研究室的其餘部分,您可以編輯work/資料夾中的版本。
cd work
- 在「
work/」目錄中,使用文字編輯器建立名稱為「index.html」的空白檔案。 - 將下列程式碼複製到「
index.html」中。
<!DOCTYPE html>
<html>

<head>
  <title>Sushi Finder</title>
  <meta name="viewport" content="initial-scale=1.0, user-scalable=no">
  <meta charset="utf-8">
  <style>
    /* Always set the map height explicitly to define the size of the div
     * element that contains the map. */
    #map {
      height: 100%;
      background-color: grey;
    }

    /* Optional: Makes the sample page fill the window. */
    html,
    body {
      height: 100%;
      margin: 0;
      padding: 0;
    }

    /* TODO: Step 4A1: Make a generic sidebar. */
  </style>
</head>

<body>
  <!-- TODO: Step 4A2: Add a generic sidebar -->

  <!-- Map appears here -->
  <div id="map"></div>

  <!-- TODO: Step 1B, Add a map -->
</body>

</html>
- 在網路瀏覽器中開啟
index.html檔案。
open index.html
2. 新增地圖
本節說明如何將 Maps JavaScript API 載入您的網頁,並編寫能用來在網頁中新增地圖的 JavaScript。
- 新增這個指令碼程式碼,請查看
<!-- TODO: Step 1B, Add a map -->在mapdiv 後面和</body>結尾標記之前。
step 1/index.html
<!-- TODO: Step 1B, Add a map -->
<script>
    /* Note: This example requires that you consent to location sharing when
     * prompted by your browser. If you see the error "Geolocation permission
     * denied.", it means you probably did not give permission for the browser * to locate you. */

    /* TODO: Step 2, Geolocate your user
     * Replace the code from here to the END TODO comment with new code from
     * codelab instructions. */
    let pos;
    let map;
    function initMap() {
        // Set the default location and initialize all variables
        pos = {lat: -33.857, lng: 151.213};
        map = new google.maps.Map(document.getElementById('map'), {
            center: pos,
            zoom: 15
        });
    }
    /* END TODO: Step 2, Geolocate your user */
</script>

<!-- TODO: Step 1C, Get an API key -->
<!-- TODO: Step 3A, Load the Places Library -->
<script async defer src="https://maps.googleapis.com/maps/api/js?key=YOUR_API_KEY&callback=initMap">
</script>
3. 貼入 API 金鑰
- 在
<!-- TODO: Step 1C, Get an API key -->這一行之後,複製指令碼來源網址中金鑰參數的值,並替換成您在必備條件中建立的 API 金鑰。
step 1/index.html
<!-- TODO: Step 1C, Get an API key -->
<!-- TODO: Step 3A, Load the Places Library -->
<script async defer src="https://maps.googleapis.com/maps/api/js?key=YOUR_API_KEY&callback=initMap">
</script>
- 儲存您已使用的 HTML 檔案。
測試
重新載入您所編輯的檔案瀏覽器檢視。這時應該會出現灰色矩形處之前的地圖。如果您看到錯誤訊息,請確認您在最後的 <script> 標記中將「YOUR_API_KEY」改成自己的 API 金鑰。如果您還沒有 API 金鑰,請參閱上方說明,瞭解如何取得 API 金鑰。
完整程式碼範例
Google Cloud Hub 上可使用此專案的完整程式碼。
3. 為使用者定位
接下來,您想要利用瀏覽器 HTML5 地理位置功能以及 Maps JavaScript API,在 Google 地圖上顯示使用者或裝置的地理位置。
以下地圖範例會顯示您從加州山景城瀏覽的地理位置:
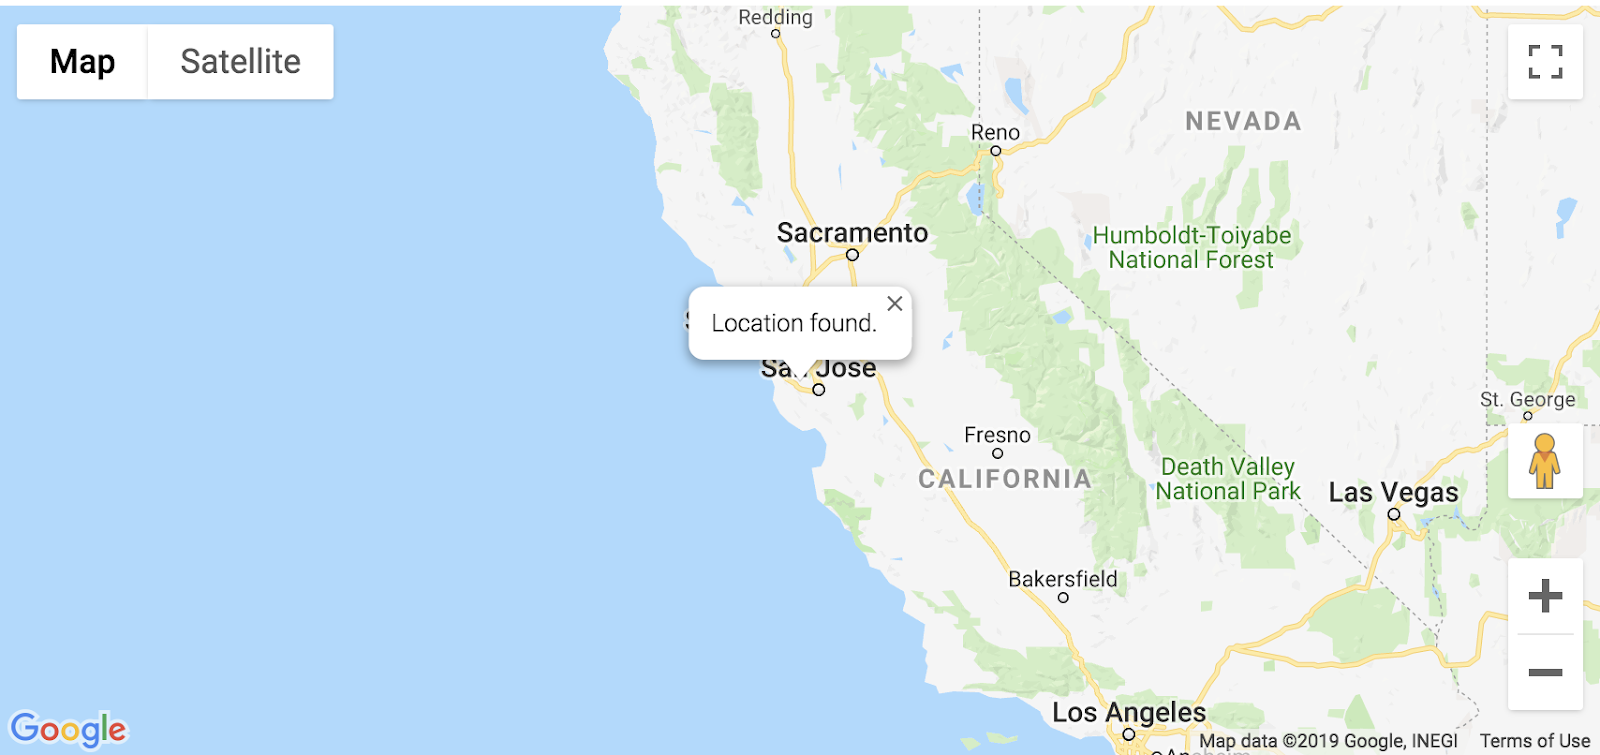
什麼是地理位置?
地理位置是指透過各種資料收集機制,識別使用者或運算裝置的地理位置。一般而言,大部分的地理定位服務利用網路路線規劃位址或利用內部 GPS 裝置,來判斷位置。這個應用程式使用網路瀏覽器的 W3C 地理位置標準 navigator.geolocation 屬性來判斷使用者的位置。
自行嘗試
將 TODO: Step 2, Geolocate your user 和 END TODO: Step 2, Geolocate your user 註解之間的程式碼換成下列程式碼:
步驟 2/index.html
/* TODO: Step 2, Geolocate your user
    * Replace the code from here to the END TODO comment with this code
    * from codelab instructions. */
let pos;
let map;
let bounds;
let infoWindow;
let currentInfoWindow;
let service;
let infoPane;
function initMap() {
    // Initialize variables
    bounds = new google.maps.LatLngBounds();
    infoWindow = new google.maps.InfoWindow;
    currentInfoWindow = infoWindow;
    /* TODO: Step 4A3: Add a generic sidebar */

    // Try HTML5 geolocation
    if (navigator.geolocation) {
    navigator.geolocation.getCurrentPosition(position => {
        pos = {
        lat: position.coords.latitude,
        lng: position.coords.longitude
        };
        map = new google.maps.Map(document.getElementById('map'), {
        center: pos,
        zoom: 15
        });
        bounds.extend(pos);

        infoWindow.setPosition(pos);
        infoWindow.setContent('Location found.');
        infoWindow.open(map);
        map.setCenter(pos);

        /* TODO: Step 3B2, Call the Places Nearby Search */
    }, () => {
        // Browser supports geolocation, but user has denied permission
        handleLocationError(true, infoWindow);
    });
    } else {
    // Browser doesn't support geolocation
    handleLocationError(false, infoWindow);
    }
}

// Handle a geolocation error
function handleLocationError(browserHasGeolocation, infoWindow) {
    // Set default location to Sydney, Australia
    pos = {lat: -33.856, lng: 151.215};
    map = new google.maps.Map(document.getElementById('map'), {
    center: pos,
    zoom: 15
    });

    // Display an InfoWindow at the map center
    infoWindow.setPosition(pos);
    infoWindow.setContent(browserHasGeolocation ?
    'Geolocation permissions denied. Using default location.' :
    'Error: Your browser doesn\'t support geolocation.');
    infoWindow.open(map);
    currentInfoWindow = infoWindow;

    /* TODO: Step 3B3, Call the Places Nearby Search */
}
/* END TODO: Step 2, Geolocate your user */
/* TODO: Step 3B1, Call the Places Nearby Search */
測試
- 儲存檔案。
- 重新載入網頁。
你的瀏覽器現在會詢問您是否要將位置資訊提供給應用程式。
- 再按一下 [封鎖],看看它是否可正常處理錯誤,且影片會以雪梨為中心。
- 重新載入並重新點選 [允許],看看地理位置是否能正常運作,並將地圖移至您目前的位置。
完整程式碼範例
Google Cloud Hub 上可使用此專案的完整程式碼。
4. 搜尋附近地點
「搜尋附近地點」可讓您依關鍵字或類型搜尋指定區域內的地點。「搜尋附近地點」必須一律包含位置,且可透過下列其中一種方式指定:
- 定義矩形搜尋區域的
LatLngBounds物件 - 圓形區域,定義為
location屬性的組合;將圓形的中心指定為LatLng物件,以及半徑,以公尺為單位
呼叫 PlacesService nearbySearch() 方法並啟動 Nearby Search,如此會傳回 PlaceResult 物件陣列。
A. 載入 Places Library
首先,如要存取 Places Library 服務,請更新指令碼來源網址,加入 libraries 參數並將 places 新增為值。
step 3/index.html
<!-- TODO: Step 3A, Load the Places Library -->
<script async defer
    src="https://maps.googleapis.com/maps/api/js?key=YOUR_API_KEY&libraries=places&callback=initMap">
B:呼叫 Places Nearby Search 要求及處理回應
接下來,請建立「地點搜尋要求」。基本必填欄位如下:
基本必填欄位如下:
bounds,必須是定義矩形搜尋區域的google.maps.LatLngBounds物件,「或」location和radius;前者需要google.maps.LatLng物件,而後者需要代表整數 (以公尺為單位) 的簡單整數。允許的最大半徑為 50 000 公尺。請注意,將rankBy設為DISTANCE時,您必須指定位置,但無法指定半徑或邊界。- 用於比對所有可用欄位的
keyword,包括但不限於名稱、類型和地址、客戶評論和其他第三方內容,或是type,也就是只在符合指定類型的地點顯示結果。只能指定一個類型 (如果提供了多種類型,系統會忽略第一個項目之後的所有類型)。請參閱支援的類型清單。
在這個程式碼研究室中,您會以使用者目前的位置做為搜尋位置,並按距離排序結果。
- 在註解
TODO: Step 3B1中加入以下內容,以撰寫兩個函式來呼叫搜尋並處理回應。
關鍵字 sushi 是搜尋字詞,但您可予以變更。下一節會提供定義 createMarkers 函式的程式碼。
step 3/index.html
/* TODO: Step 3B1, Call the Places Nearby Search */
// Perform a Places Nearby Search Request
function getNearbyPlaces(position) {
    let request = {
    location: position,
    rankBy: google.maps.places.RankBy.DISTANCE,
    keyword: 'sushi'
    };

    service = new google.maps.places.PlacesService(map);
    service.nearbySearch(request, nearbyCallback);
}

// Handle the results (up to 20) of the Nearby Search
function nearbyCallback(results, status) {
    if (status == google.maps.places.PlacesServiceStatus.OK) {
    createMarkers(results);
    }
}

/* TODO: Step 3C, Generate markers for search results */
- 在註解
TODO: Step 3B2的initMap函式結尾加入這一行。
/* TODO: Step 3B2, Call the Places Nearby Search */
// Call Places Nearby Search on user's location
getNearbyPlaces(pos);
- 在註解
TODO: Step 3B3的handleLocationError函式結尾加入這一行。
/* TODO: Step 3B3, Call the Places Nearby Search */
// Call Places Nearby Search on the default location
getNearbyPlaces(pos);
C. 產生搜尋結果的標記
您可以使用標記代表地圖上的位置。標記預設會使用標準圖片,如要瞭解如何自訂標記圖片,請參閱標記一文。
google.maps.Marker 建構函式接受單一 Marker options 物件常值,以指定標記的初始屬性。
請特別留意以下欄位,因為當您建立標記時,通常必須設定這些欄位:
position(必要) 指定LatLng,以識別標記的初始位置。map(選用) 會指定要放置標記的地圖。如果您未在建構標記時指定地圖,則會建立標記,但不會附加至地圖 (或顯示在地圖上)。您日後可以呼叫標記的setMap()方法來新增標記。- 在註解
TODO: Step 3C之後加入下列程式碼,以設定回應中傳回的每個標記的位置、地圖及標題。此外,您也可以使用bounds變數的extend方法,確保地圖及所有標記都在地圖上顯示。
step 3/index.html
/* TODO: Step 3C, Generate markers for search results */
// Set markers at the location of each place result
function createMarkers(places) {
    places.forEach(place => {
    let marker = new google.maps.Marker({
        position: place.geometry.location,
        map: map,
        title: place.name
    });

    /* TODO: Step 4B: Add click listeners to the markers */

    // Adjust the map bounds to include the location of this marker
    bounds.extend(place.geometry.location);
    });
    /* Once all the markers have been placed, adjust the bounds of the map to
    * show all the markers within the visible area. */
    map.fitBounds(bounds);
}

/* TODO: Step 4C: Show place details in an info window */
測試
- 儲存並重新載入頁面,然後按一下 [允許],授予地理位置權限。
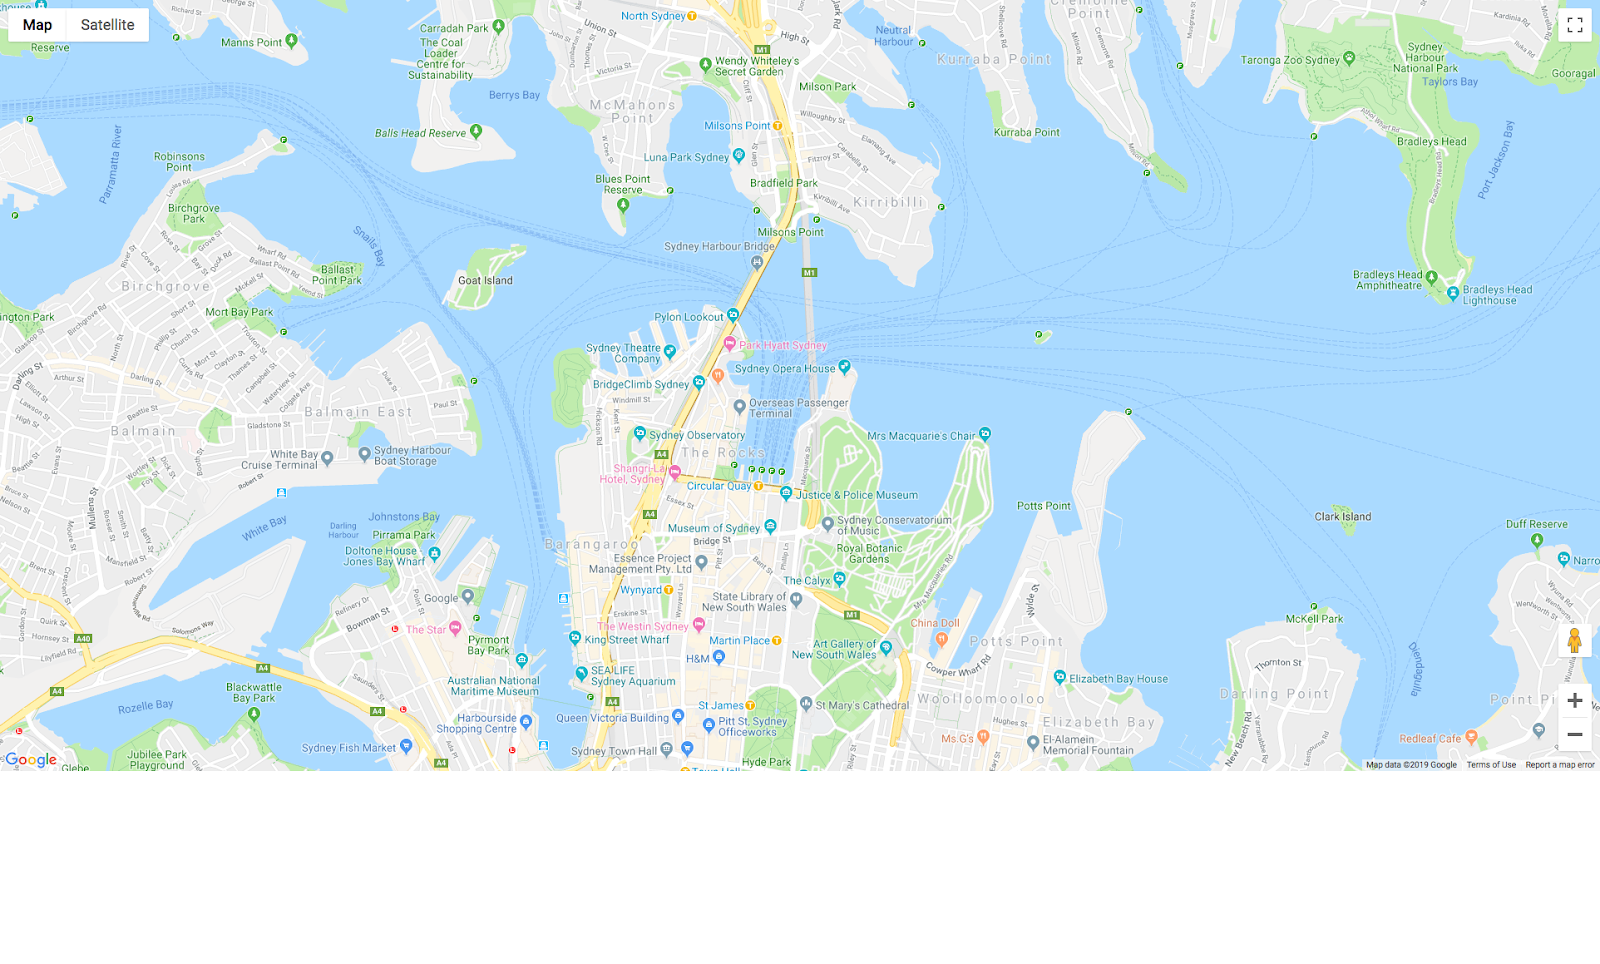
你應該能在地圖的中心位置周圍看到最多 20 個紅色標記。
- 請重新載入網頁,這次還是封鎖了地理位置權限。
您仍然可以在地圖的預設中心取得結果 (在範例中,預設使用澳洲雪梨)。
完整程式碼範例
Google Cloud Hub 上可使用此專案的完整程式碼。
5. 隨需顯示 Place Details
取得地點 ID (顯示為「鄰近搜尋」結果中的其中一個欄位) 後,您可以要求取得地點的其他詳細資料,例如完整的地址、電話號碼,以及使用者評分和評論。在這個程式碼研究室中,您將建立一個側欄,在其中顯示豐富的 Place Details,並讓標記更具互動性,以便使用者選取地點來查看詳細資料。
A. 建立一般側欄
您必須設定地點以顯示 Place Details,所以這裡提供一個簡單的側欄程式碼,讓您在使用者按一下標記時,可以滑出並顯示地點詳細資料。
- 將下列程式碼加進
style留言之後的TODO: Step 4A1標記:
步驟 4/index.html
/* TODO: Step 4A1: Make a generic sidebar */
/* Styling for an info pane that slides out from the left.
    * Hidden by default. */
#panel {
    height: 100%;
    width: null;
    background-color: white;
    position: fixed;
    z-index: 1;
    overflow-x: hidden;
    transition: all .2s ease-out;
}

.open {
    width: 250px;
}

/* Styling for place details */
.hero {
    width: 100%;
    height: auto;
    max-height: 166px;
    display: block;
}

.place,
p {
    font-family: 'open sans', arial, sans-serif;
    padding-left: 18px;
    padding-right: 18px;
}

.details {
    color: darkslategrey;
}

a {
    text-decoration: none;
    color: cadetblue;
}
- 在
mapdiv 前方的body區段中,為詳細資料面板新增 div。
<!-- TODO: Step 4A2: Add a generic sidebar -->
<!-- The slide-out panel for showing place details -->
<div id="panel"></div>
- 在
TODO: Step 4A3註解之後的initMap()函式中,初始化infoPane變數,如下所示:
/* TODO: Step 4A3: Add a generic sidebar */
infoPane = document.getElementById('panel');
B. 在標記中新增點擊事件監聽器
- 在
createMarkers函式中,在建立標記時將標記新增至每個標記。
點擊接聽器會擷取與該標記相關聯的地點詳細資料,並呼叫 函式以顯示詳細資訊。
- 請將下列程式碼貼到程式碼註解
TODO: Step 4B的createMarkers函式中。
我們會在下一節中說明 showDetails 方法。
步驟 4/index.html
/* TODO: Step 4B: Add click listeners to the markers */
// Add click listener to each marker
google.maps.event.addListener(marker, 'click', () => {
    let request = {
    placeId: place.place_id,
    fields: ['name', 'formatted_address', 'geometry', 'rating',
        'website', 'photos']
    };

    /* Only fetch the details of a place when the user clicks on a marker.
    * If we fetch the details for all place results as soon as we get
    * the search response, we will hit API rate limits. */
    service.getDetails(request, (placeResult, status) => {
    showDetails(placeResult, marker, status)
    });
});
在 addListener 要求中,placeId 屬性可指定詳細資料要求的單一位置,fields 屬性是您要查詢地點相關資訊的欄位名稱陣列。如需可要求欄位的完整清單,請參閱 PlaceResult 介面。
C. 在資訊視窗中顯示 Place Details
資訊視窗會在地圖中特定位置上方的對話方塊中顯示內容 (通常是文字或圖片)。資訊視窗是以一個內容區域以及一個錐形柄所組成。觸控筆的尖端會附加到地圖上的指定位置。一般來說,資訊視窗會附加到標記,但是您也可以將資訊視窗附加到特定的經緯度。
- 在註解
TODO: Step 4C中加入以下程式碼,以建立InfoWindow以顯示商家名稱和評分,並將該視窗附加到標記。
您在下一節中定義了 showPanel,以便在側欄中顯示詳細資料。
步驟 4/index.html
/* TODO: Step 4C: Show place details in an info window */
// Builds an InfoWindow to display details above the marker
function showDetails(placeResult, marker, status) {
    if (status == google.maps.places.PlacesServiceStatus.OK) {
    let placeInfowindow = new google.maps.InfoWindow();
    placeInfowindow.setContent('<div><strong>' + placeResult.name +
        '</strong><br>' + 'Rating: ' + placeResult.rating + '</div>');
    placeInfowindow.open(marker.map, marker);
    currentInfoWindow.close();
    currentInfoWindow = placeInfowindow;
    showPanel(placeResult);
    } else {
    console.log('showDetails failed: ' + status);
    }
}

/* TODO: Step 4D: Load place details in a sidebar */
D. 在側欄載入地點詳細資料
請使用在 PlaceResult 物件中傳回的相同詳細資料來填入另一個 div。在這個範例中,請使用 infoPane (這是 div 的任意變數名稱,且 ID 為「panel」) 的任意變數。只要使用者點選新標記,這個程式碼就會關閉側欄 (如果已經開啟),並清除舊詳細資料,接著開啟側欄。
- 在留言「
TODO: Step 4D」的後面加入以下程式碼。
步驟 4/index.html
/* TODO: Step 4D: Load place details in a sidebar */
// Displays place details in a sidebar
function showPanel(placeResult) {
    // If infoPane is already open, close it
    if (infoPane.classList.contains("open")) {
    infoPane.classList.remove("open");
    }

    // Clear the previous details
    while (infoPane.lastChild) {
    infoPane.removeChild(infoPane.lastChild);
    }

    /* TODO: Step 4E: Display a Place Photo with the Place Details */

    // Add place details with text formatting
    let name = document.createElement('h1');
    name.classList.add('place');
    name.textContent = placeResult.name;
    infoPane.appendChild(name);
    if (placeResult.rating != null) {
    let rating = document.createElement('p');
    rating.classList.add('details');
    rating.textContent = `Rating: ${placeResult.rating} \u272e`;
    infoPane.appendChild(rating);
    }
    let address = document.createElement('p');
    address.classList.add('details');
    address.textContent = placeResult.formatted_address;
    infoPane.appendChild(address);
    if (placeResult.website) {
    let websitePara = document.createElement('p');
    let websiteLink = document.createElement('a');
    let websiteUrl = document.createTextNode(placeResult.website);
    websiteLink.appendChild(websiteUrl);
    websiteLink.title = placeResult.website;
    websiteLink.href = placeResult.website;
    websitePara.appendChild(websiteLink);
    infoPane.appendChild(websitePara);
    }

    // Open the infoPane
    infoPane.classList.add("open");
}
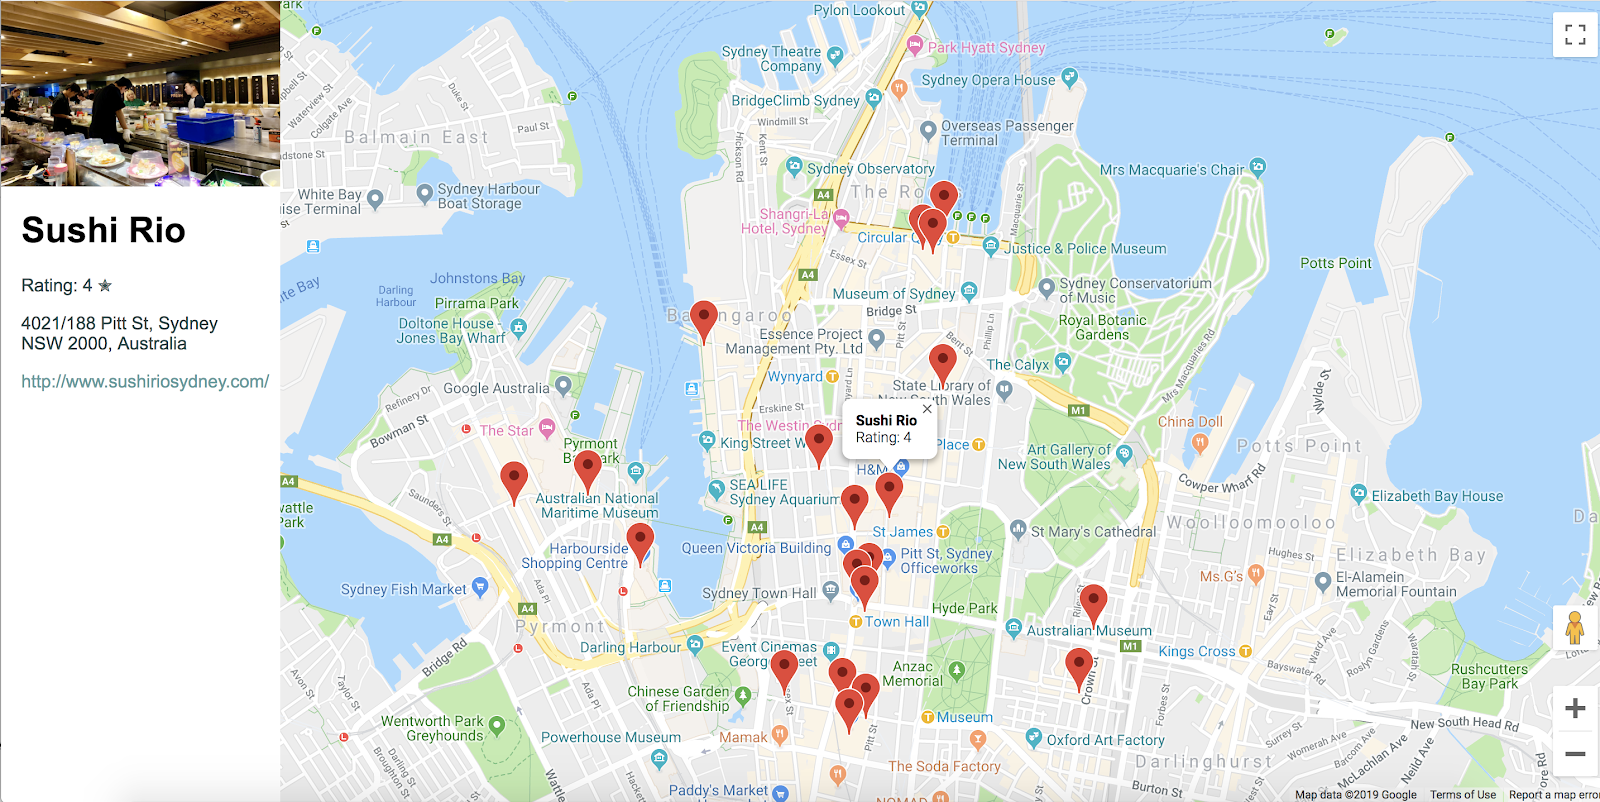
E. 顯示包含地點詳細資料的地點相片
getDetails 結果會傳回含有 placeId 的最多 10 張相片的陣列。您會在側欄中的地點名稱上方顯示第一張相片。
- 如果你想在側欄頂端顯示相片,請在建立
name元素前,先加入這段程式碼。
步驟 4/index.html
/* TODO: Step 4E: Display a Place Photo with the Place Details */
// Add the primary photo, if there is one
if (placeResult.photos != null) {
    let firstPhoto = placeResult.photos[0];
    let photo = document.createElement('img');
    photo.classList.add('hero');
    photo.src = firstPhoto.getUrl();
    infoPane.appendChild(photo);
}
測試
- 在瀏覽器中儲存網頁並重新載入,並授予地理位置權限。
- 按一下標記可查看從資訊視窗彈出的數個視窗,側欄會從左側滑出以顯示詳細資訊。
- 請測試您是否能在重新載入和拒絕地理位置權限的情況下,讓搜尋功能正常運作。針對其他查詢編輯搜尋關鍵字,並探索該搜尋傳回的結果。
完整程式碼範例
Google Cloud Hub 上可使用此專案的完整程式碼。
6. 恭喜
恭喜!您使用了 Maps JavaScript API 的許多功能,包括 Places 程式庫。
報表主題
- 使用 google.maps.Map 類別建立地圖
- 透過使用者的瀏覽器進行地理位置,然後在地圖上顯示結果
- 在地圖上加入標記,以及回應使用者點擊事件
- 新增資訊視窗,以便在使用者點擊標記時顯示更多資訊
- 載入 Places Library 並執行鄰近搜尋
- 擷取並顯示地點詳細資料和地點相片
瞭解詳情
想進一步發揮地圖的功能,請瀏覽 Maps JavaScript API 說明文件和 Places Library 說明文件,兩者都提供指南、教學課程、API 參考資料、更多程式碼範例以及支援管道等相關說明。目前常用的功能包括匯入資料到地圖、開始設定地圖樣式以及添加街景服務服務。
您最希望我們開發哪種程式碼研究室?
上方未列出您所需的程式碼研究室嗎?請在這裡提出新的問題。