
1. 事前準備
網站最常見的功能之一就是顯示 Google 地圖,用來標明一或多個商家、場所或其他有實體據點的實體。這些地圖的使用方式因地區而異,例如地點數量和變更頻率。
在這個程式碼研究室中,您查看的是最簡單的應用方式,也就是少數地點極少變更的情形,例如某間分店的店家搜尋器。在這種情況下,您可以採用相對較低的技術方法,而無需使用任何伺服器端程式。但是,您不該相信自己能夠發揮創意,也能運用 GeoJSON 資料格式,儲存和顯示地圖上的每個商店的任意資訊,以及自訂標記和整體地圖樣式。
最後,您還可以使用 Cloud Shell 來開發及代管店家搜尋器。儘管我們嚴格要求使用這項工具,但能讓您從任何執行網路瀏覽器的裝置開發店家搜尋器,並開放大眾使用。
事前準備
- HTML 和 JavaScript 的基本知識
要執行的步驟
- 顯示地圖,其中包含一組店家位置和以 GeoJSON 格式儲存的資訊。
- 自訂標記和地圖本身。
- 按一下標記時,顯示商店的額外資訊。
- 在網頁上新增 Place Autocomplete 搜尋列。
- 識別使用者最近的起點位置。
2. 做好準備
在下一節的步驟 3 中,為這個程式碼研究室啟用下列三個 API:
- Maps JavaScript API
- Places API
- Distance Matrix API
開始使用 Google 地圖平台
如果您未曾使用過 Google 地圖平台,請按照開始使用 Google 地圖平台指南或觀看 Google 地圖平台入門指南完成下列步驟:
- 建立帳單帳戶。
- 建立專案。
- 啟用 Google 地圖平台的 API 和 SDK (如上一節所示)。
- 產生 API 金鑰。
啟動 Cloud Shell
在這個程式碼研究室中,您可以使用 Cloud Shell,這是一個在 Google Cloud 中執行的指令列環境,可讓您存取在 Google Cloud 中運作的產品與資源,方便您從網路瀏覽器託管及執行專案。
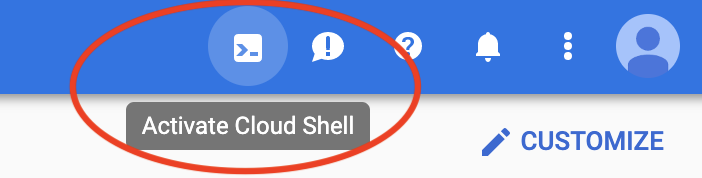
如要透過 Cloud Console 啟用 Cloud Shell,請按一下 [啟用 Cloud Shell]  (只需幾分鐘即可佈建並連線至環境)。
這個選項可能會在瀏覽器開啟後,在瀏覽器下半部開啟新的殼層。
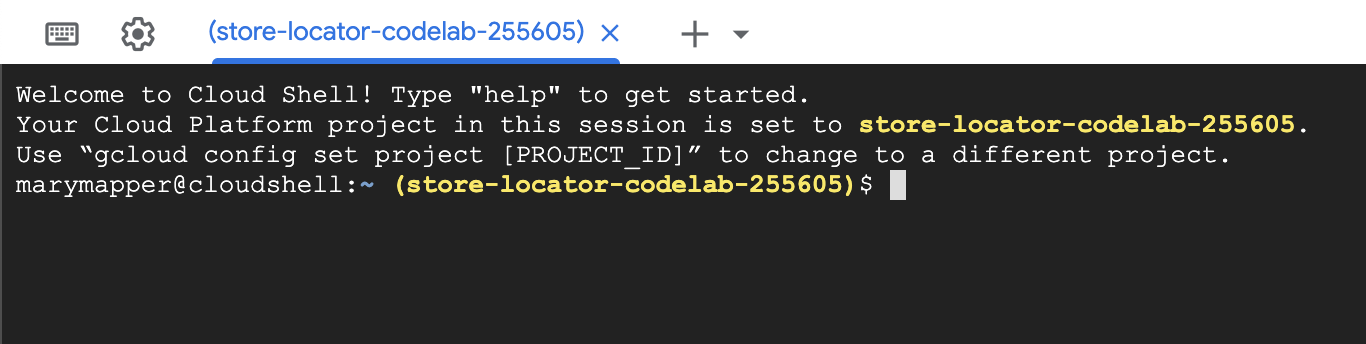
連線至 Cloud Shell 之後,您應該已經完成驗證,且專案已設為您在設定時選取的專案 ID。
$ gcloud auth list
Credentialed Accounts:
ACTIVE  ACCOUNT
  *     <myaccount>@<mydomain>.com
$ gcloud config list project
[core]
project = <YOUR_PROJECT_ID>
如果因為某些原因而無法設定專案,請執行下列指令:
$ gcloud config set project <YOUR_PROJECT_ID>
3. 「地圖,大家好!」
開始使用地圖進行開發
在 Cloud Shell 中,您會先建立一個 HTML 頁面,做為程式碼研究室的其餘部分。
- 在 Cloud Shell 工具列中,按一下「Launch Editor」(啟動編輯器)
 在新分頁中開啟新分頁編輯器。
這項網頁式程式碼編輯器可讓您輕鬆在 Cloud Shell 中編輯檔案。

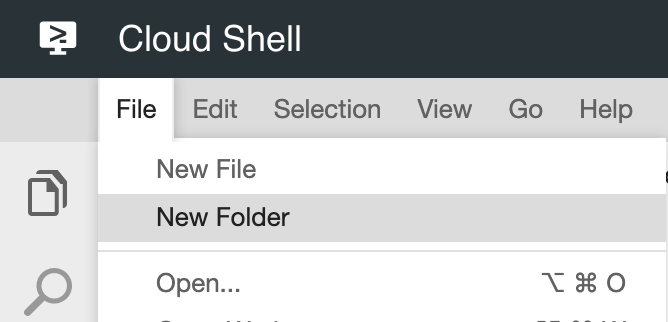
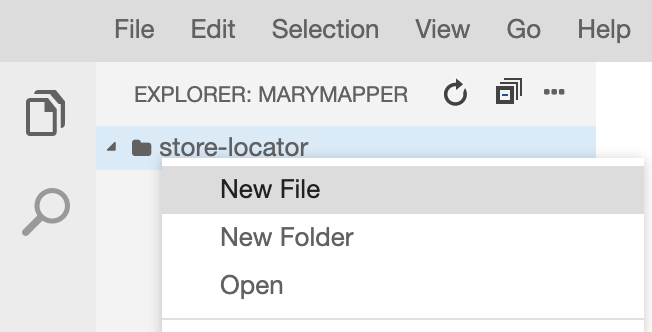
- 在程式碼編輯器中按一下 [檔案] > [新增資料夾],為應用程式建立新的
store-locator目錄。
- 將新的資料夾命名為
store-locator。
接下來,請建立一個包含地圖的網頁。
- 在名為
index.html的store-locator目錄中建立檔案。
- 將下列內容放入
index.html檔案中:
<html>

<head>
    <title>Store Locator</title>
    <style>
        #map {
            height: 100%;
        }

        html,
        body {
            height: 100%;
            margin: 0;
            padding: 0;
        }
    </style>
</head>

<body>
    <!-- The div to hold the map -->
    <div id="map"></div>

    <script src="app.js"></script>
    <script async defer src="https://maps.googleapis.com/maps/api/js?key=YOUR_API_KEY&libraries=places&callback=initMap&solution_channel=GMP_codelabs_simplestorelocator_v1_a">
    </script>
</body>

</html>
這是顯示地圖的 HTML 網頁。其中會包含一些 CSS 來確保地圖在視覺上佔滿整個頁面、一個包含地圖的 <div> 標記,以及兩組 <script> 標記。第一個指令碼標記會載入名為「app.js」的 JavaScript 檔案,其中包含所有 JavaScript 程式碼。第二個指令碼標記會載入 API 金鑰,包括您稍後將用來加入自動完成功能的 Places Library,以及指定載入 Maps JavaScript API 後執行的 JavaScript 函式名稱,也就是 initMap。
- 將程式碼片段中的文字
YOUR_API_KEY替換成您在此程式碼研究室中產生的 API 金鑰。 - 最後,使用下列程式碼建立另一個名為
app.js的檔案:
app.js
function initMap() {
   // Create the map.
    const map = new google.maps.Map(document.getElementById('map'), {
        zoom: 7,
        center: { lat: 52.632469, lng: -1.689423 },
    });

}
這就是建立地圖所需的基本程式碼。您會將參照傳遞至 <div> 標記以保存地圖,並指定中心和縮放等級。
如要測試這個應用程式,您可以在 Cloud Shell 中執行簡單的 Python HTTP 伺服器。
- 前往 Cloud Shell,然後輸入以下內容:
$ cd store-locator
$ python3 -m http.server 8080
您會看到幾行記錄輸出內容,表示您確實是在 Cloud Shell 中執行簡單的 HTTP 伺服器,且網頁應用程式會監聽 localhost 通訊埠 8080。
- 在 Cloud Console 工具列中按一下 [網頁預覽]
 ,然後選取 [透過以下埠預覽:8080],即可在這個應用程式中開啟網路瀏覽器分頁。
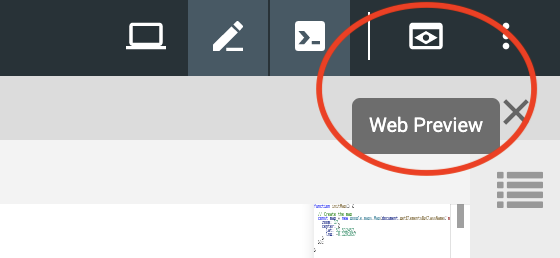
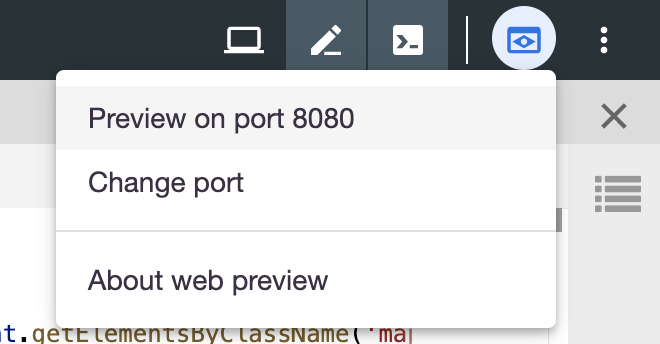
只要按一下這個選單項目,即可在網路瀏覽器中開啟新分頁,其中含有簡單的 Python HTTP 伺服器提供的 HTML 內容。如果一切順利,您應該會看到以倫敦倫敦為中心的地圖。
如要停止簡易型 HTTP 伺服器,請在 Cloud Shell 中按下 Control+C。
4. 使用 GeoJSON 填入地圖
現在,請查看商店的資料。GeoJSON 是一種資料格式,代表簡單的地理特徵,例如地圖上的點、線條或多邊形。這些功能也可以包含任意資料。這讓 GeoJSON 成為展示商店的絕佳選擇,基本上就是在地圖上以更多其他資料 (例如商店的名稱、營業時間和電話號碼) 為重點。最重要的是,GeoJSON 支援「Google 地圖」的一級支援,因此您可以將 GeoJSON 文件傳送至 Google 地圖,這樣它就會正確顯示在地圖上。
- 建立名為
stores.json的新檔案並貼入下列程式碼:
stores.json
{
    "type": "FeatureCollection",
    "features": [{
            "geometry": {
                "type": "Point",
                "coordinates": [-0.1428115,
                    51.5125168
                ]
            },
            "type": "Feature",
            "properties": {
                "category": "patisserie",
                "hours": "10am - 6pm",
                "description": "Modern twists on classic pastries. We're part of a larger chain of patisseries and cafes.",
                "name": "Josie's Patisserie Mayfair",
                "phone": "+44 20 1234 5678",
                "storeid": "01"
            }
        },
        {
            "geometry": {
                "type": "Point",
                "coordinates": [-2.579623,
                    51.452251
                ]
            },
            "type": "Feature",
            "properties": {
                "category": "patisserie",
                "hours": "10am - 6pm",
                "description": "Come and try our award-winning cakes and pastries. We're part of a larger chain of patisseries and cafes.",
                "name": "Josie's Patisserie Bristol",
                "phone": "+44 117 121 2121",
                "storeid": "02"
            }
        },
        {
            "geometry": {
                "type": "Point",
                "coordinates": [
                    1.273459,
                    52.638072
                ]
            },
            "type": "Feature",
            "properties": {
                "category": "patisserie",
                "hours": "10am - 6pm",
                "description": "Whatever the occasion, whether it's a birthday or a wedding, Josie's Patisserie has the perfect treat for you. We're part of a larger chain of patisseries and cafes.",
                "name": "Josie's Patisserie Norwich",
                "phone": "+44 1603 123456",
                "storeid": "03"
            }
        },
        {
            "geometry": {
                "type": "Point",
                "coordinates": [-1.9912838,
                    50.8000418
                ]
            },
            "type": "Feature",
            "properties": {
                "category": "patisserie",
                "hours": "10am - 6pm",
                "description": "A gourmet patisserie that will delight your senses. We're part of a larger chain of patisseries and cafes.",
                "name": "Josie's Patisserie Wimborne",
                "phone": "+44 1202 343434",
                "storeid": "04"
            }
        },
        {
            "geometry": {
                "type": "Point",
                "coordinates": [-2.985933,
                    53.408899
                ]
            },
            "type": "Feature",
            "properties": {
                "category": "patisserie",
                "hours": "10am - 6pm",
                "description": "Spoil yourself or someone special with our classic pastries. We're part of a larger chain of patisseries and cafes.",
                "name": "Josie's Patisserie Liverpool",
                "phone": "+44 151 444 4444",
                "storeid": "05"
            }
        },
        {
            "geometry": {
                "type": "Point",
                "coordinates": [-1.689423,
                    52.632469
                ]
            },
            "type": "Feature",
            "properties": {
                "category": "patisserie",
                "hours": "10am - 6pm",
                "description": "Come and feast your eyes and tastebuds on our delicious pastries and cakes. We're part of a larger chain of patisseries and cafes.",
                "name": "Josie's Patisserie Tamworth",
                "phone": "+44 5555 55555",
                "storeid": "06"
            }
        },
        {
            "geometry": {
                "type": "Point",
                "coordinates": [-3.155305,
                    51.479756
                ]
            },
            "type": "Feature",
            "properties": {
                "category": "patisserie",
                "hours": "10am - 6pm",
                "description": "Josie's Patisserie is family-owned, and our delectable pastries, cakes, and great coffee are renowed. We're part of a larger chain of patisseries and cafes.",
                "name": "Josie's Patisserie Cardiff",
                "phone": "+44 29 6666 6666",
                "storeid": "07"
            }
        },
        {
            "geometry": {
                "type": "Point",
                "coordinates": [-0.725019,
                    52.668891
                ]
            },
            "type": "Feature",
            "properties": {
                "category": "cafe",
                "hours": "8am - 9:30pm",
                "description": "Oakham's favorite spot for fresh coffee and delicious cakes. We're part of a larger chain of patisseries and cafes.",
                "name": "Josie's Cafe Oakham",
                "phone": "+44 7777 777777",
                "storeid": "08"
            }
        },
        {
            "geometry": {
                "type": "Point",
                "coordinates": [-2.477653,
                    53.735405
                ]
            },
            "type": "Feature",
            "properties": {
                "category": "cafe",
                "hours": "8am - 9:30pm",
                "description": "Enjoy freshly brewed coffe, and home baked cakes in our homely cafe. We're part of a larger chain of patisseries and cafes.",
                "name": "Josie's Cafe Blackburn",
                "phone": "+44 8888 88888",
                "storeid": "09"
            }
        },
        {
            "geometry": {
                "type": "Point",
                "coordinates": [-0.211363,
                    51.108966
                ]
            },
            "type": "Feature",
            "properties": {
                "category": "cafe",
                "hours": "8am - 9:30pm",
                "description": "A delicious array of pastries with many flavours, and fresh coffee in an snug cafe. We're part of a larger chain of patisseries and cafes.",
                "name": "Josie's Cafe Crawley",
                "phone": "+44 1010 101010",
                "storeid": "10"
            }
        },
        {
            "geometry": {
                "type": "Point",
                "coordinates": [-0.123559,
                    50.832679
                ]
            },
            "type": "Feature",
            "properties": {
                "category": "cafe",
                "hours": "8am - 9:30pm",
                "description": "Grab a freshly brewed coffee, a decadent cake and relax in our idyllic cafe. We're part of a larger chain of patisseries and cafes.",
                "name": "Josie's Cafe Brighton",
                "phone": "+44 1313 131313",
                "storeid": "11"
            }
        },
        {
            "geometry": {
                "type": "Point",
                "coordinates": [-3.319575,
                    52.517827
                ]
            },
            "type": "Feature",
            "properties": {
                "category": "cafe",
                "hours": "8am - 9:30pm",
                "description": "Come in and unwind at this idyllic cafe with fresh coffee and home made cakes. We're part of a larger chain of patisseries and cafes.",
                "name": "Josie's Cafe Newtown",
                "phone": "+44 1414 141414",
                "storeid": "12"
            }
        },
        {
            "geometry": {
                "type": "Point",
                "coordinates": [
                    1.158167,
                    52.071634
                ]
            },
            "type": "Feature",
            "properties": {
                "category": "cafe",
                "hours": "8am - 9:30pm",
                "description": "Fresh coffee and delicious cakes in an snug cafe. We're part of a larger chain of patisseries and cafes.",
                "name": "Josie's Cafe Ipswich",
                "phone": "+44 1717 17171",
                "storeid": "13"
            }
        }
    ]
}
雖然資料相當龐大,但是一旦在使用,您就會發現每家商店的結構是一樣的。每間商店皆以 GeoJSON Point 及其座標和額外金鑰 (properties) 底下的其他資料表示。有趣的是,GeoJSON 允許在 properties 鍵下加入任意命名的鍵。在這個程式碼研究室中,這些鍵為 category、hours、description、name 和 phone。
- 現在請編輯
app.js,使其可將stores.js中的 GeoJSON 載入您的地圖。
app.js
function initMap() {
  // Create the map.
  const map = new google.maps.Map(document.getElementById('map'), {
    zoom: 7,
    center: {lat: 52.632469, lng: -1.689423},
  });

  // Load the stores GeoJSON onto the map.
  map.data.loadGeoJson('stores.json', {idPropertyName: 'storeid'});

  const apiKey = 'YOUR_API_KEY';
  const infoWindow = new google.maps.InfoWindow();

  // Show the information for a store when its marker is clicked.
  map.data.addListener('click', (event) => {
    const category = event.feature.getProperty('category');
    const name = event.feature.getProperty('name');
    const description = event.feature.getProperty('description');
    const hours = event.feature.getProperty('hours');
    const phone = event.feature.getProperty('phone');
    const position = event.feature.getGeometry().get();
    const content = `
      <h2>${name}</h2><p>${description}</p>
      <p><b>Open:</b> ${hours}<br/><b>Phone:</b> ${phone}</p>
    `;

    infoWindow.setContent(content);
    infoWindow.setPosition(position);
    infoWindow.setOptions({pixelOffset: new google.maps.Size(0, -30)});
    infoWindow.open(map);
  });
}
在程式碼範例中,呼叫 loadGeoJson 並傳送 JSON 檔案名稱,即可將 GeoJSON 載入地圖。此外,您定義了每次按下標記時要執行的函式。然後,函式可以存取標記按一下之商店的其他資料,並使用顯示的資訊視窗中的資訊。如要測試這個應用程式,您可以使用與之前相同的指令執行簡單的 Python HTTP 伺服器。
- 返回 Cloud Shell 並輸入以下內容:
$ python3 -m http.server 8080
- 依序點選 [Web Preview] (網頁預覽) > [Preview onport 8080] (在通訊埠 8080 上預覽),您應該會看到含有完整標記的地圖,您可以點選這些標記,查看各商店的詳細資料 (如以下範例所示)。進度!

5. 自訂地圖
就快大功告成了。您的地圖包含所有商店標記,並在使用者點選時顯示額外資訊。不過,「Google 地圖」中還有許多其他地圖。太棒了!提供自訂地圖樣式、標記、標誌和街景服務圖片,讓內容更豐富。
以下是新版的 app.js,並新增自訂樣式:
app.js
const mapStyle = [{
  'featureType': 'administrative',
  'elementType': 'all',
  'stylers': [{
    'visibility': 'on',
  },
  {
    'lightness': 33,
  },
  ],
},
{
  'featureType': 'landscape',
  'elementType': 'all',
  'stylers': [{
    'color': '#f2e5d4',
  }],
},
{
  'featureType': 'poi.park',
  'elementType': 'geometry',
  'stylers': [{
    'color': '#c5dac6',
  }],
},
{
  'featureType': 'poi.park',
  'elementType': 'labels',
  'stylers': [{
    'visibility': 'on',
  },
  {
    'lightness': 20,
  },
  ],
},
{
  'featureType': 'road',
  'elementType': 'all',
  'stylers': [{
    'lightness': 20,
  }],
},
{
  'featureType': 'road.highway',
  'elementType': 'geometry',
  'stylers': [{
    'color': '#c5c6c6',
  }],
},
{
  'featureType': 'road.arterial',
  'elementType': 'geometry',
  'stylers': [{
    'color': '#e4d7c6',
  }],
},
{
  'featureType': 'road.local',
  'elementType': 'geometry',
  'stylers': [{
    'color': '#fbfaf7',
  }],
},
{
  'featureType': 'water',
  'elementType': 'all',
  'stylers': [{
    'visibility': 'on',
  },
  {
    'color': '#acbcc9',
  },
  ],
},
];

function initMap() {
  // Create the map.
  const map = new google.maps.Map(document.getElementById('map'), {
    zoom: 7,
    center: {lat: 52.632469, lng: -1.689423},
    styles: mapStyle,
  });

  // Load the stores GeoJSON onto the map.
  map.data.loadGeoJson('stores.json', {idPropertyName: 'storeid'});

  // Define the custom marker icons, using the store's "category".
  map.data.setStyle((feature) => {
    return {
      icon: {
        url: `img/icon_${feature.getProperty('category')}.png`,
        scaledSize: new google.maps.Size(64, 64),
      },
    };
  });

  const apiKey = 'YOUR_API_KEY';
  const infoWindow = new google.maps.InfoWindow();

  // Show the information for a store when its marker is clicked.
  map.data.addListener('click', (event) => {
    const category = event.feature.getProperty('category');
    const name = event.feature.getProperty('name');
    const description = event.feature.getProperty('description');
    const hours = event.feature.getProperty('hours');
    const phone = event.feature.getProperty('phone');
    const position = event.feature.getGeometry().get();
    const content = `
      <img style="float:left; width:200px; margin-top:30px" src="img/logo_${category}.png">
      <div style="margin-left:220px; margin-bottom:20px;">
        <h2>${name}</h2><p>${description}</p>
        <p><b>Open:</b> ${hours}<br/><b>Phone:</b> ${phone}</p>
        <p><img src="https://maps.googleapis.com/maps/api/streetview?size=350x120&location=${position.lat()},${position.lng()}&key=${apiKey}&solution_channel=GMP_codelabs_simplestorelocator_v1_a"></p>
      </div>
      `;

    infoWindow.setContent(content);
    infoWindow.setPosition(position);
    infoWindow.setOptions({pixelOffset: new google.maps.Size(0, -30)});
    infoWindow.open(map);
  });

}
以下是您新增的內容:
mapStyle變數包含設定地圖樣式的所有資訊。(如有需要,您甚至可以建立自己的樣式)。- 使用
map.data.setStyle方法,您套用自訂標記,與 GeoJSON 中每個category的標記不同。 - 您已修改
content變數,加入標誌 (再次使用 GeoJSON 中的category) 和商店位置的街景服務圖片。
在部署之前,您必須完成幾個步驟:
- 設定
apiKey變數的正確值。請將app.js中的'YOUR_API_KEY'字串替換成更早建立的 API 金鑰 (也就是您貼到index.html中的相同字串,並保留引號不變)。 - 在 Cloud Shell 中執行下列指令,以下載標記和標誌圖形。確認您在
store-locator目錄中。使用Control+C可停止簡易型 HTTP 伺服器 (如果伺服器正在執行)。
$ mkdir -p img; cd img
$ wget https://github.com/googlecodelabs/google-maps-simple-store-locator/raw/master/src/img/icon_cafe.png
$ wget https://github.com/googlecodelabs/google-maps-simple-store-locator/raw/master/src/img/icon_patisserie.png
$ wget https://github.com/googlecodelabs/google-maps-simple-store-locator/raw/master/src/img/logo_cafe.png
$ wget https://github.com/googlecodelabs/google-maps-simple-store-locator/raw/master/src/img/logo_patisserie.png
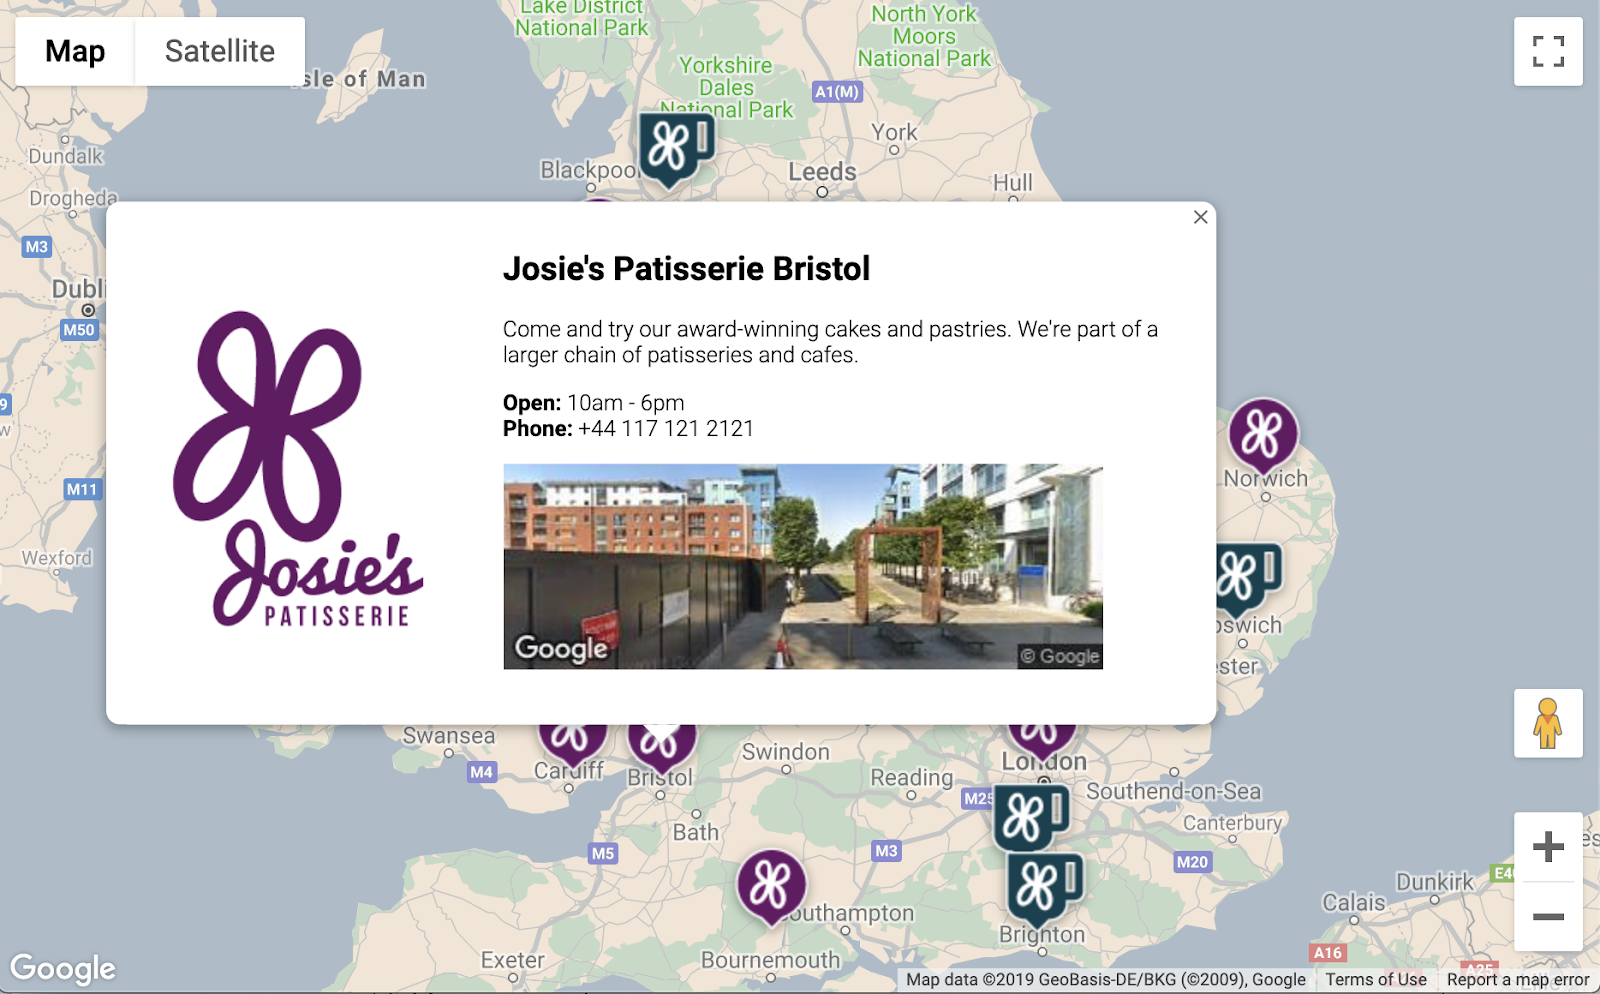
- 執行下列指令來預覽已完成的店家搜尋器:
$ python3 -m http.server 8080
重新載入預覽時,您會看到下列地圖,其中包含自訂樣式、自訂標記圖片、改善資訊視窗格式,以及每個地點的街景服務圖片:
6. 取得使用者輸入內容
店家搜尋器的使用者通常都想知道離自己最近的商店,或是預計展開旅程的地址。新增 Place Autocomplete 搜尋列,方便使用者輕鬆輸入起始地址。「地點自動完成」功能與其他 Google 搜尋列中的功能類似,就像「自動完成」功能一樣,不過預測都是 Google 地圖平台中所有的「地點」功能。
- 返回編輯
index.html,為「自動完成」搜尋列及相關側邊面板新增樣式。貼上舊程式碼後,別忘了替換您的 API 金鑰。
<html>

<head>
  <title>Store Locator</title>
  <style>
    #map {
      height: 100%;
    }

    html,
    body {
      height: 100%;
      margin: 0;
      padding: 0;
    }

    /* Styling for Autocomplete search bar */
    #pac-card {
      background-color: #fff;
      border-radius: 2px 0 0 2px;
      box-shadow: 0 2px 6px rgba(0, 0, 0, 0.3);
      box-sizing: border-box;
      font-family: Roboto;
      margin: 10px 10px 0 0;
      -moz-box-sizing: border-box;
      outline: none;
    }

    #pac-container {
      padding-top: 12px;
      padding-bottom: 12px;
      margin-right: 12px;
    }

    #pac-input {
      background-color: #fff;
      font-family: Roboto;
      font-size: 15px;
      font-weight: 300;
      margin-left: 12px;
      padding: 0 11px 0 13px;
      text-overflow: ellipsis;
      width: 400px;
    }

    #pac-input:focus {
      border-color: #4d90fe;
    }

    #title {
      color: #fff;
      background-color: #acbcc9;
      font-size: 18px;
      font-weight: 400;
      padding: 6px 12px;
    }

    .hidden {
      display: none;
    }

    /* Styling for an info pane that slides out from the left.
     * Hidden by default. */
    #panel {
      height: 100%;
      width: null;
      background-color: white;
      position: fixed;
      z-index: 1;
      overflow-x: hidden;
      transition: all .2s ease-out;
    }

    .open {
      width: 250px;
    }

    .place {
      font-family: 'open sans', arial, sans-serif;
      font-size: 1.2em;
      font-weight: 500;
      margin-block-end: 0px;
      padding-left: 18px;
      padding-right: 18px;
    }

    .distanceText {
      color: silver;
      font-family: 'open sans', arial, sans-serif;
      font-size: 1em;
      font-weight: 400;
      margin-block-start: 0.25em;
      padding-left: 18px;
      padding-right: 18px;
    }
  </style>
</head>

<body>
  <!-- The div to hold the map -->
  <div id="map"></div>

  <script src="app.js"></script>
  <script async defer src="https://maps.googleapis.com/maps/api/js?key=YOUR_API_KEY&libraries=places&callback=initMap&solution_channel=GMP_codelabs_simplestorelocator_v1_a">
  </script>
</body>

</html>
「自動完成」搜尋列和投影片面板一開始會隱藏,直到需要為止。
- 現在,只要在
app.js的initMap函式結尾加入自動完成小工具,就跟在大括號前方一樣。
app.js
  // Build and add the search bar
  const card = document.createElement('div');
  const titleBar = document.createElement('div');
  const title = document.createElement('div');
  const container = document.createElement('div');
  const input = document.createElement('input');
  const options = {
    types: ['address'],
    componentRestrictions: {country: 'gb'},
  };

  card.setAttribute('id', 'pac-card');
  title.setAttribute('id', 'title');
  title.textContent = 'Find the nearest store';
  titleBar.appendChild(title);
  container.setAttribute('id', 'pac-container');
  input.setAttribute('id', 'pac-input');
  input.setAttribute('type', 'text');
  input.setAttribute('placeholder', 'Enter an address');
  container.appendChild(input);
  card.appendChild(titleBar);
  card.appendChild(container);
  map.controls[google.maps.ControlPosition.TOP_RIGHT].push(card);

  // Make the search bar into a Places Autocomplete search bar and select
  // which detail fields should be returned about the place that
  // the user selects from the suggestions.
  const autocomplete = new google.maps.places.Autocomplete(input, options);

  autocomplete.setFields(
      ['address_components', 'geometry', 'name']);
這個程式碼只會將「自動完成」建議限制為傳回地址 (因為「地點自動完成」可以比對建築物名稱和管理地點),並限制只傳回英國的地址。新增這些選用規格會減少使用者需要輸入的字元數,以縮小預測範圍以顯示他們需要的地址。然後將您建立的「自動完成」div 移到地圖的右上角,並指定回應中每個地點的相關欄位。
- 執行下列指令,重新啟動伺服器並重新整理預覽:
$ python3 -m http.server 8080
現在,您的地圖右上角應該會顯示「自動完成」小工具,並顯示與您輸入相符的英國地址。

現在,您必須處理使用者從「自動完成」小工具中選取一個預測,並以該位置做為計算商店距離的基準。
- 將下列程式碼貼到您剛貼上的
app.js中initMap結尾。
app.js
 // Set the origin point when the user selects an address
  const originMarker = new google.maps.Marker({map: map});
  originMarker.setVisible(false);
  let originLocation = map.getCenter();

  autocomplete.addListener('place_changed', async () => {
    originMarker.setVisible(false);
    originLocation = map.getCenter();
    const place = autocomplete.getPlace();

    if (!place.geometry) {
      // User entered the name of a Place that was not suggested and
      // pressed the Enter key, or the Place Details request failed.
      window.alert('No address available for input: \'' + place.name + '\'');
      return;
    }

    // Recenter the map to the selected address
    originLocation = place.geometry.location;
    map.setCenter(originLocation);
    map.setZoom(9);
    console.log(place);

    originMarker.setPosition(originLocation);
    originMarker.setVisible(true);

    // Use the selected address as the origin to calculate distances
    // to each of the store locations
    const rankedStores = await calculateDistances(map.data, originLocation);
    showStoresList(map.data, rankedStores);

    return;
  });
程式碼會新增一個事件監聽器,如此一來,當使用者按一下其中一個建議時,該地圖就會根據所選的地址進行推算,並將起點設為計算距離的起點。您會在下一個步驟中導入距離計算。
7. 列出最近的商店
Directions API 的運作方式與在 Google 地圖應用程式中要求路線十分類似,只要輸入一個起點和一個目的地即可獲取兩者之間的路線。Distance Matrix API 可進一步採用這項概念,根據交通時間和距離,找出適用於多個可能出發地和多個可能目的地之間的最佳配對方式。在這種情況下,為了協助使用者找到與所選地址最近的商店,您必須提供一個來源和一系列商店位置做為目的地。
- 在
app.js中新增名為calculateDistances的函式。
app.js
async function calculateDistances(data, origin) {
  const stores = [];
  const destinations = [];

  // Build parallel arrays for the store IDs and destinations
  data.forEach((store) => {
    const storeNum = store.getProperty('storeid');
    const storeLoc = store.getGeometry().get();

    stores.push(storeNum);
    destinations.push(storeLoc);
  });

  // Retrieve the distances of each store from the origin
  // The returned list will be in the same order as the destinations list
  const service = new google.maps.DistanceMatrixService();
  const getDistanceMatrix =
    (service, parameters) => new Promise((resolve, reject) => {
      service.getDistanceMatrix(parameters, (response, status) => {
        if (status != google.maps.DistanceMatrixStatus.OK) {
          reject(response);
        } else {
          const distances = [];
          const results = response.rows[0].elements;
          for (let j = 0; j < results.length; j++) {
            const element = results[j];
            const distanceText = element.distance.text;
            const distanceVal = element.distance.value;
            const distanceObject = {
              storeid: stores[j],
              distanceText: distanceText,
              distanceVal: distanceVal,
            };
            distances.push(distanceObject);
          }

          resolve(distances);
        }
      });
    });

  const distancesList = await getDistanceMatrix(service, {
    origins: [origin],
    destinations: destinations,
    travelMode: 'DRIVING',
    unitSystem: google.maps.UnitSystem.METRIC,
  });

  distancesList.sort((first, second) => {
    return first.distanceVal - second.distanceVal;
  });

  return distancesList;
}
此函式會使用傳送至單一物件的 起點呼叫 Distance Matrix API,並將商店位置視為一個陣列陣列。接著,它會建構一個物件,用來儲存商店的 ID、以使用者可理解的字串表示的距離、以公尺為單位的距離 (以公尺為單位),而且會排序陣列。
使用者會期望看到一份清單,其中有從最近到最遠的訂購商店。使用從 calculateDistances 函式傳回的清單,為每個商店填入側邊面板清單,以便告知商店的顯示順序。
- 在
app.js中新增名為showStoresList的函式。
app.js
function showStoresList(data, stores) {
  if (stores.length == 0) {
    console.log('empty stores');
    return;
  }

  let panel = document.createElement('div');
  // If the panel already exists, use it. Else, create it and add to the page.
  if (document.getElementById('panel')) {
    panel = document.getElementById('panel');
    // If panel is already open, close it
    if (panel.classList.contains('open')) {
      panel.classList.remove('open');
    }
  } else {
    panel.setAttribute('id', 'panel');
    const body = document.body;
    body.insertBefore(panel, body.childNodes[0]);
  }


  // Clear the previous details
  while (panel.lastChild) {
    panel.removeChild(panel.lastChild);
  }

  stores.forEach((store) => {
    // Add store details with text formatting
    const name = document.createElement('p');
    name.classList.add('place');
    const currentStore = data.getFeatureById(store.storeid);
    name.textContent = currentStore.getProperty('name');
    panel.appendChild(name);
    const distanceText = document.createElement('p');
    distanceText.classList.add('distanceText');
    distanceText.textContent = store.distanceText;
    panel.appendChild(distanceText);
  });

  // Open the panel
  panel.classList.add('open');

  return;
}
- 執行下列指令,重新啟動伺服器並重新整理預覽。
$ python3 -m http.server 8080
- 最後,在「自動完成」搜尋列中輸入英國的地址,然後按一下其中一個建議即可。
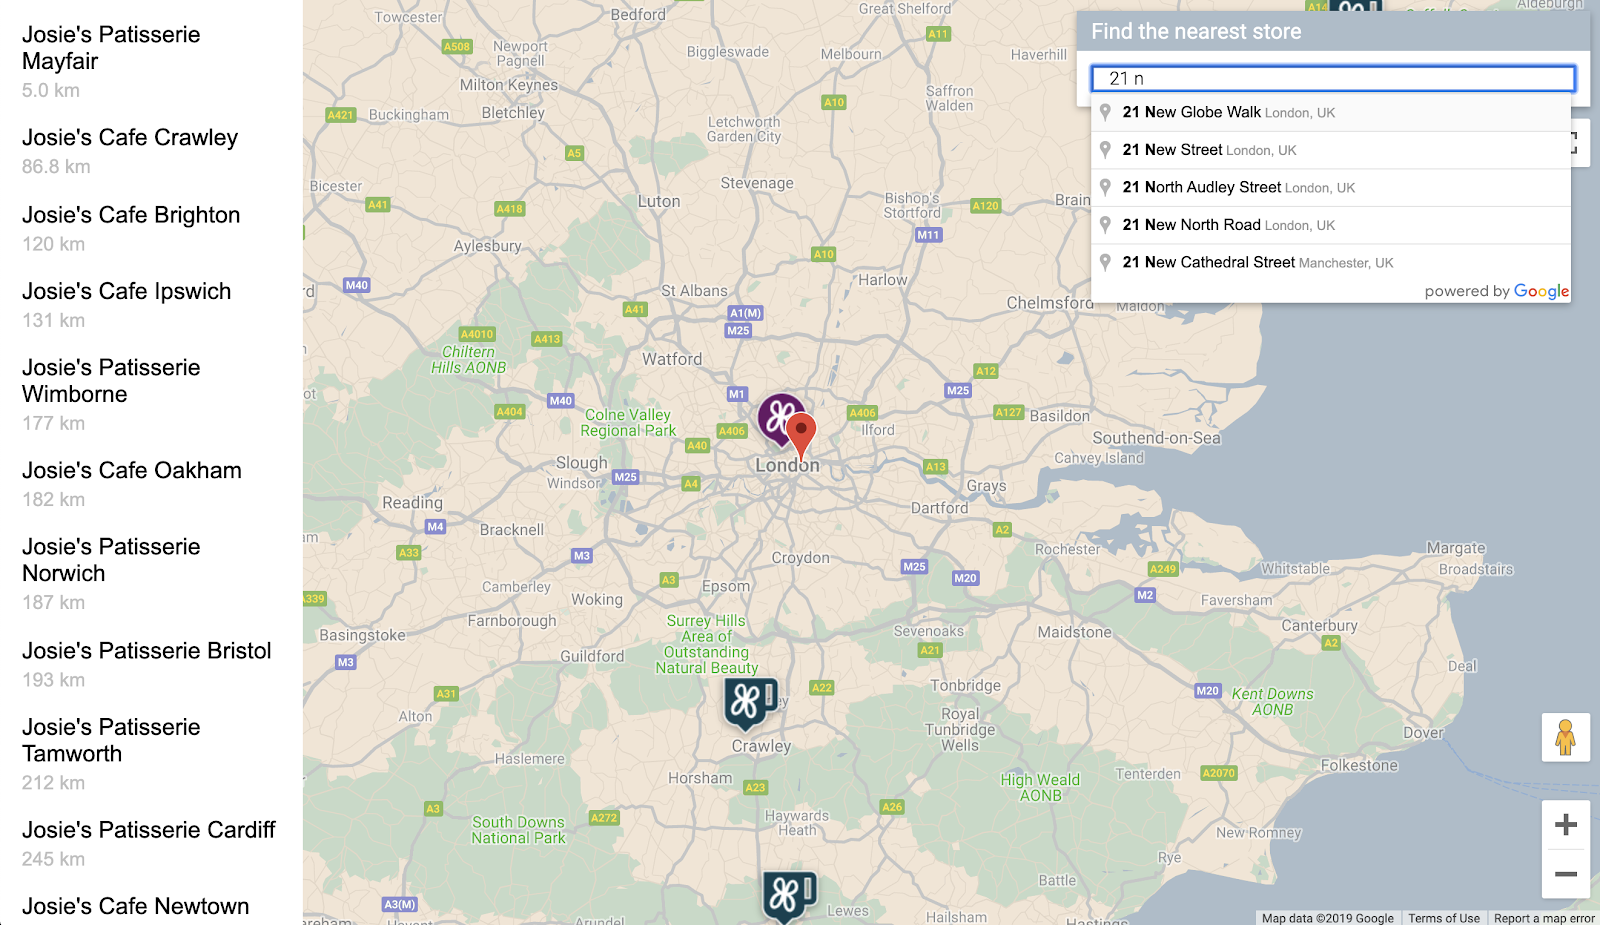
地圖應以該地址為中心,側欄應會顯示商店位置,並與選取的地址相距。如下圖所示:
8. 選擇性:代管您的網頁
到目前為止,只有當您積極執行 Python HTTP 伺服器時,您才能查看地圖。如要在使用中的 Cloud Shell 工作階段以外的地方查看地圖,或是想將自己的地圖網址分享給他人,請參考 Cloud Storage 來代管您的網頁。Cloud Storage 是一個線上檔案儲存網路服務,可用於在 Google 的基礎架構上儲存及存取資料。這項服務結合了 Google Cloud 的效能和擴充性,並提供先進的安全性與共用功能。此外,這項服務也提供免費方案,是代管簡易店家搜尋器的絕佳方法。
使用 Cloud Storage 時,檔案會儲存在值區中,與電腦上的目錄類似。如要代管網頁,您必須先建立值區。您必須為值區選擇專屬名稱,例如使用值區名稱做為值區名稱。
- 決定名稱後,請在 Cloud Shell 中執行下列指令:
$ gsutil mb gs://yourname-store-locator
gsutil 是用於與 Cloud Storage 互動的工具。mb 指令能以創意方式代表「建立值區」。如要進一步瞭解所有可用的指令 (包括您使用的指令),請參閱 gsutil 工具。
根據預設,在 Cloud Storage 託管的值區和檔案為私人檔案。然而,對於您的店家搜尋器,您想要公開所有的檔案,以便透過網際網路讓所有使用者存取。您可以在上傳檔案後公開公開檔案,但這將會相當繁瑣。您只須為您建立的值區設定預設存取層級,而所有上傳至該檔案的檔案都會沿用該存取層級。
- 執行下列指令,並將
yourname-store-locator替換為您為值區選擇的名稱:
$ gsutil defacl ch -u AllUsers:R gs://yourname-store-locator
- 現在您可以透過下列指令上傳目前目錄中的所有檔案 (目前只包括
index.html和app.js檔案):
$ gsutil -h "Cache-Control:no-cache" cp * gs://yourname-store-locator
現在,您應該已經有一個網頁,當中提供線上地圖。要查看的網址會是 http://storage.googleapis.com/yourname-store-locator/index.html,和您之前選擇的值區名稱取代了 yourname-store-locator 部分。
清理
如要清除在這項專案中建立的所有資源,最簡單的方法是關閉您在本教學課程開始時建立的 Google Cloud 專案:
- 在 Cloud Console 中開啟「Settings」(設定) 頁面
- 按一下 [Select a project] (選取專案)。
- 選取您在本教學課程開始時建立的專案,然後按一下 [Open] (開啟)。
- 輸入專案 ID,然後按一下 [Shutdown]。
9. 恭喜
恭喜!您已完成這個程式碼研究室。
您學到的內容
- 透過 Maps JavaScript API 新增自訂樣式的地圖
- 將 資料層載入採用 GeoJSON 格式的地圖
- 使用 Street View Static API 在網頁中顯示街景服務圖片。
- 使用 Places Library 為頁面新增地方資訊自動完成搜尋列
- 使用距離矩陣服務,以單一 API 呼叫來計算多個距離
- 使用瀏覽器中的 Cloud Shell 指令列介面,管理及測試 Google Cloud Platform 中的網路開發專案
- 使用 Cloud Storage 託管網站
瞭解詳情
- 您也可以參考對應紐約市地鐵的說明,瞭解如何透過 Google App Engine 代管網頁地圖。
- 探索其他 Google 地圖平台程式碼研究室,例如建構鄰近商家搜尋服務。
- 請回答下列問題,協助我們製作您覺得最實用的內容:
您還想查看其他程式碼研究室嗎?
上方未列出您所需的程式碼研究室嗎?請在這裡提出新的問題。
如想進一步研究程式碼,請前往 https://github.com/googlecodelabs/google-maps-simple-store-locator 查看原始碼存放區。