
1. Overview
Jenkins is one of the most popular continuous integration solutions available. It's used to automate the essential non-human parts of the software development process. By deploying Jenkins to Kubenetes on Google Cloud and utilizing the GKE plugin, we're able to quickly and automatically scale build executors as the need arises. Combined with Cloud Storage, we're able to build and test an application with minimal effort.
What you'll do
- Deploy Jenkins to a Kubernetes cluster
- Deploy and configure the Jenkins GKE plugin to enable Jenkins to create and destroy pods as executor nodes
- Build and test a sample SpringBoot Application
- Build and publish a container to Google Container Registry
- Deploy the sample application to a staging and production GKE environment
What you'll need
- A Google Cloud project with billing set up. If you don't have one you'll have to create one.
2. Getting set up
This codelab can run completely on Google Cloud Platform without any local installation or configuration.
Cloud Shell
Throughout this codelab, we'll provision and manage different cloud resources and services using the command line via Cloud Shell.
Enable API's
Here are the APIs we'll need to enable on our project:
- Compute Engine API - Creates and runs virtual machines
- Kubernetes Engine API - Builds and manages container-based applications
- Cloud Build API - Google Cloud's continuous integration and continuous delivery platform
- Service Management API - Allows service producers to publish services on Google Cloud Platform
- Cloud Resource Manager API - Creates, reads, and updates metadata for Google Cloud resource containers
Enable the required APIs with the following gcloud command:
gcloud services enable compute.googleapis.com \
container.googleapis.com \
cloudbuild.googleapis.com \
servicemanagement.googleapis.com \
cloudresourcemanager.googleapis.com \
--project ${GOOGLE_CLOUD_PROJECT}
Create a GCS bucket
We'll need a GCS bucket to upload our test work. Let's create a bucket using our project ID in the name to ensure uniqueness:
gsutil mb gs://${GOOGLE_CLOUD_PROJECT}-jenkins-test-bucket/
3. Creating Kubernetes clusters
Create the Cluster
Next, we'll create a GKE cluster that will host our Jenkins system, including the pods that will be dispatched as worker nodes. The additional scope indicated by the --scopes flag will allow Jenkins to access Cloud Source Repositories and Container Registry. In the Cloud Console, run the following:
gcloud container clusters create jenkins-cd \
--machine-type n1-standard-2 --num-nodes 1 \
--zone us-east1-d \
--scopes "https://www.googleapis.com/auth/source.read_write,cloud-platform" \
--cluster-version latest
Let's also deploy 2 clusters to host our staging and prod builds of our sample application:
gcloud container clusters create staging \
--machine-type n1-standard-2 --num-nodes 1 \
--zone us-east1-d \
--cluster-version latest
gcloud container clusters create prod \
--machine-type n1-standard-2 --num-nodes 2 \
--zone us-east1-d \
--cluster-version latest
 Verify
Once the clusters have been created, we can confirm that they're running with gcloud container clusters list
The output should have RUNNING in the STATUS column:
NAME        LOCATION    MASTER_VERSION  MASTER_IP     MACHINE_TYPE   NODE_VERSION  NUM_NODES  STATUS
jenkins-cd  us-east1-d  1.15.9-gke.9    34.74.77.124  n1-standard-2  1.15.9-gke.9  2          RUNNING
prod        us-east1-d  1.15.9-gke.9    35.229.98.12  n1-standard-2  1.15.9-gke.9  2          RUNNING
staging     us-east1-d  1.15.9-gke.9    34.73.92.228  n1-standard-2  1.15.9-gke.9  2          RUNNING
4. Deploy Jenkins with Helm
Install Helm
We'll be using Helm, an application package manager for Kubernetes, to install Jenkins on our cluster. To get started, download the project that includes the Kubernetes manifests that we'll use to deploy Jenkins:
git clone https://github.com/GoogleCloudPlatform/continuous-deployment-on-kubernetes.git ~/continuous-deployment-on-kubernetes
Change your current working directory to the project directory:
cd ~/continuous-deployment-on-kubernetes/
Create a cluster role binding to grant yourself cluster-admin role permissions:
kubectl create clusterrolebinding cluster-admin-binding --clusterrole=cluster-admin --user=$(gcloud config get-value account)
Connect to your jenkins cluster by getting its credentials:
gcloud container clusters get-credentials jenkins-cd --zone us-east1-d --project ${GOOGLE_CLOUD_PROJECT}
And download the Helm binary to your Cloud Console:
wget https://storage.googleapis.com/kubernetes-helm/helm-v2.14.1-linux-amd64.tar.gz
Unzip the file and copy the included helm file to your current working directory:
tar zxfv helm-v2.14.1-linux-amd64.tar.gz && \
cp linux-amd64/helm .
Tiller is the server side of Helm that runs on the Kubernetes cluster. Let's create a service account named tiller:
kubectl create serviceaccount tiller \
--namespace kube-system
And bind it to the cluster-admin cluster role so that it can make changes:
kubectl create clusterrolebinding tiller-admin-binding \
--clusterrole=cluster-admin \
--serviceaccount=kube-system:tiller
Now we can initialize Helm and update the repo:
./helm init --service-account=tiller && \
./helm repo update
Verify
Confirm that Helm is good to go with ./helm version - this should return the version numbers of the client and server:
Client: &version.Version{SemVer:"v2.14.1", GitCommit:"5270352a09c7e8b6e8c9593002a73535276507c0", GitTreeState:"clean"}
Server: &version.Version{SemVer:"v2.14.1", GitCommit:"5270352a09c7e8b6e8c9593002a73535276507c0", GitTreeState:"clean"}
Install Jenkins
Now that Helm is installed on our cluster, we're ready for the Jenkins installation:
./helm install stable/jenkins -n cd \
-f jenkins/values.yaml \
--version 1.2.2 --wait
Verify
Let's check on the pods:
kubectl get pods
The output should show our Jenkins pod with a RUNNING status:
NAME                          READY     STATUS    RESTARTS   AGE
cd-jenkins-7c786475dd-vbhg4   1/1       Running   0          1m
Confirm that the Jenkins service was created properly:
kubectl get svc
The output should look something like this:
NAME               TYPE        CLUSTER-IP      EXTERNAL-IP   PORT(S)     AGE
cd-jenkins         ClusterIP   10.35.241.170   <none>        8080/TCP    2m27s
cd-jenkins-agent   ClusterIP   10.35.250.57    <none>        50000/TCP   2m27s
kubernetes         ClusterIP   10.35.240.1     <none>        443/TCP     75m
The Jenkins installation will be using the Kubernetes Plugin to create builder agents. They will be automatically launched by the Jenkins master as needed. When their work is done, they are automatically terminated and their resources are added back to the cluster's resource pool.
Connect to Jenkins
Jenkins is running on our cluster but to access the UI, let's set up port forwarding from Cloud Shell:
export POD_NAME=$(kubectl get pods --namespace default -l "app.kubernetes.io/component=jenkins-master" -l "app.kubernetes.io/instance=cd" -o jsonpath="{.items[0].metadata.name}") &&
kubectl port-forward $POD_NAME 8080:8080 >> /dev/null &
An admin password was generated during the installation. Let's retrieve it:
printf $(kubectl get secret cd-jenkins -o jsonpath="{.data.jenkins-admin-password}" | base64 --decode);echo
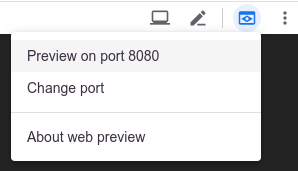
At the top of the Cloud Shell, click on the Web Preview icon  and select ‘Preview on port 8080'
We should see a login screen for Jenkins where we can enter the admin for username and the password returned at the previous step:
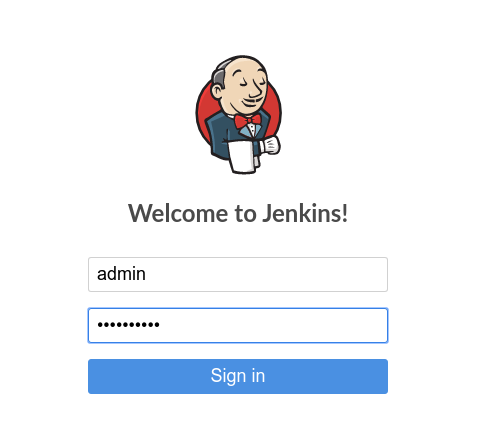
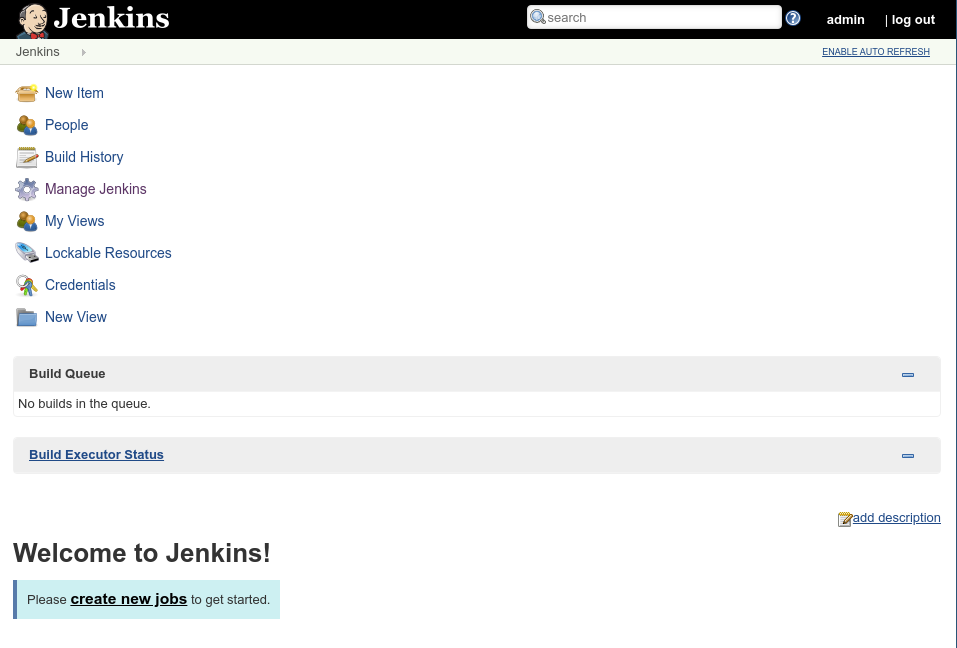
When we click Sign in we should be directed to Jenkins' main page.
5. Install and configure GKE plugin
The Google Kubernetes Engine Plugin allows us to publish deployments built within Jenkins to our Kubernetes clusters running within GKE. There is some configuration that needs to be done with IAM permissions on your project. We'll deploy that configuration using Terraform.
First, download the GKE plugin project:
git clone https://github.com/jenkinsci/google-kubernetes-engine-plugin.git ~/google-kubernetes-engine-plugin
Automated IAM Permissions Configuration
Change your current working directory to the rbac directory of the GKE project we cloned earlier:
cd ~/google-kubernetes-engine-plugin/docs/rbac/
gcp-sa-setup.tf is a Terraform configuration file that will create a custom GCP IAM role with restricted permissions along with a GCP service account to grant that role to. The file requires values for the project, region and service account name variables. We provide those values by declaring the following environment variables first:
export TF_VAR_project=${GOOGLE_CLOUD_PROJECT}
export TF_VAR_region=us-east1-d
export TF_VAR_sa_name=kaniko-role
Initialize Terraform, generate a plan, and apply it:
terraform init
terraform plan -out /tmp/tf.plan
terraform apply /tmp/tf.plan && rm /tmp/tf.plan
The service account will need storage admin permissions to save to our Cloud Storage bucket:
gcloud projects add-iam-policy-binding ${GOOGLE_CLOUD_PROJECT} \
--member serviceAccount:kaniko-role@${GOOGLE_CLOUD_PROJECT}.iam.gserviceaccount.com \
--role 'roles/storage.admin'
It'll also need container permissions for the deployment stages of our pipeline:
gcloud projects add-iam-policy-binding ${GOOGLE_CLOUD_PROJECT} --member \
serviceAccount:kaniko-role@${GOOGLE_CLOUD_PROJECT}.iam.gserviceaccount.com --role 'roles/container.developer'
Now we can use Helm to set up cluster permissions for the GKE plugin using the gke robot deployer. Change your working directory to the GKE project's helm directory:
cd ~/google-kubernetes-engine-plugin/docs/helm/
And install using the provided Helm chart:
export TARGET_NAMESPACE=kube-system && \
envsubst < gke-robot-deployer/values.yaml | helm install ./gke-robot-deployer --name gke-robot-deployer -f -
6. Configure Jenkins
Service Account Keys
In order for the service account to function properly, we'll need to generate a private key file and add it as a Kubernetes secret. First, generate the file will the following gcloud command:
gcloud iam service-accounts keys create /tmp/kaniko-secret.json --iam-account kaniko-role@${GOOGLE_CLOUD_PROJECT}.iam.gserviceaccount.com
We'll create a secret key in kubernetes secret store with that file:
kubectl create secret generic jenkins-int-samples-kaniko-secret --from-file=/tmp/kaniko-secret.json
Download the json file to your local disk by accessing the Download File item from the Cloud Shell's 3-dot menu:
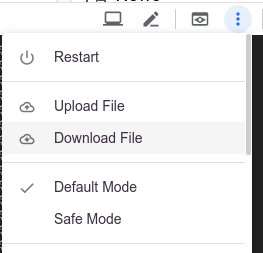
Enter the file path /tmp/kaniko-secret.json and click Download.
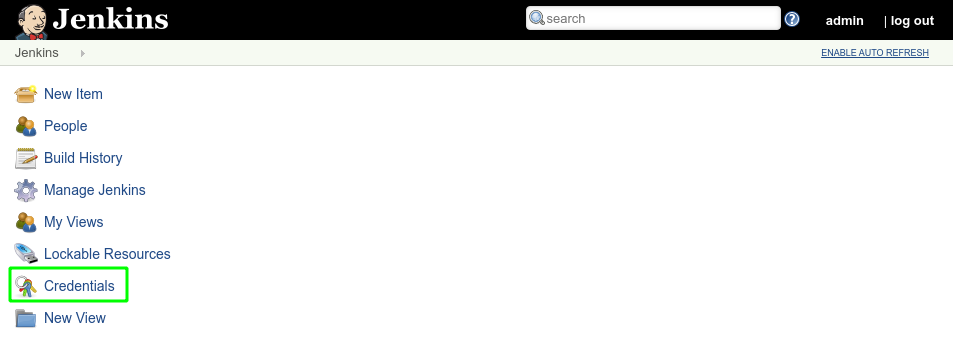
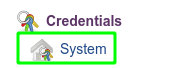
Back on the Jenkins page, on the left side pane, click Credentials, then System.
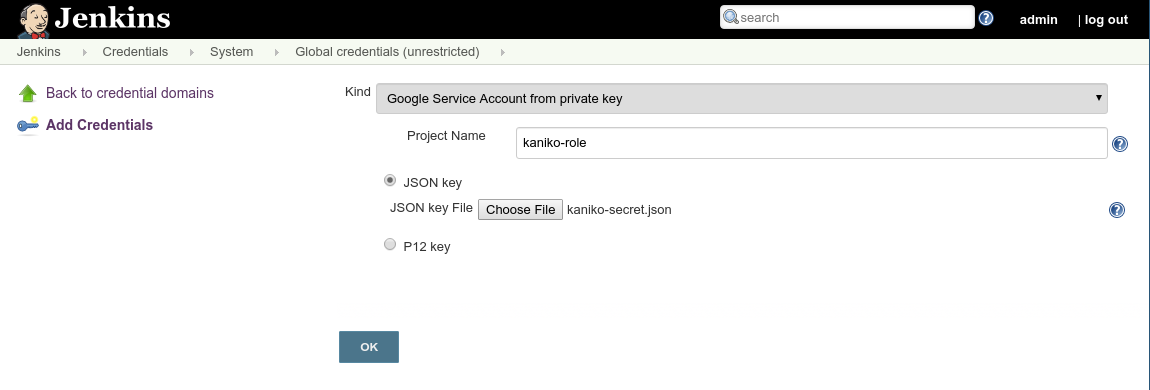
Under the section of the page titled System, Click Global credentials then Add credentials on the left:


In the Kind dropdown, select Google Service Account from private key. Enter ‘kaniko-role' as the name, then upload your JSON key that was created in the preceding steps and click OK.
Environment Variables
There are some environment variables that we'll need to define Jenkins before we create the multi-branch pipeline. They are:
- JENK_INT_IT_ZONE - the zone of the Kubernetes cluster. In our case
us-east1-d - JENK_INT_IT_PROJECT_ID - refers to the GCP project ID hosting this instance of Jenkins
- JENK_INT_IT_STAGING - our ‘staging' cluster name, for demonstration purposes it's
staging - JENK_INT_IT_PROD - our ‘prod' cluster name. For demonstration purposes, it's
prod - JENK_INT_IT_BUCKET - the Google Cloud Storage bucket created in the earlier step
- JENK_INT_IT_CRED_ID - refers to the credentials created using the json in the previous step. The value should match the name we gave it,
kaniko-role
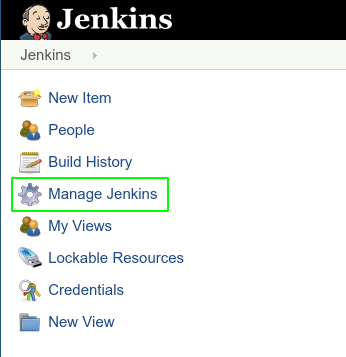
To add these, go to Manage Jenkins:
Then Configure System:

There will be a section named Global properties, and when we check the box for Environment variables we'll get an Add button we'll click to add the variables above as key value pairs:
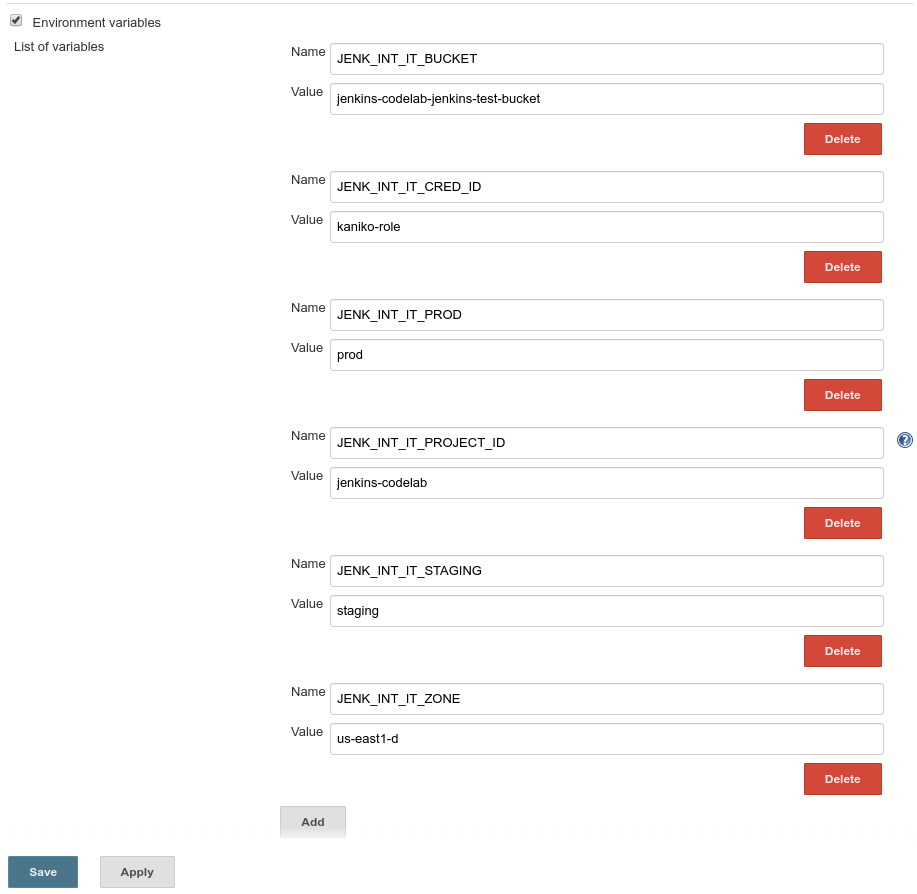
Click the Save button at the bottom of the page to apply the changes.
7. Setup a pipeline
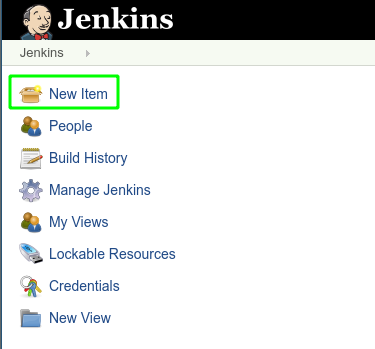
In Jenkins click on ‘New Item':
Enter ‘jenkins-integration-sample' for the name and select ‘Multibranch Pipeline' as the project type, and click OK:

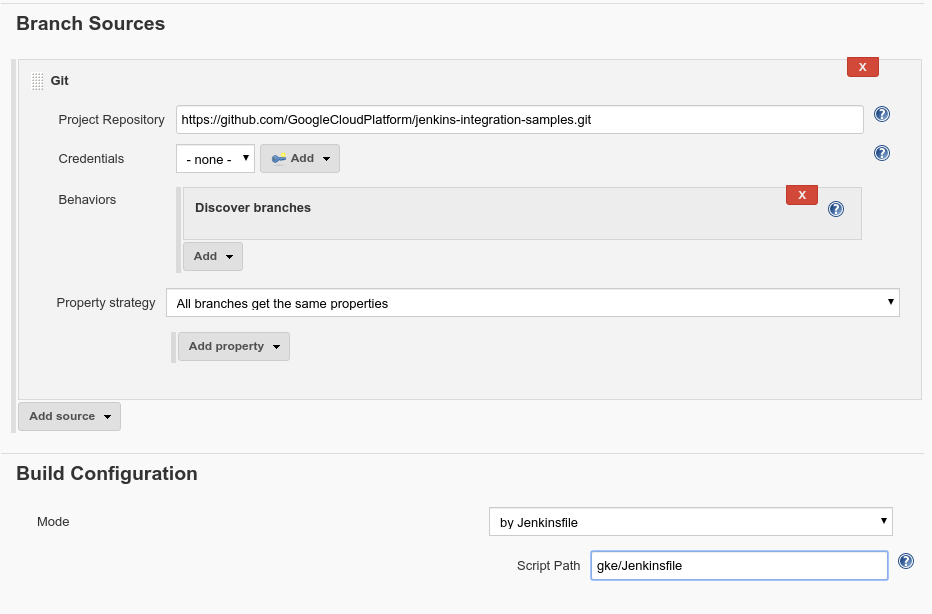
We'll be redirected to the pipeline configuration page. Under Branch Sources enter https://github.com/GoogleCloudPlatform/jenkins-integration-samples.git as the Project Repository. Under Build Configuration enter ‘gke/Jenkinsfile' as the Script Path.
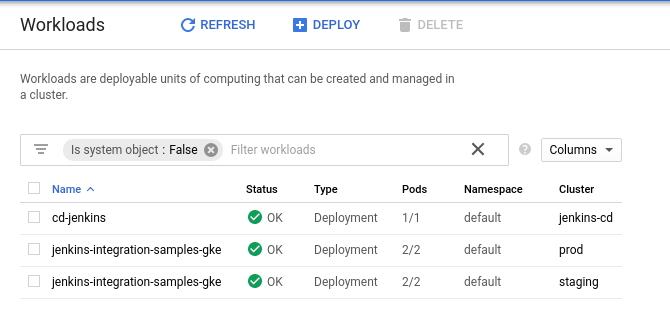
Click Save to Apply these settings. Upon saving, Jenkins will kick off a scan of the repository and a subsequent build for each branch. As it progresses, you'll see pods being created, run, and destroyed as the builds progress on the Kubernetes Workloads page.
When the builds are finished, you'll find two items on the Kubernetes Workloads page named jenkins-integration-samples-gke, each corresponding with either the prod or testing cluster. The status will read OK:
Using the following gcloud command we'll see that we have uploaded a container image to the Google Container Registry corresponding to our pipeline:
gcloud container images list
To see the workload in your browser, get the credentials for the prod cluster:
gcloud container clusters get-credentials prod --zone us-east1-d --project ${GOOGLE_CLOUD_PROJECT}
And run the following to set up a port forward from your shell's port 8081 to your workload's port 8080:
export POD_NAME=$(kubectl get pods -o jsonpath="{.items[0].metadata.name}") &&
kubectl port-forward $POD_NAME 8081:8080 >> /dev/null &
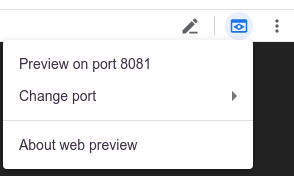
At the top of the Cloud Shell, click on the Web Preview icon and select ‘Preview on port 8081'
8. Cleanup
We've explored how to deploy a Jenkins and a sample multibranch pipeline on Kubernetes. Now it's time to clean up our project of any resources we've created.
Delete the Project
If you prefer, you can delete the entire project. In the GCP Console, go to the Cloud Resource Manager page:
In the project list, select the project we've been working in and click Delete. You'll be prompted to type in the project ID. Enter it and click Shut Down.
Alternatively, you can delete the entire project directly from Cloud Shell with gcloud:
gcloud projects delete $GOOGLE_CLOUD_PROJECT
If you prefer to delete the different billable components one by one, proceed to the next section.
Kubernetes Cluster
Delete the entire Kubernetes cluster with gcloud:
gcloud container clusters delete jenkins-cd --zone=us-east1-d
Storage Buckets
Remove all of the uploaded files and delete our bucket with gsutil:
gsutil rm -r gs://${GOOGLE_CLOUD_PROJECT}-jenkins-test-bucket
Google Container Registry Images
We'll delete the Google Container Registry images using the image digests. First, retrieve the digests with the following command:
gcloud container images list-tags gcr.io/${GOOGLE_CLOUD_PROJECT}/jenkins-integration-samples-gke --format="value(digest)"
Then for each digest returned:
gcloud container images delete gcr.io/${GOOGLE_CLOUD_PROJECT}/jenkins-integration-samples-gke@sha256:<DIGEST>
9. Congratulations!
Woo hoo! You did it. You've learned how to deploy Jenkins on GKE and dispatch jobs to Kubernetes clusters.
What we've covered
- We deployed a Kubernetes Cluster and used Helm to install Jenkins
- We installed and configured the GKE plugin to enable Jenkins to deploy build artifacts to Kubernetes clusters
- We configured Jenkins to set up a multibranch pipeline that dispatches work to GKE clusters