1. 准备工作
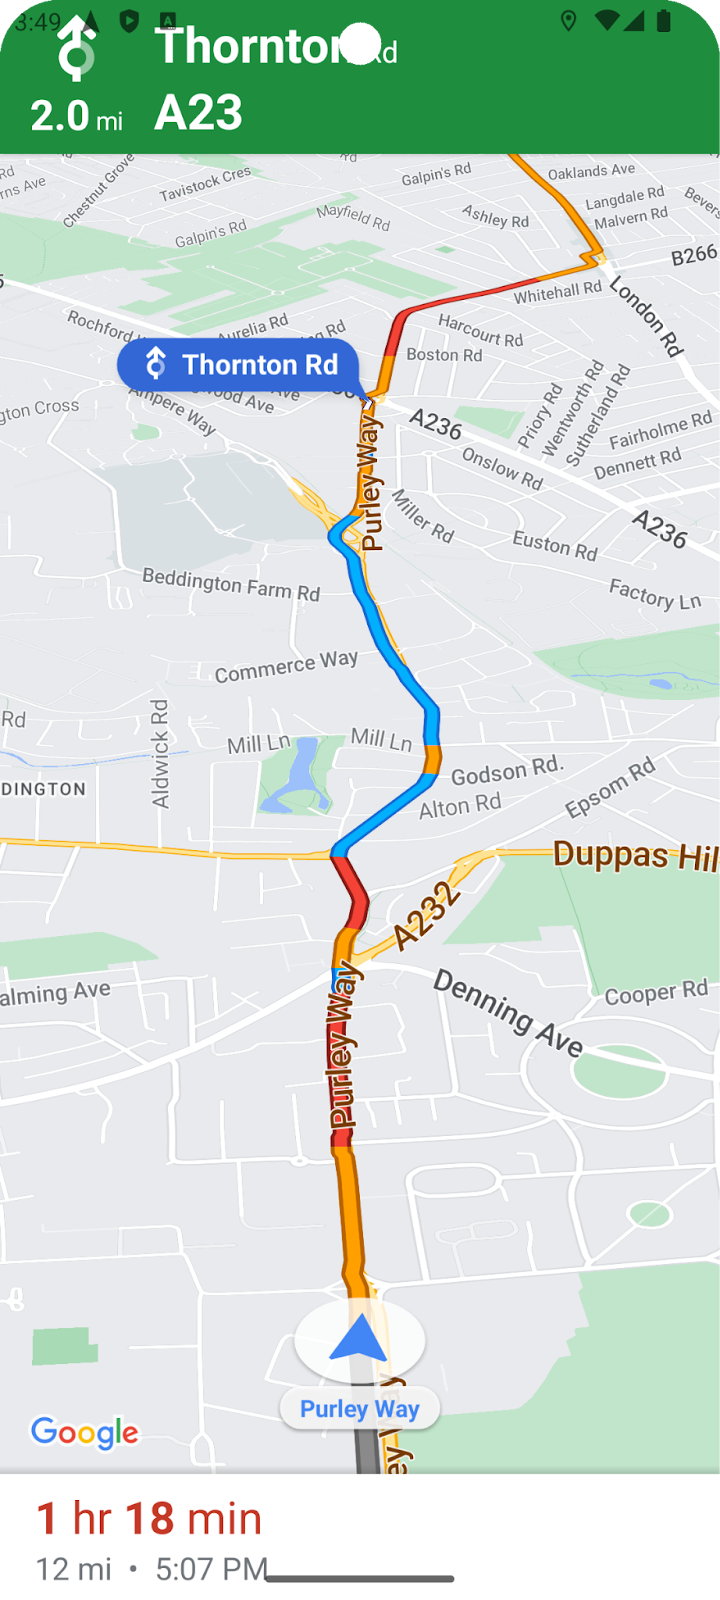
此 Codelab 将教您创建一个简单的 Android 应用,该应用使用 Google Maps Platform Navigation SDK 导航到预配置的目的地。
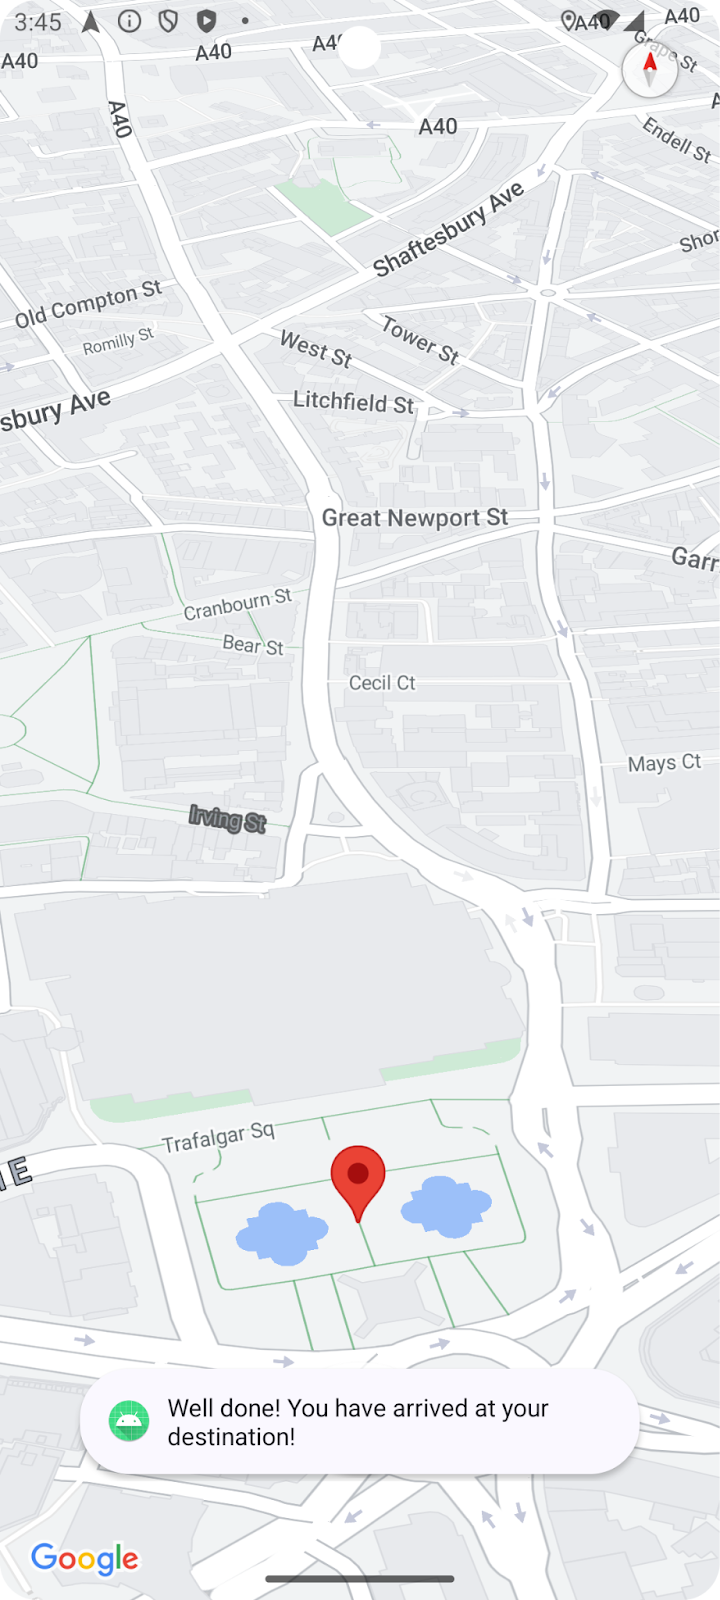
完成后,您的应用将如下所示。
前提条件
- 了解使用 Kotlin 进行 Android 应用开发的基础知识
- 对 Google Maps SDK 的基本概念(例如地图、地点、坐标)有一定了解。
学习内容
- 如何创建一个简单的 Android 应用,使用 Navigation SDK 导航到目的地。
- 如何从远程 Google Maven 制品库集成 Navigation SDK
- 如何管理位置信息权限和 Navigation SDK 最终用户条款的用户同意书
- 如何初始化 SDK
- 如何设置目的地并开始导航。
所需条件
- 安装了最新稳定版 Android Studio。此 Codelab 是使用 Android Studio Jellyfish 创建的。如果您使用的是其他版本,界面和组件的外观和布局可能会有所不同。
- 启用了结算功能的 Google 账号和项目。
- 一部处于开发者模式且启用了 USB 调试的 Android 设备或一个 Android 模拟器。无论您选择哪种方法,都必须满足 Navigation SDK 的最低要求
2. 进行设置
如果您还没有已启用结算功能的 Google Cloud Platform 账号和项目,请按照 Google Maps Platform 使用入门说明设置 Google Cloud 项目 https://developers.google.com/maps/gmp-get-started
在控制台中选择您的 Google Cloud 项目
在 Cloud 控制台中,点击项目下拉菜单,然后选择要用于此 Codelab 的项目。

在项目中启用 Navigation SDK
在 Google Cloud Marketplace 中,启用此 Codelab 所需的 Google Maps Platform API 和 SDK。
在 Google Cloud 控制台中,依次前往“API 和服务”>“库”,然后搜索“Navigation SDK”。
您应该会看到一条搜索结果。
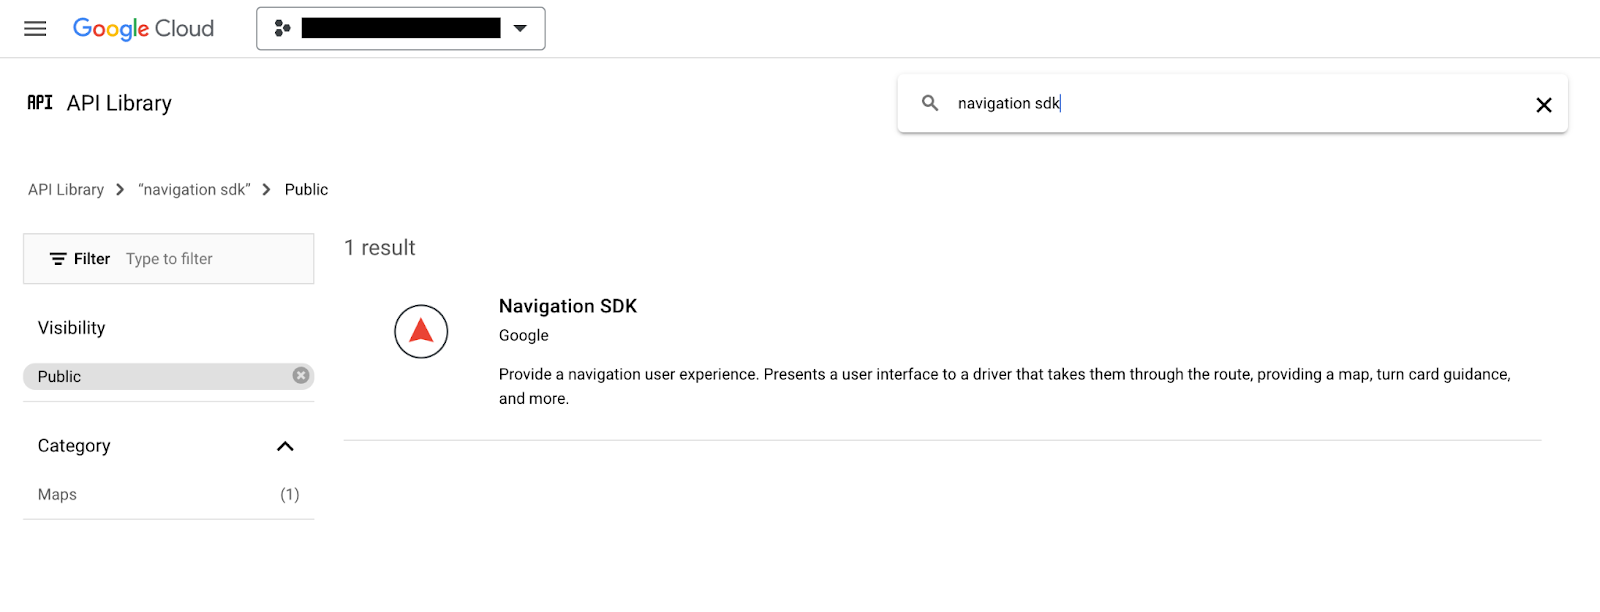
点击 Navigation SDK 结果,打开“Product Details”页面。点击“启用”按钮,为您的项目启用 SDK。
针对 Google Maps SDK for Android 重复此过程。
创建 API 密钥
在 Cloud Console 的凭据页面中,生成 API 密钥。您可以按照 Google Maps Platform 使用入门中快速入门部分第 3 步中的步骤操作。向 Google Maps Platform 发出的所有请求都需要 API 密钥。
3. 获取示例项目文件
本部分介绍如何通过从此 Codelab 的 GitHub 代码库中克隆文件来设置基本的空 Android Studio 项目。GitHub 代码库包含 Codelab 代码的“优化前”和“优化后”版本。本 Codelab 将从空白项目模板开始,逐步构建到完成状态。如果遇到问题,您可以将代码库中已完成的项目作为参考。
克隆此 GitHub 代码库以获取此 Codelab 的代码。
git clone https://github.com/googlemaps-samples/codelab-navigation-101-android-kotlin.git
如果您未安装 git,请点击此按钮获取代码:
为帮助您尽快入门,代码库的 Starter 文件夹中包含一些起始代码,可帮助您顺利完成此 Codelab。起始项目提供了基本的应用界面和 build 配置,但未添加 Navigation SDK。此外,我们还提供了一个已完成的 Solution 项目,以便您随时跳转到后面的部分或查看进度。
在 Android Studio 中打开克隆的代码库
在本地克隆代码库后,使用 Android Studio 将 Starter 文件夹作为现有项目打开。
- 在“Welcome to Android Studio”对话框中,点击“Open”按钮。
- 前往您保存克隆代码库的文件夹,然后选择顶级“
codelab-navigation-101-android-kotlin”文件夹中的Starter文件夹。 - 检查项目是否构建并运行。
添加虚拟设备,或连接硬件设备
如需将 Android 设备连接到计算机,请按照有关如何在硬件设备上运行应用的 Android Studio 说明操作。您也可以使用 Android 虚拟设备 (AVD) 管理器来配置虚拟设备。选择模拟器时,请务必选择一个包含 Google API 的映像。
在 Android Studio 中,点击“Run”菜单选项或 Play 按钮图标。按提示选择设备。
4. 将 Navigation SDK 添加到您的应用
将 Navigation SDK 库和 API 密钥添加到您的项目中
如需将 Navigation SDK 库添加到您的应用,您需要修改应用级 build.gradle.kts,以从 Google Maven 制品库中提取 Navigation SDK 并配置版本号。
在 build 配置中创建一个变量来存储 Navigation SDK 版本号。
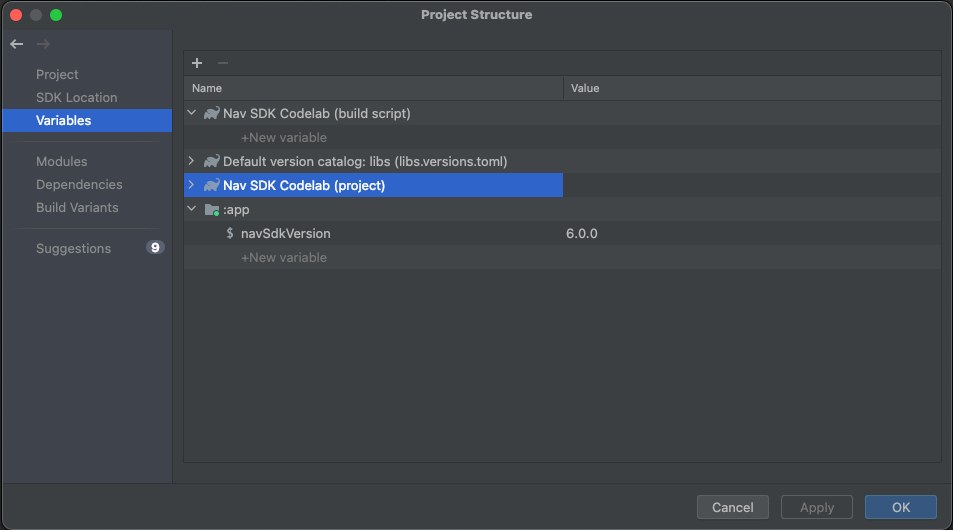
在应用级 build.gradle.kts 中设置变量,以包含应用中使用的 Navigation SDK 版本的值,以便将来可以轻松更改为最新版本。
如需了解最新版本号,请参阅 Navigation SDK 版本说明。
val navSdkVersion by extra("6.0.0")
您还可以使用位于 文件 >项目结构 >变量:
向 build 配置添加依赖项
现在,将以下 API 依赖项添加到应用级 build.gradle.kts. 中的依赖项块中。所使用的版本将是您刚刚在应用级 build.gradle.kts 中设置的 ${navSdkVersion} 的值:
dependencies {

   // Include the Google Navigation SDK.
   api("com.google.android.libraries.navigation:navigation:${navSdkVersion}")

...
添加您的 API 密钥
使用 Secrets Gradle 插件管理 API 密钥
我们建议您使用 Secrets Gradle 插件来安全地管理应用中的 API 密钥。该插件已作为依赖项添加到初始项目模板中,并置于顶级 build.gradle.kts 文件中。
// Top-level build file where you can add configuration options common to all sub-projects/modules.
plugins {
    id("com.google.android.libraries.mapsplatform.secrets-gradle-plugin") version "2.0.1" apply false
    //... other plugin definitions here
}
在顶级目录中打开 secrets.properties 文件,然后将 YOUR_API_KEY 替换为您的 API 密钥。由于 secrets.properties 不会签入版本控制系统,因此请将您的密钥存储在此文件中。
MAPS_API_KEY=YOUR_API_KEY
如需详细了解此主题,请参阅 Navigation SDK 文档中的向您的应用添加 API 密钥。
验证 local.defaults.properties 的内容
空项目还在顶级目录(即 secrets.properties 文件所在的文件夹)中包含一个 local.defaults.properties 文件。打开它,然后观察以下代码。
MAPS_API_KEY=DEFAULT_API_KEY
其目的是为 MAPS_API_KEY 属性提供备份值,以防 secrets.properties 未添加到项目中,以免构建失败。无需修改此文件。如果未找到 MAPS_API_KEY 的 secrets.properties 定义,使用默认值将在运行时停止应用运行,并显示 API 密钥错误。
检查 Android 清单是否使用了您指定的 API 密钥
打开 app/src/main/AndroidManifest.xml。您会注意到,MAPS_API_KEY 属性用于为应用设置 API 密钥:
<meta-data
    android:name="com.google.android.geo.API_KEY"
    android:value="${MAPS_API_KEY}" />
打开应用级 build.gradle.kts 文件并找到 secrets 属性。
插件的 propertiesFileName 设置应设为 secrets.properties,defaultPropertiesFileName 应设为 local.defaults.properties。
secrets {
    // Optionally specify a different file name containing your secrets.
    // The plugin defaults to "local.properties"
    propertiesFileName = "secrets.properties"

    // A properties file containing default secret values. This file can be
    // checked in version control.
    defaultPropertiesFileName = "local.defaults.properties"
}
保存所有文件,然后将项目与 Gradle 同步。
5. 配置应用权限并添加基本界面
请求确切位置信息权限
Navigation SDK 需要依赖 GPS 信号才能正常运行,因此您的应用需要请求用户授予对精确位置数据的访问权限。在 AndroidManifest.xml 中,将访问精确位置信息的权限添加为 <manifest> 元素的子元素。
<manifest xmlns:android="http://schemas.android.com/apk/res/android"
    xmlns:tools="http://schemas.android.com/tools" >
   <uses-permission
      android:name="android.permission.ACCESS_FINE_LOCATION"
   />
</manifest>
如需详细了解 Android 位置信息权限,请参阅 Android 开发者文档的请求位置信息权限部分。
如需在 Android 14 设备上运行应用,请在与精确位置信息访问权限相同的位置添加以下 uses-permission 标记,以请求前台服务位置信息权限:
<uses-permission android:name="android.permission.FOREGROUND_SERVICE_LOCATION" />
添加具有基本界面的启动 activity
当您的应用运行时,它需要在启动期间执行代码,以检查用户是否已授予访问其位置信息的权限,并处理每种可能的情况,如果尚未授予权限,则请求权限。为此,请向应用添加基本界面。此 Codelab 使用的是您在 Android Studio 中创建新的空白 View 活动时创建的界面。您将对此进行调整,以便在向导航界面 activity 添加代码之前执行位置信息权限检查。
在代码编辑器中打开 MainActivity.kt 文件并检查代码,其中显示了一个基本界面。
在运行时请求位置信息访问权限
在 Navigation SDK 初始化之前,您的应用需要触发请求以访问精确位置信息。
为确保在应用启动时进行此检查,请在 activity 的替换 onCreate() 方法中向 MainActivity 类添加一些代码。
以下代码会检查用户是否已授予精确的位置信息权限。如果未授予,它将请求此权限。在 onCreate() 方法内添加以下代码。
    val permissions =
      if (VERSION.SDK_INT >= VERSION_CODES.TIRAMISU) {
        arrayOf(permission.ACCESS_FINE_LOCATION, permission.POST_NOTIFICATIONS)
      } else {
        arrayOf(permission.ACCESS_FINE_LOCATION)
      }

    if (permissions.any { !checkPermissionGranted(it) }) {

      if (permissions.any { shouldShowRequestPermissionRationale(it) }) {
        // Display a dialogue explaining the required permissions.
      }

      val permissionsLauncher =
        registerForActivityResult(
          RequestMultiplePermissions(),
          { permissionResults ->
            if (permissionResults.getOrDefault(permission.ACCESS_FINE_LOCATION, false)) {
              onLocationPermissionGranted()
            } else {
              finish()
            }
          },
        )

      permissionsLauncher.launch(permissions)
    } else {
      android.os.Handler(Looper.getMainLooper()).postDelayed({ onLocationPermissionGranted() }, SPLASH_SCREEN_DELAY_MILLIS)
    }
  }

  private fun checkPermissionGranted(permissionToCheck: String): Boolean =
    ContextCompat.checkSelfPermission(this, permissionToCheck) == PackageManager.PERMISSION_GRANTED
向 MainActivity 类添加一个名为 onLocationPermissionGranted 的新函数,该函数将在用户授予分享其位置信息的权限时处理结果。在后续步骤中,我们将在此处添加代码以启动新的导航 activity。
private fun onLocationPermissionGranted() {
   //code to initialize Navigation SDK will go here
}
构建您的项目。如果您有任何构建错误,请查找并修复这些错误。
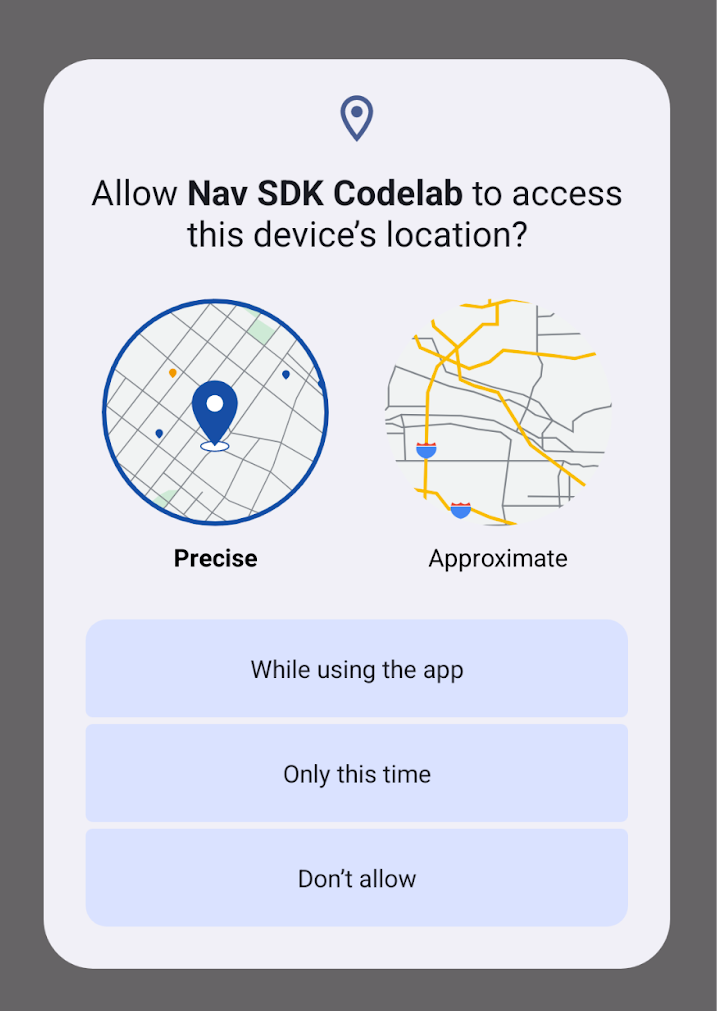
在新的虚拟设备上运行您的项目。应用安装并启动时,您应该会看到权限请求对话框。
6. 添加导航界面
您可以通过以下两种方式添加导航界面:SupportNavigationFragment 或 NavigationView。
为简单起见,此 Codelab 使用了 NavigationView。
修改布局
修改 res/layout/activity_main.xml 以添加 NavigationView 的布局。
- 打开文件并切换到代码视图。
- 将该文件的全部内容替换为
RelativeLayout中的NavigationView的新布局,如以下示例所示。由于您只需向应用添加一个导航视图,因此简单的布局即可。 - 为 NavigationView 分配 ID“
@+id/navigation_view”。
<?xml version="1.0" encoding="utf-8"?>
<RelativeLayout xmlns:android="http://schemas.android.com/apk/res/android"
   android:layout_width="match_parent"
   android:layout_height="match_parent">
 <com.google.android.libraries.navigation.NavigationView
     android:id="@+id/navigation_view"
     android:layout_width="wrap_content"
     android:layout_height="wrap_content"
      />
</RelativeLayout>
设置 Navigation activity
在 Android Studio 中,在编辑器中打开 MainActivity.kt 文件。
添加一些基本设置代码,以确保导航体验在您的应用中正常运行。在 MainActivity.kt 文件中,进行以下更改:
- 在
MainActivity类中声明一个变量以引用NavigationView:
private lateinit var navView: NavigationView
- 向
onCreate()方法添加一些代码,以获取对NavigationView的引用:
navView = findViewById(R.id.navigation_view)
navView.onCreate(savedInstanceState)
- 向
onCreate()方法添加一些代码,以确保屏幕在导航指导期间保持开启状态:
// Ensure the screen stays on during nav.
window.addFlags(WindowManager.LayoutParams.FLAG_KEEP_SCREEN_ON)
- 修改调用
ViewCompat.setOnApplyWindowInsetsListener的代码以引用NavigationView的 ID。
ViewCompat.setOnApplyWindowInsetsListener(findViewById(R.id.navigation_view)) { v, insets ->
  val systemBars = insets.getInsets(WindowInsetsCompat.Type.systemBars())
  v.setPadding(systemBars.left, systemBars.top, systemBars.right, systemBars.bottom)
  insets
}
- 将
showToast()方法添加到类中,以便向用户显示反馈:
private fun showToast(errorMessage: String) {
   Toast.makeText(this@MainActivity, errorMessage, Toast.LENGTH_LONG).show()
}
7. 初始化 Navigation SDK
现在,您已完成基本导航 activity 设置,可以初始化 Navigation SDK 了。为此,请将以下代码添加到 MainActivity.kt 文件中:
/** Starts the Navigation API, capturing a reference when ready. */
@SuppressLint("MissingPermission")
private fun initializeNavigationApi() {
   NavigationApi.getNavigator(
       this,
       object : NavigatorListener {
           override fun onNavigatorReady(navigator: Navigator) {
               // store a reference to the Navigator object
               mNavigator = navigator
               // code to start guidance will go here
           }

           override fun onError(@NavigationApi.ErrorCode errorCode: Int) {
               when (errorCode) {
                   NavigationApi.ErrorCode.NOT_AUTHORIZED -> {
                       // Note: If this message is displayed, you may need to check that
                       // your API_KEY is specified correctly in AndroidManifest.xml
                       // and is been enabled to access the Navigation API
                       showToast(
                           "Error loading Navigation API: Your API key is " +
                                   "invalid or not authorized to use Navigation."
                       )
                   }
                   NavigationApi.ErrorCode.TERMS_NOT_ACCEPTED -> {
                       showToast(
                           "Error loading Navigation API: User did not " +
                                   "accept the Navigation Terms of Use."
                       )
                   }
                   else -> showToast("Error loading Navigation API: $errorCode")
               }
           }
       },
   )

}
此代码会创建一个名为 initializeNavigationApi() 的新方法。此方法通过调用 NavigationApi.getNavigator() 获取对 Navigator 对象的引用,并实现 NavigatorListener 来处理回调。
请注意,初始化 Navigation API 后,系统将调用 NavigationListener.onNavigatorReady 方法,并将 Navigator 对象作为参数传递。上述代码将使用传递给此方法的已初始化的 Navigator 对象更新您之前声明的 mNavigator 变量。
最后,从 onLocationPermissionGranted 方法添加对 initializeNavigationApi 方法的调用。
private fun onLocationPermissionGranted() {
   initializeNavigationApi()
}
8. 为按键导航事件添加监听器
当用户遵循导航指示时,Navigation SDK 会触发事件,以便通知应用路途中的关键状态变化,例如用户重新路线或到达目的地时。在 MainActivity.kt 文件中,添加监听器来处理以下事件:
- 在
MainActivity类中,声明两个变量来引用事件监听器对象:
private var arrivalListener: Navigator.ArrivalListener? = null
private var routeChangedListener: Navigator.RouteChangedListener? = null
- 添加
registerNavigationListeners()方法,以便在初始化导航器时设置监听器。此方法会在 Arrival 事件触发时调用Navigator.clearDestinations()来重置NavigationView:
/**
* Registers a number of example event listeners that show an on screen message when certain
* navigation events occur (e.g. the driver's route changes or the destination is reached).
*/
private fun registerNavigationListeners() {
   withNavigatorAsync {
       arrivalListener =
           Navigator.ArrivalListener { // Show an onscreen message
               showToast("User has arrived at the destination!")
               mNavigator?.clearDestinations()
           }
       mNavigator?.addArrivalListener(arrivalListener)

       routeChangedListener =
           Navigator.RouteChangedListener { // Show an onscreen message when the route changes
               showToast("onRouteChanged: the driver's route changed")
           }
       mNavigator?.addRouteChangedListener(routeChangedListener)
   }
}
- 在
initializeNavigationApi方法的onNavigatorReady回调代码中添加对registerNavigationListeners()的调用:
override fun onNavigatorReady(navigator: Navigator) {
   // store a reference to the Navigator object
   mNavigator = navigator

   //listen for events en route
   registerNavigationListeners()


}
- 配置界面。在导航运行时,您可以控制导航界面的各个方面。一项重要的自定义是摄像头位置。添加对
onNavigatorReady中返回的navigator对象的setTaskRemovedBehaviour方法的调用,如下所示。如果用户滑动关闭应用,系统会终止引导和通知:
// Disables the guidance notifications and shuts down the app and background service
// when the user dismisses/swipes away the app from Android's recent tasks.
navigator.setTaskRemovedBehavior(Navigator.TaskRemovedBehavior.QUIT_SERVICE)
- 添加对
GoogleMap.followMyLocation的调用以指定CameraPerspective。您可以通过NavigatorView.getMapAsync()方法访问GoogleMap,如下所示:
navView.getMapAsync {
   googleMap  ->
   googleMap.followMyLocation(GoogleMap.CameraPerspective.TILTED)
}
- 为确保导航功能在整个应用生命周期内顺畅运行,请在
MainActivity类中实现以下方法:
override fun onSaveInstanceState(savedInstanceState: Bundle) {
   super.onSaveInstanceState(savedInstanceState)

   navView.onSaveInstanceState(savedInstanceState)
}

override fun onTrimMemory(level: Int) {
   super.onTrimMemory(level)
   navView.onTrimMemory(level)
}

override fun onStart() {
   super.onStart()
   navView.onStart()
}

override fun onResume() {
   super.onResume()
   navView.onResume()
}

override fun onPause() {
   navView.onPause()
   super.onPause()
}

override fun onConfigurationChanged(configuration: Configuration) {
   super.onConfigurationChanged(configuration)
   navView.onConfigurationChanged(configuration)
}

override fun onStop() {
   navView.onStop()
   super.onStop()
}

override fun onDestroy() {
   navView.onDestroy()
   withNavigatorAsync {
       // Unregister event listeners to avoid memory leaks.
       if (arrivalListener != null) {
           navigator.removeArrivalListener(arrivalListener)
       }
       if (routeChangedListener != null) {
           navigator.removeRouteChangedListener(routeChangedListener)
       }

       navigator.simulator?.unsetUserLocation()
       navigator.cleanup()
   }
   super.onDestroy()
}
9. 设置目的地
现在,您可以设置目的地并开始导航了。在 MainActivity.kt 文件中,进行以下更改:
- 添加了一个新的
navigateToPlace()方法,用于设置导航目的地并接受placeId参数。
/**
* Requests directions from the user's current location to a specific place (provided by the
* Place ID).
*/
private fun navigateToPlace(placeId: String) {

}
- 在
navigateToPlace()方法中,使用Waypoint.builder()方法根据传递给该方法的地点 ID 创建Waypoint。在地点 ID 无法解析为精确地址的情况下,处理这会抛出的UnsupportedPlaceIdException:
val waypoint: Waypoint? =
// Set a destination by using a Place ID (the recommended method)
try {
   Waypoint.builder().setPlaceIdString(placeId).build()
} catch (e: Waypoint.UnsupportedPlaceIdException) {
   showToast("Place ID was unsupported.")
   return
}
- 将以下代码添加到
navigateToPlace()方法中,以使用航点设置目的地:
val pendingRoute = mNavigator?.setDestination(waypoint)

// Set an action to perform when a route is determined to the destination
pendingRoute?.setOnResultListener { code ->
   when (code) {
       RouteStatus.OK -> {
           // Code to start guidance will go here
       }

       RouteStatus.ROUTE_CANCELED -> showToast("Route guidance canceled.")
       RouteStatus.NO_ROUTE_FOUND,
       RouteStatus.NETWORK_ERROR ->
           // TODO: Add logic to handle when a route could not be determined
           showToast("Error starting guidance: $code")

       else -> showToast("Error starting guidance: $code")
   }
}
Navigator 对象有一个 setDestinations() 方法,可以接受各种参数。最基本的方法是提供 Waypoint。这将默认采用 DRIVING 出行模式,适用于四轮车。setDestinations() 方法会返回一个包含 RouteStatus 对象的 ListenableResultFuture 对象。RouteStatus 将指示是否找到前往目的地的路线,并允许您处理各种错误状态(如果没有找到)。
- 进行其他配置更改,以改善导航用户体验:
// Hide the toolbar to maximize the navigation UI
supportActionBar?.hide()

// Enable voice audio guidance (through the device speaker)
mNavigator?.setAudioGuidance(Navigator.AudioGuidance.VOICE_ALERTS_AND_GUIDANCE)


// Simulate vehicle progress along the route (for demo/debug builds)
if (BuildConfig.DEBUG) {
   mNavigator?.simulator?.simulateLocationsAlongExistingRoute(
       SimulationOptions().speedMultiplier(5f)
   )
}
这些更改包括以下改进:
- 隐藏操作栏以最大限度地增加导航界面的空间。
- 启用音频引导,以播报提醒和导航说明。
- 通过指定速度乘数来设置模拟器以进行调试。
- 找到要用作目的地的地点 ID。理想情况下,该位置不会离用户所在位置太远。请使用 Google Maps Platform 地点 ID 查找工具,或通过 Places API 调用获取地点 ID。
如果您要模拟导航,可以在代码中设置用户位置,也可以从已连接的设备中获取用户位置。此 Codelab 将假定您模拟英国伦敦的某个位置。
- 向
MainActivity类添加一个伴生对象,以存储起始位置和地点 ID。此 Codelab 将使用伦敦的起始位置和 Trafalgar Square 的地点 ID:
companion object{
   const val TRAFALGAR_SQUARE ="ChIJH-tBOc4EdkgRJ8aJ8P1CUxo" //London, UK
   val startLocation = LatLng(51.345678, -0.1234456)
}
- 在
initializeNavigationApi方法内的onNavigatorReady回调中添加对navigateToPlace()方法的调用,并添加一个将在调试模式下执行的逻辑分支,用于设置用户位置:
// Disables the guidance notifications and shuts down the app and background service
// when the user dismisses/swipes away the app from Android's recent tasks.
navigator.setTaskRemovedBehavior(Navigator.TaskRemovedBehavior.QUIT_SERVICE)

mNavigator = navigator

if (BuildConfig.DEBUG) {
   mNavigator?.simulator?.setUserLocation(MainActivity.startLocation)
}
//listen for events en route
registerNavigationListeners()

navView.getMapAsync {
   googleMap  ->
   googleMap.followMyLocation(GoogleMap.CameraPerspective.TILTED)
}

//navigate to a destination
navigateToPlace(MainActivity.TRAFALGAR_SQUARE)
10. 构建并运行代码
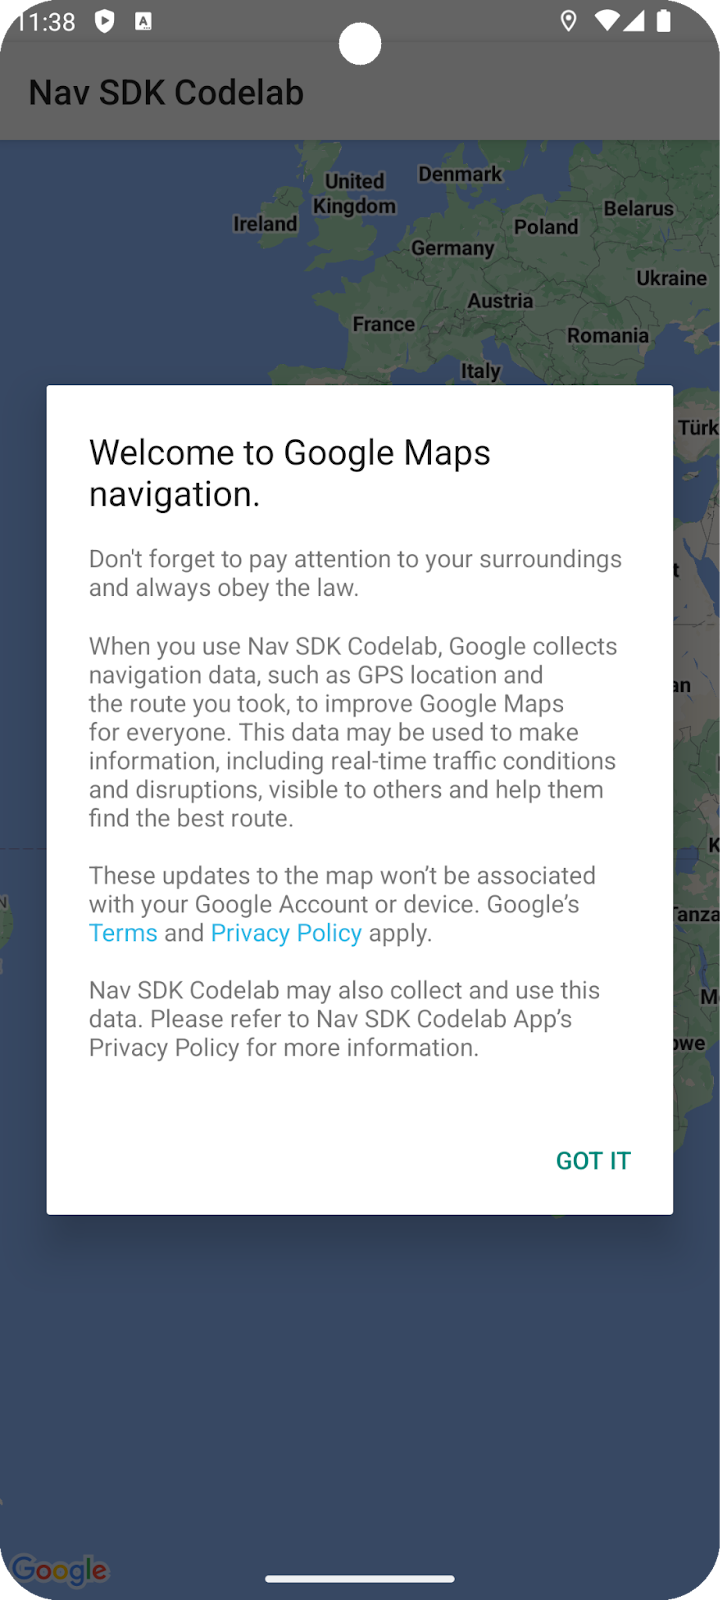
首次运行该应用时,您需要向该应用授予位置信息权限,并接受 Navigation SDK 使用条款。
注意:运行应用将调用 setDestinations() 方法,该方法在使用的目的地数量达到前 1000 个后会产生费用。如需了解详情,请参阅用量和结算。
设置位置
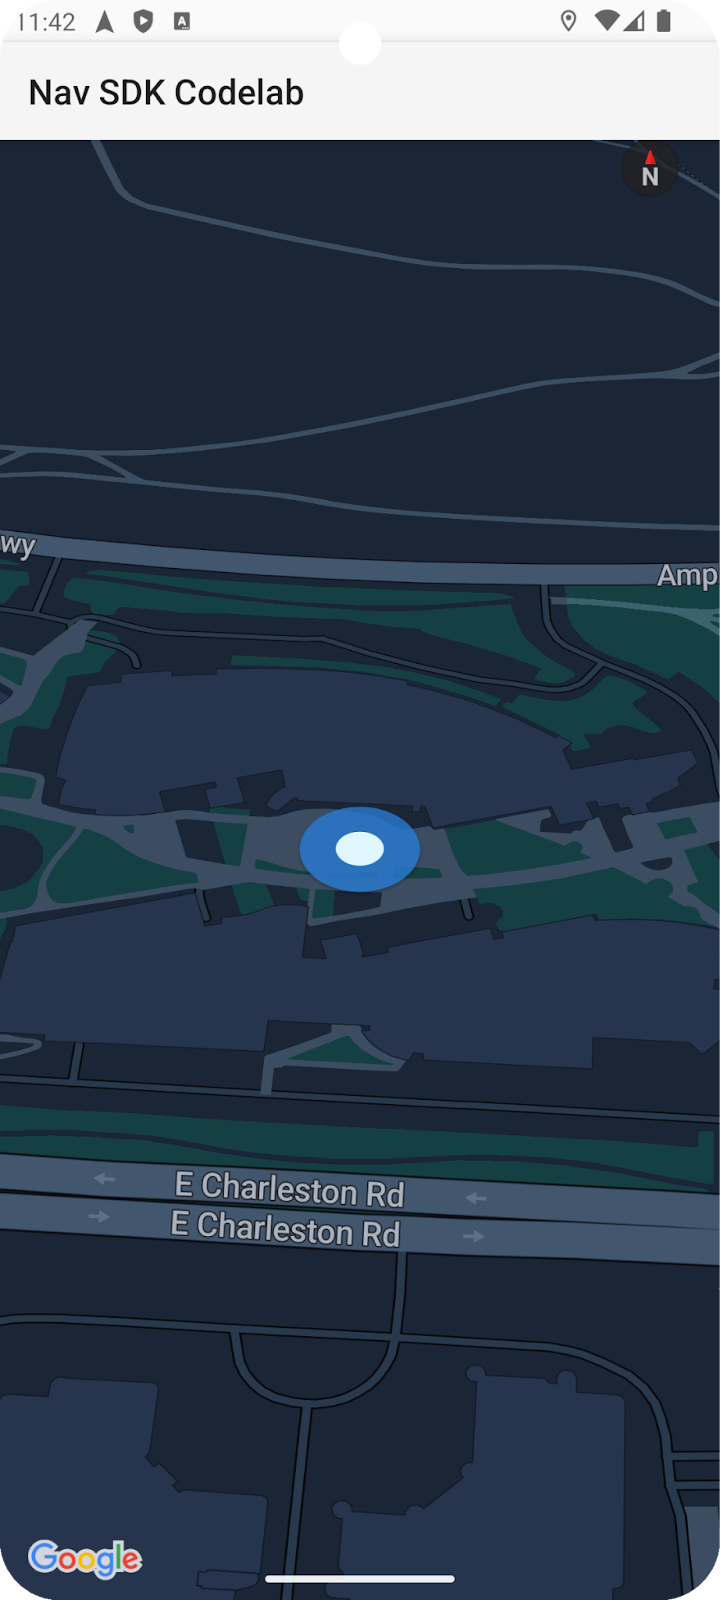
默认情况下,除非您在代码中或使用模拟器属性对话框设置位置,否则所模拟设备的位置可设为位于加利福尼亚州山景城的 Google 园区。
如果是这样,您可能会发现该应用找不到指向您所配置的地点 ID 的路线(默认情况下为澳大利亚悉尼歌剧院)。这会通过 showToast() 方法显示“找不到路线”消息来表明。
对起始位置进行硬编码
如需在代码中设置其他位置,请在 MainActivity.kt 内的 navigateToPlace() 方法中,在对 mNavigator.startGuidance() 的调用之前添加以下代码行:
mNavigator?.simulator?.setUserLocation(startLocation)
在您选择的默认位置启动模拟器
如需在设备模拟器中设置其他位置,请启动模拟器(如果尚未运行),然后点击带有“Extended Controls”提示的三点状菜单。打开的对话框中包含“位置信息”菜单选项。
例如,如果您使用悉尼歌剧院的地点 ID 作为目的地,请选择澳大利亚悉尼的地点。例如,搜索“北京海滩”,选择一条建议,然后点击“保存位置”。您还可以点击“保存点”,将相应地点添加到已保存的列表中,以备日后使用。
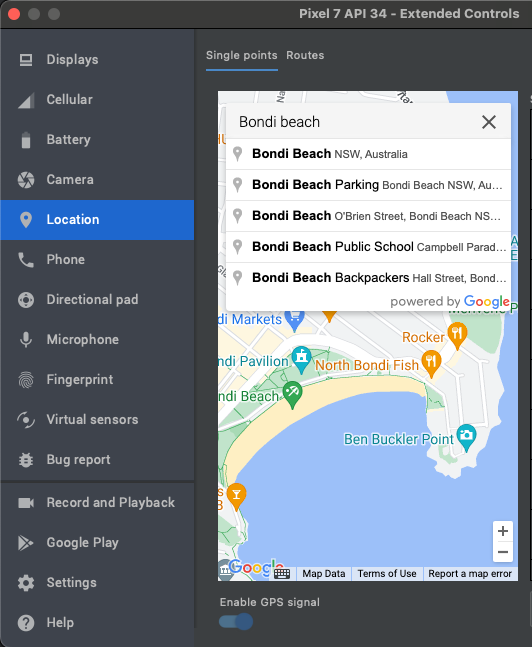
如果您为目的地设置了不同的地点 ID,请选择该目的地附近的位置,以确保模拟的路线是真实的路线,并且不会太长,不易调试。
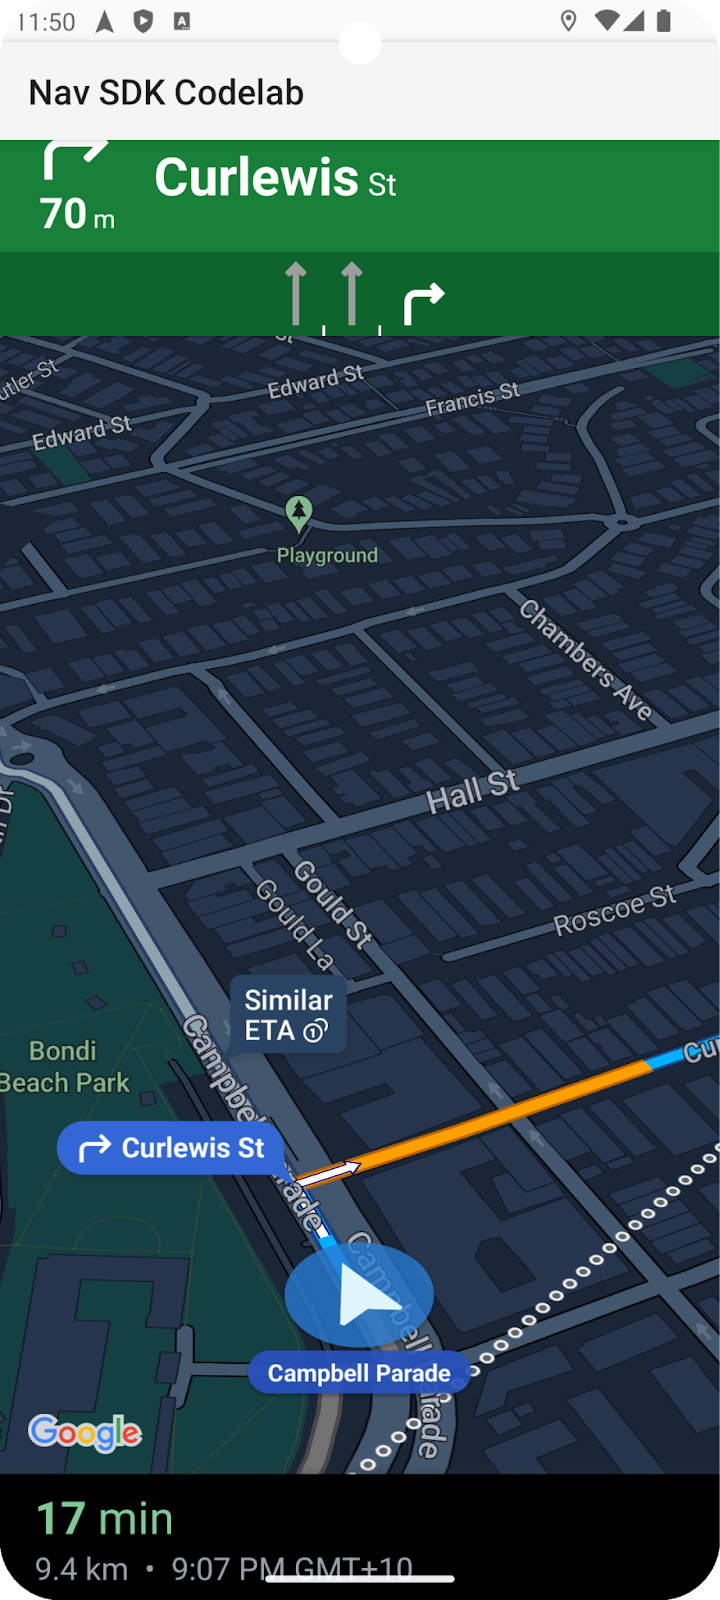
重启应用,现在应用应该会导航到目的地。
11. 恭喜!
您已完成此 Codelab。祝贺您,您已到达目的地!祝编码愉快 :-)
12. 更进一步
如果您想进一步进行应用开发,不妨从以下主题中汲取灵感。
- 监听更多导航事件。添加代码,以便在司机重新规划路线或到达时显示消息。
- 自定义导航界面。
- 如果您想接受更大的挑战,不妨尝试添加一个 Places API 地点选择器控件,以允许用户设置目的地。提示:GitHub 上的 Navigation SDK 演示版应用提供了实现示例。
- 通过采用 GitHub 上的 Navigation SDK 演示版应用中所用的方法,防止在异步调用 Navigator 和 GoogleMap 对象时出现潜在问题。在更复杂的应用场景中,当代码运行时,这些对象可能尚未完成初始化。提示:您可以在 MainActivity.kt 文件的末尾添加 InitializedNavScope 类,以便快速实现。
