1. Before you begin
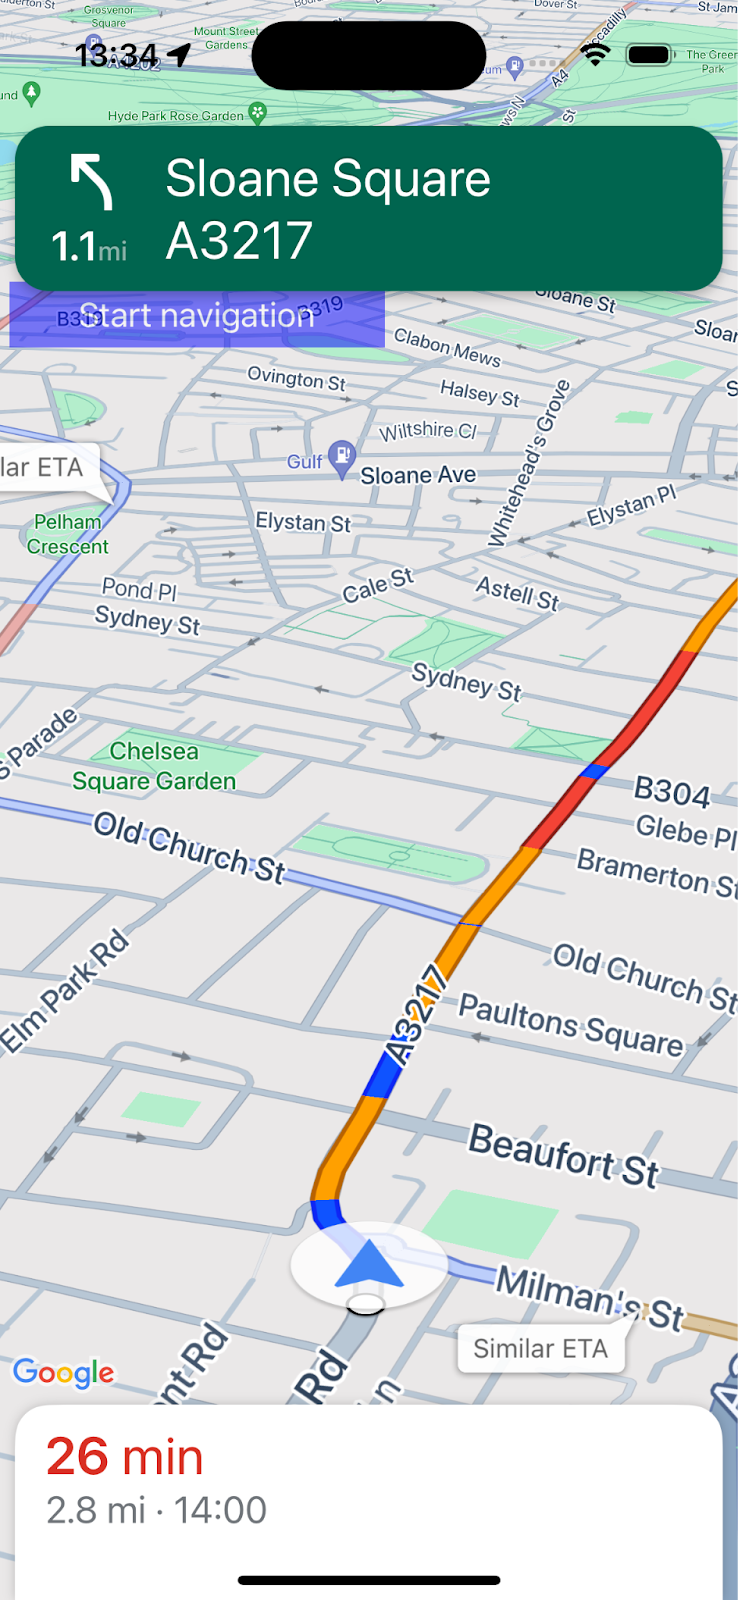
This codelab teaches you to create a simple iOS app that uses Google Maps Platform Navigation SDK to navigate to a pre-configured destination.
This is what your app will look like when you've finished.
Prerequisites
- Knowledge of basic iOS app development in Swift.
- Some familiarity with basic Google Maps SDK concepts such as creating a map centered on a specific location.
What you'll learn
- How to create a simple iOS Swift app that uses the Navigation SDK to navigate to a destination.
- How to integrate the Navigation SDK from the remote Cocoapods repository.
- How to manage location permissions and user agreement with the Navigation SDK end user terms.
- How to initialize the SDK.
- How to set a destination and start navigation guidance.
What you'll need
- The latest stable version of XCode.
- A Google Account and Project with billing enabled.
- An iOS device or an emulated device running in XCode Simulator. Whichever you choose, it must meet the minimum requirements for the Navigation SDK.
2. Get set up
If you do not already have a Google Cloud Platform account and a project with billing enabled, set up your Google Cloud project following the Getting started with Google Maps Platform instructions.
Select a Google Cloud project in the console
In the Cloud Console, click the project drop-down menu and select the project that you want to use for this codelab.

Enable Navigation SDK in your project
Enable the Google Maps Platform APIs and SDKs required for this codelab in the Google Cloud Marketplace.
Navigate to the APIs & Services > Library in Google Cloud Console and search for "Navigation SDK".
You should see one search result.
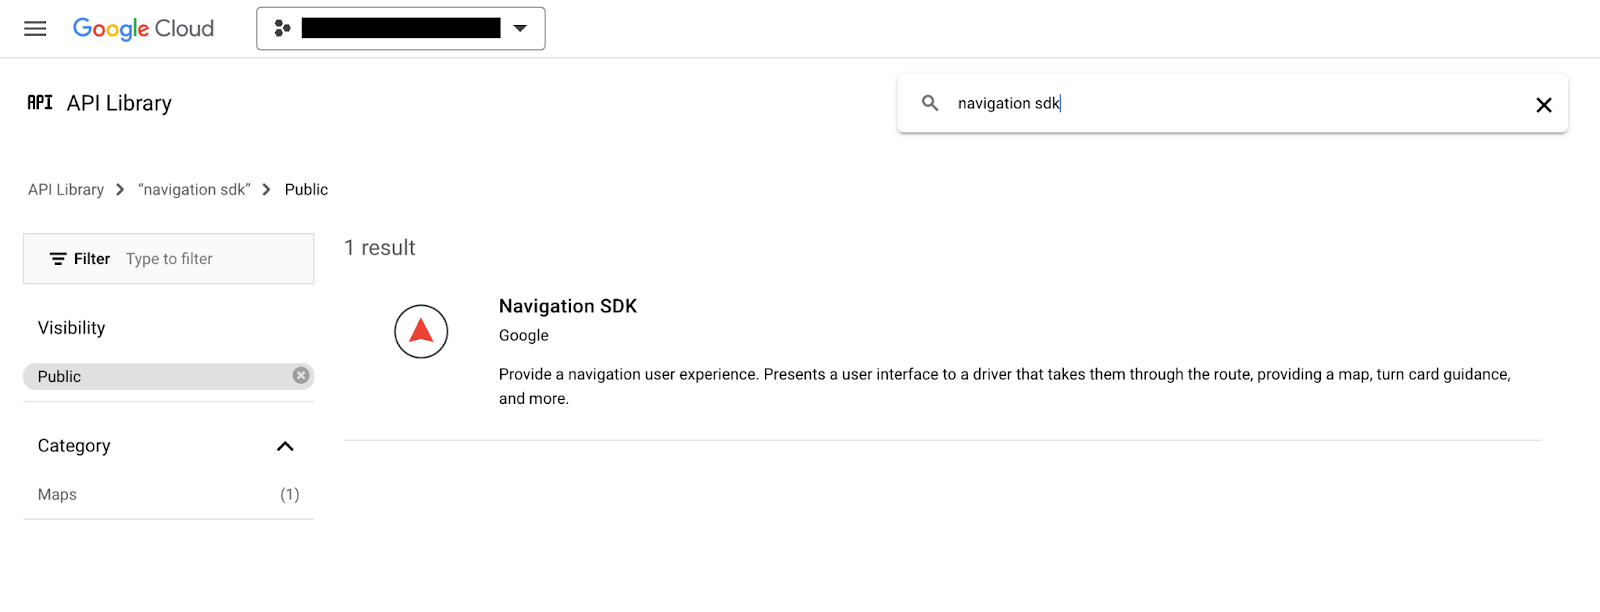
Click Navigation SDK to open the Product Details page. Click Enable to enable the SDK on your project.
Repeat this process for the Google Maps SDK for iOS.
Create an API key
Generate an API key in the Credentials page of Cloud Console. All requests to Google Maps Platform require an API key. On the Credentials page in the console. Click "+Create Credentials" at the top of the page and select "API Key" from the options.
For production use, it is best practice to set an application restriction for your API key but that is optional for this codelab.
3. Get the sample project files
This section describes how to set up a basic empty XCode App project by cloning files from the GitHub repository for this codelab. The Github repo contains before and after versions of the codelab code. The codelab will start with an empty project template and build up to the finished state. You can use the finished project in the repo as a reference if you get stuck.
Clone the repo or download the code
Navigate to the directory where you would like to store the codelab.
Then clone the repo or download the code:
git clone https://github.com/googlemaps-samples/codelab-navigation-101-ios-swift
If you don't have git installed, click this button to get the code:
To get you started as quickly as possible, the repo contains some starter code in the Starter folder to help you follow along with this codelab. There is also a finished Solution project in case you want to jump ahead or check your progress at any time. To use the solution project you will need to follow the "Install using Cocoapods" instructions below, and then run the "pod update" command from the solution/Navigation SDK Codelab folder.
Once you have cloned the repo locally, use XCode to open the Starter folder as an existing project. Check that the project builds and runs.
Connect a device or set up the XCode Simulator
4. Add the Navigation SDK to your app
There are three ways to integrate Navigation SDK into an XCode project:this codelab uses CocoaPods. For details on how to integrate using Swift Package Manager, or to manually install by downloading the SDK, see Create the Xcode project and install Navigation SDK in the Navigation SDK documentation.
Install using Cocoapods
If you don't already have the CocoaPods tool, install it on macOS by running the following command from the terminal. For details, see the CocoaPods Getting Started guide.
sudo gem install cocoapods
Create a new file called Podfile in your project folder, inside the starter/Navigation SDK Codelab folder (in XCode, File > New > File > Other > Empty, save as "Podfile")
Add the following content to your Podfile:
source 'https://github.com/CocoaPods/Specs.git'

platform :ios, '15.0'

target 'Navigation SDK Codelab' do
  pod 'GoogleNavigation', '9.1.1'
end
Save Podfile.
Open a terminal and change directory to the location where you saved your Podfile (this should be the "starter/Navigation SDK Codelab" folder in the codelab repo)
cd "<path-to-starter-project-folder>/Navigation SDK Codelab"
Run the pod install command. This installs the APIs specified in the Podfile, along with any dependencies
pod install
Close Xcode, and then open your project's .xcworkspace file to launch Xcode. From this time onwards, you must use the .xcworkspace file to open the project.
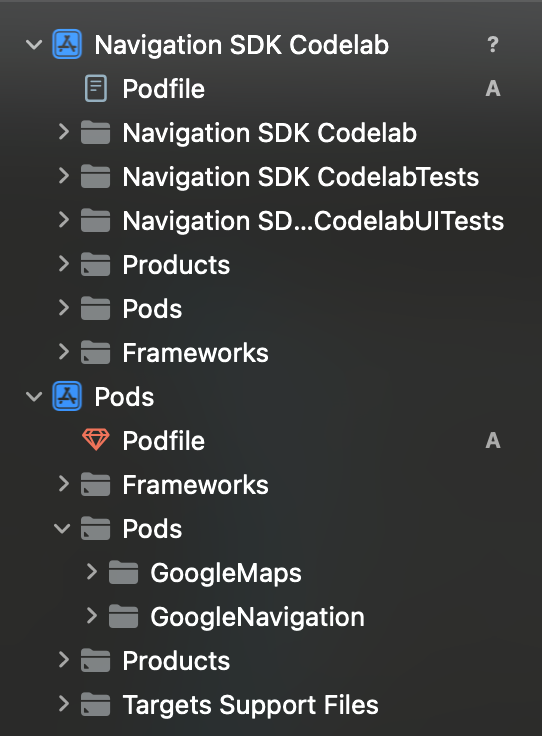
Check that a Pods directory has been added to the project structure, and that it contains "GoogleMaps" and "GoogleNavigation" Pods.
Add your API key
Add your API key to your AppDelegate.swift as follows:
- Add the following import statements:
import GoogleMaps
import GoogleNavigation
- Add the following to your
application(_:didFinishLaunchingWithOptions:)method:
GMSServices.provideAPIKey("YOUR_API_KEY")
Replace "YOUR_API_KEY" with the API key you created in the previous step.
Build your project and fix any errors.
5. Configure app permissions
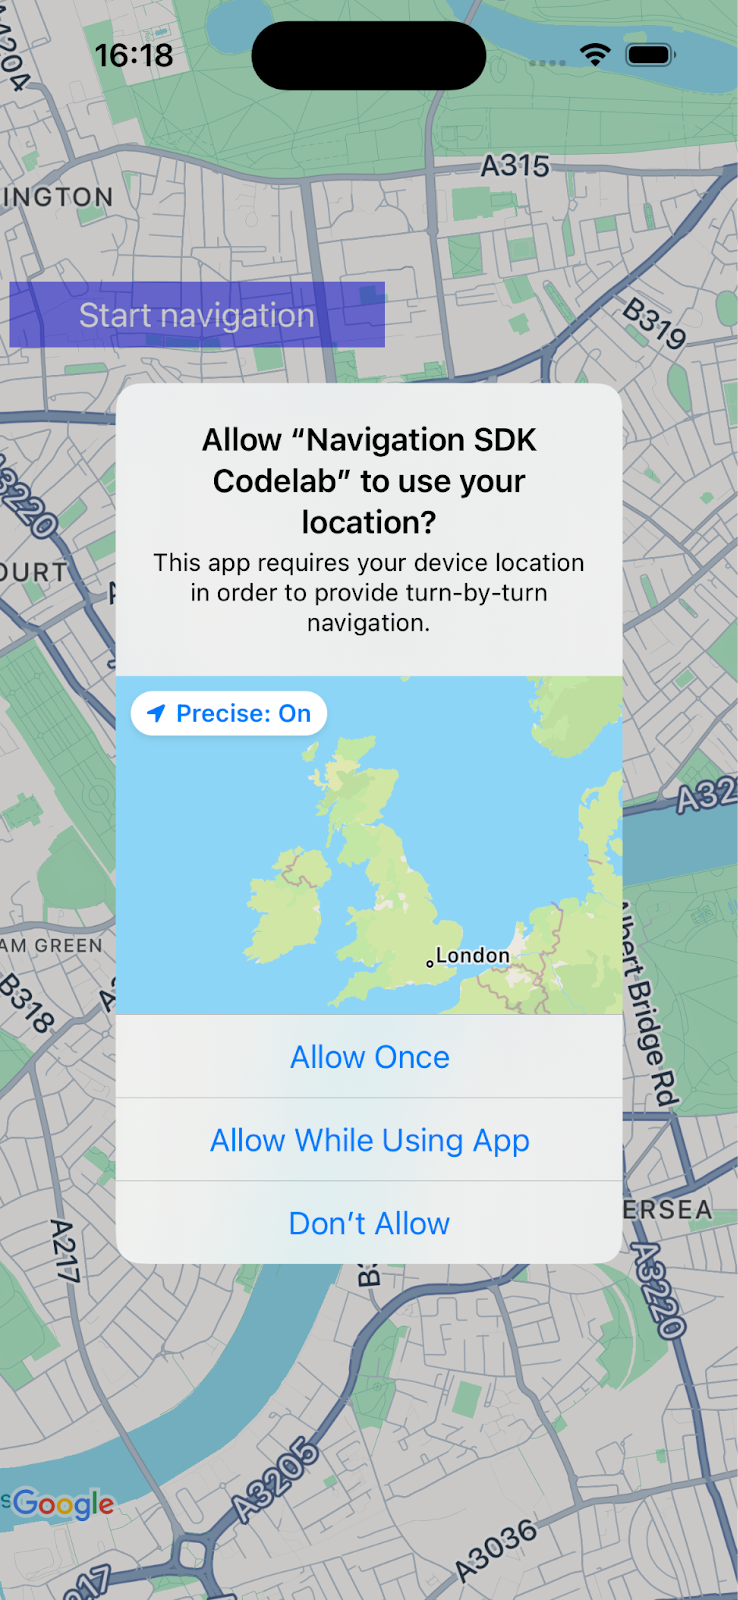
Navigation SDK depends on GPS signals to provide road-snapped location and turn-by-turn guidance, so your app will need to ask the user to grant access to precise location data.
To do this, you will add some properties to your apps Info.plist in Xcode, add some code to your app to request permission from the user at runtime, and handle any errors such as permission not being granted or location being unavailable.
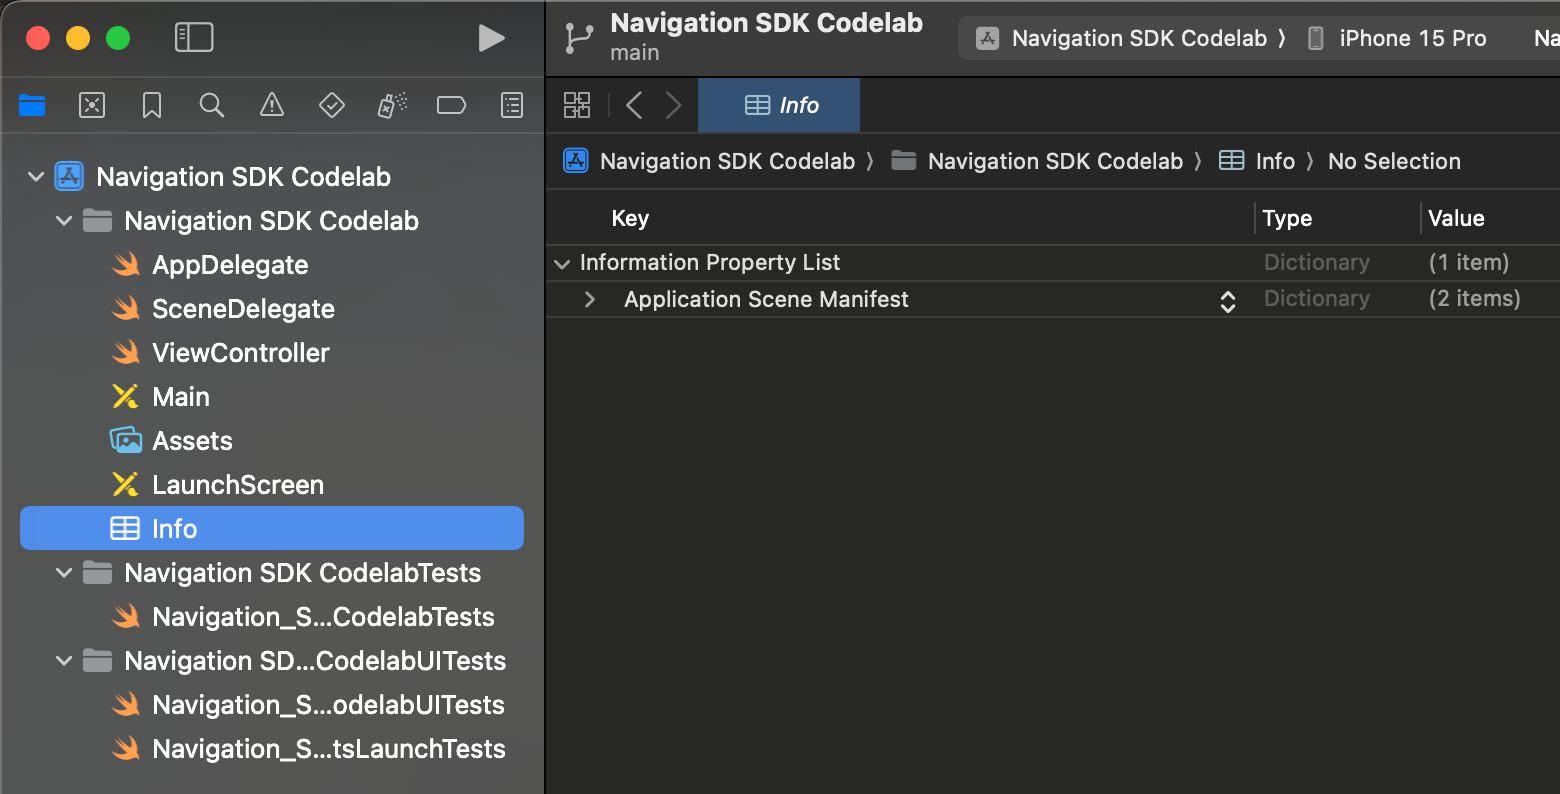
Open Info.plist in Xcode. It should look something like this.
Request precise location permission
You can add new values by hovering your mouse pointer over the "Information Property List" row until you see a "+" icon appear. Click the "+" to see a dialog with suggested property names, but note that you can also add properties manually.
Add the following properties and values to Info.plist:
Property | Value |
Privacy - Location Always And When In Use Usage Description | "This app requires your device location in order to provide turn-by-turn navigation" |
Privacy - Location When In Use Usage Description | "This app requires your device location in order to provide turn-by-turn navigation" |
allowsBackgroundLocationUpdates | YES |
Request background location permission
Add the following properties and values to Info.plist:
UIBackgroundModes > Add Row > Item 0: App registers for location updates (select this value from the drop down list of suggestions)
Info.plist should look something like this when you have finished.

Request location access at runtime
Add the following import statements to ViewController.swift:
import GoogleNavigation
Add the following declaration to your ViewController class:
var locationManager: CLLocationManager!
Add a method override for loadView() and call locationManager.requestAlwaysAuthorization():
override func loadView() {
        locationManager = CLLocationManager()
        locationManager.requestAlwaysAuthorization()
Your app will now request location from the user and make it available to your app if they grant permission .
Request permission to show notifications
Add the following code to loadView() to request permission from the user to show notifications, which will be required for showing navigation maneuver instructions.
UNUserNotificationCenter.current().requestAuthorization(options: [.alert]) {
        granted, error in
        // Handle denied authorization to display notifications.
          if !granted || error != nil {
              print("User rejected request to display notifications.")
          }
        }
Build and run the app and check that you are prompted to share location and enable notifications.
6. Add a navigation user interface
In this step you will add a map and configure it to show a location. You will then show the user a dialog with the Navigation SDK terms of use.
Add a map view to your app
Add this line to declare a GMSMapView variable in your ViewController.
var mapView: GMSMapView!
Add the following code to loadView() in your Viewcontroller.swift to initialize the map.
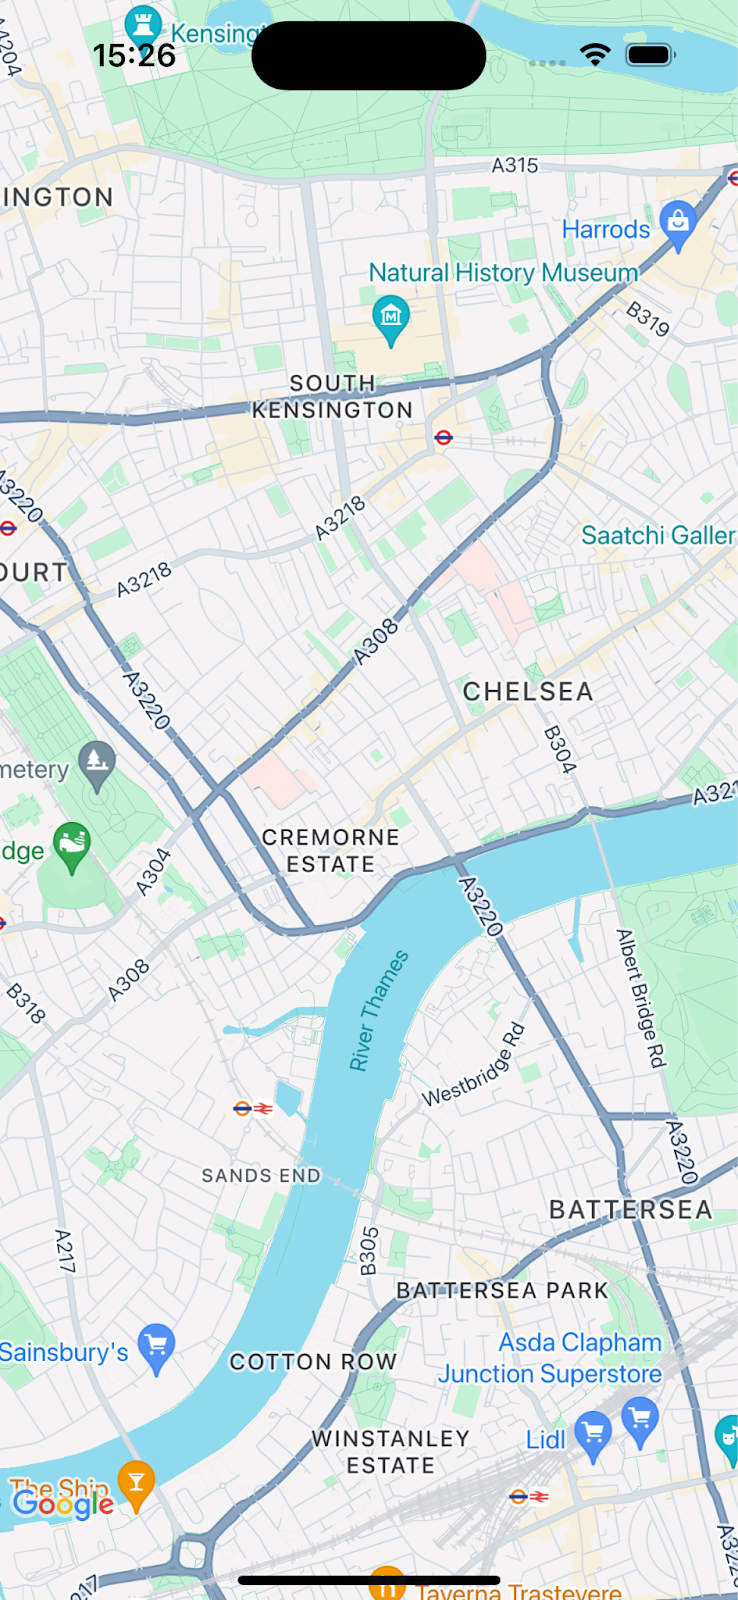
let camera = GMSCameraPosition.camera(withLatitude: 51.483174, longitude: -0.177369, zoom: 14)
let options = GMSMapViewOptions()
options.camera = camera
options.frame = .zero

mapView = GMSMapView(options: options)
view = mapView
Build and run your app, you should see a map centered on south-west London.
Show the Navigation SDK product terms of use dialog
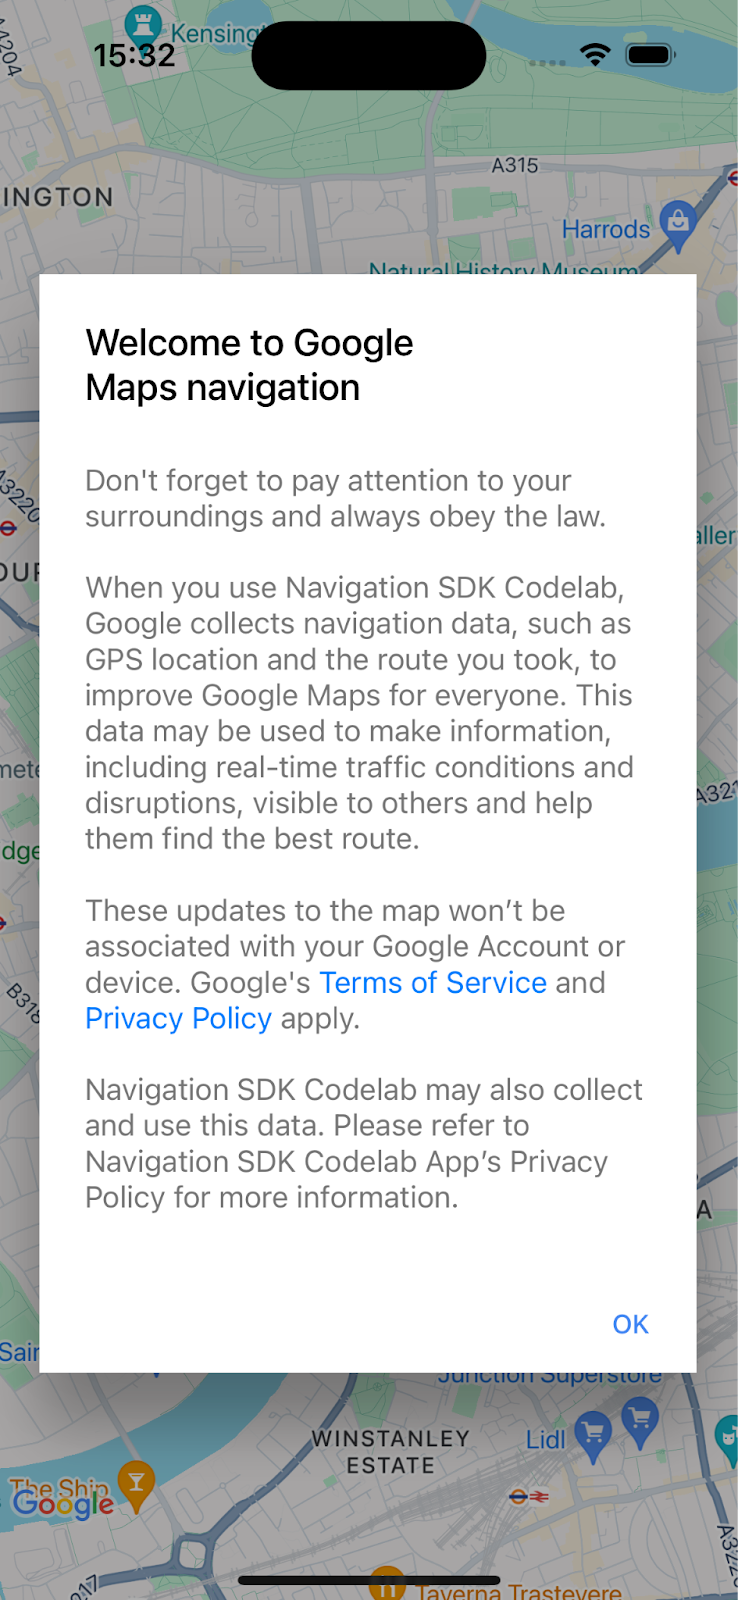
Add the following code to ViewController.swift in the same loadView() method as the previous code. This will show the Navigation SDK end-user terms of use. If not accepted, navigation will not be enabled.
// Show the terms and conditions.
let companyName = "Navigation SDK Codelab"
GMSNavigationServices.showTermsAndConditionsDialogIfNeeded(withCompanyName: companyName) { termsAccepted in
  if termsAccepted {
    // Enable navigation if the user accepts the terms.
    self.mapView.isNavigationEnabled = true
    // Request authorization for alert notifications which deliver guidance instructions
    // in the background.
  } else {
    // Handle the case when the user rejects the terms and conditions.
  }
}
Build and run the app to see the dialog.
7. Add listeners for key navigation events
This step will show you how to set up listeners for key events, such as arrival at a destination, or the driver rerouting.
To listen to these events, your view controller must adopt the GMSNavigatorListener protocol.
Add this protocol to the class definition in ViewController.swift.
class ViewController: UIViewController,
                      GMSNavigatorListener {
Now, add a line of code to set up the listener in loadView():
// Add a listener for GMSNavigator.
mapView.navigator?.add(self)
Finally, add two methods to your class to handle the events being raised.
// Listener to handle arrival events.
func navigator(_ navigator: GMSNavigator, didArriveAt waypoint: GMSNavigationWaypoint) {
  print("You have arrived at: \(waypoint.title)")
}

// Listener for route change events.
func navigatorDidChangeRoute(_ navigator: GMSNavigator) {
  print("The route has changed.")
}
8. Set a destination and start guidance
This section will teach you how to set a destination and start navigation guidance.
Create a new function for the navigation logic.
First, add a new function called startNav() to your ViewController. This will contain the logic to set a destination and start navigating.
// Create a route and start guidance.
@objc func startNav() {
}
Create a Waypoint for the destination.
Next, create an array of destinations with a single waypoint in it.
// Create a route and start guidance.
@objc func startNav() {
  var destinations = [GMSNavigationWaypoint]()
  destinations.append(
    GMSNavigationWaypoint.init(
      placeID: "ChIJH-tBOc4EdkgRJ8aJ8P1CUxo",
      title: "Trafalgar Square")!)
}
Call setDestinations()and handle the response.
Next, call setDestinations and handle the GMSRouteStatus that is returned.
If the GMSRouteStatus is "OK", start guidance by setting isGuidanceActive=true on the mapView's navigator object. Otherwise, print a statement to show that there was an error.
If the returned GMSRouteStatus value is "OK", start simulating driving along the route by calling mapView.locationSimulator.simulateLocationsAlongExistingRoute().
// Create a route and start guidance.
@objc func startNav() {
  var destinations = [GMSNavigationWaypoint]()
    destinations.append(
      GMSNavigationWaypoint.init(
        placeID: "ChIJH-tBOc4EdkgRJ8aJ8P1CUxo",
          title: "Trafalgar Square")!)

  mapView.navigator?.setDestinations(
    destinations
  ) { routeStatus in
    guard routeStatus == .OK else {
      print("Handle route statuses that are not OK.")
      return
    }
    //If routeStatus is OK, start guidance.
    self.mapView.navigator?.isGuidanceActive = true
    //start simulating driving along the route. self.mapView.locationSimulator?.simulateLocationsAlongExistingRoute()
    self.mapView.cameraMode = .following
  }
}
Handle common error statuses
It's useful to handle the GMSRouteStatus errors more explicitly, especially when debugging initial issues with your new app. For example you may find that you get location permission, API key or "no route found" errors more frequently at first due to your debug setup, so it can be useful to handle these error states.
Add code that handles these specific cases and prints a statement to the console.
mapView.navigator?.setDestinations(
  destinations
) { routeStatus in
    guard routeStatus == .OK else {
      print("Handle route statuses that are not OK.")
      switch routeStatus {
       case .locationUnavailable:
        print("Location unavailable.") //check permissions
      case .noRouteFound:
        print("No route found.") //check start location and destination
      case .waypointError:
        print("Waypoint error") //check Place ID
      default:
        print("Not sure what happened")
      }
    return
  }
Add a button to start navigation guidance
Finally, add a button to the UI and connect it to the startNav method. Create a method called makeButton() with the following code. Call your makeButton() function from loadView().
// Add a button to the view.
func makeButton() {
  // A button to start navigation.
  let navButton = UIButton(frame: CGRect(x: 5, y: 150, width: 200, height: 35))
  navButton.backgroundColor = .blue
  navButton.alpha = 0.5
  navButton.setTitle("Start navigation", for: .normal)
  navButton.addTarget(self, action: #selector(startNav), for: .touchUpInside)
  self.mapView.addSubview(navButton)
}
Build and run your app.
Note: running the code in
startNav()
will call the
setDestinations()
method which incurs a charge after the first 1000 destinations used. See Usage and billing for more information.
9. Congratulations!
Well done - you have arrived at your destination!
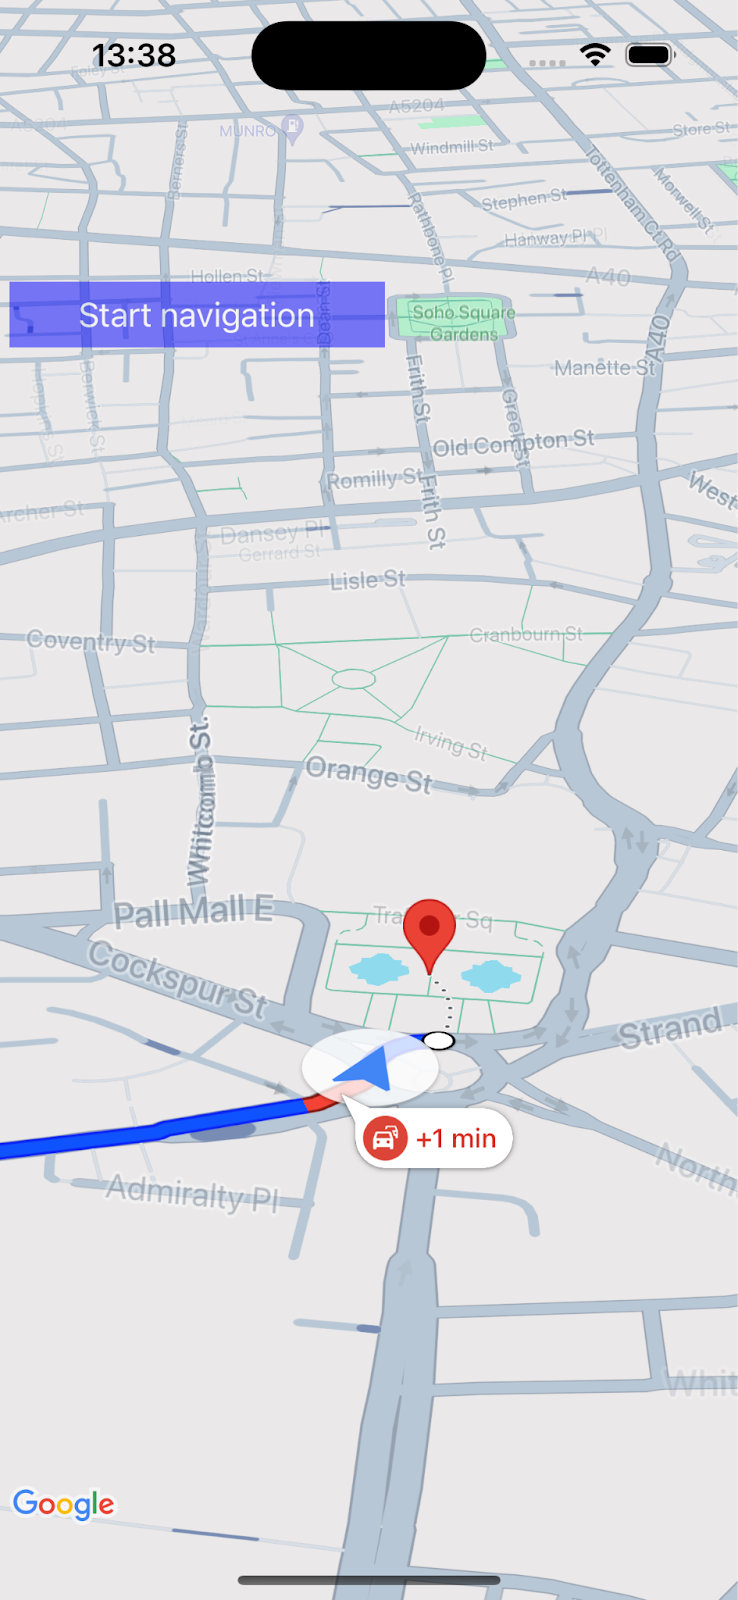
You have created a simple app that gives turn-by-turn navigation guidance to a destination using Google Maps Platform Navigation SDK.
You have configured app permissions and the Navigation SDK end user terms dialog and specified a destination using a Place ID. You have handled various success and error states in your app.
10. Taking it further
If you want to take your app development further, have a look at the following topics for inspiration.
- Listen for more navigation events. Add code to display a message if the remaining time or distance exceeds a threshold.
- Customize the navigation interface.
- If you'd like a bigger challenge, see if you can add a Places API place picker to allow the user to set the destination. Hint: the Navigation SDK demo apps have a sample implementation. Run
pod try GoogleNavigationin your project folder to see the code.
