
1. 事前準備
本程式碼研究室將說明如何建立簡單的 iOS 應用程式,使用 Google Maps Platform Navigation SDK 導航至預先設定的目的地。
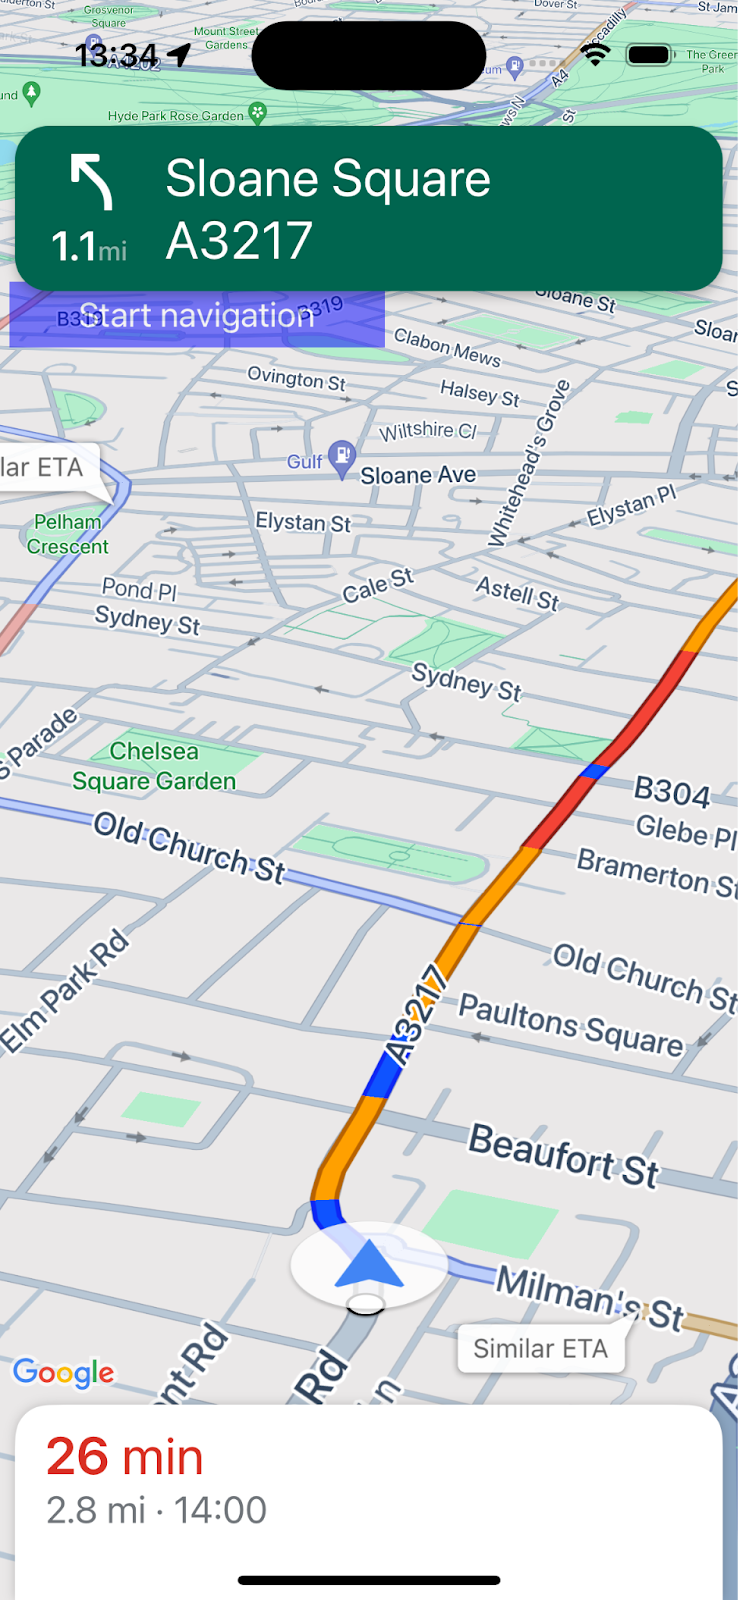
完成後,應用程式會如下所示。
必要條件
- 具備 Swift 的基本 iOS 應用程式開發知識。
- 熟悉 Google Maps SDK 的基本概念,例如建立以特定位置為中心的地圖。
課程內容
- 如何建立簡單的 iOS Swift 應用程式,使用 Navigation SDK 導航至目的地。
- 如何從遠端 Cocoapods 存放區整合 Navigation SDK。
- 如何管理位置存取權,以及使用者同意 Navigation SDK 使用者條款。
- 如何初始化 SDK。
- 如何設定目的地並開始導航指引。
軟硬體需求
- 最新穩定版 Xcode。
- 已啟用計費功能的 Google 帳戶和專案。
- iOS 裝置或在 XCode 模擬器中執行的模擬裝置。無論選擇哪種方式,都必須符合 Navigation SDK 的最低需求。
2. 做好準備
如果您還沒有啟用計費功能的 Google Cloud Platform 帳戶和雲端專案,請按照「開始使用 Google Maps Platform」一文中的操作說明,設定 Google Cloud 專案。
在控制台中選取 Google Cloud 雲端專案
在 Cloud 控制台中,按一下專案下拉式選單,然後選取要用於本程式碼研究室的專案。

在專案中啟用 Navigation SDK
在 Google Cloud Marketplace 中,啟用本程式碼研究室所需的 Google 地圖平台 API 和 SDK。
前往 Google Cloud 控制台的「API 和服務」>「程式庫」,然後搜尋「Navigation SDK」。
畫面應會顯示一項搜尋結果。
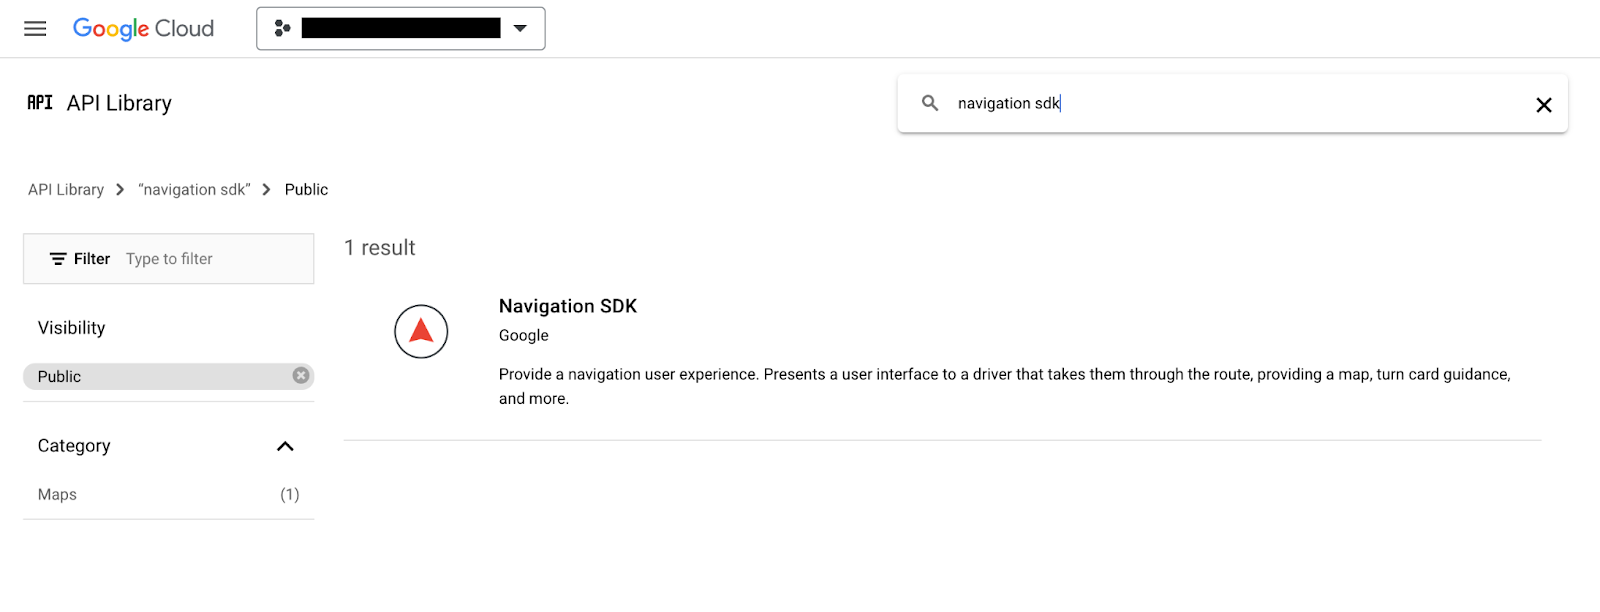
按一下「Navigation SDK」,開啟「產品詳細資料」頁面。按一下「啟用」,在專案中啟用 SDK。
針對 Google Maps SDK for iOS 重複這個程序。
建立 API 金鑰
在 Cloud Console 的「憑證」頁面中產生 API 金鑰。所有 Google 地圖平台要求都需要 API 金鑰。在控制台的「憑證」頁面中。按一下頁面頂端的「+建立憑證」,然後從選項中選取「API 金鑰」。
如要在正式環境中使用,最佳做法是為 API 金鑰設定應用程式限制,但這項操作在本程式碼研究室中為選用步驟。
3. 取得範例專案檔案
本節說明如何從本程式碼研究室的 GitHub 存放區複製檔案,設定基本的空白 XCode 應用程式專案。Github 存放區包含程式碼研究室程式碼的先前和後續版本。本程式碼研究室會從空白專案範本開始,逐步建構至完成狀態。如果遇到問題,可以參考存放區中的完成專案。
複製存放區或下載程式碼
前往要儲存程式碼研究室的目錄。
然後複製存放區或下載程式碼:
git clone https://github.com/googlemaps-samples/codelab-navigation-101-ios-swift
如果沒有安裝 Git,請點選這個按鈕取得程式碼:
為協助您盡快上手,存放區的 Starter 資料夾中提供了一些範例程式碼,方便您跟著本程式碼研究室的說明操作。此外,我們也提供已完成的 Solution 專案,方便您隨時跳過或查看進度。如要使用解決方案專案,請按照下方的「使用 Cocoapods 安裝」說明操作,然後從 solution/Navigation SDK Codelab 資料夾執行「pod update」指令。
將存放區複製到本機後,請使用 Xcode 開啟 Starter 資料夾做為現有專案。確認專案是否能建構及執行。
連線裝置或設定 XCode 模擬器
4. 在應用程式中加入 Navigation SDK
將 Navigation SDK 整合至 Xcode 專案的方法有三種,本程式碼研究室使用 CocoaPods。如要瞭解如何使用 Swift Package Manager 整合,或手動下載 SDK 安裝,請參閱 Navigation SDK 說明文件中的「建立 Xcode 專案並安裝 Navigation SDK」。
使用 Cocoapods 安裝
如果您還沒有 CocoaPods 工具,請在終端機上執行下列指令,即可在 macOS 中安裝這項工具。詳情請參閱 CocoaPods 入門指南。
sudo gem install cocoapods
在專案資料夾中建立名為 Podfile 的新檔案,該資料夾位於 starter/Navigation SDK Codelab 資料夾內 (在 Xcode 中,依序點選「File」>「New」>「File」>「Other」>「Empty」,然後儲存為「Podfile」)
在 Podfile 中新增下列內容:
source 'https://github.com/CocoaPods/Specs.git'

platform :ios, '15.0'

target 'Navigation SDK Codelab' do
  pod 'GoogleNavigation', '9.1.1'
end
現省 Podfile。
開啟終端機,然後將目錄變更為儲存 Podfile 的位置 (應該是程式碼研究室存放區中的「starter/Navigation SDK Codelab」資料夾)
cd "<path-to-starter-project-folder>/Navigation SDK Codelab"
執行 pod install 指令。此動作會安裝 Podfile 中指定的 API 及其所有依附元件。
pod install
關閉 Xcode,然後開啟專案的 .xcworkspace 檔案來啟動 Xcode。從現在起,您必須使用 .xcworkspace 檔案開啟專案。
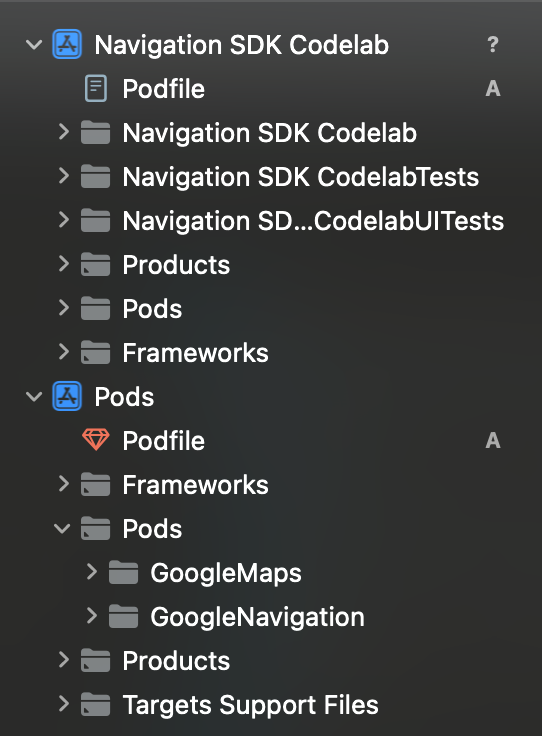
確認 Pods 目錄已新增至專案結構,且包含「GoogleMaps」和「GoogleNavigation」Pods。
新增 API 金鑰
將 API 金鑰新增到您的 AppDelegate.swift 中,如下所示:
- 新增下列匯入陳述式:
import GoogleMaps
import GoogleNavigation
- 將以下內容新增至
application(_:didFinishLaunchingWithOptions:)方法:
GMSServices.provideAPIKey("YOUR_API_KEY")
將「YOUR_API_KEY」替換為您在上一步建立的 API 金鑰。
建構專案並修正所有錯誤。
5. 設定應用程式權限
Navigation SDK 會根據 GPS 信號提供與道路相符的位置資訊和即時路線指引,因此應用程式必須要求使用者授予精確位置資料的存取權。
如要這麼做,您需要在 Xcode 中將一些屬性新增至應用程式的 Info.plist,在應用程式中新增一些程式碼,以便在執行階段向使用者要求權限,並處理任何錯誤,例如未授予權限或無法取得位置資訊。
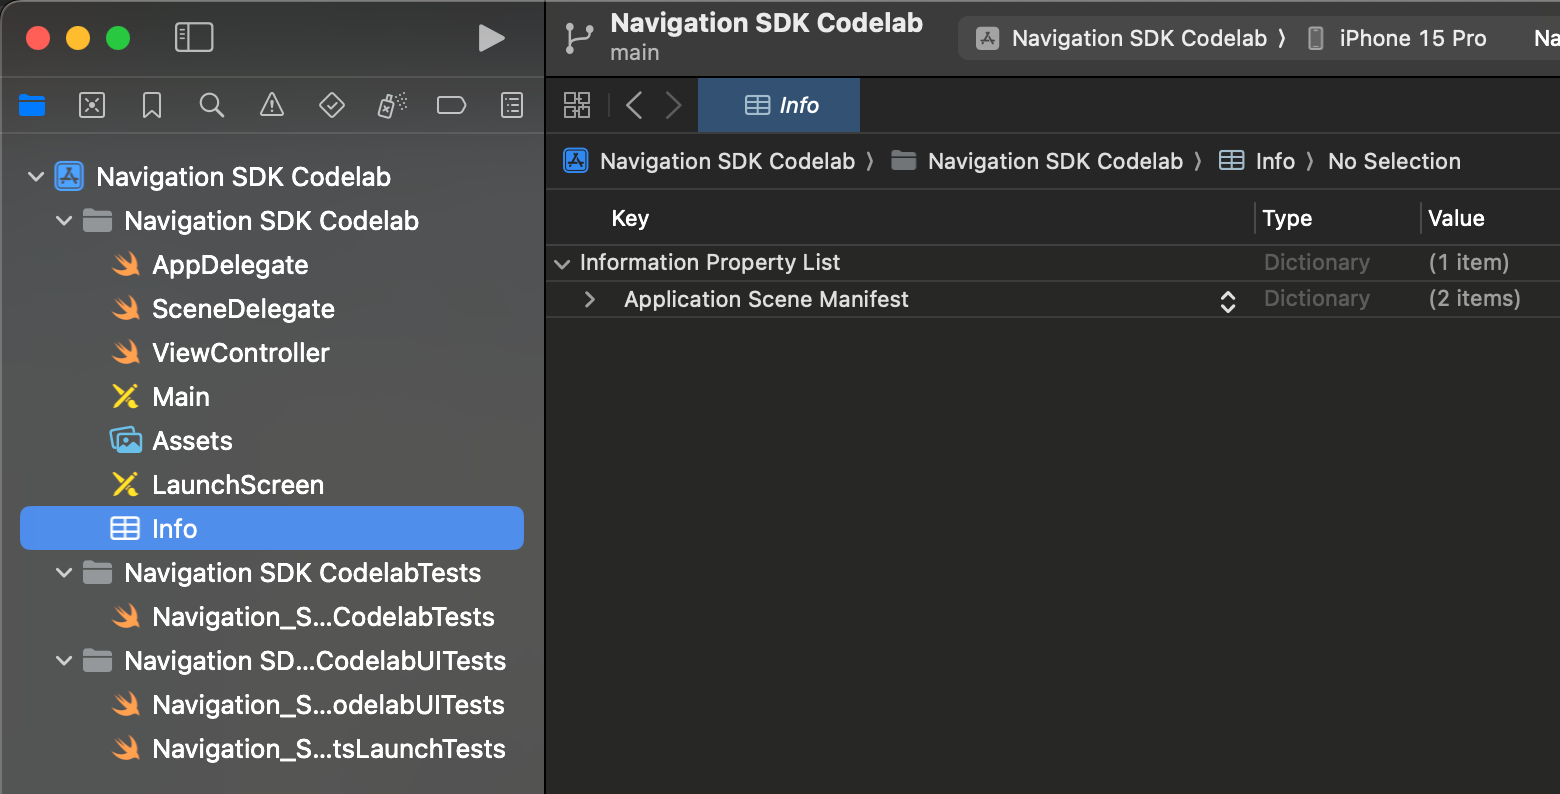
在 Xcode 中開啟 Info.plist。看起來應該會像這樣
要求精確位置存取權
將滑鼠游標懸停在「資訊屬性清單」列上,直到顯示「+」圖示為止,即可新增值。按一下「+」即可查看建議的屬性名稱對話方塊,但請注意,您也可以手動新增屬性。
在 Info.plist 中新增下列屬性和值:
屬性 | 值 |
隱私權 -「永遠」和「使用期間」位置資訊使用說明 | 「這個應用程式需要存取裝置位置資訊,才能提供即時路況導航」 |
隱私權 - 使用期間的位置資訊使用說明 | 「這個應用程式需要存取裝置位置資訊,才能提供即時路況導航」 |
allowsBackgroundLocationUpdates | 是 |
要求背景位置資訊存取權
在 Info.plist 中新增下列屬性和值:
UIBackgroundModes > 新增資料列 > Item 0: App registers for location updates (從建議的下拉式清單中選取這個值)
完成後,Info.plist 應如下所示。

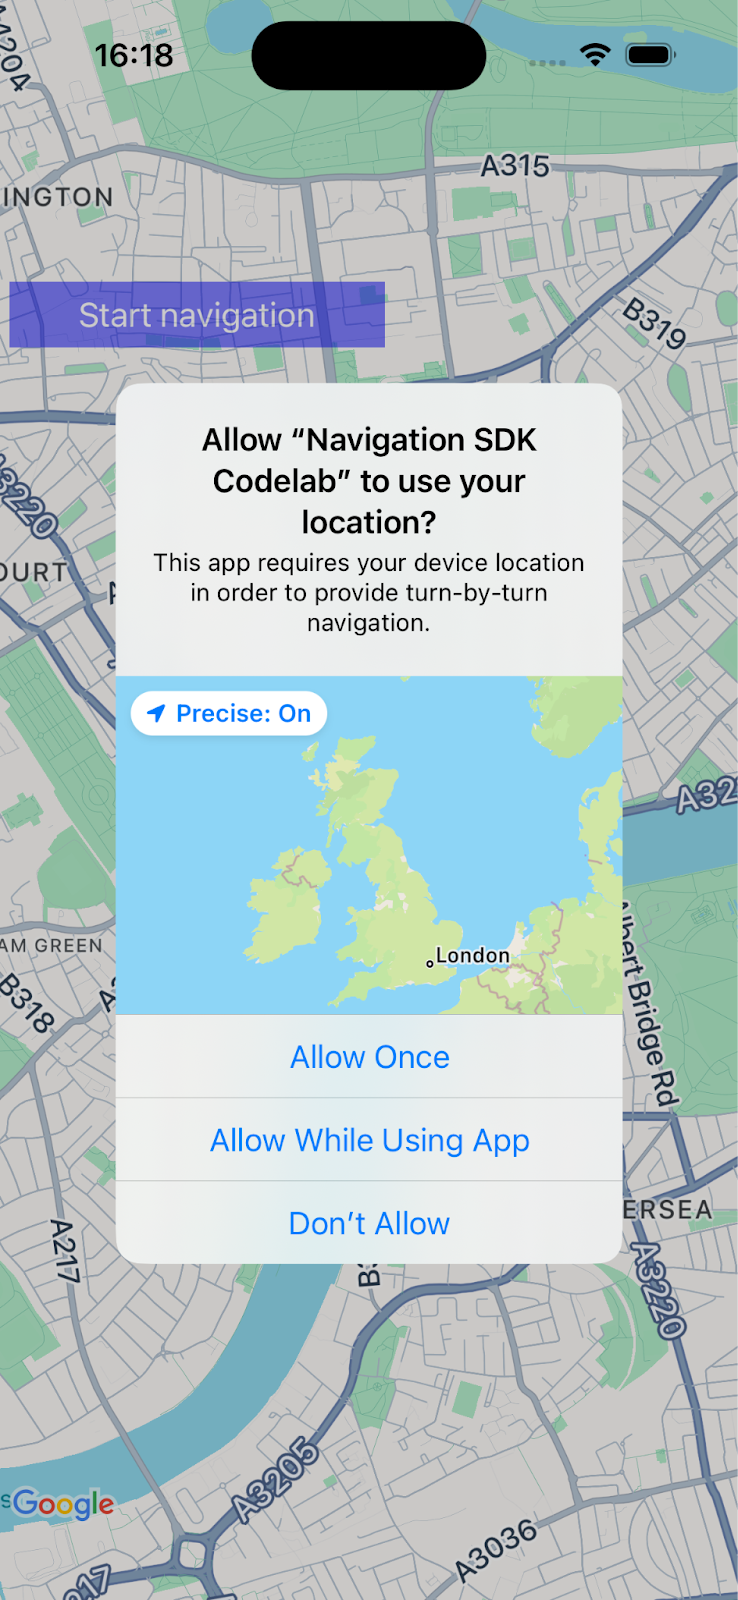
在執行階段要求位置存取權
在 ViewController.swift 中新增下列匯入陳述式:
import GoogleNavigation
在 ViewController 類別中新增下列宣告:
var locationManager: CLLocationManager!
新增 loadView() 的方法覆寫,並呼叫 locationManager.requestAlwaysAuthorization():
override func loadView() {
        locationManager = CLLocationManager()
        locationManager.requestAlwaysAuthorization()
現在,應用程式會向使用者要求位置資訊,並在使用者授予權限後提供給應用程式。
要求顯示通知的權限
在 loadView() 中新增下列程式碼,向使用者要求顯示通知的權限,這是顯示導航操作說明的必要條件。
UNUserNotificationCenter.current().requestAuthorization(options: [.alert]) {
        granted, error in
        // Handle denied authorization to display notifications.
          if !granted || error != nil {
              print("User rejected request to display notifications.")
          }
        }
建構並執行應用程式,確認系統會提示您分享位置資訊及啟用通知。
6. 新增導覽使用者介面
在這個步驟中,您將新增地圖並設定顯示位置。接著,向使用者顯示對話方塊,內含 Navigation SDK 使用條款。
在應用程式中新增地圖檢視畫面
在 ViewController 中新增這行程式碼,宣告 GMSMapView 變數。
var mapView: GMSMapView!
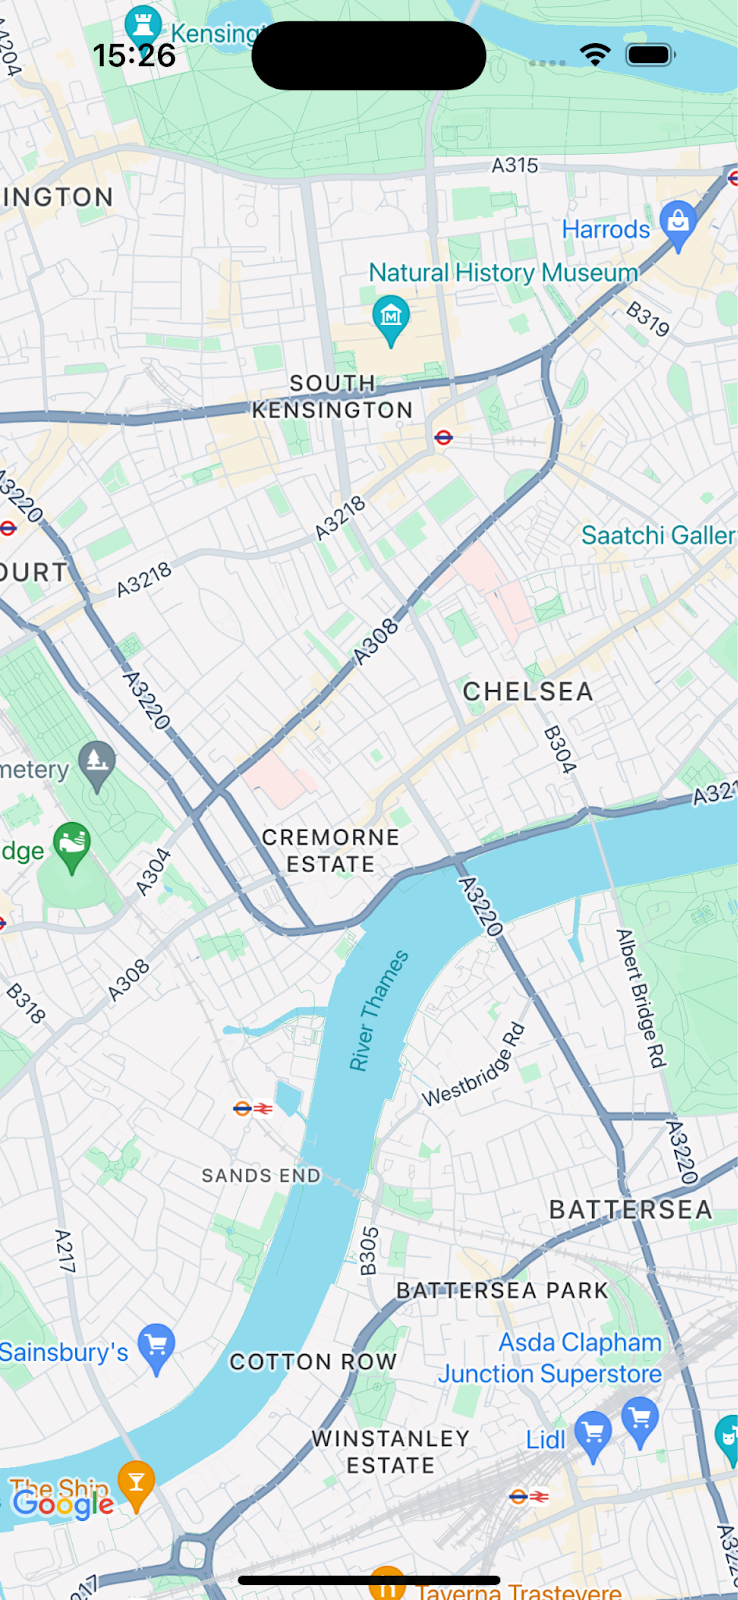
在 Viewcontroller.swift 的 loadView() 中加入下列程式碼,初始化地圖。
let camera = GMSCameraPosition.camera(withLatitude: 51.483174, longitude: -0.177369, zoom: 14)
let options = GMSMapViewOptions()
options.camera = camera
options.frame = .zero

mapView = GMSMapView(options: options)
view = mapView
建構並執行應用程式,畫面上應該會出現以倫敦西南部為中心的地圖。
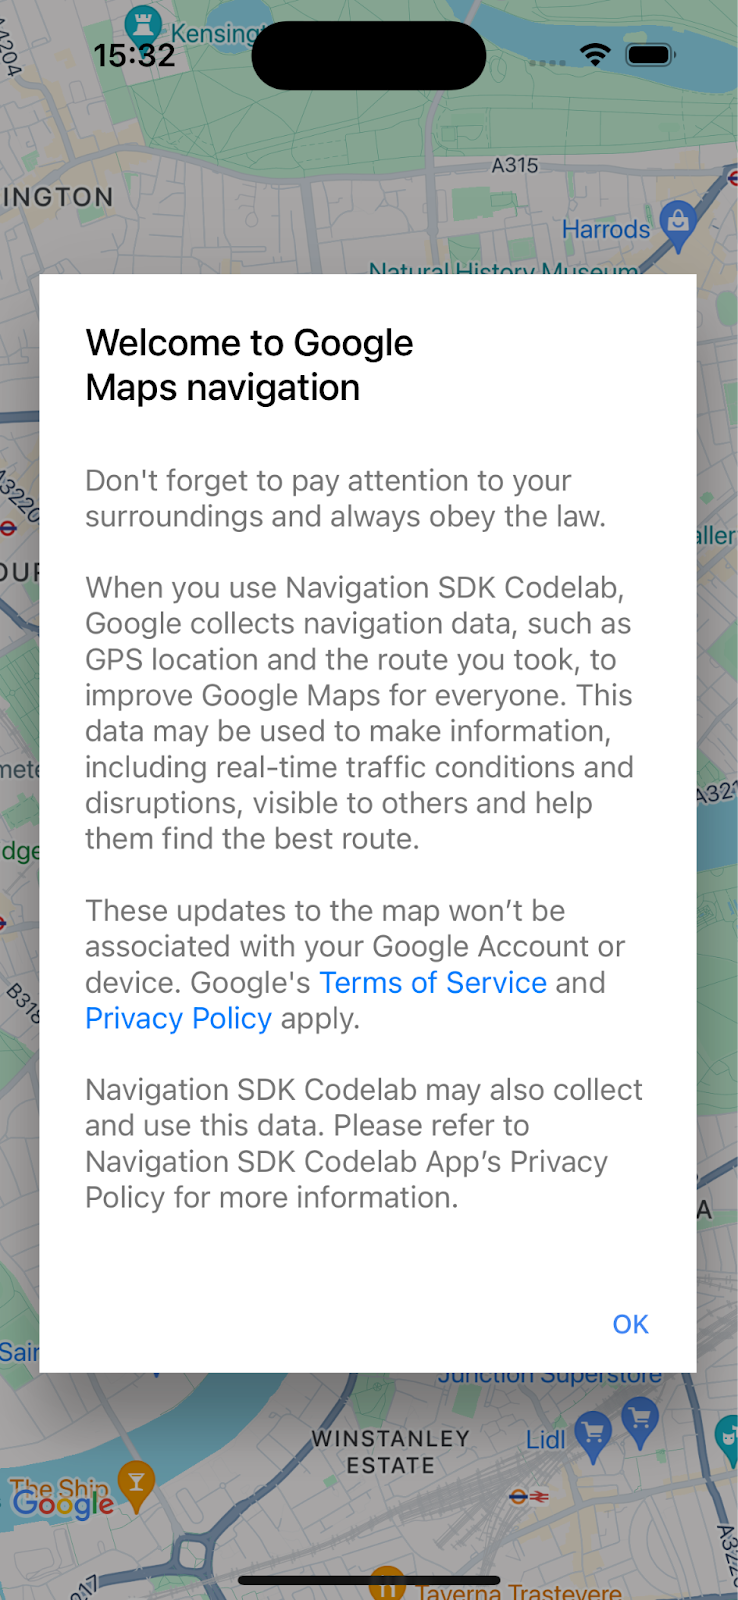
顯示 Navigation SDK 產品使用條款對話方塊
在與前一段程式碼相同的 loadView() 方法中,將下列程式碼新增至 ViewController.swift。系統會顯示 Navigation SDK 使用者服務條款。如果未接受,系統就不會啟用導覽功能。
// Show the terms and conditions.
let companyName = "Navigation SDK Codelab"
GMSNavigationServices.showTermsAndConditionsDialogIfNeeded(withCompanyName: companyName) { termsAccepted in
  if termsAccepted {
    // Enable navigation if the user accepts the terms.
    self.mapView.isNavigationEnabled = true
    // Request authorization for alert notifications which deliver guidance instructions
    // in the background.
  } else {
    // Handle the case when the user rejects the terms and conditions.
  }
}
建構並執行應用程式,查看對話方塊。
7. 為重要導覽事件新增監聽器
本步驟將說明如何為重要事件 (例如抵達目的地或駕駛人重新規劃路線) 設定監聽器。
如要監聽這些事件,檢視畫面控制器必須採用 GMSNavigatorListener 通訊協定。
在 ViewController.swift 中,將這個通訊協定新增至類別定義。
class ViewController: UIViewController,
                      GMSNavigatorListener {
現在,請在 loadView(): 中新增一行程式碼,設定監聽器。
// Add a listener for GMSNavigator.
mapView.navigator?.add(self)
最後,在類別中新增兩個方法,處理引發的事件。
// Listener to handle arrival events.
func navigator(_ navigator: GMSNavigator, didArriveAt waypoint: GMSNavigationWaypoint) {
  print("You have arrived at: \(waypoint.title)")
}

// Listener for route change events.
func navigatorDidChangeRoute(_ navigator: GMSNavigator) {
  print("The route has changed.")
}
8. 設定目的地並開始導引
本節將說明如何設定目的地並開始導航。
為導覽邏輯建立新函式。
首先,在 ViewController 中新增名為 startNav() 的函式。其中包含設定目的地和開始導航的邏輯。
// Create a route and start guidance.
@objc func startNav() {
}
為目的地建立 Waypoint 。
接著,請建立目的地陣列,其中包含單一中途點。
// Create a route and start guidance.
@objc func startNav() {
  var destinations = [GMSNavigationWaypoint]()
  destinations.append(
    GMSNavigationWaypoint.init(
      placeID: "ChIJH-tBOc4EdkgRJ8aJ8P1CUxo",
      title: "Trafalgar Square")!)
}
呼叫 setDestinations()並處理回應。
接著,呼叫 setDestinations 並處理傳回的 GMSRouteStatus。
如果 GMSRouteStatus 為「OK」,請在 mapView 的 navigator 物件上設定 isGuidanceActive=true,開始引導。否則,請列印陳述式,顯示發生錯誤。
如果傳回的 GMSRouteStatus 值為「OK」,請呼叫 mapView.locationSimulator.simulateLocationsAlongExistingRoute(),開始模擬沿路線行駛。
// Create a route and start guidance.
@objc func startNav() {
  var destinations = [GMSNavigationWaypoint]()
    destinations.append(
      GMSNavigationWaypoint.init(
        placeID: "ChIJH-tBOc4EdkgRJ8aJ8P1CUxo",
          title: "Trafalgar Square")!)

  mapView.navigator?.setDestinations(
    destinations
  ) { routeStatus in
    guard routeStatus == .OK else {
      print("Handle route statuses that are not OK.")
      return
    }
    //If routeStatus is OK, start guidance.
    self.mapView.navigator?.isGuidanceActive = true
    //start simulating driving along the route. self.mapView.locationSimulator?.simulateLocationsAlongExistingRoute()
    self.mapView.cameraMode = .following
  }
}
處理常見錯誤狀態
明確處理 GMSRouteStatus 錯誤很有用,尤其是在偵錯新應用程式的初始問題時。舉例來說,您可能會發現,由於偵錯設定,一開始您更常收到位置存取權、API 金鑰或「找不到路徑」錯誤,因此處理這些錯誤狀態很有用。
加入可處理這些特定情況的程式碼,並在控制台中列印陳述式。
mapView.navigator?.setDestinations(
  destinations
) { routeStatus in
    guard routeStatus == .OK else {
      print("Handle route statuses that are not OK.")
      switch routeStatus {
       case .locationUnavailable:
        print("Location unavailable.") //check permissions
      case .noRouteFound:
        print("No route found.") //check start location and destination
      case .waypointError:
        print("Waypoint error") //check Place ID
      default:
        print("Not sure what happened")
      }
    return
  }
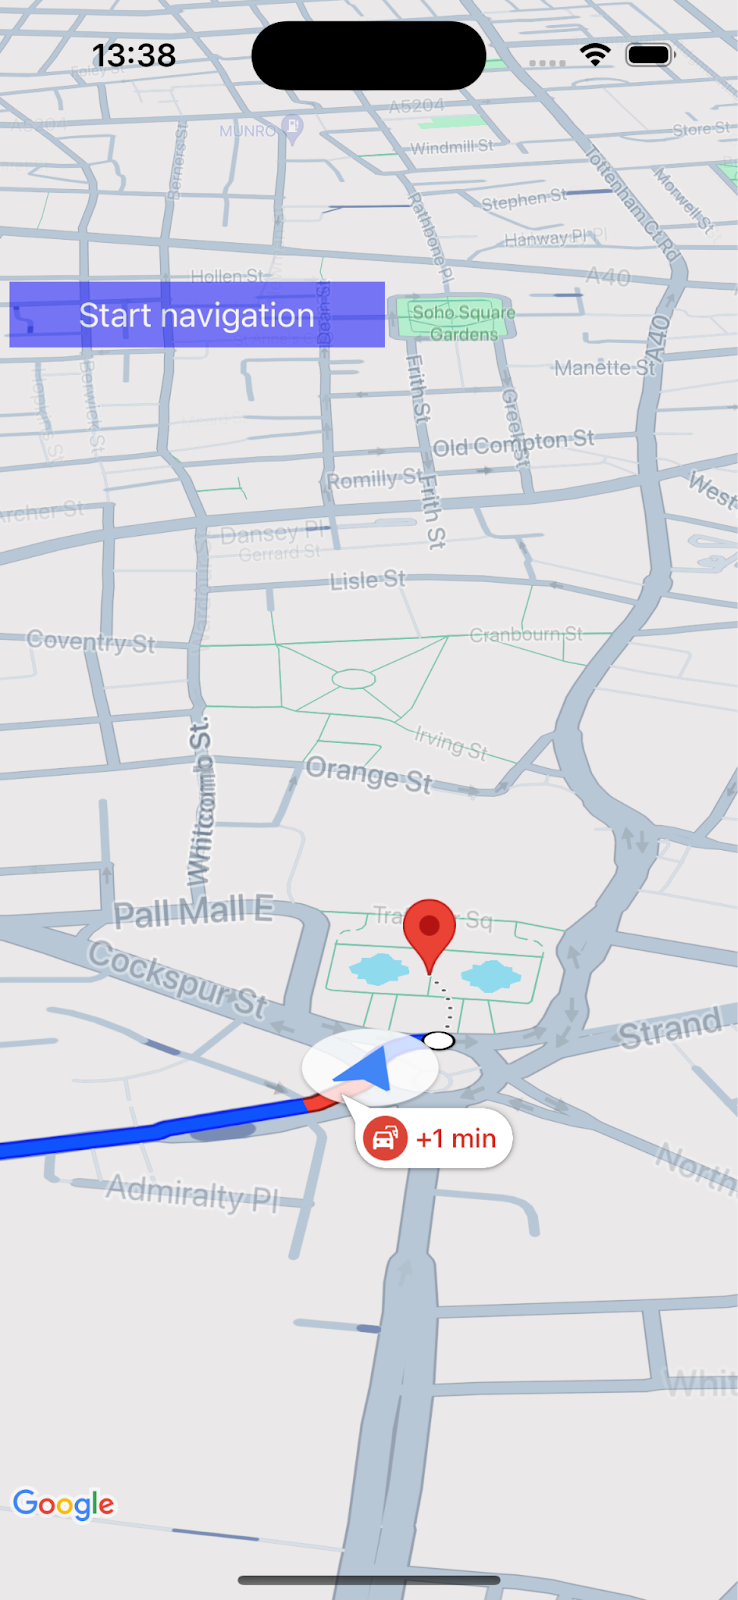
新增按鈕,啟動導航指引
最後,在 UI 中新增按鈕,並連結至 startNav 方法。使用以下程式碼建立名為 makeButton() 的方法。從 loadView() 呼叫 makeButton() 函式。
// Add a button to the view.
func makeButton() {
  // A button to start navigation.
  let navButton = UIButton(frame: CGRect(x: 5, y: 150, width: 200, height: 35))
  navButton.backgroundColor = .blue
  navButton.alpha = 0.5
  navButton.setTitle("Start navigation", for: .normal)
  navButton.addTarget(self, action: #selector(startNav), for: .touchUpInside)
  self.mapView.addSubview(navButton)
}
建構並執行應用程式。
注意:在執行程式碼時
startNav()
將呼叫
setDestinations()
方法,在您使用前 1000 個目的地後,系統會開始收費。詳情請參閱「用量與計費」一文。
9. 恭喜!
恭喜!你已抵達目的地!
您已建立簡單的應用程式,可使用 Google Maps Platform Navigation SDK 提供前往目的地的即時路況導航指引。
您已設定應用程式權限、Navigation SDK 使用者條款對話方塊,並使用地點 ID 指定目的地。您已在應用程式中處理各種成功和錯誤狀態。
10. 進階做法
如要進一步開發應用程式,請參考下列主題,尋找靈感。