1. はじめに
マテリアル コンポーネント(MDC)は、デベロッパーがマテリアル デザインを実装する際に役立ちます。Google のエンジニアと UX デザイナーのチームが作成した MDC には、美しく機能的な UI コンポーネントが多数含まれており、Android、iOS、ウェブ、Flutter.material.io/develop に利用可能です。 |
Android のマテリアル デザインとマテリアル コンポーネントとは
マテリアル デザインは、人の目に留まる美しいデジタル プロダクトを作成するためのシステムです。一貫した一連の基本原則とコンポーネントに基づいてスタイル、ブランディング、インタラクション、モーションの統一を行うことにより、プロダクト チームは、デザインの可能性を最大限に発揮できます。
Android アプリの場合、Android 向けマテリアル コンポーネント(MDC Android)は、設計とエンジニアリングをコンポーネントのライブラリと統合することで、アプリ間の一貫性を実現します。マテリアル デザイン システムの進化に合わせて、これらのコンポーネントは更新され、一貫したピクセル完全な実装と Google のフロントエンド開発基準への準拠を保証します。MDC は、ウェブ、iOS、Flutter でも使用できます。
この Codelab では、MDC Android のコンポーネントをいくつか使用してログインページを作成します。
作成するアプリの概要
この Codelab は、Shrine というアプリの作成手順を説明する 4 つの Codelab のうちの 1 番目の Codelab です。Shrine は、衣料品や家庭用品を販売する e コマース用の Android アプリです。MDC-Android を使用して、あらゆるブランドやスタイルを反映するようにコンポーネントをカスタマイズする方法を紹介します。
この Codelab では、次のもの含む Shrine 用ログインページを作成します。
- テキスト フィールド 2 つ(ユーザー名用とパスワード用)
- 2 つのボタン(1 つは [キャンセル])もう 1 つは「次へ」です
- アプリ名「Shrine」
- Shrine のロゴ画像
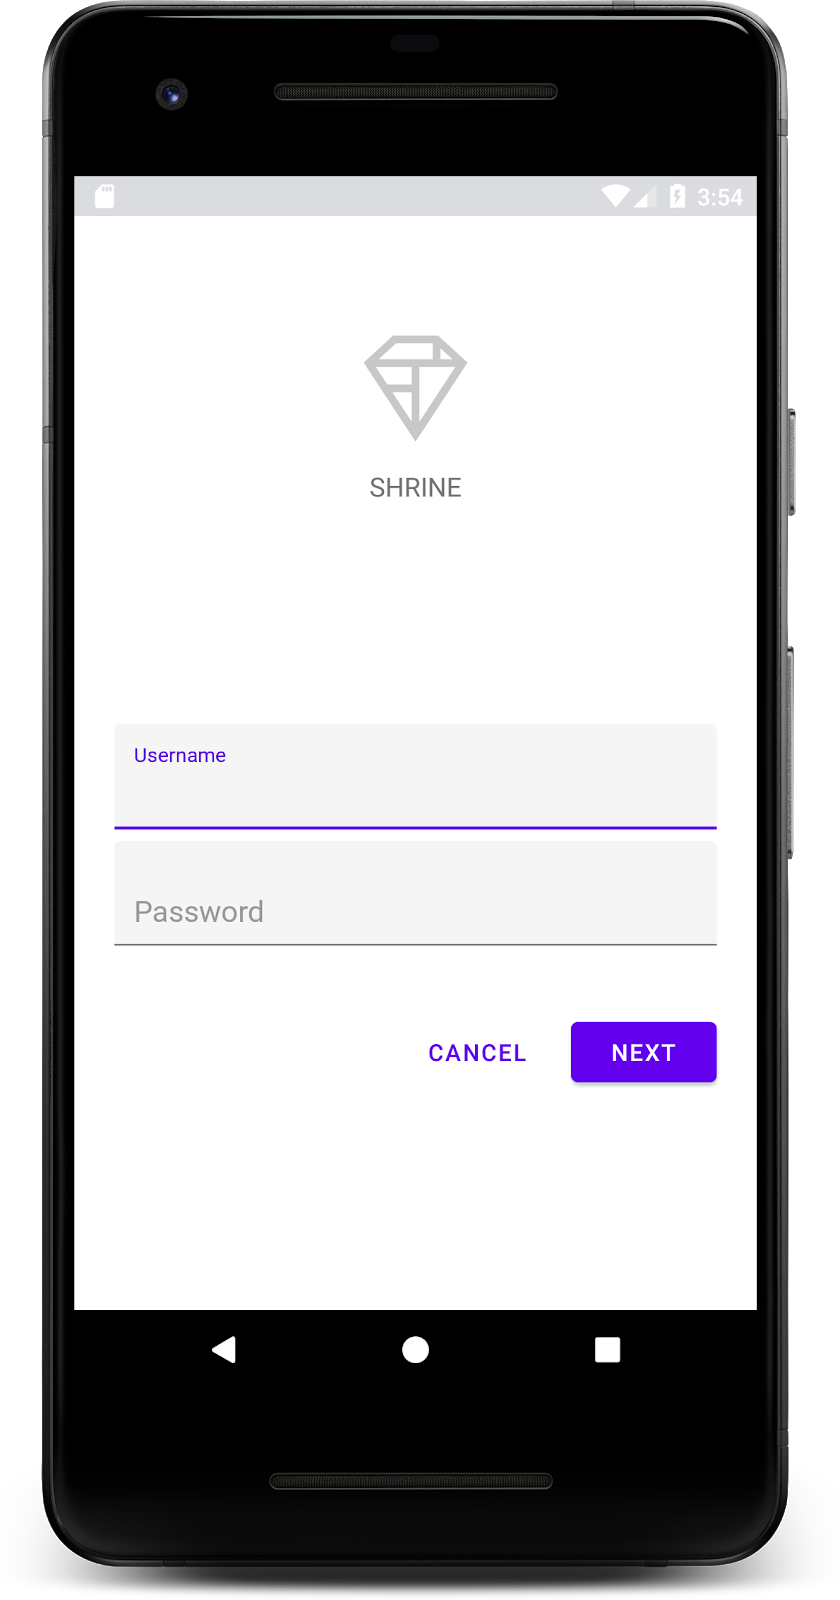
この Codelab の MDC Android コンポーネント
- テキスト フィールド
- ボタン
必要なもの
- Android 開発に関する基本的な知識
- Android Studio(まだお持ちでない場合はこちらからダウンロードしてください)
- Android Emulator または Android デバイス(Android Studio から入手可能)
- サンプルコード(次の手順を参照)
Android アプリの作成経験はどの程度ありますか?
<ph type="x-smartling-placeholder">2. 開発環境を設定する
Android Studio を起動する
Android Studio を開くと、「Welcome to Android Studio」というタイトルのウィンドウが表示されます。ただし、Android Studio を初めて起動している場合は、Android Studio 設定ウィザードの各手順を、デフォルト値を設定しながら進めていきます。このステップでは、必要なファイルのダウンロードとインストールに数分間かかる場合があります。バックグラウンドで実行させたまま、次のセクションに取り組んでもかまいません。
Codelab のスターター アプリをダウンロードする
スターター アプリは material-components-android-codelabs-101-starter/java ディレクトリ内にあります。
GitHub からクローンを作成する
GitHub からこの Codelab のクローンを作成するには、次のコマンドを実行します。
git clone https://github.com/material-components/material-components-android-codelabs
cd material-components-android-codelabs/
git checkout 101-starter
Android Studio にスターター コードを読み込む
- 設定ウィザードが完了し、[Welcome to Android Studio] ウィンドウが表示されたら、[Open an existing Android Studio project] をクリックします。サンプルコードをインストールしたディレクトリに移動し、[java] ->Shrine(またはパソコンで「shrine」を検索)して Shrine プロジェクトを開きます。
- Android Studio がプロジェクトをビルドして同期するまで待ちます。進捗状況は、Android Studio ウィンドウ下部のアクティビティ インジケーターに表示されます。
- この時点では、Android SDK やビルドツール(以下に示すものなど)が不足しているため、Android Studio でビルドエラーが発生する場合があります。Android Studio の手順に沿って、これらをインストールまたは更新し、プロジェクトを同期します。
プロジェクトの依存関係を追加する
プロジェクトに MDC Android サポート ライブラリへの依存関係が必要である。ダウンロードしたサンプルコードには、この依存関係がすでにリストされているはずですが、次の手順で確認することをおすすめします。
appモジュールのbuild.gradleファイルに移動し、dependenciesブロックに MDC Android への依存関係が含まれていることを確認します。
api 'com.google.android.material:material:1.1.0-alpha06'
- (省略可)必要に応じて
build.gradleファイルを編集して次の依存関係を追加し、プロジェクトを同期します。
dependencies {
    api 'com.google.android.material:material:1.1.0-alpha06'
    implementation 'androidx.legacy:legacy-support-v4:1.0.0'
    implementation 'com.android.volley:volley:1.1.1'
    implementation 'com.google.code.gson:gson:2.8.5'
    implementation "org.jetbrains.kotlin:kotlin-stdlib-jdk7:1.3.21"
    testImplementation 'junit:junit:4.12'
    androidTestImplementation 'androidx.test:core:1.1.0'
    androidTestImplementation 'androidx.test.ext:junit:1.1.0'
    androidTestImplementation 'androidx.test:runner:1.2.0-alpha05'
    androidTestImplementation 'androidx.test.espresso:espresso-core:3.2.0-alpha05'
}
スターター アプリを実行する
|
完了しました。Shrine のログインページのスターター コードがエミュレータで実行されている必要があります。「Shrine」という名前が表示されます。そのすぐ下に Shrine ロゴが表示されます。
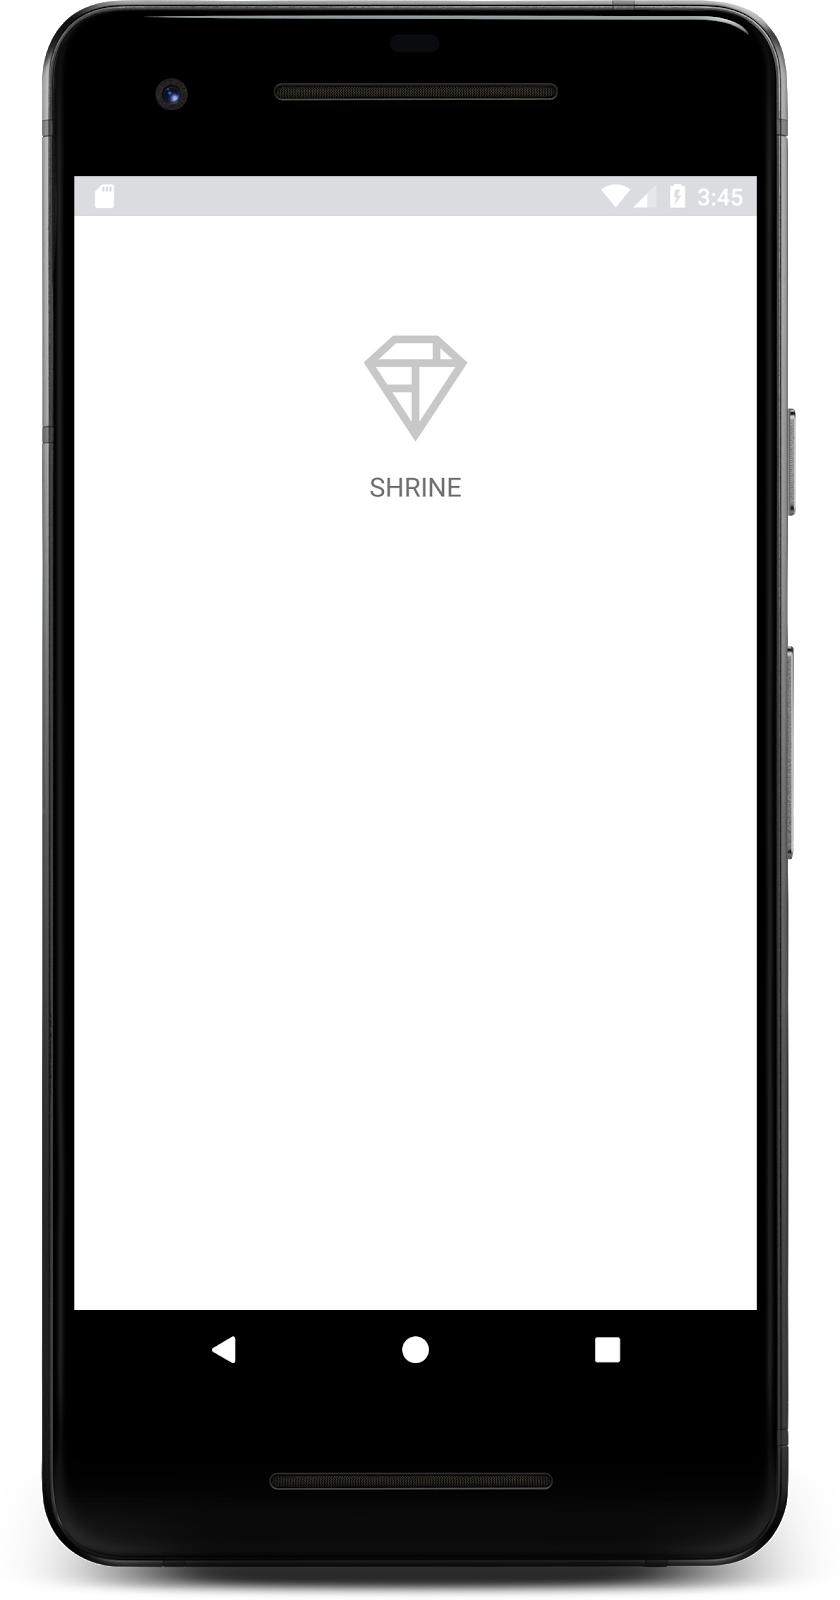
次に、コードを見てみましょう。サンプルコードには、フラグメントを表示し、フラグメント間を移動するためのシンプルな Fragment ナビゲーション フレームワークが用意されています。
shrine -> app -> src -> main -> java -> com.google.codelabs.mdc.java.shrine ディレクトリの MainActivity.java を開きます。以下が含まれているはずです。
MainActivity.java
package com.google.codelabs.mdc.java.shrine;

import android.os.Bundle;
import androidx.appcompat.app.AppCompatActivity;
import androidx.fragment.app.Fragment;
import androidx.fragment.app.FragmentTransaction;

public class MainActivity extends AppCompatActivity implements NavigationHost {

   @Override
   protected void onCreate(Bundle savedInstanceState) {
       super.onCreate(savedInstanceState);
       setContentView(R.layout.shr_main_activity);

       if (savedInstanceState == null) {
           getSupportFragmentManager()
                   .beginTransaction()
                   .add(R.id.container, new LoginFragment())
                   .commit();
       }
   }

   /**
    * Navigate to the given fragment.
    *
    * @param fragment       Fragment to navigate to.
    * @param addToBackstack Whether or not the current fragment should be added to the backstack.
    */
   @Override
   public void navigateTo(Fragment fragment, boolean addToBackstack) {
       FragmentTransaction transaction =
               getSupportFragmentManager()
                       .beginTransaction()
                       .replace(R.id.container, fragment);

       if (addToBackstack) {
           transaction.addToBackStack(null);
       }

       transaction.commit();
   }
}
このアクティビティは、shr_main_activity.xml で定義された R.layout.shr_main_activity レイアウト ファイルを表示します。
onCreate(), で、MainActivity.java が LoginFragment を表示するために Fragment トランザクションを開始していることがわかります。LoginFragment.この Codelab では、これを変更します。このアクティビティは、NavigationHost で定義された navigateTo(Fragment) メソッドも実装します。このメソッドを使用すると、任意のフラグメントを別のフラグメントに移動できます。
アクティビティ ファイル内で command+クリック(または Ctrl+クリック)shr_main_activity を押してレイアウト ファイルを開くか、app -> res -> layout -> shr_main_activity.xml 内のレイアウト ファイルに移動します。
shr_main_activity.xml
<?xml version="1.0" encoding="utf-8"?>
<FrameLayout xmlns:android="http://schemas.android.com/apk/res/android"
   xmlns:tools="http://schemas.android.com/tools"
   android:id="@+id/container"
   android:layout_width="match_parent"
   android:layout_height="match_parent"
   tools:context=".MainActivity" />
ここには、アクティビティが表示するフラグメントのコンテナとして機能するシンプルな <FrameLayout> があります。LoginFragment.java を開きましょう。
LoginFragment.java
package com.google.codelabs.mdc.java.shrine;

import android.os.Bundle;
import android.view.LayoutInflater;
import android.view.View;
import android.view.ViewGroup;
import androidx.annotation.NonNull;
import androidx.fragment.app.Fragment;

/**
* Fragment representing the login screen for Shrine.
*/
public class LoginFragment extends Fragment {

   @Override
   public View onCreateView(
           @NonNull LayoutInflater inflater, ViewGroup container, Bundle savedInstanceState) {
       // Inflate the layout for this fragment
       View view = inflater.inflate(R.layout.shr_login_fragment, container, false);

       // Snippet from "Navigate to the next Fragment" section goes here.

       return view;
   }

   // "isPasswordValid" from "Navigate to the next Fragment" section method goes here
}
LoginFragment は shr_login_fragment レイアウト ファイルをインフレートして、onCreateView() に表示します。shr_login_fragment.xml レイアウト ファイルを見て、ログインページがどのように表示されるかを確認してみましょう。
shr_login_fragment.xml
<?xml version="1.0" encoding="utf-8"?>
<ScrollView xmlns:android="http://schemas.android.com/apk/res/android"
   xmlns:app="http://schemas.android.com/apk/res-auto"
   xmlns:tools="http://schemas.android.com/tools"
   android:layout_width="match_parent"
   android:layout_height="match_parent"
   android:background="@color/loginPageBackgroundColor"
   tools:context=".LoginFragment">

   <LinearLayout
       android:layout_width="match_parent"
       android:layout_height="wrap_content"
       android:clipChildren="false"
       android:clipToPadding="false"
       android:orientation="vertical"
       android:padding="24dp"
       android:paddingTop="16dp">

       <ImageView
           android:layout_width="64dp"
           android:layout_height="64dp"
           android:layout_gravity="center_horizontal"
           android:layout_marginTop="48dp"
           android:layout_marginBottom="16dp"
           app:srcCompat="@drawable/shr_logo" />

       <TextView
           android:layout_width="wrap_content"
           android:layout_height="wrap_content"
           android:layout_gravity="center_horizontal"
           android:layout_marginBottom="132dp"
           android:text="@string/shr_app_name"
           android:textAllCaps="true"
           android:textSize="16sp" />

       <!-- Snippet from "Add text fields" section goes here. -->

       <!-- Snippet from "Add buttons" section goes here. -->

   </LinearLayout>
</ScrollView>
ここでは、上部に <ImageView> があり、「Shrine」を表す <LinearLayout> が表示されています。ロゴ。
その後に、「SHRINE」を表す <TextView> タグがあります。指定します。このラベルのテキストは、@string/shr_app_name という名前の文字列リソースです。文字列リソース名を Command + クリック(または Ctrl + クリック)するか、app -> res -> values -> strings.xml を開くと、文字列リソースが定義されている strings.xml ファイルを表示できます。今後、文字列リソースがさらに追加された場合は、ここで定義されます。このファイル内のすべてのリソースには、Shrine アプリの一部であることを示す shr_ 接頭辞を付ける必要があります。
スターター コードについて理解できたところで、最初のコンポーネントを実装してみましょう。
3. テキスト フィールドを追加する
まず、ユーザーがユーザー名とパスワードを入力するための 2 つのテキスト フィールドをログインページに追加します。ここでは、フローティング ラベルとエラー メッセージを表示する組み込み機能を含む MDC テキスト フィールド コンポーネントを使用します。
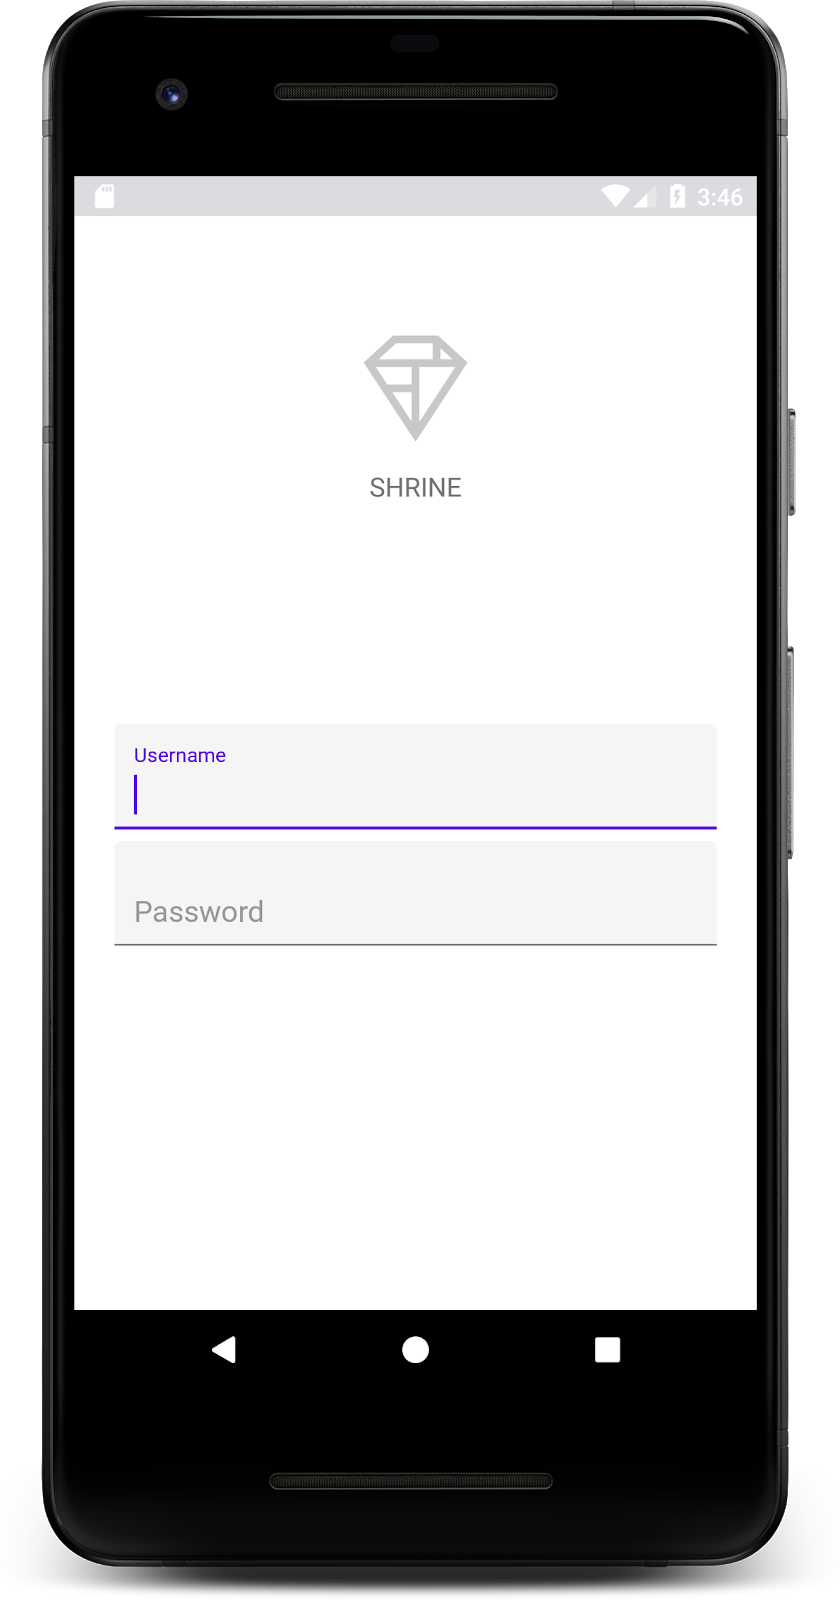
XML を追加する
shr_login_fragment.xml で、<LinearLayout> 内の「SHRINE」の下に子 TextInputEditText を持つ 2 つの TextInputLayout 要素を追加します。ラベル <TextView>:
shr_login_fragment.xml
<com.google.android.material.textfield.TextInputLayout
   android:layout_width="match_parent"
   android:layout_height="wrap_content"
   android:layout_margin="4dp"
   android:hint="@string/shr_hint_username">

   <com.google.android.material.textfield.TextInputEditText
       android:layout_width="match_parent"
       android:layout_height="wrap_content"
       android:inputType="text"
       android:maxLines="1" />
</com.google.android.material.textfield.TextInputLayout>

<com.google.android.material.textfield.TextInputLayout
   android:id="@+id/password_text_input"
   android:layout_width="match_parent"
   android:layout_height="wrap_content"
   android:layout_margin="4dp"
   android:hint="@string/shr_hint_password">

   <com.google.android.material.textfield.TextInputEditText
       android:id="@+id/password_edit_text"
       android:layout_width="match_parent"
       android:layout_height="wrap_content" />
</com.google.android.material.textfield.TextInputLayout>
上記のスニペットは 2 つのテキスト フィールドを表し、それぞれが <TextInputLayout> 要素と <TextInputEditText> 子要素で構成されています。各テキスト フィールドのヒントテキストは android:hint 属性で指定します。
テキスト フィールドに 2 つの新しい文字列リソース @string/shr_hint_username と @string/shr_hint_password を追加しました。これらの文字列リソースを表示するには、strings.xml を開きます。
strings.xml
...
<string name="shr_hint_username">Username</string>
<string name="shr_hint_password">Password</string>
...
入力検証を追加する
TextInputLayout コンポーネントにはエラー フィードバック機能が組み込まれています。
エラー フィードバックを表示するには、shr_login_fragment.xml に次の変更を加えます。
- パスワード
TextInputLayout要素でapp:errorEnabled属性を true に設定します。これにより、テキスト フィールドの下にエラー メッセージのパディングが追加されます。 android:inputType属性を「textPassword」に設定しますPasswordTextInputEditText要素で設定します。これにより、パスワードフィールドの入力テキストが非表示になります。
この変更により、shr_login_fragment.xml のテキスト フィールドは次のようになります。
shr_login_fragment.xml
<com.google.android.material.textfield.TextInputLayout
   android:layout_width="match_parent"
   android:layout_height="wrap_content"
   android:layout_margin="4dp"
   android:hint="@string/shr_hint_username">

   <com.google.android.material.textfield.TextInputEditText
       android:layout_width="match_parent"
       android:layout_height="wrap_content"
       android:inputType="text"
       android:maxLines="1" />
</com.google.android.material.textfield.TextInputLayout>

<com.google.android.material.textfield.TextInputLayout
   android:id="@+id/password_text_input"
   android:layout_width="match_parent"
   android:layout_height="wrap_content"
   android:layout_margin="4dp"
   android:hint="@string/shr_hint_password"
   app:errorEnabled="true">

   <com.google.android.material.textfield.TextInputEditText
       android:id="@+id/password_edit_text"
       android:layout_width="match_parent"
       android:layout_height="wrap_content"
       android:inputType="textPassword"/>
</com.google.android.material.textfield.TextInputLayout>
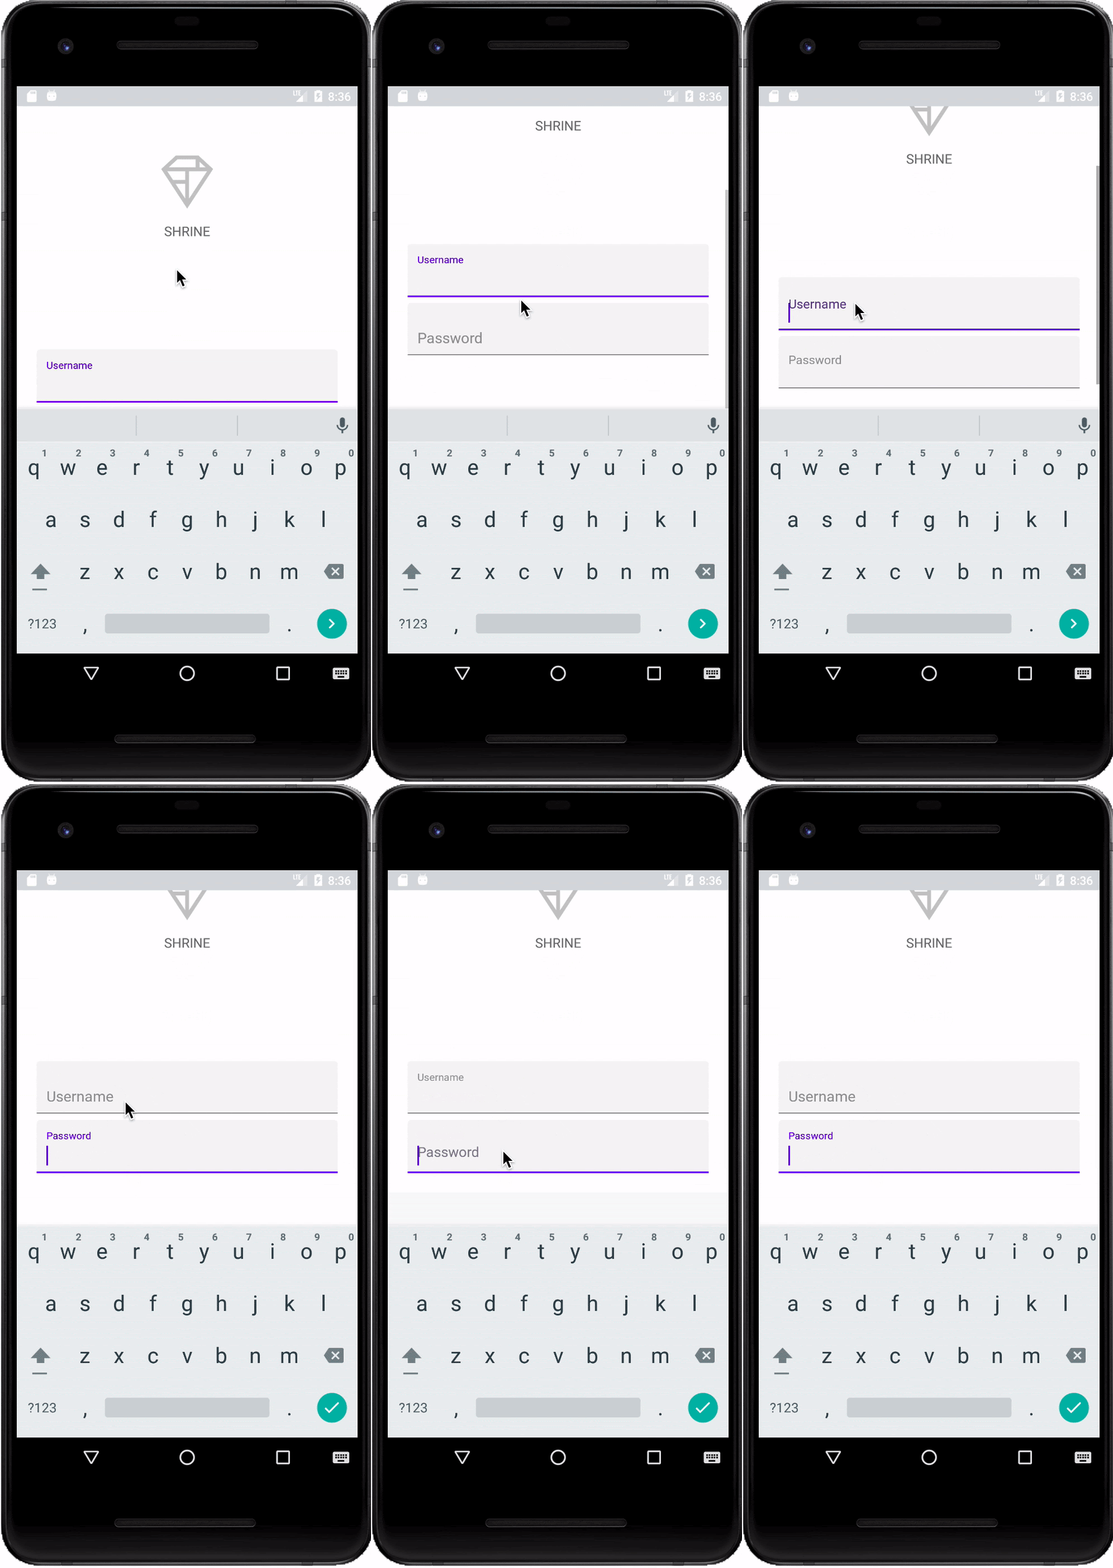
アプリを実行してみましょう。「Username」という 2 つのテキスト フィールドを含むページが表示されます。パスワードを入力してください!
フローティング ラベルのアニメーションを確認します。
4. ボタンを追加する
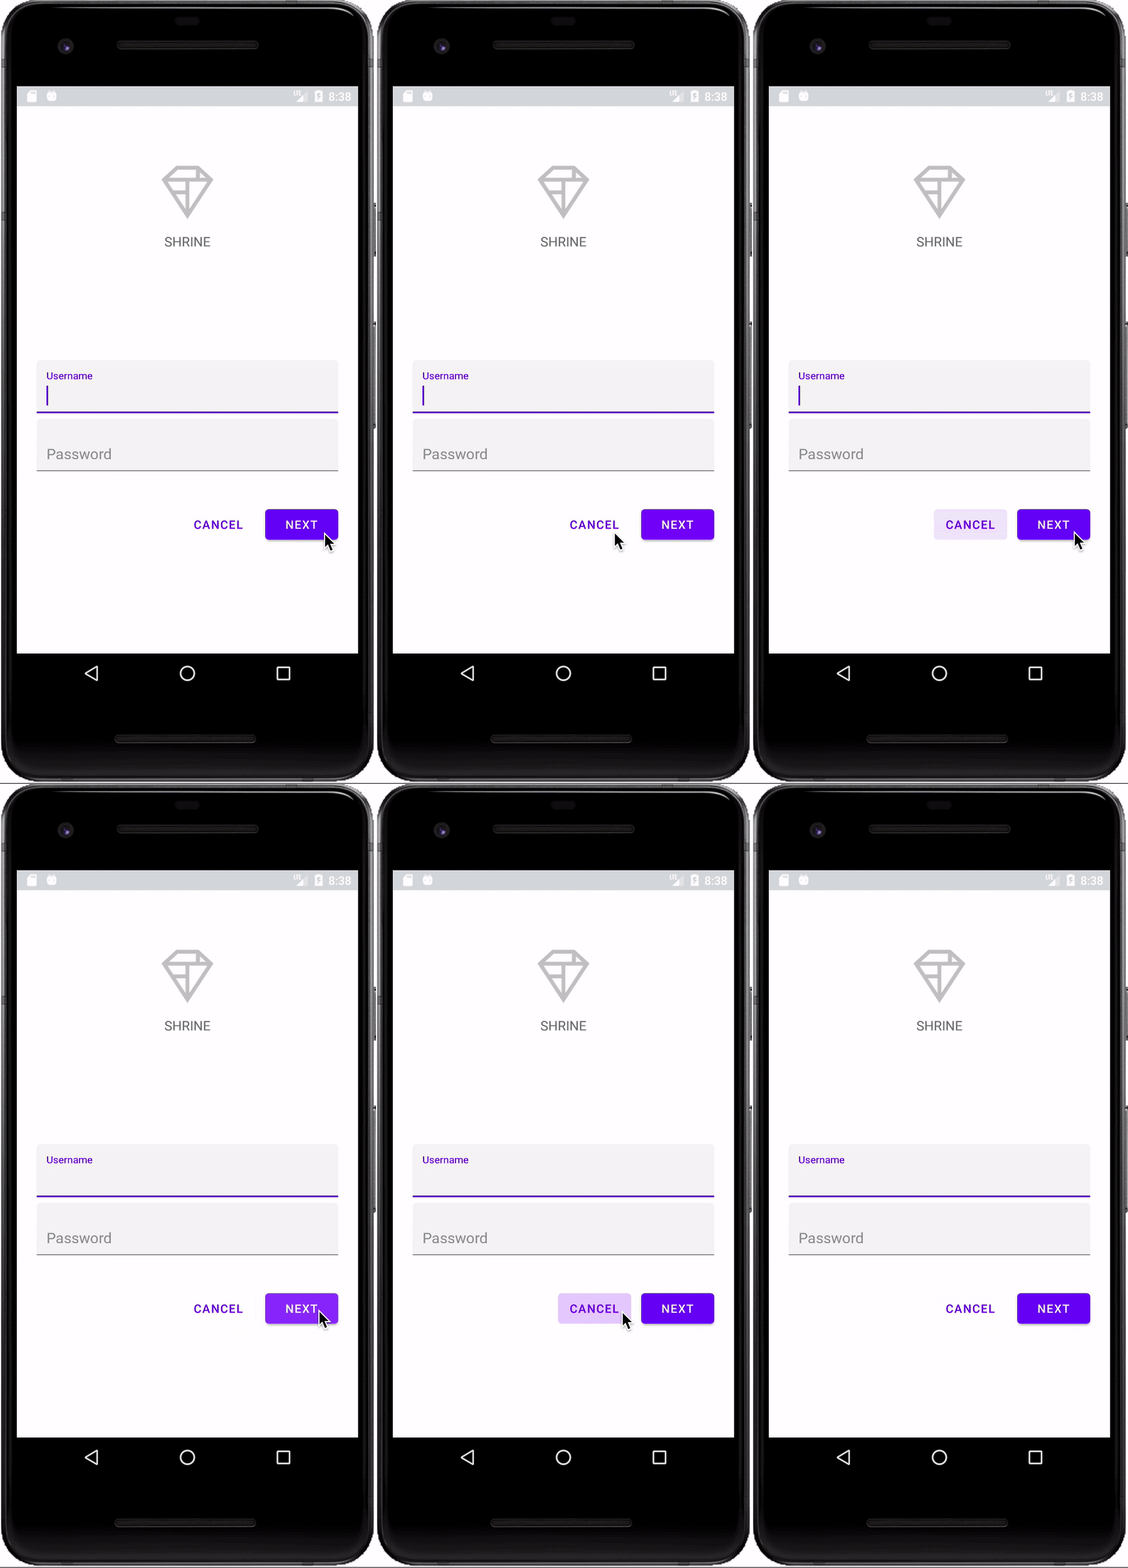
次に、ログインページに「Cancel」と「Next」という 2 つのボタンを追加します。ここでは、マテリアル デザインの象徴的なインク リップル エフェクトが組み込まれた MDC ボタン コンポーネントを使用します。

XML を追加する
shr_login_fragment.xml で、<LinearLayout> の TextInputLayout 要素の下に <RelativeLayout> を追加します。次に、2 つの <MaterialButton> 要素を <RelativeLayout> に追加します。
結果の XML ファイルは次のようになります。
shr_login_fragment.xml
<RelativeLayout
   android:layout_width="match_parent"
   android:layout_height="wrap_content">

   <com.google.android.material.button.MaterialButton
       android:id="@+id/next_button"
       android:layout_width="wrap_content"
       android:layout_height="wrap_content"
       android:layout_alignParentEnd="true"
       android:layout_alignParentRight="true"
       android:text="@string/shr_button_next" />

   <com.google.android.material.button.MaterialButton
       android:id="@+id/cancel_button"
       style="@style/Widget.MaterialComponents.Button.TextButton"
       android:layout_width="wrap_content"
       android:layout_height="wrap_content"
       android:layout_marginEnd="12dp"
       android:layout_marginRight="12dp"
       android:layout_toStartOf="@id/next_button"
       android:layout_toLeftOf="@id/next_button"
       android:text="@string/shr_button_cancel" />

</RelativeLayout>
これで、アプリを実行すると、各ボタンをタップするとインクの波紋が表示されます。
5. 次の Fragment に移動する
最後に、LoginFragment.java に Java コードを追加して「NEXT」に接続します。ボタンを別のフラグメントに追加できます。レイアウトに追加した各コンポーネントに id が割り当てられていることがわかります。これらの id を使用してコード内のコンポーネントを参照し、エラーチェックとナビゲーションを追加します。
LoginFragment.java の onCreateView() の下に、プライベート ブール値 isPasswordValid メソッドを追加して、パスワードが有効かどうかを判断するロジックを追加しましょう。このデモでは、パスワードが 8 文字以上であることを確認します。
LoginFragment.java
/*
   In reality, this will have more complex logic including, but not limited to, actual
   authentication of the username and password.
*/
private boolean isPasswordValid(@Nullable Editable text) {
   return text != null && text.length() >= 8;
}
次に、「Next」ページにクリック リスナーを先ほど作成した isPasswordValid() メソッドに基づいてエラーの設定とクリアを行うボタン。onCreateView() では、このクリック リスナーはインフレータ行と return view 行の間に配置する必要があります。
次に、パスワード TextInputEditText にキーリスナーを追加して、エラーをクリアするキーイベントをリッスンします。このリスナーは、isPasswordValid() を使用してパスワードが有効かどうかを確認する必要もあります。これは、onCreateView() のクリック リスナーのすぐ下に追加できます。
onCreateView() メソッドは次のようになります。
LoginFragment.java
@Override
public View onCreateView(
       @NonNull LayoutInflater inflater, ViewGroup container, Bundle savedInstanceState) {
   // Inflate the layout for this fragment
   View view = inflater.inflate(R.layout.shr_login_fragment, container, false);
   final TextInputLayout passwordTextInput = view.findViewById(R.id.password_text_input);
   final TextInputEditText passwordEditText = view.findViewById(R.id.password_edit_text);
   MaterialButton nextButton = view.findViewById(R.id.next_button);

   // Set an error if the password is less than 8 characters.
   nextButton.setOnClickListener(new View.OnClickListener() {
       @Override
       public void onClick(View view) {
           if (!isPasswordValid(passwordEditText.getText())) {
               passwordTextInput.setError(getString(R.string.shr_error_password));
           } else {
               passwordTextInput.setError(null); // Clear the error
           }
       }
   });

   // Clear the error once more than 8 characters are typed.
   passwordEditText.setOnKeyListener(new View.OnKeyListener() {
       @Override
       public boolean onKey(View view, int i, KeyEvent keyEvent) {
           if (isPasswordValid(passwordEditText.getText())) {
               passwordTextInput.setError(null); //Clear the error
           }
           return false;
       }
   });
   return view;
}
これで、別のフラグメントに移動できるようになりました。エラー検証が成功したときに別のフラグメントに移動するように、onCreateView() の OnClickListener を更新します。これを行うには、クリック リスナーの else ケースに ProductGridFragment に移動する次の行を追加します。
LoginFragment.java
...
((NavigationHost) getActivity()).navigateTo(new ProductGridFragment(), false); // Navigate to the next Fragment
...
クリック リスナーは次のようになります。
LoginFragment.java
...
MaterialButton nextButton = view.findViewById(R.id.next_button);

// Set an error if the password is less than 8 characters.
nextButton.setOnClickListener(new View.OnClickListener() {
   @Override
   public void onClick(View view) {
       if (!isPasswordValid(passwordEditText.getText())) {
           passwordTextInput.setError(getString(R.string.shr_error_password));
       } else {
           passwordTextInput.setError(null); // Clear the error
           ((NavigationHost) getActivity()).navigateTo(new ProductGridFragment(), false); // Navigate to the next Fragment
       }
   }
});
...
この新しいコード行は、MainActivity から navigateTo() メソッドを呼び出して、新しいフラグメント ProductGridFragment に移動します。現時点では空のページですが、MDC-102 で作業します。
次に、アプリをビルドします。では [次へ] ボタンを押してください。
これで完了です。この画面は、MDC-102 で取り組む次の Codelab の出発点となります。
6. 完了
基本的な XML マークアップと約 30 行の Java を使用して、マテリアル デザイン ライブラリのマテリアル コンポーネントにより、マテリアル デザイン ガイドラインを遵守し、すべてのデバイスで一貫した外観と動作の美しいログインページを作成できます。
次のステップ
テキスト フィールドとボタンは MDC Android ライブラリの 2 つのコア コンポーネントですが、他にも多くのコンポーネントがあります。その他の MDC Android のコンポーネントもご覧ください。トップ アプリバー、カードビュー、グリッド レイアウトの詳細については、MDC 102: マテリアル デザインの構造とレイアウトをご覧ください。マテリアル コンポーネントをお試しいただきありがとうございます。この Codelab がお役に立ちましたら幸いです。
