1. 簡介
Material Design 元件 (MDC) 可協助開發人員實作質感設計。MDC 是由 Google 工程師和使用者體驗設計師團隊打造,提供數十種精美且功能豐富的 UI 元件,適用於 Android、iOS、網頁和 Flutter.material.io/develop |
在程式碼研究室 MDC-101 中,您使用兩個 Material 元件 (MDC) 建構登入頁面:文字欄位和含有墨水漣漪的按鈕。現在,讓我們加入導覽、結構和資料,進一步擴充這個基礎。
建構項目
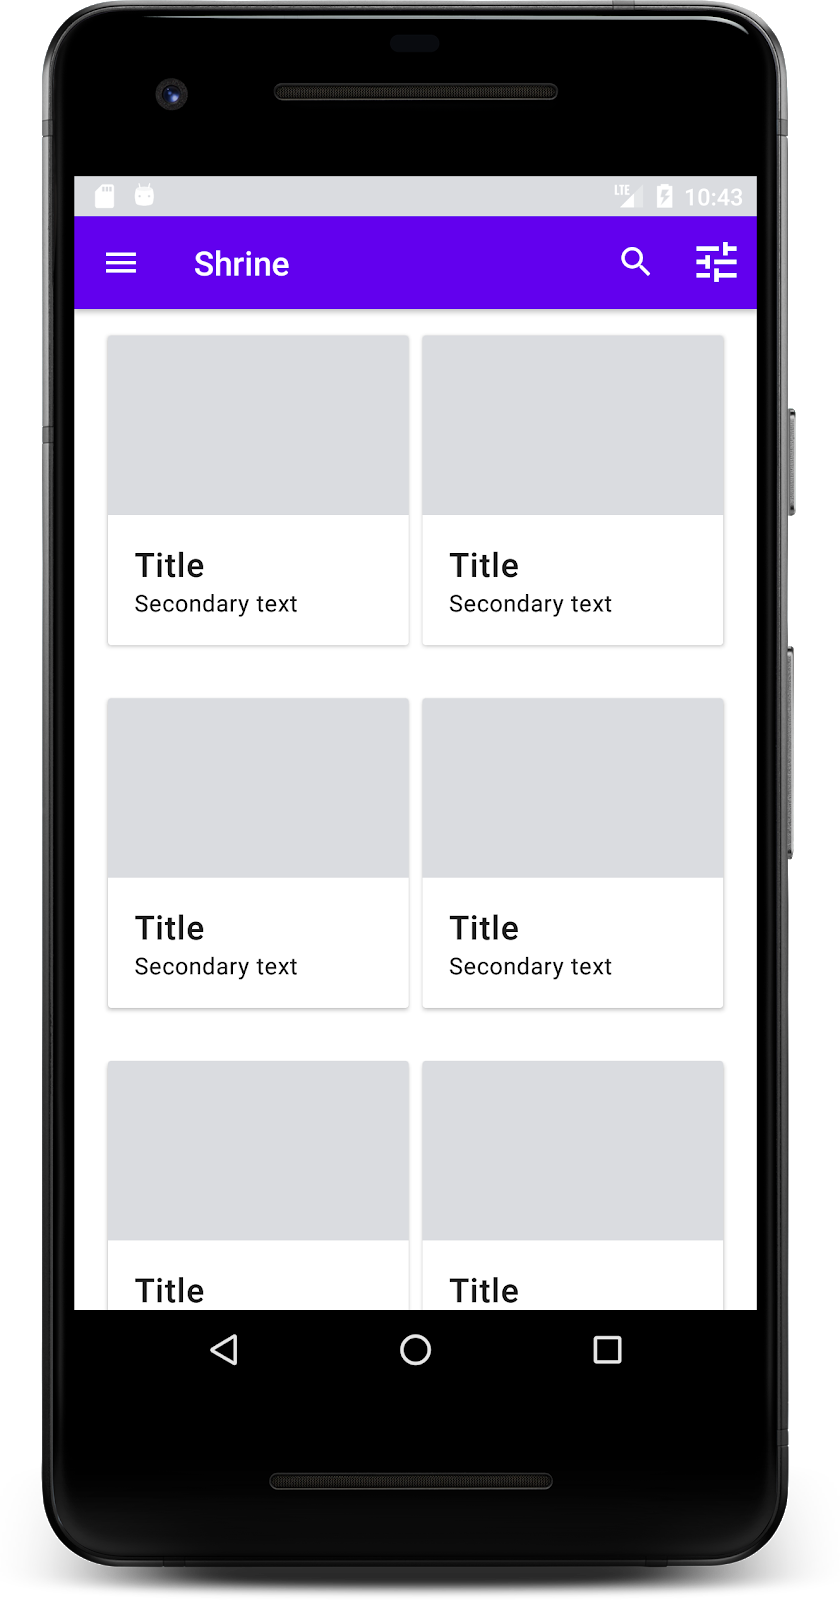
在本程式碼研究室中,您會為名為 Shrine 的電子商務應用程式建構主畫面,這是一款用於販售服飾和居家用品的電子商務應用程式。其中包含:
- 頂端應用程式列
- 完整的產品格狀清單
本程式碼研究室中的 MDC-Android 元件
- AppBarLayout
- MaterialCardView
軟硬體需求
- 對 Android 開發作業有基本瞭解
- Android Studio (如果尚未安裝,請在這裡下載)
- Android 模擬器或裝置 (可透過 Android Studio 取得)
- 程式碼範例 (請參閱下一步)
你對建立 Android 應用程式的經驗程度為何?
2. 設定開發環境
您使用的是 MDC-101 版本嗎?
如果您已完成 MDC-101 課程,您的程式碼應已準備好用於本程式碼研究室。跳至步驟 3:新增頂端應用程式列。
從頭開始?
下載程式碼研究室入門應用程式
範例應用程式位於 material-components-android-codelabs-102-starter/kotlin 目錄中。請務必先 cd 放入該目錄,再開始操作。
...或是從 GitHub 複製檔案
如要從 GitHub 複製本程式碼研究室,請執行下列指令:
git clone https://github.com/material-components/material-components-android-codelabs
cd material-components-android-codelabs/
git checkout 102-starter
在 Android Studio 中載入範例程式碼
- 設定精靈完成後,系統顯示「Welcome to Android Studio」視窗,請按一下「Open an existing Android Studio project」。前往您安裝程式碼範例的目錄,然後選取 kotlin ->神殿 (或在電腦中搜尋小時),開啟運送專案。
- 等待 Android Studio 建構並同步處理專案,如 Android Studio 視窗底部的活動指標所示。
- 此時,Android Studio 可能會引發部分建構錯誤,因為缺少 Android SDK 或建構工具 (如下所示)。請按照 Android Studio 中的指示安裝/更新這些套件,並同步處理專案。
新增專案依附元件
專案需要使用 MDC Android 支援資料庫的依附元件。您下載的程式碼範例中應該已經包含這個依附元件,但建議您執行下列步驟確認。
- 前往
app模組的build.gradle檔案,確認dependencies區塊包含 MDC Android 的依附元件:
api 'com.google.android.material:material:1.1.0-alpha06'
- (選用) 如有需要,請編輯
build.gradle檔案,新增下列依附元件並同步處理專案。
dependencies {
    api 'com.google.android.material:material:1.1.0-alpha06'
    implementation 'androidx.legacy:legacy-support-v4:1.0.0'
    implementation 'com.android.volley:volley:1.1.1'
    implementation 'com.google.code.gson:gson:2.8.5'
    implementation "org.jetbrains.kotlin:kotlin-stdlib-jdk7:1.3.21"
    testImplementation 'junit:junit:4.12'
    androidTestImplementation 'androidx.test:core:1.1.0'
    androidTestImplementation 'androidx.test.ext:junit:1.1.0'
    androidTestImplementation 'androidx.test:runner:1.2.0-alpha05'
    androidTestImplementation 'androidx.test.espresso:espresso-core:3.2.0-alpha05'
}
執行範例應用程式
|
大功告成!您應該會在 MDC-101 程式碼研究室中看到 Shrine 登入頁面。
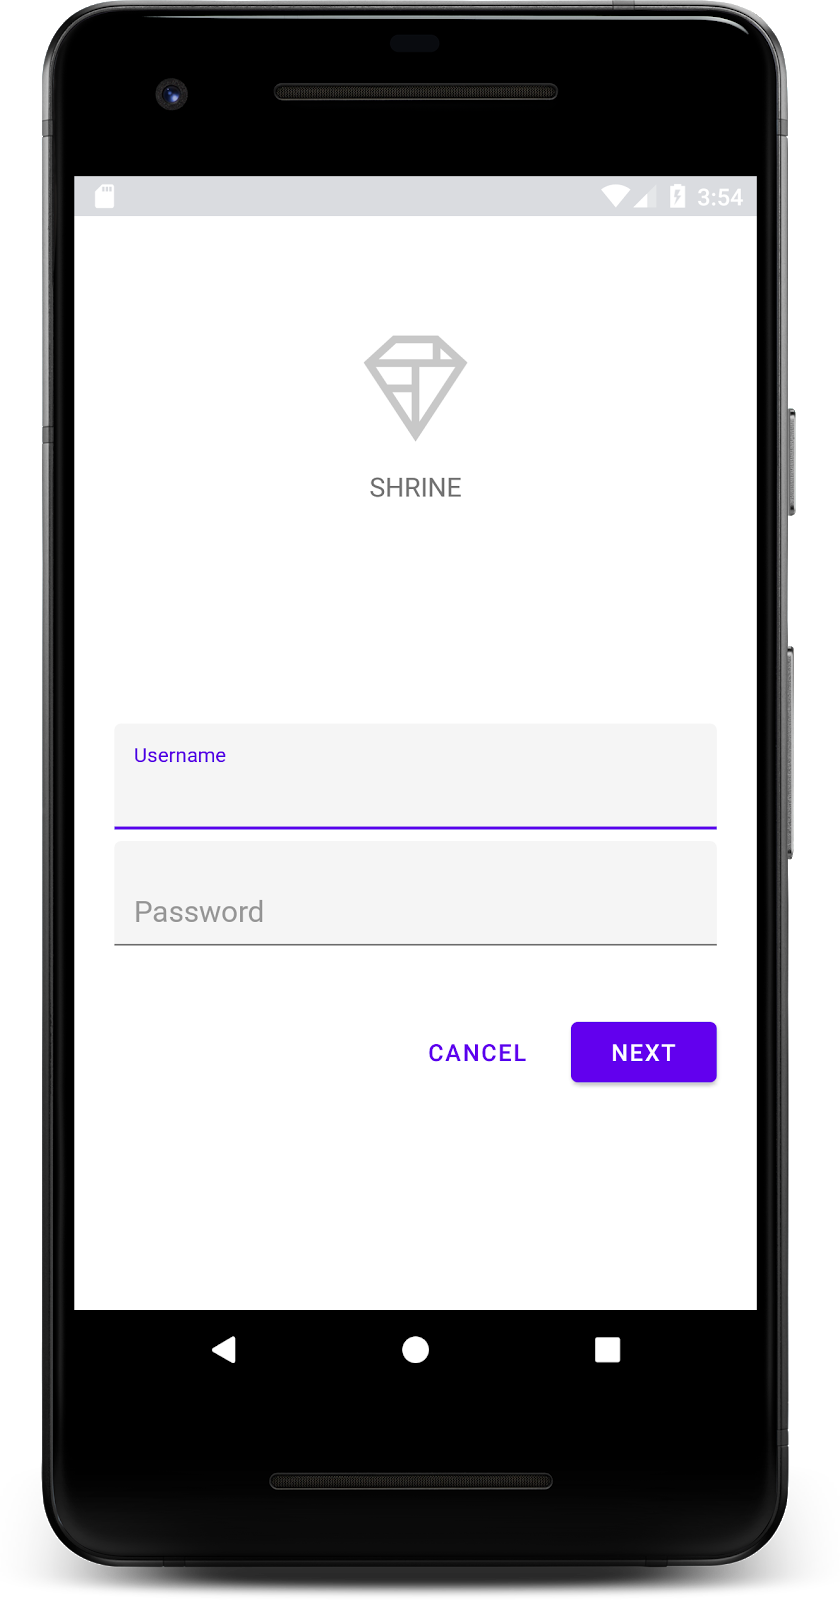
現在登入畫面沒有問題,讓我們在應用程式中填入部分產品。
3. 新增頂端應用程式列
登入頁面關閉後,主畫面會顯示「你成功了!」畫面。太好了!不過,使用者現在完全不需要採取任何行動,也不用擔心他們在應用程式中的哪個位置。現在可以新增導航功能了。
Material Design 提供的瀏覽模式可確保高度可用性。其中最明顯的元件之一是頂端應用程式列。
如要提供導覽選項,並讓使用者快速存取其他動作,請加入頂端應用程式列。
新增 AppBar 小工具
在 shr_product_grid_fragment.xml 中,刪除包含「您做到了!」的 <LinearLayout> 區塊TextView,並替換為以下內容:
shr_product_grid_fragment.xml
<com.google.android.material.appbar.AppBarLayout
   android:layout_width="match_parent"
   android:layout_height="wrap_content">

   <androidx.appcompat.widget.Toolbar
       android:id="@+id/app_bar"
       style="@style/Widget.Shrine.Toolbar"
       android:layout_width="match_parent"
       android:layout_height="?attr/actionBarSize"
       app:title="@string/shr_app_name" />
</com.google.android.material.appbar.AppBarLayout>
shr_product_grid_fragment.xml 現在應如下所示:
shr_product_grid_fragment.xml
<?xml version="1.0" encoding="utf-8"?>
<FrameLayout xmlns:android="http://schemas.android.com/apk/res/android"
   xmlns:app="http://schemas.android.com/apk/res-auto"
   xmlns:tools="http://schemas.android.com/tools"
   android:layout_width="match_parent"
   android:layout_height="match_parent"
   tools:context=".ProductGridFragment">

   <com.google.android.material.appbar.AppBarLayout
       android:layout_width="match_parent"
       android:layout_height="wrap_content">

       <androidx.appcompat.widget.Toolbar
           android:id="@+id/app_bar"
           style="@style/Widget.Shrine.Toolbar"
           android:layout_width="match_parent"
           android:layout_height="?attr/actionBarSize"
           app:title="@string/shr_app_name" />
   </com.google.android.material.appbar.AppBarLayout>

</FrameLayout>
許多應用程式列的標題旁邊都有按鈕。現在我們來新增功能表圖示。
新增導覽圖示
在 shr_product_grid_fragment.xml 中,將以下內容新增至剛新增至版面配置的 Toolbar XML 元件:
shr_product_grid_fragment.xml
app:navigationIcon="@drawable/shr_menu"
shr_product_grid_fragment.xml 應如下所示:
shr_product_grid_fragment.xml
<?xml version="1.0" encoding="utf-8"?>
<FrameLayout xmlns:android="http://schemas.android.com/apk/res/android"
   xmlns:app="http://schemas.android.com/apk/res-auto"
   xmlns:tools="http://schemas.android.com/tools"
   android:layout_width="match_parent"
   android:layout_height="match_parent"
   tools:context=".ProductGridFragment">

   <com.google.android.material.appbar.AppBarLayout
       android:layout_width="match_parent"
       android:layout_height="wrap_content">

       <androidx.appcompat.widget.Toolbar
           android:id="@+id/app_bar"
           style="@style/Widget.Shrine.Toolbar"
           android:layout_width="match_parent"
           android:layout_height="?attr/actionBarSize"
           app:navigationIcon="@drawable/shr_menu"
           app:title="@string/shr_app_name" />
   </com.google.android.material.appbar.AppBarLayout>

</FrameLayout>
新增動作按鈕及設定頂端應用程式列的樣式
此外,您也可以在應用程式列的末端加入按鈕。在 Android 中,這些按鈕稱為動作按鈕。我們將為頂端應用程式列設定樣式,並以程式輔助方式在選單中新增動作按鈕。
在 ProductGridFragment.kt 的 onCreateView 函式中,使用 setSupportActionBar 設定 activity 的 Toolbar,做為 ActionBar 使用。使用 inflater 建立檢視區塊後,即可執行此操作。
ProductGridFragment.kt
override fun onCreateView(
       inflater: LayoutInflater, container: ViewGroup?, savedInstanceState: Bundle?): View? {
   // Inflate the layout for this fragment with the ProductGrid theme
   val view = inflater.inflate(R.layout.shr_product_grid_fragment, container, false)

   // Set up the toolbar.
   (activity as AppCompatActivity).setSupportActionBar(view.app_bar)

   return view;
}
接著,在剛剛變更要設定工具列的方法正下方,請覆寫 onCreateOptionsMenu,將 shr_toolbar_menu.xml 的內容加載到工具列:
ProductGridFragment.kt
override fun onCreateOptionsMenu(menu: Menu, menuInflater: MenuInflater) {
   menuInflater.inflate(R.menu.shr_toolbar_menu, menu)
   super.onCreateOptionsMenu(menu, menuInflater)
}
最後,覆寫 ProductGridFragment.kt 中的 onCreate(),並在呼叫 super() 後使用 true 呼叫 setHasOptionMenu:
ProductGridFragment.kt
override fun onCreate(savedInstanceState: Bundle?) {
   super.onCreate(savedInstanceState)
   setHasOptionsMenu(true)
}
上述程式碼片段會將 XML 版面配置的應用程式列設為此活動的動作列。回呼 onCreateOptionsMenu 會指示活動要使用哪個項目做為選單。在本範例中,它會將 R.menu.shr_toolbar_menu 的選單項目放入應用程式列。功能表檔案包含兩個項目:「搜尋」和「篩選器」
shr_toolbar_menu.xml
<?xml version="1.0" encoding="utf-8"?>
<menu xmlns:android="http://schemas.android.com/apk/res/android"
   xmlns:app="http://schemas.android.com/apk/res-auto">
   <item
       android:id="@+id/search"
       android:icon="@drawable/shr_search"
       android:title="@string/shr_search_title"
       app:showAsAction="always" />
   <item
       android:id="@+id/filter"
       android:icon="@drawable/shr_filter"
       android:title="@string/shr_filter_title"
       app:showAsAction="always" />
</menu>
完成變更後,ProductGridFragment.kt 檔案應如下所示:
ProductGridFragment.kt
package com.google.codelabs.mdc.kotlin.shrine

import android.os.Bundle
import android.view.LayoutInflater
import android.view.Menu
import android.view.MenuInflater
import android.view.View
import android.view.ViewGroup
import androidx.appcompat.app.AppCompatActivity
import androidx.fragment.app.Fragment
import androidx.recyclerview.widget.GridLayoutManager
import com.google.codelabs.mdc.kotlin.shrine.network.ProductEntry
import kotlinx.android.synthetic.main.shr_product_grid_fragment.view.*

class ProductGridFragment : Fragment() {

   override fun onCreate(savedInstanceState: Bundle?) {
       super.onCreate(savedInstanceState)
       setHasOptionsMenu(true)
   }

   override fun onCreateView(
           inflater: LayoutInflater, container: ViewGroup?, savedInstanceState: Bundle?): View? {
       // Inflate the layout for this fragment with the ProductGrid theme
       val view = inflater.inflate(R.layout.shr_product_grid_fragment, container, false)

       // Set up the tool bar
       (activity as AppCompatActivity).setSupportActionBar(view.app_bar)

       return view;
   }

   override fun onCreateOptionsMenu(menu: Menu, menuInflater: MenuInflater) {
       menuInflater.inflate(R.menu.shr_toolbar_menu, menu)
       super.onCreateOptionsMenu(menu, menuInflater)
   }
}
建構及執行。主畫面應如下所示:
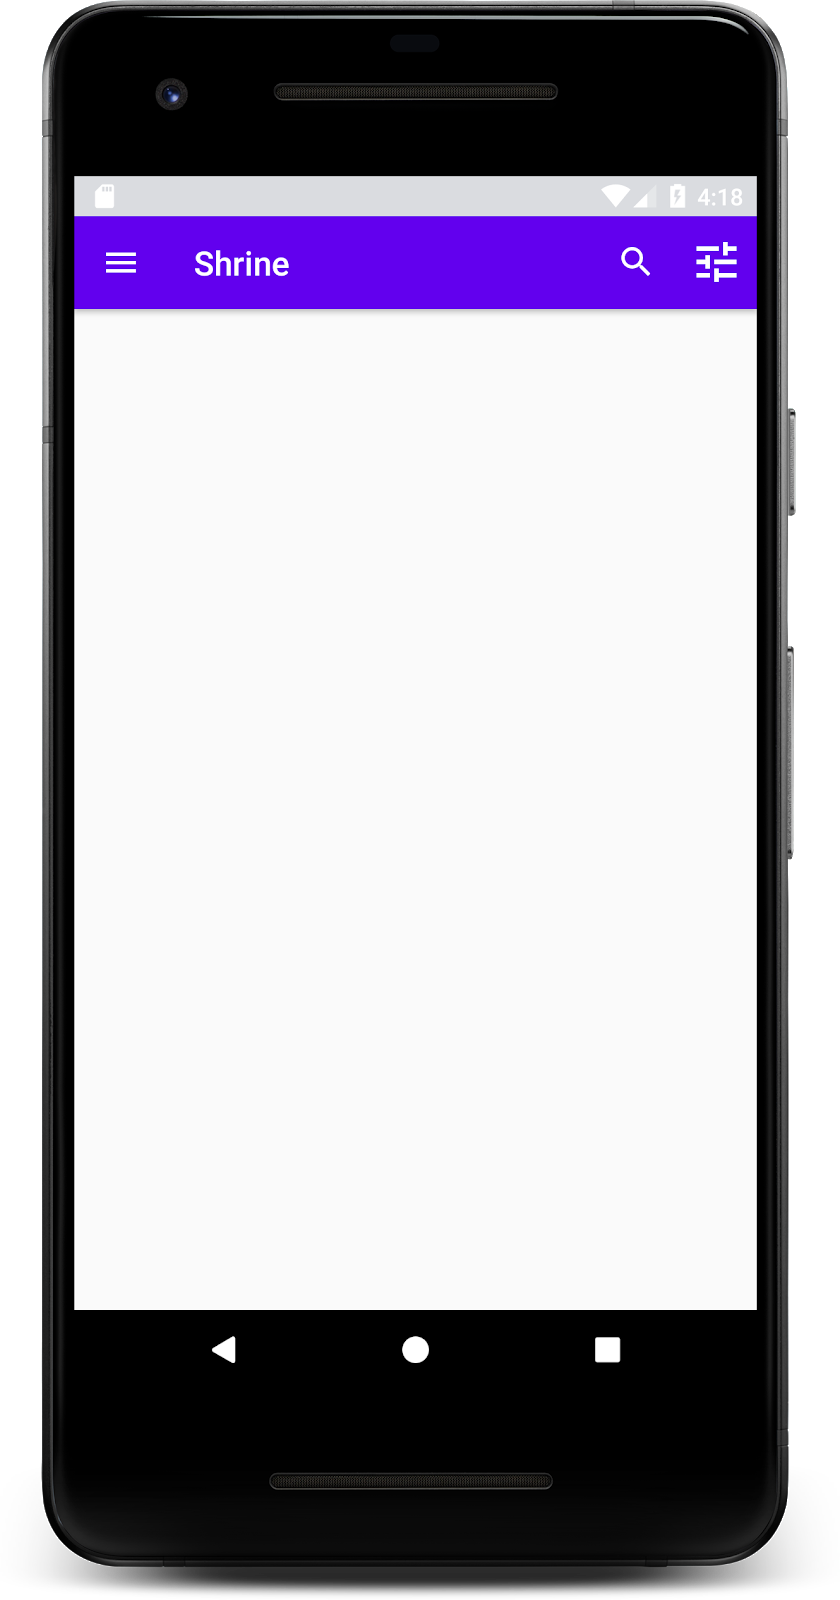
現在工具列的右側包含導覽圖示、標題和兩個動作圖示。工具列也會使用細微的陰影顯示高度,讓它看起來與內容位於不同圖層。
4. 新增卡片
現在應用程式已具備一些結構,接下來我們要將內容放在資訊卡中。
新增卡片
讓我們先在頂端應用程式列下方新增一張資訊卡。資訊卡應包含圖片的區域、標題和次要文字的標籤。在 AppBarLayout 下方的 shr_product_grid_fragment.xml 中新增以下內容。
shr_product_grid_fragment.xml
<com.google.android.material.card.MaterialCardView
   android:layout_width="160dp"
   android:layout_height="180dp"
   android:layout_marginBottom="16dp"
   android:layout_marginLeft="16dp"
   android:layout_marginRight="16dp"
   android:layout_marginTop="70dp"
   app:cardBackgroundColor="?attr/colorPrimaryDark"
   app:cardCornerRadius="4dp">

   <LinearLayout
       android:layout_width="match_parent"
       android:layout_height="wrap_content"
       android:layout_gravity="bottom"
       android:background="#FFFFFF"
       android:orientation="vertical"
       android:padding="8dp">

       <TextView
           android:layout_width="match_parent"
           android:layout_height="wrap_content"
           android:padding="2dp"
           android:text="@string/shr_product_title"
           android:textAppearance="?attr/textAppearanceHeadline6" />

       <TextView
           android:layout_width="match_parent"
           android:layout_height="wrap_content"
           android:padding="2dp"
           android:text="@string/shr_product_description"
           android:textAppearance="?attr/textAppearanceBody2" />
   </LinearLayout>
</com.google.android.material.card.MaterialCardView>
建構並執行:
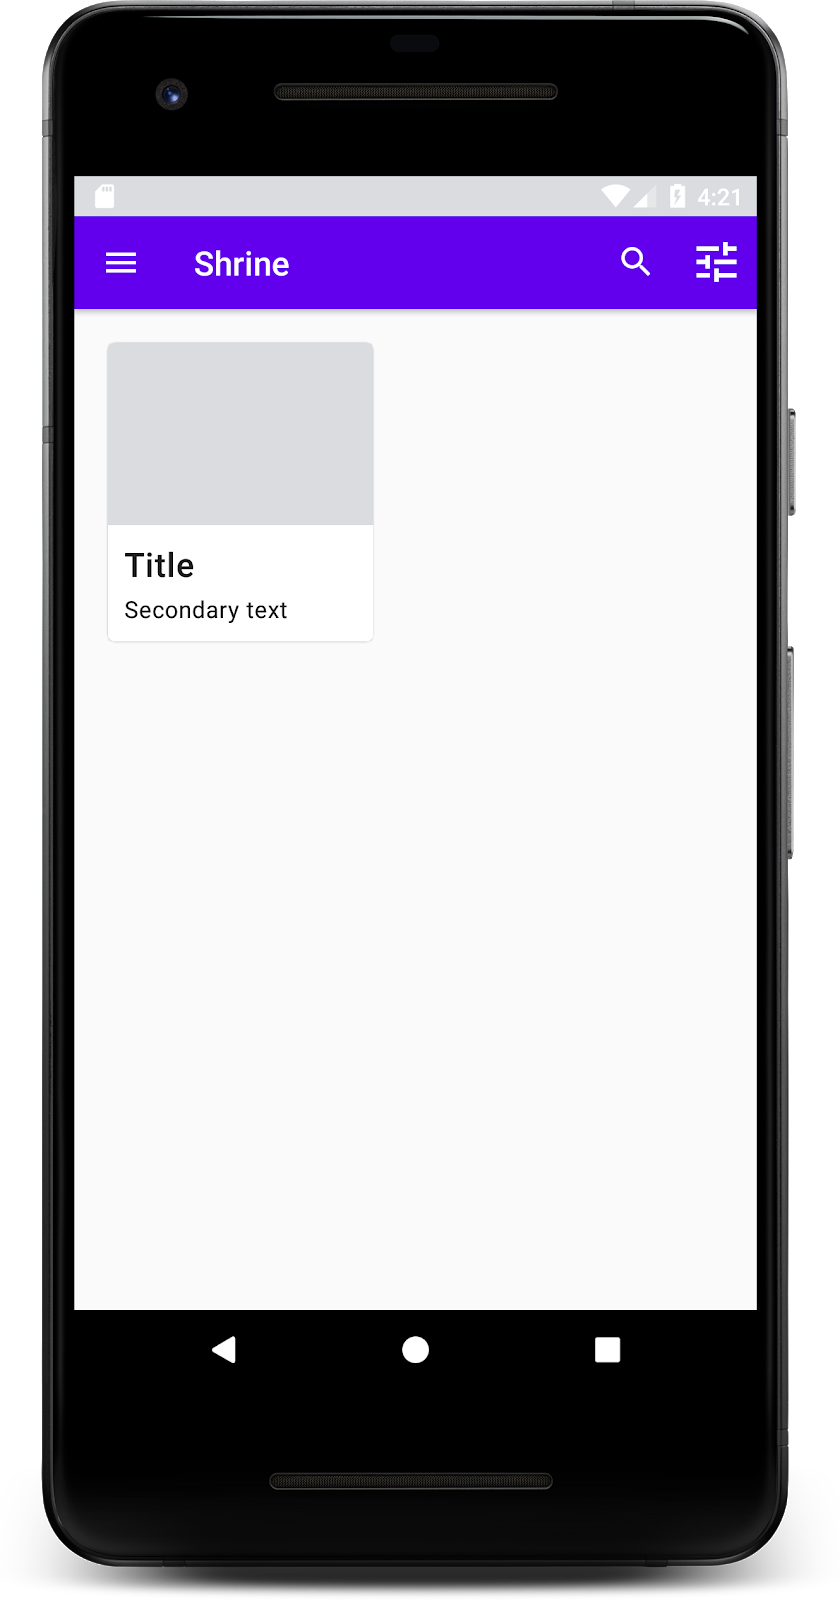
在這個預覽畫面中,您可以看到資訊卡從左側邊緣插入,而且有圓角和陰影 (代表卡片高度)。整個元素稱為「容器」。除了容器之外,容器中的所有元素皆為選用項目。
您可以在容器中加入下列元素:標題文字、縮圖或顯示圖片、子標題文字、分隔線,甚至是按鈕和圖示。例如,我們剛剛建立的資訊卡,在 LinearLayout 中包含兩個 TextView (一個用於標題,另一個用於次要文字),一個與資訊卡底部對齊。
資訊卡通常會與其他資訊卡一起顯示。在本程式碼研究室的下一節中,我們會以格線的形式列出這些元件。
5. 建立資訊卡格線
如果畫面顯示多張資訊卡,系統會將這些資訊卡歸入一或多個集合。格狀檢視畫面中的資訊卡是共鄰的,代表兩者的靜置高度相同 (除非已選擇或拖曳,但本程式碼研究室不會說明此步驟)。
設定資訊卡格線
查看我們提供給您的 shr_product_card.xml 檔案:
shr_product_card.xml
<?xml version="1.0" encoding="utf-8"?>
<com.google.android.material.card.MaterialCardView xmlns:android="http://schemas.android.com/apk/res/android"
   xmlns:app="http://schemas.android.com/apk/res-auto"
   android:layout_width="match_parent"
   android:layout_height="wrap_content"
   app:cardBackgroundColor="@android:color/white"
   app:cardElevation="2dp"
   app:cardPreventCornerOverlap="true">

   <LinearLayout
       android:layout_width="match_parent"
       android:layout_height="wrap_content"
       android:orientation="vertical">

       <com.android.volley.toolbox.NetworkImageView
           android:id="@+id/product_image"
           android:layout_width="match_parent"
           android:layout_height="@dimen/shr_product_card_image_height"
           android:background="?attr/colorPrimaryDark"
           android:scaleType="centerCrop" />

       <LinearLayout
           android:layout_width="match_parent"
           android:layout_height="wrap_content"
           android:orientation="vertical"
           android:padding="16dp">

           <TextView
               android:id="@+id/product_title"
               android:layout_width="match_parent"
               android:layout_height="wrap_content"
               android:text="@string/shr_product_title"
               android:textAppearance="?attr/textAppearanceHeadline6" />

           <TextView
               android:id="@+id/product_price"
               android:layout_width="match_parent"
               android:layout_height="wrap_content"
               android:text="@string/shr_product_description"
               android:textAppearance="?attr/textAppearanceBody2" />
       </LinearLayout>
   </LinearLayout>
</com.google.android.material.card.MaterialCardView>
這個資訊卡版面配置包含一張含有圖片的資訊卡 (在本例中為 NetworkImageView,可從網址載入並顯示圖片) 和兩個 TextViews。
接下來,請參閱我們的 ProductCardRecyclerViewAdapter。這個套件與 ProductGridFragment 位於相同套件中。
ProductCardRecyclerViewAdapter.kt
package com.google.codelabs.mdc.kotlin.shrine

import android.view.LayoutInflater
import android.view.ViewGroup
import androidx.recyclerview.widget.RecyclerView

import com.google.codelabs.mdc.kotlin.shrine.network.ProductEntry

/**
* Adapter used to show a simple grid of products.
*/
class ProductCardRecyclerViewAdapter(private val productList: List<ProductEntry>) : RecyclerView.Adapter<ProductCardViewHolder>() {

   override fun onCreateViewHolder(parent: ViewGroup, viewType: Int): ProductCardViewHolder {
       val layoutView = LayoutInflater.from(parent.context).inflate(R.layout.shr_product_card, parent, false)
       return ProductCardViewHolder(layoutView)
   }

   override fun onBindViewHolder(holder: ProductCardViewHolder, position: Int) {
       // TODO: Put ViewHolder binding code here in MDC-102
   }

   override fun getItemCount(): Int {
       return productList.size
   }
}
上述的轉接程式類別可管理格線的內容。為了判斷每個檢視畫面應對提供的內容執行的操作,我們很快就會編寫 onBindViewHolder() 的程式碼。
您也可以在相同套件中查看 ProductCardViewHolder。這個類別會儲存影響資訊卡版面配置的檢視畫面,方便日後修改。
package com.google.codelabs.mdc.kotlin.shrine

import android.view.View
import androidx.recyclerview.widget.RecyclerView

class ProductCardViewHolder(itemView: View) //TODO: Find and store views from itemView
   : RecyclerView.ViewHolder(itemView)
如要設定格線,請先從 shr_product_grid_fragment.xml 中移除預留位置 MaterialCardView。接下來,您應該新增代表資訊卡格線的元件。本例中,我們將使用 RecyclerView。將 RecyclerView 元件新增至 AppBarLayout XML 元件下方的 shr_product_grid_fragment.xml:
shr_product_grid_fragment.xml
<androidx.core.widget.NestedScrollView
   android:layout_width="match_parent"
   android:layout_height="match_parent"
   android:layout_marginTop="56dp"
   android:background="@color/productGridBackgroundColor"
   android:paddingStart="@dimen/shr_product_grid_spacing"
   android:paddingEnd="@dimen/shr_product_grid_spacing"
   app:layout_behavior="@string/appbar_scrolling_view_behavior">

   <androidx.recyclerview.widget.RecyclerView
       android:id="@+id/recycler_view"
       android:layout_width="match_parent"
       android:layout_height="match_parent" />

</androidx.core.widget.NestedScrollView>
shr_product_grid_fragment.xml 應如下所示:
shr_product_grid_fragment.xml
<?xml version="1.0" encoding="utf-8"?>
<FrameLayout xmlns:android="http://schemas.android.com/apk/res/android"
   xmlns:app="http://schemas.android.com/apk/res-auto"
   xmlns:tools="http://schemas.android.com/tools"
   android:layout_width="match_parent"
   android:layout_height="match_parent"
   tools:context=".ProductGridFragment">

   <com.google.android.material.appbar.AppBarLayout
       android:layout_width="match_parent"
       android:layout_height="wrap_content">

       <androidx.appcompat.widget.Toolbar
           android:id="@+id/app_bar"
           style="@style/Widget.Shrine.Toolbar"
           android:layout_width="match_parent"
           android:layout_height="?attr/actionBarSize"
           app:navigationIcon="@drawable/shr_menu"
           app:title="@string/shr_app_name" />
   </com.google.android.material.appbar.AppBarLayout>

   <androidx.core.widget.NestedScrollView
       android:layout_width="match_parent"
       android:layout_height="match_parent"
       android:layout_marginTop="56dp"
       android:background="@color/productGridBackgroundColor"
       android:paddingStart="@dimen/shr_product_grid_spacing"
       android:paddingEnd="@dimen/shr_product_grid_spacing"
       app:layout_behavior="@string/appbar_scrolling_view_behavior">

       <androidx.recyclerview.widget.RecyclerView
           android:id="@+id/recycler_view"
           android:layout_width="match_parent"
           android:layout_height="match_parent" />

   </androidx.core.widget.NestedScrollView>

</FrameLayout>
最後,在 onCreateView() 中,於呼叫 setUpToolbar(view) 後和 return 陳述式前方,將 RecyclerView 初始化程式碼加到 ProductGridFragment.kt 中:
ProductGridFragment.kt
override fun onCreateView(
       inflater: LayoutInflater, container: ViewGroup?, savedInstanceState: Bundle?): View? {
   // Inflate the layout for this fragment with the ProductGrid theme
   val view = inflater.inflate(R.layout.shr_product_grid_fragment, container, false)

   // Set up the toolbar.
   (activity as AppCompatActivity).setSupportActionBar(view.app_bar)

   // Set up the RecyclerView
   view.recycler_view.setHasFixedSize(true)
   view.recycler_view.layoutManager = GridLayoutManager(context, 2, RecyclerView.VERTICAL, false)
   val adapter = ProductCardRecyclerViewAdapter(
           ProductEntry.initProductEntryList(resources))
   view.recycler_view.adapter = adapter
   val largePadding = resources.getDimensionPixelSize(R.dimen.shr_product_grid_spacing)
   val smallPadding = resources.getDimensionPixelSize(R.dimen.shr_product_grid_spacing_small)
   view.recycler_view.addItemDecoration(ProductGridItemDecoration(largePadding, smallPadding))

   return view;
}
上述程式碼片段包含設定 RecyclerView 所需的初始化步驟。這包括設定 RecyclerView 的版面配置管理員,以及初始化和設定 RecyclerView 的轉接程式。
您的 ProductGridFragment.kt 檔案現在應如下所示:
ProductGridFragment .kt
package com.google.codelabs.mdc.kotlin.shrine

import android.os.Bundle
import android.view.LayoutInflater
import android.view.Menu
import android.view.MenuInflater
import android.view.View
import android.view.ViewGroup
import androidx.appcompat.app.AppCompatActivity
import androidx.fragment.app.Fragment
import androidx.recyclerview.widget.GridLayoutManager
import androidx.recyclerview.widget.RecyclerView
import com.google.codelabs.mdc.kotlin.shrine.network.ProductEntry
import kotlinx.android.synthetic.main.shr_product_grid_fragment.view.*

class ProductGridFragment : Fragment() {

   override fun onCreate(savedInstanceState: Bundle?) {
       super.onCreate(savedInstanceState)
       setHasOptionsMenu(true)
   }

   override fun onCreateView(
           inflater: LayoutInflater, container: ViewGroup?, savedInstanceState: Bundle?): View? {
       // Inflate the layout for this fragment with the ProductGrid theme
       val view = inflater.inflate(R.layout.shr_product_grid_fragment, container, false)

       // Set up the toolbar.
       (activity as AppCompatActivity).setSupportActionBar(view.app_bar)

       // Set up the RecyclerView
       view.recycler_view.setHasFixedSize(true)
       view.recycler_view.layoutManager = GridLayoutManager(context, 2, RecyclerView.VERTICAL, false)
       val adapter = ProductCardRecyclerViewAdapter(
               ProductEntry.initProductEntryList(resources))
       view.recycler_view.adapter = adapter
       val largePadding = resources.getDimensionPixelSize(R.dimen.shr_product_grid_spacing)
       val smallPadding = resources.getDimensionPixelSize(R.dimen.shr_product_grid_spacing_small)
       view.recycler_view.addItemDecoration(ProductGridItemDecoration(largePadding, smallPadding))

       return view;
   }

   override fun onCreateOptionsMenu(menu: Menu, menuInflater: MenuInflater) {
       menuInflater.inflate(R.menu.shr_toolbar_menu, menu)
       super.onCreateOptionsMenu(menu, menuInflater)
   }
}
建構並執行:
卡片現在已經出爐了!目前還無法顯示任何內容,所以讓我們加入一些產品資料。
新增圖片和文字
為每張資訊卡加入圖片、產品名稱和價格。我們的 ViewHolder 抽象層包含每張資訊卡的檢視畫面。在 ViewHolder 中,新增三個檢視畫面,如下所示。
ProductCardViewHolder.kt
package com.google.codelabs.mdc.kotlin.shrine

import android.view.View
import android.widget.TextView
import androidx.recyclerview.widget.RecyclerView

import com.android.volley.toolbox.NetworkImageView

class ProductCardViewHolder(itemView: View) : RecyclerView.ViewHolder(itemView) {

   var productImage: NetworkImageView = itemView.findViewById(R.id.product_image)
   var productTitle: TextView = itemView.findViewById(R.id.product_title)
   var productPrice: TextView = itemView.findViewById(R.id.product_price)
}
更新 ProductCardRecyclerViewAdapter 中的 onBindViewHolder() 方法,即可設定每個產品檢視畫面的名稱、價格和產品圖片,如下所示:
ProductCardRecyclerViewAdapter.kt
override fun onBindViewHolder(holder: ProductCardViewHolder, position: Int) {
   if (position < productList.size) {
       val product = productList[position]
       holder.productTitle.text = product.title
       holder.productPrice.text = product.price
       ImageRequester.setImageFromUrl(holder.productImage, product.url)
   }
}
上述程式碼會指示 RecyclerView 的轉接器使用 ViewHolder 處理每張卡片的操作。
在這個範例中,它會設定 ViewHolder 每個 TextView 上的文字資料,並呼叫 ImageRequester 從網址取得圖片。為了方便起見,我們提供了 ImageRequester 這個類別,並使用 Volley 程式庫 (這是本程式碼研究室超出範圍的主題,但您可以自行探索程式碼)。
建構並執行:

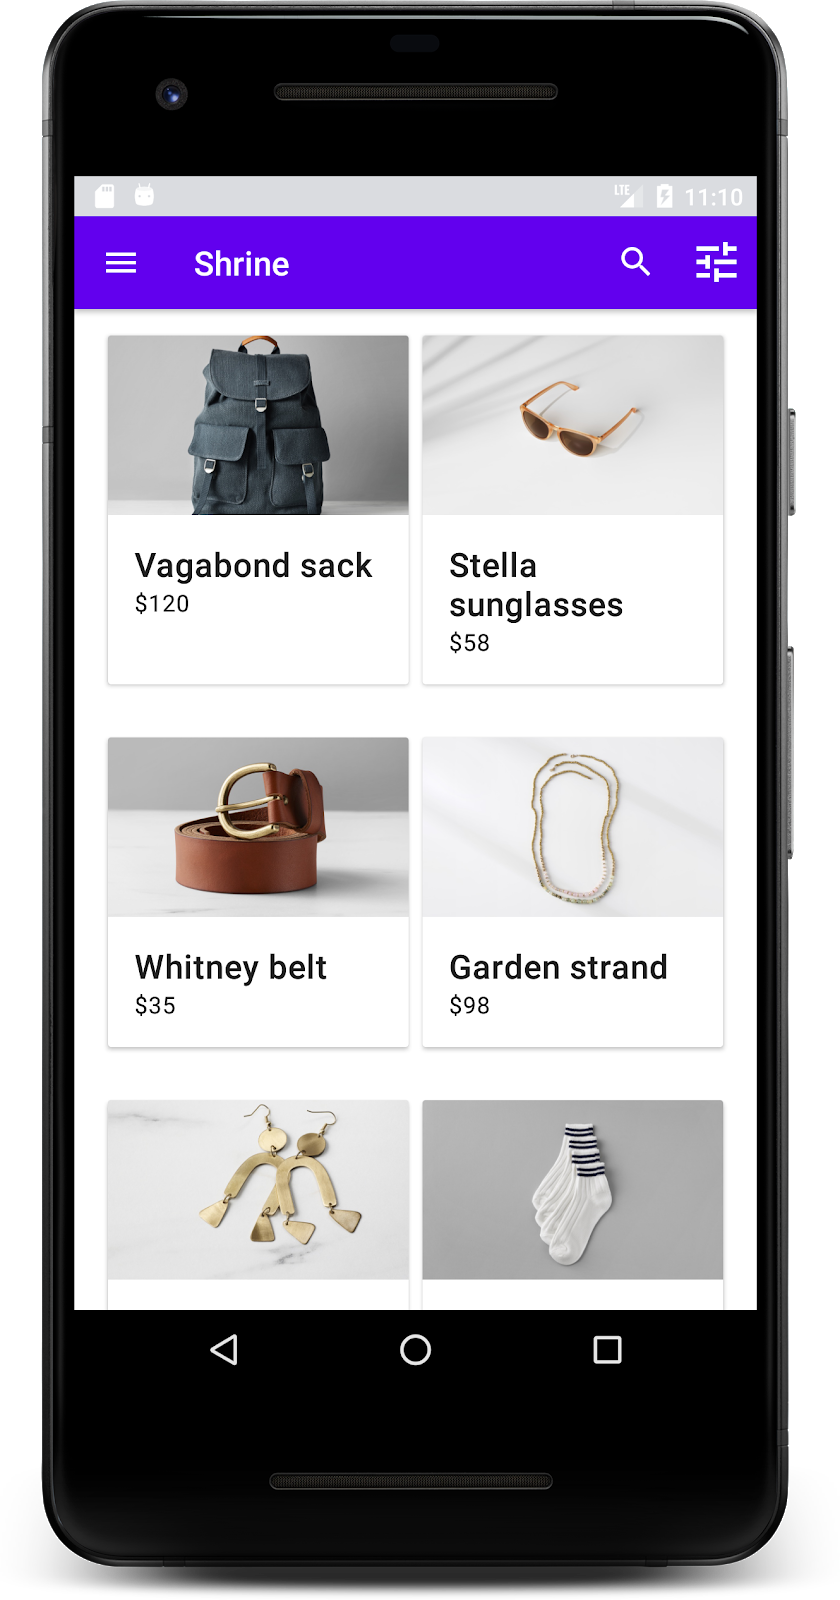
我們的產品現在可顯示在應用程式中!
6. 回顧
我們的應用程式具備基本流程,能將使用者導向登入畫面的主畫面,供使用者查看產品。我們在短短幾行程式碼內加入了頂端應用程式列,當中包含標題和三個按鈕,以及以格狀方式呈現應用程式的內容。我們的主畫面現在不僅簡單好用,還具備基本架構和實用內容,
後續步驟
您現在可以透過頂端應用程式列、資訊卡、文字欄位和按鈕,使用 MDC-Android 程式庫的四個核心 Material Design 元件!如要探索更多元件,請造訪 MDC-Android Catalog。
雖然可以完整運作,但應用程式無法呈現任何特定的品牌或風格。在 MDC-103:Material Design 主題設定搭配顏色、形狀、高度和類型,我們將自訂這些元件的樣式,呈現一種鮮豔的現代品牌。

