
1. Introduction
What you'll build
In this codelab, you'll install an Oracle Database
- On any GCE machine
- Using Workload Manager Automation
- The installation will take 1-2 hours. (the download of the installation files are not included)
What you'll learn
- Downloading Oracle binaries.
- Provisioning an Oracle database.
- Using Workload Manager Automation
What you'll need
To complete this codelab, you will need:
- A Chrome web browser.
- A Gmail account.
- A free Oracle account to download the binaries.
- A Google Cloud Project with billing enabled.
This codelab is designed for developers of all levels, including beginners.
2. Before you begin
This section guides you through the initial setup required in your Google Cloud Project before you can start installing the Oracle database.
Download Oracle binaries
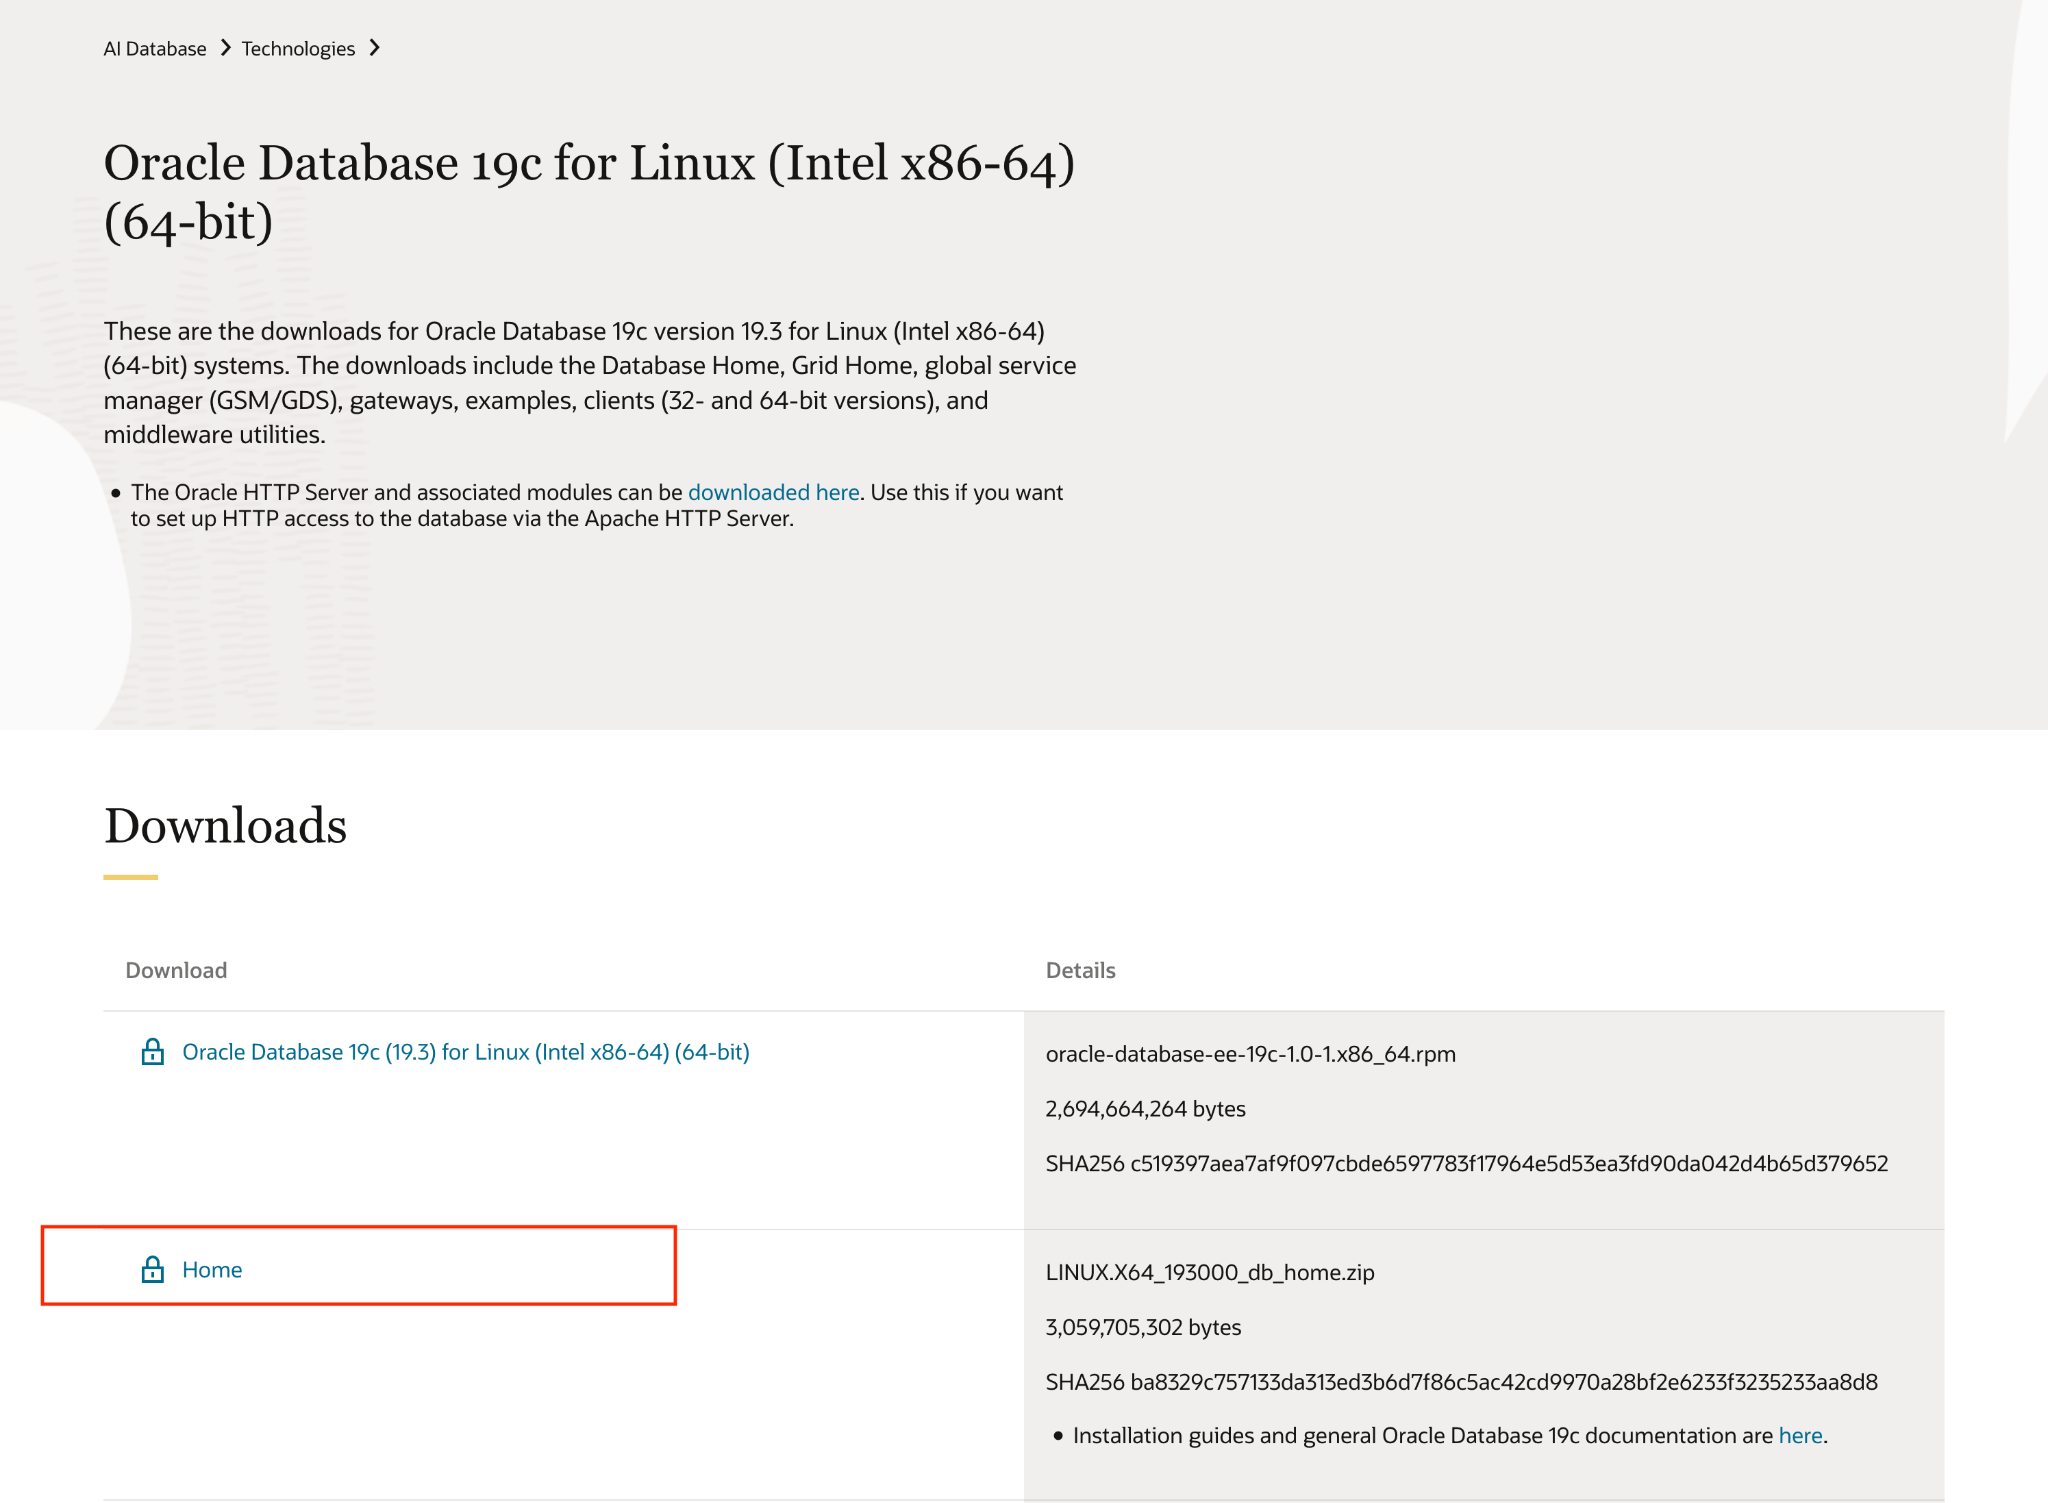
Go to the following address ( click Home ) and download oracle binaries for Oracle 19c.
If you do not have an existing Oracle account , you may create one account. You cannot download oracle software without an account.
Note: Both My Oracle Support and Oracle Software Delivery Cloud require Oracle support entitlements. If you want to use a Developer license, Oracle Database 19c (19.3) is the only version available without support entitlement. However, it's a 2019 release and has known security vulnerabilities.
Create a project
- In the Google Cloud Console, on the project selector page, select or create a Google Cloud project.
- Make sure that billing is enabled for your Cloud project. Learn how to check if billing is enabled on a project .
- Activate Cloud Shell by clicking this link. You can toggle between Cloud Shell Terminal (for running cloud commands) and Editor (for building projects) by clicking on the corresponding button from Cloud Shell.

- Once connected to Cloud Shell, you check that you're already authenticated and that the project is set to your project ID using the following command:
gcloud auth list
- Run the following command in Cloud Shell to confirm that the gcloud command knows about your project.
gcloud config list project
- Set the variable PROJECT_ID, use the following command to set it:
export PROJECT_ID=[YOUR_PROJECT_ID]
gcloud config set project $PROJECT_ID
- Enable the following APIs by running the following commands:
gcloud services enable \
                       compute.googleapis.com \
                       cloudresourcemanager.googleapis.com \
                       servicenetworking.googleapis.com \
                       vpcaccess.googleapis.com \
                       workloadmanager.googleapis.com
Change Organizational Policies (if you are using Argolis Environment)
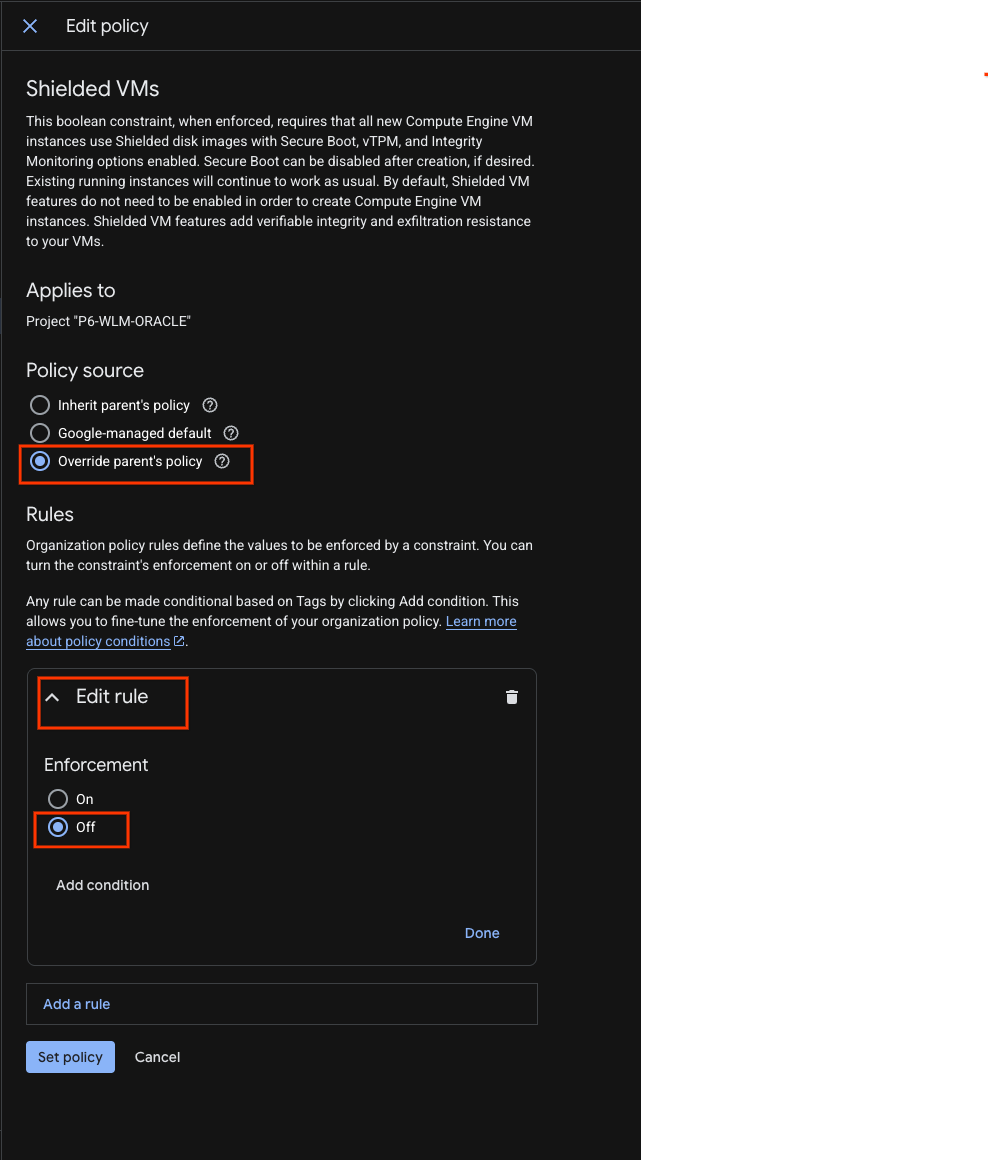
Navigate to Organization Policies and Override parent's policy for the following :
- constraints/compute.requireShieldedVM
- constraints/compute.trustedImageProjects
Use the filter to find and actions ( Edit policy) to alter

Add a rule to change the Enforcement to Off.
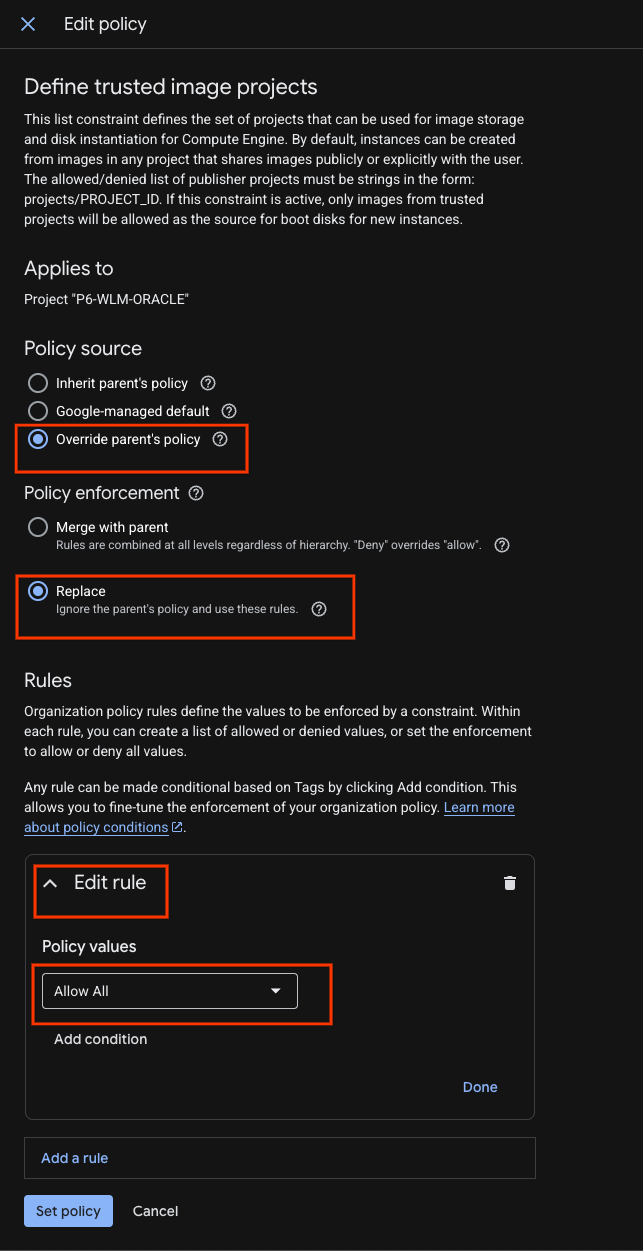
And for Define trusted image projects rule Override parent's policy to Replace it with an "Allow All" rule
Create a VPC network and subnet
Change the region parameter according to your environment.
gcloud compute networks create oracle-network --subnet-mode=custom
gcloud compute networks subnets create oracle-west3 \
--network=oracle-network --range=10.0.0.0/29 \
--region=europe-west3 --enable-private-ip-google-access
gcloud compute firewall-rules create oracle-allow-ssh  \
--network oracle-network \
--allow tcp:22,tcp:3389,icmp
Create Service accounts
For this demo we will use the default service account. For security reasons we highly advise creating separate accounts for the WLM.
Create Secrets for Oracle Database accounts
Create a secret in the same project with the following command in the gcloud console.
This password will be used for SYS, SYSTEM and PDBADMIN users if Oracle multitenant is activated.
The secret value must be between 8 and 30 characters, it can contain alphanumeric and special characters #$@%*_+=-
It must contain at least one special character, and it must not contain any of the following reserved words: oracle
gcloud secrets create mysecret
echo -n "AbraKadabra_123" | gcloud secrets versions add mysecret --data-file=-
Create Cloud Storage bucket
Change the name of the cloud storage bucket according to your environment.
gcloud storage buckets create gs://p6-wlm-oracle/ --uniform-bucket-level-access
upload your downloaded oracle binary into this bucket.
3. Create an Oracle Database deployment
To configure and deploy an Oracle Database, perform the following tasks:
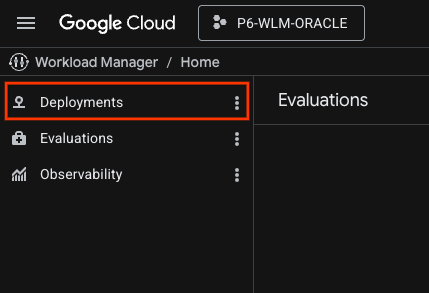
- In the Google Cloud console, go to the Workload Manager page. Go to Workload Manager
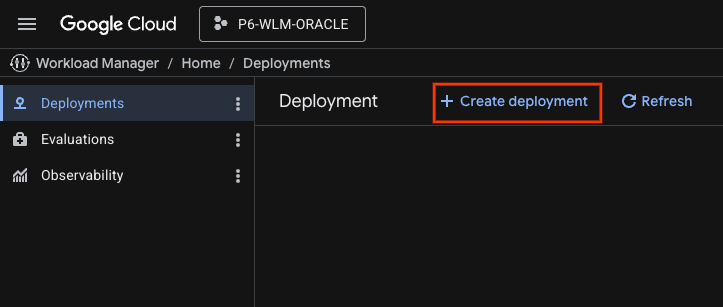
- In the Workload Manager navigation pane, click Deployments.
- Select the project in which you want to create the deployment.
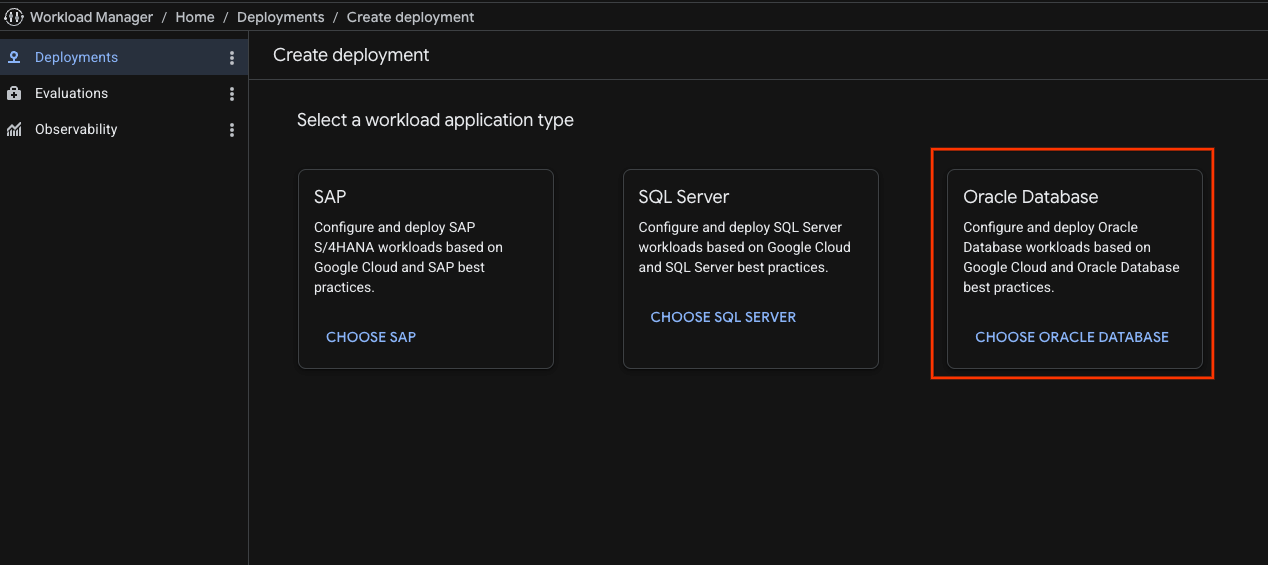
- Click Create deployment and choose Oracle Database.
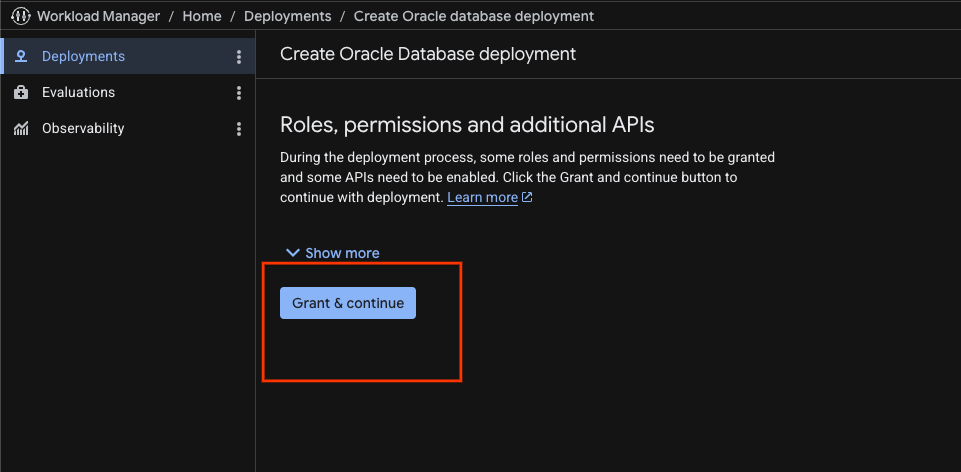
- If you don't have the required roles and permissions, the Guided Deployment Automation tool indicates the required roles and permissions. Click Grant and continue.
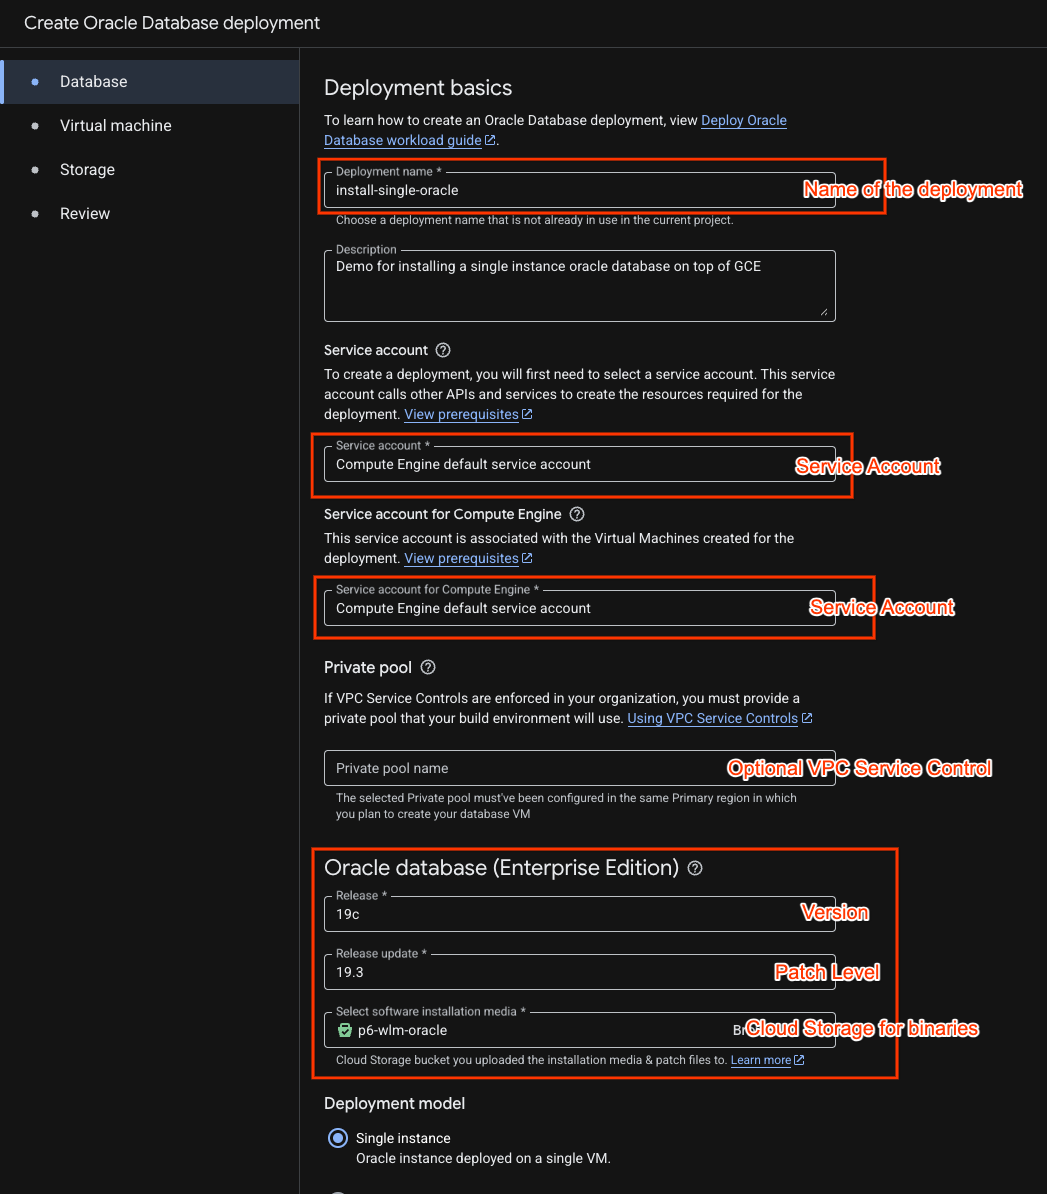
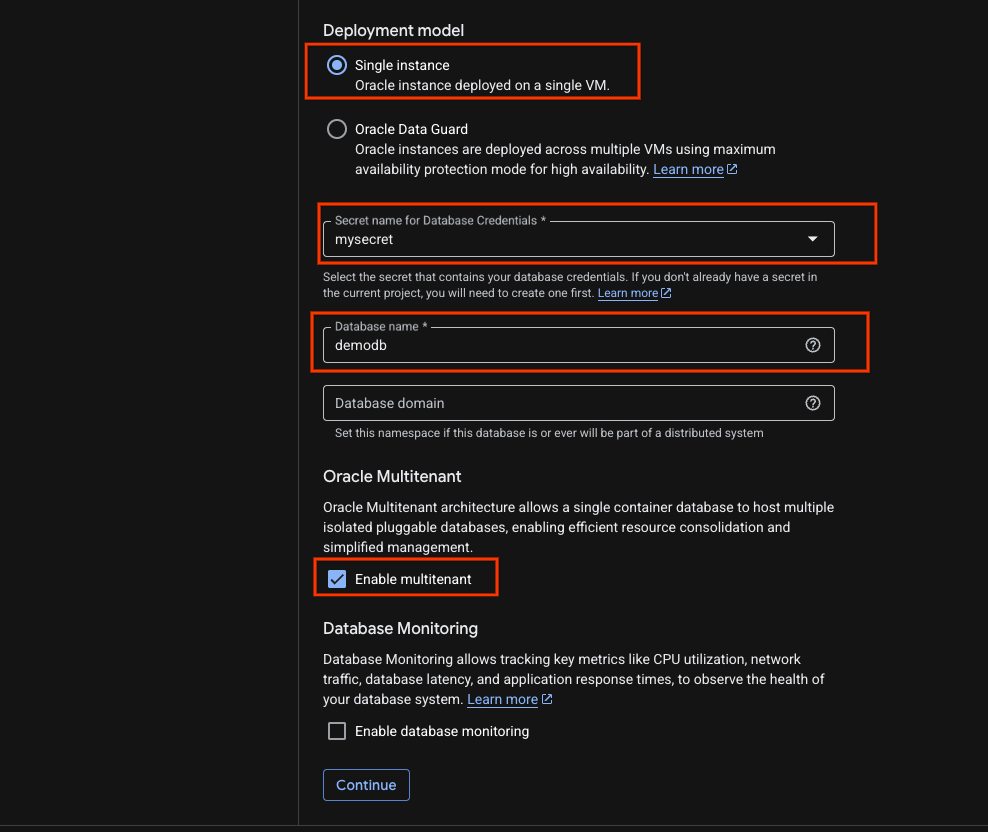
In the Deployment basics section, enter information about your deployment and workload requirements. Workload Manager uses this basic information to determine the data to be collected in the subsequent tabs.
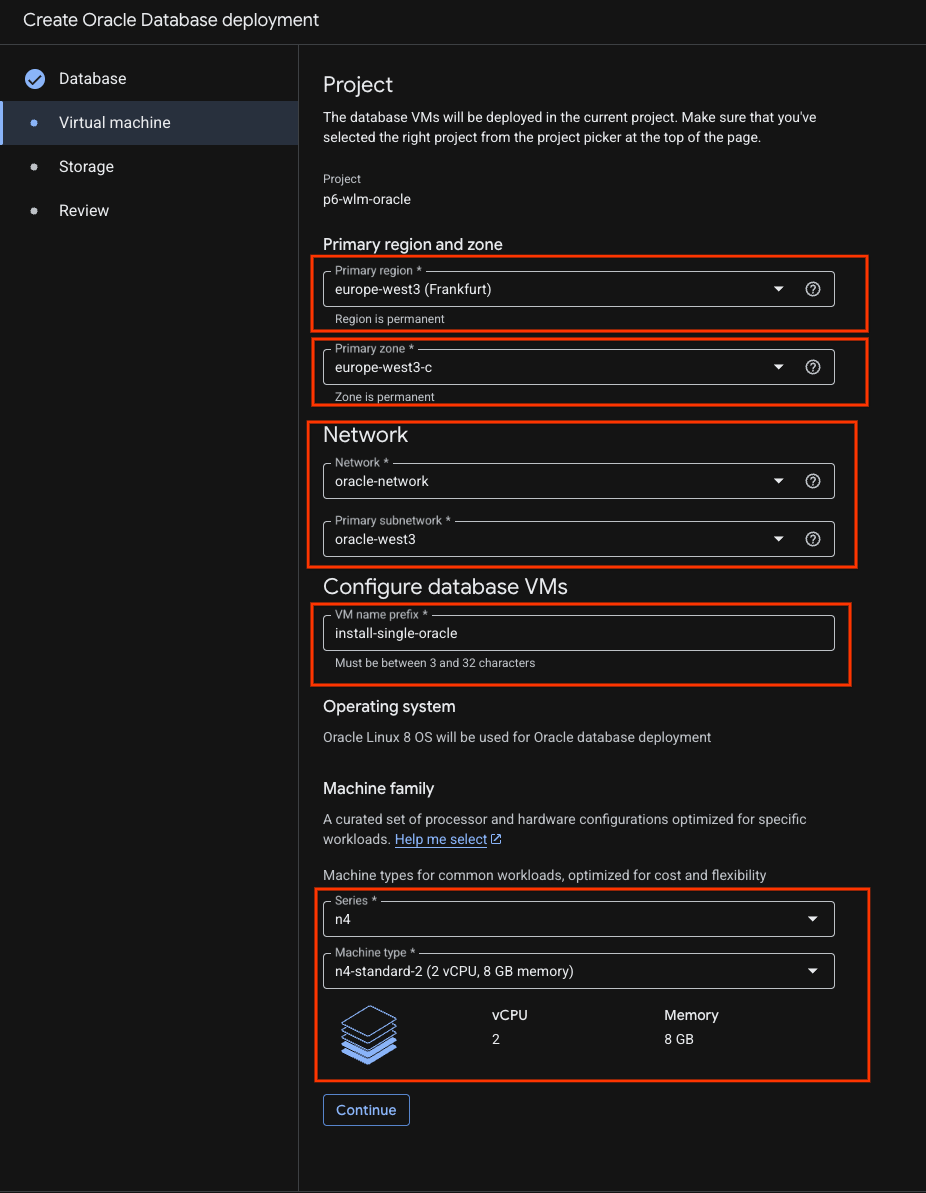
- In the Virtual machine tab, do the following:
Change the primary region according to your environment.Fill the network details.And choose your Machine type.
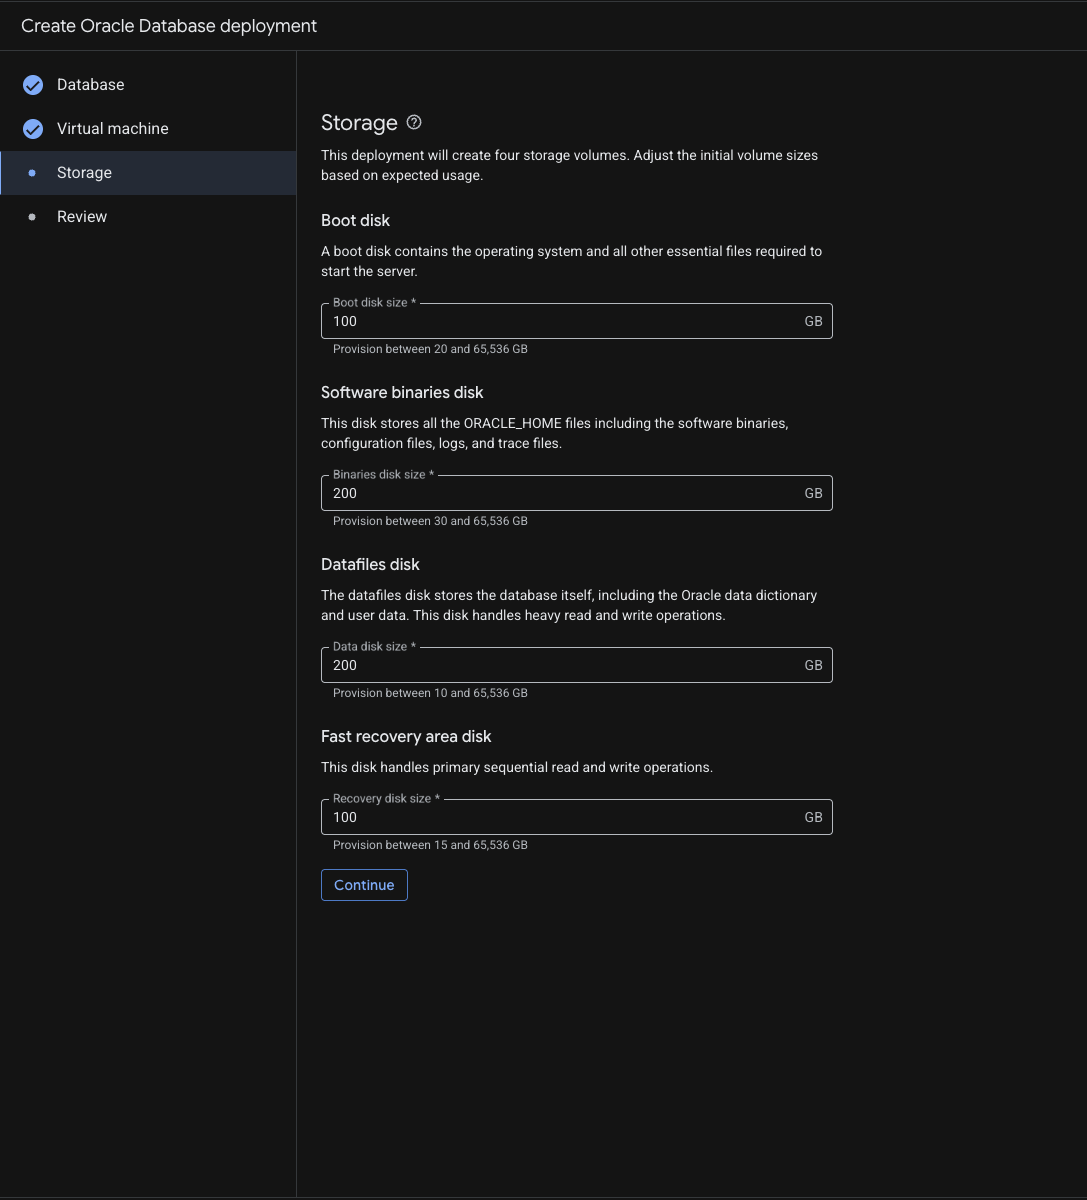
- Fill the Storage details. For the lab you may continue with the default values
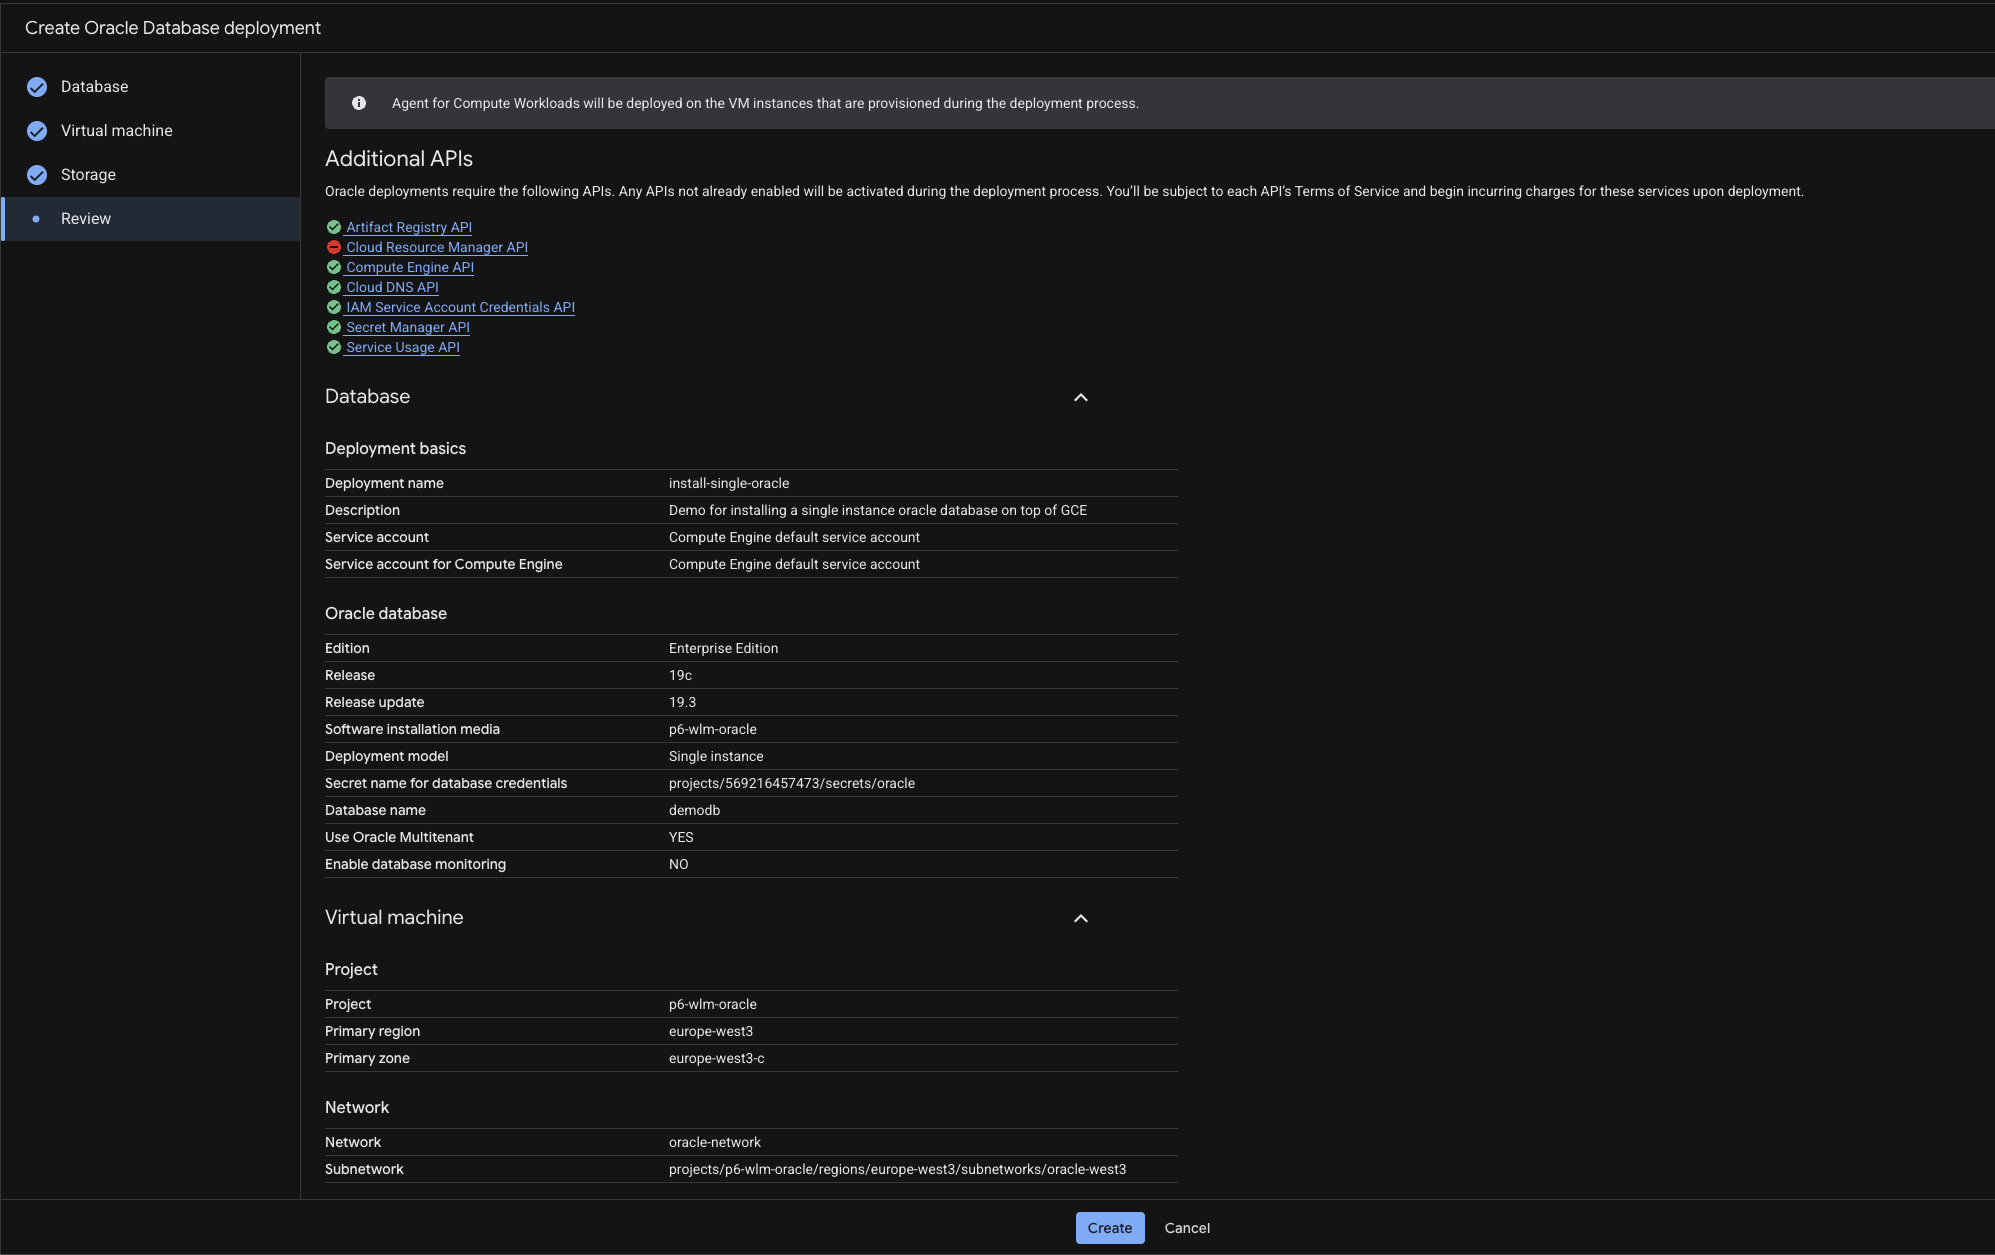
- Check the review page and click Create
- This will be the page you will see :
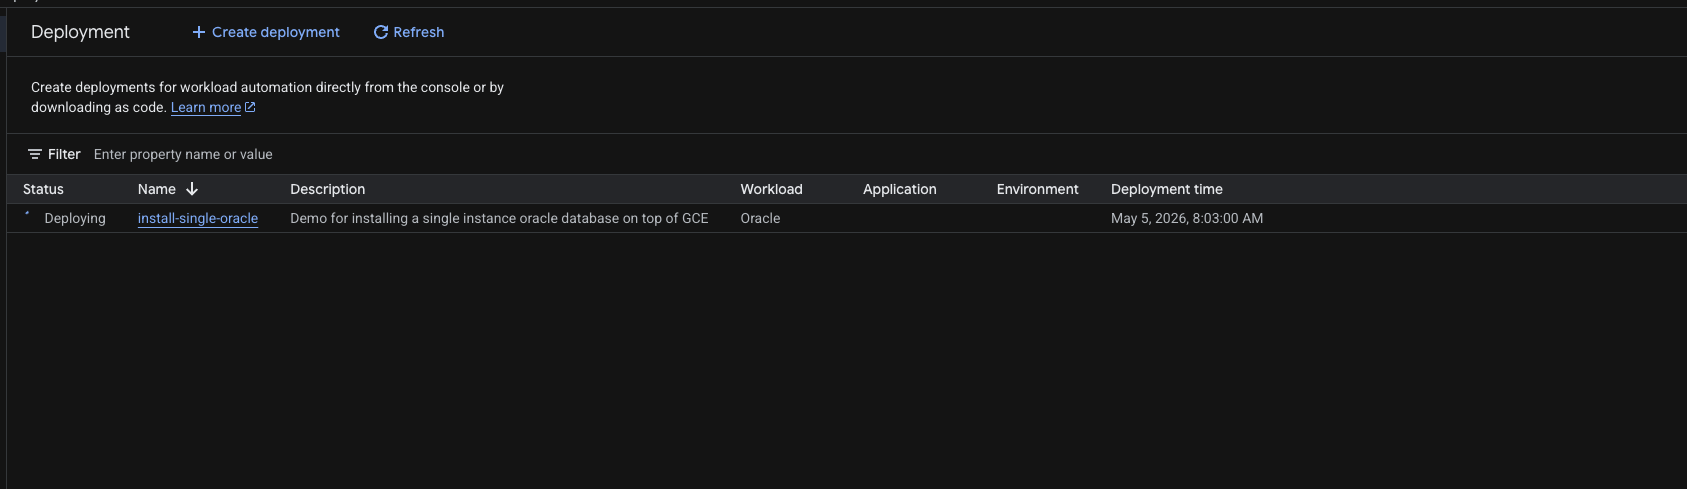
Note: The entire deployment process can take up to one to two hours to complete. The deployment process continues in the background. You can check the deployment dashboard once you receive the notification.
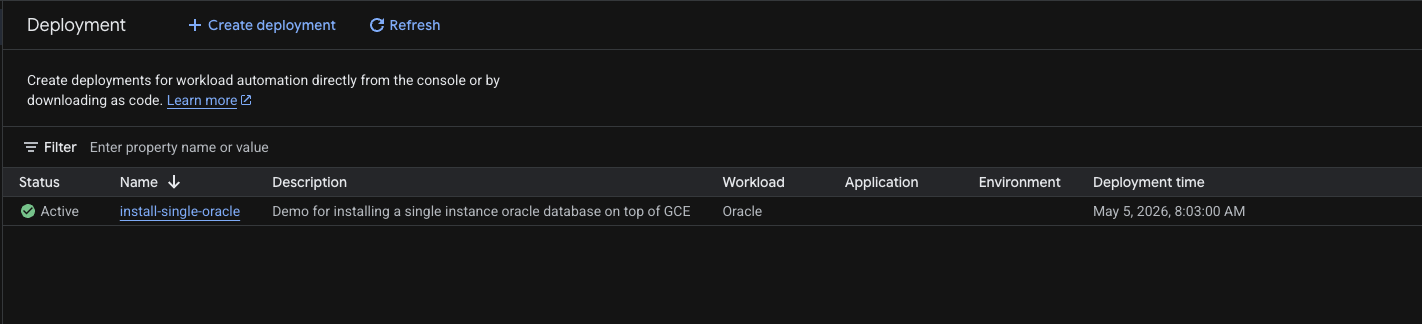
It will show Status as Active when finished and you can check the status of the VM.
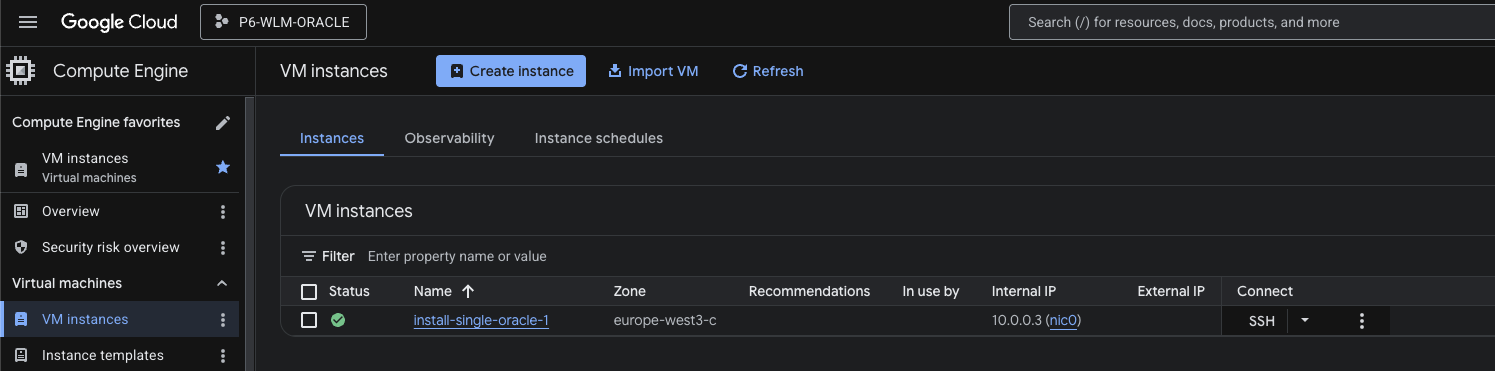
4. Connecting to Oracle
SSH to the install-single-oracle-1 VM machine and check the oracle pmon process with "ps -ef | grep pmon " command .
ps -ef | grep pmon
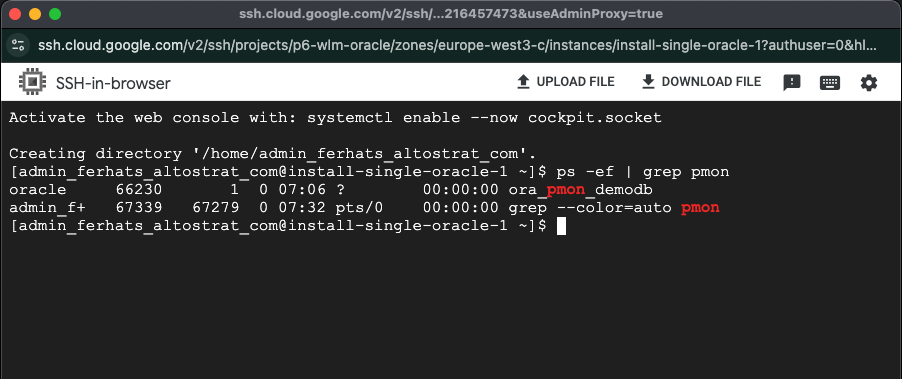
Sudo to the oracle user
sudo su - oracle
use sqlplus to connect to the database as sys user.
sqlplus / as sysdba
5. Clean Up
If you want to continue with other codelabs in this series ( client connectivity, monitoring services, etc) do not clean up your project.
To avoid incurring charges to your Google Cloud account for the resources used in this lab, follow these steps:
- In the Google Cloud console, go to the Manage resources page.
- In the project list, select the project that you want to delete, and then click Delete.
- In the dialog, type the project ID, and then click Shut down to delete the project.
6. Congratulations
Congratulations! You have successfully installed an Oracle database on GCE via Workload Manager.