

1. نظرة عامة
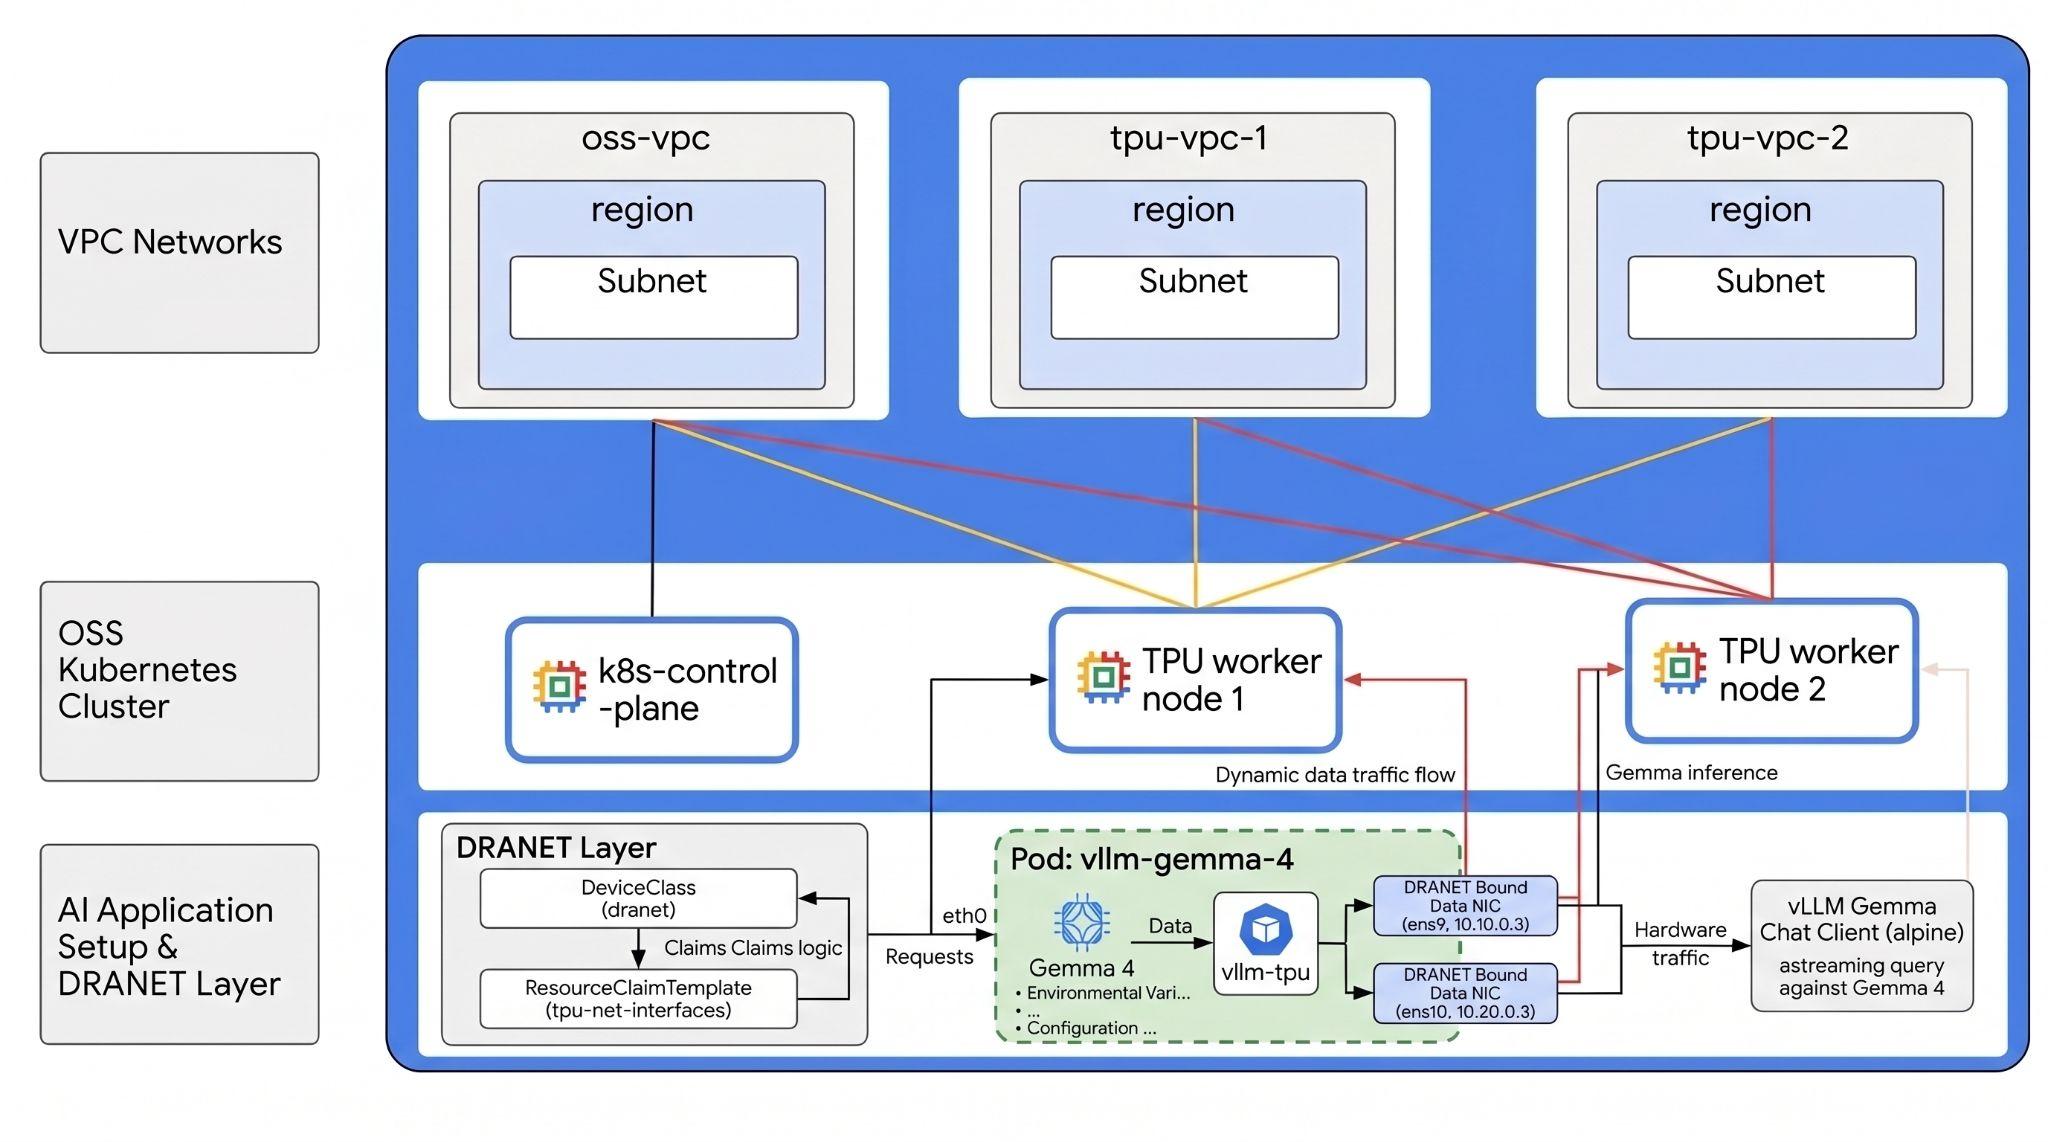
يعرّفك هذا التمرين على كيفية إنشاء بنية أساسية للذكاء الاصطناعي مُدارة ذاتيًا مباشرةً على Google Compute Engine (GCE). ستبدأ بتشغيل مجموعة Kubernetes غير مُدارة على أجهزة افتراضية (بعضها مزوّد بوحدات TPU) باستخدام Terraform وkubeadm، وستضبط ميزة "تخصيص الموارد الديناميكي" (DRA) في Kubernetes باستخدام برنامج التشغيل المفتوح المصدر. ستعمل على ما يلي:
- Google Compute Engine: يوفّر هذا المنتج موارد الحوسبة اللازمة لتشغيل مجموعاتك.
- وحدات معالجة الموتّرات: شرائح تسريع صمّمتها Google خصيصًا.
- برنامج Kubernetes مفتوح المصدر: برنامج لتثبيت Kubernetes وإعداده يدويًا
- OSS DRANET - برنامج تشغيل شبكة DRA
- برنامج تشغيل DRA مفتوح المصدر لوحدة TPU: برامج تشغيل DRA متوافقة مع وحدات TPU
لضبط البيئة، عليك نشر شبكات VPC مستقلة متعددة، كلّ منها يتضمّن شبكة فرعية خاصة به. يتيح لك ذلك توفير مثيلات الأجهزة الافتراضية مع واجهات شبكة متعدّدة (multi-NIC)، ما يؤدي إلى فصل زيارات الإدارة عن زيارات بيانات TPU العالية السرعة.
بعد ذلك، لتفعيل ميزة "تخصيص الموارد الديناميكي" (DRA) المفتوحة المصدر، عليك تثبيت كلّ من برنامج تشغيل أجهزة Google TPU وبرنامج تشغيل شبكة DRANET. بعد ذلك، عليك ضبط Kubernetes DeviceClasses وكتابة ResourceClaimTemplates للتعامل مع التوفير الديناميكي لهذه الموارد.
أخيرًا، ستنفّذ عبء عمل قياس أداء عاليًا باستخدام Neper للتحقّق من صحة مسارات بيانات الشبكة ذات الإطارات الضخمة بين عُقد العامل، ثم ستنفّذ اختبار Python JAX للتحقّق من صحة شرائح TPU الأساسية. بعد ذلك، ستنشر vLLM لعرض نموذج Gemma 4 المتطوّر من Google من خلال Hugging Face باستخدام أجهزة وشبكات معزولة تمامًا ومطالبات DRA.
ستستخدم الإعدادات مزيجًا من Terraform وgcloud وkubectl.
في هذه الميزة الاختبارية، ستتعرّف على كيفية تنفيذ المهمة التالية:
- إعداد شبكات VPC
- نشر 3 عُقد على GCE (عقدة Standard واحدة وعقدتا TPU v6)
- Bootstrap Kubernetes
- ضبط OSS DRANET وDRA لوحدة معالجة الموتّرات
- مقياس الأداء
- إنشاء DeviceClasses وResourceClaimTemplates
- قياس أداء الشبكة والأجهزة
- نشر Gemma 4: تشغيل النموذج على أجهزة TPU v6e باستخدام vLLM ومطالبات DRA النشطة
- اختبار إمكانية الاتصال بالنموذج اللغوي الكبير
في هذا الدرس التطبيقي، ستنشئ النمط التالي.
الشكل 1.
2. إعداد خدمات Google Cloud
إعداد البيئة بالسرعة التي تناسبك
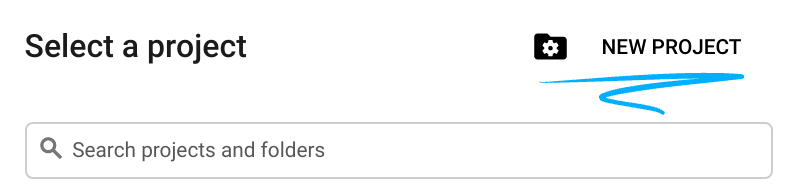
- سجِّل الدخول إلى Google Cloud Console وأنشِئ مشروعًا جديدًا أو أعِد استخدام مشروع حالي. إذا لم يكن لديك حساب على Gmail أو Google Workspace، عليك إنشاء حساب.

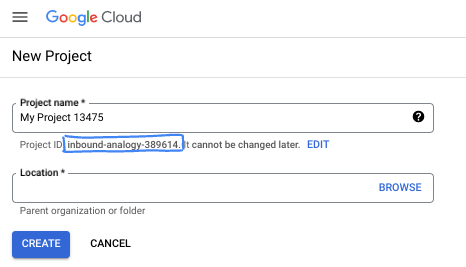
- اسم المشروع هو الاسم المعروض للمشاركين في هذا المشروع. وهي سلسلة أحرف لا تستخدمها Google APIs. ويمكنك تعديلها في أي وقت.
- رقم تعريف المشروع هو معرّف فريد في جميع مشاريع Google Cloud ولا يمكن تغييره (لا يمكن تغييره بعد ضبطه). تنشئ Cloud Console تلقائيًا سلسلة فريدة، ولا يهمّك عادةً ما هي. في معظم دروس البرمجة، عليك الرجوع إلى رقم تعريف مشروعك (يُشار إليه عادةً باسم
PROJECT_ID). إذا لم يعجبك رقم التعريف الذي تم إنشاؤه، يمكنك إنشاء رقم تعريف عشوائي آخر. يمكنك بدلاً من ذلك تجربة اسم مستخدم من اختيارك ومعرفة ما إذا كان متاحًا. لا يمكن تغيير هذا الخيار بعد هذه الخطوة ويظل ساريًا طوال مدة المشروع. - للعلم، هناك قيمة ثالثة، وهي رقم المشروع، وتستخدمها بعض واجهات برمجة التطبيقات. يمكنك الاطّلاع على مزيد من المعلومات عن هذه القيم الثلاث في المستندات.
- بعد ذلك، عليك تفعيل الفوترة في Cloud Console لاستخدام موارد/واجهات برمجة تطبيقات Cloud. لن تكلفك تجربة هذا الدرس البرمجي الكثير، إن وُجدت أي تكلفة. لإيقاف الموارد وتجنُّب تكبُّد رسوم فوترة تتجاوز هذا البرنامج التعليمي، يمكنك حذف الموارد التي أنشأتها أو حذف المشروع. يمكن لمستخدمي Google Cloud الجدد الاستفادة من برنامج الفترة التجريبية المجانية بقيمة 300 دولار أمريكي.
بدء Cloud Shell
على الرغم من إمكانية تشغيل Google Cloud عن بُعد من الكمبيوتر المحمول، ستستخدم في هذا الدرس التطبيقي حول الترميز Google Cloud Shell، وهي بيئة سطر أوامر تعمل في السحابة الإلكترونية.
من Google Cloud Console، انقر على رمز Cloud Shell في شريط الأدوات أعلى يسار الصفحة:
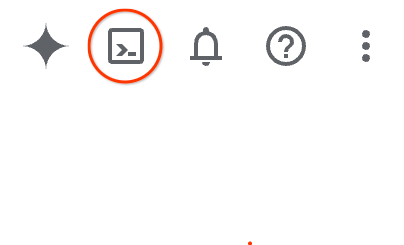
لن يستغرق توفير البيئة والاتصال بها سوى بضع لحظات. عند الانتهاء، من المفترض أن يظهر لك ما يلي:

يتم تحميل هذه الآلة الافتراضية مزوّدة بكل أدوات التطوير التي ستحتاج إليها. توفّر هذه الخدمة دليلًا منزليًا دائمًا بسعة 5 غيغابايت، وتعمل على Google Cloud، ما يؤدي إلى تحسين أداء الشبكة والمصادقة بشكل كبير. يمكن إكمال جميع المهام في هذا الدرس العملي ضمن المتصفّح. لست بحاجة إلى تثبيت أي تطبيق.
3- إعداد البيئة باستخدام Terraform
لإجراء هذا التدريب العملي، يجب أن يكون لديك إذن الوصول إلى وحدات TPU. الإصدار الدقيق المستخدَم هو TPU v6e.
- عليك اتّباع مستند خطة TPU وتفعيل حصة TPU للحصول على إذن الوصول.
- استخدِم منطقة تتوفّر فيها حصة TPU. لمزيد من المعلومات، راجِع المستند " التحقّق من توفّر وحدات TPU في GKE".
- نستخدم عملية نشر صغيرة تتطلّب شريحتَي TPU v6e (
ct6e-standard-4t)ستكونان شريحة 2x2 في منطقة واحدة. - رمز Hugging Face: يجب توفير رمز دخول لتنزيل أوزان نموذج Gemma
سننشئ ثلاث شبكات VPC مخصّصة مع قواعد جدار الحماية والشبكات الفرعية. افتح Cloud Console واختَر المشروع الذي ستستخدمه.
- افتح Cloud Shell في أعلى يسار وحدة التحكّم، وتأكَّد من ظهور رقم تعريف المشروع الصحيح في Cloud Shell، وأكِّد أي طلبات تظهر لك للسماح بالوصول.

- أنشئ مجلدًا باسم
oss-kube-dra,move to the folder وأضِف بعض المتغيّرات. ملاحظة: عدِّل قيم المتغيّرات "المنطقة" و "النطاق" إلى المنطقة والنطاق الفعليين، والمنطقة التلقائية المستخدَمة هي "europe-west4" والنطاق التلقائي المستخدَم هو "europe-west4-a".
mkdir -p oss-kube-dra && cd oss-kube-dra
export PROJECT_ID=$(gcloud config get-value project)
export REGION="europe-west4"
export ZONE="europe-west4-a"
echo $PROJECT_ID
echo $REGION
echo $ZONE
- الآن، أضِف بعض ملفات الإعداد. سيؤدي ذلك إلى إنشاء الملفات التالية: terraform.tfvars وvariables.tf وvpc.tf.
cat << EOF > terraform.tfvars
project_id = "${PROJECT_ID}"
region     = "${REGION}"
zone       = "${ZONE}"
EOF

cat << 'EOF' > variables.tf
variable "project_id" {
  type        = string
  description = "The Google Cloud Project ID"
}

variable "region" {
  type        = string
  description = "The region to deploy the resources"
}

variable "zone" {
  type        = string
  description = "The specific zone for the VMs"
}

variable "control_plane_machine_type" {
  type        = string
  default     = "e2-standard-8"
  description = "Machine type for the Kubernetes control plane node"
}

variable "tpu_worker_machine_type" {
  type        = string
  default     = "ct6e-standard-4t"
  description = "The machine type for TPU workers (TPU v6e Trillium VM)"
}
EOF


cat << 'EOF' > vpc.tf
terraform {
  required_version = ">= 1.5.0"
  required_providers {
    google = {
      source  = "hashicorp/google"
      version = "~> 7.32.0"
    }
  }
}

provider "google" {
  project = var.project_id
  region  = var.region
}

# 1. Primary Management VPC and Subnet
resource "google_compute_network" "primary_vpc" {
  name                    = "oss-k8s-primary-vpc"
  auto_create_subnetworks = false
  mtu                     = 1460
}

resource "google_compute_subnetwork" "primary_subnet" {
  name          = "oss-k8s-primary-subnet"
  ip_cidr_range = "10.0.0.0/24"
  region        = var.region
  network       = google_compute_network.primary_vpc.id
}

# 2. Cloud NAT Router and NAT Gateway for Primary VPC (Outbound Access)
resource "google_compute_router" "router" {
  name    = "oss-k8s-router"
  network = google_compute_network.primary_vpc.id
  region  = var.region
}

resource "google_compute_router_nat" "nat" {
  name                               = "oss-k8s-nat"
  router                             = google_compute_router.router.name
  region                             = var.region
  nat_ip_allocate_option             = "AUTO_ONLY"
  source_subnetwork_ip_ranges_to_nat = "ALL_SUBNETWORKS_ALL_IP_RANGES"
}

# 3. Firewalls for Primary VPC
resource "google_compute_firewall" "allow_internal" {
  name    = "oss-k8s-primary-allow-internal"
  network = google_compute_network.primary_vpc.id

  allow {
    protocol = "tcp"
  }
  allow {
    protocol = "udp"
  }
  allow {
    protocol = "icmp"
  }

  source_ranges = ["10.0.0.0/24"]
}

resource "google_compute_firewall" "allow_iap" {
  name    = "oss-k8s-allow-iap-ssh"
  network = google_compute_network.primary_vpc.id

  allow {
    protocol = "tcp"
    ports    = ["22"]
  }

  source_ranges = ["35.235.240.0/20"]
}

# 4. Multi-NIC TPU Networks and Subnets (With Jumbo Frames MTU 8896)
resource "google_compute_network" "tpu_vpc" {
  count                   = 2
  name                    = "oss-tpu-vpc-${count.index + 1}"
  auto_create_subnetworks = false
  mtu                     = 8896
}

resource "google_compute_subnetwork" "tpu_subnet" {
  count         = 2
  name          = "oss-tpu-vpc-${count.index + 1}-subnet"
  ip_cidr_range = "10.${count.index + 1}0.0.0/24"
  region        = var.region
  network       = google_compute_network.tpu_vpc[count.index].id
}

resource "google_compute_firewall" "tpu_allow_internal" {
  count   = 2
  name    = "oss-tpu${count.index + 1}-allow-internal"
  network = google_compute_network.tpu_vpc[count.index].id

  allow {
    protocol = "tcp"
  }
  allow {
    protocol = "udp"
  }
  allow {
    protocol = "icmp"
  }

  source_ranges = ["10.${count.index + 1}0.0.0/24"]
}
EOF
- تأكَّد من أنّك في دليل
oss-kube-draونفِّذ الأوامر التاليةterraform initلتهيئة دليل العمل. هذه هي الخطوة الأولى، وهي تؤدي إلى تنزيل موفّري الخدمات المطلوبين للإعداد المحدّد.terraform plan -outتنشئ خطة تنفيذ توضّح الإجراءات التي سيتّخذها Terraform لنشر البنية الأساسية. تتيح لك السمة-outحفظ خطة التنفيذ في ملف ثنائي مسمّى. يمكنك الاطّلاع على ما سيحدث بدون إجراء أي تغييرات.terraform applyينفّذ التحديثات.
terraform init
terraform plan -out=tfplan
- الآن، شغِّل عملية النشر بعد تشغيل
terraform apply، وبما أنّك تطبّق خطة التنفيذ المحفوظة، سيتم تنفيذها على الفور بدون طلب تأكيد. (قد يستغرق ذلك بين 5 و10 دقائق)
terraform apply tfplan
- تأكَّد من صحة عملية الإعداد.
echo -e "\n=== Verifying VPC Networks ==="
gcloud compute networks list --filter="name~oss-.*" --project=$PROJECT_ID

echo -e "\n=== Verifying Subnetworks ==="
gcloud compute networks subnets list --filter="name~oss-.*" --project=$PROJECT_ID

echo -e "\n=== Verifying Firewall Rules ==="
gcloud compute firewall-rules list --filter="name~oss-.*" --project=$PROJECT_ID

echo -e "\n=== Verifying Cloud NAT ==="
gcloud compute routers nats list --router=oss-k8s-router --router-region=$REGION --project=$PROJECT_ID
إنشاء عُقد الأجهزة الافتراضية
الآن، عليك تحديد آلات Compute Engine الافتراضية.
- تأكَّد من أنّك في الدليل
oss-kube-draونفِّذ الأمر التالي في Cloud Shell لكتابة الملفnodes.tf.
cat << 'EOF' > nodes.tf
# 1. K8s Control Plane VM (No TPU)
resource "google_compute_instance" "control_plane" {
  name         = "k8s-control-plane"
  machine_type = var.control_plane_machine_type
  zone         = var.zone

  boot_disk {
    initialize_params {
      image = "projects/ubuntu-os-cloud/global/images/family/ubuntu-2204-lts"
      size  = 100
    }
  }

  network_interface {
    network    = google_compute_network.primary_vpc.id
    subnetwork = google_compute_subnetwork.primary_subnet.id
    # No public IP block keeps this node private
  }

  service_account {
    scopes = ["cloud-platform"]
  }
}

# 2. TPU Worker VMs (Multi-NIC ct6e-standard-4t instances)
resource "google_compute_instance" "tpu_workers" {
  count        = 2
  name         = "k8s-tpu-worker-${count.index + 1}"
  machine_type = var.tpu_worker_machine_type
  zone         = var.zone

  boot_disk {
    initialize_params {
      image = "projects/ubuntu-os-accelerator-images/global/images/family/ubuntu-accel-2204-amd64-tpu-v5e-v5p-v6e"
      size  = 200
    }
  }

  scheduling {
    on_host_maintenance = "TERMINATE"
    provisioning_model  = "STANDARD"
  }

  # NIC 1: Management VPC Subnet
  network_interface {
    network    = google_compute_network.primary_vpc.id
    subnetwork = google_compute_subnetwork.primary_subnet.id
  }

  # NIC 2: TPU VPC 1 Subnet
  network_interface {
    network    = google_compute_network.tpu_vpc[0].id
    subnetwork = google_compute_subnetwork.tpu_subnet[0].id
  }

  # NIC 3: TPU VPC 2 Subnet
  network_interface {
    network    = google_compute_network.tpu_vpc[1].id
    subnetwork = google_compute_subnetwork.tpu_subnet[1].id
  }

  service_account {
    scopes = ["cloud-platform"]
  }


  lifecycle {
    ignore_changes = [
      boot_disk[0].initialize_params[0].image,
      guest_accelerator,
      metadata
    ]
  }
}
EOF
- بعد كتابة الإعدادات الجديدة، أنشئ خطة جديدة وطبِّقها لتوفير مثيلاتك.
terraform plan -out=tfplan

terraform apply tfplan
- يمكنكم تأكيد أعماركم بعد ذلك.
echo -e "\n=== Verifying Provisioned VM Instances ==="
gcloud compute instances list --filter="name~k8s-.*" --project=$PROJECT_ID


echo -e "\n=== Verifying Network Interfaces on Workers ==="
for i in 1 2; do
  echo -e "\n--- Interfaces for k8s-tpu-worker-${i} ---"
  gcloud compute instances describe k8s-tpu-worker-${i} \
      --zone=$ZONE \
      --project=$PROJECT_ID \
      --format="table(networkInterfaces[].network.basename(), networkInterfaces[].networkIP)"
done
4. إعداد عقدة التحكّم في مجموعة Kubernetes
في هذا القسم، ستتّصل بشكل آمن بمثيل الجهاز الافتراضي الجديد الخاص بلوحة التحكّم، وستضبط نظام التشغيل الأساسي، وتثبّت حِزم وقت تشغيل الحاويات وKubernetes، وستبدأ تشغيل مجموعتك، وستنشر Calico CNI مع عزل صارم لعدد الزيارات على شبكة الإدارة.
- اتّصِل بأمان بمثيل
k8s-control-planeباستخدام نفق Identity-Aware Proxy (IAP) في GCE. نفِّذ الأمر التالي في وحدة Cloud Shell الطرفية:
gcloud compute ssh k8s-control-plane \
    --zone=$ZONE \
    --tunnel-through-iap
- على
k8s-control-plane، أنشئ نصًا برمجيًا باسمinit-control-plane.shلبرمجة خطوات التثبيت والإعداد.
cat << 'CONTROL_PLANE_EOF' > init-control-plane.sh
#!/bin/bash
# Strict error handling: fail instantly if any command exits with a non-zero status
set -e

echo "=== 1. Neutralizing Background Updates & Preparing Base OS ==="
# Prevent unattended upgrades from locking apt or breaking network configuration mid-setup
sudo systemctl stop apt-daily.timer apt-daily-upgrade.timer || true
sudo systemctl disable apt-daily.timer apt-daily-upgrade.timer || true
sudo systemctl mask apt-daily.service apt-daily-upgrade.service || true

# Turn off swap (mandatory for Kubernetes)
sudo swapoff -a
sudo sed -i '/ swap / s/^\(.*\)$/#\1/g' /etc/fstab

# Load required kernel modules
cat << 'EOT' | sudo tee /etc/modules-load.d/k8s.conf
overlay
br_netfilter
EOT

sudo modprobe overlay
sudo modprobe br_netfilter

# Configure sysctl requirements for Kubernetes bridging
cat << 'EOT' | sudo tee /etc/sysctl.d/k8s.conf
net.bridge.bridge-nf-call-iptables  = 1
net.bridge.bridge-nf-call-ip6tables = 1
net.ipv4.ip_forward                 = 1
EOT
sudo sysctl --system

echo "=== 2. Installing Container Runtime (Containerd) ==="
sudo apt-get update
sudo apt-get install -y ca-certificates curl gnupg bash-completion

sudo install -m 0755 -d /etc/apt/keyrings
curl -fsSL https://download.docker.com/linux/ubuntu/gpg | sudo gpg --dearmor --yes -o /etc/apt/keyrings/docker.gpg
sudo chmod a+r /etc/apt/keyrings/docker.gpg
echo "deb [arch=$(dpkg --print-architecture) signed-by=/etc/apt/keyrings/docker.gpg] https://download.docker.com/linux/ubuntu $(. /etc/os-release && echo $VERSION_CODENAME) stable" | sudo tee /etc/apt/sources.list.d/docker.list > /dev/null

sudo apt-get update
sudo apt-get install -y docker-ce docker-ce-cli containerd.io

echo "=== 3. Configuring Containerd with Systemd Cgroups ==="
sudo mkdir -p /etc/containerd
containerd config default | sudo tee /etc/containerd/config.toml >/dev/null
sudo sed -i 's/SystemdCgroup = false/SystemdCgroup = true/' /etc/containerd/config.toml

sudo systemctl daemon-reload
sudo systemctl restart containerd
sudo systemctl enable containerd

# Validation Step: Verify runtime engine health
if ! systemctl is-active --quiet containerd; then
    echo "❌ ERROR: Containerd failed to start properly."
    exit 1
fi
echo "✅ Containerd runtime is active and healthy."

echo "=== 4. Installing Kubernetes 1.36 Binaries ==="
curl -fsSL https://pkgs.k8s.io/core:/stable:/v1.36/deb/Release.key | sudo gpg --dearmor --yes -o /etc/apt/keyrings/kubernetes-apt-keyring.gpg
echo 'deb [signed-by=/etc/apt/keyrings/kubernetes-apt-keyring.gpg] https://pkgs.k8s.io/core:/stable:/v1.36/deb/ /' | sudo tee /etc/apt/sources.list.d/kubernetes.list

sudo apt-get update
sudo apt-get install -y kubelet kubeadm kubectl
sudo apt-mark hold kubelet kubeadm kubectl

# Configure Autocomplete and Aliases system-wide
kubectl completion bash | sudo tee /etc/bash_completion.d/kubectl > /dev/null
kubeadm completion bash | sudo tee /etc/bash_completion.d/kubeadm > /dev/null
if ! grep -q 'alias k=kubectl' ~/.bashrc; then
  echo 'alias k=kubectl' >> ~/.bashrc
  echo 'complete -o default -F __start_kubectl k' >> ~/.bashrc
fi

echo "=== 5. Initializing Control Plane Engine ==="
sudo kubeadm init --pod-network-cidr=192.168.0.0/16

echo "=== 6. Configuring Administrative Cluster Credentials ==="
mkdir -p $HOME/.kube
sudo cp -i /etc/kubernetes/admin.conf $HOME/.kube/config
sudo chown $(id -u):$(id -g) $HOME/.kube/config

# Validation Step: Verify API Server local responsiveness
echo "Waiting for local API server context..."
until kubectl cluster-info &>/dev/null; do
    sleep 2
done
echo "✅ Kubernetes API server is responding locally."

echo "=== 7. Deploying Calico Network Operator ==="
kubectl create -f https://raw.githubusercontent.com/projectcalico/calico/v3.27.3/manifests/tigera-operator.yaml

# Validation Step: Ensure Tigera Operator CRD is fully available before applying configuration
echo "Waiting for Tigera Installation CRD to register on the API server..."
kubectl wait --for=condition=established crd/installations.operator.tigera.io --timeout=60s

echo "=== 8. Deploying Calico Custom Resources (Subnet Interlock Locked to 10.0.0.0/24) ==="
cat << 'CALICO_EOF' > custom-calico.yaml
apiVersion: operator.tigera.io/v1
kind: Installation
metadata:
  name: default
spec:
  calicoNetwork:
    nodeAddressAutodetectionV4:
      cidrs:
        - "10.0.0.0/24"
    ipPools:
    - blockSize: 26
      cidr: 192.168.0.0/16
      encapsulation: VXLANCrossSubnet
      natOutgoing: Enabled
      nodeSelector: all()
CALICO_EOF
kubectl apply -f custom-calico.yaml

# Validation Step: Confirm Calico daemon configurations are processing
echo "Waiting 10 seconds for Calico system namespaces to initialize..."
sleep 10
echo "Current Calico workload deployment status:"
kubectl get pods -n calico-system

echo "=== 9. Exporting Worker Cluster Join Token ==="
sudo kubeadm token create --print-join-command > ~/join.sh
chmod +x ~/join.sh

echo "--------------------------------------------------------"
echo "✅ CONTROL PLANE BOOTSTRAP COMPLETE!"
echo "Your cluster join command for the TPU workers is saved below:"
echo "--------------------------------------------------------"
cat ~/join.sh
CONTROL_PLANE_EOF
- شغِّل النص البرمجي.
chmod +x init-control-plane.sh
./init-control-plane.sh
- عند الانتهاء، أثبِت ملكية حسابك. سيستغرق تفعيلها جميعًا بضع دقائق.
kubectl get nodes
kubectl get pods -A
من المفترَض أن يظهر لك محتوى مشابه لما يلي
NAME                STATUS   ROLES           AGE     VERSION
k8s-control-plane   Ready    control-plane   6m50s   v1.36.2
NAMESPACE         NAME                                        READY   STATUS    RESTARTS   AGE
calico-system     calico-kube-controllers-5578ff64dd-87vp2    1/1     Running   0          6m33s
calico-system     calico-node-fxzpp                           1/1     Running   0          6m33s
calico-system     calico-typha-785cbc858-rv4nz                1/1     Running   0          6m33s
calico-system     csi-node-driver-wlrhx                       2/2     Running   0          6m33s
kube-system       coredns-589f44dc88-pqfrl                    1/1     Running   0          6m42s
kube-system       coredns-589f44dc88-sdwmj                    1/1     Running   0          6m42s
kube-system       etcd-k8s-control-plane                      1/1     Running   0          6m47s
kube-system       kube-apiserver-k8s-control-plane            1/1     Running   0          6m47s
kube-system       kube-controller-manager-k8s-control-plane   1/1     Running   0          6m47s
kube-system       kube-proxy-jnm2p                            1/1     Running   0          6m42s
kube-system       kube-scheduler-k8s-control-plane            1/1     Running   0          6m47s
tigera-operator   tigera-operator-6bc8d879b5-w5mrq            1/1     Running   0          6m42s
- الخروج من اتصال
sshللرجوع إلى Cloud Shell
exit
5- إضافة عُقد عاملة لوحدة معالجة الموتّرات
ستشغّل نصًا برمجيًا من Cloud Shell يتصل بشكل آمن بالجهاز الافتراضي الخاص بلوحة التحكّم، ويسترد الرمز المميز للانضمام إلى المجموعة، ويضبط ويسجّل في الوقت نفسه عُقد عامل TPU في المجموعة.
- نفِّذ الأمر التالي في Cloud Shell لكتابة نص البرمجة الخاص بالتنسيق:
cat << 'WORKER_BOOTSTRAP_EOF' > bootstrap-workers.sh
#!/bin/bash
# Strict error handling: fail instantly if any command exits with a non-zero status
set -e

# Fetch the join command safely from the control plane
echo "Fetching join command from Control Plane..."
JOIN_CMD=$(gcloud compute ssh k8s-control-plane --zone=$ZONE --tunnel-through-iap --command="cat ~/join.sh" 2>/dev/null)

if [ -z "$JOIN_CMD" ]; then
    echo "❌ ERROR: Failed to retrieve the join command. Ensure the control plane is reachable."
    exit 1
fi

echo "✅ Successfully retrieved join command."

# Create the setup script locally to be copied to the workers
cat << 'WORKER_INIT_EOF' > init-worker.sh
#!/bin/bash
set -e

echo "=== 1. Neutralizing Background Updates & Setting Non-Interactive Mode ==="
export DEBIAN_FRONTEND=noninteractive
sudo sed -i "s/#\$nrconf{restart} = 'i';/\$nrconf{restart} = 'a';/g" /etc/needrestart/needrestart.conf 2>/dev/null || true

# Prevent unattended upgrades from tearing down network interfaces mid-setup
sudo systemctl stop apt-daily.timer apt-daily-upgrade.timer || true
sudo systemctl disable apt-daily.timer apt-daily-upgrade.timer || true
sudo systemctl mask apt-daily.service apt-daily-upgrade.service || true

echo "=== 2. Base OS Prep ==="
# Disable swap
sudo swapoff -a
sudo sed -i '/ swap / s/^\(.*\)$/#\1/g' /etc/fstab

# Load required kernel modules
cat << 'EOT' | sudo tee /etc/modules-load.d/k8s.conf
overlay
br_netfilter
EOT
sudo modprobe overlay
sudo modprobe br_netfilter

# Configure bridging and IP forwarding sysctls
cat << 'EOT' | sudo tee /etc/sysctl.d/k8s.conf
net.bridge.bridge-nf-call-iptables  = 1
net.bridge.bridge-nf-call-ip6tables = 1
net.ipv4.ip_forward                 = 1
EOT
sudo sysctl --system

echo "=== 3. Installing Containerd (CRI-Only) ==="
sudo apt-get update && sudo apt-get install -yq ca-certificates curl gnupg bash-completion
sudo install -m 0755 -d /etc/apt/keyrings
curl -fsSL https://download.docker.com/linux/ubuntu/gpg | sudo gpg --dearmor --yes -o /etc/apt/keyrings/docker.gpg
sudo chmod a+r /etc/apt/keyrings/docker.gpg
echo "deb [arch=$(dpkg --print-architecture) signed-by=/etc/apt/keyrings/docker.gpg] https://download.docker.com/linux/ubuntu $(. /etc/os-release && echo $VERSION_CODENAME) stable" | sudo tee /etc/apt/sources.list.d/docker.list > /dev/null

# Install only containerd to avoid unnecessary Docker CE overhead
sudo apt-get update && sudo apt-get install -yq containerd.io
sudo mkdir -p /etc/containerd
containerd config default | sudo tee /etc/containerd/config.toml >/dev/null
sudo sed -i 's/SystemdCgroup = false/SystemdCgroup = true/' /etc/containerd/config.toml
sudo systemctl daemon-reload
sudo systemctl restart containerd
sudo systemctl enable containerd

# Validation: Check containerd status
if ! systemctl is-active --quiet containerd; then
    echo "❌ ERROR: Containerd failed to start."
    exit 1
fi

echo "=== 4. Installing Kubernetes 1.36 Binaries ==="
curl -fsSL https://pkgs.k8s.io/core:/stable:/v1.36/deb/Release.key | sudo gpg --dearmor --yes -o /etc/apt/keyrings/kubernetes-apt-keyring.gpg
echo 'deb [signed-by=/etc/apt/keyrings/kubernetes-apt-keyring.gpg] https://pkgs.k8s.io/core:/stable:/v1.36/deb/ /' | sudo tee /etc/apt/sources.list.d/kubernetes.list
sudo apt-get update && sudo apt-get install -yq kubelet kubeadm kubectl
sudo apt-mark hold kubelet kubeadm kubectl
WORKER_INIT_EOF

# Append the actual join command to the script
echo "echo \"=== 5. Joining Cluster ===\"" >> init-worker.sh
echo "sudo $JOIN_CMD" >> init-worker.sh

# Push and run on both Workers concurrently
echo "Starting concurrent bootstrap on both workers..."

(
    echo "[Worker 1] Copying script..."
    gcloud compute scp init-worker.sh k8s-tpu-worker-1:~ --zone=$ZONE --tunnel-through-iap --quiet
    echo "[Worker 1] Executing script..."
    gcloud compute ssh k8s-tpu-worker-1 --zone=$ZONE --tunnel-through-iap --command="bash ~/init-worker.sh"
    echo "✅ [Worker 1] Bootstrap and Join complete!"
) &

(
    echo "[Worker 2] Copying script..."
    gcloud compute scp init-worker.sh k8s-tpu-worker-2:~ --zone=$ZONE --tunnel-through-iap --quiet
    echo "[Worker 2] Executing script..."
    gcloud compute ssh k8s-tpu-worker-2 --zone=$ZONE --tunnel-through-iap --command="bash ~/init-worker.sh"
    echo "✅ [Worker 2] Bootstrap and Join complete!"
) &

# Wait for both background processes to finish
wait

echo "--------------------------------------------------------"
echo "✅ BOTH WORKERS HAVE FINISHED PROCESSING"
echo "--------------------------------------------------------"

# Final Validation Check from Control Plane
echo "Verifying cluster node status..."
sleep 5 # Give kubelet a moment to register the nodes
gcloud compute ssh k8s-control-plane --zone=$ZONE --tunnel-through-iap --command="kubectl get nodes -o wide"
WORKER_BOOTSTRAP_EOF
- نفِّذ عملية إعداد العامل. (يتم تنفيذ عمليتَي التثبيت هاتين في الوقت نفسه في الخلفية، ويستغرق اكتمالهما من 3 إلى 5 دقائق تقريبًا).
chmod +x bootstrap-workers.sh
./bootstrap-workers.sh
من المفترَض أن يظهر لك محتوى مشابه عند إضافة جميع العُقد إلى المجموعة
To increase the performance of the tunnel, consider installing NumPy. For instructions,
please see https://cloud.google.com/iap/docs/using-tcp-forwarding#increasing_the_tcp_upload_bandwidth

NAME                STATUS     ROLES           AGE   VERSION   INTERNAL-IP   EXTERNAL-IP   OS-IMAGE             KERNEL-VERSION           CONTAINER-RUNTIME
k8s-control-plane   Ready      control-plane   25m   v1.36.2   10.0.0.2      <none>        Ubuntu 22.04.5 LTS   6.8.0-1064-gcp (amd64)   containerd://2.2.6
k8s-tpu-worker-1    NotReady   <none>          10s   v1.36.2   10.0.0.3      <none>        Ubuntu 22.04.5 LTS   6.8.0-1064-gcp (amd64)   containerd://2.2.6
k8s-tpu-worker-2    Ready      <none>          27s   v1.36.2   10.0.0.4      <none>        Ubuntu 22.04.5 LTS   6.8.0-1064-gcp (amd64)   containerd://2.2.6
6. نشر برنامج تشغيل وحدة معالجة Tensor (TPU) لـ DRA مفتوحة المصدر
في هذا القسم، ستعود إلى لوحة التحكّم، وتصنّف عُقد عامل TPU حسب تفاصيل تصميم أجهزة التسريع المحدّدة، وتثبّت برنامج تشغيل Google TPU DRA مفتوح المصدر باستخدام Helm. هذا البرنامج مسؤول عن رصد شرائح TPU v6e المادية وربطها مباشرةً بواجهة برمجة تطبيقات Kubernetes.
- أعِد الاتصال بأمان بالجهاز الافتراضي
k8s-control-planeمن Cloud Shell.
gcloud compute ssh k8s-control-plane \
    --zone=$ZONE \
    --tunnel-through-iap
- نفِّذ هذه الأوامر داخل
k8s-control-planeجلسة SSH. عُقد التصنيفات التي تتضمّن مجموعة التصنيفات الكاملة (بما في ذلك مفاتيح عدد الشرائح المطابقة)
kubectl label node k8s-tpu-worker-1 \
  cloud.google.com/gke-tpu-accelerator=tpu-v6e-slice \
  cloud.google.com/gke-tpu-topology=2x2 \
  cloud.google.com/gke-tpu-dra-driver=true \
  cloud.google.com/gke-accelerator-count=4 \
  cloud.google.com/gke-tpu-count=4 \
  --overwrite

kubectl label node k8s-tpu-worker-2 \
  cloud.google.com/gke-tpu-accelerator=tpu-v6e-slice \
  cloud.google.com/gke-tpu-topology=2x2 \
  cloud.google.com/gke-tpu-dra-driver=true \
  cloud.google.com/gke-accelerator-count=4 \
  cloud.google.com/gke-tpu-count=4 \
  --overwrite
- استنساخ برنامج تشغيل DRA TPU وتثبيته باستخدام Helm
curl -fsSL https://raw.githubusercontent.com/helm/helm/main/scripts/get-helm-3 | bash

git clone https://github.com/kubernetes-sigs/dra-driver-google-tpu.git ~/dra-driver-google-tpu || true
cd ~/dra-driver-google-tpu
rm -f *.pack *.tgz

helm install dra-driver-google-tpu ./deployments/helm/dra-driver-google-tpu \
  -n dra-driver-google-tpu \
  --create-namespace \
  --set 'kubeletPlugin.env[0].name=NODE_NAME' \
  --set 'kubeletPlugin.env[0].valueFrom.fieldRef.fieldPath=spec.nodeName'

cd ~
- التحقّق من صحة إعداد برنامج تشغيل وحدة TPU الخاصة بخدمة DRA
# Verify driver daemonset status (Pods should show as Running and Ready)
kubectl get pods -n dra-driver-google-tpu -o wide

# Verify TPU ResourceSlices are successfully published to the API server
kubectl get resourceslices

# Safely parse the ResourceSlices to show the Node Name and the number of TPU chips registered
kubectl get resourceslices -o json | jq -r '.items[] | select(.spec.driver=="tpu.google.com") | "Node: \(.spec.nodeName) | TPUs Registered: \(.spec.devices | length)"'

# Inspect driver logs to confirm the TPU hardware was initialized successfully
kubectl logs -n dra-driver-google-tpu -l app.kubernetes.io/name=dra-driver-google-tpu -c tpu-dra-plugin --tail=20
7. نشر شبكة DRANET مفتوحة المصدر وفئات الأجهزة
في هذا القسم، ستعود إلى لوحة التحكّم، وتثبّت برنامج تشغيل DRANET مفتوح المصدر، وتطبّق تصحيحًا مخصّصًا للفلترة لاستبعاد الواجهات الافتراضية، وتنشئ DeviceClass وResourceClaimTemplate في Kubernetes باستخدام بادئات الشبكة المتطابقة مفتوحة المصدر.
- أعِد الاتصال بأمان بالجهاز الافتراضي
k8s-control-planeمن Cloud Shell. إذا كان الجهاز متصلاً، يمكنك تخطّي هذه الخطوة.
gcloud compute ssh k8s-control-plane \
    --zone=$ZONE \
    --tunnel-through-iap
- نفِّذ هذه الأوامر داخل جلسة
k8s-control-planeSSH
# Install the core components and patch
kubectl apply -f https://raw.githubusercontent.com/kubernetes-sigs/dranet/refs/heads/main/install.yaml


kubectl patch daemonset dranet -n kube-system --type='json' -p='[ { "op": "add", "path": "/spec/template/spec/containers/0/args/-", "value": "-filter=!(\"dra.net/type\" in attributes) || (attributes[\"dra.net/type\"].StringValue != \"veth\" && attributes[\"dra.net/type\"].StringValue != \"vxlan\" && attributes[\"dra.net/type\"].StringValue != \"bridge\")" } ]'

# Monitor rollout readiness
kubectl rollout status daemonset/dranet -n kube-system

# Verify running components and permissions
kubectl get pods -n kube-system -l app=dranet -o wide
kubectl get clusterrole,clusterrolebinding,sa dranet -n kube-system

# Interrogate logs for driver binding confirmation
kubectl logs -n kube-system -l app=dranet --tail=20
- تطبيق DeviceClass وResourceClaimTemplate
# Apply DRANET DeviceClass and BOTH ResourceClaimTemplates (Network + Hardware)
cat << 'EOF' | kubectl apply -f -
apiVersion: resource.k8s.io/v1
kind: DeviceClass
metadata:
  name: dranet
spec:
  selectors:
    - cel:
        expression: device.driver == "dra.net"
---
apiVersion: resource.k8s.io/v1
kind: ResourceClaimTemplate
metadata:
  name: tpu-net-interfaces
  namespace: default
spec:
  spec:
    devices:
      requests:
      - name: tpu-net-interface
        exactly:
          deviceClassName: dranet
          count: 2
          selectors:
          - cel:
              expression: device.attributes["gce.dra.net"].networkName.startsWith("oss-tpu-vpc")
      config:
      - opaque:
          driver: dra.net
          parameters:
            interface:
              mtu: 8896
              gsoMaxSize: 65536
              groMaxSize: 65536
              gsoIPv4MaxSize: 65536
              groIPv4MaxSize: 65536
              disableEbpfPrograms: true
---
apiVersion: resource.k8s.io/v1
kind: ResourceClaimTemplate
metadata:
  name: tpu-device-template
  namespace: default
spec:
  spec:
    devices:
      requests:
      - name: tpu-devices
        exactly:
          deviceClassName: tpu.google.com
          allocationMode: ExactCount
          count: 4
EOF
- تأكَّد من تسجيل النماذج والفئات بشكلٍ صحيح في واجهة برمجة تطبيقات Kubernetes.
# Verify ResourceSlices exist and are actively serving both drivers
kubectl get resourceslices -o custom-columns=NAME:.metadata.name,NODE:.spec.nodeName,DRIVER:.spec.driver | grep -E "dra.net|tpu.google.com"

# Verify the DRANET daemonset pods are Running across all nodes
kubectl get pods -n kube-system -l app=dranet -o wide
- تفعيل Parallel Neper StatefulSet.
cat << 'EOF' | kubectl apply -f -
---
apiVersion: v1
kind: Service
metadata:
  name: neper
spec:
  clusterIP: None
  selector:
    app: neper
---
apiVersion: apps/v1
kind: StatefulSet
metadata:
  name: neper
spec:
  selector:
    matchLabels:
      app: neper
  serviceName: neper
  replicas: 2
  template:
    metadata:
      labels:
        app: neper
    spec:
      initContainers:
      - name: "network-optimization-sysctls"
        image: "busybox"
        securityContext:
          privileged: true
        command:
        - sh
        - -c
        - |
          echo 5000 > /proc/sys/net/ipv4/tcp_rto_min_us
          echo 1 > /proc/sys/net/ipv4/tcp_no_metrics_save
          echo 0 > /proc/sys/net/ipv4/tcp_slow_start_after_idle
          echo 131072 > /proc/sys/net/core/optmem_max
          echo "4096 41943040 314572800" > /proc/sys/net/ipv4/tcp_rmem
      containers:
      - name: neper
        image: ubuntu:22.04
        command:
        - /bin/bash
        - -c
        - |
          apt-get update && apt-get install -y iproute2 build-essential git jq python3-pip &&
          git clone https://github.com/google/neper.git /tmp/neper &&
          cd /tmp/neper && make &&
          cp tcp_stream /usr/local/bin/ &&
          sleep infinity
        securityContext:
          privileged: true
        resources:
          requests:
            cpu: "170"
            memory: "650Gi"
          limits:
            cpu: "170"
            memory: "650Gi"
          claims:
          - name: tpu-net-claim
          - name: tpu-hardware-claim
      resourceClaims:
      - name: tpu-net-claim
        resourceClaimTemplateName: tpu-net-interfaces
      - name: tpu-hardware-claim
        resourceClaimTemplateName: tpu-device-template
EOF
- التحقّق من صحة البيانات
echo -e "\n=== Verifying StatefulSet Pod Status ==="
kubectl get pods -l app=neper -o wide

echo -e "\n=== Verifying Dynamic Resource Claims (DRCs) ==="
kubectl get resourceclaims

echo -e "\n=== Inspecting Device Claim Allocation ==="
# Using a safer JSONPath query to extract the allocated drivers and devices
kubectl get resourceclaims -o json | jq -r '.items[] | "Claim: \(.metadata.name) | Driver: \(.status.allocation.devices.results[0].driver // "Pending")"'
8. إجراء الاختبار
تشغيل حزمة اختبارات قياس الأداء والتحقّق من صحة الأجهزة ذات الواجهة المزدوجة
المرحلة 1 (قياس أداء الشبكة): تنتظر هذه المرحلة إلى أن يتم تجميع كل من لوحتَي Neper (neper-0 وneper-1) لعمليات الاعتمادية، ثم تستخرج عناوين IP غير التلقائية المتعددة لواجهة الشبكة المرتبطة عبر DRANET، وتطلق خوادم tcp_stream المتزامنة على neper-1، وتنشئ حمولة عالية الإنتاجية من neper-0، وتحلّل إجمالي سرعة معالجة البيانات بوحدة جيجابت في الثانية (Gbps).
المرحلة 2 (التحقّق من صحة الأجهزة): يتم تثبيت Google JAX داخل neper-0 وتنفيذ عملية ضرب المصفوفات (5000x5000) مباشرةً على شرائح TPU التي تم ربطها من خلال VFIO للتأكّد من حالة تشغيل السيليكون.
- نفِّذ الأمر التالي في
k8s-control-planeلكتابةrun_dual_neper_test.sh
cat << 'EOF' > run_dual_neper_test.sh
#!/bin/bash
set -e

SERVER_POD="neper-1"
CLIENT_POD="neper-0"

echo "================================================="
echo " PHASE 1: DUAL-INTERFACE HIGH-SPEED NETWORK TEST"
echo "================================================="
echo "=== Waiting for Pods to be Ready ==="
kubectl wait --for=condition=ready pod/$CLIENT_POD pod/$SERVER_POD --timeout=300s

echo "=== Waiting for neper compilation to finish inside Pods ==="
for POD in $SERVER_POD $CLIENT_POD; do
  until kubectl exec $POD -c neper -- sh -c 'command -v jq >/dev/null 2>&1 && command -v tcp_stream >/dev/null 2>&1'; do
    sleep 5
  done
done

echo ""
echo "=== Step 1: Extract Target IPs from $SERVER_POD ==="
# Using jq to parse the network interfaces directly from Linux JSON output
IFACE1=$(kubectl exec $SERVER_POD -c neper -- sh -c "ip -j -4 addr show | jq -r '.[] | select(.ifname != \"lo\" and .ifname != \"eth0\") | .ifname' | sed -n '1p'")
IFACE2=$(kubectl exec $SERVER_POD -c neper -- sh -c "ip -j -4 addr show | jq -r '.[] | select(.ifname != \"lo\" and .ifname != \"eth0\") | .ifname' | sed -n '2p'")

IP1=$(kubectl exec $SERVER_POD -c neper -- sh -c "ip -j -4 addr show | jq -r '.[] | select(.ifname != \"lo\" and .ifname != \"eth0\") | .addr_info[0].local' | sed -n '1p'")
IP2=$(kubectl exec $SERVER_POD -c neper -- sh -c "ip -j -4 addr show | jq -r '.[] | select(.ifname != \"lo\" and .ifname != \"eth0\") | .addr_info[0].local' | sed -n '2p'")

echo "   📍 Target IP 1 ($IFACE1): $IP1"
echo "   📍 Target IP 2 ($IFACE2): $IP2"

echo ""
echo "=== Step 2: Initialize TCP Servers on $SERVER_POD ==="
kubectl exec $SERVER_POD -c neper -- sh -c '
for i in 0 1; do
  nohup tcp_stream -C$((52279 + i)) --port=$((38339 + i)) --skip-rx-copy -rw -Z -B16384 \
    --test-length=60 --suicide-length=120 -F100 --num-threads=16 --num-flows=32 -D0 \
    --logtostderr > test${i}.log 2>&1 &
done
'
sleep 3

echo "=== Step 3: Generate Concurrent High-Throughput Load from $CLIENT_POD ==="
echo "Blasting Traffic via Interface 1 -> $IP1 ..."
kubectl exec $CLIENT_POD -c neper -- sh -c "nohup tcp_stream -C52279 --port=38339 --skip-rx-copy -rw -Z -B16384 \
  --test-length=60 --suicide-length=70 -F100 --num-threads=16 --num-flows=32 \
  --client -H $IP1 -D0 --logtostderr > test0.log 2>&1 &"

echo "Blasting Traffic via Interface 2 -> $IP2 ..."
kubectl exec $CLIENT_POD -c neper -- sh -c "nohup tcp_stream -C52280 --port=38340 --skip-rx-copy -rw -Z -B16384 \
  --test-length=60 --suicide-length=70 -F100 --num-threads=16 --num-flows=32 \
  --client -H $IP2 -D0 --logtostderr > test1.log 2>&1 &"

echo ""
echo "=== Testing in progress... Waiting 65 seconds for test completion ==="
sleep 65

echo ""
echo "=== Step 4: Evaluate Throughput Metrics ==="
RAW_BPS1=$(kubectl exec $CLIENT_POD -c neper -- grep -a "remote_throughput=" test0.log | cut -d= -f2 | tr -d '\r' || echo "0")
RAW_BPS2=$(kubectl exec $CLIENT_POD -c neper -- grep -a "remote_throughput=" test1.log | cut -d= -f2 | tr -d '\r' || echo "0")

GBPS1=$(awk -v bps="$RAW_BPS1" 'BEGIN { printf "%.2f", bps / 1000000000 }')
GBPS2=$(awk -v bps="$RAW_BPS2" 'BEGIN { printf "%.2f", bps / 1000000000 }')
TOTAL=$(awk -v b1="$RAW_BPS1" -v b2="$RAW_BPS2" 'BEGIN { printf "%.2f", (b1 + b2) / 1000000000 }')

echo "📊 --- NETWORK RESULTS ---"
echo "Interface 1 ($IFACE1) : ${GBPS1} Gbps"
echo "Interface 2 ($IFACE2) : ${GBPS2} Gbps"
echo "🔥 TOTAL AGGREGATE  : ${TOTAL} Gbps"
echo "--------------------------"


echo ""
echo "================================================="
echo " PHASE 2: TPU HARDWARE VALIDATION TEST"
echo "================================================="
echo "⏳ Installing Python and Google JAX on $CLIENT_POD (Takes ~1 minute)..."
kubectl exec $CLIENT_POD -c neper -- bash -c "apt-get update > /dev/null 2>&1 && apt-get install -y python3-pip > /dev/null 2>&1 && pip3 install jax[tpu] -f https://storage.googleapis.com/jax-releases/libtpu_releases.html > /dev/null 2>&1"

echo "🧠 Running matrix math directly on the TPU chips..."
kubectl exec $CLIENT_POD -c neper -- python3 -c "
import jax
import jax.numpy as jnp
print(f'✅ TPU Hardware Detected: {jax.device_count()} chips mapped via vfio')
print('🚀 Executing 5000x5000 Matrix Multiplication on TPU silicon...')
x = jnp.ones((5000, 5000))
y = jnp.dot(x, x)
print('✅ Success! The TPU driver is fully operational and executing math.')
"
EOF

chmod +x run_dual_neper_test.sh
- نفِّذ الاختبار. سيستغرق إكمال هذه العملية دقيقتَين.
./run_dual_neper_test.sh
عند اكتمال العملية، ستعرض نتائج الجهاز مقاييس الشبكات العالية السرعة التي تم التحقّق من صحتها وتنفيذ عمليات حسابية على المصفوفات باستخدام وحدات TPU
=== Step 4: Evaluate Throughput Metrics ===
📊 --- NETWORK RESULTS ---
Interface 1 (ens9)  : 157.51 Gbps
Interface 2 (ens10) : 167.04 Gbps
🔥 TOTAL AGGREGATE  : 324.55 Gbps
--------------------------

=================================================
 PHASE 2: TPU HARDWARE VALIDATION TEST
=================================================
⏳ Installing Python and Google JAX on neper-0 (Takes ~1 minute)...
🧠 Running matrix math directly on the TPU chips...
✅ TPU Hardware Detected: 4 chips mapped via vfio
🚀 Executing 5000x5000 Matrix Multiplication on TPU silicon...
✅ Success! The TPU driver is fully operational and executing math.
9. نشر Gemma 4 على مجموعتك
في هذا القسم، ستضبط بيانات اعتماد واجهة برمجة التطبيقات الآمنة Hugging Face كبيانات سرية في Kubernetes، وستنشر محرك الاستدلال vLLM باستخدام كلّ من شبكة "تخصيص الموارد الديناميكي" (DRA) ومطالبات الأجهزة، وستنفّذ طلب بحث اختباريًا شاملاً على نموذج Gemma 4 من Google.
تأكَّد من تسجيل الدخول إلى جلسة SSH الآمنة على k8s-control-plane:
- أعِد الاتصال بشكل آمن بالجهاز الافتراضي الخاص بلوحة التحكّم من Cloud Shell. إذا كنت متصلاً بالشبكة، يمكنك تخطّي هذه الخطوة.
gcloud compute ssh k8s-control-plane \
    --zone=$ZONE \
    --tunnel-through-iap
- تنظيف عمليات النشر السابقة
# 1. Delete the StatefulSet to stop the benchmarking pods
kubectl delete statefulset neper

# 2. Wait for the pods to terminate fully and release the claims
kubectl wait --for=delete pod/neper-0 pod/neper-1 --timeout=60s
- تخزين رمز الدخول إلى Hugging Face استبدِل
<YOUR_ACTUAL_HUGGING_FACE_TOKEN>بالرمز المميّز.
export HF_TOKEN="<YOUR_ACTUAL_HUGGING_FACE_TOKEN>"
- إنشاء سرّ
kubectl create secret generic hf-token --from-literal=token="${HF_TOKEN}"
- يجدول ملف البيان هذا نسخة واحدة من vLLM تعمل على جهاز افتراضي مزوّد بـ 4 شرائح من TPU. تستخدِم هذه الميزة معيار Kubernetes DRA لتثبيت كلّ من مطالبات الشبكة المخصّصة (tpu-net-claim) ومطالبات الأجهزة (tpu-hardware-claim) من أجل الوصول بشكل آمن إلى أجهزة TPU الأولية بدون الحاجة إلى عمليات تثبيت غير آمنة لوحدات تخزين المضيف. وأخيرًا، يعرض خادم واجهة برمجة التطبيقات المتوافق مع OpenAI على المنفذ 8080. نفِّذ الأمر التالي لإنشاء الملف:
cat << 'EOF' > gemma-inference.yaml
apiVersion: apps/v1
kind: Deployment
metadata:
  name: vllm-gemma-4
  labels:
    app: gemma-server
spec:
  replicas: 1
  selector:
    matchLabels:
      app: gemma-server
  template:
    metadata:
      labels:
        app: gemma-server
    spec:
      hostIPC: true
      containers:
      - name: vllm-tpu
        image: vllm/vllm-tpu:latest
        securityContext:
          privileged: true
        env:
        - name: HF_TOKEN
          valueFrom:
            secretKeyRef:
              name: hf-token
              key: token
        - name: JAX_PLATFORMS
          value: "tpu,cpu"
        - name: TPU_ACCELERATOR_TYPE
          value: "v6e-4"
        - name: TPU_WORKER_HOSTNAMES
          value: "127.0.0.1"
        - name: TPU_WORKER_ID
          value: "0"
        - name: LIBTPU_INIT_ARGS
          value: "--noenable_tpunetd_client"
        - name: BARE_METAL_MODE
          value: "true"
        - name: BYPASS_VBAR_CONTROL_SERVICE
          value: "1"
        - name: TPU_SKIP_MDS_QUERY
          value: "1"
        - name: TPU_DEFAULT_NETWORK_TYPE
          value: "loopback"
        - name: CHIPS_PER_HOST_BOUNDS
          value: "2,2,1"
        - name: HOST_BOUNDS
          value: "1,1,1"
        - name: ALT
          value: "false,false,false"
        - name: WRAP
          value: "false,false,false"
        command:
        - bash
        - -c
        - |
          export PYTHONUNBUFFERED=1
          sysctl -w net.ipv6.conf.all.disable_ipv6=0
          sysctl -w net.ipv6.conf.default.disable_ipv6=0
          sysctl -w net.ipv6.conf.lo.disable_ipv6=0
          ip link set lo up || true

          exec python3 -m vllm.entrypoints.openai.api_server \
            --model google/gemma-4-E4B-it \
            --tensor-parallel-size 4 \
            --trust-remote-code \
            --max-model-len 8192 \
            --max-num-batched-tokens 4096 \
            --host 0.0.0.0 \
            --port 8080
        ports:
        - containerPort: 8080
        resources:
          requests:
            cpu: "170"
            memory: "650Gi"
          limits:
            cpu: "170"
            memory: "650Gi"
          claims:
          - name: tpu-net-claim
          - name: tpu-hardware-claim
        volumeMounts:
        - name: dshm
          mountPath: /dev/shm
      volumes:
      - name: dshm
        emptyDir:
          medium: Memory
      resourceClaims:
      - name: tpu-net-claim
        resourceClaimTemplateName: tpu-net-interfaces
      - name: tpu-hardware-claim
        resourceClaimTemplateName: tpu-device-template
---
apiVersion: v1
kind: Service
metadata:
  name: vllm-gemma-service
spec:
  selector:
    app: gemma-server
  ports:
  - protocol: TCP
    port: 8080
    targetPort: 8080
  type: ClusterIP
EOF
- نشر حمل عمل الاستدلال
kubectl apply -f gemma-inference.yaml
- التحقّق من حالة النشر يجب أن يتم تنزيل النموذج وإكمال عملية الإعداد، وقد يستغرق ذلك بين
10 - 25 minutes.vLLM. This
kubectl get pods -l app=gemma-server

kubectl describe pods -l app=gemma-server
يمكنك أيضًا مشاهدة السجلات من الحاوية للاطّلاع على العملية. اضغط على CTRL+C للخروج من عرض السجلّ.
kubectl logs -l app=gemma-server -f
ستعرف أنّه تم إعداد المحرّك بالكامل عندما تظهر لك الخطوط
(APIServer pid=1) INFO: Started server process [1]
(APIServer pid=1) INFO: Waiting for application startup.
(APIServer pid=1) INFO: Application startup complete.
اضغط على CTRL+C للخروج من بث السجلّ قبل المتابعة.
- تأكيد ربط الواجهة التحقّق من واجهات الشبكة المرتبطة داخل الحاوية
kubectl exec deployment/vllm-gemma-4 -c vllm-tpu -- ls /sys/class/net
kubectl exec deployment/vllm-gemma-4 -c vllm-tpu -- cat /proc/net/fib_trie | grep -B 1 "32 host"
ما يجب البحث عنه: من المفترض أن يظهر لك ens9 وens10 (أو أسماء مشابهة ensX) بجانب واجهة CNI العادية (eth0) وواجهة loopback (lo). تمثّل هذه الواجهات واجهات شبكة PCI المضيفة الفعلية في GCE المرتبطة ديناميكيًا داخل الحزمة بواسطة برنامج تشغيل DRANET مفتوح المصدر باستخدام اصطلاح تسمية الفتحات القابل للتوقّع في systemd.
kubectl exec deployment/vllm-gemma-4 -c vllm-tpu -- ls /sys/class/net
ens10
ens9
eth0
Lo

kubectl exec deployment/vllm-gemma-4 -c vllm-tpu -- cat /proc/net/fib_trie | grep -B 1 "32 host"

              |-- 10.10.0.3
                 /32 host LOCAL
--
              |-- 10.20.0.3
                 /32 host LOCAL
--
           |-- 127.0.0.1
              /32 host LOCAL
--
     |-- 192.168.238.67
        /32 host LOCAL
--
              |-- 10.10.0.3
                 /32 host LOCAL
--
              |-- 10.20.0.3
                 /32 host LOCAL
--
           |-- 127.0.0.1
              /32 host LOCAL
--
     |-- 192.168.238.67
        /32 host LOCAL
10. اختبار النموذج اللغوي الكبير
بعد التحقّق من صحة واجهاتك، شغِّل حاوية اختبار خفيفة الوزن داخل مجموعتك لإرسال طلب استنتاج متدفّق إلى Gemma 4.
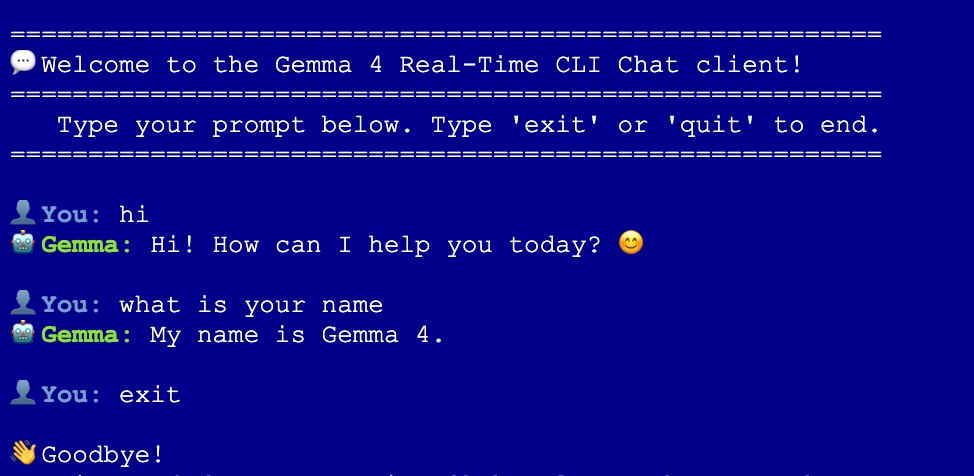
- نفِّذ الأمر التالي في جلسة
k8s-control-planeلتشغيل العميل التفاعلي:
kubectl run gemma-chat --rm -i --tty --image=alpine --restart=Never -- sh -c '
  # 1. Silently install curl and jq
  apk add --no-cache curl jq > /dev/null

  echo -e "\n========================================================"
  echo -e "💬 Welcome to the Gemma 4 Real-Time CLI Chat client!"
  echo -e "========================================================"
  echo -e "   Type your prompt below. Type '\''exit'\'' or '\''quit'\'' to end."
  echo -e "========================================================\n"

  while true; do
    # Read user input
    echo -n -e "👤 \033[1;34mYou:\033[0m "
    read -r USER_INPUT

    # Handle exit conditions
    if [ "$USER_INPUT" = "exit" ] || [ "$USER_INPUT" = "quit" ] || [ -z "$USER_INPUT" ]; then
      echo -e "\n👋 Goodbye!"
      break
    fi

    echo -n -e "🤖 \033[1;32mGemma:\033[0m "

    # Use jq to safely escape double quotes and special characters in user input
    JSON_PAYLOAD=$(jq -n --arg msg "$USER_INPUT" '\''{
      model: "google/gemma-4-E4B-it",
      messages: [{role: "user", content: $msg}],
      temperature: 0.7,
      stream: true
    }'\'')

    # Stream the tokens in real-time with a typewriter effect
    curl -s -X POST http://vllm-gemma-service:8080/v1/chat/completions \
      -H "Content-Type: application/json" \
      -d "$JSON_PAYLOAD" | while read -r line; do
        # Extract SSE data streams
        if echo "$line" | grep -q "data:"; then
          DATA_CLEAN=$(echo "$line" | sed "s/^data: //" | tr -d "\r")
          if [ "$DATA_CLEAN" != "[DONE]" ] && [ -n "$DATA_CLEAN" ]; then
            # Parse and print only the token content
            TOKEN=$(echo "$DATA_CLEAN" | jq -r ".choices[0].delta.content // empty" 2>/dev/null)
            echo -n "$TOKEN"
          fi
        fi
      done
    echo -e "\n"
  done
'
Interactive chat
11. تنظيف
أولاً، احذف جميع أحمال العمل والأسرار والإعدادات من مجموعتك.
إذا كنت لا تزال مسجّلاً الدخول إلى جلسة SSH الآمنة k8s-control-plane، نفِّذ الأمر التالي مباشرةً. (إذا سبق أن خرجت، عليك إعادة تسجيل الدخول باستخدام SSH أولاً):
- أعِد الاتصال بشكل آمن بالجهاز الافتراضي الخاص بلوحة التحكّم من Cloud Shell. إذا كنت متصلاً بهذه الآلة الافتراضية، يمكنك تخطّي هذه الخطوة.
gcloud compute ssh k8s-control-plane \
    --zone=$ZONE \
    --tunnel-through-iap
- تنظيف موارد Kubernetes
# 1. Delete the Gemma 4 deployment and service
kubectl delete -f gemma-inference.yaml --ignore-not-found=true

# 2. Delete the Hugging Face access secret
kubectl delete secret hf-token --ignore-not-found=true

# 3. Delete the open-source DRANET specs and drivers
kubectl delete deviceclass dranet --ignore-not-found=true
kubectl delete resourceclaimtemplate tpu-net-interfaces --ignore-not-found=true
kubectl delete -f https://raw.githubusercontent.com/kubernetes-sigs/dranet/refs/heads/main/install.yaml --ignore-not-found=true

# 4. Uninstall the OSS TPU Hardware Driver
helm uninstall dra-driver-google-tpu -n dra-driver-google-tpu --wait || true
- الآن، اكتب
exitوارجع إلى دليل Cloud Shell النشط حيث يتم تخزين ملفات Terraform، ثم احذف جميع العُقد وشبكات السحابة الإلكترونية الخاصة الافتراضية وقواعد جدار الحماية.
# 1. Create the teardown script
cat << 'EOF' > teardown.sh
#!/bin/bash

# The specific networks defined in your Terraform vpc.tf
NETWORKS=(
  "oss-k8s-primary-vpc"
  "oss-tpu-vpc-1"
  "oss-tpu-vpc-2"
)

echo "=== Hunting down and deleting ALL firewall rules for OSS networks ==="

for NETWORK in "${NETWORKS[@]}"; do
    echo "Searching for firewall rules attached to network: $NETWORK..."

    # Query GCP for any firewall rule tied to this specific network
    STUCK_RULES=$(gcloud compute firewall-rules list \
        --filter="network:($NETWORK)" \
        --format="value(name)" | tr '\n' ' ')

    # Check if the string is not empty and contains more than just whitespace
    if [ -n "$STUCK_RULES" ] && [ "$STUCK_RULES" != " " ]; then
        echo "🔥 Found rules holding $NETWORK hostage: $STUCK_RULES"
        echo "Deleting them now..."
        gcloud compute firewall-rules delete $STUCK_RULES --quiet
    else
        echo "✅ No firewall rules found for $NETWORK."
    fi
done

# Fallback: Explicitly delete the named rules from your Terraform file
# just in case the dynamic filter missed them due to caching delays
echo "=== Running fallback deletion for explicitly named Terraform rules ==="
gcloud compute firewall-rules delete \
    oss-k8s-primary-allow-internal \
    oss-k8s-allow-iap-ssh \
    oss-tpu1-allow-internal \
    oss-tpu2-allow-internal \
    --quiet 2>/dev/null || true

echo "--------------------------------------------------------"
echo "✅ Firewall cleanup complete!"
echo "Your networks are now stripped of firewalls and ready to be deleted."
echo "--------------------------------------------------------"

echo "=== Destroying Infrastructure ==="
cd ~/oss-kube-dra || exit
terraform destroy -auto-approve

echo "--------------------------------------------------------"
echo "✅ Infrastructure successfully destroyed!"
echo "--------------------------------------------------------"
EOF

# 2. Make the script executable and run it
chmod +x teardown.sh
./teardown.sh
- احذف مجلد Terraform
oss-kube-dra
cd
rm -r oss-kube-dra
12. تهانينا
لقد نجحت في توفير بنية تحتية عالية الأداء ومُدارة ذاتيًا للذكاء الاصطناعي في Kubernetes، وإعدادها، والتحقّق من صحتها مباشرةً على مثيلات الأجهزة الافتراضية في Google Compute Engine (GCE).
أصبح لديك الآن فهم عميق على مستوى النظام لكيفية استخدام Kubernetes لميزة "تخصيص الموارد الديناميكي" (DRA) لتنظيم مسرّعات TPU الأولية وربط طُرق عرض المضيفات المتعددة بطاقة واجهة شبكة عالية السرعة وعرض نماذج لغوية كبيرة متطورة.
الخطوات التالية / مزيد من المعلومات
يمكنك الاطّلاع على مزيد من المعلومات حول شبكات GKE.
الدرس التطبيقي التالي
يمكنك مواصلة رحلتك مع Google Cloud، والاطّلاع على هذه المختبرات الأخرى في Google Cloud: