

১. সংক্ষিপ্ত বিবরণ
এই ল্যাবটি আপনাকে সরাসরি গুগল কম্পিউট ইঞ্জিন (GCE)-এর উপর একটি স্ব-পরিচালিত, এআই পরিকাঠামো তৈরি করার সাথে পরিচয় করিয়ে দেবে। আপনি টেরাফর্ম (Terraform) ও কিউবঅ্যাডম (kubeadm) ব্যবহার করে ভার্চুয়াল মেশিনে (যার কয়েকটিতে টিপিইউ (TPU) রয়েছে) একটি অব্যবস্থাপিত কুবারনেটিস (Kubernetes) ক্লাস্টার বুটস্ট্র্যাপ করবেন এবং ওপেন-সোর্স ড্রাইভার ব্যবহার করে কুবারনেটিস ডাইনামিক রিসোর্স অ্যালোকেশন (DRA) কনফিগার করবেন। আপনাকে নিম্নলিখিত বিষয়গুলো নিয়ে কাজ করতে হবে:
- গুগল কম্পিউট ইঞ্জিন - এটি আপনার ক্লাস্টারগুলো বুটস্ট্র্যাপ করার জন্য কম্পিউটিং রিসোর্স সরবরাহ করে।
- টিপিইউ - গুগলের নিজস্ব প্রযুক্তিতে তৈরি অ্যাক্সিলারেটর চিপ।
- Kubernetes OSS - ম্যানুয়ালি Kubernetes ইনস্টল ও সেট আপ করার সফটওয়্যার
- OSS DRANET - DRA নেটওয়ার্কিং ড্রাইভার
- TPU-এর জন্য OSS DRA - যে DRA ড্রাইভারগুলো TPU সমর্থন করে
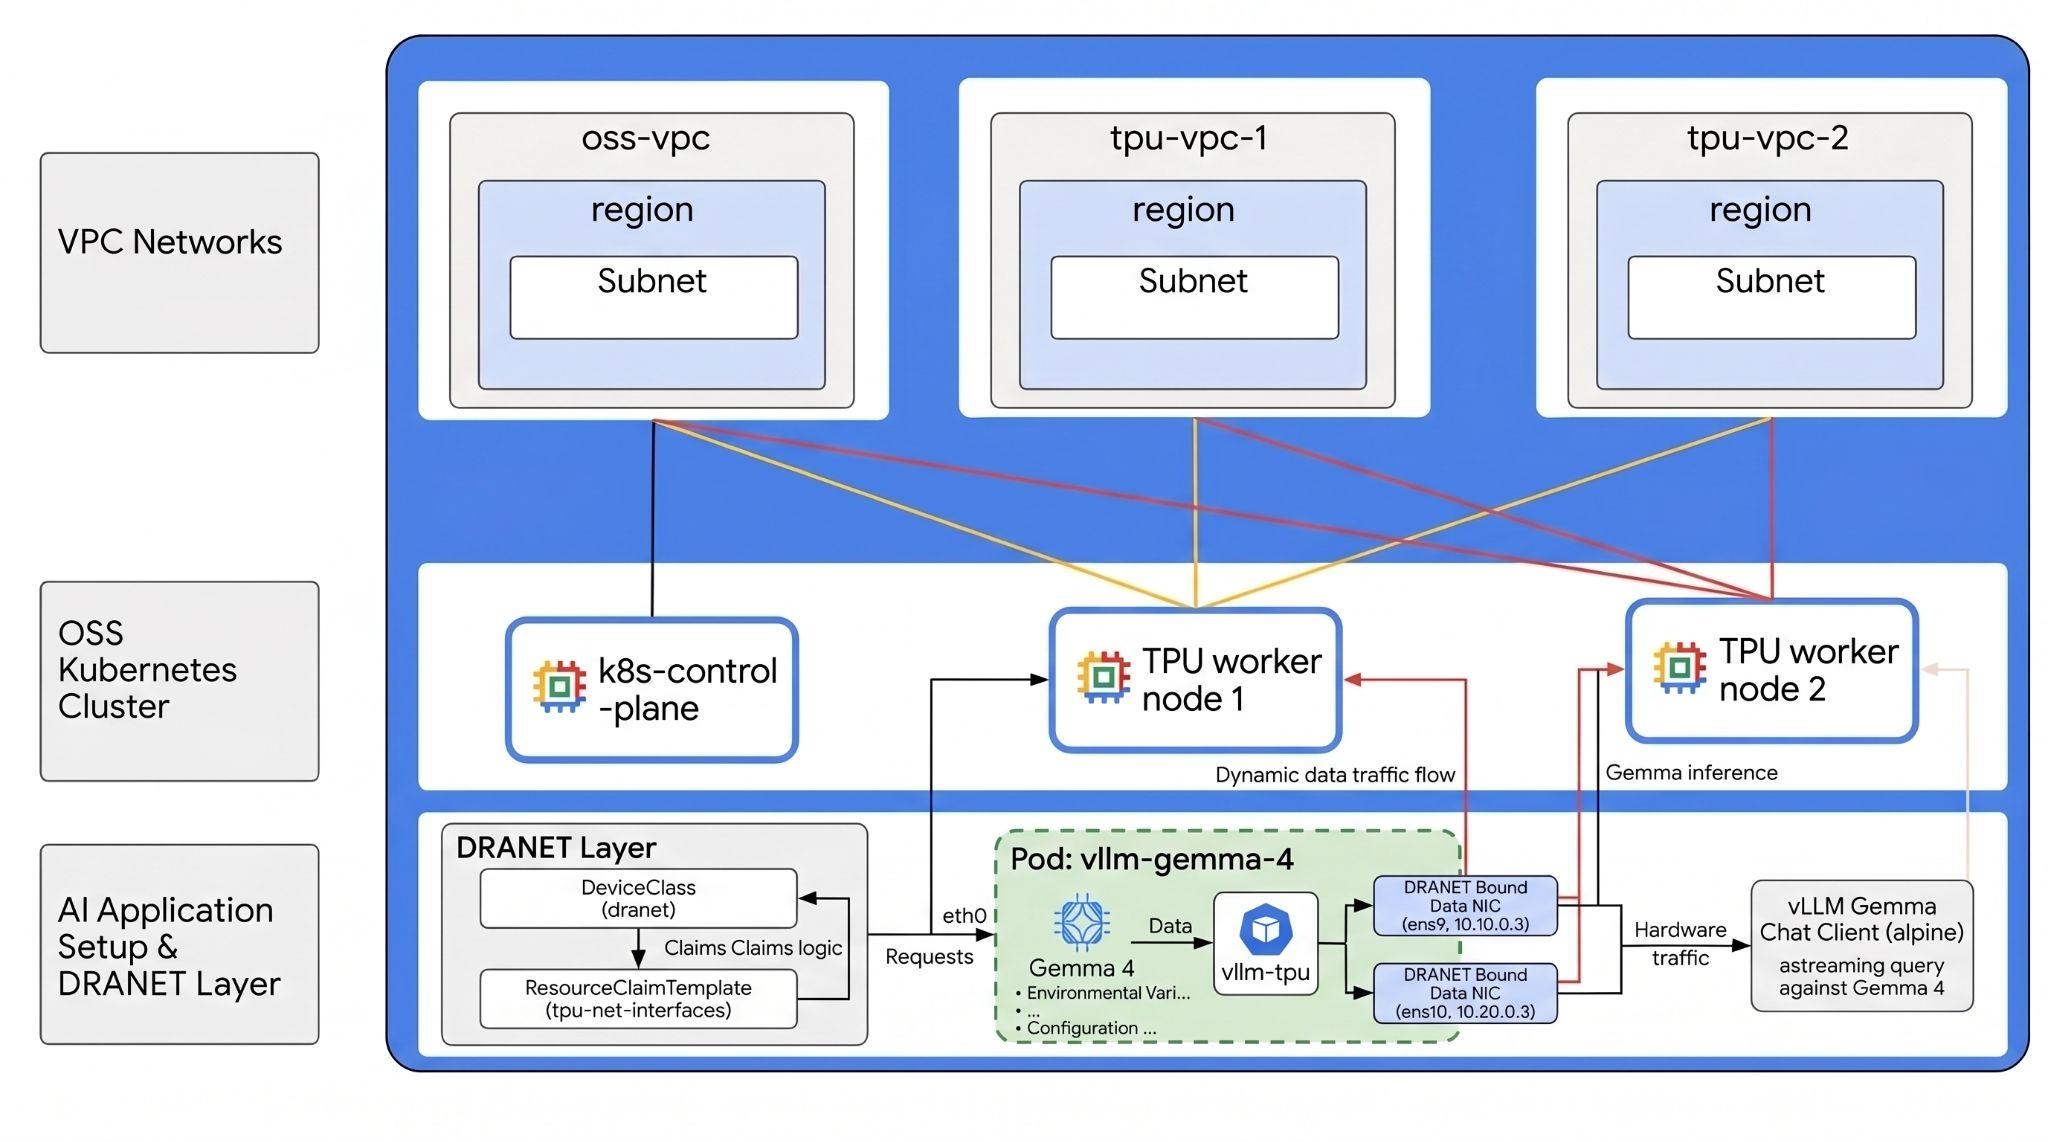
পরিবেশটি কনফিগার করার জন্য, আপনাকে নিজস্ব সাবনেটসহ একাধিক স্বাধীন VPC নেটওয়ার্ক স্থাপন করতে হবে। এর মাধ্যমে আপনি আপনার VM ইনস্ট্যান্সগুলোকে একাধিক নেটওয়ার্ক ইন্টারফেস (মাল্টি-এনআইসি) দিয়ে সজ্জিত করতে পারবেন, যা ম্যানেজমেন্ট ট্র্যাফিককে উচ্চ-গতির TPU ডেটা ট্র্যাফিক থেকে আলাদা করে।
এরপরে, ওপেন-সোর্স ডাইনামিক রিসোর্স অ্যালোকেশন (DRA) সক্রিয় করতে, আপনাকে DRA Google TPU হার্ডওয়্যার ড্রাইভার এবং DRANET নেটওয়ার্কিং ড্রাইভার উভয়ই ইনস্টল করতে হবে। তারপরে, এই রিসোর্সগুলির ডাইনামিক প্রভিশনিং পরিচালনা করার জন্য আপনাকে Kubernetes DeviceClass কনফিগার করতে হবে এবং ResourceClaimTemplate লিখতে হবে।
অবশেষে, আপনি আপনার ওয়ার্কার নোডগুলোর মধ্যেকার জাম্বো ফ্রেম নেটওয়ার্ক ডেটা পাথগুলো যাচাই করার জন্য নেপার (Neper) ব্যবহার করে একটি উচ্চ-পারফরম্যান্স বেঞ্চমার্কিং ওয়ার্কলোড ডেপ্লয় করবেন, এবং এরপর অন্তর্নিহিত টিপিইউ সিলিকন (TPU silicon) যাচাই করার জন্য একটি পাইথন জ্যাক্স (Python JAX) টেস্ট চালাবেন। তারপর আপনি সম্পূর্ণ আইসোলেটেড হার্ডওয়্যার এবং নেটওয়ার্ক ডিআরএ (DRA) ক্লেইম ব্যবহার করে হাগিং ফেস (Hugging Face)-এর মাধ্যমে গুগলের অত্যাধুনিক জেমা ৪ (Gemma 4) মডেলটি পরিবেশন করার জন্য ভিএলএলএম (vLLM) ডেপ্লয় করবেন।
কনফিগারেশনগুলোতে Terraform , gcloud এবং kubectl এর সমন্বয় ব্যবহার করা হবে।
এই ল্যাবে তোমরা নিম্নলিখিত কাজটি কীভাবে সম্পাদন করতে হয় তা শিখবে:
- একটি VPC নেটওয়ার্ক সেট আপ করুন
- GCE-তে ৩টি নোড স্থাপন করুন (১টি স্ট্যান্ডার্ড নোড এবং ২টি TPU v6 নোড)
- বুটস্ট্র্যাপ কুবারনেটিস
- TPU-এর জন্য OSS DRANET এবং DRA কনফিগার করুন
- বেঞ্চমার্ক পারফরম্যান্স
- ডিভাইসক্লাস এবং রিসোর্সক্লেমটেমপ্লেট তৈরি করুন
- নেটওয়ার্ক এবং হার্ডওয়্যারের কর্মক্ষমতা বেঞ্চমার্ক করুন
- জেমা ৪ স্থাপন করুন: vLLM এবং সক্রিয় DRA ক্লেইম ব্যবহার করে TPU v6e হার্ডওয়্যারে মডেলটি পরিবেশন করুন।
- এলএলএম-এর সাথে সংযোগ পরীক্ষা করুন
এই ল্যাবে, আপনারা নিম্নলিখিত প্যাটার্নটি তৈরি করবেন।
চিত্র ১।
২. গুগল ক্লাউড পরিষেবা সেটআপ
স্ব-গতিতে পরিবেশ সেটআপ
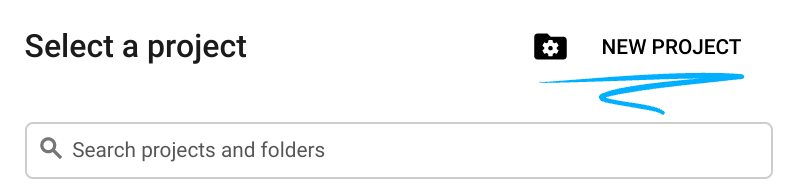
- Google Cloud Console- এ সাইন-ইন করুন এবং একটি নতুন প্রজেক্ট তৈরি করুন অথবা বিদ্যমান কোনো প্রজেক্ট পুনরায় ব্যবহার করুন। যদি আপনার আগে থেকে Gmail বা Google Workspace অ্যাকাউন্ট না থাকে, তবে আপনাকে অবশ্যই একটি তৈরি করতে হবে।

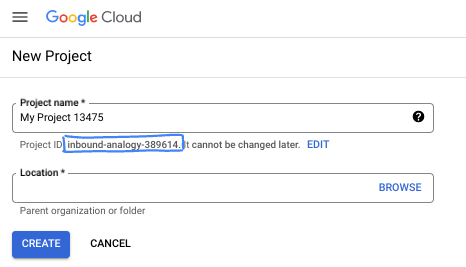
- প্রজেক্টের নামটি হলো এই প্রজেক্টের অংশগ্রহণকারীদের প্রদর্শিত নাম। এটি একটি ক্যারেক্টার স্ট্রিং যা গুগল এপিআই ব্যবহার করে না। আপনি যেকোনো সময় এটি আপডেট করতে পারেন।
- প্রজেক্ট আইডি সমস্ত গুগল ক্লাউড প্রজেক্ট জুড়ে অনন্য এবং অপরিবর্তনীয় (একবার সেট করার পর এটি পরিবর্তন করা যায় না)। ক্লাউড কনসোল স্বয়ংক্রিয়ভাবে একটি অনন্য স্ট্রিং তৈরি করে; সাধারণত এটি কী তা নিয়ে আপনার মাথা ঘামানোর দরকার নেই। বেশিরভাগ কোডল্যাবে, আপনাকে আপনার প্রজেক্ট আইডি উল্লেখ করতে হবে (যা সাধারণত
PROJECT_IDহিসাবে চিহ্নিত করা হয়)। তৈরি করা আইডিটি আপনার পছন্দ না হলে, আপনি এলোমেলোভাবে আরেকটি তৈরি করতে পারেন। বিকল্পভাবে, আপনি আপনার নিজের আইডি দিয়ে চেষ্টা করে দেখতে পারেন যে সেটি উপলব্ধ আছে কিনা। এই ধাপের পরে এটি পরিবর্তন করা যাবে না এবং প্রজেক্টের পুরো সময়কাল জুড়ে এটি অপরিবর্তিত থাকবে। - আপনার অবগতির জন্য জানাচ্ছি যে, তৃতীয় একটি ভ্যালু রয়েছে, যা হলো প্রজেক্ট নম্বর , এবং কিছু এপিআই এটি ব্যবহার করে থাকে। ডকুমেন্টেশনে এই তিনটি ভ্যালু সম্পর্কে আরও বিস্তারিত জানুন।
- এরপর, ক্লাউড রিসোর্স/এপিআই ব্যবহার করার জন্য আপনাকে ক্লাউড কনসোলে বিলিং চালু করতে হবে। এই কোডল্যাবটি সম্পন্ন করতে খুব বেশি খরচ হবে না, এমনকি আদৌ কোনো খরচ নাও হতে পারে। এই টিউটোরিয়ালের পর বিলিং এড়াতে রিসোর্সগুলো বন্ধ করার জন্য, আপনি আপনার তৈরি করা রিসোর্সগুলো অথবা প্রজেক্টটি ডিলিট করে দিতে পারেন। নতুন গুগল ক্লাউড ব্যবহারকারীরা ৩০০ মার্কিন ডলারের ফ্রি ট্রায়াল প্রোগ্রামের জন্য যোগ্য।
ক্লাউড শেল শুরু করুন
যদিও গুগল ক্লাউড আপনার ল্যাপটপ থেকে দূরবর্তীভাবে পরিচালনা করা যায়, এই কোডল্যাবে আপনি গুগল ক্লাউড শেল ব্যবহার করবেন, যা ক্লাউডে চালিত একটি কমান্ড লাইন পরিবেশ।
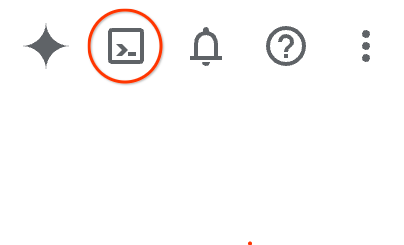
গুগল ক্লাউড কনসোল থেকে, উপরের ডানদিকের টুলবারে থাকা ক্লাউড শেল আইকনটিতে ক্লিক করুন:
পরিবেশটি প্রস্তুত করতে এবং এর সাথে সংযোগ স্থাপন করতে মাত্র কয়েক মুহূর্ত সময় লাগবে। এটি শেষ হলে, আপনি এইরকম কিছু দেখতে পাবেন:

এই ভার্চুয়াল মেশিনটিতে আপনার প্রয়োজনীয় সমস্ত ডেভেলপমেন্ট টুলস লোড করা আছে। এটি একটি স্থায়ী ৫ জিবি হোম ডিরেক্টরি প্রদান করে এবং গুগল ক্লাউডে চলে, যা নেটওয়ার্ক পারফরম্যান্স ও অথেনটিকেশনকে ব্যাপকভাবে উন্নত করে। এই কোডল্যাবে আপনার সমস্ত কাজ একটি ব্রাউজারের মধ্যেই করা যাবে। আপনাকে কিছুই ইনস্টল করতে হবে না।
৩. টেরাফর্ম দিয়ে পরিবেশ সেটআপ করুন
এই ল্যাবটি করার জন্য আপনার টিপিইউ ব্যবহারের সুযোগ প্রয়োজন। ব্যবহৃত নির্দিষ্ট সংস্করণটি হলো টিপিইউ ভি৬ই।
- অ্যাক্সেস পেতে আপনাকে টিপিইউ প্ল্যান ডকুমেন্টটি অনুসরণ করতে হবে এবং টিপিইউ কোটা সক্রিয় করতে হবে ।
- এমন একটি অঞ্চল ব্যবহার করুন যেখানে আপনার TPU কোটা আছে। আরও তথ্যের জন্য " GKE-তে TPU প্রাপ্যতা যাচাই করুন " এই নথিটি দেখুন।
- আমরা একটি ছোট ডেপ্লয়মেন্ট ব্যবহার করছি যার জন্য (2) 4 TPU v6e চিপ (
ct6e-standard-4t)প্রয়োজন হবে যা একটি একক অঞ্চলে একটি 2x2 স্লাইস হবে। - হাগিং ফেস টোকেন: জেমা মডেলের ওয়েটগুলো ডাউনলোড করার জন্য একটি অ্যাক্সেস টোকেন প্রয়োজন।
আমরা ফায়ারওয়াল নিয়ম এবং সাবনেট সহ তিনটি কাস্টম ভিপিসি তৈরি করব। ক্লাউড কনসোল খুলুন এবং আপনি যে প্রজেক্টটি ব্যবহার করবেন তা নির্বাচন করুন।
- আপনার কনসোলের উপরে ডানদিকে অবস্থিত ক্লাউড শেল খুলুন, নিশ্চিত করুন যে আপনি ক্লাউড শেলে সঠিক প্রজেক্ট আইডি দেখতে পাচ্ছেন, অ্যাক্সেসের অনুমতি দেওয়ার জন্য যেকোনো প্রম্পট নিশ্চিত করুন।

-
oss-kube-dra,সেই ফোল্ডারে যান এবং কিছু ভেরিয়েবল যোগ করুন। ps কমান্ডের মাধ্যমে " REGION " এবং " ZONE " ভেরিয়েবলের মান আপনার আসল অঞ্চল এবং জোন অনুযায়ী আপডেট করুন। ডিফল্ট হিসেবে ব্যবহৃত অঞ্চল হলো "europe-west4" এবং ডিফল্ট জোন হলো "europe-west4-a"।
mkdir -p oss-kube-dra && cd oss-kube-dra
export PROJECT_ID=$(gcloud config get-value project)
export REGION="europe-west4"
export ZONE="europe-west4-a"
echo $PROJECT_ID
echo $REGION
echo $ZONE
- এখন কিছু কনফিগারেশন ফাইল যোগ করুন। এগুলো terraform.tfvars , variables.tf , vpc.tf ফাইলগুলো তৈরি করবে।
cat << EOF > terraform.tfvars
project_id = "${PROJECT_ID}"
region     = "${REGION}"
zone       = "${ZONE}"
EOF

cat << 'EOF' > variables.tf
variable "project_id" {
  type        = string
  description = "The Google Cloud Project ID"
}

variable "region" {
  type        = string
  description = "The region to deploy the resources"
}

variable "zone" {
  type        = string
  description = "The specific zone for the VMs"
}

variable "control_plane_machine_type" {
  type        = string
  default     = "e2-standard-8"
  description = "Machine type for the Kubernetes control plane node"
}

variable "tpu_worker_machine_type" {
  type        = string
  default     = "ct6e-standard-4t"
  description = "The machine type for TPU workers (TPU v6e Trillium VM)"
}
EOF


cat << 'EOF' > vpc.tf
terraform {
  required_version = ">= 1.5.0"
  required_providers {
    google = {
      source  = "hashicorp/google"
      version = "~> 7.32.0"
    }
  }
}

provider "google" {
  project = var.project_id
  region  = var.region
}

# 1. Primary Management VPC and Subnet
resource "google_compute_network" "primary_vpc" {
  name                    = "oss-k8s-primary-vpc"
  auto_create_subnetworks = false
  mtu                     = 1460
}

resource "google_compute_subnetwork" "primary_subnet" {
  name          = "oss-k8s-primary-subnet"
  ip_cidr_range = "10.0.0.0/24"
  region        = var.region
  network       = google_compute_network.primary_vpc.id
}

# 2. Cloud NAT Router and NAT Gateway for Primary VPC (Outbound Access)
resource "google_compute_router" "router" {
  name    = "oss-k8s-router"
  network = google_compute_network.primary_vpc.id
  region  = var.region
}

resource "google_compute_router_nat" "nat" {
  name                               = "oss-k8s-nat"
  router                             = google_compute_router.router.name
  region                             = var.region
  nat_ip_allocate_option             = "AUTO_ONLY"
  source_subnetwork_ip_ranges_to_nat = "ALL_SUBNETWORKS_ALL_IP_RANGES"
}

# 3. Firewalls for Primary VPC
resource "google_compute_firewall" "allow_internal" {
  name    = "oss-k8s-primary-allow-internal"
  network = google_compute_network.primary_vpc.id

  allow {
    protocol = "tcp"
  }
  allow {
    protocol = "udp"
  }
  allow {
    protocol = "icmp"
  }

  source_ranges = ["10.0.0.0/24"]
}

resource "google_compute_firewall" "allow_iap" {
  name    = "oss-k8s-allow-iap-ssh"
  network = google_compute_network.primary_vpc.id

  allow {
    protocol = "tcp"
    ports    = ["22"]
  }

  source_ranges = ["35.235.240.0/20"]
}

# 4. Multi-NIC TPU Networks and Subnets (With Jumbo Frames MTU 8896)
resource "google_compute_network" "tpu_vpc" {
  count                   = 2
  name                    = "oss-tpu-vpc-${count.index + 1}"
  auto_create_subnetworks = false
  mtu                     = 8896
}

resource "google_compute_subnetwork" "tpu_subnet" {
  count         = 2
  name          = "oss-tpu-vpc-${count.index + 1}-subnet"
  ip_cidr_range = "10.${count.index + 1}0.0.0/24"
  region        = var.region
  network       = google_compute_network.tpu_vpc[count.index].id
}

resource "google_compute_firewall" "tpu_allow_internal" {
  count   = 2
  name    = "oss-tpu${count.index + 1}-allow-internal"
  network = google_compute_network.tpu_vpc[count.index].id

  allow {
    protocol = "tcp"
  }
  allow {
    protocol = "udp"
  }
  allow {
    protocol = "icmp"
  }

  source_ranges = ["10.${count.index + 1}0.0.0/24"]
}
EOF
- নিশ্চিত করুন যে আপনি
oss-kube-draডিরেক্টরিতে আছেন এবং নিম্নলিখিত কমান্ডগুলি চালান।
terraform initওয়ার্কিং ডিরেক্টরি প্রস্তুত করে। এটি প্রথম ধাপ এবং এটি প্রদত্ত কনফিগারেশনের জন্য প্রয়োজনীয় প্রোভাইডারগুলো ডাউনলোড করে।
terraform plan -outএকটি এক্সিকিউশন প্ল্যান তৈরি করে, যা দেখায় আপনার ইনফ্রাস্ট্রাকচার ডেপ্লয় করতে Terraform কী কী পদক্ষেপ নেবে। `-outঅপশনটি আপনাকে এক্সিকিউশন প্ল্যানটি একটি নামযুক্ত বাইনারি ফাইলে সেভ করার সুযোগ দেয়। এর ফলে আপনি কোনো পরিবর্তন না করেই দেখতে পারবেন কী ঘটবে।
terraform applyআপডেটগুলো চালায়।
terraform init
terraform plan -out=tfplan
- এখন
terraform applyচালানোর পর ডিপ্লয়মেন্টটি চালান। যেহেতু আপনি সংরক্ষিত এক্সিকিউশন প্ল্যানটি প্রয়োগ করছেন, এটি কোনো নিশ্চিতকরণের অনুরোধ ছাড়াই অবিলম্বে কার্যকর হবে। (এতে ৫-১০ মিনিট সময় লাগতে পারে)
terraform apply tfplan
- সেটআপটি যাচাই করুন।
echo -e "\n=== Verifying VPC Networks ==="
gcloud compute networks list --filter="name~oss-.*" --project=$PROJECT_ID

echo -e "\n=== Verifying Subnetworks ==="
gcloud compute networks subnets list --filter="name~oss-.*" --project=$PROJECT_ID

echo -e "\n=== Verifying Firewall Rules ==="
gcloud compute firewall-rules list --filter="name~oss-.*" --project=$PROJECT_ID

echo -e "\n=== Verifying Cloud NAT ==="
gcloud compute routers nats list --router=oss-k8s-router --router-region=$REGION --project=$PROJECT_ID
আপনার ভিএম নোড তৈরি করুন
এখন, আপনি কম্পিউট ইঞ্জিন ইনস্ট্যান্সগুলো সংজ্ঞায়িত করবেন।
- নিশ্চিত করুন যে আপনি
oss-kube-draডিরেক্টরিতে আছেন এবংnodes.tfফাইলটি লেখার জন্য ক্লাউড শেলে নিম্নলিখিত কমান্ডটি চালান।
cat << 'EOF' > nodes.tf
# 1. K8s Control Plane VM (No TPU)
resource "google_compute_instance" "control_plane" {
  name         = "k8s-control-plane"
  machine_type = var.control_plane_machine_type
  zone         = var.zone

  boot_disk {
    initialize_params {
      image = "projects/ubuntu-os-cloud/global/images/family/ubuntu-2204-lts"
      size  = 100
    }
  }

  network_interface {
    network    = google_compute_network.primary_vpc.id
    subnetwork = google_compute_subnetwork.primary_subnet.id
    # No public IP block keeps this node private
  }

  service_account {
    scopes = ["cloud-platform"]
  }
}

# 2. TPU Worker VMs (Multi-NIC ct6e-standard-4t instances)
resource "google_compute_instance" "tpu_workers" {
  count        = 2
  name         = "k8s-tpu-worker-${count.index + 1}"
  machine_type = var.tpu_worker_machine_type
  zone         = var.zone

  boot_disk {
    initialize_params {
      image = "projects/ubuntu-os-accelerator-images/global/images/family/ubuntu-accel-2204-amd64-tpu-v5e-v5p-v6e"
      size  = 200
    }
  }

  scheduling {
    on_host_maintenance = "TERMINATE"
    provisioning_model  = "STANDARD"
  }

  # NIC 1: Management VPC Subnet
  network_interface {
    network    = google_compute_network.primary_vpc.id
    subnetwork = google_compute_subnetwork.primary_subnet.id
  }

  # NIC 2: TPU VPC 1 Subnet
  network_interface {
    network    = google_compute_network.tpu_vpc[0].id
    subnetwork = google_compute_subnetwork.tpu_subnet[0].id
  }

  # NIC 3: TPU VPC 2 Subnet
  network_interface {
    network    = google_compute_network.tpu_vpc[1].id
    subnetwork = google_compute_subnetwork.tpu_subnet[1].id
  }

  service_account {
    scopes = ["cloud-platform"]
  }


  lifecycle {
    ignore_changes = [
      boot_disk[0].initialize_params[0].image,
      guest_accelerator,
      metadata
    ]
  }
}
EOF
- আপনার নতুন কনফিগারেশন লেখা হয়ে গেলে, একটি নতুন প্ল্যান তৈরি করুন এবং আপনার ইনস্ট্যান্সগুলো প্রোভিশন করতে সেটি প্রয়োগ করুন।
terraform plan -out=tfplan

terraform apply tfplan
- যাচাই করুন।
echo -e "\n=== Verifying Provisioned VM Instances ==="
gcloud compute instances list --filter="name~k8s-.*" --project=$PROJECT_ID


echo -e "\n=== Verifying Network Interfaces on Workers ==="
for i in 1 2; do
  echo -e "\n--- Interfaces for k8s-tpu-worker-${i} ---"
  gcloud compute instances describe k8s-tpu-worker-${i} \
      --zone=$ZONE \
      --project=$PROJECT_ID \
      --format="table(networkInterfaces[].network.basename(), networkInterfaces[].networkIP)"
done
৪. আপনার কুবারনেটিস ক্লাস্টার কন্ট্রোল নোড বুটস্ট্র্যাপ করুন
এই অংশে, আপনি আপনার সদ্য তৈরি কন্ট্রোল প্লেন ভিএম ইনস্ট্যান্সে নিরাপদে সংযুক্ত হবেন, অন্তর্নিহিত অপারেটিং সিস্টেম কনফিগার করবেন, কন্টেইনার রানটাইম এবং কুবারনেটিস প্যাকেজ ইনস্টল করবেন, আপনার ক্লাস্টার ইনিশিয়ালাইজ করবেন এবং ম্যানেজমেন্ট নেটওয়ার্কে কঠোর ট্র্যাফিক আইসোলেশন সহ ক্যালিকো সিএনআই স্থাপন করবেন।
- GCE-এর আইডেন্টিটি-অ্যাওয়্যার প্রক্সি (IAP) টানেল ব্যবহার করে
k8s-control-planeইনস্ট্যান্সের সাথে নিরাপদে সংযোগ করুন। আপনার ক্লাউড শেল টার্মিনালে নিম্নলিখিত কমান্ডটি চালান:
gcloud compute ssh k8s-control-plane \
    --zone=$ZONE \
    --tunnel-through-iap
-
k8s-control-planeVM-এ ইনস্টলেশন এবং কনফিগারেশন ধাপগুলো স্বয়ংক্রিয় করার জন্যinit-control-plane.shনামে একটি স্ক্রিপ্ট তৈরি করুন।
cat << 'CONTROL_PLANE_EOF' > init-control-plane.sh
#!/bin/bash
# Strict error handling: fail instantly if any command exits with a non-zero status
set -e

echo "=== 1. Neutralizing Background Updates & Preparing Base OS ==="
# Prevent unattended upgrades from locking apt or breaking network configuration mid-setup
sudo systemctl stop apt-daily.timer apt-daily-upgrade.timer || true
sudo systemctl disable apt-daily.timer apt-daily-upgrade.timer || true
sudo systemctl mask apt-daily.service apt-daily-upgrade.service || true

# Turn off swap (mandatory for Kubernetes)
sudo swapoff -a
sudo sed -i '/ swap / s/^\(.*\)$/#\1/g' /etc/fstab

# Load required kernel modules
cat << 'EOT' | sudo tee /etc/modules-load.d/k8s.conf
overlay
br_netfilter
EOT

sudo modprobe overlay
sudo modprobe br_netfilter

# Configure sysctl requirements for Kubernetes bridging
cat << 'EOT' | sudo tee /etc/sysctl.d/k8s.conf
net.bridge.bridge-nf-call-iptables  = 1
net.bridge.bridge-nf-call-ip6tables = 1
net.ipv4.ip_forward                 = 1
EOT
sudo sysctl --system

echo "=== 2. Installing Container Runtime (Containerd) ==="
sudo apt-get update
sudo apt-get install -y ca-certificates curl gnupg bash-completion

sudo install -m 0755 -d /etc/apt/keyrings
curl -fsSL https://download.docker.com/linux/ubuntu/gpg | sudo gpg --dearmor --yes -o /etc/apt/keyrings/docker.gpg
sudo chmod a+r /etc/apt/keyrings/docker.gpg
echo "deb [arch=$(dpkg --print-architecture) signed-by=/etc/apt/keyrings/docker.gpg] https://download.docker.com/linux/ubuntu $(. /etc/os-release && echo $VERSION_CODENAME) stable" | sudo tee /etc/apt/sources.list.d/docker.list > /dev/null

sudo apt-get update
sudo apt-get install -y docker-ce docker-ce-cli containerd.io

echo "=== 3. Configuring Containerd with Systemd Cgroups ==="
sudo mkdir -p /etc/containerd
containerd config default | sudo tee /etc/containerd/config.toml >/dev/null
sudo sed -i 's/SystemdCgroup = false/SystemdCgroup = true/' /etc/containerd/config.toml

sudo systemctl daemon-reload
sudo systemctl restart containerd
sudo systemctl enable containerd

# Validation Step: Verify runtime engine health
if ! systemctl is-active --quiet containerd; then
    echo "❌ ERROR: Containerd failed to start properly."
    exit 1
fi
echo "✅ Containerd runtime is active and healthy."

echo "=== 4. Installing Kubernetes 1.36 Binaries ==="
curl -fsSL https://pkgs.k8s.io/core:/stable:/v1.36/deb/Release.key | sudo gpg --dearmor --yes -o /etc/apt/keyrings/kubernetes-apt-keyring.gpg
echo 'deb [signed-by=/etc/apt/keyrings/kubernetes-apt-keyring.gpg] https://pkgs.k8s.io/core:/stable:/v1.36/deb/ /' | sudo tee /etc/apt/sources.list.d/kubernetes.list

sudo apt-get update
sudo apt-get install -y kubelet kubeadm kubectl
sudo apt-mark hold kubelet kubeadm kubectl

# Configure Autocomplete and Aliases system-wide
kubectl completion bash | sudo tee /etc/bash_completion.d/kubectl > /dev/null
kubeadm completion bash | sudo tee /etc/bash_completion.d/kubeadm > /dev/null
if ! grep -q 'alias k=kubectl' ~/.bashrc; then
  echo 'alias k=kubectl' >> ~/.bashrc
  echo 'complete -o default -F __start_kubectl k' >> ~/.bashrc
fi

echo "=== 5. Initializing Control Plane Engine ==="
sudo kubeadm init --pod-network-cidr=192.168.0.0/16

echo "=== 6. Configuring Administrative Cluster Credentials ==="
mkdir -p $HOME/.kube
sudo cp -i /etc/kubernetes/admin.conf $HOME/.kube/config
sudo chown $(id -u):$(id -g) $HOME/.kube/config

# Validation Step: Verify API Server local responsiveness
echo "Waiting for local API server context..."
until kubectl cluster-info &>/dev/null; do
    sleep 2
done
echo "✅ Kubernetes API server is responding locally."

echo "=== 7. Deploying Calico Network Operator ==="
kubectl create -f https://raw.githubusercontent.com/projectcalico/calico/v3.27.3/manifests/tigera-operator.yaml

# Validation Step: Ensure Tigera Operator CRD is fully available before applying configuration
echo "Waiting for Tigera Installation CRD to register on the API server..."
kubectl wait --for=condition=established crd/installations.operator.tigera.io --timeout=60s

echo "=== 8. Deploying Calico Custom Resources (Subnet Interlock Locked to 10.0.0.0/24) ==="
cat << 'CALICO_EOF' > custom-calico.yaml
apiVersion: operator.tigera.io/v1
kind: Installation
metadata:
  name: default
spec:
  calicoNetwork:
    nodeAddressAutodetectionV4:
      cidrs:
        - "10.0.0.0/24"
    ipPools:
    - blockSize: 26
      cidr: 192.168.0.0/16
      encapsulation: VXLANCrossSubnet
      natOutgoing: Enabled
      nodeSelector: all()
CALICO_EOF
kubectl apply -f custom-calico.yaml

# Validation Step: Confirm Calico daemon configurations are processing
echo "Waiting 10 seconds for Calico system namespaces to initialize..."
sleep 10
echo "Current Calico workload deployment status:"
kubectl get pods -n calico-system

echo "=== 9. Exporting Worker Cluster Join Token ==="
sudo kubeadm token create --print-join-command > ~/join.sh
chmod +x ~/join.sh

echo "--------------------------------------------------------"
echo "✅ CONTROL PLANE BOOTSTRAP COMPLETE!"
echo "Your cluster join command for the TPU workers is saved below:"
echo "--------------------------------------------------------"
cat ~/join.sh
CONTROL_PLANE_EOF
- স্ক্রিপ্টটি চালান।
chmod +x init-control-plane.sh
./init-control-plane.sh
- সম্পূর্ণ হলে যাচাই করুন। সবগুলো সক্রিয় হতে কয়েক মিনিট সময় লাগবে।
kubectl get nodes
kubectl get pods -A
আপনার এর মতো কিছু দেখা উচিত।
NAME                STATUS   ROLES           AGE     VERSION
k8s-control-plane   Ready    control-plane   6m50s   v1.36.2
NAMESPACE         NAME                                        READY   STATUS    RESTARTS   AGE
calico-system     calico-kube-controllers-5578ff64dd-87vp2    1/1     Running   0          6m33s
calico-system     calico-node-fxzpp                           1/1     Running   0          6m33s
calico-system     calico-typha-785cbc858-rv4nz                1/1     Running   0          6m33s
calico-system     csi-node-driver-wlrhx                       2/2     Running   0          6m33s
kube-system       coredns-589f44dc88-pqfrl                    1/1     Running   0          6m42s
kube-system       coredns-589f44dc88-sdwmj                    1/1     Running   0          6m42s
kube-system       etcd-k8s-control-plane                      1/1     Running   0          6m47s
kube-system       kube-apiserver-k8s-control-plane            1/1     Running   0          6m47s
kube-system       kube-controller-manager-k8s-control-plane   1/1     Running   0          6m47s
kube-system       kube-proxy-jnm2p                            1/1     Running   0          6m42s
kube-system       kube-scheduler-k8s-control-plane            1/1     Running   0          6m47s
tigera-operator   tigera-operator-6bc8d879b5-w5mrq            1/1     Running   0          6m42s
- ক্লাউড শেলে ফিরে যেতে
sshসংযোগটি ত্যাগ করুন।
exit
৫. টিপিইউ ওয়ার্কার নোডগুলো যোগ করুন
আপনি ক্লাউড শেল থেকে একটি স্ক্রিপ্ট চালাবেন যা নিরাপদে আপনার কন্ট্রোল প্লেন ভিএম-এর সাথে সংযোগ স্থাপন করবে, ক্লাস্টার জয়েন টোকেন সংগ্রহ করবে এবং একই সাথে আপনার টিপিইউ ওয়ার্কার নোডগুলিকে ক্লাস্টারে কনফিগার ও রেজিস্টার করবে।
- অর্কেস্ট্রেশন স্ক্রিপ্টটি লেখার জন্য ক্লাউড শেলে নিম্নলিখিত কমান্ডটি চালান:
cat << 'WORKER_BOOTSTRAP_EOF' > bootstrap-workers.sh
#!/bin/bash
# Strict error handling: fail instantly if any command exits with a non-zero status
set -e

# Fetch the join command safely from the control plane
echo "Fetching join command from Control Plane..."
JOIN_CMD=$(gcloud compute ssh k8s-control-plane --zone=$ZONE --tunnel-through-iap --command="cat ~/join.sh" 2>/dev/null)

if [ -z "$JOIN_CMD" ]; then
    echo "❌ ERROR: Failed to retrieve the join command. Ensure the control plane is reachable."
    exit 1
fi

echo "✅ Successfully retrieved join command."

# Create the setup script locally to be copied to the workers
cat << 'WORKER_INIT_EOF' > init-worker.sh
#!/bin/bash
set -e

echo "=== 1. Neutralizing Background Updates & Setting Non-Interactive Mode ==="
export DEBIAN_FRONTEND=noninteractive
sudo sed -i "s/#\$nrconf{restart} = 'i';/\$nrconf{restart} = 'a';/g" /etc/needrestart/needrestart.conf 2>/dev/null || true

# Prevent unattended upgrades from tearing down network interfaces mid-setup
sudo systemctl stop apt-daily.timer apt-daily-upgrade.timer || true
sudo systemctl disable apt-daily.timer apt-daily-upgrade.timer || true
sudo systemctl mask apt-daily.service apt-daily-upgrade.service || true

echo "=== 2. Base OS Prep ==="
# Disable swap
sudo swapoff -a
sudo sed -i '/ swap / s/^\(.*\)$/#\1/g' /etc/fstab

# Load required kernel modules
cat << 'EOT' | sudo tee /etc/modules-load.d/k8s.conf
overlay
br_netfilter
EOT
sudo modprobe overlay
sudo modprobe br_netfilter

# Configure bridging and IP forwarding sysctls
cat << 'EOT' | sudo tee /etc/sysctl.d/k8s.conf
net.bridge.bridge-nf-call-iptables  = 1
net.bridge.bridge-nf-call-ip6tables = 1
net.ipv4.ip_forward                 = 1
EOT
sudo sysctl --system

echo "=== 3. Installing Containerd (CRI-Only) ==="
sudo apt-get update && sudo apt-get install -yq ca-certificates curl gnupg bash-completion
sudo install -m 0755 -d /etc/apt/keyrings
curl -fsSL https://download.docker.com/linux/ubuntu/gpg | sudo gpg --dearmor --yes -o /etc/apt/keyrings/docker.gpg
sudo chmod a+r /etc/apt/keyrings/docker.gpg
echo "deb [arch=$(dpkg --print-architecture) signed-by=/etc/apt/keyrings/docker.gpg] https://download.docker.com/linux/ubuntu $(. /etc/os-release && echo $VERSION_CODENAME) stable" | sudo tee /etc/apt/sources.list.d/docker.list > /dev/null

# Install only containerd to avoid unnecessary Docker CE overhead
sudo apt-get update && sudo apt-get install -yq containerd.io
sudo mkdir -p /etc/containerd
containerd config default | sudo tee /etc/containerd/config.toml >/dev/null
sudo sed -i 's/SystemdCgroup = false/SystemdCgroup = true/' /etc/containerd/config.toml
sudo systemctl daemon-reload
sudo systemctl restart containerd
sudo systemctl enable containerd

# Validation: Check containerd status
if ! systemctl is-active --quiet containerd; then
    echo "❌ ERROR: Containerd failed to start."
    exit 1
fi

echo "=== 4. Installing Kubernetes 1.36 Binaries ==="
curl -fsSL https://pkgs.k8s.io/core:/stable:/v1.36/deb/Release.key | sudo gpg --dearmor --yes -o /etc/apt/keyrings/kubernetes-apt-keyring.gpg
echo 'deb [signed-by=/etc/apt/keyrings/kubernetes-apt-keyring.gpg] https://pkgs.k8s.io/core:/stable:/v1.36/deb/ /' | sudo tee /etc/apt/sources.list.d/kubernetes.list
sudo apt-get update && sudo apt-get install -yq kubelet kubeadm kubectl
sudo apt-mark hold kubelet kubeadm kubectl
WORKER_INIT_EOF

# Append the actual join command to the script
echo "echo \"=== 5. Joining Cluster ===\"" >> init-worker.sh
echo "sudo $JOIN_CMD" >> init-worker.sh

# Push and run on both Workers concurrently
echo "Starting concurrent bootstrap on both workers..."

(
    echo "[Worker 1] Copying script..."
    gcloud compute scp init-worker.sh k8s-tpu-worker-1:~ --zone=$ZONE --tunnel-through-iap --quiet
    echo "[Worker 1] Executing script..."
    gcloud compute ssh k8s-tpu-worker-1 --zone=$ZONE --tunnel-through-iap --command="bash ~/init-worker.sh"
    echo "✅ [Worker 1] Bootstrap and Join complete!"
) &

(
    echo "[Worker 2] Copying script..."
    gcloud compute scp init-worker.sh k8s-tpu-worker-2:~ --zone=$ZONE --tunnel-through-iap --quiet
    echo "[Worker 2] Executing script..."
    gcloud compute ssh k8s-tpu-worker-2 --zone=$ZONE --tunnel-through-iap --command="bash ~/init-worker.sh"
    echo "✅ [Worker 2] Bootstrap and Join complete!"
) &

# Wait for both background processes to finish
wait

echo "--------------------------------------------------------"
echo "✅ BOTH WORKERS HAVE FINISHED PROCESSING"
echo "--------------------------------------------------------"

# Final Validation Check from Control Plane
echo "Verifying cluster node status..."
sleep 5 # Give kubelet a moment to register the nodes
gcloud compute ssh k8s-control-plane --zone=$ZONE --tunnel-through-iap --command="kubectl get nodes -o wide"
WORKER_BOOTSTRAP_EOF
- ওয়ার্কার সেটআপটি সম্পাদন করুন। (এই প্রক্রিয়াটি ব্যাকগ্রাউন্ডে একই সাথে উভয় ইনস্টলেশন চালায় এবং এটি সম্পন্ন হতে প্রায় ৩ থেকে ৫ মিনিট সময় লাগে)।
chmod +x bootstrap-workers.sh
./bootstrap-workers.sh
যখন সমস্ত নোড ক্লাস্টারে যুক্ত করা হবে, তখন আপনি অনুরূপ কিছু দেখতে পাবেন।
To increase the performance of the tunnel, consider installing NumPy. For instructions,
please see https://cloud.google.com/iap/docs/using-tcp-forwarding#increasing_the_tcp_upload_bandwidth

NAME                STATUS     ROLES           AGE   VERSION   INTERNAL-IP   EXTERNAL-IP   OS-IMAGE             KERNEL-VERSION           CONTAINER-RUNTIME
k8s-control-plane   Ready      control-plane   25m   v1.36.2   10.0.0.2      <none>        Ubuntu 22.04.5 LTS   6.8.0-1064-gcp (amd64)   containerd://2.2.6
k8s-tpu-worker-1    NotReady   <none>          10s   v1.36.2   10.0.0.3      <none>        Ubuntu 22.04.5 LTS   6.8.0-1064-gcp (amd64)   containerd://2.2.6
k8s-tpu-worker-2    Ready      <none>          27s   v1.36.2   10.0.0.4      <none>        Ubuntu 22.04.5 LTS   6.8.0-1064-gcp (amd64)   containerd://2.2.6
৬. ওএসএস ডিআরএ টিপিইউ ড্রাইভার স্থাপন করা
এই অংশে, আপনি কন্ট্রোল প্লেনে ফিরে আসবেন, আপনার TPU ওয়ার্কার নোডগুলোকে তাদের নির্দিষ্ট অ্যাক্সিলারেটর টপোলজির বিবরণ দিয়ে লেবেল করবেন এবং Helm ব্যবহার করে ওপেন-সোর্স Google TPU DRA ড্রাইভারটি ইনস্টল করবেন। এই ড্রাইভারটি ফিজিক্যাল TPU v6e চিপগুলো খুঁজে বের করা এবং সেগুলোকে নেটিভভাবে Kubernetes API-এর সাথে ম্যাপ করার জন্য দায়ী।
- ক্লাউড শেল থেকে
k8s-control-planeVM-এ নিরাপদে পুনরায় সংযোগ করুন।
gcloud compute ssh k8s-control-plane \
    --zone=$ZONE \
    --tunnel-through-iap
- আপনার
k8s-control-planeSSH সেশনের ভিতরে এই কমান্ডগুলি চালান। সম্পূর্ণ লেবেল সেট দিয়ে নোডগুলিকে লেবেল করুন (সঠিক চিপ সংখ্যাযুক্ত কীগুলি সহ)।
kubectl label node k8s-tpu-worker-1 \
  cloud.google.com/gke-tpu-accelerator=tpu-v6e-slice \
  cloud.google.com/gke-tpu-topology=2x2 \
  cloud.google.com/gke-tpu-dra-driver=true \
  cloud.google.com/gke-accelerator-count=4 \
  cloud.google.com/gke-tpu-count=4 \
  --overwrite

kubectl label node k8s-tpu-worker-2 \
  cloud.google.com/gke-tpu-accelerator=tpu-v6e-slice \
  cloud.google.com/gke-tpu-topology=2x2 \
  cloud.google.com/gke-tpu-dra-driver=true \
  cloud.google.com/gke-accelerator-count=4 \
  cloud.google.com/gke-tpu-count=4 \
  --overwrite
- Helm ব্যবহার করে DRA TPU ড্রাইভার ক্লোন এবং ইনস্টল করুন।
curl -fsSL https://raw.githubusercontent.com/helm/helm/main/scripts/get-helm-3 | bash

git clone https://github.com/kubernetes-sigs/dra-driver-google-tpu.git ~/dra-driver-google-tpu || true
cd ~/dra-driver-google-tpu
rm -f *.pack *.tgz

helm install dra-driver-google-tpu ./deployments/helm/dra-driver-google-tpu \
  -n dra-driver-google-tpu \
  --create-namespace \
  --set 'kubeletPlugin.env[0].name=NODE_NAME' \
  --set 'kubeletPlugin.env[0].valueFrom.fieldRef.fieldPath=spec.nodeName'

cd ~
- DRA TPU ড্রাইভার সেটআপ যাচাই করুন
# Verify driver daemonset status (Pods should show as Running and Ready)
kubectl get pods -n dra-driver-google-tpu -o wide

# Verify TPU ResourceSlices are successfully published to the API server
kubectl get resourceslices

# Safely parse the ResourceSlices to show the Node Name and the number of TPU chips registered
kubectl get resourceslices -o json | jq -r '.items[] | select(.spec.driver=="tpu.google.com") | "Node: \(.spec.nodeName) | TPUs Registered: \(.spec.devices | length)"'

# Inspect driver logs to confirm the TPU hardware was initialized successfully
kubectl logs -n dra-driver-google-tpu -l app.kubernetes.io/name=dra-driver-google-tpu -c tpu-dra-plugin --tail=20
৭. ওপেন-সোর্স ড্রনেট ও ডিভাইস ক্লাস স্থাপন
এই অংশে, আপনি কন্ট্রোল প্লেনে ফিরে যাবেন, ওপেন-সোর্স DRANET ড্রাইভারটি ইনস্টল করবেন, ভার্চুয়াল ইন্টারফেস বাদ দেওয়ার জন্য একটি কাস্টম ফিল্টার প্যাচ প্রয়োগ করবেন এবং উপযুক্ত oss নেটওয়ার্ক প্রিফিক্স ব্যবহার করে আপনার Kubernetes DeviceClass ও ResourceClaimTemplate স্থাপন করবেন।
- ক্লাউড শেল থেকে
k8s-control-planeVM-এ নিরাপদে পুনরায় সংযোগ করুন। যদি ইতিমধ্যে সংযুক্ত থাকেন, তবে এই ধাপটি এড়িয়ে যান।
gcloud compute ssh k8s-control-plane \
    --zone=$ZONE \
    --tunnel-through-iap
- আপনার
k8s-control-planeSSH সেশনের ভিতরে এই কমান্ডগুলি চালান।
# Install the core components and patch
kubectl apply -f https://raw.githubusercontent.com/kubernetes-sigs/dranet/refs/heads/main/install.yaml


kubectl patch daemonset dranet -n kube-system --type='json' -p='[ { "op": "add", "path": "/spec/template/spec/containers/0/args/-", "value": "-filter=!(\"dra.net/type\" in attributes) || (attributes[\"dra.net/type\"].StringValue != \"veth\" && attributes[\"dra.net/type\"].StringValue != \"vxlan\" && attributes[\"dra.net/type\"].StringValue != \"bridge\")" } ]'

# Monitor rollout readiness
kubectl rollout status daemonset/dranet -n kube-system

# Verify running components and permissions
kubectl get pods -n kube-system -l app=dranet -o wide
kubectl get clusterrole,clusterrolebinding,sa dranet -n kube-system

# Interrogate logs for driver binding confirmation
kubectl logs -n kube-system -l app=dranet --tail=20
- DeviceClass এবং ResourceClaimTemplate প্রয়োগ করুন
# Apply DRANET DeviceClass and BOTH ResourceClaimTemplates (Network + Hardware)
cat << 'EOF' | kubectl apply -f -
apiVersion: resource.k8s.io/v1
kind: DeviceClass
metadata:
  name: dranet
spec:
  selectors:
    - cel:
        expression: device.driver == "dra.net"
---
apiVersion: resource.k8s.io/v1
kind: ResourceClaimTemplate
metadata:
  name: tpu-net-interfaces
  namespace: default
spec:
  spec:
    devices:
      requests:
      - name: tpu-net-interface
        exactly:
          deviceClassName: dranet
          count: 2
          selectors:
          - cel:
              expression: device.attributes["gce.dra.net"].networkName.startsWith("oss-tpu-vpc")
      config:
      - opaque:
          driver: dra.net
          parameters:
            interface:
              mtu: 8896
              gsoMaxSize: 65536
              groMaxSize: 65536
              gsoIPv4MaxSize: 65536
              groIPv4MaxSize: 65536
              disableEbpfPrograms: true
---
apiVersion: resource.k8s.io/v1
kind: ResourceClaimTemplate
metadata:
  name: tpu-device-template
  namespace: default
spec:
  spec:
    devices:
      requests:
      - name: tpu-devices
        exactly:
          deviceClassName: tpu.google.com
          allocationMode: ExactCount
          count: 4
EOF
- আপনার টেমপ্লেট এবং ক্লাসগুলো কুবারনেটিস এপিআই-তে সঠিকভাবে নিবন্ধিত আছে কিনা তা নিশ্চিত করুন।
# Verify ResourceSlices exist and are actively serving both drivers
kubectl get resourceslices -o custom-columns=NAME:.metadata.name,NODE:.spec.nodeName,DRIVER:.spec.driver | grep -E "dra.net|tpu.google.com"

# Verify the DRANET daemonset pods are Running across all nodes
kubectl get pods -n kube-system -l app=dranet -o wide
- প্যারালাল নেপার স্টেটফুলসেটটি ডিপ্লয় করুন।
cat << 'EOF' | kubectl apply -f -
---
apiVersion: v1
kind: Service
metadata:
  name: neper
spec:
  clusterIP: None
  selector:
    app: neper
---
apiVersion: apps/v1
kind: StatefulSet
metadata:
  name: neper
spec:
  selector:
    matchLabels:
      app: neper
  serviceName: neper
  replicas: 2
  template:
    metadata:
      labels:
        app: neper
    spec:
      initContainers:
      - name: "network-optimization-sysctls"
        image: "busybox"
        securityContext:
          privileged: true
        command:
        - sh
        - -c
        - |
          echo 5000 > /proc/sys/net/ipv4/tcp_rto_min_us
          echo 1 > /proc/sys/net/ipv4/tcp_no_metrics_save
          echo 0 > /proc/sys/net/ipv4/tcp_slow_start_after_idle
          echo 131072 > /proc/sys/net/core/optmem_max
          echo "4096 41943040 314572800" > /proc/sys/net/ipv4/tcp_rmem
      containers:
      - name: neper
        image: ubuntu:22.04
        command:
        - /bin/bash
        - -c
        - |
          apt-get update && apt-get install -y iproute2 build-essential git jq python3-pip &&
          git clone https://github.com/google/neper.git /tmp/neper &&
          cd /tmp/neper && make &&
          cp tcp_stream /usr/local/bin/ &&
          sleep infinity
        securityContext:
          privileged: true
        resources:
          requests:
            cpu: "170"
            memory: "650Gi"
          limits:
            cpu: "170"
            memory: "650Gi"
          claims:
          - name: tpu-net-claim
          - name: tpu-hardware-claim
      resourceClaims:
      - name: tpu-net-claim
        resourceClaimTemplateName: tpu-net-interfaces
      - name: tpu-hardware-claim
        resourceClaimTemplateName: tpu-device-template
EOF
- বৈধতা যাচাই
echo -e "\n=== Verifying StatefulSet Pod Status ==="
kubectl get pods -l app=neper -o wide

echo -e "\n=== Verifying Dynamic Resource Claims (DRCs) ==="
kubectl get resourceclaims

echo -e "\n=== Inspecting Device Claim Allocation ==="
# Using a safer JSONPath query to extract the allocated drivers and devices
kubectl get resourceclaims -o json | jq -r '.items[] | "Claim: \(.metadata.name) | Driver: \(.status.allocation.devices.results[0].driver // "Pending")"'
৮. পরীক্ষা চালান
ডুয়াল-ইন্টারফেস বেঞ্চমার্কিং এবং হার্ডওয়্যার ভ্যালিডেশন স্যুট চালান।
প্রথম পর্যায় (নেটওয়ার্ক বেঞ্চমার্কিং): এটি উভয় নেপার পড (নেপার-০ এবং নেপার-১)-এর ডিপেন্ডেন্সি কম্পাইল করার জন্য অপেক্ষা করে, DRANET-এর মাধ্যমে আবদ্ধ নন-ডিফল্ট মাল্টি-এনআইসি আইপি অ্যাড্রেসগুলো এক্সট্র্যাক্ট করে, নেপার-১-এ কনকারেন্ট tcp_stream সার্ভার চালু করে, নেপার-০ থেকে হাই-থ্রুপুট লোড তৈরি করে এবং গিগাবিটস প্রতি সেকেন্ড (Gbps)-এ অ্যাগ্রিগেট থ্রুপুট পার্স করে।
দ্বিতীয় পর্যায় (হার্ডওয়্যার যাচাইকরণ): এটি neper-0-এর ভিতরে Google JAX ইনস্টল করে এবং সিলিকনের কার্যক্ষম অবস্থা নিশ্চিত করার জন্য VFIO-এর মাধ্যমে সরাসরি ম্যাপ করা TPU চিপগুলিতে ম্যাট্রিক্স গুণন (5000x5000) সম্পাদন করে।
-
run_dual_neper_test.shফাইলটি লেখার জন্য আপনারk8s-control-planeএ নিম্নলিখিত কমান্ডটি চালান।
cat << 'EOF' > run_dual_neper_test.sh
#!/bin/bash
set -e

SERVER_POD="neper-1"
CLIENT_POD="neper-0"

echo "================================================="
echo " PHASE 1: DUAL-INTERFACE HIGH-SPEED NETWORK TEST"
echo "================================================="
echo "=== Waiting for Pods to be Ready ==="
kubectl wait --for=condition=ready pod/$CLIENT_POD pod/$SERVER_POD --timeout=300s

echo "=== Waiting for neper compilation to finish inside Pods ==="
for POD in $SERVER_POD $CLIENT_POD; do
  until kubectl exec $POD -c neper -- sh -c 'command -v jq >/dev/null 2>&1 && command -v tcp_stream >/dev/null 2>&1'; do
    sleep 5
  done
done

echo ""
echo "=== Step 1: Extract Target IPs from $SERVER_POD ==="
# Using jq to parse the network interfaces directly from Linux JSON output
IFACE1=$(kubectl exec $SERVER_POD -c neper -- sh -c "ip -j -4 addr show | jq -r '.[] | select(.ifname != \"lo\" and .ifname != \"eth0\") | .ifname' | sed -n '1p'")
IFACE2=$(kubectl exec $SERVER_POD -c neper -- sh -c "ip -j -4 addr show | jq -r '.[] | select(.ifname != \"lo\" and .ifname != \"eth0\") | .ifname' | sed -n '2p'")

IP1=$(kubectl exec $SERVER_POD -c neper -- sh -c "ip -j -4 addr show | jq -r '.[] | select(.ifname != \"lo\" and .ifname != \"eth0\") | .addr_info[0].local' | sed -n '1p'")
IP2=$(kubectl exec $SERVER_POD -c neper -- sh -c "ip -j -4 addr show | jq -r '.[] | select(.ifname != \"lo\" and .ifname != \"eth0\") | .addr_info[0].local' | sed -n '2p'")

echo "   📍 Target IP 1 ($IFACE1): $IP1"
echo "   📍 Target IP 2 ($IFACE2): $IP2"

echo ""
echo "=== Step 2: Initialize TCP Servers on $SERVER_POD ==="
kubectl exec $SERVER_POD -c neper -- sh -c '
for i in 0 1; do
  nohup tcp_stream -C$((52279 + i)) --port=$((38339 + i)) --skip-rx-copy -rw -Z -B16384 \
    --test-length=60 --suicide-length=120 -F100 --num-threads=16 --num-flows=32 -D0 \
    --logtostderr > test${i}.log 2>&1 &
done
'
sleep 3

echo "=== Step 3: Generate Concurrent High-Throughput Load from $CLIENT_POD ==="
echo "Blasting Traffic via Interface 1 -> $IP1 ..."
kubectl exec $CLIENT_POD -c neper -- sh -c "nohup tcp_stream -C52279 --port=38339 --skip-rx-copy -rw -Z -B16384 \
  --test-length=60 --suicide-length=70 -F100 --num-threads=16 --num-flows=32 \
  --client -H $IP1 -D0 --logtostderr > test0.log 2>&1 &"

echo "Blasting Traffic via Interface 2 -> $IP2 ..."
kubectl exec $CLIENT_POD -c neper -- sh -c "nohup tcp_stream -C52280 --port=38340 --skip-rx-copy -rw -Z -B16384 \
  --test-length=60 --suicide-length=70 -F100 --num-threads=16 --num-flows=32 \
  --client -H $IP2 -D0 --logtostderr > test1.log 2>&1 &"

echo ""
echo "=== Testing in progress... Waiting 65 seconds for test completion ==="
sleep 65

echo ""
echo "=== Step 4: Evaluate Throughput Metrics ==="
RAW_BPS1=$(kubectl exec $CLIENT_POD -c neper -- grep -a "remote_throughput=" test0.log | cut -d= -f2 | tr -d '\r' || echo "0")
RAW_BPS2=$(kubectl exec $CLIENT_POD -c neper -- grep -a "remote_throughput=" test1.log | cut -d= -f2 | tr -d '\r' || echo "0")

GBPS1=$(awk -v bps="$RAW_BPS1" 'BEGIN { printf "%.2f", bps / 1000000000 }')
GBPS2=$(awk -v bps="$RAW_BPS2" 'BEGIN { printf "%.2f", bps / 1000000000 }')
TOTAL=$(awk -v b1="$RAW_BPS1" -v b2="$RAW_BPS2" 'BEGIN { printf "%.2f", (b1 + b2) / 1000000000 }')

echo "📊 --- NETWORK RESULTS ---"
echo "Interface 1 ($IFACE1) : ${GBPS1} Gbps"
echo "Interface 2 ($IFACE2) : ${GBPS2} Gbps"
echo "🔥 TOTAL AGGREGATE  : ${TOTAL} Gbps"
echo "--------------------------"


echo ""
echo "================================================="
echo " PHASE 2: TPU HARDWARE VALIDATION TEST"
echo "================================================="
echo "⏳ Installing Python and Google JAX on $CLIENT_POD (Takes ~1 minute)..."
kubectl exec $CLIENT_POD -c neper -- bash -c "apt-get update > /dev/null 2>&1 && apt-get install -y python3-pip > /dev/null 2>&1 && pip3 install jax[tpu] -f https://storage.googleapis.com/jax-releases/libtpu_releases.html > /dev/null 2>&1"

echo "🧠 Running matrix math directly on the TPU chips..."
kubectl exec $CLIENT_POD -c neper -- python3 -c "
import jax
import jax.numpy as jnp
print(f'✅ TPU Hardware Detected: {jax.device_count()} chips mapped via vfio')
print('🚀 Executing 5000x5000 Matrix Multiplication on TPU silicon...')
x = jnp.ones((5000, 5000))
y = jnp.dot(x, x)
print('✅ Success! The TPU driver is fully operational and executing math.')
"
EOF

chmod +x run_dual_neper_test.sh
- পরীক্ষাটি চালান। এটি সম্পন্ন হতে ২ মিনিট সময় লাগবে।
./run_dual_neper_test.sh
সম্পন্ন হলে, আপনার টার্মিনাল আউটপুটে যাচাইকৃত হাই-স্পিড নেটওয়ার্কিং মেট্রিক্স এবং টিপিইউ ম্যাট্রিক্স ম্যাথ এক্সিকিউশন প্রদর্শিত হবে।
=== Step 4: Evaluate Throughput Metrics ===
📊 --- NETWORK RESULTS ---
Interface 1 (ens9)  : 157.51 Gbps
Interface 2 (ens10) : 167.04 Gbps
🔥 TOTAL AGGREGATE  : 324.55 Gbps
--------------------------

=================================================
 PHASE 2: TPU HARDWARE VALIDATION TEST
=================================================
⏳ Installing Python and Google JAX on neper-0 (Takes ~1 minute)...
🧠 Running matrix math directly on the TPU chips...
✅ TPU Hardware Detected: 4 chips mapped via vfio
🚀 Executing 5000x5000 Matrix Multiplication on TPU silicon...
✅ Success! The TPU driver is fully operational and executing math.
৯. আপনার ক্লাস্টারে জেমা ৪ স্থাপন করুন
এই অংশে, আপনি আপনার সুরক্ষিত হাগিং ফেস এপিআই ক্রেডেনশিয়ালগুলোকে একটি কুবারনেটিস সিক্রেট হিসেবে কনফিগার করবেন, আপনার ডাইনামিক রিসোর্স অ্যালোকেশন (ডিআরএ) নেটওয়ার্ক এবং হার্ডওয়্যার ক্লেইম উভয়ই ব্যবহার করে আপনার ভিএলএলএম ইনফারেন্স ইঞ্জিন ডেপ্লয় করবেন, এবং গুগলের জেমা ৪ মডেলের বিরুদ্ধে একটি এন্ড-টু-এন্ড টেস্ট কোয়েরি চালাবেন।
নিশ্চিত করুন যে আপনি k8s-control-plane এ আপনার সুরক্ষিত SSH সেশনে লগ ইন করেছেন:
- ক্লাউড শেল থেকে কন্ট্রোল প্লেন ভিএম-এ নিরাপদে পুনরায় সংযোগ করুন। আপনি যদি ইতিমধ্যেই সংযুক্ত থাকেন, তবে এই ধাপটি এড়িয়ে যান।
gcloud compute ssh k8s-control-plane \
    --zone=$ZONE \
    --tunnel-through-iap
- পূর্ববর্তী স্থাপনাগুলি পরিষ্কার করুন
# 1. Delete the StatefulSet to stop the benchmarking pods
kubectl delete statefulset neper

# 2. Wait for the pods to terminate fully and release the claims
kubectl wait --for=delete pod/neper-0 pod/neper-1 --timeout=60s
- আপনার হাগিং ফেস অ্যাক্সেস টোকেন সংরক্ষণ করুন।
<YOUR_ACTUAL_HUGGING_FACE_TOKEN>এর জায়গায় আপনার টোকেনটি বসান।
export HF_TOKEN="<YOUR_ACTUAL_HUGGING_FACE_TOKEN>"
- একটি গোপনীয়তা তৈরি করুন
kubectl create secret generic hf-token --from-literal=token="${HF_TOKEN}"
- এই ম্যানিফেস্টটি একটি ৪-চিপের র TPU VM-এ চলমান vLLM-এর একটিমাত্র রেপ্লিকা শিডিউল করে। এটি অনিরাপদ হোস্ট ভলিউম মাউন্টের প্রয়োজন ছাড়াই নিরাপদে র TPU হার্ডওয়্যার অ্যাক্সেস করার জন্য আপনার কাস্টম নেটওয়ার্ক ক্লেইম ( tpu-net-claim ) এবং হার্ডওয়্যার ক্লেইম ( tpu-hardware-claim ) উভয়ই মাউন্ট করতে Kubernetes DRA স্ট্যান্ডার্ড ব্যবহার করে। সবশেষে, এটি পোর্ট ৮০৮০-এর মাধ্যমে OpenAI-কম্প্যাটিবল API সার্ভারটি উন্মুক্ত করে । ফাইলটি তৈরি করতে নিম্নলিখিত কমান্ডটি চালান :
cat << 'EOF' > gemma-inference.yaml
apiVersion: apps/v1
kind: Deployment
metadata:
  name: vllm-gemma-4
  labels:
    app: gemma-server
spec:
  replicas: 1
  selector:
    matchLabels:
      app: gemma-server
  template:
    metadata:
      labels:
        app: gemma-server
    spec:
      hostIPC: true
      containers:
      - name: vllm-tpu
        image: vllm/vllm-tpu:latest
        securityContext:
          privileged: true
        env:
        - name: HF_TOKEN
          valueFrom:
            secretKeyRef:
              name: hf-token
              key: token
        - name: JAX_PLATFORMS
          value: "tpu,cpu"
        - name: TPU_ACCELERATOR_TYPE
          value: "v6e-4"
        - name: TPU_WORKER_HOSTNAMES
          value: "127.0.0.1"
        - name: TPU_WORKER_ID
          value: "0"
        - name: LIBTPU_INIT_ARGS
          value: "--noenable_tpunetd_client"
        - name: BARE_METAL_MODE
          value: "true"
        - name: BYPASS_VBAR_CONTROL_SERVICE
          value: "1"
        - name: TPU_SKIP_MDS_QUERY
          value: "1"
        - name: TPU_DEFAULT_NETWORK_TYPE
          value: "loopback"
        - name: CHIPS_PER_HOST_BOUNDS
          value: "2,2,1"
        - name: HOST_BOUNDS
          value: "1,1,1"
        - name: ALT
          value: "false,false,false"
        - name: WRAP
          value: "false,false,false"
        command:
        - bash
        - -c
        - |
          export PYTHONUNBUFFERED=1
          sysctl -w net.ipv6.conf.all.disable_ipv6=0
          sysctl -w net.ipv6.conf.default.disable_ipv6=0
          sysctl -w net.ipv6.conf.lo.disable_ipv6=0
          ip link set lo up || true

          exec python3 -m vllm.entrypoints.openai.api_server \
            --model google/gemma-4-E4B-it \
            --tensor-parallel-size 4 \
            --trust-remote-code \
            --max-model-len 8192 \
            --max-num-batched-tokens 4096 \
            --host 0.0.0.0 \
            --port 8080
        ports:
        - containerPort: 8080
        resources:
          requests:
            cpu: "170"
            memory: "650Gi"
          limits:
            cpu: "170"
            memory: "650Gi"
          claims:
          - name: tpu-net-claim
          - name: tpu-hardware-claim
        volumeMounts:
        - name: dshm
          mountPath: /dev/shm
      volumes:
      - name: dshm
        emptyDir:
          medium: Memory
      resourceClaims:
      - name: tpu-net-claim
        resourceClaimTemplateName: tpu-net-interfaces
      - name: tpu-hardware-claim
        resourceClaimTemplateName: tpu-device-template
---
apiVersion: v1
kind: Service
metadata:
  name: vllm-gemma-service
spec:
  selector:
    app: gemma-server
  ports:
  - protocol: TCP
    port: 8080
    targetPort: 8080
  type: ClusterIP
EOF
- ইনফারেন্স ওয়ার্কলোড স্থাপন করুন
kubectl apply -f gemma-inference.yaml
- ডেপ্লয়মেন্টের অবস্থা যাচাই করুন। এই সেটআপটিকে মডেলটি ডাউনলোড করে
vLLM. This10 - 25 minutes.
kubectl get pods -l app=gemma-server

kubectl describe pods -l app=gemma-server
প্রসেসটি দেখার জন্য আপনি কন্টেইনারের লগগুলোও দেখতে পারেন। লগ ভিউ থেকে বের হতে CTRL+C চাপুন।
kubectl logs -l app=gemma-server -f
লাইনগুলো দেখলেই বুঝবেন ইঞ্জিনটি সম্পূর্ণরূপে চালু হয়েছে।
(APIServer pid=1) INFO: Started server process [1]
(APIServer pid=1) INFO: Waiting for application startup.
(APIServer pid=1) INFO: Application startup complete ।
এগিয়ে যাওয়ার আগে লগ স্ট্রিম থেকে বের হতে CTRL+C চাপুন ।
- ইন্টারফেস সংযুক্তি যাচাই করুন। কন্টেইনারের ভিতরে সংযুক্ত নেটওয়ার্ক ইন্টারফেসগুলো পরীক্ষা করুন।
kubectl exec deployment/vllm-gemma-4 -c vllm-tpu -- ls /sys/class/net
kubectl exec deployment/vllm-gemma-4 -c vllm-tpu -- cat /proc/net/fib_trie | grep -B 1 "32 host"
কী দেখবেন : আপনার স্ট্যান্ডার্ড CNI ইন্টারফেস ( eth0 ) এবং লুপব্যাক ( lo )-এর পাশাপাশি ens9 এবং ens10 (বা একই ধরনের ensX নাম) দেখতে পাবেন। এগুলি হলো ফিজিক্যাল GCE হোস্ট PCI নেটওয়ার্ক ইন্টারফেস, যা systemd-এর অনুমানযোগ্য স্লট-নামকরণ পদ্ধতি ব্যবহার করে ওপেন-সোর্স DRANET ড্রাইভারের মাধ্যমে আপনার পডের ভেতরে ডায়নামিকভাবে আবদ্ধ থাকে।
kubectl exec deployment/vllm-gemma-4 -c vllm-tpu -- ls /sys/class/net
ens10
ens9
eth0
Lo

kubectl exec deployment/vllm-gemma-4 -c vllm-tpu -- cat /proc/net/fib_trie | grep -B 1 "32 host"

              |-- 10.10.0.3
                 /32 host LOCAL
--
              |-- 10.20.0.3
                 /32 host LOCAL
--
           |-- 127.0.0.1
              /32 host LOCAL
--
     |-- 192.168.238.67
        /32 host LOCAL
--
              |-- 10.10.0.3
                 /32 host LOCAL
--
              |-- 10.20.0.3
                 /32 host LOCAL
--
           |-- 127.0.0.1
              /32 host LOCAL
--
     |-- 192.168.238.67
        /32 host LOCAL
১০. এলএলএম পরীক্ষা করুন
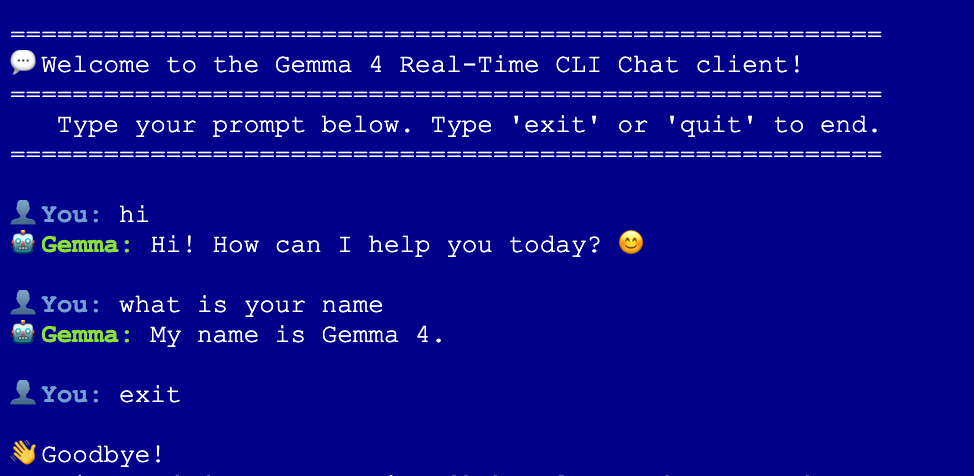
আপনার ইন্টারফেসগুলো যাচাই করা হয়ে গেলে, Gemma 4-এর বিরুদ্ধে একটি স্ট্রিমিং ইনফারেন্স অনুরোধ প্রেরণের জন্য আপনার ক্লাস্টারের ভিতরে একটি লাইটওয়েট টেস্ট কন্টেইনার চালু করুন।
- ইন্টারেক্টিভ ক্লায়েন্ট চালু করতে
k8s-control-planeসেশনে নিম্নলিখিত কমান্ডটি চালান:
kubectl run gemma-chat --rm -i --tty --image=alpine --restart=Never -- sh -c '
  # 1. Silently install curl and jq
  apk add --no-cache curl jq > /dev/null

  echo -e "\n========================================================"
  echo -e "💬 Welcome to the Gemma 4 Real-Time CLI Chat client!"
  echo -e "========================================================"
  echo -e "   Type your prompt below. Type '\''exit'\'' or '\''quit'\'' to end."
  echo -e "========================================================\n"

  while true; do
    # Read user input
    echo -n -e "👤 \033[1;34mYou:\033[0m "
    read -r USER_INPUT

    # Handle exit conditions
    if [ "$USER_INPUT" = "exit" ] || [ "$USER_INPUT" = "quit" ] || [ -z "$USER_INPUT" ]; then
      echo -e "\n👋 Goodbye!"
      break
    fi

    echo -n -e "🤖 \033[1;32mGemma:\033[0m "

    # Use jq to safely escape double quotes and special characters in user input
    JSON_PAYLOAD=$(jq -n --arg msg "$USER_INPUT" '\''{
      model: "google/gemma-4-E4B-it",
      messages: [{role: "user", content: $msg}],
      temperature: 0.7,
      stream: true
    }'\'')

    # Stream the tokens in real-time with a typewriter effect
    curl -s -X POST http://vllm-gemma-service:8080/v1/chat/completions \
      -H "Content-Type: application/json" \
      -d "$JSON_PAYLOAD" | while read -r line; do
        # Extract SSE data streams
        if echo "$line" | grep -q "data:"; then
          DATA_CLEAN=$(echo "$line" | sed "s/^data: //" | tr -d "\r")
          if [ "$DATA_CLEAN" != "[DONE]" ] && [ -n "$DATA_CLEAN" ]; then
            # Parse and print only the token content
            TOKEN=$(echo "$DATA_CLEAN" | jq -r ".choices[0].delta.content // empty" 2>/dev/null)
            echo -n "$TOKEN"
          fi
        fi
      done
    echo -e "\n"
  done
'
Interactive chat
১১. পরিষ্কার করা
প্রথমে, আপনার ক্লাস্টার থেকে সমস্ত ওয়ার্কলোড, সিক্রেট এবং কনফিগারেশন মুছে ফেলুন।
আপনি যদি এখনও আপনার k8s-control-plane সুরক্ষিত SSH সেশনে লগ ইন করা থাকেন, তাহলে সরাসরি নিম্নলিখিত কমান্ডটি চালান। (আপনি যদি ইতিমধ্যে বেরিয়ে গিয়ে থাকেন, তাহলে প্রথমে SSH-এর মাধ্যমে আবার লগ ইন করুন):
- ক্লাউড শেল থেকে কন্ট্রোল প্লেন ভিএম-এ নিরাপদে পুনরায় সংযোগ করুন। আপনি যদি ইতিমধ্যেই এই ভিএম-এর সাথে সংযুক্ত থাকেন, তবে এই ধাপটি এড়িয়ে যান।
gcloud compute ssh k8s-control-plane \
    --zone=$ZONE \
    --tunnel-through-iap
- কুবারনেটিস রিসোর্স পরিষ্কার করুন
# 1. Delete the Gemma 4 deployment and service
kubectl delete -f gemma-inference.yaml --ignore-not-found=true

# 2. Delete the Hugging Face access secret
kubectl delete secret hf-token --ignore-not-found=true

# 3. Delete the open-source DRANET specs and drivers
kubectl delete deviceclass dranet --ignore-not-found=true
kubectl delete resourceclaimtemplate tpu-net-interfaces --ignore-not-found=true
kubectl delete -f https://raw.githubusercontent.com/kubernetes-sigs/dranet/refs/heads/main/install.yaml --ignore-not-found=true

# 4. Uninstall the OSS TPU Hardware Driver
helm uninstall dra-driver-google-tpu -n dra-driver-google-tpu --wait || true
- এখন,
exitটাইপ করুন এবং আপনার সক্রিয় ক্লাউড শেল ডিরেক্টরিতে ফিরে যান যেখানে আপনার Terraform ফাইলগুলি সংরক্ষিত আছে এবং সমস্ত নোড, VPC নেটওয়ার্ক এবং ফায়ারওয়াল নিয়মগুলি ধ্বংস করে দিন।
# 1. Create the teardown script
cat << 'EOF' > teardown.sh
#!/bin/bash

# The specific networks defined in your Terraform vpc.tf
NETWORKS=(
  "oss-k8s-primary-vpc"
  "oss-tpu-vpc-1"
  "oss-tpu-vpc-2"
)

echo "=== Hunting down and deleting ALL firewall rules for OSS networks ==="

for NETWORK in "${NETWORKS[@]}"; do
    echo "Searching for firewall rules attached to network: $NETWORK..."

    # Query GCP for any firewall rule tied to this specific network
    STUCK_RULES=$(gcloud compute firewall-rules list \
        --filter="network:($NETWORK)" \
        --format="value(name)" | tr '\n' ' ')

    # Check if the string is not empty and contains more than just whitespace
    if [ -n "$STUCK_RULES" ] && [ "$STUCK_RULES" != " " ]; then
        echo "🔥 Found rules holding $NETWORK hostage: $STUCK_RULES"
        echo "Deleting them now..."
        gcloud compute firewall-rules delete $STUCK_RULES --quiet
    else
        echo "✅ No firewall rules found for $NETWORK."
    fi
done

# Fallback: Explicitly delete the named rules from your Terraform file
# just in case the dynamic filter missed them due to caching delays
echo "=== Running fallback deletion for explicitly named Terraform rules ==="
gcloud compute firewall-rules delete \
    oss-k8s-primary-allow-internal \
    oss-k8s-allow-iap-ssh \
    oss-tpu1-allow-internal \
    oss-tpu2-allow-internal \
    --quiet 2>/dev/null || true

echo "--------------------------------------------------------"
echo "✅ Firewall cleanup complete!"
echo "Your networks are now stripped of firewalls and ready to be deleted."
echo "--------------------------------------------------------"

echo "=== Destroying Infrastructure ==="
cd ~/oss-kube-dra || exit
terraform destroy -auto-approve

echo "--------------------------------------------------------"
echo "✅ Infrastructure successfully destroyed!"
echo "--------------------------------------------------------"
EOF

# 2. Make the script executable and run it
chmod +x teardown.sh
./teardown.sh
- টেরাফর্ম ফোল্ডার
oss-kube-draমুছুন
cd
rm -r oss-kube-dra
১২. অভিনন্দন
আপনি সরাসরি গুগল কম্পিউট ইঞ্জিন (GCE) ভিএম ইনস্ট্যান্সের উপর একটি উচ্চ-কর্মক্ষমতাসম্পন্ন, স্ব-পরিচালিত কুবারনেটিস এআই পরিকাঠামো সফলভাবে প্রোভিশন, বুটস্ট্র্যাপ এবং ভ্যালিডেট করেছেন।
কুবারনেটিস কীভাবে ডাইনামিক রিসোর্স অ্যালোকেশন (DRA) ব্যবহার করে র TPU অ্যাক্সিলারেটরগুলোকে অর্কেস্ট্রেট করে, উচ্চ-গতির মাল্টি-NIC হোস্ট টপোলজিগুলোকে সংযুক্ত করে এবং অত্যাধুনিক বৃহৎ ল্যাঙ্গুয়েজ মডেলগুলোকে পরিবেশন করে, সে সম্পর্কে এখন আপনার একটি গভীর, সিস্টেম-স্তরের ধারণা তৈরি হয়েছে।
পরবর্তী পদক্ষেপ / আরও জানুন
আপনি GKE নেটওয়ার্কিং সম্পর্কে আরও পড়তে পারেন।
আপনার পরবর্তী ল্যাব নিন
গুগল ক্লাউডের সাথে আপনার অনুসন্ধান চালিয়ে যান, এবং এই অন্যান্য গুগল ক্লাউড ল্যাবগুলোও দেখে নিন: