

1. סקירה כללית
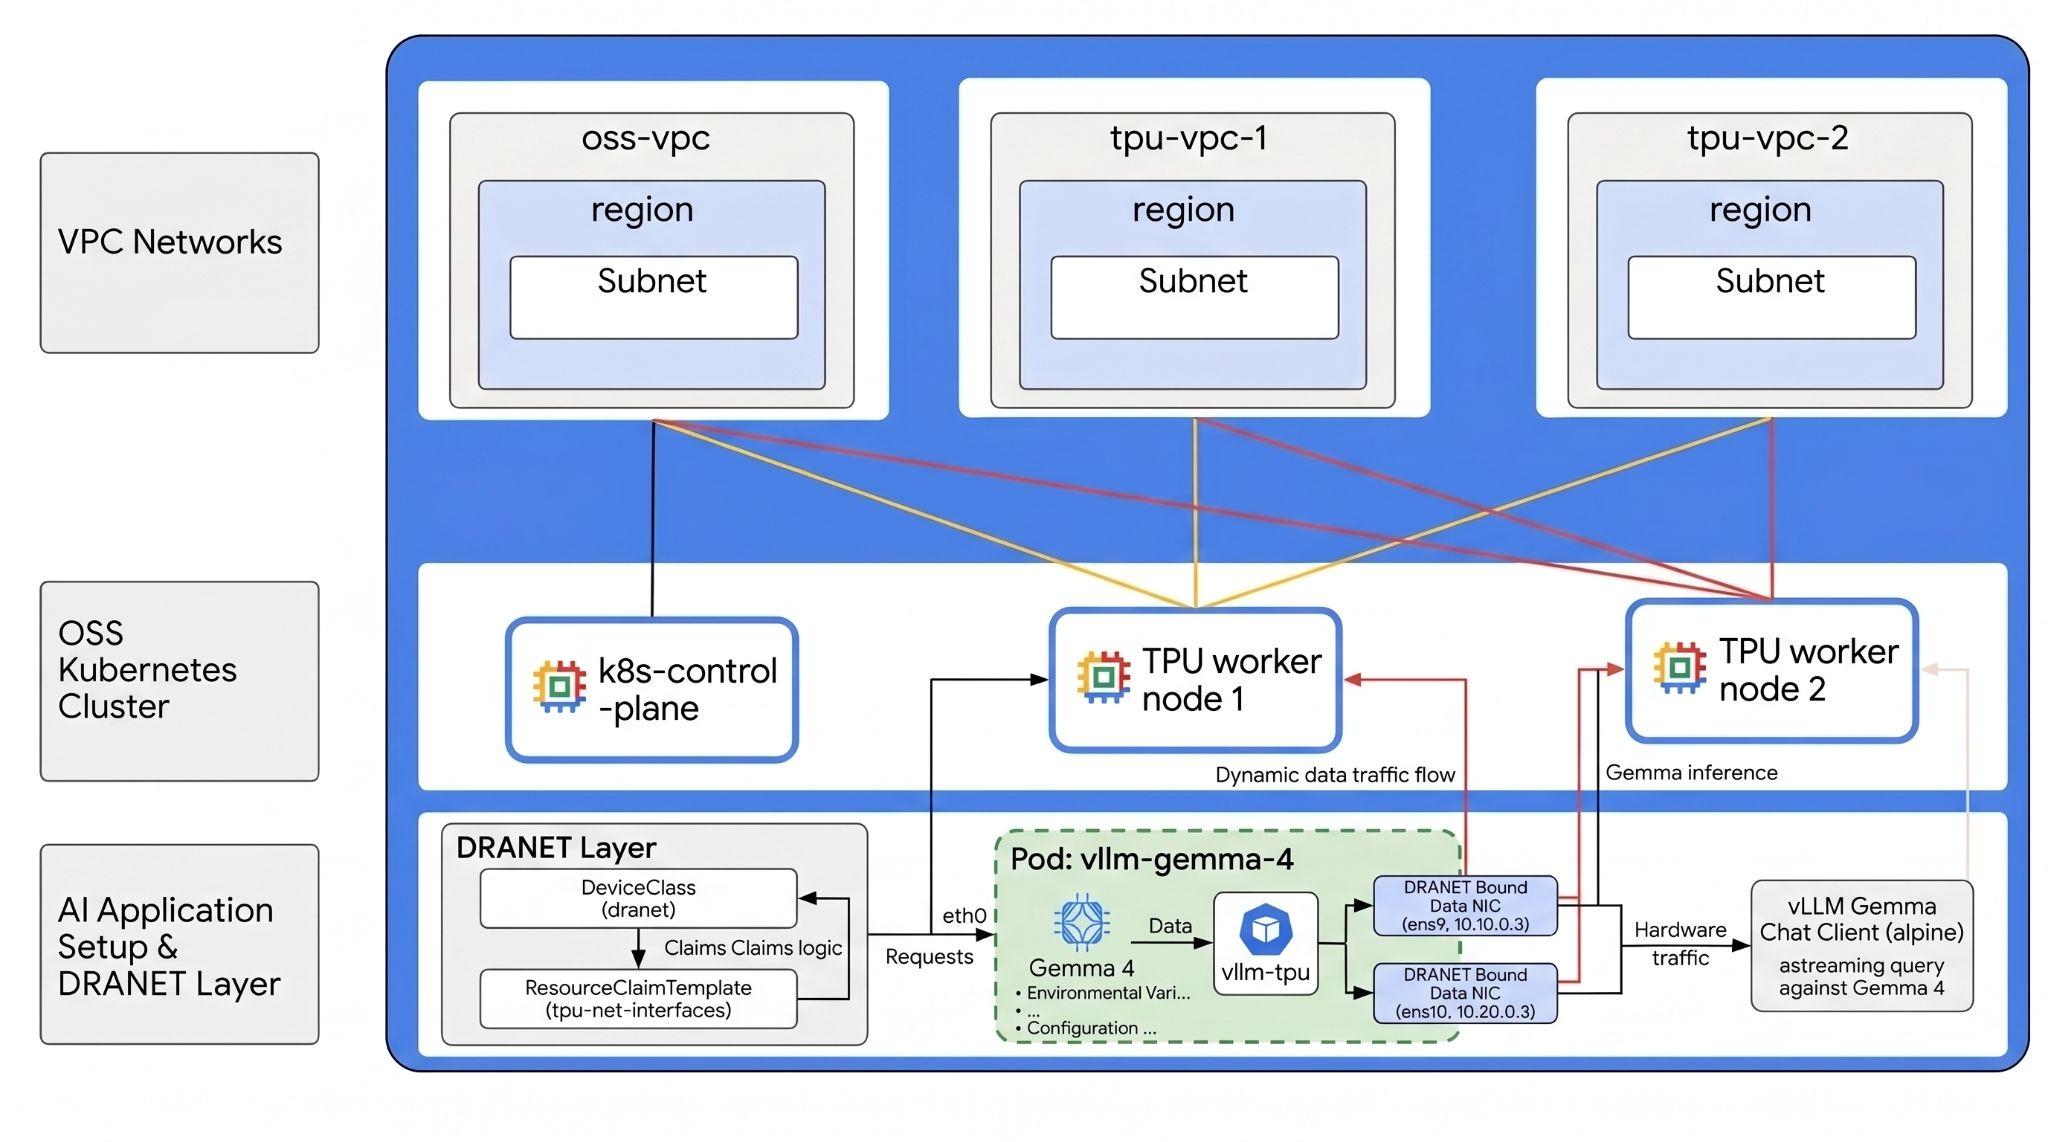
בשיעור ה-Lab הזה תלמדו איך לבנות תשתית AI בניהול עצמי ישירות ב-Google Compute Engine (GCE). תפעילו אשכול Kubernetes לא מנוהל במכונות וירטואליות (חלקן עם TPU) באמצעות Terraform ו-kubeadm, ותגדירו הקצאת משאבים דינמית (DRA) של Kubernetes באמצעות מנהל ההתקן בקוד פתוח. תעבדו עם הרכיבים הבאים:
- Google Compute Engine – השירות הזה מספק את משאבי המחשוב להפעלה של האשכולות
- TPU – שבבי האצה מותאמים אישית של Google.
- Kubernetes OSS – תוכנה להתקנה ולהגדרה של Kubernetes באופן ידני
- OSS DRANET – מנהל התקן של רשת DRA
- OSS DRA for TPU – מנהלי התקנים של DRA שתומכים ב-TPU
כדי להגדיר את הסביבה, תפרסו כמה רשתות VPC עצמאיות, שלכל אחת מהן יש רשת משנה משלה. כך תוכלו להקצות למכונות הווירטואליות שלכם כמה ממשקי רשת (multi-NIC), ולהפריד בין תעבורת הניהול לבין תעבורת הנתונים של TPU במהירות גבוהה.
לאחר מכן, כדי להפעיל הקצאת משאבים דינמית (DRA) בקוד פתוח, תצטרכו להתקין גם את מנהל ההתקן של ציוד ה-TPU של Google ל-DRA וגם את מנהל ההתקן של הרשת DRANET. לאחר מכן תגדירו את Kubernetes DeviceClasses ותכתבו ResourceClaimTemplates כדי לטפל בהקצאה הדינמית של המשאבים האלה.
לבסוף, תפרסו עומס עבודה של הערכת ביצועים ברמה גבוהה באמצעות Neper כדי לאמת את נתיבי הנתונים ברשת של מסגרות ג'מבו בין צומתי העובדים, ולאחר מכן תבצעו בדיקת Python JAX כדי לאמת את שבב הסיליקון הבסיסי של TPU. לאחר מכן תפרסו את vLLM כדי להכניס לשימוש בסביבת הייצור את מודל Gemma 4 המתקדם של Google דרך Hugging Face באמצעות טענות DRA של חומרה ורשת מבודדות לחלוטין.
ההגדרות ישתמשו בשילוב של Terraform, gcloud ו-kubectl.
בשיעור ה-Lab הזה תלמדו איך לבצע את המשימה הבאה:
- הגדרת רשתות VPC
- פריסת 3 צמתים ב-GCE (צומת Standard אחד ו-2 צמתים של TPU v6)
- הפעלת Kubernetes
- הגדרת OSS DRANET ו-DRA ל-TPU
- השוואת ביצועים
- יצירת DeviceClasses ו-ResourceClaimTemplates
- השוואת ביצועים של רשת ושל חומרה
- פריסת Gemma 4: מילוי בקשות של המודל בציוד TPU v6e באמצעות vLLM וטענות DRA פעילות
- בדיקת הקישוריות ל-LLM
בשיעור ה-Lab הזה תיצרו את התבנית הבאה.
איור 1.
2. הגדרה של שירותי Google Cloud
הגדרת סביבה בקצב אישי
- נכנסים ל-מסוף Google Cloud ויוצרים פרויקט חדש או משתמשים בפרויקט קיים. אם עדיין אין לכם חשבון Gmail או Google Workspace, אתם צריכים ליצור חשבון.

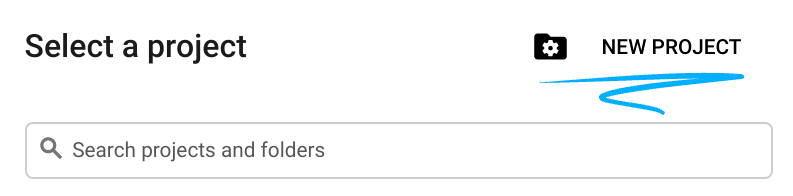
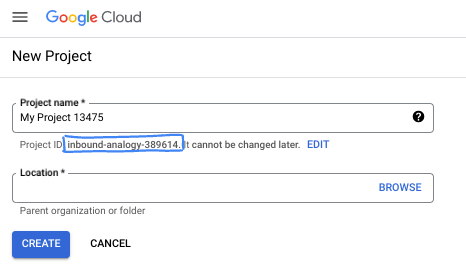
- שם הפרויקט הוא השם המוצג למשתתפים בפרויקט. זו מחרוזת תווים שלא נמצאת בשימוש ב-Google APIs. תמיד אפשר לעדכן את המיקום.
- מזהה הפרויקט הוא ייחודי לכל הפרויקטים ב-Google Cloud ואי אפשר לשנות אותו אחרי שהוא מוגדר. מסוף Cloud יוצר באופן אוטומטי מחרוזת ייחודית, ובדרך כלל לא צריך לדעת מה היא. ברוב ה-Codelabs, תצטרכו להפנות למזהה הפרויקט (בדרך כלל מסומן כ-
PROJECT_ID). אם אתם לא אוהבים את המזהה שנוצר, אתם יכולים ליצור מזהה אקראי אחר. אפשר גם לנסות כתובת משלכם ולבדוק אם היא זמינה. אי אפשר לשנות את ההגדרה הזו אחרי השלב הזה, והיא נשארת לאורך הפרויקט. - לידיעתכם, יש ערך שלישי, מספר פרויקט, שחלק מממשקי ה-API משתמשים בו. מידע נוסף על שלושת הערכים האלה מופיע במאמרי העזרה.
- בשלב הבא, תצטרכו להפעיל את החיוב במסוף Cloud כדי להשתמש במשאבי Cloud או בממשקי API של Cloud. השלמת ה-codelab הזה לא תעלה לכם הרבה, אם בכלל. כדי להשבית את המשאבים ולמנוע חיובים נוספים אחרי שתסיימו את המדריך הזה, תוכלו למחוק את המשאבים שיצרתם או למחוק את הפרויקט. משתמשים חדשים ב-Google Cloud זכאים לתוכנית תקופת ניסיון בחינם בשווי 300$.
מפעילים את Cloud Shell
אפשר להפעיל את Google Cloud מרחוק מהמחשב הנייד, אבל ב-Codelab הזה נשתמש ב-Google Cloud Shell, סביבת שורת פקודה שפועלת בענן.
ב-מסוף Google Cloud, לוחצים על סמל Cloud Shell בסרגל הכלים שבפינה הימנית העליונה:
הקצאת המשאבים והחיבור לסביבה יימשכו רק כמה רגעים. בסיום התהליך, אמור להופיע משהו כזה:

המכונה הווירטואלית הזו כוללת את כל הכלים שדרושים למפתחים. יש בה ספריית בית בנפח מתמיד של 5GB והיא פועלת ב-Google Cloud, מה שמשפר מאוד את הביצועים והאימות ברשת. אפשר לבצע את כל העבודה ב-codelab הזה בדפדפן. לא צריך להתקין שום דבר.
3. הגדרת סביבה באמצעות Terraform
כדי לבצע את ה-Lab הזה, אתם צריכים גישה ל-TPU. הגרסה המדויקת שבה נעשה שימוש היא TPU v6e.
- כדי לקבל גישה, צריך לפעול לפי מסמך התוכנית של TPU ולהפעיל את מכסת TPU.
- משתמשים באזור שיש בו מכסת TPU. מידע נוסף זמין במסמך אימות הזמינות של TPU ב-GKE.
- אנחנו משתמשים בפריסה קטנה שדורשת (2) שבבי TPU v6e (
ct6e-standard-4t)שהם 2x2 slice באזור יחיד. - Hugging Face Token: נדרש Access Token כדי להוריד את משקלי המודל של Gemma
ניצור שלוש רשתות VPC בהתאמה אישית עם כללי חומת אש ורשתות משנה. פותחים את מסוף Cloud ובוחרים את הפרויקט שבו רוצים להשתמש.
- פותחים את Cloud Shell בפינה השמאלית העליונה של המסוף, מוודאים שמופיע מזהה הפרויקט הנכון ב-Cloud Shell ומאשרים את כל ההנחיות למתן גישה.

- יוצרים תיקייה בשם
oss-kube-dra,, עוברים לתיקייה ומוסיפים כמה משתנים. נ.ב. צריך לעדכן את ערכי המשתנים של REGION ו-ZONE לאזור ולמיקום בפועל. האזור שמוגדר כברירת מחדל הוא europe-west4 והמיקום שמוגדר כברירת מחדל הוא europe-west4-a.
mkdir -p oss-kube-dra && cd oss-kube-dra
export PROJECT_ID=$(gcloud config get-value project)
export REGION="europe-west4"
export ZONE="europe-west4-a"
echo $PROJECT_ID
echo $REGION
echo $ZONE
- עכשיו מוסיפים קובצי הגדרה. הפקודות האלה ייצרו את הקבצים הבאים: terraform.tfvars , variables.tf, vpc.tf.
cat << EOF > terraform.tfvars
project_id = "${PROJECT_ID}"
region     = "${REGION}"
zone       = "${ZONE}"
EOF

cat << 'EOF' > variables.tf
variable "project_id" {
  type        = string
  description = "The Google Cloud Project ID"
}

variable "region" {
  type        = string
  description = "The region to deploy the resources"
}

variable "zone" {
  type        = string
  description = "The specific zone for the VMs"
}

variable "control_plane_machine_type" {
  type        = string
  default     = "e2-standard-8"
  description = "Machine type for the Kubernetes control plane node"
}

variable "tpu_worker_machine_type" {
  type        = string
  default     = "ct6e-standard-4t"
  description = "The machine type for TPU workers (TPU v6e Trillium VM)"
}
EOF


cat << 'EOF' > vpc.tf
terraform {
  required_version = ">= 1.5.0"
  required_providers {
    google = {
      source  = "hashicorp/google"
      version = "~> 7.32.0"
    }
  }
}

provider "google" {
  project = var.project_id
  region  = var.region
}

# 1. Primary Management VPC and Subnet
resource "google_compute_network" "primary_vpc" {
  name                    = "oss-k8s-primary-vpc"
  auto_create_subnetworks = false
  mtu                     = 1460
}

resource "google_compute_subnetwork" "primary_subnet" {
  name          = "oss-k8s-primary-subnet"
  ip_cidr_range = "10.0.0.0/24"
  region        = var.region
  network       = google_compute_network.primary_vpc.id
}

# 2. Cloud NAT Router and NAT Gateway for Primary VPC (Outbound Access)
resource "google_compute_router" "router" {
  name    = "oss-k8s-router"
  network = google_compute_network.primary_vpc.id
  region  = var.region
}

resource "google_compute_router_nat" "nat" {
  name                               = "oss-k8s-nat"
  router                             = google_compute_router.router.name
  region                             = var.region
  nat_ip_allocate_option             = "AUTO_ONLY"
  source_subnetwork_ip_ranges_to_nat = "ALL_SUBNETWORKS_ALL_IP_RANGES"
}

# 3. Firewalls for Primary VPC
resource "google_compute_firewall" "allow_internal" {
  name    = "oss-k8s-primary-allow-internal"
  network = google_compute_network.primary_vpc.id

  allow {
    protocol = "tcp"
  }
  allow {
    protocol = "udp"
  }
  allow {
    protocol = "icmp"
  }

  source_ranges = ["10.0.0.0/24"]
}

resource "google_compute_firewall" "allow_iap" {
  name    = "oss-k8s-allow-iap-ssh"
  network = google_compute_network.primary_vpc.id

  allow {
    protocol = "tcp"
    ports    = ["22"]
  }

  source_ranges = ["35.235.240.0/20"]
}

# 4. Multi-NIC TPU Networks and Subnets (With Jumbo Frames MTU 8896)
resource "google_compute_network" "tpu_vpc" {
  count                   = 2
  name                    = "oss-tpu-vpc-${count.index + 1}"
  auto_create_subnetworks = false
  mtu                     = 8896
}

resource "google_compute_subnetwork" "tpu_subnet" {
  count         = 2
  name          = "oss-tpu-vpc-${count.index + 1}-subnet"
  ip_cidr_range = "10.${count.index + 1}0.0.0/24"
  region        = var.region
  network       = google_compute_network.tpu_vpc[count.index].id
}

resource "google_compute_firewall" "tpu_allow_internal" {
  count   = 2
  name    = "oss-tpu${count.index + 1}-allow-internal"
  network = google_compute_network.tpu_vpc[count.index].id

  allow {
    protocol = "tcp"
  }
  allow {
    protocol = "udp"
  }
  allow {
    protocol = "icmp"
  }

  source_ranges = ["10.${count.index + 1}0.0.0/24"]
}
EOF
- מוודאים שאתם נמצאים בספרייה
oss-kube-draומריצים את הפקודות הבאותterraform initהפקודה מאתחלת את ספריית העבודה. זה השלב הראשון, ובמהלכו מורידים את הספקים שנדרשים להגדרות שצוינו.terraform plan -outיוצר תוכנית הרצה שמראה אילו פעולות Terraform תבצע כדי לפרוס את התשתית. הפקודה-outמאפשרת לשמור את תוכנית הביצוע בקובץ בינארי עם שם. תוכלו לראות מה יקרה בלי לבצע שינויים.terraform applyמפעיל את העדכונים.
terraform init
terraform plan -out=tfplan
- עכשיו מריצים את הפריסה אחרי שמריצים את הפקודה
terraform apply. מכיוון שמחילים את תוכנית הביצוע השמורה, היא תופעל באופן מיידי בלי לבקש אישור. (התהליך עשוי להימשך בין 5 ל-10 דקות)
terraform apply tfplan
- בודקים את ההגדרה.
echo -e "\n=== Verifying VPC Networks ==="
gcloud compute networks list --filter="name~oss-.*" --project=$PROJECT_ID

echo -e "\n=== Verifying Subnetworks ==="
gcloud compute networks subnets list --filter="name~oss-.*" --project=$PROJECT_ID

echo -e "\n=== Verifying Firewall Rules ==="
gcloud compute firewall-rules list --filter="name~oss-.*" --project=$PROJECT_ID

echo -e "\n=== Verifying Cloud NAT ==="
gcloud compute routers nats list --router=oss-k8s-router --router-region=$REGION --project=$PROJECT_ID
יצירת צמתי VM
עכשיו מגדירים את מכונות Compute Engine.
- מוודאים שאתם בספרייה
oss-kube-draומריצים את הפקודה הבאה ב-Cloud Shell כדי לכתוב את הקובץnodes.tf.
cat << 'EOF' > nodes.tf
# 1. K8s Control Plane VM (No TPU)
resource "google_compute_instance" "control_plane" {
  name         = "k8s-control-plane"
  machine_type = var.control_plane_machine_type
  zone         = var.zone

  boot_disk {
    initialize_params {
      image = "projects/ubuntu-os-cloud/global/images/family/ubuntu-2204-lts"
      size  = 100
    }
  }

  network_interface {
    network    = google_compute_network.primary_vpc.id
    subnetwork = google_compute_subnetwork.primary_subnet.id
    # No public IP block keeps this node private
  }

  service_account {
    scopes = ["cloud-platform"]
  }
}

# 2. TPU Worker VMs (Multi-NIC ct6e-standard-4t instances)
resource "google_compute_instance" "tpu_workers" {
  count        = 2
  name         = "k8s-tpu-worker-${count.index + 1}"
  machine_type = var.tpu_worker_machine_type
  zone         = var.zone

  boot_disk {
    initialize_params {
      image = "projects/ubuntu-os-accelerator-images/global/images/family/ubuntu-accel-2204-amd64-tpu-v5e-v5p-v6e"
      size  = 200
    }
  }

  scheduling {
    on_host_maintenance = "TERMINATE"
    provisioning_model  = "STANDARD"
  }

  # NIC 1: Management VPC Subnet
  network_interface {
    network    = google_compute_network.primary_vpc.id
    subnetwork = google_compute_subnetwork.primary_subnet.id
  }

  # NIC 2: TPU VPC 1 Subnet
  network_interface {
    network    = google_compute_network.tpu_vpc[0].id
    subnetwork = google_compute_subnetwork.tpu_subnet[0].id
  }

  # NIC 3: TPU VPC 2 Subnet
  network_interface {
    network    = google_compute_network.tpu_vpc[1].id
    subnetwork = google_compute_subnetwork.tpu_subnet[1].id
  }

  service_account {
    scopes = ["cloud-platform"]
  }


  lifecycle {
    ignore_changes = [
      boot_disk[0].initialize_params[0].image,
      guest_accelerator,
      metadata
    ]
  }
}
EOF
- אחרי שכותבים את ההגדרה החדשה, יוצרים תוכנית חדשה ומחילים אותה כדי להקצות את המופעים.
terraform plan -out=tfplan

terraform apply tfplan
- מבצעים אימות.
echo -e "\n=== Verifying Provisioned VM Instances ==="
gcloud compute instances list --filter="name~k8s-.*" --project=$PROJECT_ID


echo -e "\n=== Verifying Network Interfaces on Workers ==="
for i in 1 2; do
  echo -e "\n--- Interfaces for k8s-tpu-worker-${i} ---"
  gcloud compute instances describe k8s-tpu-worker-${i} \
      --zone=$ZONE \
      --project=$PROJECT_ID \
      --format="table(networkInterfaces[].network.basename(), networkInterfaces[].networkIP)"
done
4. הפעלת צומת הבקרה של אשכול Kubernetes
בקטע הזה תתחברו בצורה מאובטחת למכונת ה-VM של מישור הבקרה שיצרתם, תגדירו את מערכת ההפעלה הבסיסית, תתקינו את חבילות Kubernetes ואת זמן הריצה של הקונטיינר, תפעילו את האשכול ותפרוסו את Calico CNI עם בידוד תנועה קפדני לרשת הניהול.
- מתחברים בצורה מאובטחת למופע
k8s-control-planeבאמצעות מנהרת שרת proxy לאימות זהויות (IAP) של GCE. מריצים את הפקודה הבאה במסוף Cloud Shell:
gcloud compute ssh k8s-control-plane \
    --zone=$ZONE \
    --tunnel-through-iap
- במכונת ה-VM
k8s-control-planeיוצרים סקריפט בשםinit-control-plane.shכדי להפוך את שלבי ההתקנה וההגדרה לאוטומטיים.
cat << 'CONTROL_PLANE_EOF' > init-control-plane.sh
#!/bin/bash
# Strict error handling: fail instantly if any command exits with a non-zero status
set -e

echo "=== 1. Neutralizing Background Updates & Preparing Base OS ==="
# Prevent unattended upgrades from locking apt or breaking network configuration mid-setup
sudo systemctl stop apt-daily.timer apt-daily-upgrade.timer || true
sudo systemctl disable apt-daily.timer apt-daily-upgrade.timer || true
sudo systemctl mask apt-daily.service apt-daily-upgrade.service || true

# Turn off swap (mandatory for Kubernetes)
sudo swapoff -a
sudo sed -i '/ swap / s/^\(.*\)$/#\1/g' /etc/fstab

# Load required kernel modules
cat << 'EOT' | sudo tee /etc/modules-load.d/k8s.conf
overlay
br_netfilter
EOT

sudo modprobe overlay
sudo modprobe br_netfilter

# Configure sysctl requirements for Kubernetes bridging
cat << 'EOT' | sudo tee /etc/sysctl.d/k8s.conf
net.bridge.bridge-nf-call-iptables  = 1
net.bridge.bridge-nf-call-ip6tables = 1
net.ipv4.ip_forward                 = 1
EOT
sudo sysctl --system

echo "=== 2. Installing Container Runtime (Containerd) ==="
sudo apt-get update
sudo apt-get install -y ca-certificates curl gnupg bash-completion

sudo install -m 0755 -d /etc/apt/keyrings
curl -fsSL https://download.docker.com/linux/ubuntu/gpg | sudo gpg --dearmor --yes -o /etc/apt/keyrings/docker.gpg
sudo chmod a+r /etc/apt/keyrings/docker.gpg
echo "deb [arch=$(dpkg --print-architecture) signed-by=/etc/apt/keyrings/docker.gpg] https://download.docker.com/linux/ubuntu $(. /etc/os-release && echo $VERSION_CODENAME) stable" | sudo tee /etc/apt/sources.list.d/docker.list > /dev/null

sudo apt-get update
sudo apt-get install -y docker-ce docker-ce-cli containerd.io

echo "=== 3. Configuring Containerd with Systemd Cgroups ==="
sudo mkdir -p /etc/containerd
containerd config default | sudo tee /etc/containerd/config.toml >/dev/null
sudo sed -i 's/SystemdCgroup = false/SystemdCgroup = true/' /etc/containerd/config.toml

sudo systemctl daemon-reload
sudo systemctl restart containerd
sudo systemctl enable containerd

# Validation Step: Verify runtime engine health
if ! systemctl is-active --quiet containerd; then
    echo "❌ ERROR: Containerd failed to start properly."
    exit 1
fi
echo "✅ Containerd runtime is active and healthy."

echo "=== 4. Installing Kubernetes 1.36 Binaries ==="
curl -fsSL https://pkgs.k8s.io/core:/stable:/v1.36/deb/Release.key | sudo gpg --dearmor --yes -o /etc/apt/keyrings/kubernetes-apt-keyring.gpg
echo 'deb [signed-by=/etc/apt/keyrings/kubernetes-apt-keyring.gpg] https://pkgs.k8s.io/core:/stable:/v1.36/deb/ /' | sudo tee /etc/apt/sources.list.d/kubernetes.list

sudo apt-get update
sudo apt-get install -y kubelet kubeadm kubectl
sudo apt-mark hold kubelet kubeadm kubectl

# Configure Autocomplete and Aliases system-wide
kubectl completion bash | sudo tee /etc/bash_completion.d/kubectl > /dev/null
kubeadm completion bash | sudo tee /etc/bash_completion.d/kubeadm > /dev/null
if ! grep -q 'alias k=kubectl' ~/.bashrc; then
  echo 'alias k=kubectl' >> ~/.bashrc
  echo 'complete -o default -F __start_kubectl k' >> ~/.bashrc
fi

echo "=== 5. Initializing Control Plane Engine ==="
sudo kubeadm init --pod-network-cidr=192.168.0.0/16

echo "=== 6. Configuring Administrative Cluster Credentials ==="
mkdir -p $HOME/.kube
sudo cp -i /etc/kubernetes/admin.conf $HOME/.kube/config
sudo chown $(id -u):$(id -g) $HOME/.kube/config

# Validation Step: Verify API Server local responsiveness
echo "Waiting for local API server context..."
until kubectl cluster-info &>/dev/null; do
    sleep 2
done
echo "✅ Kubernetes API server is responding locally."

echo "=== 7. Deploying Calico Network Operator ==="
kubectl create -f https://raw.githubusercontent.com/projectcalico/calico/v3.27.3/manifests/tigera-operator.yaml

# Validation Step: Ensure Tigera Operator CRD is fully available before applying configuration
echo "Waiting for Tigera Installation CRD to register on the API server..."
kubectl wait --for=condition=established crd/installations.operator.tigera.io --timeout=60s

echo "=== 8. Deploying Calico Custom Resources (Subnet Interlock Locked to 10.0.0.0/24) ==="
cat << 'CALICO_EOF' > custom-calico.yaml
apiVersion: operator.tigera.io/v1
kind: Installation
metadata:
  name: default
spec:
  calicoNetwork:
    nodeAddressAutodetectionV4:
      cidrs:
        - "10.0.0.0/24"
    ipPools:
    - blockSize: 26
      cidr: 192.168.0.0/16
      encapsulation: VXLANCrossSubnet
      natOutgoing: Enabled
      nodeSelector: all()
CALICO_EOF
kubectl apply -f custom-calico.yaml

# Validation Step: Confirm Calico daemon configurations are processing
echo "Waiting 10 seconds for Calico system namespaces to initialize..."
sleep 10
echo "Current Calico workload deployment status:"
kubectl get pods -n calico-system

echo "=== 9. Exporting Worker Cluster Join Token ==="
sudo kubeadm token create --print-join-command > ~/join.sh
chmod +x ~/join.sh

echo "--------------------------------------------------------"
echo "✅ CONTROL PLANE BOOTSTRAP COMPLETE!"
echo "Your cluster join command for the TPU workers is saved below:"
echo "--------------------------------------------------------"
cat ~/join.sh
CONTROL_PLANE_EOF
- מריצים את הסקריפט.
chmod +x init-control-plane.sh
./init-control-plane.sh
- בסיום, מאמתים. יעברו כמה דקות עד שכולם יהיו פעילים.
kubectl get nodes
kubectl get pods -A
התוצאה אמורה להיות דומה לזו
NAME                STATUS   ROLES           AGE     VERSION
k8s-control-plane   Ready    control-plane   6m50s   v1.36.2
NAMESPACE         NAME                                        READY   STATUS    RESTARTS   AGE
calico-system     calico-kube-controllers-5578ff64dd-87vp2    1/1     Running   0          6m33s
calico-system     calico-node-fxzpp                           1/1     Running   0          6m33s
calico-system     calico-typha-785cbc858-rv4nz                1/1     Running   0          6m33s
calico-system     csi-node-driver-wlrhx                       2/2     Running   0          6m33s
kube-system       coredns-589f44dc88-pqfrl                    1/1     Running   0          6m42s
kube-system       coredns-589f44dc88-sdwmj                    1/1     Running   0          6m42s
kube-system       etcd-k8s-control-plane                      1/1     Running   0          6m47s
kube-system       kube-apiserver-k8s-control-plane            1/1     Running   0          6m47s
kube-system       kube-controller-manager-k8s-control-plane   1/1     Running   0          6m47s
kube-system       kube-proxy-jnm2p                            1/1     Running   0          6m42s
kube-system       kube-scheduler-k8s-control-plane            1/1     Running   0          6m47s
tigera-operator   tigera-operator-6bc8d879b5-w5mrq            1/1     Running   0          6m42s
- יציאה מהחיבור
sshכדי לחזור ל-Cloud Shell
exit
5. הוספת צמתי עובדים של TPU
תריצו סקריפט מ-Cloud Shell שמתחבר באופן מאובטח למכונה הווירטואלית של מישור הבקרה, מאחזר את אסימון ההצטרפות לאשכול, ובמקביל מגדיר ורושם את צמתי העובדים של TPU באשכול.
- מריצים את הפקודה הבאה ב-Cloud Shell כדי לכתוב את סקריפט התזמור:
cat << 'WORKER_BOOTSTRAP_EOF' > bootstrap-workers.sh
#!/bin/bash
# Strict error handling: fail instantly if any command exits with a non-zero status
set -e

# Fetch the join command safely from the control plane
echo "Fetching join command from Control Plane..."
JOIN_CMD=$(gcloud compute ssh k8s-control-plane --zone=$ZONE --tunnel-through-iap --command="cat ~/join.sh" 2>/dev/null)

if [ -z "$JOIN_CMD" ]; then
    echo "❌ ERROR: Failed to retrieve the join command. Ensure the control plane is reachable."
    exit 1
fi

echo "✅ Successfully retrieved join command."

# Create the setup script locally to be copied to the workers
cat << 'WORKER_INIT_EOF' > init-worker.sh
#!/bin/bash
set -e

echo "=== 1. Neutralizing Background Updates & Setting Non-Interactive Mode ==="
export DEBIAN_FRONTEND=noninteractive
sudo sed -i "s/#\$nrconf{restart} = 'i';/\$nrconf{restart} = 'a';/g" /etc/needrestart/needrestart.conf 2>/dev/null || true

# Prevent unattended upgrades from tearing down network interfaces mid-setup
sudo systemctl stop apt-daily.timer apt-daily-upgrade.timer || true
sudo systemctl disable apt-daily.timer apt-daily-upgrade.timer || true
sudo systemctl mask apt-daily.service apt-daily-upgrade.service || true

echo "=== 2. Base OS Prep ==="
# Disable swap
sudo swapoff -a
sudo sed -i '/ swap / s/^\(.*\)$/#\1/g' /etc/fstab

# Load required kernel modules
cat << 'EOT' | sudo tee /etc/modules-load.d/k8s.conf
overlay
br_netfilter
EOT
sudo modprobe overlay
sudo modprobe br_netfilter

# Configure bridging and IP forwarding sysctls
cat << 'EOT' | sudo tee /etc/sysctl.d/k8s.conf
net.bridge.bridge-nf-call-iptables  = 1
net.bridge.bridge-nf-call-ip6tables = 1
net.ipv4.ip_forward                 = 1
EOT
sudo sysctl --system

echo "=== 3. Installing Containerd (CRI-Only) ==="
sudo apt-get update && sudo apt-get install -yq ca-certificates curl gnupg bash-completion
sudo install -m 0755 -d /etc/apt/keyrings
curl -fsSL https://download.docker.com/linux/ubuntu/gpg | sudo gpg --dearmor --yes -o /etc/apt/keyrings/docker.gpg
sudo chmod a+r /etc/apt/keyrings/docker.gpg
echo "deb [arch=$(dpkg --print-architecture) signed-by=/etc/apt/keyrings/docker.gpg] https://download.docker.com/linux/ubuntu $(. /etc/os-release && echo $VERSION_CODENAME) stable" | sudo tee /etc/apt/sources.list.d/docker.list > /dev/null

# Install only containerd to avoid unnecessary Docker CE overhead
sudo apt-get update && sudo apt-get install -yq containerd.io
sudo mkdir -p /etc/containerd
containerd config default | sudo tee /etc/containerd/config.toml >/dev/null
sudo sed -i 's/SystemdCgroup = false/SystemdCgroup = true/' /etc/containerd/config.toml
sudo systemctl daemon-reload
sudo systemctl restart containerd
sudo systemctl enable containerd

# Validation: Check containerd status
if ! systemctl is-active --quiet containerd; then
    echo "❌ ERROR: Containerd failed to start."
    exit 1
fi

echo "=== 4. Installing Kubernetes 1.36 Binaries ==="
curl -fsSL https://pkgs.k8s.io/core:/stable:/v1.36/deb/Release.key | sudo gpg --dearmor --yes -o /etc/apt/keyrings/kubernetes-apt-keyring.gpg
echo 'deb [signed-by=/etc/apt/keyrings/kubernetes-apt-keyring.gpg] https://pkgs.k8s.io/core:/stable:/v1.36/deb/ /' | sudo tee /etc/apt/sources.list.d/kubernetes.list
sudo apt-get update && sudo apt-get install -yq kubelet kubeadm kubectl
sudo apt-mark hold kubelet kubeadm kubectl
WORKER_INIT_EOF

# Append the actual join command to the script
echo "echo \"=== 5. Joining Cluster ===\"" >> init-worker.sh
echo "sudo $JOIN_CMD" >> init-worker.sh

# Push and run on both Workers concurrently
echo "Starting concurrent bootstrap on both workers..."

(
    echo "[Worker 1] Copying script..."
    gcloud compute scp init-worker.sh k8s-tpu-worker-1:~ --zone=$ZONE --tunnel-through-iap --quiet
    echo "[Worker 1] Executing script..."
    gcloud compute ssh k8s-tpu-worker-1 --zone=$ZONE --tunnel-through-iap --command="bash ~/init-worker.sh"
    echo "✅ [Worker 1] Bootstrap and Join complete!"
) &

(
    echo "[Worker 2] Copying script..."
    gcloud compute scp init-worker.sh k8s-tpu-worker-2:~ --zone=$ZONE --tunnel-through-iap --quiet
    echo "[Worker 2] Executing script..."
    gcloud compute ssh k8s-tpu-worker-2 --zone=$ZONE --tunnel-through-iap --command="bash ~/init-worker.sh"
    echo "✅ [Worker 2] Bootstrap and Join complete!"
) &

# Wait for both background processes to finish
wait

echo "--------------------------------------------------------"
echo "✅ BOTH WORKERS HAVE FINISHED PROCESSING"
echo "--------------------------------------------------------"

# Final Validation Check from Control Plane
echo "Verifying cluster node status..."
sleep 5 # Give kubelet a moment to register the nodes
gcloud compute ssh k8s-control-plane --zone=$ZONE --tunnel-through-iap --command="kubectl get nodes -o wide"
WORKER_BOOTSTRAP_EOF
- מבצעים את הגדרת ה-Worker. (התהליך הזה מפעיל את שתי ההתקנות בו-זמנית ברקע, והוא נמשך כ-3 עד 5 דקות).
chmod +x bootstrap-workers.sh
./bootstrap-workers.sh
אחרי שכל הצמתים יתווספו לאשכול, תופיע הודעה דומה לזו
To increase the performance of the tunnel, consider installing NumPy. For instructions,
please see https://cloud.google.com/iap/docs/using-tcp-forwarding#increasing_the_tcp_upload_bandwidth

NAME                STATUS     ROLES           AGE   VERSION   INTERNAL-IP   EXTERNAL-IP   OS-IMAGE             KERNEL-VERSION           CONTAINER-RUNTIME
k8s-control-plane   Ready      control-plane   25m   v1.36.2   10.0.0.2      <none>        Ubuntu 22.04.5 LTS   6.8.0-1064-gcp (amd64)   containerd://2.2.6
k8s-tpu-worker-1    NotReady   <none>          10s   v1.36.2   10.0.0.3      <none>        Ubuntu 22.04.5 LTS   6.8.0-1064-gcp (amd64)   containerd://2.2.6
k8s-tpu-worker-2    Ready      <none>          27s   v1.36.2   10.0.0.4      <none>        Ubuntu 22.04.5 LTS   6.8.0-1064-gcp (amd64)   containerd://2.2.6
6. פריסת מנהל התקן TPU של OSS DRA
בקטע הזה תחזרו למישור הבקרה, תתנו תווית לצמתי העובדים של TPU עם פרטים ספציפיים על טופולוגיית המאיץ, ותתקינו את מנהל ההתקן של Google TPU DRA בקוד פתוח באמצעות Helm. הדרייבר הזה אחראי לזיהוי של שבבי TPU v6e פיזיים ולמיפוי שלהם באופן מקורי ל-Kubernetes API.
- מתחברים מחדש באופן מאובטח ל-VM
k8s-control-planeמ-Cloud Shell.
gcloud compute ssh k8s-control-plane \
    --zone=$ZONE \
    --tunnel-through-iap
- מריצים את הפקודות האלה בתוך סשן ה-SSH של
k8s-control-plane. הוספת תוויות לצמתי Node עם קבוצת התוויות המלאה (כולל מפתחות מדויקים של מספר הצ'יפים)
kubectl label node k8s-tpu-worker-1 \
  cloud.google.com/gke-tpu-accelerator=tpu-v6e-slice \
  cloud.google.com/gke-tpu-topology=2x2 \
  cloud.google.com/gke-tpu-dra-driver=true \
  cloud.google.com/gke-accelerator-count=4 \
  cloud.google.com/gke-tpu-count=4 \
  --overwrite

kubectl label node k8s-tpu-worker-2 \
  cloud.google.com/gke-tpu-accelerator=tpu-v6e-slice \
  cloud.google.com/gke-tpu-topology=2x2 \
  cloud.google.com/gke-tpu-dra-driver=true \
  cloud.google.com/gke-accelerator-count=4 \
  cloud.google.com/gke-tpu-count=4 \
  --overwrite
- שיבוט והתקנה של מנהל התקן DRA TPU באמצעות Helm
curl -fsSL https://raw.githubusercontent.com/helm/helm/main/scripts/get-helm-3 | bash

git clone https://github.com/kubernetes-sigs/dra-driver-google-tpu.git ~/dra-driver-google-tpu || true
cd ~/dra-driver-google-tpu
rm -f *.pack *.tgz

helm install dra-driver-google-tpu ./deployments/helm/dra-driver-google-tpu \
  -n dra-driver-google-tpu \
  --create-namespace \
  --set 'kubeletPlugin.env[0].name=NODE_NAME' \
  --set 'kubeletPlugin.env[0].valueFrom.fieldRef.fieldPath=spec.nodeName'

cd ~
- אימות ההגדרה של מנהל ההתקן של DRA TPU
# Verify driver daemonset status (Pods should show as Running and Ready)
kubectl get pods -n dra-driver-google-tpu -o wide

# Verify TPU ResourceSlices are successfully published to the API server
kubectl get resourceslices

# Safely parse the ResourceSlices to show the Node Name and the number of TPU chips registered
kubectl get resourceslices -o json | jq -r '.items[] | select(.spec.driver=="tpu.google.com") | "Node: \(.spec.nodeName) | TPUs Registered: \(.spec.devices | length)"'

# Inspect driver logs to confirm the TPU hardware was initialized successfully
kubectl logs -n dra-driver-google-tpu -l app.kubernetes.io/name=dra-driver-google-tpu -c tpu-dra-plugin --tail=20
7. פריסת DRANET וסוגי מכשירים בקוד פתוח
בקטע הזה, תחזרו למישור הבקרה, תתקינו את מנהל ההתקן של DRANET בקוד פתוח, תחיל תיקון של מסנן בהתאמה אישית כדי להחריג ממשקים וירטואליים, ותגדירו את Kubernetes DeviceClass ו-ResourceClaimTemplate עם קידומות הרשת התואמות של oss.
- מתחברים מחדש באופן מאובטח ל-VM
k8s-control-planeמ-Cloud Shell. אם כבר מחוברים, מדלגים.
gcloud compute ssh k8s-control-plane \
    --zone=$ZONE \
    --tunnel-through-iap
- מריצים את הפקודות האלה בסשן
k8s-control-planeSSH
# Install the core components and patch
kubectl apply -f https://raw.githubusercontent.com/kubernetes-sigs/dranet/refs/heads/main/install.yaml


kubectl patch daemonset dranet -n kube-system --type='json' -p='[ { "op": "add", "path": "/spec/template/spec/containers/0/args/-", "value": "-filter=!(\"dra.net/type\" in attributes) || (attributes[\"dra.net/type\"].StringValue != \"veth\" && attributes[\"dra.net/type\"].StringValue != \"vxlan\" && attributes[\"dra.net/type\"].StringValue != \"bridge\")" } ]'

# Monitor rollout readiness
kubectl rollout status daemonset/dranet -n kube-system

# Verify running components and permissions
kubectl get pods -n kube-system -l app=dranet -o wide
kubectl get clusterrole,clusterrolebinding,sa dranet -n kube-system

# Interrogate logs for driver binding confirmation
kubectl logs -n kube-system -l app=dranet --tail=20
- החלת DeviceClass ו-ResourceClaimTemplate
# Apply DRANET DeviceClass and BOTH ResourceClaimTemplates (Network + Hardware)
cat << 'EOF' | kubectl apply -f -
apiVersion: resource.k8s.io/v1
kind: DeviceClass
metadata:
  name: dranet
spec:
  selectors:
    - cel:
        expression: device.driver == "dra.net"
---
apiVersion: resource.k8s.io/v1
kind: ResourceClaimTemplate
metadata:
  name: tpu-net-interfaces
  namespace: default
spec:
  spec:
    devices:
      requests:
      - name: tpu-net-interface
        exactly:
          deviceClassName: dranet
          count: 2
          selectors:
          - cel:
              expression: device.attributes["gce.dra.net"].networkName.startsWith("oss-tpu-vpc")
      config:
      - opaque:
          driver: dra.net
          parameters:
            interface:
              mtu: 8896
              gsoMaxSize: 65536
              groMaxSize: 65536
              gsoIPv4MaxSize: 65536
              groIPv4MaxSize: 65536
              disableEbpfPrograms: true
---
apiVersion: resource.k8s.io/v1
kind: ResourceClaimTemplate
metadata:
  name: tpu-device-template
  namespace: default
spec:
  spec:
    devices:
      requests:
      - name: tpu-devices
        exactly:
          deviceClassName: tpu.google.com
          allocationMode: ExactCount
          count: 4
EOF
- מוודאים שהתבניות והמחלקות רשומות בצורה נכונה ב-Kubernetes API.
# Verify ResourceSlices exist and are actively serving both drivers
kubectl get resourceslices -o custom-columns=NAME:.metadata.name,NODE:.spec.nodeName,DRIVER:.spec.driver | grep -E "dra.net|tpu.google.com"

# Verify the DRANET daemonset pods are Running across all nodes
kubectl get pods -n kube-system -l app=dranet -o wide
- פורסים את Parallel Neper StatefulSet.
cat << 'EOF' | kubectl apply -f -
---
apiVersion: v1
kind: Service
metadata:
  name: neper
spec:
  clusterIP: None
  selector:
    app: neper
---
apiVersion: apps/v1
kind: StatefulSet
metadata:
  name: neper
spec:
  selector:
    matchLabels:
      app: neper
  serviceName: neper
  replicas: 2
  template:
    metadata:
      labels:
        app: neper
    spec:
      initContainers:
      - name: "network-optimization-sysctls"
        image: "busybox"
        securityContext:
          privileged: true
        command:
        - sh
        - -c
        - |
          echo 5000 > /proc/sys/net/ipv4/tcp_rto_min_us
          echo 1 > /proc/sys/net/ipv4/tcp_no_metrics_save
          echo 0 > /proc/sys/net/ipv4/tcp_slow_start_after_idle
          echo 131072 > /proc/sys/net/core/optmem_max
          echo "4096 41943040 314572800" > /proc/sys/net/ipv4/tcp_rmem
      containers:
      - name: neper
        image: ubuntu:22.04
        command:
        - /bin/bash
        - -c
        - |
          apt-get update && apt-get install -y iproute2 build-essential git jq python3-pip &&
          git clone https://github.com/google/neper.git /tmp/neper &&
          cd /tmp/neper && make &&
          cp tcp_stream /usr/local/bin/ &&
          sleep infinity
        securityContext:
          privileged: true
        resources:
          requests:
            cpu: "170"
            memory: "650Gi"
          limits:
            cpu: "170"
            memory: "650Gi"
          claims:
          - name: tpu-net-claim
          - name: tpu-hardware-claim
      resourceClaims:
      - name: tpu-net-claim
        resourceClaimTemplateName: tpu-net-interfaces
      - name: tpu-hardware-claim
        resourceClaimTemplateName: tpu-device-template
EOF
- בדיקת אימות
echo -e "\n=== Verifying StatefulSet Pod Status ==="
kubectl get pods -l app=neper -o wide

echo -e "\n=== Verifying Dynamic Resource Claims (DRCs) ==="
kubectl get resourceclaims

echo -e "\n=== Inspecting Device Claim Allocation ==="
# Using a safer JSONPath query to extract the allocated drivers and devices
kubectl get resourceclaims -o json | jq -r '.items[] | "Claim: \(.metadata.name) | Driver: \(.status.allocation.devices.results[0].driver // "Pending")"'
8. הרצת בדיקה
מריצים את חבילת הכלים להשוואה לשוק של ממשקים כפולים ולאימות חומרה.
שלב 1 (השוואת ביצועים ברשת): התהליך ממתין עד ששני ה-Pods של Neper (neper-0 ו-neper-1) יקמפלו את התלות, מחלץ את כתובות ה-IP של multi-NIC שאינן ברירת מחדל שקשורות דרך DRANET, מפעיל שרתי tcp_stream מקבילים ב-neper-1, יוצר עומס גבוה של נתונים מ-neper-0 ומנתח את התפוקה הכוללת בגיגה-ביט לשנייה (Gbps).
שלב 2 (אימות חומרה): המערכת מתקינה את Google JAX בתוך neper-0 ומבצעת כפל מטריצות (5000x5000) ישירות בשבבי ה-TPU הממופים דרך VFIO כדי לוודא את סטטוס הפעולה של הסיליקון.
- מריצים את הפקודה הבאה ב-
k8s-control-planeכדי לכתובrun_dual_neper_test.sh
cat << 'EOF' > run_dual_neper_test.sh
#!/bin/bash
set -e

SERVER_POD="neper-1"
CLIENT_POD="neper-0"

echo "================================================="
echo " PHASE 1: DUAL-INTERFACE HIGH-SPEED NETWORK TEST"
echo "================================================="
echo "=== Waiting for Pods to be Ready ==="
kubectl wait --for=condition=ready pod/$CLIENT_POD pod/$SERVER_POD --timeout=300s

echo "=== Waiting for neper compilation to finish inside Pods ==="
for POD in $SERVER_POD $CLIENT_POD; do
  until kubectl exec $POD -c neper -- sh -c 'command -v jq >/dev/null 2>&1 && command -v tcp_stream >/dev/null 2>&1'; do
    sleep 5
  done
done

echo ""
echo "=== Step 1: Extract Target IPs from $SERVER_POD ==="
# Using jq to parse the network interfaces directly from Linux JSON output
IFACE1=$(kubectl exec $SERVER_POD -c neper -- sh -c "ip -j -4 addr show | jq -r '.[] | select(.ifname != \"lo\" and .ifname != \"eth0\") | .ifname' | sed -n '1p'")
IFACE2=$(kubectl exec $SERVER_POD -c neper -- sh -c "ip -j -4 addr show | jq -r '.[] | select(.ifname != \"lo\" and .ifname != \"eth0\") | .ifname' | sed -n '2p'")

IP1=$(kubectl exec $SERVER_POD -c neper -- sh -c "ip -j -4 addr show | jq -r '.[] | select(.ifname != \"lo\" and .ifname != \"eth0\") | .addr_info[0].local' | sed -n '1p'")
IP2=$(kubectl exec $SERVER_POD -c neper -- sh -c "ip -j -4 addr show | jq -r '.[] | select(.ifname != \"lo\" and .ifname != \"eth0\") | .addr_info[0].local' | sed -n '2p'")

echo "   📍 Target IP 1 ($IFACE1): $IP1"
echo "   📍 Target IP 2 ($IFACE2): $IP2"

echo ""
echo "=== Step 2: Initialize TCP Servers on $SERVER_POD ==="
kubectl exec $SERVER_POD -c neper -- sh -c '
for i in 0 1; do
  nohup tcp_stream -C$((52279 + i)) --port=$((38339 + i)) --skip-rx-copy -rw -Z -B16384 \
    --test-length=60 --suicide-length=120 -F100 --num-threads=16 --num-flows=32 -D0 \
    --logtostderr > test${i}.log 2>&1 &
done
'
sleep 3

echo "=== Step 3: Generate Concurrent High-Throughput Load from $CLIENT_POD ==="
echo "Blasting Traffic via Interface 1 -> $IP1 ..."
kubectl exec $CLIENT_POD -c neper -- sh -c "nohup tcp_stream -C52279 --port=38339 --skip-rx-copy -rw -Z -B16384 \
  --test-length=60 --suicide-length=70 -F100 --num-threads=16 --num-flows=32 \
  --client -H $IP1 -D0 --logtostderr > test0.log 2>&1 &"

echo "Blasting Traffic via Interface 2 -> $IP2 ..."
kubectl exec $CLIENT_POD -c neper -- sh -c "nohup tcp_stream -C52280 --port=38340 --skip-rx-copy -rw -Z -B16384 \
  --test-length=60 --suicide-length=70 -F100 --num-threads=16 --num-flows=32 \
  --client -H $IP2 -D0 --logtostderr > test1.log 2>&1 &"

echo ""
echo "=== Testing in progress... Waiting 65 seconds for test completion ==="
sleep 65

echo ""
echo "=== Step 4: Evaluate Throughput Metrics ==="
RAW_BPS1=$(kubectl exec $CLIENT_POD -c neper -- grep -a "remote_throughput=" test0.log | cut -d= -f2 | tr -d '\r' || echo "0")
RAW_BPS2=$(kubectl exec $CLIENT_POD -c neper -- grep -a "remote_throughput=" test1.log | cut -d= -f2 | tr -d '\r' || echo "0")

GBPS1=$(awk -v bps="$RAW_BPS1" 'BEGIN { printf "%.2f", bps / 1000000000 }')
GBPS2=$(awk -v bps="$RAW_BPS2" 'BEGIN { printf "%.2f", bps / 1000000000 }')
TOTAL=$(awk -v b1="$RAW_BPS1" -v b2="$RAW_BPS2" 'BEGIN { printf "%.2f", (b1 + b2) / 1000000000 }')

echo "📊 --- NETWORK RESULTS ---"
echo "Interface 1 ($IFACE1) : ${GBPS1} Gbps"
echo "Interface 2 ($IFACE2) : ${GBPS2} Gbps"
echo "🔥 TOTAL AGGREGATE  : ${TOTAL} Gbps"
echo "--------------------------"


echo ""
echo "================================================="
echo " PHASE 2: TPU HARDWARE VALIDATION TEST"
echo "================================================="
echo "⏳ Installing Python and Google JAX on $CLIENT_POD (Takes ~1 minute)..."
kubectl exec $CLIENT_POD -c neper -- bash -c "apt-get update > /dev/null 2>&1 && apt-get install -y python3-pip > /dev/null 2>&1 && pip3 install jax[tpu] -f https://storage.googleapis.com/jax-releases/libtpu_releases.html > /dev/null 2>&1"

echo "🧠 Running matrix math directly on the TPU chips..."
kubectl exec $CLIENT_POD -c neper -- python3 -c "
import jax
import jax.numpy as jnp
print(f'✅ TPU Hardware Detected: {jax.device_count()} chips mapped via vfio')
print('🚀 Executing 5000x5000 Matrix Multiplication on TPU silicon...')
x = jnp.ones((5000, 5000))
y = jnp.dot(x, x)
print('✅ Success! The TPU driver is fully operational and executing math.')
"
EOF

chmod +x run_dual_neper_test.sh
- מריצים את הבדיקה. הפעולה תימשך 2 דקות.
./run_dual_neper_test.sh
בסיום, בפלט של הטרמינל יוצגו מדדי הרשת המהירה שאומתו וביצועי המתמטיקה של מטריצת ה-TPU
=== Step 4: Evaluate Throughput Metrics ===
📊 --- NETWORK RESULTS ---
Interface 1 (ens9)  : 157.51 Gbps
Interface 2 (ens10) : 167.04 Gbps
🔥 TOTAL AGGREGATE  : 324.55 Gbps
--------------------------

=================================================
 PHASE 2: TPU HARDWARE VALIDATION TEST
=================================================
⏳ Installing Python and Google JAX on neper-0 (Takes ~1 minute)...
🧠 Running matrix math directly on the TPU chips...
✅ TPU Hardware Detected: 4 chips mapped via vfio
🚀 Executing 5000x5000 Matrix Multiplication on TPU silicon...
✅ Success! The TPU driver is fully operational and executing math.
9. פריסת Gemma 4 באשכול
בקטע הזה תגדירו את פרטי הכניסה המאובטחים של Hugging Face API כסוד של Kubernetes, תפרסו את מנוע ההסקה vLLM באמצעות הרשת של הקצאת משאבים דינמית (DRA) וגם תביעות חומרה, ותריצו שאילתת בדיקה מקצה לקצה מול מודל Gemma 4 של Google.
מוודאים שנכנסתם לסשן SSH מאובטח ב-k8s-control-plane:
- מתחברים מחדש בצורה מאובטחת ל-VM של מישור הבקרה מ-Cloud Shell. אם כבר התחברתם, אפשר לדלג על השלב הזה.
gcloud compute ssh k8s-control-plane \
    --zone=$ZONE \
    --tunnel-through-iap
- ניקוי פריסות קודמות
# 1. Delete the StatefulSet to stop the benchmarking pods
kubectl delete statefulset neper

# 2. Wait for the pods to terminate fully and release the claims
kubectl wait --for=delete pod/neper-0 pod/neper-1 --timeout=60s
- מאחסנים את טוקן הגישה ל-Hugging Face. מחליפים את
<YOUR_ACTUAL_HUGGING_FACE_TOKEN>באסימון שלכם.
export HF_TOKEN="<YOUR_ACTUAL_HUGGING_FACE_TOKEN>"
- יצירת סוד
kubectl create secret generic hf-token --from-literal=token="${HF_TOKEN}"
- קובץ המניפסט הזה מתזמן העתק יחיד של vLLM שפועל במכונה וירטואלית של TPU גולמי עם 4 שבבים. הוא משתמש בתקן Kubernetes DRA כדי לטעון גם את התביעות המותאמות אישית של הרשת (tpu-net-claim) וגם את התביעות של החומרה (tpu-hardware-claim) כדי לגשת בצורה מאובטחת לחומרת TPU גולמית, בלי לדרוש טעינה לא מאובטחת של נפח האחסון של המארח. לבסוף, הוא חושף את שרת ה-API שתואם ל-OpenAI ביציאה 8080. מריצים את הפקודה הבאה כדי ליצור את הקובץ:
cat << 'EOF' > gemma-inference.yaml
apiVersion: apps/v1
kind: Deployment
metadata:
  name: vllm-gemma-4
  labels:
    app: gemma-server
spec:
  replicas: 1
  selector:
    matchLabels:
      app: gemma-server
  template:
    metadata:
      labels:
        app: gemma-server
    spec:
      hostIPC: true
      containers:
      - name: vllm-tpu
        image: vllm/vllm-tpu:latest
        securityContext:
          privileged: true
        env:
        - name: HF_TOKEN
          valueFrom:
            secretKeyRef:
              name: hf-token
              key: token
        - name: JAX_PLATFORMS
          value: "tpu,cpu"
        - name: TPU_ACCELERATOR_TYPE
          value: "v6e-4"
        - name: TPU_WORKER_HOSTNAMES
          value: "127.0.0.1"
        - name: TPU_WORKER_ID
          value: "0"
        - name: LIBTPU_INIT_ARGS
          value: "--noenable_tpunetd_client"
        - name: BARE_METAL_MODE
          value: "true"
        - name: BYPASS_VBAR_CONTROL_SERVICE
          value: "1"
        - name: TPU_SKIP_MDS_QUERY
          value: "1"
        - name: TPU_DEFAULT_NETWORK_TYPE
          value: "loopback"
        - name: CHIPS_PER_HOST_BOUNDS
          value: "2,2,1"
        - name: HOST_BOUNDS
          value: "1,1,1"
        - name: ALT
          value: "false,false,false"
        - name: WRAP
          value: "false,false,false"
        command:
        - bash
        - -c
        - |
          export PYTHONUNBUFFERED=1
          sysctl -w net.ipv6.conf.all.disable_ipv6=0
          sysctl -w net.ipv6.conf.default.disable_ipv6=0
          sysctl -w net.ipv6.conf.lo.disable_ipv6=0
          ip link set lo up || true

          exec python3 -m vllm.entrypoints.openai.api_server \
            --model google/gemma-4-E4B-it \
            --tensor-parallel-size 4 \
            --trust-remote-code \
            --max-model-len 8192 \
            --max-num-batched-tokens 4096 \
            --host 0.0.0.0 \
            --port 8080
        ports:
        - containerPort: 8080
        resources:
          requests:
            cpu: "170"
            memory: "650Gi"
          limits:
            cpu: "170"
            memory: "650Gi"
          claims:
          - name: tpu-net-claim
          - name: tpu-hardware-claim
        volumeMounts:
        - name: dshm
          mountPath: /dev/shm
      volumes:
      - name: dshm
        emptyDir:
          medium: Memory
      resourceClaims:
      - name: tpu-net-claim
        resourceClaimTemplateName: tpu-net-interfaces
      - name: tpu-hardware-claim
        resourceClaimTemplateName: tpu-device-template
---
apiVersion: v1
kind: Service
metadata:
  name: vllm-gemma-service
spec:
  selector:
    app: gemma-server
  ports:
  - protocol: TCP
    port: 8080
    targetPort: 8080
  type: ClusterIP
EOF
- פריסת עומס העבודה של ההסקות
kubectl apply -f gemma-inference.yaml
- מאמתים את סטטוס הפריסה. במהלך ההגדרה הזו, המערכת מורידה את המודל וטוענת את
vLLM. This. התהליך הזה יכול להימשך בין10 - 25 minutes.
kubectl get pods -l app=gemma-server

kubectl describe pods -l app=gemma-server
אפשר גם לצפות ביומנים מהקונטיינר כדי לראות את התהליך. מקישים על CTRL+C כדי לצאת מתצוגת היומן.
kubectl logs -l app=gemma-server -f
המנוע יאותחל באופן מלא כשתראו את השורות
(APIServer pid=1) INFO: Started server process [1]
(APIServer pid=1) INFO: Waiting for application startup.
(APIServer pid=1) INFO: Application startup complete.
לפני שממשיכים, לוחצים על CTRL+C כדי לצאת מהזרם של היומן.
- מאמתים את צירוף הממשק. בדיקת הממשקים של הרשת שקשורים לקונטיינר
kubectl exec deployment/vllm-gemma-4 -c vllm-tpu -- ls /sys/class/net
kubectl exec deployment/vllm-gemma-4 -c vllm-tpu -- cat /proc/net/fib_trie | grep -B 1 "32 host"
מה לחפש: אמורים לראות את ens9 ו-ens10 (או שמות דומים של ensX) לצד ממשק ה-CNI הרגיל (eth0) וה-loopback (lo). אלה מייצגים את ממשקי הרשת הפיזיים של מארח ה-GCE שנקשרים באופן דינמי בתוך ה-pod על ידי מנהל ההתקן של DRANET בקוד פתוח, באמצעות מוסכמת מתן השמות החזויה של systemd.
kubectl exec deployment/vllm-gemma-4 -c vllm-tpu -- ls /sys/class/net
ens10
ens9
eth0
Lo

kubectl exec deployment/vllm-gemma-4 -c vllm-tpu -- cat /proc/net/fib_trie | grep -B 1 "32 host"

              |-- 10.10.0.3
                 /32 host LOCAL
--
              |-- 10.20.0.3
                 /32 host LOCAL
--
           |-- 127.0.0.1
              /32 host LOCAL
--
     |-- 192.168.238.67
        /32 host LOCAL
--
              |-- 10.10.0.3
                 /32 host LOCAL
--
              |-- 10.20.0.3
                 /32 host LOCAL
--
           |-- 127.0.0.1
              /32 host LOCAL
--
     |-- 192.168.238.67
        /32 host LOCAL
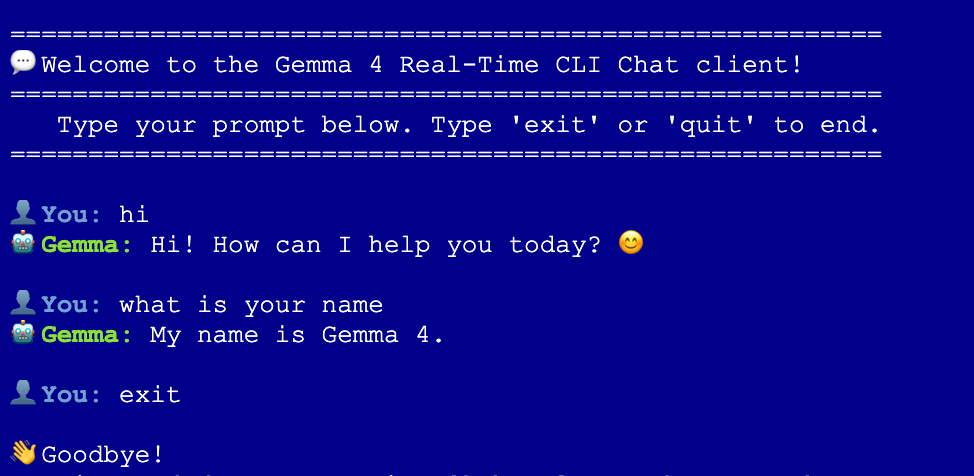
10. בדיקת ה-LLM
אחרי שמאמתים את הממשקים, מפעילים קונטיינר בדיקה קל משקל בתוך האשכול כדי לשלוח בקשת הסקה של סטרימינג אל Gemma 4.
- מריצים את הפקודה הבאה בסשן
k8s-control-planeכדי להפעיל את הלקוח האינטראקטיבי:
kubectl run gemma-chat --rm -i --tty --image=alpine --restart=Never -- sh -c '
  # 1. Silently install curl and jq
  apk add --no-cache curl jq > /dev/null

  echo -e "\n========================================================"
  echo -e "💬 Welcome to the Gemma 4 Real-Time CLI Chat client!"
  echo -e "========================================================"
  echo -e "   Type your prompt below. Type '\''exit'\'' or '\''quit'\'' to end."
  echo -e "========================================================\n"

  while true; do
    # Read user input
    echo -n -e "👤 \033[1;34mYou:\033[0m "
    read -r USER_INPUT

    # Handle exit conditions
    if [ "$USER_INPUT" = "exit" ] || [ "$USER_INPUT" = "quit" ] || [ -z "$USER_INPUT" ]; then
      echo -e "\n👋 Goodbye!"
      break
    fi

    echo -n -e "🤖 \033[1;32mGemma:\033[0m "

    # Use jq to safely escape double quotes and special characters in user input
    JSON_PAYLOAD=$(jq -n --arg msg "$USER_INPUT" '\''{
      model: "google/gemma-4-E4B-it",
      messages: [{role: "user", content: $msg}],
      temperature: 0.7,
      stream: true
    }'\'')

    # Stream the tokens in real-time with a typewriter effect
    curl -s -X POST http://vllm-gemma-service:8080/v1/chat/completions \
      -H "Content-Type: application/json" \
      -d "$JSON_PAYLOAD" | while read -r line; do
        # Extract SSE data streams
        if echo "$line" | grep -q "data:"; then
          DATA_CLEAN=$(echo "$line" | sed "s/^data: //" | tr -d "\r")
          if [ "$DATA_CLEAN" != "[DONE]" ] && [ -n "$DATA_CLEAN" ]; then
            # Parse and print only the token content
            TOKEN=$(echo "$DATA_CLEAN" | jq -r ".choices[0].delta.content // empty" 2>/dev/null)
            echo -n "$TOKEN"
          fi
        fi
      done
    echo -e "\n"
  done
'
Interactive chat
11. מחיקה
קודם צריך למחוק את כל עומסי העבודה, הסודות וההגדרות מהאשכול.
אם אתם עדיין מחוברים לסשן מאובטח של SSH ב-k8s-control-plane, מריצים את הפקודה הבאה ישירות. (אם כבר יצאתם, צריך להתחבר מחדש באמצעות SSH):
- מתחברים מחדש בצורה מאובטחת ל-VM של מישור הבקרה מ-Cloud Shell. אם כבר התחברתם למכונה הווירטואלית הזו, אפשר לדלג על השלב הזה.
gcloud compute ssh k8s-control-plane \
    --zone=$ZONE \
    --tunnel-through-iap
- ניקוי משאבים ב-Kubernetes
# 1. Delete the Gemma 4 deployment and service
kubectl delete -f gemma-inference.yaml --ignore-not-found=true

# 2. Delete the Hugging Face access secret
kubectl delete secret hf-token --ignore-not-found=true

# 3. Delete the open-source DRANET specs and drivers
kubectl delete deviceclass dranet --ignore-not-found=true
kubectl delete resourceclaimtemplate tpu-net-interfaces --ignore-not-found=true
kubectl delete -f https://raw.githubusercontent.com/kubernetes-sigs/dranet/refs/heads/main/install.yaml --ignore-not-found=true

# 4. Uninstall the OSS TPU Hardware Driver
helm uninstall dra-driver-google-tpu -n dra-driver-google-tpu --wait || true
- עכשיו, מקלידים
exitוחוזרים לספרייה הפעילה של Cloud Shell שבה מאוחסנים קובצי Terraform, ומשמידים את כל הצמתים, רשתות ה-VPC וכללי חומת האש.
# 1. Create the teardown script
cat << 'EOF' > teardown.sh
#!/bin/bash

# The specific networks defined in your Terraform vpc.tf
NETWORKS=(
  "oss-k8s-primary-vpc"
  "oss-tpu-vpc-1"
  "oss-tpu-vpc-2"
)

echo "=== Hunting down and deleting ALL firewall rules for OSS networks ==="

for NETWORK in "${NETWORKS[@]}"; do
    echo "Searching for firewall rules attached to network: $NETWORK..."

    # Query GCP for any firewall rule tied to this specific network
    STUCK_RULES=$(gcloud compute firewall-rules list \
        --filter="network:($NETWORK)" \
        --format="value(name)" | tr '\n' ' ')

    # Check if the string is not empty and contains more than just whitespace
    if [ -n "$STUCK_RULES" ] && [ "$STUCK_RULES" != " " ]; then
        echo "🔥 Found rules holding $NETWORK hostage: $STUCK_RULES"
        echo "Deleting them now..."
        gcloud compute firewall-rules delete $STUCK_RULES --quiet
    else
        echo "✅ No firewall rules found for $NETWORK."
    fi
done

# Fallback: Explicitly delete the named rules from your Terraform file
# just in case the dynamic filter missed them due to caching delays
echo "=== Running fallback deletion for explicitly named Terraform rules ==="
gcloud compute firewall-rules delete \
    oss-k8s-primary-allow-internal \
    oss-k8s-allow-iap-ssh \
    oss-tpu1-allow-internal \
    oss-tpu2-allow-internal \
    --quiet 2>/dev/null || true

echo "--------------------------------------------------------"
echo "✅ Firewall cleanup complete!"
echo "Your networks are now stripped of firewalls and ready to be deleted."
echo "--------------------------------------------------------"

echo "=== Destroying Infrastructure ==="
cd ~/oss-kube-dra || exit
terraform destroy -auto-approve

echo "--------------------------------------------------------"
echo "✅ Infrastructure successfully destroyed!"
echo "--------------------------------------------------------"
EOF

# 2. Make the script executable and run it
chmod +x teardown.sh
./teardown.sh
- מחיקת תיקיית Terraform
oss-kube-dra
cd
rm -r oss-kube-dra
12. מזל טוב
הקצאתם, הפעלתם ואימתתם בהצלחה תשתית AI של Kubernetes בניהול עצמי עם ביצועים גבוהים, ישירות במכונות וירטואליות של Google Compute Engine (GCE).
עכשיו יש לכם הבנה מעמיקה ברמת המערכת של האופן שבו Kubernetes משתמשת בהקצאת משאבים דינמית (DRA) כדי לתזמר מאיצי TPU גולמיים, לקשור טופולוגיות של מארחים עם multi-NIC במהירות גבוהה ולהכניס לשימוש בסביבת הייצור מודלים גדולים של שפה (LLM) מתקדמים.
השלבים הבאים / מידע נוסף
אל שיעור ה-Lab הבא
אתם יכולים להמשיך את יחידת ה-Quest ב-Google Cloud או לנסות את שיעורי ה-Lab הבאים של Google Cloud: