

1. Panoramica
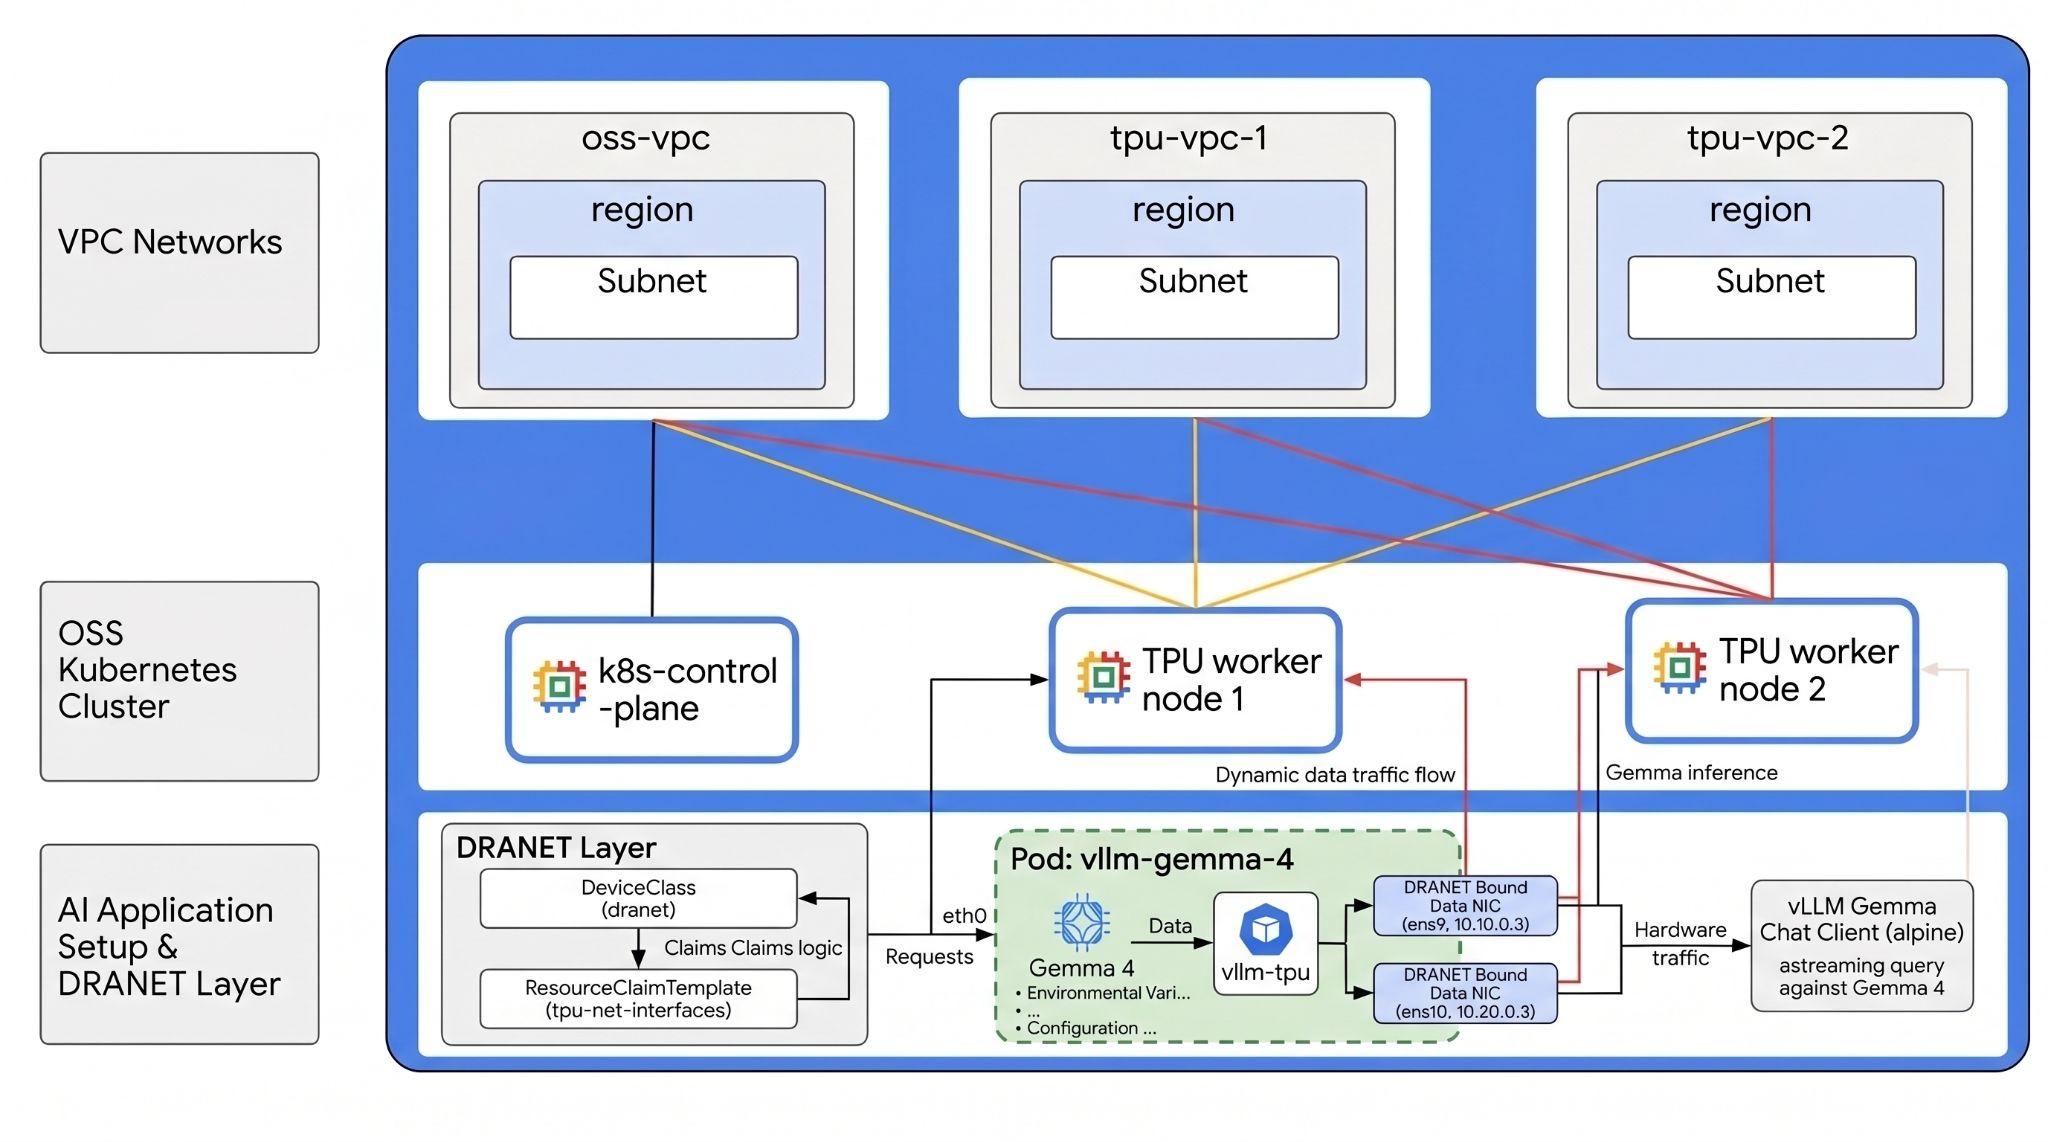
Questo lab ti introduce alla creazione di un'infrastruttura AI autogestita direttamente su Google Compute Engine (GCE). Eseguirai il bootstrap di un cluster Kubernetes non gestito su macchine virtuali (alcune con TPU) utilizzando Terraform, kubeadm e configurerai l'allocazione dinamica delle risorse (DRA) di Kubernetes utilizzando il driver open source. Lavorerai con quanto segue:
- Google Compute Engine: fornisce le risorse di calcolo per il bootstrap dei cluster
- TPU: chip di accelerazione personalizzati di Google.
- Kubernetes OSS: software per installare e configurare Kubernetes manualmente
- OSS DRANET - Driver di rete DRA
- OSS DRA per TPU: driver DRA che supportano le TPU
Per configurare l'ambiente, devi eseguire il deployment di più reti VPC indipendenti, ognuna con la propria subnet. In questo modo, puoi eseguire il provisioning delle tue istanze VM con più interfacce di rete (multi-NIC), separando il traffico di gestione dal traffico di dati TPU ad alta velocità.
Successivamente, per abilitare l'allocazione dinamica delle risorse (DRA) open source, installerai sia il driver hardware Google TPU DRA sia il driver di rete DRANET. Poi configurerai le DeviceClasses di Kubernetes e scriverai ResourceClaimTemplates per gestire il provisioning dinamico di queste risorse.
Infine, eseguirai il deployment di un carico di lavoro di benchmarking ad alte prestazioni utilizzando Neper per convalidare i percorsi dei dati di rete Jumbo Frame tra i nodi di lavoro, seguito da un test Python JAX per convalidare il silicio TPU sottostante. A questo punto, eseguirai il deployment di vLLM per pubblicare il modello Gemma 4 all'avanguardia di Google tramite Hugging Face utilizzando hardware e rivendicazioni DRA di rete completamente isolati.
Le configurazioni utilizzeranno una combinazione di Terraform, gcloud e kubectl.
In questo lab imparerai a:
- Configura una rete VPC
- Esegui il deployment di 3 nodi su GCE (1 nodo standard e 2 nodi TPU v6)
- Bootstrap Kubernetes
- Configura OSS DRANET e DRA per TPU
- Rendimento del benchmark
- Crea DeviceClasses e ResourceClaimTemplates
- Eseguire il benchmark delle prestazioni di rete e hardware
- Esegui il deployment di Gemma 4: distribuisci il modello sull'hardware TPU v6e utilizzando vLLM e le rivendicazioni DRA attive
- Testa la connettività al LLM
In questo lab creerai il seguente pattern.
Figura 1.
2. Configurazione dei servizi Google Cloud
Configurazione dell'ambiente autonomo
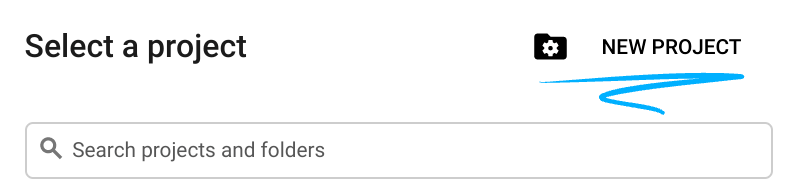
- Accedi alla console Google Cloud e crea un nuovo progetto o riutilizzane uno esistente. Se non hai ancora un account Gmail o Google Workspace, devi crearne uno.

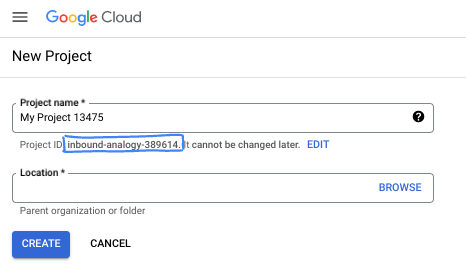
- Il nome del progetto è il nome visualizzato per i partecipanti a questo progetto. È una stringa di caratteri non utilizzata dalle API di Google. Puoi sempre aggiornarlo.
- L'ID progetto è univoco in tutti i progetti Google Cloud ed è immutabile (non può essere modificato dopo l'impostazione). La console Cloud genera automaticamente una stringa univoca, di solito non ti interessa di cosa si tratta. Nella maggior parte dei codelab, dovrai fare riferimento all'ID progetto (in genere identificato come
PROJECT_ID). Se non ti piace l'ID generato, puoi generarne un altro casuale. In alternativa, puoi provare a crearne uno e vedere se è disponibile. Non può essere modificato dopo questo passaggio e rimane per tutta la durata del progetto. - Per tua informazione, esiste un terzo valore, un numero di progetto, utilizzato da alcune API. Scopri di più su tutti e tre questi valori nella documentazione.
- Successivamente, dovrai abilitare la fatturazione in Cloud Console per utilizzare le risorse/API Cloud. Completare questo codelab non costa molto, se non nulla. Per arrestare le risorse ed evitare addebiti oltre a quelli previsti in questo tutorial, puoi eliminare le risorse che hai creato o il progetto. I nuovi utenti di Google Cloud possono beneficiare del programma prova senza costi di 300$.
Avvia Cloud Shell
Sebbene Google Cloud possa essere gestito da remoto dal tuo laptop, in questo codelab utilizzerai Google Cloud Shell, un ambiente a riga di comando in esecuzione nel cloud.
Nella console Google Cloud, fai clic sull'icona di Cloud Shell nella barra degli strumenti in alto a destra:
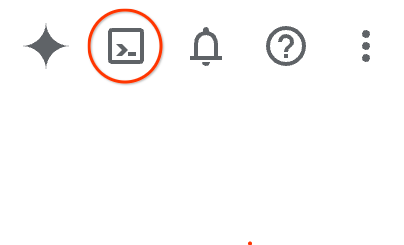
Bastano pochi istanti per eseguire il provisioning e connettersi all'ambiente. Al termine, dovresti vedere un risultato simile a questo:

Questa macchina virtuale è caricata con tutti gli strumenti per sviluppatori di cui avrai bisogno. Offre una home directory permanente da 5 GB e viene eseguita su Google Cloud, migliorando notevolmente le prestazioni e l'autenticazione della rete. Tutto il lavoro in questo codelab può essere svolto all'interno di un browser. Non devi installare nulla.
3. Configura l'ambiente con Terraform
Per svolgere questo lab, devi avere accesso alle TPU. La versione esatta utilizzata è TPU v6e.
- Per ottenere l'accesso, devi seguire il documento relativo al piano TPU e abilitare la quota TPU.
- Utilizza una regione in cui hai una quota TPU. Per ulteriori informazioni, consulta il documento "Convalida della disponibilità di TPU in GKE".
- Stiamo utilizzando un piccolo deployment che richiede (2) chip TPU v6e (
ct6e-standard-4t)che sarà una slice 2x2 in una singola regione. - Token Hugging Face: è necessario un token di accesso per scaricare i pesi del modello Gemma
Creeremo tre VPC personalizzati con regole firewall e subnet. Apri la console Cloud e seleziona il progetto che utilizzerai.
- Apri Cloud Shell in alto a destra nella console, assicurati di visualizzare l'ID progetto corretto in Cloud Shell e conferma le richieste di autorizzazione dell'accesso.

- Crea una cartella denominata
oss-kube-dra,, spostati nella cartella e aggiungi alcune variabili. P.S. Aggiorna i valori delle variabili "REGION" e "ZONE" con la regione e la zona effettive. La regione predefinita utilizzata è "europe-west4" e la zona predefinita utilizzata è "europe-west4-a".
mkdir -p oss-kube-dra && cd oss-kube-dra
export PROJECT_ID=$(gcloud config get-value project)
export REGION="europe-west4"
export ZONE="europe-west4-a"
echo $PROJECT_ID
echo $REGION
echo $ZONE
- Ora aggiungi alcuni file di configurazione. Verranno creati i seguenti file terraform.tfvars, variables.tf e vpc.tf.
cat << EOF > terraform.tfvars
project_id = "${PROJECT_ID}"
region     = "${REGION}"
zone       = "${ZONE}"
EOF

cat << 'EOF' > variables.tf
variable "project_id" {
  type        = string
  description = "The Google Cloud Project ID"
}

variable "region" {
  type        = string
  description = "The region to deploy the resources"
}

variable "zone" {
  type        = string
  description = "The specific zone for the VMs"
}

variable "control_plane_machine_type" {
  type        = string
  default     = "e2-standard-8"
  description = "Machine type for the Kubernetes control plane node"
}

variable "tpu_worker_machine_type" {
  type        = string
  default     = "ct6e-standard-4t"
  description = "The machine type for TPU workers (TPU v6e Trillium VM)"
}
EOF


cat << 'EOF' > vpc.tf
terraform {
  required_version = ">= 1.5.0"
  required_providers {
    google = {
      source  = "hashicorp/google"
      version = "~> 7.32.0"
    }
  }
}

provider "google" {
  project = var.project_id
  region  = var.region
}

# 1. Primary Management VPC and Subnet
resource "google_compute_network" "primary_vpc" {
  name                    = "oss-k8s-primary-vpc"
  auto_create_subnetworks = false
  mtu                     = 1460
}

resource "google_compute_subnetwork" "primary_subnet" {
  name          = "oss-k8s-primary-subnet"
  ip_cidr_range = "10.0.0.0/24"
  region        = var.region
  network       = google_compute_network.primary_vpc.id
}

# 2. Cloud NAT Router and NAT Gateway for Primary VPC (Outbound Access)
resource "google_compute_router" "router" {
  name    = "oss-k8s-router"
  network = google_compute_network.primary_vpc.id
  region  = var.region
}

resource "google_compute_router_nat" "nat" {
  name                               = "oss-k8s-nat"
  router                             = google_compute_router.router.name
  region                             = var.region
  nat_ip_allocate_option             = "AUTO_ONLY"
  source_subnetwork_ip_ranges_to_nat = "ALL_SUBNETWORKS_ALL_IP_RANGES"
}

# 3. Firewalls for Primary VPC
resource "google_compute_firewall" "allow_internal" {
  name    = "oss-k8s-primary-allow-internal"
  network = google_compute_network.primary_vpc.id

  allow {
    protocol = "tcp"
  }
  allow {
    protocol = "udp"
  }
  allow {
    protocol = "icmp"
  }

  source_ranges = ["10.0.0.0/24"]
}

resource "google_compute_firewall" "allow_iap" {
  name    = "oss-k8s-allow-iap-ssh"
  network = google_compute_network.primary_vpc.id

  allow {
    protocol = "tcp"
    ports    = ["22"]
  }

  source_ranges = ["35.235.240.0/20"]
}

# 4. Multi-NIC TPU Networks and Subnets (With Jumbo Frames MTU 8896)
resource "google_compute_network" "tpu_vpc" {
  count                   = 2
  name                    = "oss-tpu-vpc-${count.index + 1}"
  auto_create_subnetworks = false
  mtu                     = 8896
}

resource "google_compute_subnetwork" "tpu_subnet" {
  count         = 2
  name          = "oss-tpu-vpc-${count.index + 1}-subnet"
  ip_cidr_range = "10.${count.index + 1}0.0.0/24"
  region        = var.region
  network       = google_compute_network.tpu_vpc[count.index].id
}

resource "google_compute_firewall" "tpu_allow_internal" {
  count   = 2
  name    = "oss-tpu${count.index + 1}-allow-internal"
  network = google_compute_network.tpu_vpc[count.index].id

  allow {
    protocol = "tcp"
  }
  allow {
    protocol = "udp"
  }
  allow {
    protocol = "icmp"
  }

  source_ranges = ["10.${count.index + 1}0.0.0/24"]
}
EOF
- Assicurati di trovarti nella directory
oss-kube-draed esegui i seguenti comanditerraform initInizializza la directory di lavoro. Questo è il primo passaggio e scarica i provider richiesti per la configurazione specificata.terraform plan -outgenera un piano di esecuzione, che mostra le azioni che Terraform eseguirà per eseguire il deployment dell'infrastruttura.-outti consente di salvare il piano di esecuzione in un file binario denominato. Puoi vedere cosa succederà senza apportare modifiche.terraform applyesegue gli aggiornamenti.
terraform init
terraform plan -out=tfplan
- Ora esegui il deployment dopo aver eseguito
terraform apply, poiché stai applicando il piano di esecuzione salvato, verrà eseguito immediatamente senza richiedere la conferma. (potrebbe richiedere 5-10 minuti)
terraform apply tfplan
- Verifica la configurazione.
echo -e "\n=== Verifying VPC Networks ==="
gcloud compute networks list --filter="name~oss-.*" --project=$PROJECT_ID

echo -e "\n=== Verifying Subnetworks ==="
gcloud compute networks subnets list --filter="name~oss-.*" --project=$PROJECT_ID

echo -e "\n=== Verifying Firewall Rules ==="
gcloud compute firewall-rules list --filter="name~oss-.*" --project=$PROJECT_ID

echo -e "\n=== Verifying Cloud NAT ==="
gcloud compute routers nats list --router=oss-k8s-router --router-region=$REGION --project=$PROJECT_ID
Crea i nodi VM
Ora definirai le istanze Compute Engine.
- Assicurati di trovarti nella directory
oss-kube-draed esegui questo comando in Cloud Shell per scrivere il filenodes.tf.
cat << 'EOF' > nodes.tf
# 1. K8s Control Plane VM (No TPU)
resource "google_compute_instance" "control_plane" {
  name         = "k8s-control-plane"
  machine_type = var.control_plane_machine_type
  zone         = var.zone

  boot_disk {
    initialize_params {
      image = "projects/ubuntu-os-cloud/global/images/family/ubuntu-2204-lts"
      size  = 100
    }
  }

  network_interface {
    network    = google_compute_network.primary_vpc.id
    subnetwork = google_compute_subnetwork.primary_subnet.id
    # No public IP block keeps this node private
  }

  service_account {
    scopes = ["cloud-platform"]
  }
}

# 2. TPU Worker VMs (Multi-NIC ct6e-standard-4t instances)
resource "google_compute_instance" "tpu_workers" {
  count        = 2
  name         = "k8s-tpu-worker-${count.index + 1}"
  machine_type = var.tpu_worker_machine_type
  zone         = var.zone

  boot_disk {
    initialize_params {
      image = "projects/ubuntu-os-accelerator-images/global/images/family/ubuntu-accel-2204-amd64-tpu-v5e-v5p-v6e"
      size  = 200
    }
  }

  scheduling {
    on_host_maintenance = "TERMINATE"
    provisioning_model  = "STANDARD"
  }

  # NIC 1: Management VPC Subnet
  network_interface {
    network    = google_compute_network.primary_vpc.id
    subnetwork = google_compute_subnetwork.primary_subnet.id
  }

  # NIC 2: TPU VPC 1 Subnet
  network_interface {
    network    = google_compute_network.tpu_vpc[0].id
    subnetwork = google_compute_subnetwork.tpu_subnet[0].id
  }

  # NIC 3: TPU VPC 2 Subnet
  network_interface {
    network    = google_compute_network.tpu_vpc[1].id
    subnetwork = google_compute_subnetwork.tpu_subnet[1].id
  }

  service_account {
    scopes = ["cloud-platform"]
  }


  lifecycle {
    ignore_changes = [
      boot_disk[0].initialize_params[0].image,
      guest_accelerator,
      metadata
    ]
  }
}
EOF
- Con la nuova configurazione scritta, genera un nuovo piano e applicalo per eseguire il provisioning delle istanze.
terraform plan -out=tfplan

terraform apply tfplan
- Verifica.
echo -e "\n=== Verifying Provisioned VM Instances ==="
gcloud compute instances list --filter="name~k8s-.*" --project=$PROJECT_ID


echo -e "\n=== Verifying Network Interfaces on Workers ==="
for i in 1 2; do
  echo -e "\n--- Interfaces for k8s-tpu-worker-${i} ---"
  gcloud compute instances describe k8s-tpu-worker-${i} \
      --zone=$ZONE \
      --project=$PROJECT_ID \
      --format="table(networkInterfaces[].network.basename(), networkInterfaces[].networkIP)"
done
4. Esegui il bootstrap del nodo di controllo del cluster Kubernetes
In questa sezione, ti connetterai in modo sicuro all'istanza VM del control plane appena creata, configurerai il sistema operativo sottostante, installerai il runtime del container e i pacchetti Kubernetes, inizializzerai il cluster e implementerai Calico CNI con un isolamento rigoroso del traffico nella rete di gestione.
- Connettiti in modo sicuro all'istanza
k8s-control-planeutilizzando il tunnel Identity-Aware Proxy (IAP) di GCE. Esegui questo comando nel terminale Cloud Shell:
gcloud compute ssh k8s-control-plane \
    --zone=$ZONE \
    --tunnel-through-iap
- Sulla VM
k8s-control-planecrea uno script denominatoinit-control-plane.shper automatizzare i passaggi di installazione e configurazione.
cat << 'CONTROL_PLANE_EOF' > init-control-plane.sh
#!/bin/bash
# Strict error handling: fail instantly if any command exits with a non-zero status
set -e

echo "=== 1. Neutralizing Background Updates & Preparing Base OS ==="
# Prevent unattended upgrades from locking apt or breaking network configuration mid-setup
sudo systemctl stop apt-daily.timer apt-daily-upgrade.timer || true
sudo systemctl disable apt-daily.timer apt-daily-upgrade.timer || true
sudo systemctl mask apt-daily.service apt-daily-upgrade.service || true

# Turn off swap (mandatory for Kubernetes)
sudo swapoff -a
sudo sed -i '/ swap / s/^\(.*\)$/#\1/g' /etc/fstab

# Load required kernel modules
cat << 'EOT' | sudo tee /etc/modules-load.d/k8s.conf
overlay
br_netfilter
EOT

sudo modprobe overlay
sudo modprobe br_netfilter

# Configure sysctl requirements for Kubernetes bridging
cat << 'EOT' | sudo tee /etc/sysctl.d/k8s.conf
net.bridge.bridge-nf-call-iptables  = 1
net.bridge.bridge-nf-call-ip6tables = 1
net.ipv4.ip_forward                 = 1
EOT
sudo sysctl --system

echo "=== 2. Installing Container Runtime (Containerd) ==="
sudo apt-get update
sudo apt-get install -y ca-certificates curl gnupg bash-completion

sudo install -m 0755 -d /etc/apt/keyrings
curl -fsSL https://download.docker.com/linux/ubuntu/gpg | sudo gpg --dearmor --yes -o /etc/apt/keyrings/docker.gpg
sudo chmod a+r /etc/apt/keyrings/docker.gpg
echo "deb [arch=$(dpkg --print-architecture) signed-by=/etc/apt/keyrings/docker.gpg] https://download.docker.com/linux/ubuntu $(. /etc/os-release && echo $VERSION_CODENAME) stable" | sudo tee /etc/apt/sources.list.d/docker.list > /dev/null

sudo apt-get update
sudo apt-get install -y docker-ce docker-ce-cli containerd.io

echo "=== 3. Configuring Containerd with Systemd Cgroups ==="
sudo mkdir -p /etc/containerd
containerd config default | sudo tee /etc/containerd/config.toml >/dev/null
sudo sed -i 's/SystemdCgroup = false/SystemdCgroup = true/' /etc/containerd/config.toml

sudo systemctl daemon-reload
sudo systemctl restart containerd
sudo systemctl enable containerd

# Validation Step: Verify runtime engine health
if ! systemctl is-active --quiet containerd; then
    echo "❌ ERROR: Containerd failed to start properly."
    exit 1
fi
echo "✅ Containerd runtime is active and healthy."

echo "=== 4. Installing Kubernetes 1.36 Binaries ==="
curl -fsSL https://pkgs.k8s.io/core:/stable:/v1.36/deb/Release.key | sudo gpg --dearmor --yes -o /etc/apt/keyrings/kubernetes-apt-keyring.gpg
echo 'deb [signed-by=/etc/apt/keyrings/kubernetes-apt-keyring.gpg] https://pkgs.k8s.io/core:/stable:/v1.36/deb/ /' | sudo tee /etc/apt/sources.list.d/kubernetes.list

sudo apt-get update
sudo apt-get install -y kubelet kubeadm kubectl
sudo apt-mark hold kubelet kubeadm kubectl

# Configure Autocomplete and Aliases system-wide
kubectl completion bash | sudo tee /etc/bash_completion.d/kubectl > /dev/null
kubeadm completion bash | sudo tee /etc/bash_completion.d/kubeadm > /dev/null
if ! grep -q 'alias k=kubectl' ~/.bashrc; then
  echo 'alias k=kubectl' >> ~/.bashrc
  echo 'complete -o default -F __start_kubectl k' >> ~/.bashrc
fi

echo "=== 5. Initializing Control Plane Engine ==="
sudo kubeadm init --pod-network-cidr=192.168.0.0/16

echo "=== 6. Configuring Administrative Cluster Credentials ==="
mkdir -p $HOME/.kube
sudo cp -i /etc/kubernetes/admin.conf $HOME/.kube/config
sudo chown $(id -u):$(id -g) $HOME/.kube/config

# Validation Step: Verify API Server local responsiveness
echo "Waiting for local API server context..."
until kubectl cluster-info &>/dev/null; do
    sleep 2
done
echo "✅ Kubernetes API server is responding locally."

echo "=== 7. Deploying Calico Network Operator ==="
kubectl create -f https://raw.githubusercontent.com/projectcalico/calico/v3.27.3/manifests/tigera-operator.yaml

# Validation Step: Ensure Tigera Operator CRD is fully available before applying configuration
echo "Waiting for Tigera Installation CRD to register on the API server..."
kubectl wait --for=condition=established crd/installations.operator.tigera.io --timeout=60s

echo "=== 8. Deploying Calico Custom Resources (Subnet Interlock Locked to 10.0.0.0/24) ==="
cat << 'CALICO_EOF' > custom-calico.yaml
apiVersion: operator.tigera.io/v1
kind: Installation
metadata:
  name: default
spec:
  calicoNetwork:
    nodeAddressAutodetectionV4:
      cidrs:
        - "10.0.0.0/24"
    ipPools:
    - blockSize: 26
      cidr: 192.168.0.0/16
      encapsulation: VXLANCrossSubnet
      natOutgoing: Enabled
      nodeSelector: all()
CALICO_EOF
kubectl apply -f custom-calico.yaml

# Validation Step: Confirm Calico daemon configurations are processing
echo "Waiting 10 seconds for Calico system namespaces to initialize..."
sleep 10
echo "Current Calico workload deployment status:"
kubectl get pods -n calico-system

echo "=== 9. Exporting Worker Cluster Join Token ==="
sudo kubeadm token create --print-join-command > ~/join.sh
chmod +x ~/join.sh

echo "--------------------------------------------------------"
echo "✅ CONTROL PLANE BOOTSTRAP COMPLETE!"
echo "Your cluster join command for the TPU workers is saved below:"
echo "--------------------------------------------------------"
cat ~/join.sh
CONTROL_PLANE_EOF
- Esegui lo script.
chmod +x init-control-plane.sh
./init-control-plane.sh
- Al termine, verifica. L'attivazione potrebbe richiedere alcuni minuti.
kubectl get nodes
kubectl get pods -A
Dovresti vedere qualcosa di simile a questo
NAME                STATUS   ROLES           AGE     VERSION
k8s-control-plane   Ready    control-plane   6m50s   v1.36.2
NAMESPACE         NAME                                        READY   STATUS    RESTARTS   AGE
calico-system     calico-kube-controllers-5578ff64dd-87vp2    1/1     Running   0          6m33s
calico-system     calico-node-fxzpp                           1/1     Running   0          6m33s
calico-system     calico-typha-785cbc858-rv4nz                1/1     Running   0          6m33s
calico-system     csi-node-driver-wlrhx                       2/2     Running   0          6m33s
kube-system       coredns-589f44dc88-pqfrl                    1/1     Running   0          6m42s
kube-system       coredns-589f44dc88-sdwmj                    1/1     Running   0          6m42s
kube-system       etcd-k8s-control-plane                      1/1     Running   0          6m47s
kube-system       kube-apiserver-k8s-control-plane            1/1     Running   0          6m47s
kube-system       kube-controller-manager-k8s-control-plane   1/1     Running   0          6m47s
kube-system       kube-proxy-jnm2p                            1/1     Running   0          6m42s
kube-system       kube-scheduler-k8s-control-plane            1/1     Running   0          6m47s
tigera-operator   tigera-operator-6bc8d879b5-w5mrq            1/1     Running   0          6m42s
- Esci dalla connessione
sshper tornare a Cloud Shell.
exit
5. Aggiungi i nodi worker TPU
Esegui uno script da Cloud Shell che si connette in sicurezza alla VM del piano di controllo, recupera il token di unione del cluster e configura e registra contemporaneamente i nodi worker TPU nel cluster.
- Esegui questo comando in Cloud Shell per scrivere lo script di orchestrazione:
cat << 'WORKER_BOOTSTRAP_EOF' > bootstrap-workers.sh
#!/bin/bash
# Strict error handling: fail instantly if any command exits with a non-zero status
set -e

# Fetch the join command safely from the control plane
echo "Fetching join command from Control Plane..."
JOIN_CMD=$(gcloud compute ssh k8s-control-plane --zone=$ZONE --tunnel-through-iap --command="cat ~/join.sh" 2>/dev/null)

if [ -z "$JOIN_CMD" ]; then
    echo "❌ ERROR: Failed to retrieve the join command. Ensure the control plane is reachable."
    exit 1
fi

echo "✅ Successfully retrieved join command."

# Create the setup script locally to be copied to the workers
cat << 'WORKER_INIT_EOF' > init-worker.sh
#!/bin/bash
set -e

echo "=== 1. Neutralizing Background Updates & Setting Non-Interactive Mode ==="
export DEBIAN_FRONTEND=noninteractive
sudo sed -i "s/#\$nrconf{restart} = 'i';/\$nrconf{restart} = 'a';/g" /etc/needrestart/needrestart.conf 2>/dev/null || true

# Prevent unattended upgrades from tearing down network interfaces mid-setup
sudo systemctl stop apt-daily.timer apt-daily-upgrade.timer || true
sudo systemctl disable apt-daily.timer apt-daily-upgrade.timer || true
sudo systemctl mask apt-daily.service apt-daily-upgrade.service || true

echo "=== 2. Base OS Prep ==="
# Disable swap
sudo swapoff -a
sudo sed -i '/ swap / s/^\(.*\)$/#\1/g' /etc/fstab

# Load required kernel modules
cat << 'EOT' | sudo tee /etc/modules-load.d/k8s.conf
overlay
br_netfilter
EOT
sudo modprobe overlay
sudo modprobe br_netfilter

# Configure bridging and IP forwarding sysctls
cat << 'EOT' | sudo tee /etc/sysctl.d/k8s.conf
net.bridge.bridge-nf-call-iptables  = 1
net.bridge.bridge-nf-call-ip6tables = 1
net.ipv4.ip_forward                 = 1
EOT
sudo sysctl --system

echo "=== 3. Installing Containerd (CRI-Only) ==="
sudo apt-get update && sudo apt-get install -yq ca-certificates curl gnupg bash-completion
sudo install -m 0755 -d /etc/apt/keyrings
curl -fsSL https://download.docker.com/linux/ubuntu/gpg | sudo gpg --dearmor --yes -o /etc/apt/keyrings/docker.gpg
sudo chmod a+r /etc/apt/keyrings/docker.gpg
echo "deb [arch=$(dpkg --print-architecture) signed-by=/etc/apt/keyrings/docker.gpg] https://download.docker.com/linux/ubuntu $(. /etc/os-release && echo $VERSION_CODENAME) stable" | sudo tee /etc/apt/sources.list.d/docker.list > /dev/null

# Install only containerd to avoid unnecessary Docker CE overhead
sudo apt-get update && sudo apt-get install -yq containerd.io
sudo mkdir -p /etc/containerd
containerd config default | sudo tee /etc/containerd/config.toml >/dev/null
sudo sed -i 's/SystemdCgroup = false/SystemdCgroup = true/' /etc/containerd/config.toml
sudo systemctl daemon-reload
sudo systemctl restart containerd
sudo systemctl enable containerd

# Validation: Check containerd status
if ! systemctl is-active --quiet containerd; then
    echo "❌ ERROR: Containerd failed to start."
    exit 1
fi

echo "=== 4. Installing Kubernetes 1.36 Binaries ==="
curl -fsSL https://pkgs.k8s.io/core:/stable:/v1.36/deb/Release.key | sudo gpg --dearmor --yes -o /etc/apt/keyrings/kubernetes-apt-keyring.gpg
echo 'deb [signed-by=/etc/apt/keyrings/kubernetes-apt-keyring.gpg] https://pkgs.k8s.io/core:/stable:/v1.36/deb/ /' | sudo tee /etc/apt/sources.list.d/kubernetes.list
sudo apt-get update && sudo apt-get install -yq kubelet kubeadm kubectl
sudo apt-mark hold kubelet kubeadm kubectl
WORKER_INIT_EOF

# Append the actual join command to the script
echo "echo \"=== 5. Joining Cluster ===\"" >> init-worker.sh
echo "sudo $JOIN_CMD" >> init-worker.sh

# Push and run on both Workers concurrently
echo "Starting concurrent bootstrap on both workers..."

(
    echo "[Worker 1] Copying script..."
    gcloud compute scp init-worker.sh k8s-tpu-worker-1:~ --zone=$ZONE --tunnel-through-iap --quiet
    echo "[Worker 1] Executing script..."
    gcloud compute ssh k8s-tpu-worker-1 --zone=$ZONE --tunnel-through-iap --command="bash ~/init-worker.sh"
    echo "✅ [Worker 1] Bootstrap and Join complete!"
) &

(
    echo "[Worker 2] Copying script..."
    gcloud compute scp init-worker.sh k8s-tpu-worker-2:~ --zone=$ZONE --tunnel-through-iap --quiet
    echo "[Worker 2] Executing script..."
    gcloud compute ssh k8s-tpu-worker-2 --zone=$ZONE --tunnel-through-iap --command="bash ~/init-worker.sh"
    echo "✅ [Worker 2] Bootstrap and Join complete!"
) &

# Wait for both background processes to finish
wait

echo "--------------------------------------------------------"
echo "✅ BOTH WORKERS HAVE FINISHED PROCESSING"
echo "--------------------------------------------------------"

# Final Validation Check from Control Plane
echo "Verifying cluster node status..."
sleep 5 # Give kubelet a moment to register the nodes
gcloud compute ssh k8s-control-plane --zone=$ZONE --tunnel-through-iap --command="kubectl get nodes -o wide"
WORKER_BOOTSTRAP_EOF
- Esegui la configurazione del worker. Questo processo esegue entrambe le installazioni contemporaneamente in background e richiede circa 3-5 minuti.
chmod +x bootstrap-workers.sh
./bootstrap-workers.sh
Dovresti vedere qualcosa di simile quando tutti i nodi vengono aggiunti al cluster
To increase the performance of the tunnel, consider installing NumPy. For instructions,
please see https://cloud.google.com/iap/docs/using-tcp-forwarding#increasing_the_tcp_upload_bandwidth

NAME                STATUS     ROLES           AGE   VERSION   INTERNAL-IP   EXTERNAL-IP   OS-IMAGE             KERNEL-VERSION           CONTAINER-RUNTIME
k8s-control-plane   Ready      control-plane   25m   v1.36.2   10.0.0.2      <none>        Ubuntu 22.04.5 LTS   6.8.0-1064-gcp (amd64)   containerd://2.2.6
k8s-tpu-worker-1    NotReady   <none>          10s   v1.36.2   10.0.0.3      <none>        Ubuntu 22.04.5 LTS   6.8.0-1064-gcp (amd64)   containerd://2.2.6
k8s-tpu-worker-2    Ready      <none>          27s   v1.36.2   10.0.0.4      <none>        Ubuntu 22.04.5 LTS   6.8.0-1064-gcp (amd64)   containerd://2.2.6
6. Deployment del driver TPU OSS DRA
In questa sezione, tornerai al control plane, etichetterai i worker TPU con i dettagli specifici della topologia dell'acceleratore e installerai il driver DRA Google TPU open source utilizzando Helm. Questo driver è responsabile del rilevamento dei chip TPU v6e fisici e del loro mapping nativo all'API Kubernetes.
- Riconnettiti in modo sicuro alla VM
k8s-control-planeda Cloud Shell.
gcloud compute ssh k8s-control-plane \
    --zone=$ZONE \
    --tunnel-through-iap
- Esegui questi comandi all'interno della sessione SSH
k8s-control-plane. Etichettare i nodi con il set completo di etichette (incluse le chiavi di conteggio esatto dei chip)
kubectl label node k8s-tpu-worker-1 \
  cloud.google.com/gke-tpu-accelerator=tpu-v6e-slice \
  cloud.google.com/gke-tpu-topology=2x2 \
  cloud.google.com/gke-tpu-dra-driver=true \
  cloud.google.com/gke-accelerator-count=4 \
  cloud.google.com/gke-tpu-count=4 \
  --overwrite

kubectl label node k8s-tpu-worker-2 \
  cloud.google.com/gke-tpu-accelerator=tpu-v6e-slice \
  cloud.google.com/gke-tpu-topology=2x2 \
  cloud.google.com/gke-tpu-dra-driver=true \
  cloud.google.com/gke-accelerator-count=4 \
  cloud.google.com/gke-tpu-count=4 \
  --overwrite
- Clona e installa il driver TPU DRA con Helm
curl -fsSL https://raw.githubusercontent.com/helm/helm/main/scripts/get-helm-3 | bash

git clone https://github.com/kubernetes-sigs/dra-driver-google-tpu.git ~/dra-driver-google-tpu || true
cd ~/dra-driver-google-tpu
rm -f *.pack *.tgz

helm install dra-driver-google-tpu ./deployments/helm/dra-driver-google-tpu \
  -n dra-driver-google-tpu \
  --create-namespace \
  --set 'kubeletPlugin.env[0].name=NODE_NAME' \
  --set 'kubeletPlugin.env[0].valueFrom.fieldRef.fieldPath=spec.nodeName'

cd ~
- Convalida la configurazione del driver TPU DRA
# Verify driver daemonset status (Pods should show as Running and Ready)
kubectl get pods -n dra-driver-google-tpu -o wide

# Verify TPU ResourceSlices are successfully published to the API server
kubectl get resourceslices

# Safely parse the ResourceSlices to show the Node Name and the number of TPU chips registered
kubectl get resourceslices -o json | jq -r '.items[] | select(.spec.driver=="tpu.google.com") | "Node: \(.spec.nodeName) | TPUs Registered: \(.spec.devices | length)"'

# Inspect driver logs to confirm the TPU hardware was initialized successfully
kubectl logs -n dra-driver-google-tpu -l app.kubernetes.io/name=dra-driver-google-tpu -c tpu-dra-plugin --tail=20
7. Deployment di DRANET e classi di dispositivi open source
In questa sezione, tornerai al control plane, installerai il driver DRANET open source, applicherai una patch di filtro personalizzata per escludere le interfacce virtuali e stabilirai Kubernetes DeviceClass e ResourceClaimTemplate con i prefissi di rete open source corrispondenti.
- Riconnettiti in modo sicuro alla VM
k8s-control-planeda Cloud Shell. Se è già connesso, salta questo passaggio.
gcloud compute ssh k8s-control-plane \
    --zone=$ZONE \
    --tunnel-through-iap
- Esegui questi comandi all'interno della sessione
k8s-control-planeSSH
# Install the core components and patch
kubectl apply -f https://raw.githubusercontent.com/kubernetes-sigs/dranet/refs/heads/main/install.yaml


kubectl patch daemonset dranet -n kube-system --type='json' -p='[ { "op": "add", "path": "/spec/template/spec/containers/0/args/-", "value": "-filter=!(\"dra.net/type\" in attributes) || (attributes[\"dra.net/type\"].StringValue != \"veth\" && attributes[\"dra.net/type\"].StringValue != \"vxlan\" && attributes[\"dra.net/type\"].StringValue != \"bridge\")" } ]'

# Monitor rollout readiness
kubectl rollout status daemonset/dranet -n kube-system

# Verify running components and permissions
kubectl get pods -n kube-system -l app=dranet -o wide
kubectl get clusterrole,clusterrolebinding,sa dranet -n kube-system

# Interrogate logs for driver binding confirmation
kubectl logs -n kube-system -l app=dranet --tail=20
- Applica DeviceClass e ResourceClaimTemplate
# Apply DRANET DeviceClass and BOTH ResourceClaimTemplates (Network + Hardware)
cat << 'EOF' | kubectl apply -f -
apiVersion: resource.k8s.io/v1
kind: DeviceClass
metadata:
  name: dranet
spec:
  selectors:
    - cel:
        expression: device.driver == "dra.net"
---
apiVersion: resource.k8s.io/v1
kind: ResourceClaimTemplate
metadata:
  name: tpu-net-interfaces
  namespace: default
spec:
  spec:
    devices:
      requests:
      - name: tpu-net-interface
        exactly:
          deviceClassName: dranet
          count: 2
          selectors:
          - cel:
              expression: device.attributes["gce.dra.net"].networkName.startsWith("oss-tpu-vpc")
      config:
      - opaque:
          driver: dra.net
          parameters:
            interface:
              mtu: 8896
              gsoMaxSize: 65536
              groMaxSize: 65536
              gsoIPv4MaxSize: 65536
              groIPv4MaxSize: 65536
              disableEbpfPrograms: true
---
apiVersion: resource.k8s.io/v1
kind: ResourceClaimTemplate
metadata:
  name: tpu-device-template
  namespace: default
spec:
  spec:
    devices:
      requests:
      - name: tpu-devices
        exactly:
          deviceClassName: tpu.google.com
          allocationMode: ExactCount
          count: 4
EOF
- Verifica che i modelli e le classi siano registrati correttamente nell'API Kubernetes.
# Verify ResourceSlices exist and are actively serving both drivers
kubectl get resourceslices -o custom-columns=NAME:.metadata.name,NODE:.spec.nodeName,DRIVER:.spec.driver | grep -E "dra.net|tpu.google.com"

# Verify the DRANET daemonset pods are Running across all nodes
kubectl get pods -n kube-system -l app=dranet -o wide
- Esegui il deployment di StatefulSet parallelo di Neper.
cat << 'EOF' | kubectl apply -f -
---
apiVersion: v1
kind: Service
metadata:
  name: neper
spec:
  clusterIP: None
  selector:
    app: neper
---
apiVersion: apps/v1
kind: StatefulSet
metadata:
  name: neper
spec:
  selector:
    matchLabels:
      app: neper
  serviceName: neper
  replicas: 2
  template:
    metadata:
      labels:
        app: neper
    spec:
      initContainers:
      - name: "network-optimization-sysctls"
        image: "busybox"
        securityContext:
          privileged: true
        command:
        - sh
        - -c
        - |
          echo 5000 > /proc/sys/net/ipv4/tcp_rto_min_us
          echo 1 > /proc/sys/net/ipv4/tcp_no_metrics_save
          echo 0 > /proc/sys/net/ipv4/tcp_slow_start_after_idle
          echo 131072 > /proc/sys/net/core/optmem_max
          echo "4096 41943040 314572800" > /proc/sys/net/ipv4/tcp_rmem
      containers:
      - name: neper
        image: ubuntu:22.04
        command:
        - /bin/bash
        - -c
        - |
          apt-get update && apt-get install -y iproute2 build-essential git jq python3-pip &&
          git clone https://github.com/google/neper.git /tmp/neper &&
          cd /tmp/neper && make &&
          cp tcp_stream /usr/local/bin/ &&
          sleep infinity
        securityContext:
          privileged: true
        resources:
          requests:
            cpu: "170"
            memory: "650Gi"
          limits:
            cpu: "170"
            memory: "650Gi"
          claims:
          - name: tpu-net-claim
          - name: tpu-hardware-claim
      resourceClaims:
      - name: tpu-net-claim
        resourceClaimTemplateName: tpu-net-interfaces
      - name: tpu-hardware-claim
        resourceClaimTemplateName: tpu-device-template
EOF
- Controllo di convalida
echo -e "\n=== Verifying StatefulSet Pod Status ==="
kubectl get pods -l app=neper -o wide

echo -e "\n=== Verifying Dynamic Resource Claims (DRCs) ==="
kubectl get resourceclaims

echo -e "\n=== Inspecting Device Claim Allocation ==="
# Using a safer JSONPath query to extract the allocated drivers and devices
kubectl get resourceclaims -o json | jq -r '.items[] | "Claim: \(.metadata.name) | Driver: \(.status.allocation.devices.results[0].driver // "Pending")"'
8. Esegui test
Esegui la suite di benchmark a doppia interfaccia e convalida hardware.
Fase 1 (benchmark di rete): attende che entrambi i pod Neper (neper-0 e neper-1) compilino le dipendenze, estrae gli indirizzi IP multi-NIC non predefiniti associati tramite DRANET, avvia server tcp_stream simultanei su neper-1, genera un carico a velocità effettiva elevata da neper-0 e analizza la velocità effettiva aggregata in gigabit al secondo (Gbps).
Fase 2 (convalida hardware): installa Google JAX all'interno di neper-0 ed esegue la moltiplicazione di matrici (5000x5000) direttamente sui chip TPU mappati tramite VFIO per confermare lo stato operativo del silicio.
- Esegui questo comando in
k8s-control-planeper scrivererun_dual_neper_test.sh
cat << 'EOF' > run_dual_neper_test.sh
#!/bin/bash
set -e

SERVER_POD="neper-1"
CLIENT_POD="neper-0"

echo "================================================="
echo " PHASE 1: DUAL-INTERFACE HIGH-SPEED NETWORK TEST"
echo "================================================="
echo "=== Waiting for Pods to be Ready ==="
kubectl wait --for=condition=ready pod/$CLIENT_POD pod/$SERVER_POD --timeout=300s

echo "=== Waiting for neper compilation to finish inside Pods ==="
for POD in $SERVER_POD $CLIENT_POD; do
  until kubectl exec $POD -c neper -- sh -c 'command -v jq >/dev/null 2>&1 && command -v tcp_stream >/dev/null 2>&1'; do
    sleep 5
  done
done

echo ""
echo "=== Step 1: Extract Target IPs from $SERVER_POD ==="
# Using jq to parse the network interfaces directly from Linux JSON output
IFACE1=$(kubectl exec $SERVER_POD -c neper -- sh -c "ip -j -4 addr show | jq -r '.[] | select(.ifname != \"lo\" and .ifname != \"eth0\") | .ifname' | sed -n '1p'")
IFACE2=$(kubectl exec $SERVER_POD -c neper -- sh -c "ip -j -4 addr show | jq -r '.[] | select(.ifname != \"lo\" and .ifname != \"eth0\") | .ifname' | sed -n '2p'")

IP1=$(kubectl exec $SERVER_POD -c neper -- sh -c "ip -j -4 addr show | jq -r '.[] | select(.ifname != \"lo\" and .ifname != \"eth0\") | .addr_info[0].local' | sed -n '1p'")
IP2=$(kubectl exec $SERVER_POD -c neper -- sh -c "ip -j -4 addr show | jq -r '.[] | select(.ifname != \"lo\" and .ifname != \"eth0\") | .addr_info[0].local' | sed -n '2p'")

echo "   📍 Target IP 1 ($IFACE1): $IP1"
echo "   📍 Target IP 2 ($IFACE2): $IP2"

echo ""
echo "=== Step 2: Initialize TCP Servers on $SERVER_POD ==="
kubectl exec $SERVER_POD -c neper -- sh -c '
for i in 0 1; do
  nohup tcp_stream -C$((52279 + i)) --port=$((38339 + i)) --skip-rx-copy -rw -Z -B16384 \
    --test-length=60 --suicide-length=120 -F100 --num-threads=16 --num-flows=32 -D0 \
    --logtostderr > test${i}.log 2>&1 &
done
'
sleep 3

echo "=== Step 3: Generate Concurrent High-Throughput Load from $CLIENT_POD ==="
echo "Blasting Traffic via Interface 1 -> $IP1 ..."
kubectl exec $CLIENT_POD -c neper -- sh -c "nohup tcp_stream -C52279 --port=38339 --skip-rx-copy -rw -Z -B16384 \
  --test-length=60 --suicide-length=70 -F100 --num-threads=16 --num-flows=32 \
  --client -H $IP1 -D0 --logtostderr > test0.log 2>&1 &"

echo "Blasting Traffic via Interface 2 -> $IP2 ..."
kubectl exec $CLIENT_POD -c neper -- sh -c "nohup tcp_stream -C52280 --port=38340 --skip-rx-copy -rw -Z -B16384 \
  --test-length=60 --suicide-length=70 -F100 --num-threads=16 --num-flows=32 \
  --client -H $IP2 -D0 --logtostderr > test1.log 2>&1 &"

echo ""
echo "=== Testing in progress... Waiting 65 seconds for test completion ==="
sleep 65

echo ""
echo "=== Step 4: Evaluate Throughput Metrics ==="
RAW_BPS1=$(kubectl exec $CLIENT_POD -c neper -- grep -a "remote_throughput=" test0.log | cut -d= -f2 | tr -d '\r' || echo "0")
RAW_BPS2=$(kubectl exec $CLIENT_POD -c neper -- grep -a "remote_throughput=" test1.log | cut -d= -f2 | tr -d '\r' || echo "0")

GBPS1=$(awk -v bps="$RAW_BPS1" 'BEGIN { printf "%.2f", bps / 1000000000 }')
GBPS2=$(awk -v bps="$RAW_BPS2" 'BEGIN { printf "%.2f", bps / 1000000000 }')
TOTAL=$(awk -v b1="$RAW_BPS1" -v b2="$RAW_BPS2" 'BEGIN { printf "%.2f", (b1 + b2) / 1000000000 }')

echo "📊 --- NETWORK RESULTS ---"
echo "Interface 1 ($IFACE1) : ${GBPS1} Gbps"
echo "Interface 2 ($IFACE2) : ${GBPS2} Gbps"
echo "🔥 TOTAL AGGREGATE  : ${TOTAL} Gbps"
echo "--------------------------"


echo ""
echo "================================================="
echo " PHASE 2: TPU HARDWARE VALIDATION TEST"
echo "================================================="
echo "⏳ Installing Python and Google JAX on $CLIENT_POD (Takes ~1 minute)..."
kubectl exec $CLIENT_POD -c neper -- bash -c "apt-get update > /dev/null 2>&1 && apt-get install -y python3-pip > /dev/null 2>&1 && pip3 install jax[tpu] -f https://storage.googleapis.com/jax-releases/libtpu_releases.html > /dev/null 2>&1"

echo "🧠 Running matrix math directly on the TPU chips..."
kubectl exec $CLIENT_POD -c neper -- python3 -c "
import jax
import jax.numpy as jnp
print(f'✅ TPU Hardware Detected: {jax.device_count()} chips mapped via vfio')
print('🚀 Executing 5000x5000 Matrix Multiplication on TPU silicon...')
x = jnp.ones((5000, 5000))
y = jnp.dot(x, x)
print('✅ Success! The TPU driver is fully operational and executing math.')
"
EOF

chmod +x run_dual_neper_test.sh
- Esegui il test. Il completamento dell'operazione richiede 2 minuti.
./run_dual_neper_test.sh
Al termine, l'output del terminale mostrerà le metriche di rete ad alta velocità convalidate e l'esecuzione di operazioni matematiche con matrici TPU
=== Step 4: Evaluate Throughput Metrics ===
📊 --- NETWORK RESULTS ---
Interface 1 (ens9)  : 157.51 Gbps
Interface 2 (ens10) : 167.04 Gbps
🔥 TOTAL AGGREGATE  : 324.55 Gbps
--------------------------

=================================================
 PHASE 2: TPU HARDWARE VALIDATION TEST
=================================================
⏳ Installing Python and Google JAX on neper-0 (Takes ~1 minute)...
🧠 Running matrix math directly on the TPU chips...
✅ TPU Hardware Detected: 4 chips mapped via vfio
🚀 Executing 5000x5000 Matrix Multiplication on TPU silicon...
✅ Success! The TPU driver is fully operational and executing math.
9. Esegui il deployment di Gemma 4 sul tuo cluster
In questa sezione configurerai le tue credenziali API Hugging Face sicure come secret Kubernetes, eseguirai il deployment del motore di inferenza vLLM utilizzando sia le richieste di rete che hardware di allocazione dinamica delle risorse (DRA) ed eseguirai una query di test end-to-end sul modello Gemma 4 di Google.
Assicurati di aver eseguito l'accesso alla sessione SSH protetta su k8s-control-plane:
- Riconnettiti in modo sicuro alla VM del control plane da Cloud Shell. Se hai già eseguito la connessione, salta questo passaggio.
gcloud compute ssh k8s-control-plane \
    --zone=$ZONE \
    --tunnel-through-iap
- Liberare spazio dai deployment precedenti
# 1. Delete the StatefulSet to stop the benchmarking pods
kubectl delete statefulset neper

# 2. Wait for the pods to terminate fully and release the claims
kubectl wait --for=delete pod/neper-0 pod/neper-1 --timeout=60s
- Memorizza il token di accesso a Hugging Face. Sostituisci
<YOUR_ACTUAL_HUGGING_FACE_TOKEN>con il tuo token.
export HF_TOKEN="<YOUR_ACTUAL_HUGGING_FACE_TOKEN>"
- Crea un secret
kubectl create secret generic hf-token --from-literal=token="${HF_TOKEN}"
- Questo manifest pianifica una singola replica di vLLM in esecuzione su una VM TPU non elaborata a 4 chip. Utilizza lo standard DRA di Kubernetes per montare sia le rivendicazioni di rete personalizzate (tpu-net-claim) sia le rivendicazioni hardware (tpu-hardware-claim) per accedere in modo sicuro all'hardware TPU non elaborato senza richiedere montaggi di volumi host non sicuri. Infine, espone il server API compatibile con OpenAI sulla porta 8080. Esegui questo comando per creare il file:
cat << 'EOF' > gemma-inference.yaml
apiVersion: apps/v1
kind: Deployment
metadata:
  name: vllm-gemma-4
  labels:
    app: gemma-server
spec:
  replicas: 1
  selector:
    matchLabels:
      app: gemma-server
  template:
    metadata:
      labels:
        app: gemma-server
    spec:
      hostIPC: true
      containers:
      - name: vllm-tpu
        image: vllm/vllm-tpu:latest
        securityContext:
          privileged: true
        env:
        - name: HF_TOKEN
          valueFrom:
            secretKeyRef:
              name: hf-token
              key: token
        - name: JAX_PLATFORMS
          value: "tpu,cpu"
        - name: TPU_ACCELERATOR_TYPE
          value: "v6e-4"
        - name: TPU_WORKER_HOSTNAMES
          value: "127.0.0.1"
        - name: TPU_WORKER_ID
          value: "0"
        - name: LIBTPU_INIT_ARGS
          value: "--noenable_tpunetd_client"
        - name: BARE_METAL_MODE
          value: "true"
        - name: BYPASS_VBAR_CONTROL_SERVICE
          value: "1"
        - name: TPU_SKIP_MDS_QUERY
          value: "1"
        - name: TPU_DEFAULT_NETWORK_TYPE
          value: "loopback"
        - name: CHIPS_PER_HOST_BOUNDS
          value: "2,2,1"
        - name: HOST_BOUNDS
          value: "1,1,1"
        - name: ALT
          value: "false,false,false"
        - name: WRAP
          value: "false,false,false"
        command:
        - bash
        - -c
        - |
          export PYTHONUNBUFFERED=1
          sysctl -w net.ipv6.conf.all.disable_ipv6=0
          sysctl -w net.ipv6.conf.default.disable_ipv6=0
          sysctl -w net.ipv6.conf.lo.disable_ipv6=0
          ip link set lo up || true

          exec python3 -m vllm.entrypoints.openai.api_server \
            --model google/gemma-4-E4B-it \
            --tensor-parallel-size 4 \
            --trust-remote-code \
            --max-model-len 8192 \
            --max-num-batched-tokens 4096 \
            --host 0.0.0.0 \
            --port 8080
        ports:
        - containerPort: 8080
        resources:
          requests:
            cpu: "170"
            memory: "650Gi"
          limits:
            cpu: "170"
            memory: "650Gi"
          claims:
          - name: tpu-net-claim
          - name: tpu-hardware-claim
        volumeMounts:
        - name: dshm
          mountPath: /dev/shm
      volumes:
      - name: dshm
        emptyDir:
          medium: Memory
      resourceClaims:
      - name: tpu-net-claim
        resourceClaimTemplateName: tpu-net-interfaces
      - name: tpu-hardware-claim
        resourceClaimTemplateName: tpu-device-template
---
apiVersion: v1
kind: Service
metadata:
  name: vllm-gemma-service
spec:
  selector:
    app: gemma-server
  ports:
  - protocol: TCP
    port: 8080
    targetPort: 8080
  type: ClusterIP
EOF
- Esegui il deployment del workload di inferenza
kubectl apply -f gemma-inference.yaml
- Verifica lo stato del deployment. Questa configurazione deve scaricare il modello e il caricamento di
vLLM. Thispuò richiedere da10 - 25 minutes.
kubectl get pods -l app=gemma-server

kubectl describe pods -l app=gemma-server
Puoi anche guardare i log del container per vedere il processo. Premi CTRL+C per uscire dalla visualizzazione dei log.
kubectl logs -l app=gemma-server -f
Saprai che il motore è completamente inizializzato quando vedrai le righe
(APIServer pid=1) INFO: Started server process [1]
(APIServer pid=1) INFO: Waiting for application startup.
(APIServer pid=1) INFO: Application startup complete.
Premi CTRL+C per uscire dal flusso di log prima di procedere.
- Verifica l'allegato dell'interfaccia. Controlla le interfacce di rete associate all'interno del container
kubectl exec deployment/vllm-gemma-4 -c vllm-tpu -- ls /sys/class/net
kubectl exec deployment/vllm-gemma-4 -c vllm-tpu -- cat /proc/net/fib_trie | grep -B 1 "32 host"
Cosa cercare: dovresti vedere ens9 e ens10 (o nomi ensX simili) insieme all'interfaccia CNI standard (eth0) e al loopback (lo). Questi rappresentano le interfacce di rete PCI host GCE fisiche associate dinamicamente all'interno del pod dal driver DRANET open source utilizzando la convenzione di denominazione degli slot prevedibile di systemd.
kubectl exec deployment/vllm-gemma-4 -c vllm-tpu -- ls /sys/class/net
ens10
ens9
eth0
Lo

kubectl exec deployment/vllm-gemma-4 -c vllm-tpu -- cat /proc/net/fib_trie | grep -B 1 "32 host"

              |-- 10.10.0.3
                 /32 host LOCAL
--
              |-- 10.20.0.3
                 /32 host LOCAL
--
           |-- 127.0.0.1
              /32 host LOCAL
--
     |-- 192.168.238.67
        /32 host LOCAL
--
              |-- 10.10.0.3
                 /32 host LOCAL
--
              |-- 10.20.0.3
                 /32 host LOCAL
--
           |-- 127.0.0.1
              /32 host LOCAL
--
     |-- 192.168.238.67
        /32 host LOCAL
10. Testare l'LLM
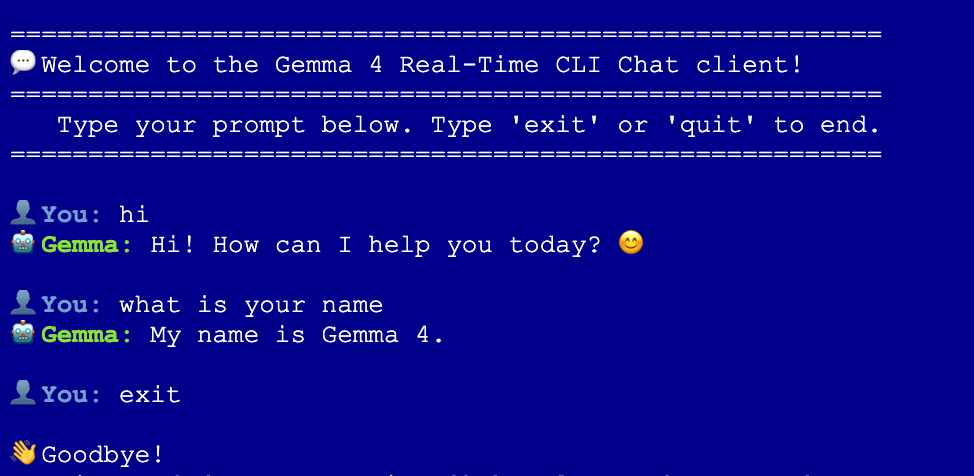
Una volta convalidate le interfacce, avvia un contenitore di test leggero all'interno del cluster per inviare una richiesta di inferenza di streaming a Gemma 4.
- Esegui questo comando nella sessione
k8s-control-planeper avviare il client interattivo:
kubectl run gemma-chat --rm -i --tty --image=alpine --restart=Never -- sh -c '
  # 1. Silently install curl and jq
  apk add --no-cache curl jq > /dev/null

  echo -e "\n========================================================"
  echo -e "💬 Welcome to the Gemma 4 Real-Time CLI Chat client!"
  echo -e "========================================================"
  echo -e "   Type your prompt below. Type '\''exit'\'' or '\''quit'\'' to end."
  echo -e "========================================================\n"

  while true; do
    # Read user input
    echo -n -e "👤 \033[1;34mYou:\033[0m "
    read -r USER_INPUT

    # Handle exit conditions
    if [ "$USER_INPUT" = "exit" ] || [ "$USER_INPUT" = "quit" ] || [ -z "$USER_INPUT" ]; then
      echo -e "\n👋 Goodbye!"
      break
    fi

    echo -n -e "🤖 \033[1;32mGemma:\033[0m "

    # Use jq to safely escape double quotes and special characters in user input
    JSON_PAYLOAD=$(jq -n --arg msg "$USER_INPUT" '\''{
      model: "google/gemma-4-E4B-it",
      messages: [{role: "user", content: $msg}],
      temperature: 0.7,
      stream: true
    }'\'')

    # Stream the tokens in real-time with a typewriter effect
    curl -s -X POST http://vllm-gemma-service:8080/v1/chat/completions \
      -H "Content-Type: application/json" \
      -d "$JSON_PAYLOAD" | while read -r line; do
        # Extract SSE data streams
        if echo "$line" | grep -q "data:"; then
          DATA_CLEAN=$(echo "$line" | sed "s/^data: //" | tr -d "\r")
          if [ "$DATA_CLEAN" != "[DONE]" ] && [ -n "$DATA_CLEAN" ]; then
            # Parse and print only the token content
            TOKEN=$(echo "$DATA_CLEAN" | jq -r ".choices[0].delta.content // empty" 2>/dev/null)
            echo -n "$TOKEN"
          fi
        fi
      done
    echo -e "\n"
  done
'
Interactive chat
11. Elimina
Innanzitutto, elimina tutti i workload, i secret e le configurazioni dal cluster.
Se hai ancora eseguito l'accesso alla sessione SSH sicura k8s-control-plane, esegui direttamente il seguente comando. (Se hai già chiuso, accedi di nuovo tramite SSH):
- Riconnettiti in modo sicuro alla VM del control plane da Cloud Shell. Se hai già eseguito la connessione a questa VM, salta questo passaggio.
gcloud compute ssh k8s-control-plane \
    --zone=$ZONE \
    --tunnel-through-iap
- Esegui la pulizia delle risorse Kubernetes
# 1. Delete the Gemma 4 deployment and service
kubectl delete -f gemma-inference.yaml --ignore-not-found=true

# 2. Delete the Hugging Face access secret
kubectl delete secret hf-token --ignore-not-found=true

# 3. Delete the open-source DRANET specs and drivers
kubectl delete deviceclass dranet --ignore-not-found=true
kubectl delete resourceclaimtemplate tpu-net-interfaces --ignore-not-found=true
kubectl delete -f https://raw.githubusercontent.com/kubernetes-sigs/dranet/refs/heads/main/install.yaml --ignore-not-found=true

# 4. Uninstall the OSS TPU Hardware Driver
helm uninstall dra-driver-google-tpu -n dra-driver-google-tpu --wait || true
- Ora digita
exite torna alla directory Cloud Shell attiva in cui sono archiviati i file Terraform ed elimina tutti i nodi, le reti VPC e le regole firewall.
# 1. Create the teardown script
cat << 'EOF' > teardown.sh
#!/bin/bash

# The specific networks defined in your Terraform vpc.tf
NETWORKS=(
  "oss-k8s-primary-vpc"
  "oss-tpu-vpc-1"
  "oss-tpu-vpc-2"
)

echo "=== Hunting down and deleting ALL firewall rules for OSS networks ==="

for NETWORK in "${NETWORKS[@]}"; do
    echo "Searching for firewall rules attached to network: $NETWORK..."

    # Query GCP for any firewall rule tied to this specific network
    STUCK_RULES=$(gcloud compute firewall-rules list \
        --filter="network:($NETWORK)" \
        --format="value(name)" | tr '\n' ' ')

    # Check if the string is not empty and contains more than just whitespace
    if [ -n "$STUCK_RULES" ] && [ "$STUCK_RULES" != " " ]; then
        echo "🔥 Found rules holding $NETWORK hostage: $STUCK_RULES"
        echo "Deleting them now..."
        gcloud compute firewall-rules delete $STUCK_RULES --quiet
    else
        echo "✅ No firewall rules found for $NETWORK."
    fi
done

# Fallback: Explicitly delete the named rules from your Terraform file
# just in case the dynamic filter missed them due to caching delays
echo "=== Running fallback deletion for explicitly named Terraform rules ==="
gcloud compute firewall-rules delete \
    oss-k8s-primary-allow-internal \
    oss-k8s-allow-iap-ssh \
    oss-tpu1-allow-internal \
    oss-tpu2-allow-internal \
    --quiet 2>/dev/null || true

echo "--------------------------------------------------------"
echo "✅ Firewall cleanup complete!"
echo "Your networks are now stripped of firewalls and ready to be deleted."
echo "--------------------------------------------------------"

echo "=== Destroying Infrastructure ==="
cd ~/oss-kube-dra || exit
terraform destroy -auto-approve

echo "--------------------------------------------------------"
echo "✅ Infrastructure successfully destroyed!"
echo "--------------------------------------------------------"
EOF

# 2. Make the script executable and run it
chmod +x teardown.sh
./teardown.sh
- Elimina la cartella Terraform
oss-kube-dra
cd
rm -r oss-kube-dra
12. Complimenti
Hai eseguito il provisioning, l'avvio e la convalida di un'infrastruttura di Kubernetes AI autogestita e ad alte prestazioni direttamente sulle istanze VM di Google Compute Engine (GCE).
Ora hai una conoscenza approfondita a livello di sistema di come Kubernetes utilizza l'allocazione dinamica delle risorse (DRA) per orchestrare gli acceleratori TPU non elaborati, associare topologie host multi-NIC ad alta velocità e pubblicare modelli linguistici di grandi dimensioni all'avanguardia.
Prossimi passi/Scopri di più
Puoi scoprire di più sul networking GKE.
Segui il prossimo lab
Continua la Quest con Google Cloud e dai un'occhiata a questi altri lab Google Cloud: