

1. ภาพรวม
แล็บนี้จะแนะนำวิธีสร้างโครงสร้างพื้นฐาน AI ที่มีการจัดการด้วยตนเองโดยตรงใน Google Compute Engine (GCE) คุณจะเริ่มต้นคลัสเตอร์ Kubernetes ที่ไม่มีการจัดการในเครื่องเสมือน (บางเครื่องมี TPU) โดยใช้ Terraform, kubeadm และกำหนดค่าการจัดสรรทรัพยากรแบบไดนามิก (DRA) ของ Kubernetes โดยใช้ไดรเวอร์โอเพนซอร์ส คุณจะต้องทำงานร่วมกับสิ่งต่อไปนี้
- Google Compute Engine - บริการนี้มีทรัพยากรการประมวลผลเพื่อเริ่มต้นคลัสเตอร์
- TPU - ชิปตัวเร่งที่ Google สร้างขึ้นเอง
- Kubernetes OSS - ซอฟต์แวร์สำหรับติดตั้งและตั้งค่า Kubernetes ด้วยตนเอง
- OSS DRANET - ไดรเวอร์เครือข่าย DRA
- OSS DRA สำหรับ TPU - ไดรเวอร์ DRA ที่รองรับ TPU
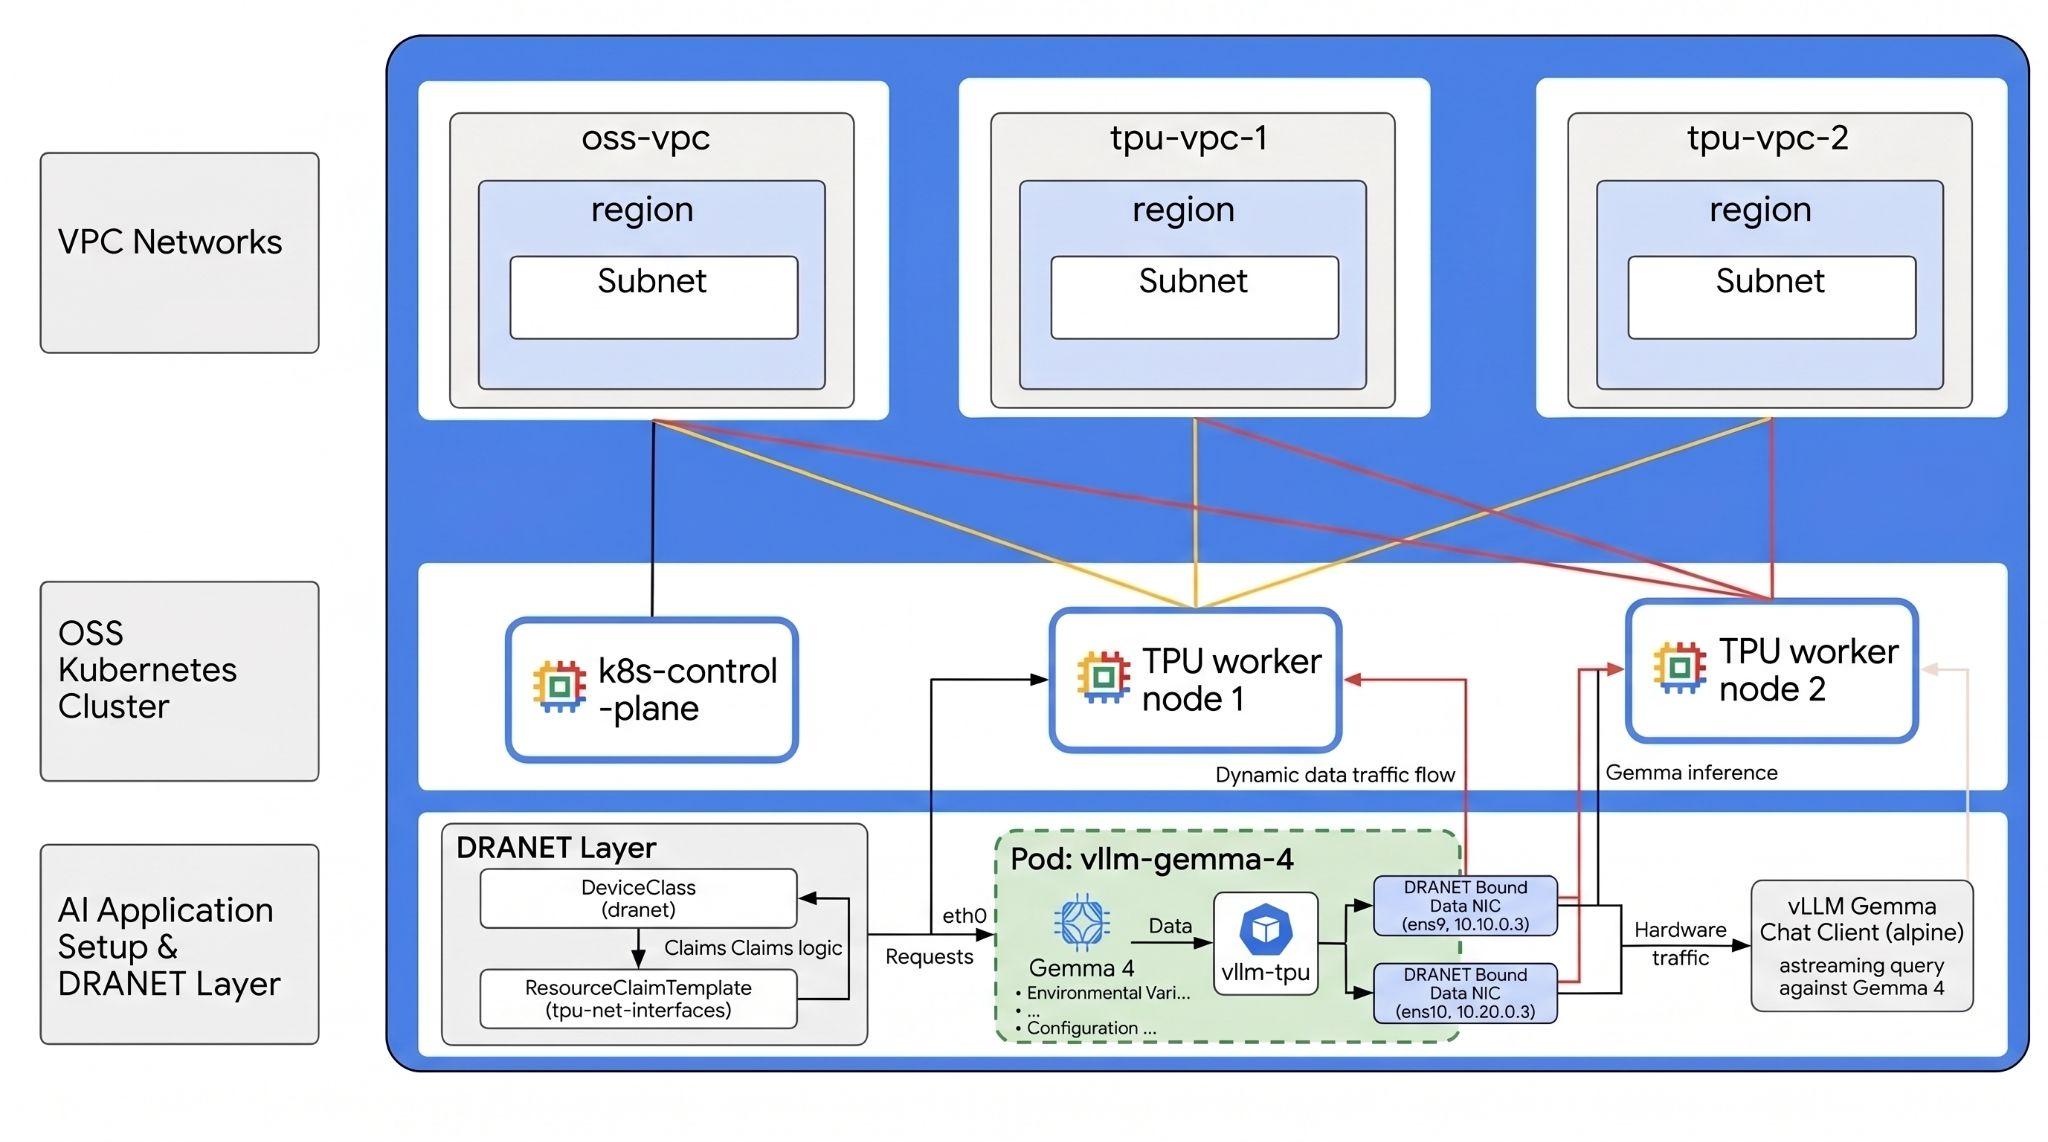
หากต้องการกำหนดค่าสภาพแวดล้อม คุณจะต้องติดตั้งใช้งานเครือข่าย VPC ที่เป็นอิสระหลายเครือข่าย โดยแต่ละเครือข่ายจะมีซับเน็ตของตัวเอง ซึ่งช่วยให้คุณจัดสรรอินสแตนซ์ VM ที่มีอินเทอร์เฟซเครือข่ายหลายรายการ (Multi-NIC) โดยแยกการรับส่งข้อมูลการจัดการจากการรับส่งข้อมูล TPU ความเร็วสูง
จากนั้น หากต้องการเปิดใช้การจัดสรรทรัพยากรแบบไดนามิก (DRA) แบบโอเพนซอร์ส คุณจะต้องติดตั้งทั้งไดรเวอร์ฮาร์ดแวร์ TPU ของ Google สำหรับ DRA และไดรเวอร์เครือข่าย DRANET จากนั้นคุณจะกำหนดค่า Kubernetes DeviceClasses และเขียน ResourceClaimTemplates เพื่อจัดการการจัดสรรแบบไดนามิกของทรัพยากรเหล่านี้
สุดท้าย คุณจะติดตั้งใช้งานภาระงานการเปรียบเทียบประสิทธิภาพสูงโดยใช้ Neper เพื่อตรวจสอบเส้นทางข้อมูลเครือข่าย Jumbo Frame ระหว่างโหนด Worker ตามด้วยการทดสอบ Python JAX เพื่อตรวจสอบซิลิคอน TPU พื้นฐาน จากนั้นคุณจะติดตั้งใช้งาน vLLM เพื่อให้บริการโมเดล Gemma 4 ที่ล้ำสมัยของ Google ผ่าน Hugging Face โดยใช้ฮาร์ดแวร์และเครือข่ายที่แยกจากกันอย่างสมบูรณ์ รวมถึงการอ้างสิทธิ์ DRA
การกำหนดค่าจะใช้ร่วมกับ Terraform, gcloud และ kubectl
ในแล็บนี้ คุณจะได้เรียนรู้วิธีทำงานต่อไปนี้
- ตั้งค่าเครือข่าย VPC
- ติดตั้งใช้งาน 3 โหนดใน GCE (1 โหนดมาตรฐานและ 2 โหนด TPU v6)
- Bootstrap Kubernetes
- กำหนดค่า OSS DRANET และ DRA สำหรับ TPU
- ประสิทธิภาพการเปรียบเทียบ
- สร้าง DeviceClasses และ ResourceClaimTemplates
- เปรียบเทียบประสิทธิภาพของเครือข่ายและฮาร์ดแวร์
- ติดตั้งใช้งาน Gemma 4: แสดงโมเดลบนฮาร์ดแวร์ TPU v6e โดยใช้ vLLM และการอ้างสิทธิ์ DRA ที่ใช้งานอยู่
- ทดสอบการเชื่อมต่อกับ LLM
ในแล็บนี้ คุณจะได้สร้างรูปแบบต่อไปนี้
รูปที่ 1
2. การตั้งค่าบริการของ Google Cloud
การตั้งค่าสภาพแวดล้อมแบบเรียนรู้ด้วยตนเอง
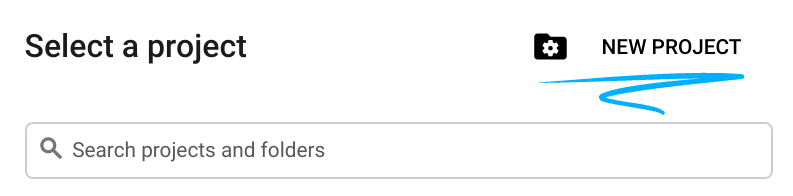
- ลงชื่อเข้าใช้ คอนโซล Google Cloud แล้วสร้างโปรเจ็กต์ใหม่หรือใช้โปรเจ็กต์ที่มีอยู่ซ้ำ หากยังไม่มีบัญชี Gmail หรือ Google Workspace คุณต้องสร้างบัญชี

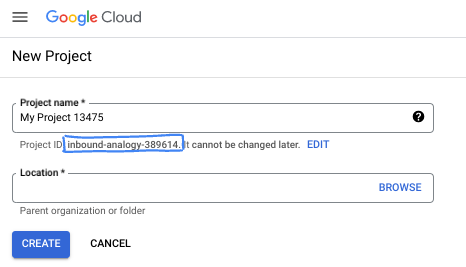
- ชื่อโปรเจ็กต์คือชื่อที่แสดงสำหรับผู้เข้าร่วมโปรเจ็กต์นี้ ซึ่งเป็นสตริงอักขระที่ Google APIs ไม่ได้ใช้ คุณอัปเดตได้ทุกเมื่อ
- รหัสโปรเจ็กต์จะไม่ซ้ำกันในโปรเจ็กต์ Google Cloud ทั้งหมดและเปลี่ยนแปลงไม่ได้ (เปลี่ยนไม่ได้หลังจากตั้งค่าแล้ว) Cloud Console จะสร้างสตริงที่ไม่ซ้ำกันโดยอัตโนมัติ ซึ่งโดยปกติแล้วคุณไม่จำเป็นต้องสนใจว่าสตริงนั้นคืออะไร ใน Codelab ส่วนใหญ่ คุณจะต้องอ้างอิงรหัสโปรเจ็กต์ (โดยปกติจะระบุเป็น
PROJECT_ID) หากไม่ชอบรหัสที่สร้างขึ้น คุณอาจสร้างรหัสแบบสุ่มอีกรหัสหนึ่งได้ หรือคุณจะลองใช้ชื่อของคุณเองและดูว่าชื่อนั้นพร้อมใช้งานหรือไม่ก็ได้ คุณจะเปลี่ยนแปลงรหัสนี้หลังจากขั้นตอนนี้ไม่ได้ และรหัสจะคงอยู่ตลอดระยะเวลาของโปรเจ็กต์ - โปรดทราบว่ายังมีค่าที่ 3 ซึ่งก็คือหมายเลขโปรเจ็กต์ที่ API บางตัวใช้ ดูข้อมูลเพิ่มเติมเกี่ยวกับค่าทั้ง 3 นี้ได้ในเอกสารประกอบ
- จากนั้นคุณจะต้องเปิดใช้การเรียกเก็บเงินใน Cloud Console เพื่อใช้ทรัพยากร/API ของ Cloud การทำตาม Codelab นี้จะไม่เสียค่าใช้จ่ายมากนัก หรืออาจไม่เสียเลย หากต้องการปิดทรัพยากรเพื่อหลีกเลี่ยงการเรียกเก็บเงินนอกเหนือจากบทแนะนำนี้ คุณสามารถลบทรัพยากรที่สร้างขึ้นหรือลบโปรเจ็กต์ได้ ผู้ใช้ Google Cloud รายใหม่มีสิทธิ์เข้าร่วมโปรแกรมช่วงทดลองใช้ฟรีมูลค่า$300 USD
เริ่มต้น Cloud Shell
แม้ว่าคุณจะใช้งาน Google Cloud จากระยะไกลในแล็ปท็อปได้ แต่ใน Codelab นี้คุณจะใช้ Google Cloud Shell ซึ่งเป็นสภาพแวดล้อมบรรทัดคำสั่งที่ทำงานในระบบคลาวด์
จาก คอนโซล Google Cloud ให้คลิกไอคอน Cloud Shell ในแถบเครื่องมือด้านขวาบน
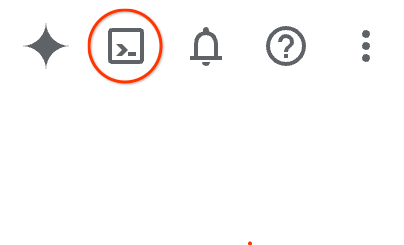
การจัดสรรและเชื่อมต่อกับสภาพแวดล้อมจะใช้เวลาเพียงไม่กี่นาที เมื่อเสร็จแล้ว คุณควรเห็นข้อความคล้ายกับตัวอย่างต่อไปนี้

เครื่องเสมือนนี้มาพร้อมเครื่องมือพัฒนาซอฟต์แวร์ทั้งหมดที่คุณต้องการ โดยมีไดเรกทอรีหลักแบบถาวรขนาด 5 GB และทำงานบน Google Cloud ซึ่งช่วยเพิ่มประสิทธิภาพเครือข่ายและการตรวจสอบสิทธิ์ได้อย่างมาก คุณสามารถทำงานทั้งหมดใน Codelab นี้ได้ภายในเบราว์เซอร์ คุณไม่จำเป็นต้องติดตั้งอะไร
3. ตั้งค่าสภาพแวดล้อมด้วย Terraform
คุณต้องมีสิทธิ์เข้าถึง TPU เพื่อทำแล็บนี้ เวอร์ชันที่ใช้คือ TPU v6e
- คุณควรทำตามเอกสารแผน TPU และเปิดใช้โควต้า TPU เพื่อรับสิทธิ์เข้าถึง
- ใช้ภูมิภาคที่คุณมีโควต้า TPU ดูข้อมูลเพิ่มเติมได้ที่เอกสาร "ตรวจสอบความพร้อมใช้งานของ TPU ใน GKE"
- เราใช้การติดตั้งใช้งานขนาดเล็กที่ต้องใช้ชิป TPU v6e จำนวน 2 ชิป (
ct6e-standard-4t)ซึ่งจะเป็นสไลซ์ 2x2 ในภูมิภาคเดียว - โทเค็น Hugging Face: ต้องใช้โทเค็นเพื่อการเข้าถึงเพื่อดาวน์โหลดน้ำหนักของโมเดล Gemma
เราจะสร้าง VPC ที่กำหนดเอง 3 รายการพร้อมกฎไฟร์วอลล์และซับเน็ต เปิด Cloud Console แล้วเลือกโปรเจ็กต์ที่จะใช้
- เปิด Cloud Shell ที่ด้านบนของคอนโซลทางด้านขวา ตรวจสอบว่าคุณเห็นรหัสโปรเจ็กต์ที่ถูกต้องใน Cloud Shell และยืนยันข้อความแจ้งเพื่ออนุญาตการเข้าถึง

- สร้างโฟลเดอร์ชื่อ
oss-kube-dra,move to the folder แล้วเพิ่มตัวแปรบางรายการ ป.ล. อัปเดตค่าตัวแปรสำหรับ "REGION" และ "ZONE" เป็นภูมิภาคและโซนจริงของคุณ โดยภูมิภาคเริ่มต้นที่ใช้คือ "europe-west4" และโซนเริ่มต้นที่ใช้คือ "europe-west4-a"
mkdir -p oss-kube-dra && cd oss-kube-dra
export PROJECT_ID=$(gcloud config get-value project)
export REGION="europe-west4"
export ZONE="europe-west4-a"
echo $PROJECT_ID
echo $REGION
echo $ZONE
- ตอนนี้ให้เพิ่มไฟล์การกำหนดค่า ซึ่งจะสร้างไฟล์ terraform.tfvars , variables.tf, vpc.tf ดังต่อไปนี้
cat << EOF > terraform.tfvars
project_id = "${PROJECT_ID}"
region     = "${REGION}"
zone       = "${ZONE}"
EOF

cat << 'EOF' > variables.tf
variable "project_id" {
  type        = string
  description = "The Google Cloud Project ID"
}

variable "region" {
  type        = string
  description = "The region to deploy the resources"
}

variable "zone" {
  type        = string
  description = "The specific zone for the VMs"
}

variable "control_plane_machine_type" {
  type        = string
  default     = "e2-standard-8"
  description = "Machine type for the Kubernetes control plane node"
}

variable "tpu_worker_machine_type" {
  type        = string
  default     = "ct6e-standard-4t"
  description = "The machine type for TPU workers (TPU v6e Trillium VM)"
}
EOF


cat << 'EOF' > vpc.tf
terraform {
  required_version = ">= 1.5.0"
  required_providers {
    google = {
      source  = "hashicorp/google"
      version = "~> 7.32.0"
    }
  }
}

provider "google" {
  project = var.project_id
  region  = var.region
}

# 1. Primary Management VPC and Subnet
resource "google_compute_network" "primary_vpc" {
  name                    = "oss-k8s-primary-vpc"
  auto_create_subnetworks = false
  mtu                     = 1460
}

resource "google_compute_subnetwork" "primary_subnet" {
  name          = "oss-k8s-primary-subnet"
  ip_cidr_range = "10.0.0.0/24"
  region        = var.region
  network       = google_compute_network.primary_vpc.id
}

# 2. Cloud NAT Router and NAT Gateway for Primary VPC (Outbound Access)
resource "google_compute_router" "router" {
  name    = "oss-k8s-router"
  network = google_compute_network.primary_vpc.id
  region  = var.region
}

resource "google_compute_router_nat" "nat" {
  name                               = "oss-k8s-nat"
  router                             = google_compute_router.router.name
  region                             = var.region
  nat_ip_allocate_option             = "AUTO_ONLY"
  source_subnetwork_ip_ranges_to_nat = "ALL_SUBNETWORKS_ALL_IP_RANGES"
}

# 3. Firewalls for Primary VPC
resource "google_compute_firewall" "allow_internal" {
  name    = "oss-k8s-primary-allow-internal"
  network = google_compute_network.primary_vpc.id

  allow {
    protocol = "tcp"
  }
  allow {
    protocol = "udp"
  }
  allow {
    protocol = "icmp"
  }

  source_ranges = ["10.0.0.0/24"]
}

resource "google_compute_firewall" "allow_iap" {
  name    = "oss-k8s-allow-iap-ssh"
  network = google_compute_network.primary_vpc.id

  allow {
    protocol = "tcp"
    ports    = ["22"]
  }

  source_ranges = ["35.235.240.0/20"]
}

# 4. Multi-NIC TPU Networks and Subnets (With Jumbo Frames MTU 8896)
resource "google_compute_network" "tpu_vpc" {
  count                   = 2
  name                    = "oss-tpu-vpc-${count.index + 1}"
  auto_create_subnetworks = false
  mtu                     = 8896
}

resource "google_compute_subnetwork" "tpu_subnet" {
  count         = 2
  name          = "oss-tpu-vpc-${count.index + 1}-subnet"
  ip_cidr_range = "10.${count.index + 1}0.0.0/24"
  region        = var.region
  network       = google_compute_network.tpu_vpc[count.index].id
}

resource "google_compute_firewall" "tpu_allow_internal" {
  count   = 2
  name    = "oss-tpu${count.index + 1}-allow-internal"
  network = google_compute_network.tpu_vpc[count.index].id

  allow {
    protocol = "tcp"
  }
  allow {
    protocol = "udp"
  }
  allow {
    protocol = "icmp"
  }

  source_ranges = ["10.${count.index + 1}0.0.0/24"]
}
EOF
- ตรวจสอบว่าคุณอยู่ในไดเรกทอรี
oss-kube-draแล้วเรียกใช้คำสั่งต่อไปนี้terraform initเริ่มต้นไดเรกทอรีการทำงาน นี่เป็นขั้นตอนแรกและจะดาวน์โหลดผู้ให้บริการที่จำเป็นสำหรับการกำหนดค่าที่ระบุterraform plan -outจะสร้างแผนการดำเนินการ ซึ่งแสดงให้เห็นว่า Terraform จะดำเนินการใดบ้างเพื่อทำให้โครงสร้างพื้นฐานใช้งานได้-outช่วยให้คุณบันทึกแผนการดำเนินการเป็นไบนารีที่มีชื่อได้ คุณสามารถดูได้ว่าจะเกิดอะไรขึ้นโดยไม่ต้องทำการเปลี่ยนแปลงใดๆterraform applyจะเรียกใช้การอัปเดต
terraform init
terraform plan -out=tfplan
- ตอนนี้ให้เรียกใช้การติดตั้งใช้งานหลังจากเรียกใช้
terraform applyเนื่องจากคุณใช้แผนการดำเนินการที่บันทึกไว้ ระบบจึงจะดำเนินการทันทีโดยไม่ต้องแจ้งให้ยืนยัน (การดำเนินการนี้อาจใช้เวลา 5-10 นาที)
terraform apply tfplan
- ยืนยันการตั้งค่า
echo -e "\n=== Verifying VPC Networks ==="
gcloud compute networks list --filter="name~oss-.*" --project=$PROJECT_ID

echo -e "\n=== Verifying Subnetworks ==="
gcloud compute networks subnets list --filter="name~oss-.*" --project=$PROJECT_ID

echo -e "\n=== Verifying Firewall Rules ==="
gcloud compute firewall-rules list --filter="name~oss-.*" --project=$PROJECT_ID

echo -e "\n=== Verifying Cloud NAT ==="
gcloud compute routers nats list --router=oss-k8s-router --router-region=$REGION --project=$PROJECT_ID
สร้างโหนด VM
ตอนนี้คุณจะกำหนดอินสแตนซ์ Compute Engine
- ตรวจสอบว่าคุณอยู่ในไดเรกทอรี
oss-kube-draแล้วเรียกใช้คำสั่งต่อไปนี้ใน Cloud Shell เพื่อเขียนไฟล์nodes.tf
cat << 'EOF' > nodes.tf
# 1. K8s Control Plane VM (No TPU)
resource "google_compute_instance" "control_plane" {
  name         = "k8s-control-plane"
  machine_type = var.control_plane_machine_type
  zone         = var.zone

  boot_disk {
    initialize_params {
      image = "projects/ubuntu-os-cloud/global/images/family/ubuntu-2204-lts"
      size  = 100
    }
  }

  network_interface {
    network    = google_compute_network.primary_vpc.id
    subnetwork = google_compute_subnetwork.primary_subnet.id
    # No public IP block keeps this node private
  }

  service_account {
    scopes = ["cloud-platform"]
  }
}

# 2. TPU Worker VMs (Multi-NIC ct6e-standard-4t instances)
resource "google_compute_instance" "tpu_workers" {
  count        = 2
  name         = "k8s-tpu-worker-${count.index + 1}"
  machine_type = var.tpu_worker_machine_type
  zone         = var.zone

  boot_disk {
    initialize_params {
      image = "projects/ubuntu-os-accelerator-images/global/images/family/ubuntu-accel-2204-amd64-tpu-v5e-v5p-v6e"
      size  = 200
    }
  }

  scheduling {
    on_host_maintenance = "TERMINATE"
    provisioning_model  = "STANDARD"
  }

  # NIC 1: Management VPC Subnet
  network_interface {
    network    = google_compute_network.primary_vpc.id
    subnetwork = google_compute_subnetwork.primary_subnet.id
  }

  # NIC 2: TPU VPC 1 Subnet
  network_interface {
    network    = google_compute_network.tpu_vpc[0].id
    subnetwork = google_compute_subnetwork.tpu_subnet[0].id
  }

  # NIC 3: TPU VPC 2 Subnet
  network_interface {
    network    = google_compute_network.tpu_vpc[1].id
    subnetwork = google_compute_subnetwork.tpu_subnet[1].id
  }

  service_account {
    scopes = ["cloud-platform"]
  }


  lifecycle {
    ignore_changes = [
      boot_disk[0].initialize_params[0].image,
      guest_accelerator,
      metadata
    ]
  }
}
EOF
- เมื่อเขียนการกำหนดค่าใหม่แล้ว ให้สร้างแผนใหม่และนำไปใช้เพื่อจัดสรรอินสแตนซ์
terraform plan -out=tfplan

terraform apply tfplan
- ยืนยัน
echo -e "\n=== Verifying Provisioned VM Instances ==="
gcloud compute instances list --filter="name~k8s-.*" --project=$PROJECT_ID


echo -e "\n=== Verifying Network Interfaces on Workers ==="
for i in 1 2; do
  echo -e "\n--- Interfaces for k8s-tpu-worker-${i} ---"
  gcloud compute instances describe k8s-tpu-worker-${i} \
      --zone=$ZONE \
      --project=$PROJECT_ID \
      --format="table(networkInterfaces[].network.basename(), networkInterfaces[].networkIP)"
done
4. บูตโหนดควบคุมคลัสเตอร์ Kubernetes
ในส่วนนี้ คุณจะเชื่อมต่อกับอินสแตนซ์ VM ของ Control Plane ที่สร้างขึ้นใหม่ได้อย่างปลอดภัย กำหนดค่าระบบปฏิบัติการพื้นฐาน ติดตั้งรันไทม์ของคอนเทนเนอร์และแพ็กเกจ Kubernetes เริ่มต้นคลัสเตอร์ และติดตั้งใช้งาน Calico CNI ที่มีการแยกการรับส่งข้อมูลอย่างเข้มงวดไปยังเครือข่ายการจัดการ
- เชื่อมต่อกับอินสแตนซ์
k8s-control-planeอย่างปลอดภัยโดยใช้อุโมงค์ Identity-Aware Proxy (IAP) ของ GCE เรียกใช้คำสั่งต่อไปนี้ในเทอร์มินัล Cloud Shell
gcloud compute ssh k8s-control-plane \
    --zone=$ZONE \
    --tunnel-through-iap
- ใน
k8s-control-planeVM ให้สร้างสคริปต์ชื่อinit-control-plane.shเพื่อทำให้ขั้นตอนการติดตั้งและการกำหนดค่าเป็นอัตโนมัติ
cat << 'CONTROL_PLANE_EOF' > init-control-plane.sh
#!/bin/bash
# Strict error handling: fail instantly if any command exits with a non-zero status
set -e

echo "=== 1. Neutralizing Background Updates & Preparing Base OS ==="
# Prevent unattended upgrades from locking apt or breaking network configuration mid-setup
sudo systemctl stop apt-daily.timer apt-daily-upgrade.timer || true
sudo systemctl disable apt-daily.timer apt-daily-upgrade.timer || true
sudo systemctl mask apt-daily.service apt-daily-upgrade.service || true

# Turn off swap (mandatory for Kubernetes)
sudo swapoff -a
sudo sed -i '/ swap / s/^\(.*\)$/#\1/g' /etc/fstab

# Load required kernel modules
cat << 'EOT' | sudo tee /etc/modules-load.d/k8s.conf
overlay
br_netfilter
EOT

sudo modprobe overlay
sudo modprobe br_netfilter

# Configure sysctl requirements for Kubernetes bridging
cat << 'EOT' | sudo tee /etc/sysctl.d/k8s.conf
net.bridge.bridge-nf-call-iptables  = 1
net.bridge.bridge-nf-call-ip6tables = 1
net.ipv4.ip_forward                 = 1
EOT
sudo sysctl --system

echo "=== 2. Installing Container Runtime (Containerd) ==="
sudo apt-get update
sudo apt-get install -y ca-certificates curl gnupg bash-completion

sudo install -m 0755 -d /etc/apt/keyrings
curl -fsSL https://download.docker.com/linux/ubuntu/gpg | sudo gpg --dearmor --yes -o /etc/apt/keyrings/docker.gpg
sudo chmod a+r /etc/apt/keyrings/docker.gpg
echo "deb [arch=$(dpkg --print-architecture) signed-by=/etc/apt/keyrings/docker.gpg] https://download.docker.com/linux/ubuntu $(. /etc/os-release && echo $VERSION_CODENAME) stable" | sudo tee /etc/apt/sources.list.d/docker.list > /dev/null

sudo apt-get update
sudo apt-get install -y docker-ce docker-ce-cli containerd.io

echo "=== 3. Configuring Containerd with Systemd Cgroups ==="
sudo mkdir -p /etc/containerd
containerd config default | sudo tee /etc/containerd/config.toml >/dev/null
sudo sed -i 's/SystemdCgroup = false/SystemdCgroup = true/' /etc/containerd/config.toml

sudo systemctl daemon-reload
sudo systemctl restart containerd
sudo systemctl enable containerd

# Validation Step: Verify runtime engine health
if ! systemctl is-active --quiet containerd; then
    echo "❌ ERROR: Containerd failed to start properly."
    exit 1
fi
echo "✅ Containerd runtime is active and healthy."

echo "=== 4. Installing Kubernetes 1.36 Binaries ==="
curl -fsSL https://pkgs.k8s.io/core:/stable:/v1.36/deb/Release.key | sudo gpg --dearmor --yes -o /etc/apt/keyrings/kubernetes-apt-keyring.gpg
echo 'deb [signed-by=/etc/apt/keyrings/kubernetes-apt-keyring.gpg] https://pkgs.k8s.io/core:/stable:/v1.36/deb/ /' | sudo tee /etc/apt/sources.list.d/kubernetes.list

sudo apt-get update
sudo apt-get install -y kubelet kubeadm kubectl
sudo apt-mark hold kubelet kubeadm kubectl

# Configure Autocomplete and Aliases system-wide
kubectl completion bash | sudo tee /etc/bash_completion.d/kubectl > /dev/null
kubeadm completion bash | sudo tee /etc/bash_completion.d/kubeadm > /dev/null
if ! grep -q 'alias k=kubectl' ~/.bashrc; then
  echo 'alias k=kubectl' >> ~/.bashrc
  echo 'complete -o default -F __start_kubectl k' >> ~/.bashrc
fi

echo "=== 5. Initializing Control Plane Engine ==="
sudo kubeadm init --pod-network-cidr=192.168.0.0/16

echo "=== 6. Configuring Administrative Cluster Credentials ==="
mkdir -p $HOME/.kube
sudo cp -i /etc/kubernetes/admin.conf $HOME/.kube/config
sudo chown $(id -u):$(id -g) $HOME/.kube/config

# Validation Step: Verify API Server local responsiveness
echo "Waiting for local API server context..."
until kubectl cluster-info &>/dev/null; do
    sleep 2
done
echo "✅ Kubernetes API server is responding locally."

echo "=== 7. Deploying Calico Network Operator ==="
kubectl create -f https://raw.githubusercontent.com/projectcalico/calico/v3.27.3/manifests/tigera-operator.yaml

# Validation Step: Ensure Tigera Operator CRD is fully available before applying configuration
echo "Waiting for Tigera Installation CRD to register on the API server..."
kubectl wait --for=condition=established crd/installations.operator.tigera.io --timeout=60s

echo "=== 8. Deploying Calico Custom Resources (Subnet Interlock Locked to 10.0.0.0/24) ==="
cat << 'CALICO_EOF' > custom-calico.yaml
apiVersion: operator.tigera.io/v1
kind: Installation
metadata:
  name: default
spec:
  calicoNetwork:
    nodeAddressAutodetectionV4:
      cidrs:
        - "10.0.0.0/24"
    ipPools:
    - blockSize: 26
      cidr: 192.168.0.0/16
      encapsulation: VXLANCrossSubnet
      natOutgoing: Enabled
      nodeSelector: all()
CALICO_EOF
kubectl apply -f custom-calico.yaml

# Validation Step: Confirm Calico daemon configurations are processing
echo "Waiting 10 seconds for Calico system namespaces to initialize..."
sleep 10
echo "Current Calico workload deployment status:"
kubectl get pods -n calico-system

echo "=== 9. Exporting Worker Cluster Join Token ==="
sudo kubeadm token create --print-join-command > ~/join.sh
chmod +x ~/join.sh

echo "--------------------------------------------------------"
echo "✅ CONTROL PLANE BOOTSTRAP COMPLETE!"
echo "Your cluster join command for the TPU workers is saved below:"
echo "--------------------------------------------------------"
cat ~/join.sh
CONTROL_PLANE_EOF
- เรียกใช้สคริปต์
chmod +x init-control-plane.sh
./init-control-plane.sh
- เมื่อเสร็จแล้ว ให้ยืนยัน ซึ่งอาจใช้เวลาสักครู่
kubectl get nodes
kubectl get pods -A
คุณควรเห็นข้อความคล้ายกับข้อความนี้
NAME                STATUS   ROLES           AGE     VERSION
k8s-control-plane   Ready    control-plane   6m50s   v1.36.2
NAMESPACE         NAME                                        READY   STATUS    RESTARTS   AGE
calico-system     calico-kube-controllers-5578ff64dd-87vp2    1/1     Running   0          6m33s
calico-system     calico-node-fxzpp                           1/1     Running   0          6m33s
calico-system     calico-typha-785cbc858-rv4nz                1/1     Running   0          6m33s
calico-system     csi-node-driver-wlrhx                       2/2     Running   0          6m33s
kube-system       coredns-589f44dc88-pqfrl                    1/1     Running   0          6m42s
kube-system       coredns-589f44dc88-sdwmj                    1/1     Running   0          6m42s
kube-system       etcd-k8s-control-plane                      1/1     Running   0          6m47s
kube-system       kube-apiserver-k8s-control-plane            1/1     Running   0          6m47s
kube-system       kube-controller-manager-k8s-control-plane   1/1     Running   0          6m47s
kube-system       kube-proxy-jnm2p                            1/1     Running   0          6m42s
kube-system       kube-scheduler-k8s-control-plane            1/1     Running   0          6m47s
tigera-operator   tigera-operator-6bc8d879b5-w5mrq            1/1     Running   0          6m42s
- ออกจากการเชื่อมต่อ
sshเพื่อกลับไปที่ Cloud Shell
exit
5. เพิ่มโหนด Worker ของ TPU
คุณจะเรียกใช้สคริปต์จาก Cloud Shell ที่เชื่อมต่อกับ VM ของ Control Plane อย่างปลอดภัย ดึงโทเค็นการเข้าร่วมคลัสเตอร์ และกำหนดค่าและลงทะเบียนโหนด Worker ของ TPU ในคลัสเตอร์พร้อมกัน
- เรียกใช้คำสั่งต่อไปนี้ใน Cloud Shell เพื่อเขียนสคริปต์การจัดการเป็นกลุ่ม
cat << 'WORKER_BOOTSTRAP_EOF' > bootstrap-workers.sh
#!/bin/bash
# Strict error handling: fail instantly if any command exits with a non-zero status
set -e

# Fetch the join command safely from the control plane
echo "Fetching join command from Control Plane..."
JOIN_CMD=$(gcloud compute ssh k8s-control-plane --zone=$ZONE --tunnel-through-iap --command="cat ~/join.sh" 2>/dev/null)

if [ -z "$JOIN_CMD" ]; then
    echo "❌ ERROR: Failed to retrieve the join command. Ensure the control plane is reachable."
    exit 1
fi

echo "✅ Successfully retrieved join command."

# Create the setup script locally to be copied to the workers
cat << 'WORKER_INIT_EOF' > init-worker.sh
#!/bin/bash
set -e

echo "=== 1. Neutralizing Background Updates & Setting Non-Interactive Mode ==="
export DEBIAN_FRONTEND=noninteractive
sudo sed -i "s/#\$nrconf{restart} = 'i';/\$nrconf{restart} = 'a';/g" /etc/needrestart/needrestart.conf 2>/dev/null || true

# Prevent unattended upgrades from tearing down network interfaces mid-setup
sudo systemctl stop apt-daily.timer apt-daily-upgrade.timer || true
sudo systemctl disable apt-daily.timer apt-daily-upgrade.timer || true
sudo systemctl mask apt-daily.service apt-daily-upgrade.service || true

echo "=== 2. Base OS Prep ==="
# Disable swap
sudo swapoff -a
sudo sed -i '/ swap / s/^\(.*\)$/#\1/g' /etc/fstab

# Load required kernel modules
cat << 'EOT' | sudo tee /etc/modules-load.d/k8s.conf
overlay
br_netfilter
EOT
sudo modprobe overlay
sudo modprobe br_netfilter

# Configure bridging and IP forwarding sysctls
cat << 'EOT' | sudo tee /etc/sysctl.d/k8s.conf
net.bridge.bridge-nf-call-iptables  = 1
net.bridge.bridge-nf-call-ip6tables = 1
net.ipv4.ip_forward                 = 1
EOT
sudo sysctl --system

echo "=== 3. Installing Containerd (CRI-Only) ==="
sudo apt-get update && sudo apt-get install -yq ca-certificates curl gnupg bash-completion
sudo install -m 0755 -d /etc/apt/keyrings
curl -fsSL https://download.docker.com/linux/ubuntu/gpg | sudo gpg --dearmor --yes -o /etc/apt/keyrings/docker.gpg
sudo chmod a+r /etc/apt/keyrings/docker.gpg
echo "deb [arch=$(dpkg --print-architecture) signed-by=/etc/apt/keyrings/docker.gpg] https://download.docker.com/linux/ubuntu $(. /etc/os-release && echo $VERSION_CODENAME) stable" | sudo tee /etc/apt/sources.list.d/docker.list > /dev/null

# Install only containerd to avoid unnecessary Docker CE overhead
sudo apt-get update && sudo apt-get install -yq containerd.io
sudo mkdir -p /etc/containerd
containerd config default | sudo tee /etc/containerd/config.toml >/dev/null
sudo sed -i 's/SystemdCgroup = false/SystemdCgroup = true/' /etc/containerd/config.toml
sudo systemctl daemon-reload
sudo systemctl restart containerd
sudo systemctl enable containerd

# Validation: Check containerd status
if ! systemctl is-active --quiet containerd; then
    echo "❌ ERROR: Containerd failed to start."
    exit 1
fi

echo "=== 4. Installing Kubernetes 1.36 Binaries ==="
curl -fsSL https://pkgs.k8s.io/core:/stable:/v1.36/deb/Release.key | sudo gpg --dearmor --yes -o /etc/apt/keyrings/kubernetes-apt-keyring.gpg
echo 'deb [signed-by=/etc/apt/keyrings/kubernetes-apt-keyring.gpg] https://pkgs.k8s.io/core:/stable:/v1.36/deb/ /' | sudo tee /etc/apt/sources.list.d/kubernetes.list
sudo apt-get update && sudo apt-get install -yq kubelet kubeadm kubectl
sudo apt-mark hold kubelet kubeadm kubectl
WORKER_INIT_EOF

# Append the actual join command to the script
echo "echo \"=== 5. Joining Cluster ===\"" >> init-worker.sh
echo "sudo $JOIN_CMD" >> init-worker.sh

# Push and run on both Workers concurrently
echo "Starting concurrent bootstrap on both workers..."

(
    echo "[Worker 1] Copying script..."
    gcloud compute scp init-worker.sh k8s-tpu-worker-1:~ --zone=$ZONE --tunnel-through-iap --quiet
    echo "[Worker 1] Executing script..."
    gcloud compute ssh k8s-tpu-worker-1 --zone=$ZONE --tunnel-through-iap --command="bash ~/init-worker.sh"
    echo "✅ [Worker 1] Bootstrap and Join complete!"
) &

(
    echo "[Worker 2] Copying script..."
    gcloud compute scp init-worker.sh k8s-tpu-worker-2:~ --zone=$ZONE --tunnel-through-iap --quiet
    echo "[Worker 2] Executing script..."
    gcloud compute ssh k8s-tpu-worker-2 --zone=$ZONE --tunnel-through-iap --command="bash ~/init-worker.sh"
    echo "✅ [Worker 2] Bootstrap and Join complete!"
) &

# Wait for both background processes to finish
wait

echo "--------------------------------------------------------"
echo "✅ BOTH WORKERS HAVE FINISHED PROCESSING"
echo "--------------------------------------------------------"

# Final Validation Check from Control Plane
echo "Verifying cluster node status..."
sleep 5 # Give kubelet a moment to register the nodes
gcloud compute ssh k8s-control-plane --zone=$ZONE --tunnel-through-iap --command="kubectl get nodes -o wide"
WORKER_BOOTSTRAP_EOF
- เรียกใช้การตั้งค่า Worker (กระบวนการนี้จะเรียกใช้การติดตั้งทั้ง 2 รายการพร้อมกันในเบื้องหลัง และใช้เวลาประมาณ 3-5 นาทีจึงจะเสร็จสมบูรณ์)
chmod +x bootstrap-workers.sh
./bootstrap-workers.sh
คุณควรเห็นสิ่งที่คล้ายกันเมื่อเพิ่มโหนดทั้งหมดลงในคลัสเตอร์
To increase the performance of the tunnel, consider installing NumPy. For instructions,
please see https://cloud.google.com/iap/docs/using-tcp-forwarding#increasing_the_tcp_upload_bandwidth

NAME                STATUS     ROLES           AGE   VERSION   INTERNAL-IP   EXTERNAL-IP   OS-IMAGE             KERNEL-VERSION           CONTAINER-RUNTIME
k8s-control-plane   Ready      control-plane   25m   v1.36.2   10.0.0.2      <none>        Ubuntu 22.04.5 LTS   6.8.0-1064-gcp (amd64)   containerd://2.2.6
k8s-tpu-worker-1    NotReady   <none>          10s   v1.36.2   10.0.0.3      <none>        Ubuntu 22.04.5 LTS   6.8.0-1064-gcp (amd64)   containerd://2.2.6
k8s-tpu-worker-2    Ready      <none>          27s   v1.36.2   10.0.0.4      <none>        Ubuntu 22.04.5 LTS   6.8.0-1064-gcp (amd64)   containerd://2.2.6
6. การติดตั้งใช้งานไดรเวอร์ TPU ของ DRA แบบโอเพนซอร์ส
ในส่วนนี้ คุณจะกลับไปที่ระนาบควบคุม ติดป้ายกำกับโหนด Worker ของ TPU ด้วยรายละเอียดโทโพโลยีของตัวเร่งความเร็วที่เฉพาะเจาะจง และติดตั้งไดรเวอร์ DRA ของ Google TPU แบบโอเพนซอร์สโดยใช้ Helm ไดรเวอร์นี้มีหน้าที่ค้นหาชิป TPU v6e จริงและแมปชิปเหล่านั้นกับ Kubernetes API โดยตรง
- เชื่อมต่อกับ
k8s-control-planeVM จาก Cloud Shell อีกครั้งอย่างปลอดภัย
gcloud compute ssh k8s-control-plane \
    --zone=$ZONE \
    --tunnel-through-iap
- เรียกใช้คำสั่งเหล่านี้ภายใน
k8s-control-planeเซสชัน SSH ติดป้ายกำกับโหนดด้วยชุดป้ายกำกับที่สมบูรณ์ (รวมถึงคีย์จำนวนชิปที่แน่นอน)
kubectl label node k8s-tpu-worker-1 \
  cloud.google.com/gke-tpu-accelerator=tpu-v6e-slice \
  cloud.google.com/gke-tpu-topology=2x2 \
  cloud.google.com/gke-tpu-dra-driver=true \
  cloud.google.com/gke-accelerator-count=4 \
  cloud.google.com/gke-tpu-count=4 \
  --overwrite

kubectl label node k8s-tpu-worker-2 \
  cloud.google.com/gke-tpu-accelerator=tpu-v6e-slice \
  cloud.google.com/gke-tpu-topology=2x2 \
  cloud.google.com/gke-tpu-dra-driver=true \
  cloud.google.com/gke-accelerator-count=4 \
  cloud.google.com/gke-tpu-count=4 \
  --overwrite
- โคลนและติดตั้งไดรเวอร์ TPU ของ DRA ด้วย Helm
curl -fsSL https://raw.githubusercontent.com/helm/helm/main/scripts/get-helm-3 | bash

git clone https://github.com/kubernetes-sigs/dra-driver-google-tpu.git ~/dra-driver-google-tpu || true
cd ~/dra-driver-google-tpu
rm -f *.pack *.tgz

helm install dra-driver-google-tpu ./deployments/helm/dra-driver-google-tpu \
  -n dra-driver-google-tpu \
  --create-namespace \
  --set 'kubeletPlugin.env[0].name=NODE_NAME' \
  --set 'kubeletPlugin.env[0].valueFrom.fieldRef.fieldPath=spec.nodeName'

cd ~
- ตรวจสอบการตั้งค่าไดรเวอร์ TPU ของ DRA
# Verify driver daemonset status (Pods should show as Running and Ready)
kubectl get pods -n dra-driver-google-tpu -o wide

# Verify TPU ResourceSlices are successfully published to the API server
kubectl get resourceslices

# Safely parse the ResourceSlices to show the Node Name and the number of TPU chips registered
kubectl get resourceslices -o json | jq -r '.items[] | select(.spec.driver=="tpu.google.com") | "Node: \(.spec.nodeName) | TPUs Registered: \(.spec.devices | length)"'

# Inspect driver logs to confirm the TPU hardware was initialized successfully
kubectl logs -n dra-driver-google-tpu -l app.kubernetes.io/name=dra-driver-google-tpu -c tpu-dra-plugin --tail=20
7. การติดตั้งใช้งาน DRANET โอเพนซอร์สและคลาสอุปกรณ์
ในส่วนนี้ คุณจะกลับไปที่ Control Plane ติดตั้งไดรเวอร์ DRANET แบบโอเพนซอร์ส ใช้แพตช์ตัวกรองที่กำหนดเองเพื่อยกเว้นอินเทอร์เฟซเสมือน และสร้าง DeviceClass และ ResourceClaimTemplate ของ Kubernetes ด้วยคำนำหน้าเครือข่าย oss ที่ตรงกัน
- เชื่อมต่อกับ
k8s-control-planeVM จาก Cloud Shell อีกครั้งอย่างปลอดภัย หากเชื่อมต่อแล้ว ให้ข้าม
gcloud compute ssh k8s-control-plane \
    --zone=$ZONE \
    --tunnel-through-iap
- เรียกใช้คำสั่งเหล่านี้ภายในเซสชัน
k8s-control-planeSSH
# Install the core components and patch
kubectl apply -f https://raw.githubusercontent.com/kubernetes-sigs/dranet/refs/heads/main/install.yaml


kubectl patch daemonset dranet -n kube-system --type='json' -p='[ { "op": "add", "path": "/spec/template/spec/containers/0/args/-", "value": "-filter=!(\"dra.net/type\" in attributes) || (attributes[\"dra.net/type\"].StringValue != \"veth\" && attributes[\"dra.net/type\"].StringValue != \"vxlan\" && attributes[\"dra.net/type\"].StringValue != \"bridge\")" } ]'

# Monitor rollout readiness
kubectl rollout status daemonset/dranet -n kube-system

# Verify running components and permissions
kubectl get pods -n kube-system -l app=dranet -o wide
kubectl get clusterrole,clusterrolebinding,sa dranet -n kube-system

# Interrogate logs for driver binding confirmation
kubectl logs -n kube-system -l app=dranet --tail=20
- ใช้ DeviceClass และ ResourceClaimTemplate
# Apply DRANET DeviceClass and BOTH ResourceClaimTemplates (Network + Hardware)
cat << 'EOF' | kubectl apply -f -
apiVersion: resource.k8s.io/v1
kind: DeviceClass
metadata:
  name: dranet
spec:
  selectors:
    - cel:
        expression: device.driver == "dra.net"
---
apiVersion: resource.k8s.io/v1
kind: ResourceClaimTemplate
metadata:
  name: tpu-net-interfaces
  namespace: default
spec:
  spec:
    devices:
      requests:
      - name: tpu-net-interface
        exactly:
          deviceClassName: dranet
          count: 2
          selectors:
          - cel:
              expression: device.attributes["gce.dra.net"].networkName.startsWith("oss-tpu-vpc")
      config:
      - opaque:
          driver: dra.net
          parameters:
            interface:
              mtu: 8896
              gsoMaxSize: 65536
              groMaxSize: 65536
              gsoIPv4MaxSize: 65536
              groIPv4MaxSize: 65536
              disableEbpfPrograms: true
---
apiVersion: resource.k8s.io/v1
kind: ResourceClaimTemplate
metadata:
  name: tpu-device-template
  namespace: default
spec:
  spec:
    devices:
      requests:
      - name: tpu-devices
        exactly:
          deviceClassName: tpu.google.com
          allocationMode: ExactCount
          count: 4
EOF
- ยืนยันว่าได้ลงทะเบียนเทมเพลตและคลาสอย่างถูกต้องใน Kubernetes API
# Verify ResourceSlices exist and are actively serving both drivers
kubectl get resourceslices -o custom-columns=NAME:.metadata.name,NODE:.spec.nodeName,DRIVER:.spec.driver | grep -E "dra.net|tpu.google.com"

# Verify the DRANET daemonset pods are Running across all nodes
kubectl get pods -n kube-system -l app=dranet -o wide
- ทำให้ StatefulSet ของ Parallel Neper ใช้งานได้
cat << 'EOF' | kubectl apply -f -
---
apiVersion: v1
kind: Service
metadata:
  name: neper
spec:
  clusterIP: None
  selector:
    app: neper
---
apiVersion: apps/v1
kind: StatefulSet
metadata:
  name: neper
spec:
  selector:
    matchLabels:
      app: neper
  serviceName: neper
  replicas: 2
  template:
    metadata:
      labels:
        app: neper
    spec:
      initContainers:
      - name: "network-optimization-sysctls"
        image: "busybox"
        securityContext:
          privileged: true
        command:
        - sh
        - -c
        - |
          echo 5000 > /proc/sys/net/ipv4/tcp_rto_min_us
          echo 1 > /proc/sys/net/ipv4/tcp_no_metrics_save
          echo 0 > /proc/sys/net/ipv4/tcp_slow_start_after_idle
          echo 131072 > /proc/sys/net/core/optmem_max
          echo "4096 41943040 314572800" > /proc/sys/net/ipv4/tcp_rmem
      containers:
      - name: neper
        image: ubuntu:22.04
        command:
        - /bin/bash
        - -c
        - |
          apt-get update && apt-get install -y iproute2 build-essential git jq python3-pip &&
          git clone https://github.com/google/neper.git /tmp/neper &&
          cd /tmp/neper && make &&
          cp tcp_stream /usr/local/bin/ &&
          sleep infinity
        securityContext:
          privileged: true
        resources:
          requests:
            cpu: "170"
            memory: "650Gi"
          limits:
            cpu: "170"
            memory: "650Gi"
          claims:
          - name: tpu-net-claim
          - name: tpu-hardware-claim
      resourceClaims:
      - name: tpu-net-claim
        resourceClaimTemplateName: tpu-net-interfaces
      - name: tpu-hardware-claim
        resourceClaimTemplateName: tpu-device-template
EOF
- การตรวจสอบความถูกต้อง
echo -e "\n=== Verifying StatefulSet Pod Status ==="
kubectl get pods -l app=neper -o wide

echo -e "\n=== Verifying Dynamic Resource Claims (DRCs) ==="
kubectl get resourceclaims

echo -e "\n=== Inspecting Device Claim Allocation ==="
# Using a safer JSONPath query to extract the allocated drivers and devices
kubectl get resourceclaims -o json | jq -r '.items[] | "Claim: \(.metadata.name) | Driver: \(.status.allocation.devices.results[0].driver // "Pending")"'
8. เรียกใช้การทดสอบ
เรียกใช้ชุดการเปรียบเทียบแบบอินเทอร์เฟซคู่และชุดการตรวจสอบฮาร์ดแวร์
เฟส 1 (การเปรียบเทียบเครือข่าย): รอให้ทั้ง 2 พ็อด Neper (neper-0 และ neper-1) คอมไพล์ทรัพยากร Dependency แยกที่อยู่ IP แบบหลาย NIC ที่ไม่ใช่ค่าเริ่มต้นซึ่งเชื่อมโยงผ่าน DRANET เปิดเซิร์ฟเวอร์ tcp_stream พร้อมกันใน neper-1 สร้างโหลดที่มีอัตราการส่งข้อมูลสูงจาก neper-0 และแยกวิเคราะห์อัตราการส่งข้อมูลรวมเป็นกิกะบิตต่อวินาที (Gbps)
ระยะที่ 2 (การตรวจสอบฮาร์ดแวร์): ติดตั้ง Google JAX ภายใน neper-0 และดำเนินการคูณเมทริกซ์ (5000x5000) โดยตรงบนชิป TPU ที่แมปผ่าน VFIO เพื่อยืนยันสถานะการทำงานของซิลิคอน
- เรียกใช้คำสั่งต่อไปนี้ใน
k8s-control-planeเพื่อเขียนrun_dual_neper_test.sh
cat << 'EOF' > run_dual_neper_test.sh
#!/bin/bash
set -e

SERVER_POD="neper-1"
CLIENT_POD="neper-0"

echo "================================================="
echo " PHASE 1: DUAL-INTERFACE HIGH-SPEED NETWORK TEST"
echo "================================================="
echo "=== Waiting for Pods to be Ready ==="
kubectl wait --for=condition=ready pod/$CLIENT_POD pod/$SERVER_POD --timeout=300s

echo "=== Waiting for neper compilation to finish inside Pods ==="
for POD in $SERVER_POD $CLIENT_POD; do
  until kubectl exec $POD -c neper -- sh -c 'command -v jq >/dev/null 2>&1 && command -v tcp_stream >/dev/null 2>&1'; do
    sleep 5
  done
done

echo ""
echo "=== Step 1: Extract Target IPs from $SERVER_POD ==="
# Using jq to parse the network interfaces directly from Linux JSON output
IFACE1=$(kubectl exec $SERVER_POD -c neper -- sh -c "ip -j -4 addr show | jq -r '.[] | select(.ifname != \"lo\" and .ifname != \"eth0\") | .ifname' | sed -n '1p'")
IFACE2=$(kubectl exec $SERVER_POD -c neper -- sh -c "ip -j -4 addr show | jq -r '.[] | select(.ifname != \"lo\" and .ifname != \"eth0\") | .ifname' | sed -n '2p'")

IP1=$(kubectl exec $SERVER_POD -c neper -- sh -c "ip -j -4 addr show | jq -r '.[] | select(.ifname != \"lo\" and .ifname != \"eth0\") | .addr_info[0].local' | sed -n '1p'")
IP2=$(kubectl exec $SERVER_POD -c neper -- sh -c "ip -j -4 addr show | jq -r '.[] | select(.ifname != \"lo\" and .ifname != \"eth0\") | .addr_info[0].local' | sed -n '2p'")

echo "   📍 Target IP 1 ($IFACE1): $IP1"
echo "   📍 Target IP 2 ($IFACE2): $IP2"

echo ""
echo "=== Step 2: Initialize TCP Servers on $SERVER_POD ==="
kubectl exec $SERVER_POD -c neper -- sh -c '
for i in 0 1; do
  nohup tcp_stream -C$((52279 + i)) --port=$((38339 + i)) --skip-rx-copy -rw -Z -B16384 \
    --test-length=60 --suicide-length=120 -F100 --num-threads=16 --num-flows=32 -D0 \
    --logtostderr > test${i}.log 2>&1 &
done
'
sleep 3

echo "=== Step 3: Generate Concurrent High-Throughput Load from $CLIENT_POD ==="
echo "Blasting Traffic via Interface 1 -> $IP1 ..."
kubectl exec $CLIENT_POD -c neper -- sh -c "nohup tcp_stream -C52279 --port=38339 --skip-rx-copy -rw -Z -B16384 \
  --test-length=60 --suicide-length=70 -F100 --num-threads=16 --num-flows=32 \
  --client -H $IP1 -D0 --logtostderr > test0.log 2>&1 &"

echo "Blasting Traffic via Interface 2 -> $IP2 ..."
kubectl exec $CLIENT_POD -c neper -- sh -c "nohup tcp_stream -C52280 --port=38340 --skip-rx-copy -rw -Z -B16384 \
  --test-length=60 --suicide-length=70 -F100 --num-threads=16 --num-flows=32 \
  --client -H $IP2 -D0 --logtostderr > test1.log 2>&1 &"

echo ""
echo "=== Testing in progress... Waiting 65 seconds for test completion ==="
sleep 65

echo ""
echo "=== Step 4: Evaluate Throughput Metrics ==="
RAW_BPS1=$(kubectl exec $CLIENT_POD -c neper -- grep -a "remote_throughput=" test0.log | cut -d= -f2 | tr -d '\r' || echo "0")
RAW_BPS2=$(kubectl exec $CLIENT_POD -c neper -- grep -a "remote_throughput=" test1.log | cut -d= -f2 | tr -d '\r' || echo "0")

GBPS1=$(awk -v bps="$RAW_BPS1" 'BEGIN { printf "%.2f", bps / 1000000000 }')
GBPS2=$(awk -v bps="$RAW_BPS2" 'BEGIN { printf "%.2f", bps / 1000000000 }')
TOTAL=$(awk -v b1="$RAW_BPS1" -v b2="$RAW_BPS2" 'BEGIN { printf "%.2f", (b1 + b2) / 1000000000 }')

echo "📊 --- NETWORK RESULTS ---"
echo "Interface 1 ($IFACE1) : ${GBPS1} Gbps"
echo "Interface 2 ($IFACE2) : ${GBPS2} Gbps"
echo "🔥 TOTAL AGGREGATE  : ${TOTAL} Gbps"
echo "--------------------------"


echo ""
echo "================================================="
echo " PHASE 2: TPU HARDWARE VALIDATION TEST"
echo "================================================="
echo "⏳ Installing Python and Google JAX on $CLIENT_POD (Takes ~1 minute)..."
kubectl exec $CLIENT_POD -c neper -- bash -c "apt-get update > /dev/null 2>&1 && apt-get install -y python3-pip > /dev/null 2>&1 && pip3 install jax[tpu] -f https://storage.googleapis.com/jax-releases/libtpu_releases.html > /dev/null 2>&1"

echo "🧠 Running matrix math directly on the TPU chips..."
kubectl exec $CLIENT_POD -c neper -- python3 -c "
import jax
import jax.numpy as jnp
print(f'✅ TPU Hardware Detected: {jax.device_count()} chips mapped via vfio')
print('🚀 Executing 5000x5000 Matrix Multiplication on TPU silicon...')
x = jnp.ones((5000, 5000))
y = jnp.dot(x, x)
print('✅ Success! The TPU driver is fully operational and executing math.')
"
EOF

chmod +x run_dual_neper_test.sh
- ทำการทดสอบ ซึ่งจะใช้เวลา 2 นาที
./run_dual_neper_test.sh
เมื่อเสร็จแล้ว เอาต์พุตของเทอร์มินัลจะแสดงเมตริกเครือข่ายความเร็วสูงที่ตรวจสอบแล้วและการดำเนินการทางคณิตศาสตร์ของเมทริกซ์ TPU
=== Step 4: Evaluate Throughput Metrics ===
📊 --- NETWORK RESULTS ---
Interface 1 (ens9)  : 157.51 Gbps
Interface 2 (ens10) : 167.04 Gbps
🔥 TOTAL AGGREGATE  : 324.55 Gbps
--------------------------

=================================================
 PHASE 2: TPU HARDWARE VALIDATION TEST
=================================================
⏳ Installing Python and Google JAX on neper-0 (Takes ~1 minute)...
🧠 Running matrix math directly on the TPU chips...
✅ TPU Hardware Detected: 4 chips mapped via vfio
🚀 Executing 5000x5000 Matrix Multiplication on TPU silicon...
✅ Success! The TPU driver is fully operational and executing math.
9. ติดตั้งใช้งาน Gemma 4 ในคลัสเตอร์
ในส่วนนี้ คุณจะกำหนดค่าข้อมูลเข้าสู่ระบบ API ของ Hugging Face ที่ปลอดภัยเป็น Kubernetes ข้อมูลลับ, ทำให้ใช้งานได้เครื่องมือ การอนุมาน vLLM โดยใช้ทั้งเครือข่าย การจัดสรร ทรัพยากรแบบไดนามิก (DRA) และ การอ้างสิทธิ์ ฮาร์ดแวร์ รวมถึงเรียกใช้การทดสอบแบบครบวงจรกับ โมเดล Gemma 4 ของ Google
ตรวจสอบว่าคุณเข้าสู่ระบบเซสชัน SSH ที่ปลอดภัยใน k8s-control-plane แล้ว
- เชื่อมต่อกับ VM ของ Control Plane จาก Cloud Shell อีกครั้งอย่างปลอดภัย หากเชื่อมต่อแล้ว ให้ข้ามขั้นตอนนี้
gcloud compute ssh k8s-control-plane \
    --zone=$ZONE \
    --tunnel-through-iap
- ล้างข้อมูลการทำให้ใช้งานได้ก่อนหน้า
# 1. Delete the StatefulSet to stop the benchmarking pods
kubectl delete statefulset neper

# 2. Wait for the pods to terminate fully and release the claims
kubectl wait --for=delete pod/neper-0 pod/neper-1 --timeout=60s
- จัดเก็บโทเค็นเพื่อการเข้าถึง Hugging Face แทนที่
<YOUR_ACTUAL_HUGGING_FACE_TOKEN>ด้วยโทเค็นของคุณ
export HF_TOKEN="<YOUR_ACTUAL_HUGGING_FACE_TOKEN>"
- สร้างข้อมูลลับ
kubectl create secret generic hf-token --from-literal=token="${HF_TOKEN}"
- ไฟล์ Manifest นี้จะกำหนดเวลาจำลอง vLLM รายการเดียวที่ทำงานบน VM ของ TPU แบบดิบที่มีชิป 4 ตัว โดยจะใช้มาตรฐาน DRA ของ Kubernetes เพื่อติดตั้งทั้งการอ้างสิทธิ์เครือข่ายที่กำหนดเอง (tpu-net-claim) และการอ้างสิทธิ์ฮาร์ดแวร์ (tpu-hardware-claim) เพื่อเข้าถึงฮาร์ดแวร์ TPU ดิบอย่างปลอดภัยโดยไม่ต้องติดตั้งโวลุ่มของโฮสต์ที่ไม่ปลอดภัย สุดท้ายนี้ จะแสดงเซิร์ฟเวอร์ API ที่เข้ากันได้กับ OpenAI ผ่านพอร์ต 8080 เรียกใช้คำสั่งต่อไปนี้เพื่อสร้างไฟล์
cat << 'EOF' > gemma-inference.yaml
apiVersion: apps/v1
kind: Deployment
metadata:
  name: vllm-gemma-4
  labels:
    app: gemma-server
spec:
  replicas: 1
  selector:
    matchLabels:
      app: gemma-server
  template:
    metadata:
      labels:
        app: gemma-server
    spec:
      hostIPC: true
      containers:
      - name: vllm-tpu
        image: vllm/vllm-tpu:latest
        securityContext:
          privileged: true
        env:
        - name: HF_TOKEN
          valueFrom:
            secretKeyRef:
              name: hf-token
              key: token
        - name: JAX_PLATFORMS
          value: "tpu,cpu"
        - name: TPU_ACCELERATOR_TYPE
          value: "v6e-4"
        - name: TPU_WORKER_HOSTNAMES
          value: "127.0.0.1"
        - name: TPU_WORKER_ID
          value: "0"
        - name: LIBTPU_INIT_ARGS
          value: "--noenable_tpunetd_client"
        - name: BARE_METAL_MODE
          value: "true"
        - name: BYPASS_VBAR_CONTROL_SERVICE
          value: "1"
        - name: TPU_SKIP_MDS_QUERY
          value: "1"
        - name: TPU_DEFAULT_NETWORK_TYPE
          value: "loopback"
        - name: CHIPS_PER_HOST_BOUNDS
          value: "2,2,1"
        - name: HOST_BOUNDS
          value: "1,1,1"
        - name: ALT
          value: "false,false,false"
        - name: WRAP
          value: "false,false,false"
        command:
        - bash
        - -c
        - |
          export PYTHONUNBUFFERED=1
          sysctl -w net.ipv6.conf.all.disable_ipv6=0
          sysctl -w net.ipv6.conf.default.disable_ipv6=0
          sysctl -w net.ipv6.conf.lo.disable_ipv6=0
          ip link set lo up || true

          exec python3 -m vllm.entrypoints.openai.api_server \
            --model google/gemma-4-E4B-it \
            --tensor-parallel-size 4 \
            --trust-remote-code \
            --max-model-len 8192 \
            --max-num-batched-tokens 4096 \
            --host 0.0.0.0 \
            --port 8080
        ports:
        - containerPort: 8080
        resources:
          requests:
            cpu: "170"
            memory: "650Gi"
          limits:
            cpu: "170"
            memory: "650Gi"
          claims:
          - name: tpu-net-claim
          - name: tpu-hardware-claim
        volumeMounts:
        - name: dshm
          mountPath: /dev/shm
      volumes:
      - name: dshm
        emptyDir:
          medium: Memory
      resourceClaims:
      - name: tpu-net-claim
        resourceClaimTemplateName: tpu-net-interfaces
      - name: tpu-hardware-claim
        resourceClaimTemplateName: tpu-device-template
---
apiVersion: v1
kind: Service
metadata:
  name: vllm-gemma-service
spec:
  selector:
    app: gemma-server
  ports:
  - protocol: TCP
    port: 8080
    targetPort: 8080
  type: ClusterIP
EOF
- ทำให้ภาระงานการอนุมานใช้งานได้
kubectl apply -f gemma-inference.yaml
- ยืนยันสถานะการติดตั้งใช้งาน การตั้งค่านี้ต้องดาวน์โหลดโมเดลและโหลด
vLLM. Thisซึ่งอาจใช้เวลาประมาณ10 - 25 minutes.
kubectl get pods -l app=gemma-server

kubectl describe pods -l app=gemma-server
นอกจากนี้ คุณยังดูบันทึกจากคอนเทนเนอร์เพื่อดูกระบวนการได้ด้วย กด CTRL+C เพื่อออกจากมุมมองบันทึก
kubectl logs -l app=gemma-server -f
คุณจะทราบว่าเครื่องมือเริ่มต้นอย่างสมบูรณ์เมื่อเห็นบรรทัดต่อไปนี้
(APIServer pid=1) INFO: Started server process [1]
(APIServer pid=1) INFO: Waiting for application startup.
(APIServer pid=1) INFO: Application startup complete
กด CTRL+C เพื่อออกจากสตรีมบันทึกก่อนดำเนินการต่อ
- ยืนยันการแนบอินเทอร์เฟซ ตรวจสอบอินเทอร์เฟซเครือข่ายที่เชื่อมโยงภายในคอนเทนเนอร์
kubectl exec deployment/vllm-gemma-4 -c vllm-tpu -- ls /sys/class/net
kubectl exec deployment/vllm-gemma-4 -c vllm-tpu -- cat /proc/net/fib_trie | grep -B 1 "32 host"
สิ่งที่ควรสังเกต: คุณควรเห็น ens9 และ ens10 (หรือชื่อ ensX ที่คล้ายกัน) ข้างอินเทอร์เฟซ CNI มาตรฐาน (eth0) และ Loopback (lo) ซึ่งแสดงถึงอินเทอร์เฟซเครือข่าย PCI ของโฮสต์ GCE จริงที่เชื่อมโยงแบบไดนามิกภายในพ็อดโดยไดรเวอร์ DRANET แบบโอเพนซอร์สที่ใช้รูปแบบการตั้งชื่อสล็อตที่คาดการณ์ได้ของ systemd
kubectl exec deployment/vllm-gemma-4 -c vllm-tpu -- ls /sys/class/net
ens10
ens9
eth0
Lo

kubectl exec deployment/vllm-gemma-4 -c vllm-tpu -- cat /proc/net/fib_trie | grep -B 1 "32 host"

              |-- 10.10.0.3
                 /32 host LOCAL
--
              |-- 10.20.0.3
                 /32 host LOCAL
--
           |-- 127.0.0.1
              /32 host LOCAL
--
     |-- 192.168.238.67
        /32 host LOCAL
--
              |-- 10.10.0.3
                 /32 host LOCAL
--
              |-- 10.20.0.3
                 /32 host LOCAL
--
           |-- 127.0.0.1
              /32 host LOCAL
--
     |-- 192.168.238.67
        /32 host LOCAL
10. ทดสอบ LLM
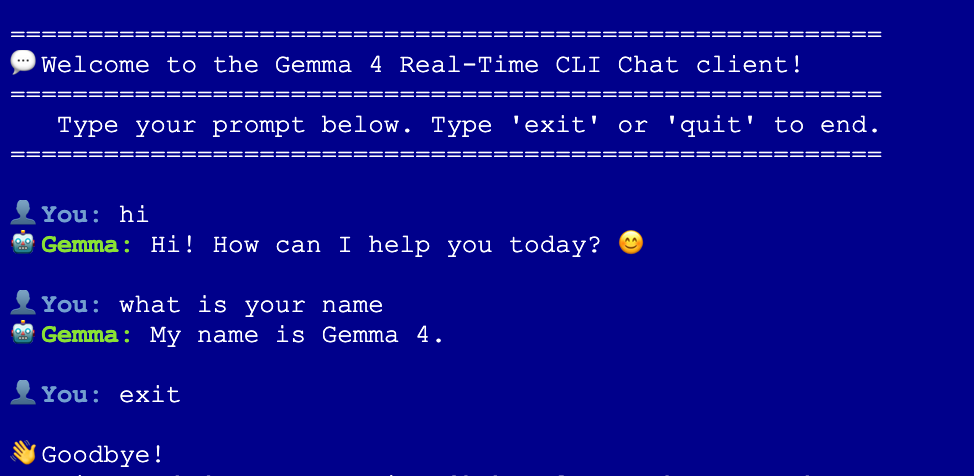
เมื่อตรวจสอบอินเทอร์เฟซแล้ว ให้เปิดใช้คอนเทนเนอร์ทดสอบแบบเบาภายในคลัสเตอร์เพื่อส่งคำขอการอนุมานแบบสตรีมมิงกับ Gemma 4
- เรียกใช้คำสั่งต่อไปนี้ในเซสชัน
k8s-control-planeเพื่อเปิดใช้ไคลเอ็นต์แบบอินเทอร์แอกทีฟ
kubectl run gemma-chat --rm -i --tty --image=alpine --restart=Never -- sh -c '
  # 1. Silently install curl and jq
  apk add --no-cache curl jq > /dev/null

  echo -e "\n========================================================"
  echo -e "💬 Welcome to the Gemma 4 Real-Time CLI Chat client!"
  echo -e "========================================================"
  echo -e "   Type your prompt below. Type '\''exit'\'' or '\''quit'\'' to end."
  echo -e "========================================================\n"

  while true; do
    # Read user input
    echo -n -e "👤 \033[1;34mYou:\033[0m "
    read -r USER_INPUT

    # Handle exit conditions
    if [ "$USER_INPUT" = "exit" ] || [ "$USER_INPUT" = "quit" ] || [ -z "$USER_INPUT" ]; then
      echo -e "\n👋 Goodbye!"
      break
    fi

    echo -n -e "🤖 \033[1;32mGemma:\033[0m "

    # Use jq to safely escape double quotes and special characters in user input
    JSON_PAYLOAD=$(jq -n --arg msg "$USER_INPUT" '\''{
      model: "google/gemma-4-E4B-it",
      messages: [{role: "user", content: $msg}],
      temperature: 0.7,
      stream: true
    }'\'')

    # Stream the tokens in real-time with a typewriter effect
    curl -s -X POST http://vllm-gemma-service:8080/v1/chat/completions \
      -H "Content-Type: application/json" \
      -d "$JSON_PAYLOAD" | while read -r line; do
        # Extract SSE data streams
        if echo "$line" | grep -q "data:"; then
          DATA_CLEAN=$(echo "$line" | sed "s/^data: //" | tr -d "\r")
          if [ "$DATA_CLEAN" != "[DONE]" ] && [ -n "$DATA_CLEAN" ]; then
            # Parse and print only the token content
            TOKEN=$(echo "$DATA_CLEAN" | jq -r ".choices[0].delta.content // empty" 2>/dev/null)
            echo -n "$TOKEN"
          fi
        fi
      done
    echo -e "\n"
  done
'
Interactive chat
11. ล้าง
ก่อนอื่น ให้ลบภาระงาน ความลับ และการกำหนดค่าทั้งหมดออกจากคลัสเตอร์
หากยังคงเข้าสู่ระบบk8s-control-planeเซสชัน SSH ที่ปลอดภัยอยู่ ให้เรียกใช้คำสั่งต่อไปนี้โดยตรง (หากคุณออกไปแล้ว ให้ SSH กลับเข้ามาก่อน)
- เชื่อมต่อกับ VM ของ Control Plane จาก Cloud Shell อีกครั้งอย่างปลอดภัย หากคุณเชื่อมต่อกับ VM นี้อยู่แล้ว ให้ข้ามขั้นตอนนี้
gcloud compute ssh k8s-control-plane \
    --zone=$ZONE \
    --tunnel-through-iap
- ล้างข้อมูลทรัพยากร Kubernetes
# 1. Delete the Gemma 4 deployment and service
kubectl delete -f gemma-inference.yaml --ignore-not-found=true

# 2. Delete the Hugging Face access secret
kubectl delete secret hf-token --ignore-not-found=true

# 3. Delete the open-source DRANET specs and drivers
kubectl delete deviceclass dranet --ignore-not-found=true
kubectl delete resourceclaimtemplate tpu-net-interfaces --ignore-not-found=true
kubectl delete -f https://raw.githubusercontent.com/kubernetes-sigs/dranet/refs/heads/main/install.yaml --ignore-not-found=true

# 4. Uninstall the OSS TPU Hardware Driver
helm uninstall dra-driver-google-tpu -n dra-driver-google-tpu --wait || true
- ตอนนี้ให้พิมพ์
exitแล้วกลับไปที่ไดเรกทอรี Cloud Shell ที่ใช้งานอยู่ซึ่งจัดเก็บไฟล์ Terraform และทำลายโหนด เครือข่าย VPC และกฎไฟร์วอลล์ทั้งหมด
# 1. Create the teardown script
cat << 'EOF' > teardown.sh
#!/bin/bash

# The specific networks defined in your Terraform vpc.tf
NETWORKS=(
  "oss-k8s-primary-vpc"
  "oss-tpu-vpc-1"
  "oss-tpu-vpc-2"
)

echo "=== Hunting down and deleting ALL firewall rules for OSS networks ==="

for NETWORK in "${NETWORKS[@]}"; do
    echo "Searching for firewall rules attached to network: $NETWORK..."

    # Query GCP for any firewall rule tied to this specific network
    STUCK_RULES=$(gcloud compute firewall-rules list \
        --filter="network:($NETWORK)" \
        --format="value(name)" | tr '\n' ' ')

    # Check if the string is not empty and contains more than just whitespace
    if [ -n "$STUCK_RULES" ] && [ "$STUCK_RULES" != " " ]; then
        echo "🔥 Found rules holding $NETWORK hostage: $STUCK_RULES"
        echo "Deleting them now..."
        gcloud compute firewall-rules delete $STUCK_RULES --quiet
    else
        echo "✅ No firewall rules found for $NETWORK."
    fi
done

# Fallback: Explicitly delete the named rules from your Terraform file
# just in case the dynamic filter missed them due to caching delays
echo "=== Running fallback deletion for explicitly named Terraform rules ==="
gcloud compute firewall-rules delete \
    oss-k8s-primary-allow-internal \
    oss-k8s-allow-iap-ssh \
    oss-tpu1-allow-internal \
    oss-tpu2-allow-internal \
    --quiet 2>/dev/null || true

echo "--------------------------------------------------------"
echo "✅ Firewall cleanup complete!"
echo "Your networks are now stripped of firewalls and ready to be deleted."
echo "--------------------------------------------------------"

echo "=== Destroying Infrastructure ==="
cd ~/oss-kube-dra || exit
terraform destroy -auto-approve

echo "--------------------------------------------------------"
echo "✅ Infrastructure successfully destroyed!"
echo "--------------------------------------------------------"
EOF

# 2. Make the script executable and run it
chmod +x teardown.sh
./teardown.sh
- ลบโฟลเดอร์ Terraform
oss-kube-dra
cd
rm -r oss-kube-dra
12. ขอแสดงความยินดี
คุณจัดสรร บูตสแตป และตรวจสอบโครงสร้างพื้นฐาน AI ของ Kubernetes ที่มีการจัดการด้วยตนเองและมีประสิทธิภาพสูงในอินสแตนซ์ VM ของ Google Compute Engine (GCE) โดยตรงเรียบร้อยแล้ว
ตอนนี้คุณมีความเข้าใจในระดับระบบอย่างลึกซึ้งเกี่ยวกับวิธีที่ Kubernetes ใช้การจัดสรรทรัพยากรแบบไดนามิก (DRA) เพื่อจัดระเบียบตัวเร่ง TPU ดิบ ผูกโทโพโลยีโฮสต์แบบหลาย NIC ความเร็วสูง และให้บริการโมเดลภาษาขนาดใหญ่ที่ล้ำสมัย
ขั้นตอนถัดไป / ดูข้อมูลเพิ่มเติม
อ่านข้อมูลเพิ่มเติมเกี่ยวกับเครือข่าย GKE
เข้าสู่ห้องทดลองถัดไป
ทำภารกิจต่อด้วย Google Cloud และดูแล็บอื่นๆ ของ Google Cloud เหล่านี้