
1. מבוא
סקירה כללית
אתם מפתחים בחברת שיווק בתחום התיירות. מחלקת המכירות החליטה שהיא צריכה אפליקציית צ'אט חדשה כדי להתחרות בחברות גדולות יותר בתחום ההזמנות והחיפוש. הם גם שמעו על AI גנרטיבי, אבל אין להם הרבה ידע בנושא. מחלקות אחרות שמעו על היוזמה הזו, והן רוצות לדעת איך היא יכולה לעזור להן לשפר את חוויית הלקוח.
הפעולות שתבצעו:
בשיעור ה-Lab הזה תלמדו איך ליצור צ'אט בוט שיעזור בתכנון נסיעות באמצעות מודל Gemini 2.5 Flash ב-Vertex AI.
האפליקציה צריכה:
- עוזרת למשתמשים לשאול שאלות על נסיעות, להזמין נסיעות ולקבל מידע על מקומות שהם מתכננים לנסוע אליהם
- מספקת למשתמשים דרכים לקבל עזרה לגבי תוכניות נסיעה ספציפיות
- יכולים להשתמש בכלים כדי לאחזר נתונים בזמן אמת, כמו מזג האוויר
תעבדו בסביבת Google Cloud שהוגדרה מראש, באופן ספציפי ב-Cloud Shell Editor. ממשק קצה בסיסי של אפליקציית אינטרנט כבר מוגדר בשבילכם, יחד עם ההרשאות הדרושות לגישה ל-Vertex AI. האפליקציה הזו פותחה באמצעות Streamlit.
מה תלמדו
בשיעור ה-Lab הזה תלמדו איך לבצע את המשימות הבאות:
- כדאי לעיין בפלטפורמת Vertex AI כדי לזהות מודלים של AI גנרטיבי שזמינים לשימוש.
- פיתוח בטרמינל וב-Cloud Shell Editor
- משתמשים ב-Gemini Code Assist כדי להבין קוד.
- משתמשים ב-Vertex AI SDK ב-Python כדי לשלוח הנחיות ל-Gemini LLM ולקבל ממנו תשובות.
- אפשר להשתמש בהנדסת הנחיות בסיסית (הוראות מערכת, פרמטרים של המודל) כדי להתאים אישית את הפלט של מודל שפה גדול (LLM) של Gemini.
- בודקים ומעדכנים שוב ושוב אפליקציית צ'אט שמבוססת על LLM, על ידי שינוי ההנחיות והפרמטרים כדי לשפר את התשובות.
- הגדרת כלים ושימוש בהם באמצעות מודל Gemini כדי להפעיל בקשה להפעלת פונקציה.
- שינוי מבנה הקוד כדי להשתמש בסשן שיחת צ'אט עם שמירת מצב, שיטה מומלצת לאפליקציות מבוססות-שיחה.
2. הגדרת הפרויקט
חשבון Google
אם אין לכם חשבון Google אישי, אתם צריכים ליצור חשבון Google.
משתמשים בחשבון לשימוש אישי במקום בחשבון לצורכי עבודה או בחשבון בית ספרי.
כניסה למסוף Google Cloud
נכנסים למסוף Google Cloud באמצעות חשבון Google אישי.
הפעלת חיוב
מימוש קרדיטים ב-Google Cloud (אופציונלי)
כדי להשתתף בסדנה הזו, צריך חשבון לחיוב עם יתרה מסוימת. כדי להתחיל, משתמשים בקרדיטים שמופיעים בבאנר בחלק העליון של ה-codelab. אם כבר קישרתם חשבון לחיוב, אתם יכולים לדלג על השלב הזה.
הגדרה של חשבון לחיוב לשימוש אישי
אם הגדרתם חיוב באמצעות קרדיטים ל-Google Cloud, אתם יכולים לדלג על השלב הזה.
כדי להגדיר חשבון לחיוב לשימוש אישי, עוברים לכאן כדי להפעיל את החיוב ב-Cloud Console.
הערות:
- העלות של השלמת ה-Lab הזה במשאבי Cloud צריכה להיות פחות מ-1$.
- כדי למחוק משאבים ולמנוע חיובים נוספים, אפשר לבצע את השלבים בסוף ה-Lab הזה.
- משתמשים חדשים זכאים לתקופת ניסיון בחינם בשווי 300$.
יצירת פרויקט (אופציונלי)
אם אין לכם פרויקט שאתם רוצים להשתמש בו בסדנה הזו, אתם יכולים ליצור פרויקט חדש כאן.
3. פתיחת Cloud Shell Editor
- כדי לעבור ישירות אל Cloud Shell Editor, לוחצים על הקישור הזה.
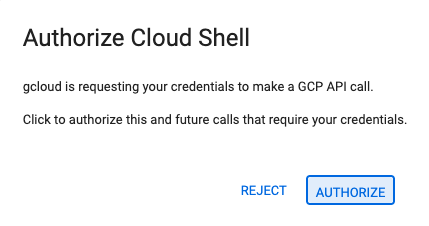
- אם תתבקשו לאשר בשלב כלשהו היום, תצטרכו ללחוץ על אישור כדי להמשיך.
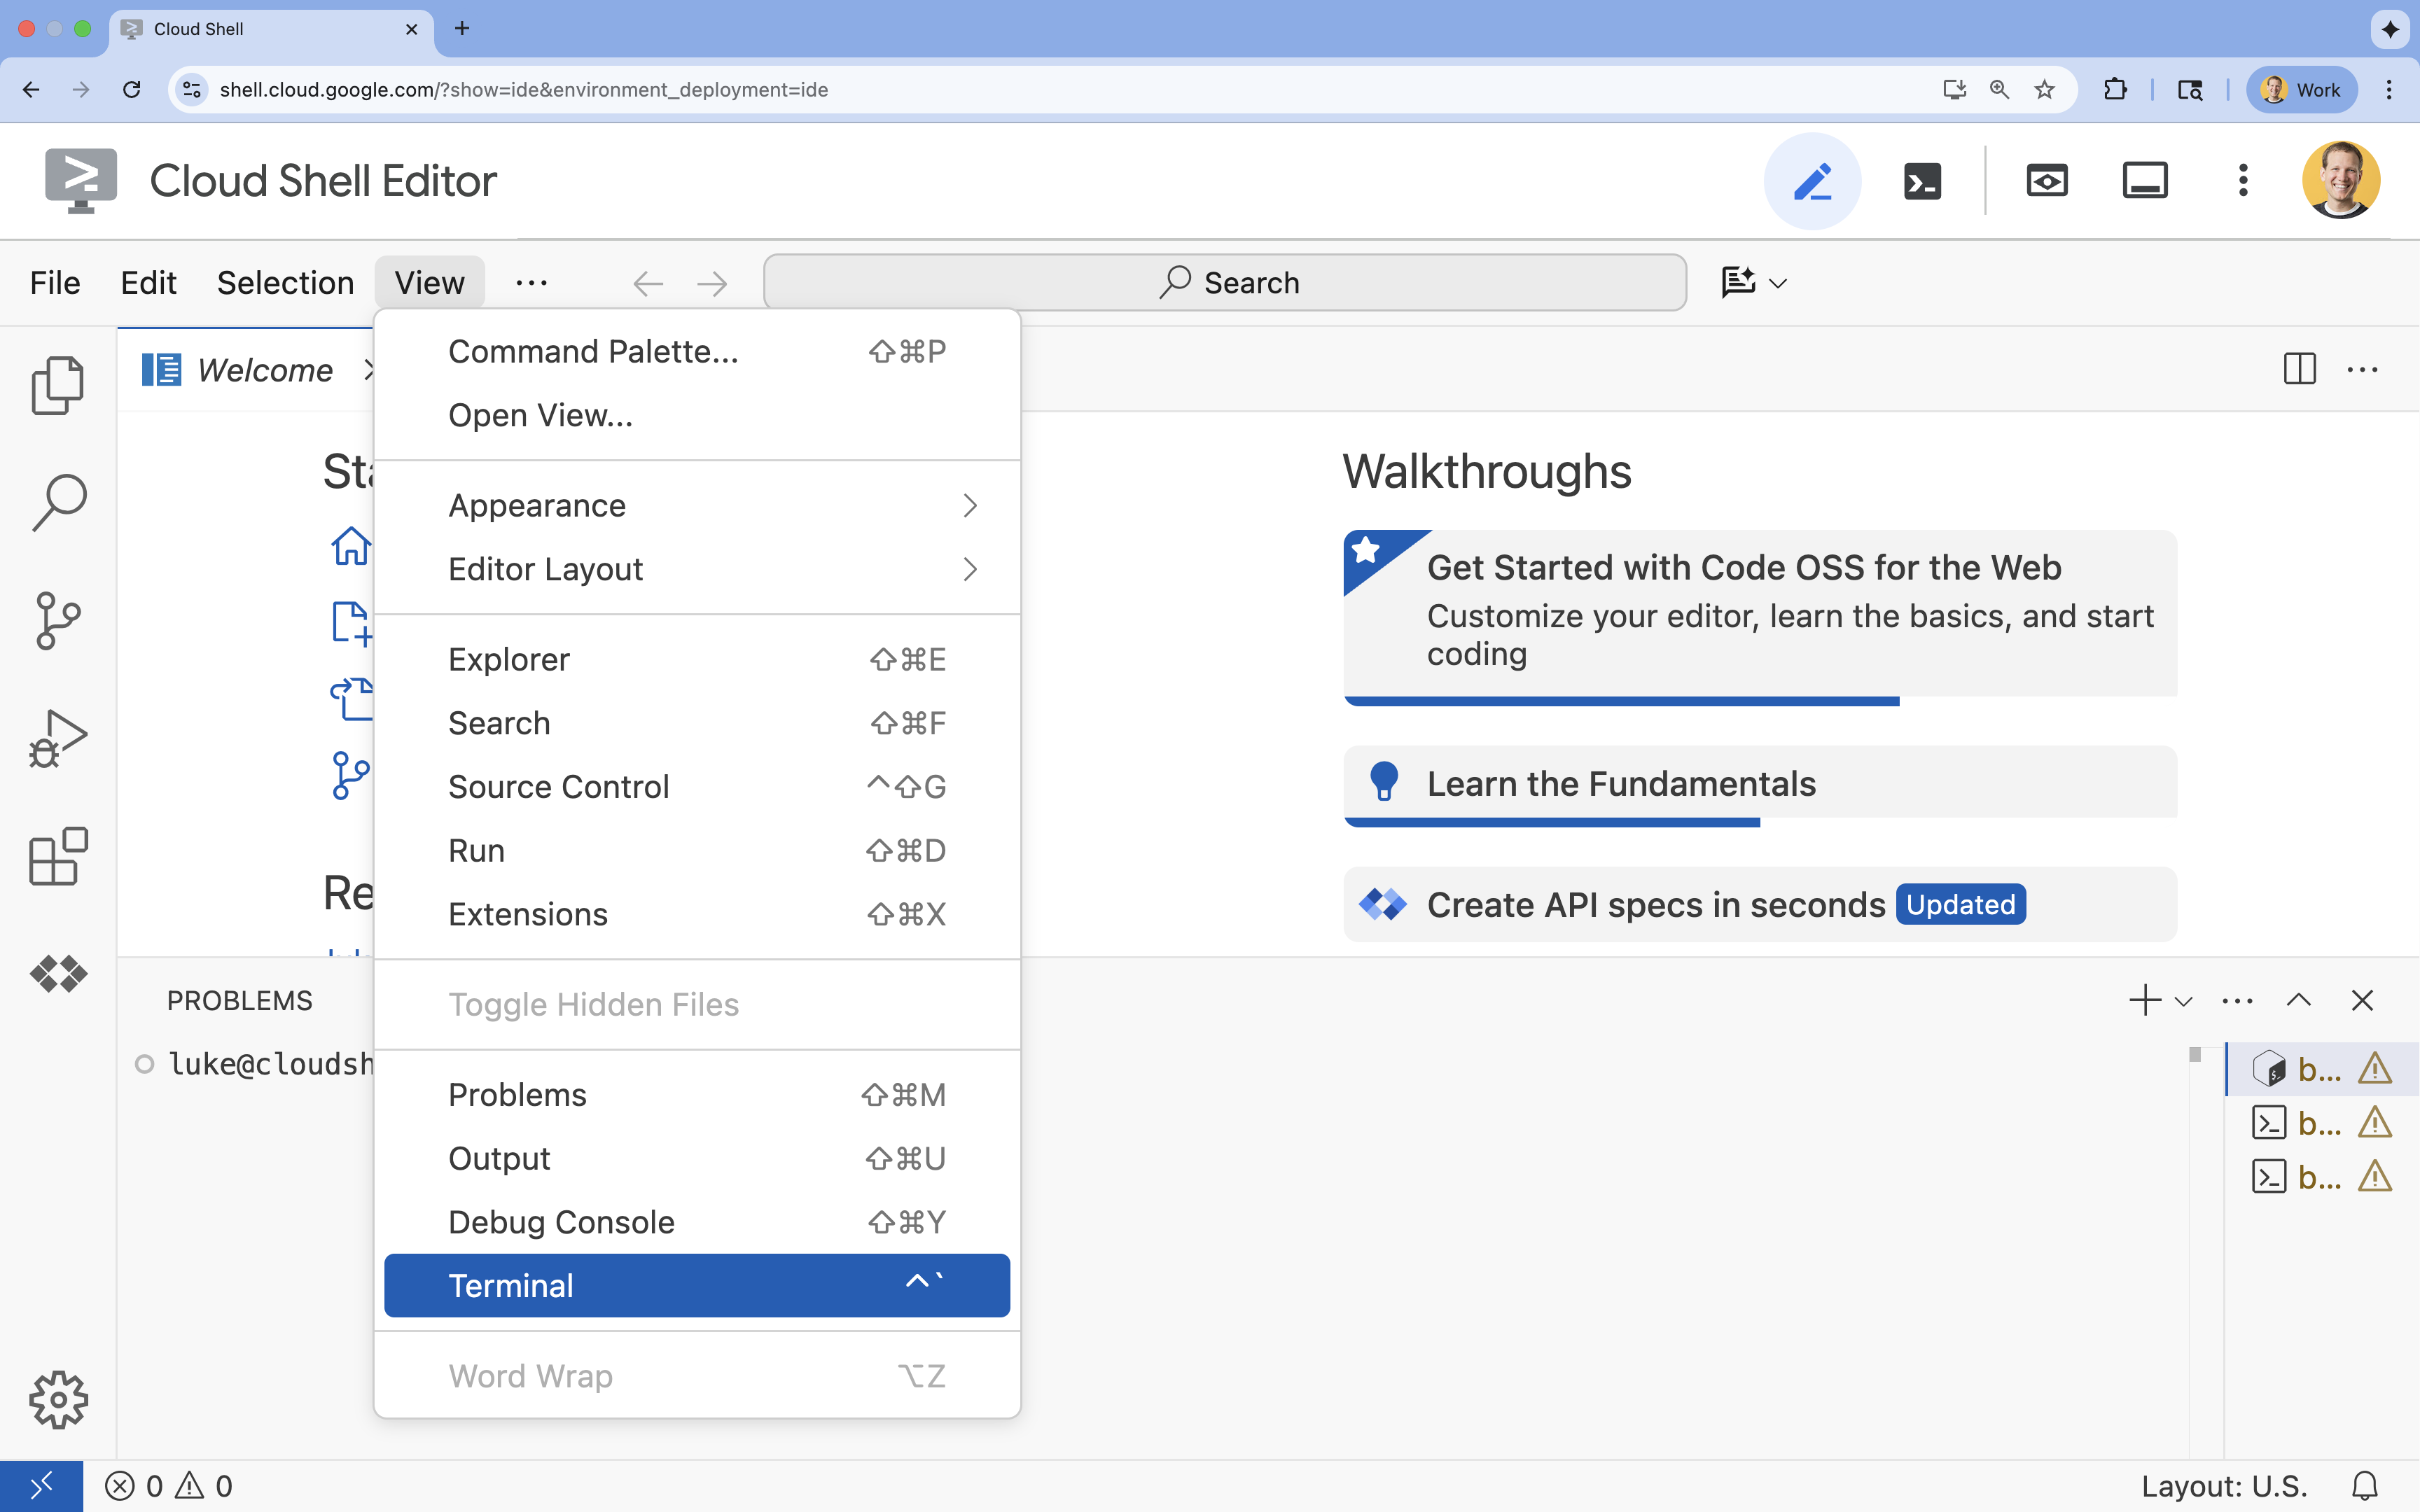
- אם הטרמינל לא מופיע בתחתית המסך, פותחים אותו:
- לוחצים על הצגה.
- לוחצים על Terminal (מסוף)
 .
.
- בטרמינל, מגדירים את הפרויקט באמצעות הפקודה הבאה:
gcloud config set project [PROJECT_ID]- דוגמה:
gcloud config set project lab-project-id-example - אם אתם לא זוכרים את מזהה הפרויקט, אתם יכולים להציג רשימה של כל מזהי הפרויקטים באמצעות הפקודה:
gcloud projects list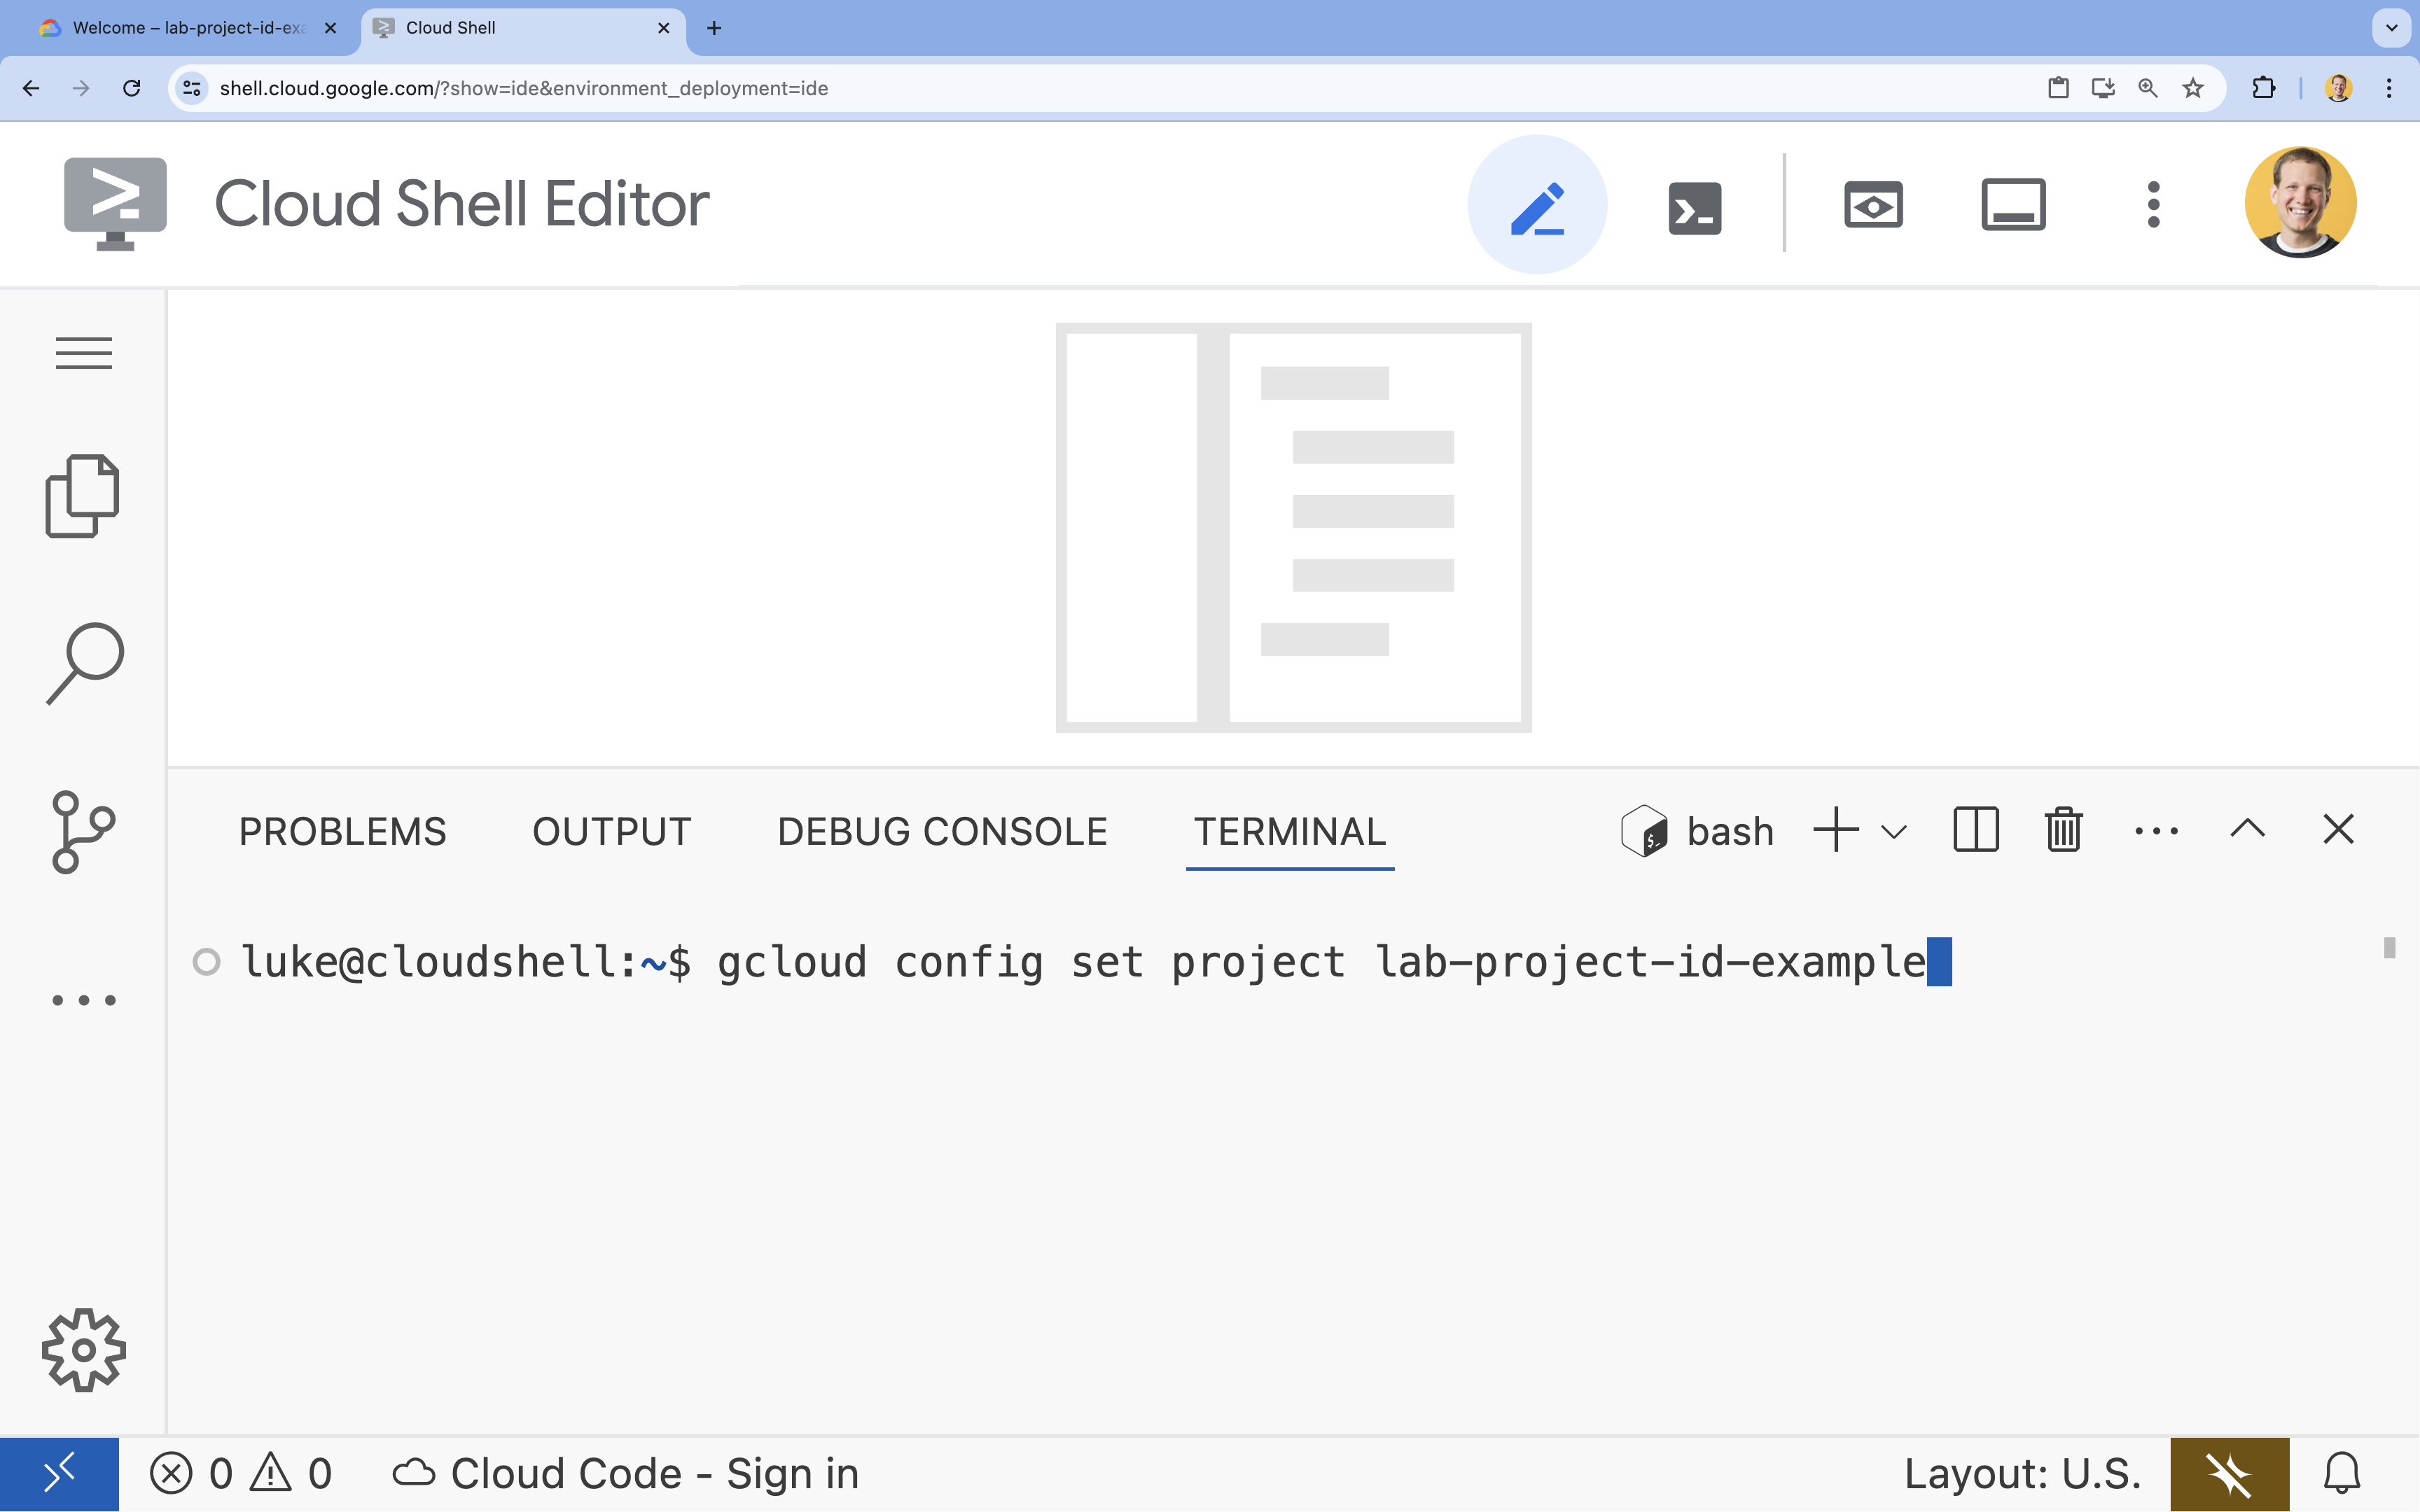
- דוגמה:
- תוצג ההודעה הבאה:
Updated property [core/project].
4. הפעלת ממשקי ה-API
כדי להשתמש ב-Vertex AI SDK ולקיים אינטראקציה עם מודל Gemini, צריך להפעיל את Vertex AI API בפרויקט Google Cloud.
- בטרמינל, מפעילים את ממשקי ה-API:
gcloud services enable \
  aiplatform.googleapis.com
מבוא ל-Vertex AI SDK ל-Python
כדי ליצור אינטראקציה עם מודלים שמתארחים ב-Vertex AI מאפליקציית Python, תשתמשו ב-Vertex AI SDK ל-Python. ערכת ה-SDK הזו מפשטת את התהליך של שליחת הנחיות, ציון פרמטרים של מודל וקבלת תשובות, בלי צורך לטפל ישירות במורכבויות של הקריאות הבסיסיות ל-API.
כאן אפשר למצוא מאמרי עזרה מקיפים בנושא Vertex AI SDK ל-Python.
5. יצירת סביבה וירטואלית והתקנת יחסי תלות
לפני שמתחילים פרויקט Python, מומלץ ליצור סביבה וירטואלית. כך מבודדים את התלויות של הפרויקט, ומונעים התנגשויות עם פרויקטים אחרים או עם חבילות Python גלובליות של המערכת.
- יוצרים תיקייה בשם
wanderbotכדי לאחסן את הקוד של אפליקציית העוזר האישי לתכנון נסיעות. מריצים את הקוד הבא בטרמינל:mkdir wanderbot && cd wanderbot - יוצרים ומפעילים סביבה וירטואלית:
uv venv --python 3.12 source .venv/bin/activatewanderbot) תופיע בהנחיית המסוף, כדי לציין שהסביבה הווירטואלית פעילה. הוא ייראה בערך כך:
6. יצירת קבצים ראשוניים עבור wanderbot
- יוצרים ופותחים קובץ
app.pyחדש לאפליקציה. מריצים את הקוד הבא בטרמינל:cloudshell edit app.pycloudshell editתפתח את הקובץapp.pyבעורך שמעל הטרמינל. - מדביקים את קוד לתחילת הדרך הבא של האפליקציה ב-
app.py:import streamlit as st from google import genai from google.genai import types import requests import logging # --- Defining variables and parameters --- REGION = "global" PROJECT_ID = None # TODO: Insert Project ID GEMINI_MODEL_NAME = "gemini-2.5-flash" temperature = .2 top_p = 0.95 system_instructions = None # --- Tooling --- # TODO: Define the weather tool function declaration # TODO: Define the get_current_temperature function # --- Initialize the Vertex AI Client --- try: # TODO: Initialize the Vertex AI client print(f"VertexAI Client initialized successfully with model {GEMINI_MODEL_NAME}") except Exception as e: st.error(f"Error initializing VertexAI client: {e}") st.stop() # TODO: Add the get_chat function here in Task 15. # --- Call the Model --- def call_model(prompt: str, model_name: str) -> str: """ This function interacts with a large language model (LLM) to generate text based on a given prompt and system instructions. It will be replaced in a later step with a more advanced version that handles tooling. """ try: # TODO: Prepare the content for the model # TODO: Define generate_content configuration (needed for system instructions and parameters) # TODO: Define response logging.info(f"[call_model_response] LLM Response: \"{response.text}\"") # TODO: Uncomment the below "return response.text" line # return response.text except Exception as e: return f"Error: {e}" # --- Presentation Tier (Streamlit) --- # Set the title of the Streamlit application st.title("Travel Chat Bot") # Initialize session state variables if they don't exist if "messages" not in st.session_state: # Initialize the chat history with a welcome message st.session_state["messages"] = [ {"role": "assistant", "content": "How can I help you today?"} ] # Display the chat history for msg in st.session_state.messages: st.chat_message(msg["role"]).write(msg["content"]) # Get user input if prompt := st.chat_input(): # Add the user's message to the chat history st.session_state.messages.append({"role": "user", "content": prompt}) # Display the user's message st.chat_message("user").write(prompt) # Show a spinner while waiting for the model's response with st.spinner("Thinking..."): # Get the model's response using the call_model function model_response = call_model(prompt, GEMINI_MODEL_NAME) # Add the model's response to the chat history st.session_state.messages.append( {"role": "assistant", "content": model_response} ) # Display the model's response st.chat_message("assistant").write(model_response) - יוצרים ופותחים קובץ
requirements.txtחדש לקוד האפליקציה. מריצים את הקוד הבא בטרמינל:cloudshell edit requirements.txtcloudshell editתפתח את הקובץrequirements.txtבעורך שמעל הטרמינל. - מדביקים את קוד לתחילת הדרך הבא של האפליקציה ב-
requirements.txt.google-genai streamlit requests - מתקינים את יחסי התלות הנדרשים של Python בפרויקט הזה. מריצים את הקוד הבא בטרמינל:
uv pip install -r requirements.txt
7. הסבר על הקוד
הקבצים שיצרתם כוללים קצה קדמי בסיסי של אפליקציית צ'אט. זה כולל את הנתונים של:
-
app.py: זה הקובץ שבו נעבוד. בשלב הזה, הוא כולל את הפריטים הבאים:- ייבוא נדרש
- משתני סביבה ופרמטרים (חלקם הם placeholders)
- פונקציית
call_modelריקה, שנמלא אותה - קוד Streamlit לאפליקציית הצ'אט של ממשק המשתמש
requirements.txt:- כולל את דרישות ההתקנה להפעלת
app.py
- כולל את דרישות ההתקנה להפעלת
עכשיו הגיע הזמן לבדוק את הקוד.
פתיחת הצ'אט עם Gemini Code Assist
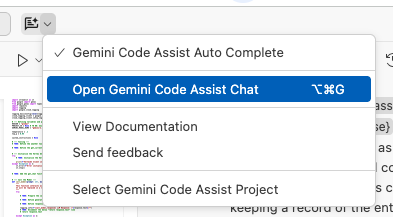
הצ'אט של Gemini Code Assist אמור להיפתח כבר בחלונית בצד שמאל ב-Cloud Shell Editor. אם הצ'אט עם Gemini Code Assist לא פתוח, אפשר לפתוח אותו כך:
- לוחצים על הלחצן של Gemini Code Assist (
 ) בחלק העליון של המסך.
 - בוחרים באפשרות פתיחת הצ'אט עם Gemini Code Assist.
שימוש ב-Gemini Code Assist כדי להבין את הקוד
אתם יכולים להשתמש ב-Gemini Code Assist Chat כדי להבין טוב יותר את הקוד.
- מסמנים או בוחרים את קטע הקוד הרצוי.
- מקלידים 'הסבר על הקוד הזה' בצ'אט עם Gemini.
- לוחצים על Enter כדי לשלוח
8. הפעלת אפליקציית האינטרנט
לפני שמקשרים את האפליקציה הזו ל-LLM, מפעילים אותה כדי לראות איך היא מתנהגת בהתחלה.
- בתוך הספרייה
wanderbot, מריצים את הפקודה הבאה בטרמינל כדי להפעיל את אפליקציית Streamlit ולאפשר גישה מקומית אליה בסביבת מעטפת Cloud Shell:streamlit run app.py --browser.serverAddress=localhost --server.enableCORS=false --server.enableXsrfProtection=false --server.port 8080 - אחרי שמריצים את הפקודה, לוחצים על הלחצן Web Preview בחלק העליון של עורך Cloud Shell ובוחרים באפשרות Preview on port 8080.
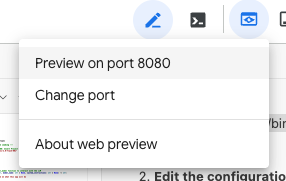
יוצג לכם ממשק פשוט של צ'אט לאפליקציית הנסיעות. - מקלידים הודעה (למשל
Hi!) ומקישים על Enter.
ההודעה תופיע בהיסטוריית הצ'אט, אבל במקום תשובה מהעוזר הדיגיטלי, תקבלו הודעת שגיאה. הסיבה לכך היא שהאפליקציה עדיין לא מחוברת למודל שפה גדול. כדאי לשים לב להתנהגות הזו כדי להבין מהי נקודת ההתחלה של שיעור ה-Lab.
9. אתחול הלקוח של Vertex AI
עיון במודלים שזמינים ב-Vertex AI
פלטפורמת Vertex AI של Google Cloud מספקת גישה למגוון מודלים של AI גנרטיבי. לפני שמבצעים שילוב, אפשר לעיין באפשרויות הזמינות במסוף Google Cloud.
- במסוף Google Cloud, עוברים אל Model Garden. כדי לעשות את זה, מחפשים את האפשרות Model Garden בסרגל החיפוש בחלק העליון של המסך ובוחרים באפשרות Vertex AI. (
 )
) - מעיינים ברשימת המודלים הזמינים. אפשר לסנן לפי דברים כמו אופנים, סוגי משימות ותכונות.
לצורך המעבדה הזו, תשתמשו במודל Gemini 2.5 Flash, שהוא בחירה טובה לבניית אפליקציות צ'אט רספונסיביות בגלל המהירות שלו.
אתחול הלקוח של Vertex AI
עכשיו משנים את הקטע --- Initialize the Vertex AI Client --- ב-app.py כדי לאתחל את לקוח Vertex AI. אובייקט הלקוח הזה ישמש לשליחת הנחיות למודל.
- פותחים את הקובץ
app.pyב-Cloud Shell Editor. - ב-
app.py, מחפשים את השורהPROJECT_ID = None. - מחליפים את
Noneבמזהה הפרויקט ב-Google Cloud בתוך מרכאות. (לדוגמה,PROJECT_ID = "google-cloud-labs")
אם אתם לא זוכרים את מזהה הפרויקט, אתם יכולים להציג רשימה של כל מזהי הפרויקטים שלכם באמצעות הפקודה:gcloud projects list | awk '/PROJECT_ID/{print $2}' - הגדרת הלקוח: בתוך הבלוק
try, מאתחלים את הלקוח של Vertex AI.client = genai.Client( vertexai=True, project=PROJECT_ID, location=REGION, )
עדכון של אתחול לקוח Vertex AI
בשלב הזה, הקטע Initialize the Vertex AI Client ייראה כך:
# --- Initialize the Vertex AI Client ---
try:
    client = genai.Client(
        vertexai=True,
        project=PROJECT_ID,
        location=REGION,
    )
print(f"VertexAI Client initialized successfully with model {GEMINI_MODEL_NAME}")
except Exception as e:
st.error(f"Error initializing VertexAI client: {e}")
st.stop()
10. הכנת הנתונים והפעלת המודל
עכשיו מכינים את התוכן לשליחה למודל ומבצעים קריאה למודל Gemini.
- מוצאים את הקטע
--- Call the Model ---שבו מוגדרת הפונקציהcall_model. - הגדרת התוכן: בקטע
# TODO: Prepare the content for the model, מגדירים את תוכן הקלט שיישלח למודל. בהנחיה בסיסית, זה יהיה קלט ההודעה של המשתמש.contents = [prompt] - הגדרת התשובה: מדביקים את הקוד הזה מתחת ל-
# TODO: Define response.response = client.models.generate_content( model=model_name, contents=contents, ) - החזרת התשובה: מבטלים את ההערה בשורה הבאה:
return response.text - בודקים את השורה שבה הפונקציה
call_modelנקראת, לקראת החלק התחתון של הקובץ בבלוקwith. אם אתם לא מבינים מה קורה כאן, סמנו את השורה ויש לכם שאלה ל-Gemini Code Assist.
דרך מפורשת יותר להגדיר את contents
הדרך שבה הגדרנו את contents פועלת כי ה-SDK חכם מספיק כדי להבין שרשימה שמכילה מחרוזות מייצגת קלט טקסט של משתמש. הוא מעצב אותו אוטומטית בצורה הנכונה עבור ה-API של המודל.
עם זאת, הדרך המפורשת והבסיסית יותר להגדיר קלט היא באמצעות אובייקטים של types.Part ו-types.Content, כמו בדוגמה הבאה:
user_message_parts = [types.Part.from_text(text=prompt)]
contents = [
types.Content(
role="user", # Indicates the content is from the user
parts=user_message_parts, # A list, allowing multiple types of content
),
]
הפונקציה call_model עודכנה
בשלב הזה, הפונקציה call_model אמורה להיראות כך:
def call_model(prompt: str, model_name: str) -> str:
"""
This function interacts with a large language model (LLM) to generate text based on a given prompt and system instructions.
It will be replaced in a later step with a more advanced version that handles tooling.
"""
try:
contents = [prompt]
# TODO: Define generate_content configuration (needed later for system instructions and parameters)
        response = client.models.generate_content(
            model=model_name,
            contents=contents,
        )
logging.info(f"[call_model_response] LLM Response: \"{response.text}\"")
return response.text
except Exception as e:
return f"Error: {e}"
11. בדיקת האפליקציה המקושרת
- בטרמינל, מסיימים את התהליך שפועל כרגע (CTRL+C)
- מריצים מחדש את הפקודה כדי להפעיל שוב את אפליקציית Streamlit.
streamlit run app.py --browser.serverAddress=localhost --server.enableCORS=false --server.enableXsrfProtection=false --server.port 8080 - מרעננים את אפליקציית Streamlit. אם אפליקציית Streamlit עדיין פועלת, אפשר פשוט לרענן את דף התצוגה המקדימה באינטרנט בדפדפן.
- עכשיו מקלידים שאלה בשדה הקלט של הצ'אט, כמו:
What is the best time of year to go to Iceland? - מקישים על Enter.
ההודעה שלכם תוצג באפליקציה, יופיע סמל של גלגל מסתובב עם הכיתוב 'מתבצעת חשיבה...', ואז תופיע תשובה שנוצרה על ידי מודל Gemini. אם כן, סימן שהצלחתם לקשר את אפליקציית האינטרנט שלכם ל-LLM ב-Vertex AI. 🙌 🥳
12. הגדרת הוראות מערכת
החיבור הבסיסי עובד, אבל האיכות והסגנון של התשובות של מודל ה-LLM מושפעים מאוד מהקלט שהוא מקבל. הנדסת הנחיות היא התהליך של עיצוב ושיפור של הקלטים האלה (הנחיות) כדי להנחות את המודל ליצירת הפלט הרצוי.
לכן, תתחילו ביצירת הוראות למערכת והעברה שלהן למודל.
אתם יכולים להשתמש ביש לך שאלה ל-Gemini? כדי לקבל הצעות להוראות מערכת שימושיות.
- ב-
app.py, מאתרים את המשתנהsystem_instructions, שמוגדר כרגע ל-None.system_instructions = NoneNoneבמחרוזת מרובת שורות שמספקת הוראות לבוט של עוזר הנסיעות שלנו. - יש לך שאלה ל-Gemini Code Assist: מעבירים את ההנחיה הבאה ל-Gemini Code Assist (או יוצרים הנחיה משלכם):
I am a developer at a travel marketing company, and my sales department has decided that they need a new chat application to keep up with the bigger booking and search companies. I'm building a simple travel assistant chatbot using the Gemini 2.5 Flash model on Vertex AI. The application should: - Helps users ask questions about travel, book travel, and learn about places they are going to go - Provides users ways to get help about their specific travel plans - Provides all this in a production quality way (multiple environments, logging and monitoring, etc.) Please create system instructions appropriate for that chat app. Be thorough. Do not alter the code in any way beyond providing me with system instructions. - הגדרה
system_instructions: מגדירים אתsystem_instructionsכך שיהיה שווה להוראות המערכת שיצרתם באמצעות Gemini Code Assist. לחלופין, אתם יכולים להשתמש בהוראות המערכת האלה, שנוצרו על ידי Gemini בעזרת הנחיה דומה.system_instructions = """ You are a sophisticated travel assistant chatbot designed to provide comprehensive support to users throughout their travel journey. Your capabilities include answering travel-related questions, assisting with booking travel arrangements, offering detailed information about destinations, and providing support for existing travel plans. **Core Functionalities:** 1. **Travel Information and Recommendations:** * Answer user inquiries about travel destinations, including popular attractions, local customs, visa requirements, weather conditions, and safety advice. * Provide personalized recommendations for destinations, activities, and accommodations based on user preferences, interests, and budget. * Offer insights into the best times to visit specific locations, considering factors like weather, crowds, and pricing. * Suggest alternative destinations or activities if the user's initial choices are unavailable or unsuitable. 2. **Booking Assistance:** * Facilitate the booking of flights, hotels, rental cars, tours, and activities. * Search for available options based on user-specified criteria such as dates, destinations, budget, and preferences. * Present clear and concise information about available options, including pricing, amenities, and booking terms. * Guide users through the booking process, ensuring accurate information and secure transactions. * Provide booking confirmations and relevant details, such as booking references and contact information. 3. **Travel Planning and Itinerary Management:** * Assist users in creating detailed travel itineraries, including flights, accommodations, activities, and transportation. * Offer suggestions for optimizing travel plans, such as minimizing travel time or maximizing sightseeing opportunities. * Provide tools for managing and modifying existing itineraries, including adding or removing activities, changing booking dates, or upgrading accommodations. * Offer reminders and notifications for upcoming travel events, such as flight check-in or tour departure times. 4. **Customer Support and Troubleshooting:** * Provide prompt and helpful support to users with questions or issues related to their travel plans. * Assist with resolving booking discrepancies, cancellations, or modifications. * Offer guidance on travel-related emergencies, such as lost luggage or travel delays. * Provide access to relevant contact information for airlines, hotels, and other travel providers. **Interaction Guidelines:** * **Professionalism:** Maintain a polite, respectful, and professional tone in all interactions. * **Clarity and Conciseness:** Provide clear, concise, and easy-to-understand information. Avoid jargon or technical terms unless necessary and always explain them. * **Accuracy:** Ensure all information provided is accurate and up-to-date. Double-check details before sharing them with users. If unsure about something, admit that you don't know and offer to find the information. * **Personalization:** Tailor your responses and recommendations to the specific needs and preferences of each user. * **Proactive Assistance:** Anticipate user needs and offer relevant information or suggestions proactively. * **Error Handling:** Gracefully handle user errors or misunderstandings. Provide helpful guidance and alternative options when necessary. * **Confidentiality:** Respect user privacy and handle personal information with the utmost confidentiality and in compliance with data protection regulations. **Example Interactions:** **User:** "I want to go on a beach vacation in the Caribbean. I have a budget of $2000 per person for a week." **Chatbot:** "Certainly! The Caribbean offers many beautiful beach destinations within your budget. Some popular options include Punta Cana in the Dominican Republic, Cancun in Mexico, and Montego Bay in Jamaica. These destinations offer stunning beaches, all-inclusive resorts, and various activities. Would you like me to search for flights and accommodations for these locations based on your travel dates?" **User:** "My flight is delayed. What should I do?" **Chatbot:** "I'm sorry to hear about the delay. Please check with the airline for the updated departure time and any assistance they can offer. You may be entitled to compensation or rebooking options depending on the length of the delay and the airline's policy. Do you have your flight number handy so I can look up the current status for you?" **User:** "Tell me about the best time to visit Japan." **Chatbot:** "Japan is a fantastic destination with distinct seasons offering unique experiences. Spring (March-May) is famous for the beautiful cherry blossoms, while autumn (September-November) boasts stunning fall foliage. Both seasons have pleasant temperatures, making them ideal for sightseeing. Summer (June-August) can be hot and humid, but it's a great time for festivals and outdoor activities in the mountains. Winter (December-February) offers opportunities for skiing and snowboarding in the Japanese Alps, though some areas may experience heavy snowfall. To recommend the best time for you, could you tell me what you'd like to experience in Japan?" By following these instructions, you will be able to provide exceptional travel assistance and create a positive experience for every user. """ - הגדרת האובייקט generate_content: מאתחלים אובייקט הגדרה שאליו מעבירים את הוראות המערכת האלה. הפונקציה יכולה לגשת ישירות ל-
system_instructionsכי הוא מוגדר באופן גלובלי בסקריפט.generate_content_config = types.GenerateContentConfig( system_instruction=[ types.Part.from_text(text=system_instructions) ], ) logging.info(f"[generate_config_details] System Instruction: {generate_content_config.system_instruction[0].text}") - כדי להוסיף את הוראות המערכת לתגובה, מוסיפים פרמטר
configלשיטהgenerate_contentומגדירים אותו כשווה לאובייקטgenerate_content_configשנוצר למעלה.response = client.models.generate_content( model=model_name, contents=contents, config=generate_content_config, # This is the new line )
הפונקציה call_model עודכנה
הפונקציה המלאה call_model נראית עכשיו כך:
def call_model(prompt: str, model_name: str) -> str:
"""
This function interacts with a large language model (LLM) to generate text based on a given prompt and system instructions.
It will be replaced in a later step with a more advanced version that handles tooling.
"""
try:
contents = [prompt]
        generate_content_config = types.GenerateContentConfig(
            system_instruction=[
                types.Part.from_text(text=system_instructions)
            ],
        )
        logging.info(f"[generate_config_details] System Instruction: {generate_content_config.system_instruction[0].text}")
response = client.models.generate_content(
model=model_name,
contents=contents,
config=generate_content_config,
)
logging.info(f"[call_model_response] LLM Response: \"{response.text}\"")
return response.text
except Exception as e:
return f"Error: {e}"
13. בדיקת האפליקציה באמצעות הוראות מערכת
- בטרמינל, מסיימים את התהליך שפועל כרגע (CTRL+C)
- מריצים מחדש את הפקודה כדי להפעיל שוב את אפליקציית Streamlit.
streamlit run app.py --browser.serverAddress=localhost --server.enableCORS=false --server.enableXsrfProtection=false --server.port 8080 - מרעננים את אפליקציית Streamlit. אם אפליקציית Streamlit עדיין פועלת, אפשר פשוט לרענן את דף התצוגה המקדימה באינטרנט בדפדפן.
- אפשר לנסות לשאול את אותה שאלה כמו קודם:
What is the best time of year to go to Iceland? - מקישים על Enter.
משווים את התשובה הפעם לתשובה שקיבלתם בפעם הקודמת.
14. הגדרת כלי מזג אוויר
עד עכשיו, הצ'אטבוט שלנו יודע הרבה, אבל הידע שלו מוגבל לנתונים שהוא אומן לפיהם. אין לו גישה למידע בזמן אמת. לבוט נסיעות, היכולת לאחזר נתונים בזמן אמת כמו תחזיות מזג האוויר היא יתרון עצום.
כאן נכנס לתמונה כלי, שנקרא גם הפעלת פונקציות. אנחנו יכולים להגדיר קבוצה של כלים (פונקציות Python) שמודל ה-LLM יכול לבחור להפעיל כדי לקבל מידע חיצוני.
איך כלי פועלים
- אנחנו מתארים למודל את הכלים שלנו, כולל מה הם עושים ואילו פרמטרים הם מקבלים.
- המשתמש שולח הנחיה (לדוגמה, מה מזג האוויר בלונדון?).
- המודל מקבל את ההנחיה ומבין שהמשתמש שואל על משהו שהוא יכול לגלות באמצעות אחד מהכלים שלו.
- במקום להשיב באמצעות טקסט, המודל משיב באמצעות אובייקט
function_callמיוחד, שמציין לאיזה כלי הוא רוצה להתקשר ואילו ארגומנטים הוא רוצה להעביר. - קוד ה-Python שלנו מקבל את הערך
function_call, מפעיל את הפונקציהget_current_temperatureעם הארגומנטים שסופקו ומקבל את התוצאה (לדוגמה, 15°C). - אנחנו שולחים את התוצאה הזו בחזרה למודל.
- המודל מקבל את התוצאה ומפיק תשובה בשפה טבעית למשתמש (למשל, "הטמפרטורה הנוכחית בלונדון היא 15 מעלות צלזיוס").
התהליך הזה מאפשר למודל לענות על שאלות שחורגות בהרבה מנתוני האימון שלו, ולכן הוא הופך לעוזר חזק ושימושי הרבה יותר.
הגדרת כלי מזג אוויר
אם נוסע מחפש המלצות לפעילויות, ומתלבט בין פעילויות שמושפעות ממזג האוויר, כדאי לו להשתמש בכלי מזג אוויר. בוא ניצור כלי למודל שלנו כדי לקבל את מזג האוויר הנוכחי. צריך להוסיף שני חלקים: הצהרת פונקציה שמתארת את הכלי למודל, והפונקציה בפועל ב-Python שמטמיעה אותו.
- ב-
app.py, מוצאים את התגובה# TODO: Define the weather tool function declaration. - מתחת לתגובה הזו, מוסיפים את המשתנה
weather_function. זהו מילון שמספק למודל את כל המידע שהוא צריך על המטרה של הפונקציה, הפרמטרים והארגומנטים הנדרשים.weather_function = { "name": "get_current_temperature", "description": "Gets the current temperature for a given location.", "parameters": { "type": "object", "properties": { "location": { "type": "string", "description": "The city name, e.g. San Francisco", }, }, "required": ["location"], }, } - אחר כך מוצאים את התגובה
# TODO: Define the get_current_temperature function. מתחת לקוד, מוסיפים את קוד Python הבא. הפונקציה הזו תבצע את הפעולות הבאות:- שולחים קריאה ל-API לקידוד גאוגרפי כדי לקבל את הקואורדינטות של המיקום.
- משתמשים בקואורדינטות האלה כדי להפעיל API של מזג אוויר.
- מחזירה מחרוזת פשוטה עם הטמפרטורה והיחידה.
def get_current_temperature(location: str) -> str: """Gets the current temperature for a given location.""" try: # --- Get Latitude and Longitude for the location --- geocode_url = f"https://geocoding-api.open-meteo.com/v1/search?name={location}&count=1&language=en&format=json" geocode_response = requests.get(geocode_url) geocode_data = geocode_response.json() if not geocode_data.get("results"): return f"Could not find coordinates for {location}." lat = geocode_data["results"][0]["latitude"] lon = geocode_data["results"][0]["longitude"] # --- Get Weather for the coordinates --- weather_url = f"https://api.open-meteo.com/v1/forecast?latitude={lat}&longitude={lon}¤t_weather=true" weather_response = requests.get(weather_url) weather_data = weather_response.json() temperature = weather_data["current_weather"]["temperature"] unit = "°C" return f"{temperature}{unit}" except Exception as e: return f"Error fetching weather: {e}"
15. שינוי מבנה הקוד של הצ'אט והכלים
פונקציית call_model הנוכחית שלנו משתמשת בקריאת generate_content פשוטה של פעם אחת. האפשרות הזו מצוינת לשאלות בודדות, אבל היא לא אידיאלית לשיחה מרובת תפניות, במיוחד אם היא כוללת הלוך ושוב של שימוש בכלים.
מומלץ יותר להשתמש בשיחת צ'אט, שבה ההקשר של השיחה נשמר. עכשיו נשכתב את הקוד כדי להשתמש בשיחת צ'אט, שנדרש להטמעה נכונה של כלי.
- מוחקים את הפונקציה הקיימת
call_model. אנחנו נחליף אותו בגרסה מתקדמת יותר. - במקומה, מוסיפים את הפונקציה החדשה
call_modelמבלוק הקוד שבהמשך. הפונקציה החדשה הזו מכילה את הלוגיקה לטיפול בלולאת קריאה לכלי שדיברנו עליה קודם. שימו לב שיש כמה הערות TODO שנשלים בשלבים הבאים.# --- Call the Model --- def call_model(prompt: str, model_name: str) -> str: """ This function interacts with a large language model (LLM) to generate text based on a given prompt. It maintains a chat session and handles function calls from the model to external tools. """ try: # TODO: Get the existing chat session or create a new one. message_content = prompt # Start the tool-calling loop while True: # TODO: Send the message to the model. # Check if the model wants to call a tool has_tool_calls = False for part in response.candidates[0].content.parts: if part.function_call: has_tool_calls = True function_call = part.function_call logging.info(f"Function to call: {function_call.name}") logging.info(f"Arguments: {function_call.args}") # TODO: Call the appropriate function if the model requests it. elif part.text: logging.info("No function call found in the response.") logging.info(response.text) # If no tool call was made, break the loop if not has_tool_calls: break # TODO: Return the model's final text response. except Exception as e: return f"Error: {e}" - עכשיו נוסיף פונקציית עזר לניהול שיחת הצ'אט. מעל הפונקציה החדשה
call_model, מוסיפים את הפונקציהget_chat. הפונקציה הזו תיצור שיחת צ'אט חדשה עם הוראות המערכת והגדרות הכלים, או תאחזר את השיחה הקיימת. זו שיטה מומלצת לארגון הקוד.def get_chat(model_name: str): if f"chat-{model_name}" not in st.session_state: # TODO: Define the tools configuration for the model # TODO: Define the generate_content configuration, including tools # TODO: Create a new chat session st.session_state[f"chat-{model_name}"] = chat return st.session_state[f"chat-{model_name}"]
הגדרתם עכשיו את התשתית ללוגיקת הצ'אט המתקדמת שלנו עם הפעלת כלי!
16. הטמעה של לוגיקה להפעלת כלים
עכשיו נמלא את TODOs כדי שהלוגיקה של קריאת הכלים תפעל באופן מלא.
הטמעה של get_chat
- בפונקציה
get_chatמתחת לתגובה# TODO: Define the tools configuration..., מגדירים את האובייקטtoolsעל ידי יצירת מופעtypes.Toolמההצהרהweather_functionשלנו.tools = types.Tool(function_declarations=[weather_function]) - בקטע
# TODO: Define the generate_content configuration..., מגדירים אתgenerate_content_configומוודאים שמעבירים את האובייקטtoolsלמודל. כך המודל לומד על הכלים שהוא יכול להשתמש בהם.generate_content_config = types.GenerateContentConfig( system_instruction=[types.Part.from_text(text=system_instructions)], tools=[tools] # Pass the tool definition here ) - בקטע
# TODO: Create a new chat session, יוצרים את אובייקט הצ'אט באמצעותclient.chats.create(), ומעבירים את שם המודל וההגדרה.chat = client.chats.create( model=model_name, config=generate_content_config, )
הטמעה של call_model
- בקטע
# TODO: Get the existing chat session...בפונקציהcall_model, קוראים לפונקציית העזר החדשהget_chat.chat = get_chat(model_name) - לאחר מכן, מאתרים את
# TODO: Send the message to the model. שולחים את ההודעה של המשתמש באמצעות השיטהchat.send_message().response = chat.send_message(message_content) - חיפוש של
# TODO: Call the appropriate function.... כאן אנחנו בודקים איזו פונקציה המודל רוצה ומבצעים אותה.
if function_call.name == "get_current_temperature":
result = get_current_temperature(**function_call.args)
function_response_part = types.Part.from_function_response(
name=function_call.name,
response={"result": result},
)
message_content = [function_response_part]
- לבסוף, מחפשים את
# TODO: Return the model's final text responseומוסיפים את פקודת החזרה.return response.text
הפונקציה get_chat עודכנה
הפונקציה המעודכנת get_chat אמורה להיראות כך:
def get_chat(model_name: str):
if f"chat-{model_name}" not in st.session_state:
# Tools
tools = types.Tool(function_declarations=[weather_function])
# Initialize a configuration object
generate_content_config = types.GenerateContentConfig(
system_instruction=[types.Part.from_text(text=system_instructions)],
tools=[tools]
)
        chat = client.chats.create(
            model=model_name,
            config=generate_content_config,
        )
st.session_state[f"chat-{model_name}"] = chat
return st.session_state[f"chat-{model_name}"]
הפונקציה call_model עודכנה
הפונקציה המעודכנת call_model אמורה להיראות כך:
def call_model(prompt: str, model_name: str) -> str:
try:
chat = get_chat(model_name)
message_content = prompt
while True:
response = chat.send_message(message_content)
has_tool_calls = False
for part in response.candidates[0].content.parts:
if part.function_call:
has_tool_calls = True
function_call = part.function_call
logging.info(f"Function to call: {function_call.name}")
logging.info(f"Arguments: {function_call.args}")
                    if function_call.name == "get_current_temperature":
                      result = get_current_temperature(**function_call.args)
                    function_response_part = types.Part.from_function_response(
                        name=function_call.name,
                        response={"result": result},
                    )
                    message_content = [function_response_part]
elif part.text:
logging.info("No function call found in the response.")
logging.info(response.text)
if not has_tool_calls:
break
return response.text
except Exception as e:
return f"Error: {e}"
17. בדיקת האפליקציה עם הגישה לכלי
בואו נראה את התכונה החדשה בפעולה!
- בטרמינל, מסיימים את התהליך שפועל כרגע (CTRL+C)
- מריצים מחדש את הפקודה כדי להפעיל שוב את אפליקציית Streamlit.
streamlit run app.py --browser.serverAddress=localhost --server.enableCORS=false --server.enableXsrfProtection=false --server.port 8080 - מרעננים את אפליקציית Streamlit. אם אפליקציית Streamlit עדיין פועלת, אפשר פשוט לרענן את דף התצוגה המקדימה באינטרנט בדפדפן.
- עכשיו שואלים שאלה שתפעיל את הכלי החדש, למשל:
I'm looking for something to do in New York today. What do you recommend? Would it be a good day to go to Ellis Island? - מקישים על Enter
השוואה בין התשובה הזו לתשובות קודמות. מה ההבדל?
אתם אמורים לראות תגובה שכוללת את הטמפרטורה מהפונקציה! כדאי גם לבדוק את הטרמינל של Cloud Shell. אמורות להופיע בו הצהרות הדפסה שמאשרות שהפונקציה של Python הופעלה.
18. שיפור הפלט של המודל באמצעות פרמטרים
כל הכבוד! עכשיו עוזר הנסיעות יכול להשתמש בכלים כדי לאחזר נתונים חיצוניים בזמן אמת, מה שהופך אותו ליעיל הרבה יותר.
עכשיו, אחרי ששיפרנו את היכולות של המודל, נכוון את התגובות שלו. פרמטרים של מודל מאפשרים לכם לשלוט בסגנון ובאקראיות של הטקסט שנוצר על ידי ה-LLM. שינוי ההגדרות האלה מאפשר לכם להפוך את התוצאות של הבוט לממוקדות ודטרמיניסטיות יותר, או ליצירתיות ומגוונות יותר.
בשיעור ה-Lab הזה נתמקד ב-temperature וב-top_p. (רשימה מלאה של הפרמטרים שניתנים להגדרה והתיאורים שלהם מופיעה GenerateContentConfig בהפניית API).
-
temperature: קובעת את הרנדומיזציה של הפלט. ערך נמוך יותר (קרוב ל-0) הופך את הפלט ליותר דטרמיניסטי וממוקד, בעוד שערך גבוה יותר (קרוב ל-2) מגדיל את האקראיות והיצירתיות. בצ'אטבוט של שאלות ותשובות או של עוזר דיגיטלי, בדרך כלל עדיף להשתמש בטמפרטורה נמוכה יותר כדי לקבל תשובות עקביות ומבוססות על עובדות. -
top_p: ההסתברות המצטברת המקסימלית של טוקנים שצריך לקחת בחשבון כשדוגמים. האסימונים ממוינים לפי ההסתברויות שהוקצו להם, כך שרק האסימונים הסבירים ביותר נלקחים בחשבון. המודל מתייחס לאסימונים בעלי ההסתברות הגבוהה ביותר, שהסכום שלהם הואtop_p. ערך נמוך יותר מגביל את האפשרויות של הטוקנים, וכתוצאה מכך הפלט פחות מגוון
פרמטרים של שיחות
- מחפשים את המשתנים
temperatureו-top_pשמוגדרים בחלק העליון שלapp.py. שימו לב שעדיין לא נעשה שימוש בשמות האלה בשום מקום. - מוסיפים את
temperatureואתtop_pלפרמטרים שמוגדרים בתוךGenerateContentConfigבפונקציהget_chat.generate_content_config = types.GenerateContentConfig( temperature=temperature, top_p=top_p, system_instruction=[types.Part.from_text(text=system_instructions)], tools=[tools] # Pass the tool definition here )
הפונקציה get_chat עודכנה
האפליקציה get_chat נראית עכשיו כך:
def get_chat(model_name: str):
    if f"chat-{model_name}" not in st.session_state:
        # Tools
        tools = types.Tool(function_declarations=[weather_function])

        # Initialize a configuration object
        generate_content_config = types.GenerateContentConfig(
            temperature=temperature,
            top_p=top_p,
            system_instruction=[types.Part.from_text(text=system_instructions)],
            tools=[tools]
        )
        chat = client.chats.create(
            model=model_name,
            config=generate_content_config,
        )
        st.session_state[f"chat-{model_name}"] = chat
    return st.session_state[f"chat-{model_name}"]
19. בדיקה באמצעות פרמטרים של מודל
- בטרמינל, מסיימים את התהליך שפועל כרגע (CTRL+C)
- מריצים מחדש את הפקודה כדי להפעיל שוב את אפליקציית Streamlit.
streamlit run app.py --browser.serverAddress=localhost --server.enableCORS=false --server.enableXsrfProtection=false --server.port 8080 - מרעננים את אפליקציית Streamlit. אם אפליקציית Streamlit עדיין פועלת, אפשר פשוט לרענן את דף התצוגה המקדימה באינטרנט בדפדפן.
- כדאי לנסות לשאול את אותה שאלה כמו קודם,
I'm looking for something to do in New York today. What do you recommend? Would it be a good day to go to Ellis Island? - מקישים על Enter
השוואה בין התשובה הזו לתשובות קודמות.
20. מעולה!
שדרגתם בהצלחה את אפליקציית השאלות והתשובות באמצעות כלי עזר, תכונה עוצמתית שמאפשרת לאפליקציה שלכם שמבוססת על Gemini ליצור אינטראקציה עם מערכות חיצוניות ולגשת למידע בזמן אמת.
המשך הניסויים
יש הרבה אפשרויות להמשך האופטימיזציה של ההנחיה. הנה כמה דוגמאות:
- משנים את
temperatureואתtop_pורואים איך זה משנה את התשובה שמתקבלת מ-LLM. - רשימה מלאה של הפרמטרים שאפשר להגדיר והתיאורים שלהם מופיעה
GenerateContentConfigבהפניית API. נסו להגדיר עוד פרמטרים ולשנות אותם כדי לראות מה קורה.
Recap
בשיעור ה-Lab הזה:
- השתמשתי בCloud Shell Editor ובטרמינל לפיתוח.
- השתמשתם ב-Vertex AI Python SDK כדי לחבר את האפליקציה שלכם למודל Gemini.
- השתמשנו בהוראות מערכת ובפרמטרים של המודל כדי להנחות את התשובות של ה-LLM.
- הבנתם את המושג 'שימוש בכלים' (הפעלת פונקציות) והיתרונות שלו.
- בוצע רפקטורינג של הקוד כדי להשתמש בשיחת צ'אט עם שמירת מצב, שיטה מומלצת ל-AI בממשק שיחה.
- הגדרתם כלי למודל באמצעות הצהרת פונקציה.
- הטמעתי את פונקציית Python כדי לספק את הלוגיקה של הכלי.
- כתבתם את הקוד לטיפול בבקשות להפעלת פונקציות של המודל ולהחזרת התוצאות.