
1. परिचय
खास जानकारी
मान लें कि आप किसी ट्रैवल मार्केटिंग कंपनी में डेवलपर हैं. आपके सेल्स डिपार्टमेंट ने यह फ़ैसला किया है कि उसे बुकिंग और खोज से जुड़ी बड़ी कंपनियों के साथ बने रहने के लिए, नए चैट ऐप्लिकेशन की ज़रूरत है. उन्होंने जनरेटिव एआई के बारे में भी सुना है, लेकिन उन्हें इसके बारे में ज़्यादा जानकारी नहीं है. अन्य विभागों को इस पहल के बारे में पता चल गया है. वे यह जानने के लिए उत्सुक हैं कि इससे ग्राहक अनुभव को बेहतर बनाने में कैसे मदद मिल सकती है.
आपको क्या करना होगा
इस लैब में, Vertex AI पर Gemini 2.5 Flash मॉडल का इस्तेमाल करके, यात्रा से जुड़ी जानकारी देने वाला चैटबॉट बनाया जाएगा.
ऐप्लिकेशन में:
- यह कुकी, लोगों को यात्रा के बारे में सवाल पूछने, यात्रा बुक करने, और उन जगहों के बारे में जानने में मदद करती है जहां वे जाने का प्लान बना रहे हैं
- लोगों को यात्रा की खास योजनाओं के बारे में मदद पाने के तरीके उपलब्ध कराता है
- टूल का इस्तेमाल करके, मौसम जैसे रीयल-टाइम डेटा को फ़ेच कर सके
आपको पहले से कॉन्फ़िगर किए गए Google Cloud एनवायरमेंट में काम करना होगा. खास तौर पर, Cloud Shell Editor में. आपके लिए, बुनियादी वेब ऐप्लिकेशन का फ़्रंटएंड पहले से ही सेट अप किया गया है. साथ ही, Vertex AI को ऐक्सेस करने के लिए ज़रूरी अनुमतियां भी दी गई हैं. इस ऐप्लिकेशन को Streamlit का इस्तेमाल करके बनाया गया है.
आपको क्या सीखने को मिलेगा
इस लैब में, आपको ये टास्क करने का तरीका बताया जाएगा:
- उपलब्ध जनरेटिव एआई मॉडल के बारे में जानने के लिए, Vertex AI प्लैटफ़ॉर्म एक्सप्लोर करें.
- Cloud Shell Editor और टर्मिनल में डेवलपमेंट करना
- कोड को समझने के लिए, Gemini Code Assist का इस्तेमाल करें.
- Python में Vertex AI SDK का इस्तेमाल करके, Gemini LLM को प्रॉम्प्ट भेजें और उससे जवाब पाएं.
- Gemini के एलएलएम के आउटपुट को अपनी पसंद के मुताबिक बनाने के लिए, प्रॉम्प्ट इंजीनियरिंग (सिस्टम के निर्देश, मॉडल के पैरामीटर) की बुनियादी बातों को लागू करें.
- प्रॉम्प्ट और पैरामीटर में बदलाव करके, LLM की मदद से काम करने वाले चैट ऐप्लिकेशन की जांच करें और उसे बेहतर बनाएं. इससे जवाबों को बेहतर बनाने में मदद मिलती है.
- फ़ंक्शन कॉलिंग की सुविधा चालू करने के लिए, Gemini मॉडल के साथ टूल तय करें और उनका इस्तेमाल करें.
- चैट सेशन की स्थिति को बनाए रखने के लिए कोड को फिर से व्यवस्थित करें. यह बातचीत वाले ऐप्लिकेशन के लिए सबसे सही तरीका है.
2. प्रोजेक्ट सेटअप करना
Google खाता
अगर आपके पास पहले से कोई निजी Google खाता नहीं है, तो आपको Google खाता बनाना होगा.
ऑफ़िस या स्कूल वाले खाते के बजाय, निजी खाते का इस्तेमाल करें.
Google Cloud Console में साइन इन करना
किसी निजी Google खाते का इस्तेमाल करके, Google Cloud Console में साइन इन करें.
बिलिंग चालू करें
Google Cloud क्रेडिट रिडीम करना (ज़रूरी नहीं है)
इस वर्कशॉप को चलाने के लिए, आपके पास कुछ क्रेडिट वाला बिलिंग खाता होना चाहिए. शुरू करने के लिए, इस कोडलैब के सबसे ऊपर मौजूद बैनर में दिए गए क्रेडिट का इस्तेमाल करें. अगर आपका खाता पहले से ही किसी बिलिंग खाते से कनेक्ट है, तो इस चरण को छोड़ा जा सकता है.
निजी बिलिंग खाता सेट अप करना
अगर आपने Google Cloud क्रेडिट का इस्तेमाल करके बिलिंग सेट अप की है, तो इस चरण को छोड़ें.
निजी बिलिंग खाता सेट अप करने के लिए, Cloud Console में बिलिंग की सुविधा चालू करने के लिए यहां जाएं.
ध्यान दें:
- इस लैब को पूरा करने में, Cloud संसाधनों पर 1 डॉलर से कम का खर्च आना चाहिए.
- ज़्यादा शुल्क से बचने के लिए, इस लैब के आखिर में दिए गए निर्देशों का पालन करके संसाधनों को मिटाया जा सकता है.
- नए उपयोगकर्ता, 300 डॉलर के मुफ़्त में आज़माने की सुविधा का फ़ायदा पा सकते हैं.
कोई प्रोजेक्ट बनाएं (ज़रूरी नहीं)
अगर आपके पास कोई ऐसा मौजूदा प्रोजेक्ट नहीं है जिसका इस्तेमाल आपको इस लैब के लिए करना है, तो यहां नया प्रोजेक्ट बनाएं.
3. Cloud Shell Editor खोलें
- सीधे Cloud Shell Editor पर जाने के लिए, इस लिंक पर क्लिक करें
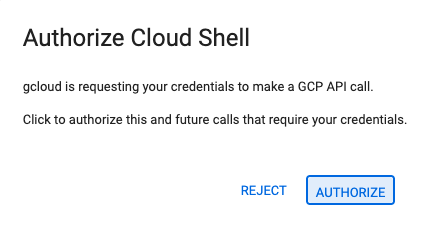
- अगर आज किसी भी समय अनुमति देने के लिए कहा जाता है, तो जारी रखने के लिए अनुमति दें पर क्लिक करें.
- अगर टर्मिनल स्क्रीन पर सबसे नीचे नहीं दिखता है, तो इसे खोलें:
- देखें पर क्लिक करें
- टर्मिनल
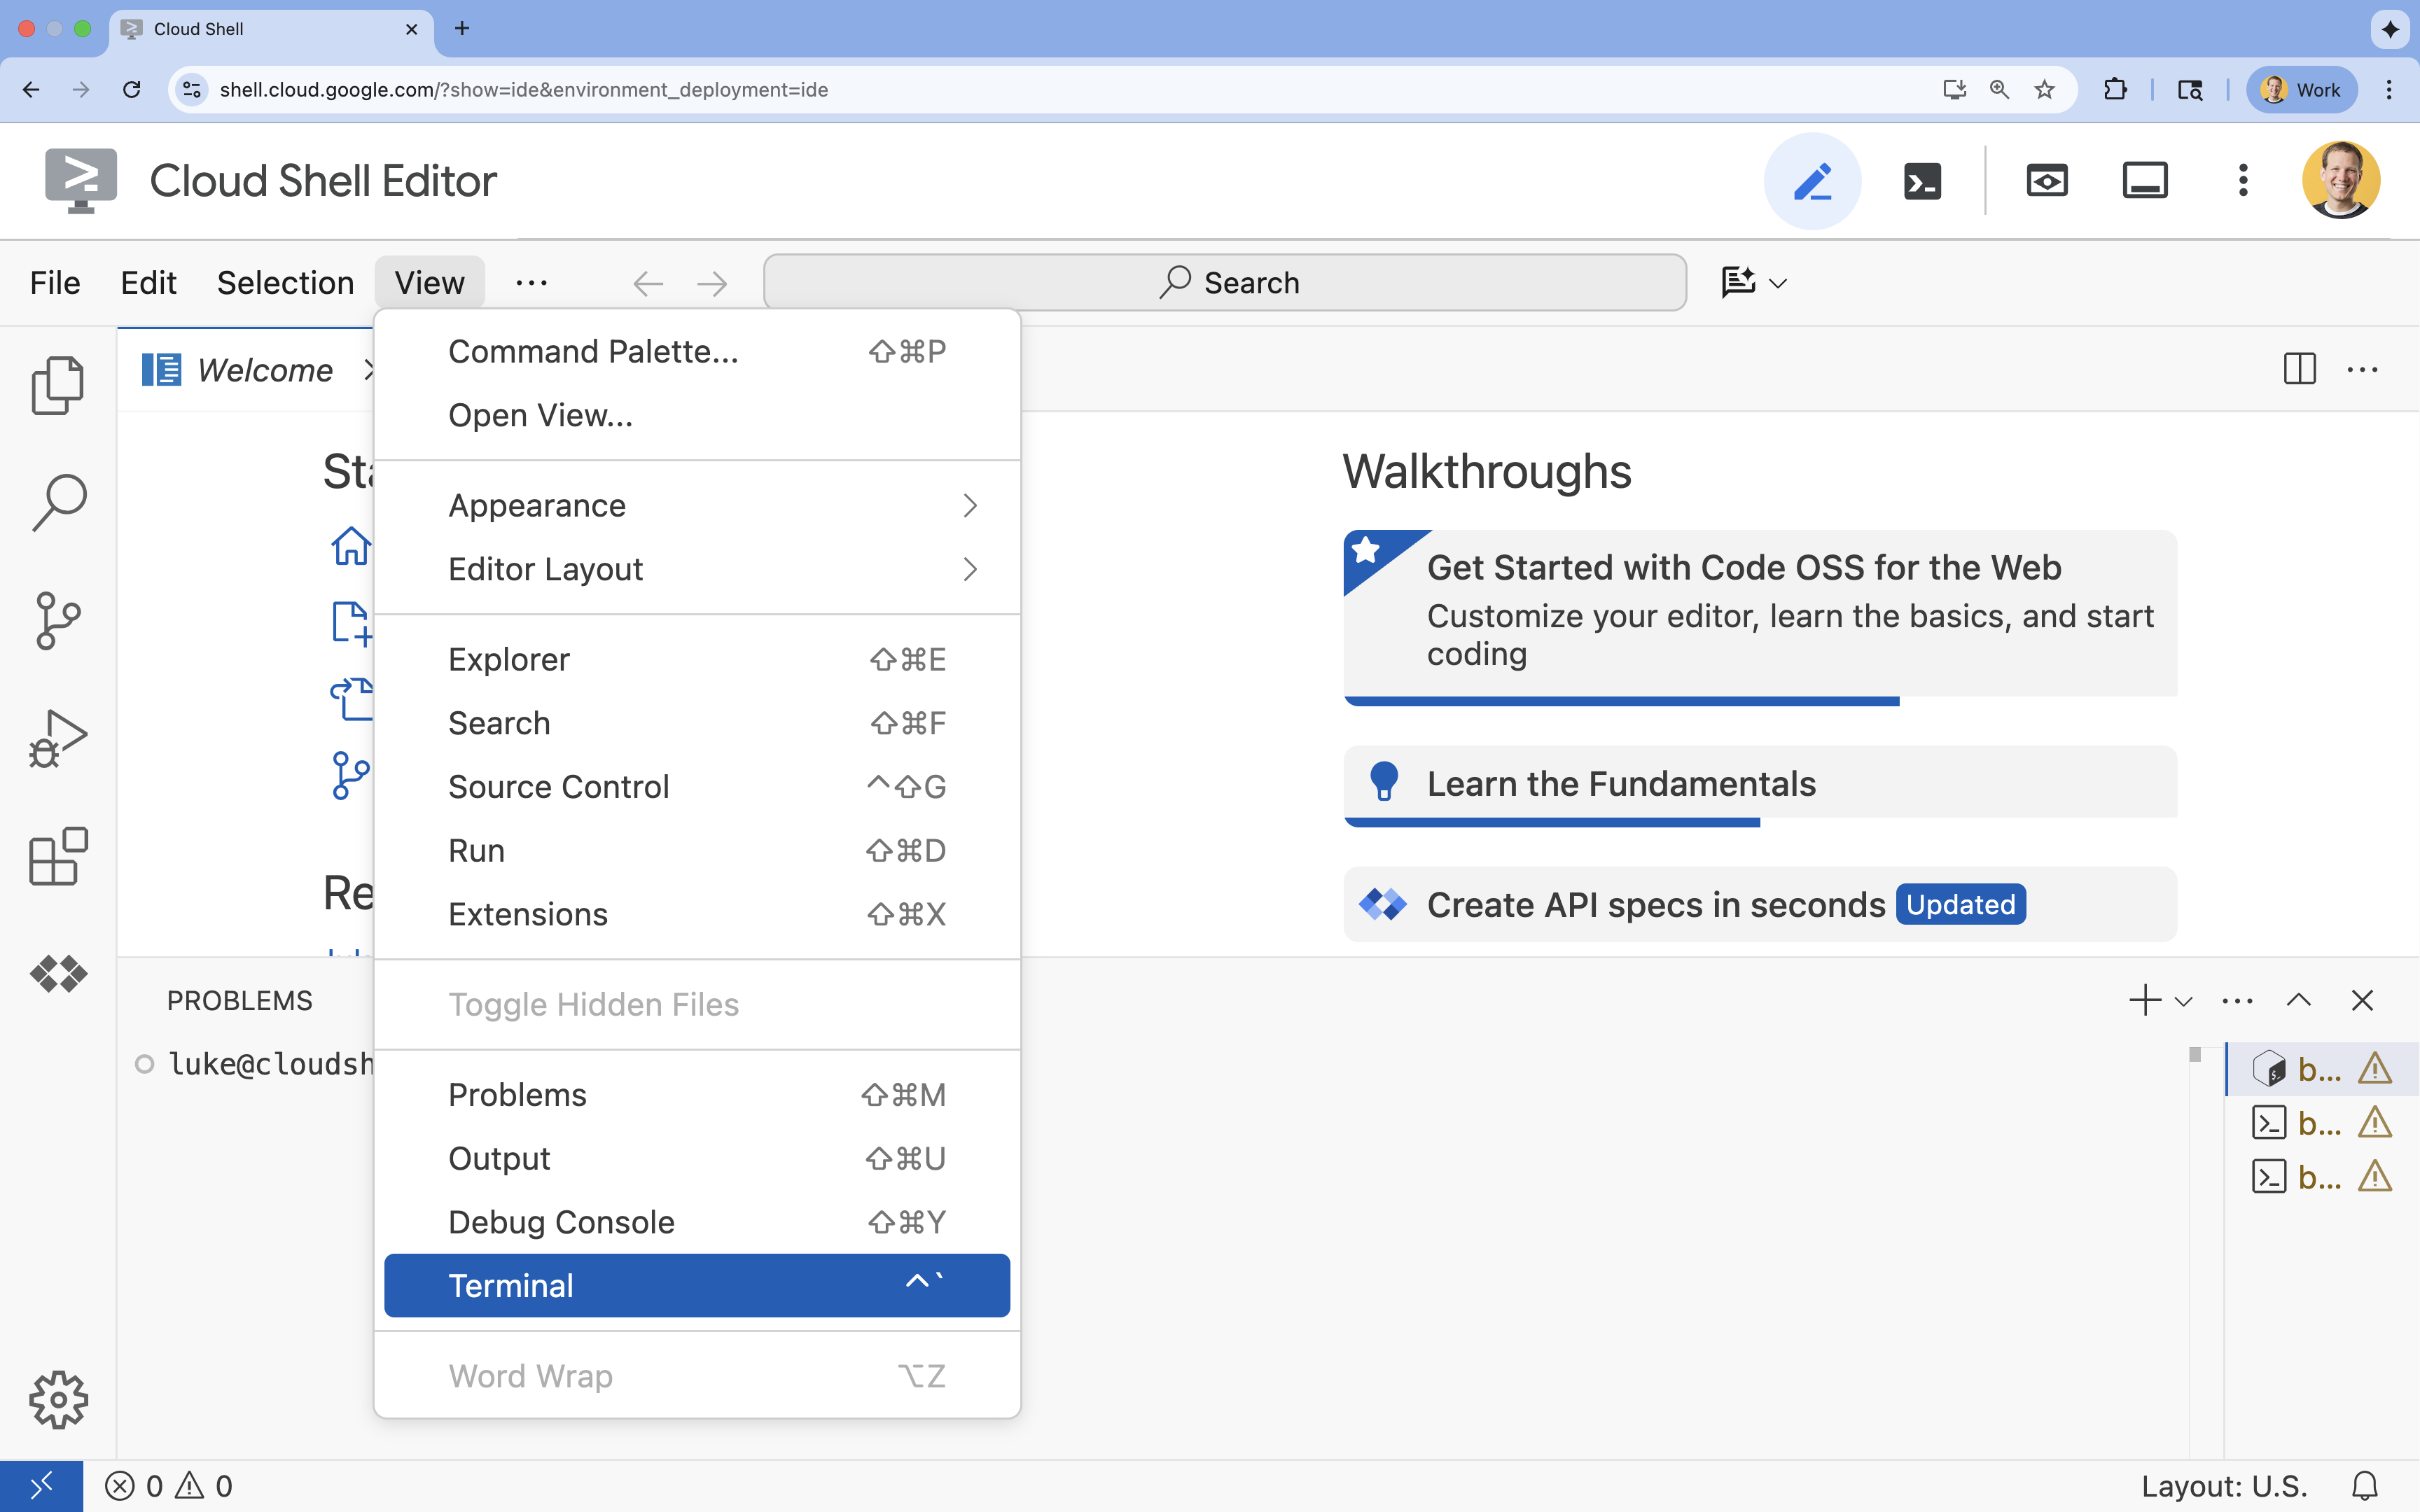 पर क्लिक करें
- टर्मिनल में, इस कमांड का इस्तेमाल करके अपना प्रोजेक्ट सेट करें:
gcloud config set project [PROJECT_ID]- उदाहरण:
gcloud config set project lab-project-id-example - अगर आपको अपना प्रोजेक्ट आईडी याद नहीं है, तो इन कमांड का इस्तेमाल करके अपने सभी प्रोजेक्ट आईडी की सूची देखी जा सकती है:
gcloud projects list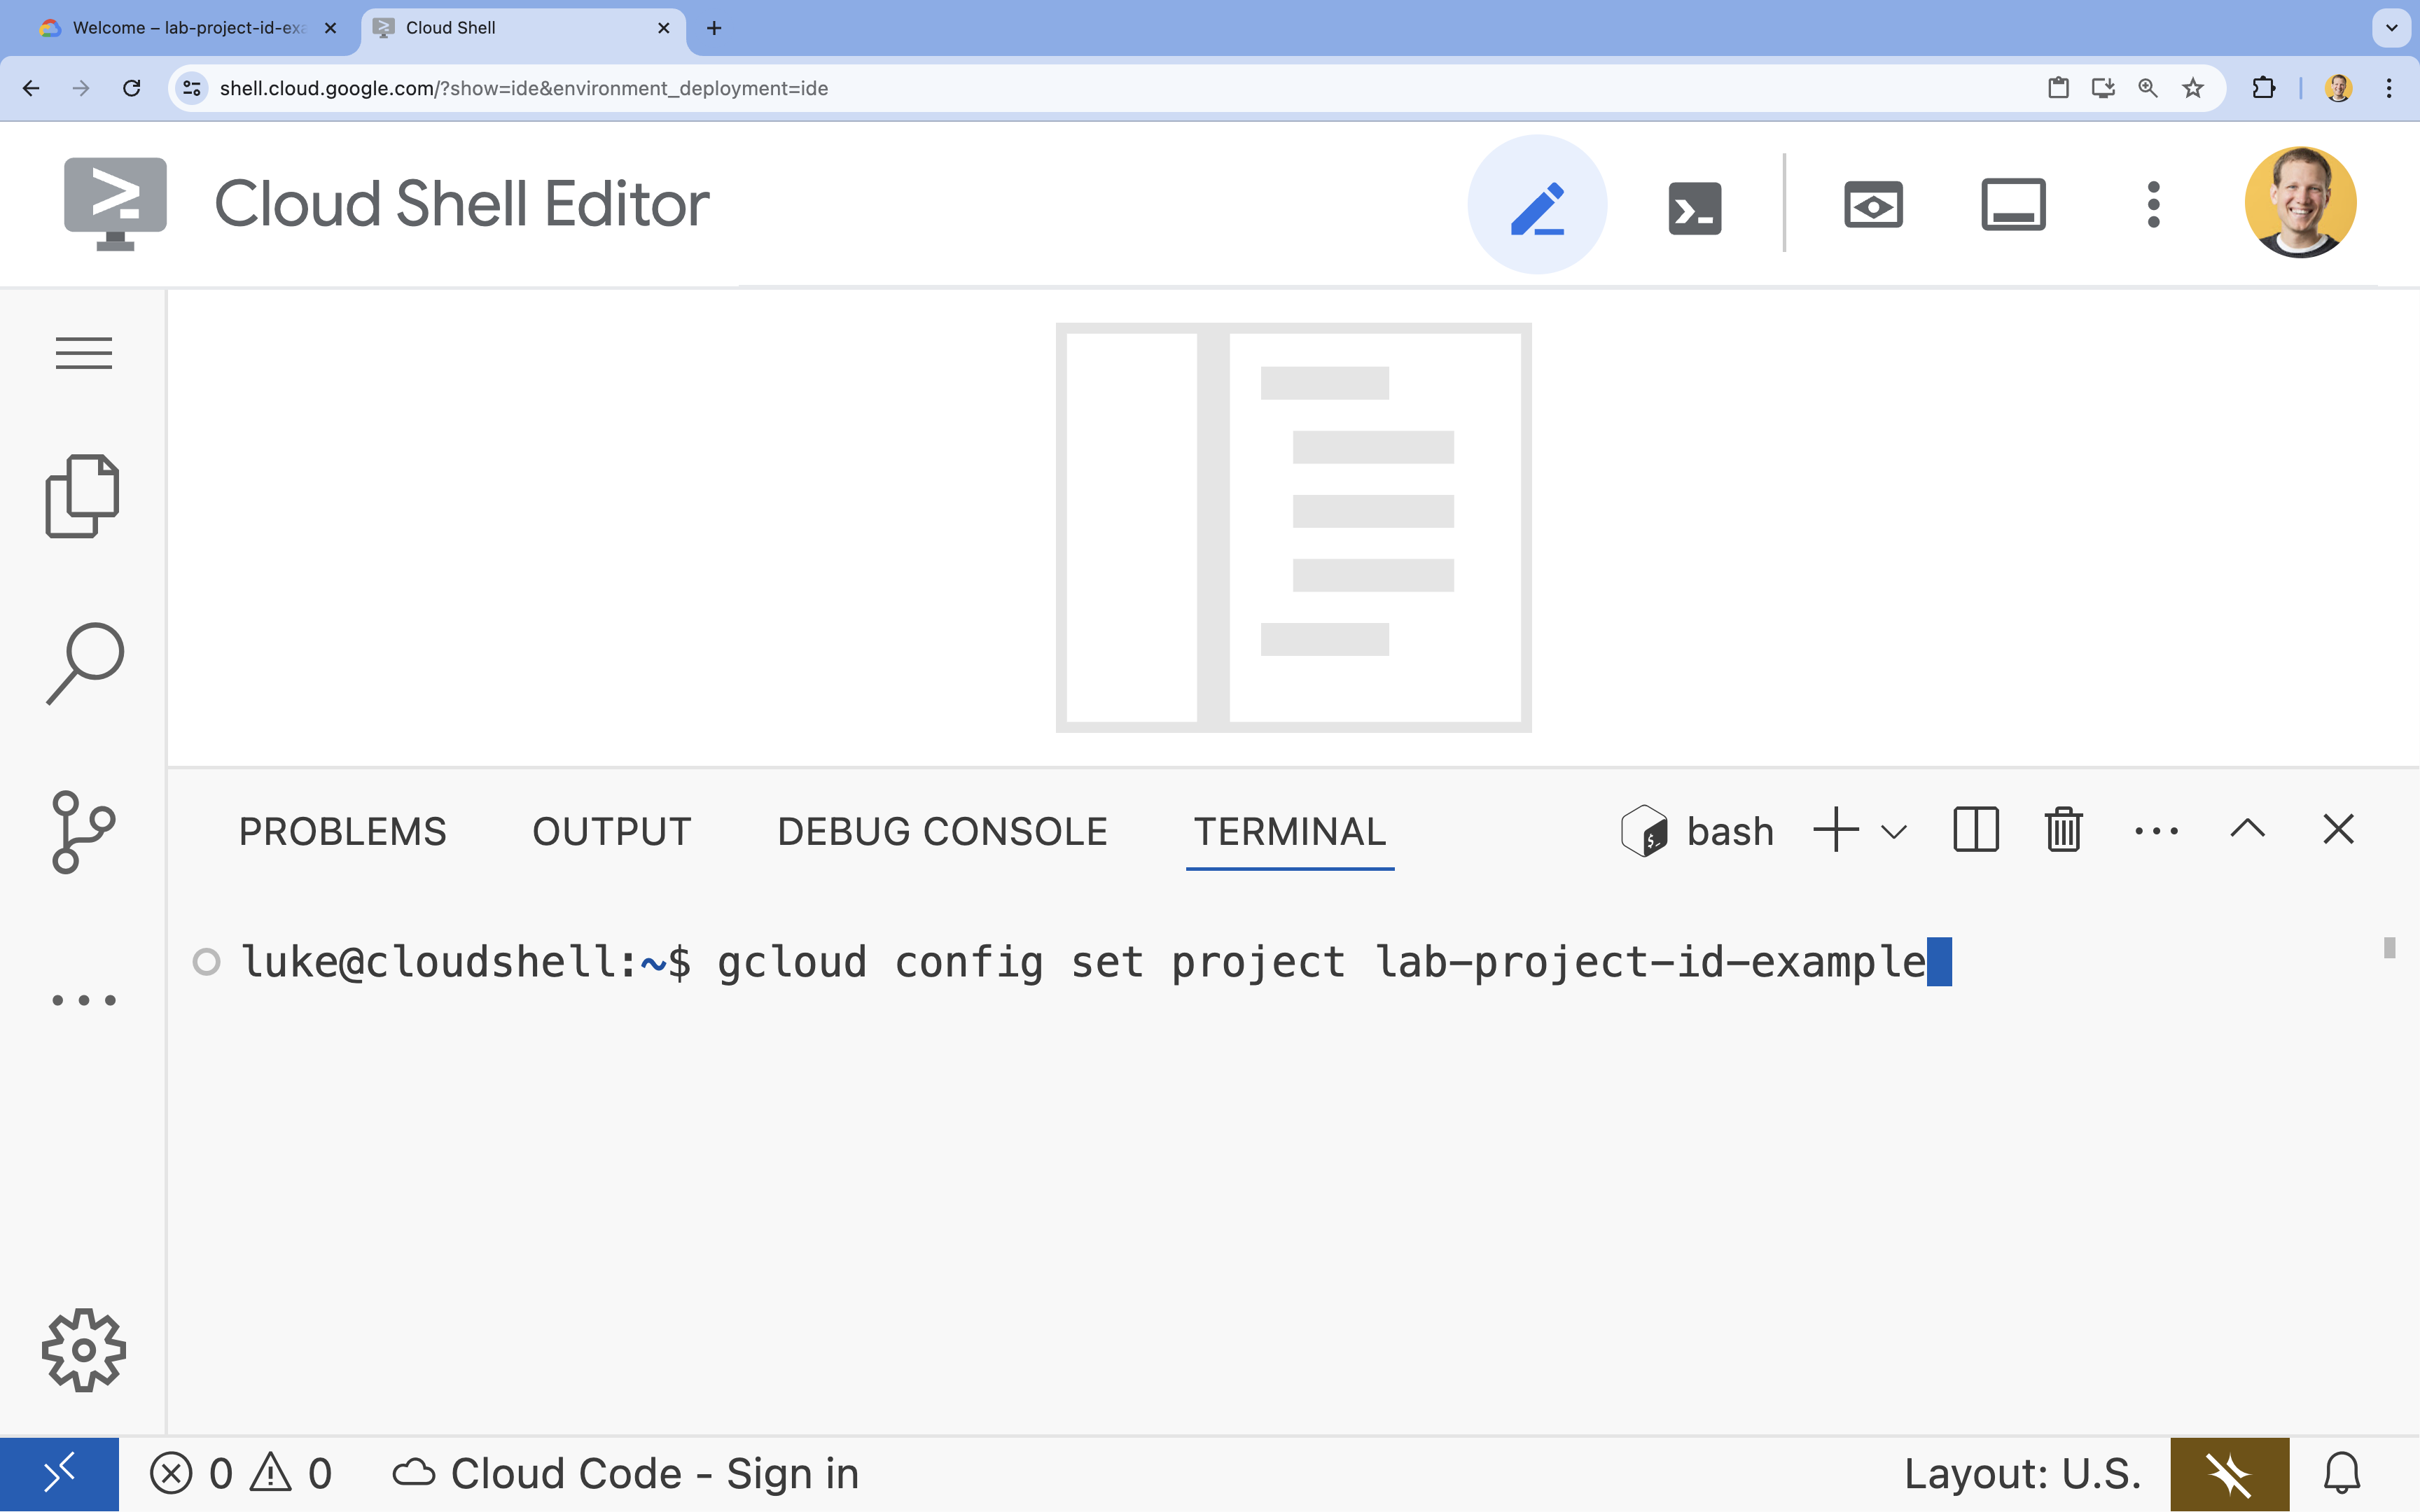
- उदाहरण:
- आपको यह मैसेज दिखेगा:
Updated property [core/project].
4. एपीआई चालू करें
Vertex AI SDK का इस्तेमाल करने और Gemini मॉडल के साथ इंटरैक्ट करने के लिए, आपको अपने Google Cloud प्रोजेक्ट में Vertex AI API चालू करना होगा.
- टर्मिनल में, इन एपीआई को चालू करें:
gcloud services enable \
  aiplatform.googleapis.com
Python के लिए Vertex AI SDK के बारे में जानकारी
अपने Python ऐप्लिकेशन से Vertex AI पर होस्ट किए गए मॉडल के साथ इंटरैक्ट करने के लिए, आपको Python के लिए Vertex AI SDK का इस्तेमाल करना होगा. यह SDK, प्रॉम्प्ट भेजने, मॉडल पैरामीटर तय करने, और जवाब पाने की प्रोसेस को आसान बनाता है. इसके लिए, आपको एपीआई कॉल की जटिलताओं को सीधे तौर पर मैनेज करने की ज़रूरत नहीं होती.
आपको Vertex AI SDK for Python का पूरा दस्तावेज़ यहां मिल सकता है: Vertex AI SDK for Python के बारे में जानकारी | Google Cloud.
5. वर्चुअल एनवायरमेंट बनाना और डिपेंडेंसी इंस्टॉल करना
किसी भी Python प्रोजेक्ट को शुरू करने से पहले, वर्चुअल एनवायरमेंट बनाना एक अच्छा तरीका है. इससे प्रोजेक्ट की डिपेंडेंसी अलग हो जाती हैं. इससे अन्य प्रोजेक्ट या सिस्टम के ग्लोबल Python पैकेज के साथ होने वाले टकराव को रोका जा सकता है.
- अपने यात्रा सहायक ऐप्लिकेशन के कोड को सेव करने के लिए,
wanderbotनाम का फ़ोल्डर बनाएं. टर्मिनल में यह कोड चलाएं:mkdir wanderbot && cd wanderbot - वर्चुअल एनवायरमेंट बनाएं और उसे चालू करें:
uv venv --python 3.12 source .venv/bin/activatewanderbot) दिखेगा. इससे पता चलता है कि वर्चुअल एनवायरमेंट चालू है. यह कुछ ऐसा दिखेगा:
6. wanderbot के लिए शुरुआती फ़ाइलें बनाएं
- ऐप्लिकेशन के लिए नई
app.pyफ़ाइल बनाएं और उसे खोलें. टर्मिनल में यह कोड चलाएं:cloudshell edit app.pycloudshell editकमांड, टर्मिनल के ऊपर मौजूद एडिटर मेंapp.pyफ़ाइल खोलेगी. - ऐप्लिकेशन के इस स्टार्टर कोड को
app.pyमें चिपकाएं:import streamlit as st from google import genai from google.genai import types import requests import logging # --- Defining variables and parameters --- REGION = "global" PROJECT_ID = None # TODO: Insert Project ID GEMINI_MODEL_NAME = "gemini-2.5-flash" temperature = .2 top_p = 0.95 system_instructions = None # --- Tooling --- # TODO: Define the weather tool function declaration # TODO: Define the get_current_temperature function # --- Initialize the Vertex AI Client --- try: # TODO: Initialize the Vertex AI client print(f"VertexAI Client initialized successfully with model {GEMINI_MODEL_NAME}") except Exception as e: st.error(f"Error initializing VertexAI client: {e}") st.stop() # TODO: Add the get_chat function here in Task 15. # --- Call the Model --- def call_model(prompt: str, model_name: str) -> str: """ This function interacts with a large language model (LLM) to generate text based on a given prompt and system instructions. It will be replaced in a later step with a more advanced version that handles tooling. """ try: # TODO: Prepare the content for the model # TODO: Define generate_content configuration (needed for system instructions and parameters) # TODO: Define response logging.info(f"[call_model_response] LLM Response: \"{response.text}\"") # TODO: Uncomment the below "return response.text" line # return response.text except Exception as e: return f"Error: {e}" # --- Presentation Tier (Streamlit) --- # Set the title of the Streamlit application st.title("Travel Chat Bot") # Initialize session state variables if they don't exist if "messages" not in st.session_state: # Initialize the chat history with a welcome message st.session_state["messages"] = [ {"role": "assistant", "content": "How can I help you today?"} ] # Display the chat history for msg in st.session_state.messages: st.chat_message(msg["role"]).write(msg["content"]) # Get user input if prompt := st.chat_input(): # Add the user's message to the chat history st.session_state.messages.append({"role": "user", "content": prompt}) # Display the user's message st.chat_message("user").write(prompt) # Show a spinner while waiting for the model's response with st.spinner("Thinking..."): # Get the model's response using the call_model function model_response = call_model(prompt, GEMINI_MODEL_NAME) # Add the model's response to the chat history st.session_state.messages.append( {"role": "assistant", "content": model_response} ) # Display the model's response st.chat_message("assistant").write(model_response) - ऐप्लिकेशन कोड के लिए, नई
requirements.txtफ़ाइल बनाएं और उसे खोलें. टर्मिनल में यह कोड चलाएं:cloudshell edit requirements.txtcloudshell editकमांड, टर्मिनल के ऊपर मौजूद एडिटर मेंrequirements.txtफ़ाइल खोलेगी. - ऐप्लिकेशन के इस स्टार्टर कोड को
requirements.txtमें चिपकाएं.google-genai streamlit requests - इस प्रोजेक्ट के लिए, ज़रूरी Python डिपेंडेंसी इंस्टॉल करें. टर्मिनल में यह कोड चलाएं:
uv pip install -r requirements.txt
7. कोड के बारे में जानकारी
आपकी बनाई गई फ़ाइलों में, बुनियादी चैट ऐप्लिकेशन का फ़्रंटएंड शामिल है. इन मेट्रिक में ये शामिल हैं:
app.py: हम इस फ़ाइल में काम करेंगे. फ़िलहाल, इसमें यह जानकारी शामिल है:- ज़रूरी इंपोर्ट
- एनवायरमेंट वैरिएबल और पैरामीटर (इनमें से कुछ प्लेसहोल्डर होते हैं)
- एक खाली
call_modelफ़ंक्शन, जिसे हम भरेंगे - फ़्रंट-एंड चैट ऐप्लिकेशन के लिए Streamlit कोड
requirements.txt:- इसमें
app.pyको चलाने के लिए, इंस्टॉल करने से जुड़ी ज़रूरी शर्तें शामिल होती हैं
- इसमें
अब कोड को एक्सप्लोर करने का समय है!
Gemini Code Assist की चैट खोलें
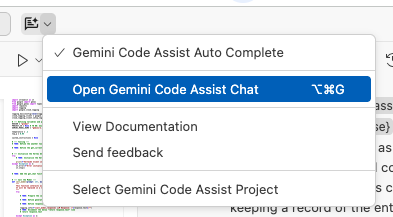
Cloud Shell Editor में, दाईं ओर मौजूद पैनल में Gemini Code Assist Chat पहले से ही खुली होनी चाहिए. अगर Gemini Code Assist की चैट पहले से खुली नहीं है, तो इसे खोलने के लिए यह तरीका अपनाएं:
- स्क्रीन पर सबसे ऊपर मौजूद, कोड से जुड़ी सहायता देने वाली Gemini की सुविधा वाले बटन (
 ) पर क्लिक करके.
 - Gemini Code Assist की चैट खोलें को चुनें.
कोड को समझने के लिए, Gemini Code Assist का इस्तेमाल करना
कोड को बेहतर तरीके से समझने के लिए, Gemini Code Assist Chat का इस्तेमाल किया जा सकता है.
- कोड के उस सेक्शन को हाइलाइट करें या चुनें जिसे आपको बदलना है.
- Gemini की चैट में "इस कोड के बारे में बताओ" टाइप करें.
- सबमिट करने के लिए, Enter दबाएं
8. वेब ऐप्लिकेशन लॉन्च करना
इस ऐप्लिकेशन को एलएलएम से कनेक्ट करने से पहले, इसे लॉन्च करके देखें कि यह शुरू में कैसा काम करता है.
- Streamlit ऐप्लिकेशन शुरू करने के लिए,
wanderbotडायरेक्ट्री में जाकर टर्मिनल में यह कमांड चलाएं. इससे, ऐप्लिकेशन को Cloud Shell एनवायरमेंट में इंटरनल तौर पर ऐक्सेस किया जा सकेगा:streamlit run app.py --browser.serverAddress=localhost --server.enableCORS=false --server.enableXsrfProtection=false --server.port 8080 - कमांड चलाने के बाद, Cloud Shell एडिटर में सबसे ऊपर मौजूद वेब प्रीव्यू बटन पर क्लिक करें. इसके बाद, पोर्ट 8080 पर झलक देखें को चुनें.
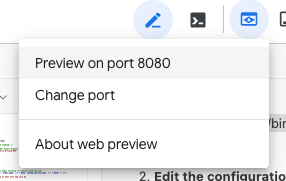
आपको यात्रा से जुड़े ऐप्लिकेशन के लिए, चैट का आसान इंटरफ़ेस दिखेगा. - कोई भी मैसेज टाइप करें (जैसे,
Hi!) और ENTER दबाएं.
आपको दिखेगा कि मैसेज, चैट के इतिहास में दिखेगा. हालांकि, आपको Assistant से जवाब नहीं मिलेगा, बल्कि गड़बड़ी का मैसेज मिलेगा. ऐसा इसलिए है, क्योंकि ऐप्लिकेशन को अब तक बड़े भाषा मॉडल से कनेक्ट नहीं किया गया है. लैब की शुरुआत को समझने के लिए, इस व्यवहार को देखें.
9. Vertex AI क्लाइंट शुरू करना
Vertex AI में उपलब्ध मॉडल एक्सप्लोर करना
Google Cloud का Vertex AI प्लैटफ़ॉर्म, कई तरह के जनरेटिव एआई मॉडल का ऐक्सेस देता है. किसी एक को इंटिग्रेट करने से पहले, Google Cloud Console में उपलब्ध विकल्पों को एक्सप्लोर किया जा सकता है.
- Google Cloud Console में, Model Garden पर जाएं. इसके लिए, स्क्रीन पर सबसे ऊपर मौजूद खोज बार में "Model Garden" खोजें. इसके बाद, Vertex AI चुनें.(
 )
) - उपलब्ध मॉडल ब्राउज़ करें. मोडेलिटी, टास्क टाइप, और सुविधाओं जैसी चीज़ों के हिसाब से फ़िल्टर किया जा सकता है.
इस लैब के लिए, आपको Gemini 2.5 Flash मॉडल का इस्तेमाल करना होगा. यह मॉडल, तेज़ी से काम करता है. इसलिए, यह चैट ऐप्लिकेशन बनाने के लिए एक अच्छा विकल्प है.
Vertex AI क्लाइंट शुरू करना
अब Vertex AI क्लाइंट को शुरू करने के लिए, app.py में मौजूद --- Initialize the Vertex AI Client --- सेक्शन में बदलाव करें. इस क्लाइंट ऑब्जेक्ट का इस्तेमाल, मॉडल को प्रॉम्प्ट भेजने के लिए किया जाएगा.
- Cloud Shell Editor में
app.pyखोलें. app.pyमें,PROJECT_ID = Noneलाइन ढूंढें.- कोटेशन मार्क में दिए गए
Noneकी जगह, अपना Google Cloud प्रोजेक्ट आईडी डालें. (उदाहरण के लिए,PROJECT_ID = "google-cloud-labs")
अगर आपको अपना प्रोजेक्ट आईडी याद नहीं है, तो इन कमांड का इस्तेमाल करके अपने सभी प्रोजेक्ट आईडी की सूची देखी जा सकती है:gcloud projects list | awk '/PROJECT_ID/{print $2}' - क्लाइंट तय करें:
tryब्लॉक में, Vertex AI क्लाइंट को शुरू करें.client = genai.Client( vertexai=True, project=PROJECT_ID, location=REGION, )
Vertex AI क्लाइंट को शुरू करने की प्रोसेस अपडेट की गई
इस समय, Vertex AI क्लाइंट को शुरू करने का सेक्शन ऐसा दिखेगा:
# --- Initialize the Vertex AI Client ---
try:
    client = genai.Client(
        vertexai=True,
        project=PROJECT_ID,
        location=REGION,
    )
print(f"VertexAI Client initialized successfully with model {GEMINI_MODEL_NAME}")
except Exception as e:
st.error(f"Error initializing VertexAI client: {e}")
st.stop()
10. डेटा तैयार करना और मॉडल को कॉल करना
अब आपको मॉडल को भेजने के लिए कॉन्टेंट तैयार करना होगा. साथ ही, Gemini मॉडल को कॉल करना होगा.
--- Call the Model ---सेक्शन में जाकर,call_modelफ़ंक्शन को ढूंढें.- कॉन्टेंट तय करना:
# TODO: Prepare the content for the modelमें जाकर , वह इनपुट कॉन्टेंट तय करें जिसे मॉडल को भेजा जाएगा. बुनियादी प्रॉम्प्ट के लिए, यह उपयोगकर्ता का इनपुट मैसेज होगा.contents = [prompt] - जवाब तय करना: इस कोड को
# TODO: Define responseके नीचे चिपकाएं.response = client.models.generate_content( model=model_name, contents=contents, ) - जवाब वापस पाएं: इस लाइन से कमेंट हटाएं:
return response.text call_modelब्लॉक में फ़ाइल के सबसे नीचे मौजूद उस लाइन की जांच करें जहांcall_modelफ़ंक्शन को कॉल किया जा रहा है.withअगर आपको समझ नहीं आ रहा है कि यहां क्या हो रहा है, तो लाइन को हाइलाइट करें और Gemini Code Assist से इसके बारे में बताने के लिए कहें.
contents को ज़्यादा साफ़ तौर पर तय करने का तरीका
contents को ऊपर दिए गए तरीके से इसलिए तय किया गया है, क्योंकि एसडीके इतना स्मार्ट है कि वह समझ सकता है कि स्ट्रिंग वाली सूची, उपयोगकर्ता के टेक्स्ट इनपुट को दिखाती है. यह मॉडल एपीआई के लिए, इसे सही तरीके से अपने-आप फ़ॉर्मैट करता है.
हालांकि, इनपुट को स्ट्रक्चर करने का ज़्यादा सटीक और बुनियादी तरीका यह है कि types.Part और types.Content ऑब्जेक्ट का इस्तेमाल किया जाए. जैसे:
user_message_parts = [types.Part.from_text(text=prompt)]
contents = [
types.Content(
role="user", # Indicates the content is from the user
parts=user_message_parts, # A list, allowing multiple types of content
),
]
call_model फ़ंक्शन को अपडेट किया गया
इस समय, call_model फ़ंक्शन ऐसा दिखना चाहिए:
def call_model(prompt: str, model_name: str) -> str:
"""
This function interacts with a large language model (LLM) to generate text based on a given prompt and system instructions.
It will be replaced in a later step with a more advanced version that handles tooling.
"""
try:
contents = [prompt]
# TODO: Define generate_content configuration (needed later for system instructions and parameters)
        response = client.models.generate_content(
            model=model_name,
            contents=contents,
        )
logging.info(f"[call_model_response] LLM Response: \"{response.text}\"")
return response.text
except Exception as e:
return f"Error: {e}"
11. कनेक्ट किए गए ऐप्लिकेशन को टेस्ट करना
- टर्मिनल में, फ़िलहाल चल रही प्रोसेस को बंद करें (CTRL+C)
- Streamlit ऐप्लिकेशन को फिर से शुरू करने के लिए, कमांड को फिर से चलाएं.
streamlit run app.py --browser.serverAddress=localhost --server.enableCORS=false --server.enableXsrfProtection=false --server.port 8080 - Streamlit ऐप्लिकेशन को रीफ़्रेश करें. अगर Streamlit ऐप्लिकेशन अब भी चल रहा है, तो अपने ब्राउज़र में वेब प्रीव्यू पेज को रीफ़्रेश करें.
- अब चैट इनपुट में कोई सवाल टाइप करें. जैसे:
What is the best time of year to go to Iceland? - ENTER दबाएं.
आपको ऐप्लिकेशन में अपना मैसेज, "सोचा जा रहा है..." स्पिनर, और फिर Gemini मॉडल से जनरेट किया गया जवाब दिखेगा! अगर आपने ऐसा किया है, तो इसका मतलब है कि आपने अपने वेब ऐप्लिकेशन को Vertex AI पर मौजूद एलएलएम से कनेक्ट कर लिया है. 🙌 🥳
12. सिस्टम के लिए निर्देश तय करना
बुनियादी कनेक्शन काम करता है, लेकिन एलएलएम के जवाबों की क्वालिटी और स्टाइल पर, उसे मिले इनपुट का काफ़ी असर पड़ता है. प्रॉम्प्ट इंजीनियरिंग, मॉडल को मनचाहा आउटपुट जनरेट करने के लिए, इन इनपुट (प्रॉम्प्ट) को डिज़ाइन करने और बेहतर बनाने की प्रोसेस है.
इसके लिए, आपको कुछ सिस्टम निर्देश बनाने होंगे और उन्हें मॉडल को पास करना होगा.
सिस्टम के लिए मददगार निर्देश बनाने के लिए, Gemini से पूछें सुविधा का इस्तेमाल करें.
app.pyमें,system_instructionsवैरिएबल ढूंढें. फ़िलहाल, यहNoneपर सेट है.system_instructions = NoneNoneको कई लाइनों वाली ऐसी स्ट्रिंग से बदलना होगा जिसमें यात्रा से जुड़ी जानकारी देने वाले हमारे असिस्टेंट बॉट के लिए निर्देश दिए गए हों.- Gemini Code Assist से पूछें: Gemini Code Assist में यह प्रॉम्प्ट डालें या अपना कोई प्रॉम्प्ट बनाएं:
I am a developer at a travel marketing company, and my sales department has decided that they need a new chat application to keep up with the bigger booking and search companies. I'm building a simple travel assistant chatbot using the Gemini 2.5 Flash model on Vertex AI. The application should: - Helps users ask questions about travel, book travel, and learn about places they are going to go - Provides users ways to get help about their specific travel plans - Provides all this in a production quality way (multiple environments, logging and monitoring, etc.) Please create system instructions appropriate for that chat app. Be thorough. Do not alter the code in any way beyond providing me with system instructions. - तय करें
system_instructions:system_instructionsको Gemini Code Assist का इस्तेमाल करके जनरेट किए गए सिस्टम निर्देशों के बराबर सेट करें. इसके अलावा, सिस्टम के इन निर्देशों का इस्तेमाल किया जा सकता है. इन्हें Gemini ने मिलते-जुलते प्रॉम्प्ट के साथ बनाया है.system_instructions = """ You are a sophisticated travel assistant chatbot designed to provide comprehensive support to users throughout their travel journey. Your capabilities include answering travel-related questions, assisting with booking travel arrangements, offering detailed information about destinations, and providing support for existing travel plans. **Core Functionalities:** 1. **Travel Information and Recommendations:** * Answer user inquiries about travel destinations, including popular attractions, local customs, visa requirements, weather conditions, and safety advice. * Provide personalized recommendations for destinations, activities, and accommodations based on user preferences, interests, and budget. * Offer insights into the best times to visit specific locations, considering factors like weather, crowds, and pricing. * Suggest alternative destinations or activities if the user's initial choices are unavailable or unsuitable. 2. **Booking Assistance:** * Facilitate the booking of flights, hotels, rental cars, tours, and activities. * Search for available options based on user-specified criteria such as dates, destinations, budget, and preferences. * Present clear and concise information about available options, including pricing, amenities, and booking terms. * Guide users through the booking process, ensuring accurate information and secure transactions. * Provide booking confirmations and relevant details, such as booking references and contact information. 3. **Travel Planning and Itinerary Management:** * Assist users in creating detailed travel itineraries, including flights, accommodations, activities, and transportation. * Offer suggestions for optimizing travel plans, such as minimizing travel time or maximizing sightseeing opportunities. * Provide tools for managing and modifying existing itineraries, including adding or removing activities, changing booking dates, or upgrading accommodations. * Offer reminders and notifications for upcoming travel events, such as flight check-in or tour departure times. 4. **Customer Support and Troubleshooting:** * Provide prompt and helpful support to users with questions or issues related to their travel plans. * Assist with resolving booking discrepancies, cancellations, or modifications. * Offer guidance on travel-related emergencies, such as lost luggage or travel delays. * Provide access to relevant contact information for airlines, hotels, and other travel providers. **Interaction Guidelines:** * **Professionalism:** Maintain a polite, respectful, and professional tone in all interactions. * **Clarity and Conciseness:** Provide clear, concise, and easy-to-understand information. Avoid jargon or technical terms unless necessary and always explain them. * **Accuracy:** Ensure all information provided is accurate and up-to-date. Double-check details before sharing them with users. If unsure about something, admit that you don't know and offer to find the information. * **Personalization:** Tailor your responses and recommendations to the specific needs and preferences of each user. * **Proactive Assistance:** Anticipate user needs and offer relevant information or suggestions proactively. * **Error Handling:** Gracefully handle user errors or misunderstandings. Provide helpful guidance and alternative options when necessary. * **Confidentiality:** Respect user privacy and handle personal information with the utmost confidentiality and in compliance with data protection regulations. **Example Interactions:** **User:** "I want to go on a beach vacation in the Caribbean. I have a budget of $2000 per person for a week." **Chatbot:** "Certainly! The Caribbean offers many beautiful beach destinations within your budget. Some popular options include Punta Cana in the Dominican Republic, Cancun in Mexico, and Montego Bay in Jamaica. These destinations offer stunning beaches, all-inclusive resorts, and various activities. Would you like me to search for flights and accommodations for these locations based on your travel dates?" **User:** "My flight is delayed. What should I do?" **Chatbot:** "I'm sorry to hear about the delay. Please check with the airline for the updated departure time and any assistance they can offer. You may be entitled to compensation or rebooking options depending on the length of the delay and the airline's policy. Do you have your flight number handy so I can look up the current status for you?" **User:** "Tell me about the best time to visit Japan." **Chatbot:** "Japan is a fantastic destination with distinct seasons offering unique experiences. Spring (March-May) is famous for the beautiful cherry blossoms, while autumn (September-November) boasts stunning fall foliage. Both seasons have pleasant temperatures, making them ideal for sightseeing. Summer (June-August) can be hot and humid, but it's a great time for festivals and outdoor activities in the mountains. Winter (December-February) offers opportunities for skiing and snowboarding in the Japanese Alps, though some areas may experience heavy snowfall. To recommend the best time for you, could you tell me what you'd like to experience in Japan?" By following these instructions, you will be able to provide exceptional travel assistance and create a positive experience for every user. """ - generate_content कॉन्फ़िगरेशन तय करना: एक कॉन्फ़िगरेशन ऑब्जेक्ट शुरू करें. इसमें आपको सिस्टम के ये निर्देश पास करने होंगे.
system_instructionsको हमारी स्क्रिप्ट में ग्लोबल तौर पर तय किया गया है. इसलिए, फ़ंक्शन इसे सीधे तौर पर ऐक्सेस कर सकता है.generate_content_config = types.GenerateContentConfig( system_instruction=[ types.Part.from_text(text=system_instructions) ], ) logging.info(f"[generate_config_details] System Instruction: {generate_content_config.system_instruction[0].text}") - सिस्टम के निर्देशों को जवाब में जोड़ने के लिए,
generate_contentतरीके मेंconfigपैरामीटर जोड़ें. इसके बाद, इसे ऊपर बनाए गएgenerate_content_configऑब्जेक्ट के बराबर पर सेट करें.response = client.models.generate_content( model=model_name, contents=contents, config=generate_content_config, # This is the new line )
call_model फ़ंक्शन को अपडेट किया गया
अब पूरा call_model फ़ंक्शन ऐसा दिखता है:
def call_model(prompt: str, model_name: str) -> str:
"""
This function interacts with a large language model (LLM) to generate text based on a given prompt and system instructions.
It will be replaced in a later step with a more advanced version that handles tooling.
"""
try:
contents = [prompt]
        generate_content_config = types.GenerateContentConfig(
            system_instruction=[
                types.Part.from_text(text=system_instructions)
            ],
        )
        logging.info(f"[generate_config_details] System Instruction: {generate_content_config.system_instruction[0].text}")
response = client.models.generate_content(
model=model_name,
contents=contents,
config=generate_content_config,
)
logging.info(f"[call_model_response] LLM Response: \"{response.text}\"")
return response.text
except Exception as e:
return f"Error: {e}"
13. सिस्टम के निर्देशों के साथ ऐप्लिकेशन की जांच करना
- टर्मिनल में, फ़िलहाल चल रही प्रोसेस को बंद करें (CTRL+C)
- Streamlit ऐप्लिकेशन को फिर से शुरू करने के लिए, कमांड को फिर से चलाएं.
streamlit run app.py --browser.serverAddress=localhost --server.enableCORS=false --server.enableXsrfProtection=false --server.port 8080 - Streamlit ऐप्लिकेशन को रीफ़्रेश करें. अगर Streamlit ऐप्लिकेशन अब भी चल रहा है, तो अपने ब्राउज़र में वेब प्रीव्यू पेज को रीफ़्रेश करें.
- पहले वाला सवाल फिर से पूछकर देखें:
What is the best time of year to go to Iceland? - ENTER दबाएं.
तुलना करें कि इस बार जवाब कैसा मिला और पिछली बार कैसा मिला था.
14. मौसम की जानकारी देने वाले टूल के बारे में बताना
अब तक, हमारा चैटबॉट काफ़ी जानकारी रखता है. हालांकि, इसकी जानकारी सिर्फ़ उस डेटा तक सीमित है जिस पर इसे ट्रेन किया गया है. यह रीयल-टाइम जानकारी को ऐक्सेस नहीं कर सकता. यात्रा से जुड़े बॉट के लिए, मौसम के पूर्वानुमान जैसे लाइव डेटा को फ़ेच करने की सुविधा बहुत फ़ायदेमंद होती है.
ऐसे में, टूलिंग का इस्तेमाल किया जाता है. इसे फ़ंक्शन कॉलिंग भी कहा जाता है. हम टूल का एक सेट (Python फ़ंक्शन) तय कर सकते हैं. एलएलएम, बाहरी जानकारी पाने के लिए इनमें से किसी टूल को कॉल कर सकता है.
टूलिंग कैसे काम करती है
- हम मॉडल को अपने टूल के बारे में बताते हैं. इसमें यह भी शामिल है कि वे क्या काम करते हैं और कौनसे पैरामीटर लेते हैं.
- उपयोगकर्ता कोई प्रॉम्प्ट भेजता है. जैसे, "लंदन का मौसम कैसा है?".
- मॉडल को प्रॉम्प्ट मिलता है और उसे पता चलता है कि उपयोगकर्ता किसी ऐसी चीज़ के बारे में पूछ रहा है जिसके बारे में वह अपने किसी टूल का इस्तेमाल करके पता लगा सकता है.
- टेक्स्ट में जवाब देने के बजाय, मॉडल एक खास
function_callऑब्जेक्ट के साथ जवाब देता है. इससे पता चलता है कि मॉडल किस टूल को कॉल करना चाहता है और किन तर्कों के साथ कॉल करना चाहता है. - हमारा Python कोड इस
function_callको स्वीकार करता है. इसके बाद, दिए गए आर्ग्युमेंट के साथ हमारे असलीget_current_temperatureफ़ंक्शन को लागू करता है और नतीजा (जैसे, 15°C) पाता है. - हम इस नतीजे को मॉडल को वापस भेजते हैं.
- मॉडल को नतीजे मिलते हैं और वह उपयोगकर्ता के लिए सामान्य भाषा में जवाब जनरेट करता है. उदाहरण के लिए, "लंदन का मौजूदा तापमान 15°C है."
इस प्रोसेस की मदद से, मॉडल अपने ट्रेनिंग डेटा से बाहर के सवालों के जवाब भी दे पाता है. इससे यह एक ज़्यादा बेहतर और मददगार असिस्टेंट बन जाता है.
मौसम की जानकारी देने वाले टूल के बारे में बताना
अगर कोई यात्री यह जानना चाहता है कि उसे क्या करना चाहिए और वह ऐसी गतिविधियों में से किसी एक को चुनना चाहता है जिन पर मौसम का असर पड़ता है, तो मौसम की जानकारी देने वाला टूल उसके काम आ सकता है! आइए, अपने मॉडल के लिए एक ऐसा टूल बनाएं जो मौसम की मौजूदा जानकारी दे सके. हमें दो चीज़ों की ज़रूरत है: एक फ़ंक्शन डिक्लेरेशन, जो मॉडल को टूल के बारे में बताता है. दूसरा, Python का वह फ़ंक्शन जो इसे लागू करता है.
app.pyमें, टिप्पणी# TODO: Define the weather tool function declarationढूंढें.- इस टिप्पणी के नीचे,
weather_functionवैरिएबल जोड़ें. यह एक डिक्शनरी है. इसमें मॉडल को फ़ंक्शन के मकसद, पैरामीटर, और ज़रूरी आर्ग्युमेंट के बारे में पूरी जानकारी मिलती है.weather_function = { "name": "get_current_temperature", "description": "Gets the current temperature for a given location.", "parameters": { "type": "object", "properties": { "location": { "type": "string", "description": "The city name, e.g. San Francisco", }, }, "required": ["location"], }, } - इसके बाद, टिप्पणी
# TODO: Define the get_current_temperature functionढूंढें. इसके नीचे, यह Python कोड जोड़ें. यह फ़ंक्शन:- जगह के निर्देशांक पाने के लिए, geocoding API को कॉल करें.
- उन निर्देशांकों का इस्तेमाल करके, मौसम के एपीआई को कॉल करें.
- तापमान और यूनिट के साथ एक सामान्य स्ट्रिंग दिखाओ.
def get_current_temperature(location: str) -> str: """Gets the current temperature for a given location.""" try: # --- Get Latitude and Longitude for the location --- geocode_url = f"https://geocoding-api.open-meteo.com/v1/search?name={location}&count=1&language=en&format=json" geocode_response = requests.get(geocode_url) geocode_data = geocode_response.json() if not geocode_data.get("results"): return f"Could not find coordinates for {location}." lat = geocode_data["results"][0]["latitude"] lon = geocode_data["results"][0]["longitude"] # --- Get Weather for the coordinates --- weather_url = f"https://api.open-meteo.com/v1/forecast?latitude={lat}&longitude={lon}¤t_weather=true" weather_response = requests.get(weather_url) weather_data = weather_response.json() temperature = weather_data["current_weather"]["temperature"] unit = "°C" return f"{temperature}{unit}" except Exception as e: return f"Error fetching weather: {e}"
15. चैट और टूलिंग के लिए रिफ़ैक्टर
हमारे मौजूदा call_model फ़ंक्शन में, एक बार में generate_content कॉल करने की सुविधा का इस्तेमाल किया जाता है. यह सुविधा, एक बार में पूछे गए सवालों के लिए बहुत अच्छी है. हालांकि, यह कई बार में होने वाली बातचीत के लिए सही नहीं है. खास तौर पर, टूलिंग के लिए बार-बार होने वाली बातचीत के लिए.
बेहतर तरीका यह है कि चैट सेशन का इस्तेमाल किया जाए. इससे बातचीत का कॉन्टेक्स्ट बना रहता है. अब हम अपने कोड को फिर से व्यवस्थित करेंगे, ताकि चैट सेशन का इस्तेमाल किया जा सके. टूल को सही तरीके से लागू करने के लिए, यह ज़रूरी है.
- मौजूदा
call_modelफ़ंक्शन मिटाएं. हम इसे ज़्यादा बेहतर वर्शन से बदल देंगे. - इसकी जगह, नीचे दिए गए कोड ब्लॉक से नया
call_modelफ़ंक्शन जोड़ें. इस नए फ़ंक्शन में, टूल-कॉलिंग लूप को मैनेज करने का लॉजिक शामिल है. इसके बारे में हमने पहले चर्चा की थी. ध्यान दें कि इसमें कई TODO टिप्पणियां हैं, जिन्हें हम अगले चरणों में पूरा करेंगे.# --- Call the Model --- def call_model(prompt: str, model_name: str) -> str: """ This function interacts with a large language model (LLM) to generate text based on a given prompt. It maintains a chat session and handles function calls from the model to external tools. """ try: # TODO: Get the existing chat session or create a new one. message_content = prompt # Start the tool-calling loop while True: # TODO: Send the message to the model. # Check if the model wants to call a tool has_tool_calls = False for part in response.candidates[0].content.parts: if part.function_call: has_tool_calls = True function_call = part.function_call logging.info(f"Function to call: {function_call.name}") logging.info(f"Arguments: {function_call.args}") # TODO: Call the appropriate function if the model requests it. elif part.text: logging.info("No function call found in the response.") logging.info(response.text) # If no tool call was made, break the loop if not has_tool_calls: break # TODO: Return the model's final text response. except Exception as e: return f"Error: {e}" - अब चैट सेशन को मैनेज करने के लिए, एक हेल्पर फ़ंक्शन जोड़ते हैं. नए
call_modelफ़ंक्शन के ऊपर,get_chatफ़ंक्शन जोड़ें. यह फ़ंक्शन, हमारे सिस्टम के निर्देशों और टूल की परिभाषाओं के साथ एक नया चैट सेशन बनाएगा या मौजूदा चैट सेशन को वापस लाएगा. यह कोड को व्यवस्थित करने का एक अच्छा तरीका है.def get_chat(model_name: str): if f"chat-{model_name}" not in st.session_state: # TODO: Define the tools configuration for the model # TODO: Define the generate_content configuration, including tools # TODO: Create a new chat session st.session_state[f"chat-{model_name}"] = chat return st.session_state[f"chat-{model_name}"]
आपने अब टूल की सुविधा के साथ काम करने वाले हमारे ऐडवांस चैट लॉजिक के लिए, स्केफ़ोल्डिंग सेट अप कर ली है!
16. टूल कॉल करने का लॉजिक लागू करना
अब, टूल को कॉल करने के लॉजिक को पूरी तरह से काम करने के लिए, TODOs भरें.
get_chat लागू करें
# TODO: Define the tools configuration...टिप्पणी के नीचे दिए गएget_chatफ़ंक्शन में,weather_functionके एलान सेtypes.Toolइंस्टेंस बनाकर,toolsऑब्जेक्ट तय करें.tools = types.Tool(function_declarations=[weather_function])# TODO: Define the generate_content configuration...में जाकर,generate_content_configको तय करें. साथ ही, यह पक्का करें कि मॉडल कोtoolsऑब्जेक्ट पास किया गया हो. इस तरह मॉडल को उन टूल के बारे में पता चलता है जिनका इस्तेमाल वह कर सकता है.generate_content_config = types.GenerateContentConfig( system_instruction=[types.Part.from_text(text=system_instructions)], tools=[tools] # Pass the tool definition here )# TODO: Create a new chat sessionमें,client.chats.create()का इस्तेमाल करके चैट ऑब्जेक्ट बनाएं. इसके लिए, मॉडल का नाम और कॉन्फ़िगरेशन पास करें.chat = client.chats.create( model=model_name, config=generate_content_config, )
call_model लागू करें
call_modelफ़ंक्शन में मौजूद# TODO: Get the existing chat session...के नीचे, हमारे नएget_chatहेल्पर फ़ंक्शन को कॉल करें.chat = get_chat(model_name)- इसके बाद,
# TODO: Send the message to the modelढूंढें.chat.send_message()तरीके का इस्तेमाल करके, उपयोगकर्ता का मैसेज भेजें.response = chat.send_message(message_content) # TODO: Call the appropriate function...खोजें. यहां हम यह देखते हैं कि मॉडल को कौनसे फ़ंक्शन की ज़रूरत है और उसे लागू करते हैं.
if function_call.name == "get_current_temperature":
result = get_current_temperature(**function_call.args)
function_response_part = types.Part.from_function_response(
name=function_call.name,
response={"result": result},
)
message_content = [function_response_part]
- आखिर में,
# TODO: Return the model's final text responseढूंढें और सामान लौटाने के बारे में जानकारी जोड़ें.return response.text
get_chat फ़ंक्शन को अपडेट किया गया
अपडेट किया गया get_chat फ़ंक्शन अब ऐसा दिखना चाहिए:
def get_chat(model_name: str):
if f"chat-{model_name}" not in st.session_state:
# Tools
tools = types.Tool(function_declarations=[weather_function])
# Initialize a configuration object
generate_content_config = types.GenerateContentConfig(
system_instruction=[types.Part.from_text(text=system_instructions)],
tools=[tools]
)
        chat = client.chats.create(
            model=model_name,
            config=generate_content_config,
        )
st.session_state[f"chat-{model_name}"] = chat
return st.session_state[f"chat-{model_name}"]
call_model फ़ंक्शन को अपडेट किया गया
अपडेट किया गया call_model फ़ंक्शन अब ऐसा दिखना चाहिए:
def call_model(prompt: str, model_name: str) -> str:
try:
chat = get_chat(model_name)
message_content = prompt
while True:
response = chat.send_message(message_content)
has_tool_calls = False
for part in response.candidates[0].content.parts:
if part.function_call:
has_tool_calls = True
function_call = part.function_call
logging.info(f"Function to call: {function_call.name}")
logging.info(f"Arguments: {function_call.args}")
                    if function_call.name == "get_current_temperature":
                      result = get_current_temperature(**function_call.args)
                    function_response_part = types.Part.from_function_response(
                        name=function_call.name,
                        response={"result": result},
                    )
                    message_content = [function_response_part]
elif part.text:
logging.info("No function call found in the response.")
logging.info(response.text)
if not has_tool_calls:
break
return response.text
except Exception as e:
return f"Error: {e}"
17. टूल की सुविधा वाले ऐप्लिकेशन को टेस्ट करना
आइए, देखते हैं कि आपकी नई सुविधा कैसे काम करती है!
- टर्मिनल में, फ़िलहाल चल रही प्रोसेस को बंद करें (CTRL+C)
- Streamlit ऐप्लिकेशन को फिर से शुरू करने के लिए, कमांड को फिर से चलाएं.
streamlit run app.py --browser.serverAddress=localhost --server.enableCORS=false --server.enableXsrfProtection=false --server.port 8080 - Streamlit ऐप्लिकेशन को रीफ़्रेश करें. अगर Streamlit ऐप्लिकेशन अब भी चल रहा है, तो अपने ब्राउज़र में वेब प्रीव्यू पेज को रीफ़्रेश करें.
- अब ऐसा सवाल पूछें जिससे आपका नया टूल ट्रिगर हो जाए. जैसे:
I'm looking for something to do in New York today. What do you recommend? Would it be a good day to go to Ellis Island? - ENTER दबाएं
इस जवाब की तुलना पिछले जवाबों से करें. फ़र्क क्या है?
आपको एक ऐसा जवाब दिखेगा जिसमें आपके फ़ंक्शन से मिला तापमान शामिल होगा! अपने Cloud Shell टर्मिनल की भी जाँच करें. आपको प्रिंट स्टेटमेंट दिखेंगे, जिनसे पुष्टि होगी कि आपका Python फ़ंक्शन एक्ज़ीक्यूट हो गया है.
18. पैरामीटर की मदद से मॉडल के आउटपुट को बेहतर बनाना
बहुत बढ़िया! अब आपकी यात्रा से जुड़ी Assistant, लाइव और बाहरी डेटा पाने के लिए टूल का इस्तेमाल कर सकती है. इससे यह Assistant ज़्यादा बेहतर तरीके से काम कर पाएगी.
हमने अपने मॉडल की क्षमताओं को बेहतर बना दिया है. अब हम यह तय करेंगे कि यह कैसे जवाब देगा. मॉडल पैरामीटर की मदद से, एलएलएम से जनरेट किए गए टेक्स्ट की स्टाइल और रैंडमनेस को कंट्रोल किया जा सकता है. इन सेटिंग में बदलाव करके, बॉट के आउटपुट को ज़्यादा फ़ोकस और तय किया जा सकता है. इसके अलावा, इसे ज़्यादा क्रिएटिव और अलग-अलग तरह का बनाया जा सकता है.
इस लैब के लिए, हम temperature और top_p पर फ़ोकस करेंगे. (कॉन्फ़िगर किए जा सकने वाले पैरामीटर और उनके ब्यौरे की पूरी सूची देखने के लिए, हमारे एपीआई के रेफ़रंस में GenerateContentConfig देखें.)
temperature: इससे आउटपुट में मौजूद शब्दों के क्रम को कंट्रोल किया जाता है. कम वैल्यू (0 के करीब) होने पर, आउटपुट ज़्यादा सटीक और फ़ोकस किया गया होता है. वहीं, ज़्यादा वैल्यू (2 के करीब) होने पर, आउटपुट में क्रिएटिविटी और रैंडमनेस बढ़ जाती है. सवाल-जवाब या असिस्टेंट बॉट के लिए, आम तौर पर कम तापमान को प्राथमिकता दी जाती है, ताकि जवाब ज़्यादा सटीक और भरोसेमंद हों.top_p: सैंपलिंग करते समय, टोकन की ज़्यादा से ज़्यादा संचयी संभावना. टोकन को उनकी असाइन की गई संभावनाओं के आधार पर क्रम से लगाया जाता है, ताकि सिर्फ़ सबसे संभावित टोकन पर विचार किया जा सके. मॉडल, सबसे संभावित टोकन को ध्यान में रखता है. इनकी संभावनाओं का योगtop_pवैल्यू के बराबर होता है. वैल्यू कम होने पर, टोकन के विकल्प सीमित हो जाते हैं. इससे अलग-अलग तरह के आउटपुट नहीं मिलते
कॉल पैरामीटर
app.pyके सबसे ऊपर तय किए गए वैरिएबलtemperatureऔरtop_pढूंढें. ध्यान दें कि इन्हें अब तक कहीं भी कॉल नहीं किया गया है.get_chatफ़ंक्शन में,GenerateContentConfigमें तय किए गए पैरामीटर मेंtemperatureऔरtop_pजोड़ें.generate_content_config = types.GenerateContentConfig( temperature=temperature, top_p=top_p, system_instruction=[types.Part.from_text(text=system_instructions)], tools=[tools] # Pass the tool definition here )
get_chat फ़ंक्शन को अपडेट किया गया
get_chat ऐप्लिकेशन अब ऐसा दिखता है:
def get_chat(model_name: str):
    if f"chat-{model_name}" not in st.session_state:
        # Tools
        tools = types.Tool(function_declarations=[weather_function])

        # Initialize a configuration object
        generate_content_config = types.GenerateContentConfig(
            temperature=temperature,
            top_p=top_p,
            system_instruction=[types.Part.from_text(text=system_instructions)],
            tools=[tools]
        )
        chat = client.chats.create(
            model=model_name,
            config=generate_content_config,
        )
        st.session_state[f"chat-{model_name}"] = chat
    return st.session_state[f"chat-{model_name}"]
19. मॉडल पैरामीटर के साथ टेस्ट करना
- टर्मिनल में, फ़िलहाल चल रही प्रोसेस को बंद करें (CTRL+C)
- Streamlit ऐप्लिकेशन को फिर से शुरू करने के लिए, कमांड को फिर से चलाएं.
streamlit run app.py --browser.serverAddress=localhost --server.enableCORS=false --server.enableXsrfProtection=false --server.port 8080 - Streamlit ऐप्लिकेशन को रीफ़्रेश करें. अगर Streamlit ऐप्लिकेशन अब भी चल रहा है, तो अपने ब्राउज़र में वेब प्रीव्यू पेज को रीफ़्रेश करें.
- वही सवाल पूछकर देखें,
I'm looking for something to do in New York today. What do you recommend? Would it be a good day to go to Ellis Island? - ENTER दबाएं
इस जवाब की तुलना पिछले जवाबों से करें.
20. बधाई हो!
आपने टूलिंग की मदद से, अपने सवाल-जवाब वाले ऐप्लिकेशन को अपग्रेड कर लिया है. यह एक ऐसी सुविधा है जिसकी मदद से, Gemini की सुविधा वाले ऐप्लिकेशन, बाहरी सिस्टम के साथ इंटरैक्ट कर सकते हैं और रीयल-टाइम में जानकारी ऐक्सेस कर सकते हैं.
लगातार एक्सपेरिमेंट करना
अपने प्रॉम्प्ट को ऑप्टिमाइज़ करने के लिए, कई विकल्प उपलब्ध हैं. यहां कुछ बातों का ध्यान रखें:
temperatureऔरtop_pको अडजस्ट करें और देखें कि इससे एलएलएम के जवाब पर क्या असर पड़ता है.- कॉन्फ़िगर किए जा सकने वाले पैरामीटर और उनके ब्यौरे की पूरी सूची देखने के लिए, हमारे एपीआई रेफ़रंस में
GenerateContentConfigदेखें. ज़्यादा पैरामीटर तय करें और उनमें बदलाव करके देखें कि क्या होता है!
रीकैप
इस लैब में, आपने ये काम किए:
- डेवलपमेंट के लिए, Cloud Shell Editor और टर्मिनल का इस्तेमाल किया गया हो.
- आपने अपने ऐप्लिकेशन को Gemini मॉडल से कनेक्ट करने के लिए, Vertex AI Python SDK का इस्तेमाल किया हो.
- एलएलएम को जवाब देने में मदद करने के लिए, सिस्टम के निर्देशों और मॉडल पैरामीटर लागू किए गए.
- टूलिंग (फ़ंक्शन कॉलिंग) के कॉन्सेप्ट और इसके फ़ायदों के बारे में जाना.
- हमने आपके कोड को फिर से फ़ैक्टर किया है, ताकि स्टेटफ़ुल चैट सेशन का इस्तेमाल किया जा सके. यह बातचीत वाले एआई के लिए सबसे सही तरीका है.
- फ़ंक्शन के एलान का इस्तेमाल करके, मॉडल के लिए टूल तय किया गया है.
- टूल के लॉजिक को लागू करने के लिए, Python फ़ंक्शन लागू किया गया.
- मॉडल के फ़ंक्शन कॉल के अनुरोधों को मैनेज करने और नतीजे दिखाने के लिए कोड लिखा.