
1. 소개
개요
여행 마케팅 회사의 개발자입니다. 영업 부서에서는 더 큰 예약 및 검색 회사에 대응하기 위해 새로운 채팅 애플리케이션이 필요하다고 결정했습니다. 생성형 AI에 대해서도 들어봤지만 잘 모릅니다. 다른 부서에서도 이 이니셔티브에 대해 들었고, 이 이니셔티브가 고객 경험에도 도움이 될 수 있는지 궁금해합니다.
실습할 내용
이 실습에서는 Vertex AI에서 Gemini 2.5 Flash 모델을 사용하여 여행 도우미 챗봇을 빌드합니다.
애플리케이션은 다음을 충족해야 합니다.
- 사용자가 여행에 관해 질문하고, 여행을 예약하고, 가려는 장소에 관해 알아볼 수 있도록 지원합니다.
- 사용자에게 특정 여행 계획에 관한 도움을 받을 수 있는 방법을 제공합니다.
- 도구를 사용하여 날씨와 같은 실시간 데이터를 가져올 수 있음
사전 구성된 Google Cloud 환경, 특히 Cloud Shell 편집기에서 작업합니다. Vertex AI에 액세스하는 데 필요한 권한과 함께 기본 웹 애플리케이션 프런트엔드가 이미 설정되어 있습니다. 이 앱은 Streamlit을 사용하여 빌드되었습니다.
학습할 내용
이 실습에서는 다음 작업을 수행하는 방법을 알아봅니다.
- Vertex AI 플랫폼을 살펴보고 사용 가능한 생성형 AI 모델을 확인합니다.
- Cloud Shell 편집기 및 터미널에서 개발
- Gemini Code Assist를 활용하여 코드를 이해합니다.
- Python에서 Vertex AI SDK를 사용하여 Gemini LLM에 프롬프트를 보내고 응답을 받습니다.
- 기본 프롬프트 엔지니어링 (시스템 요청 사항, 모델 매개변수)을 적용하여 Gemini LLM의 출력을 맞춤설정합니다.
- 프롬프트와 파라미터를 수정하여 대답을 개선함으로써 LLM 기반 채팅 애플리케이션을 테스트하고 반복적으로 개선합니다.
- Gemini 모델로 도구를 정의하고 사용하여 함수 호출을 사용 설정합니다.
- 대화형 앱의 권장사항인 상태 저장 채팅 세션을 사용하도록 코드를 리팩터링합니다.
2. 프로젝트 설정
Google 계정
아직 개인 Google 계정이 없다면 Google 계정을 만들어야 합니다.
직장 또는 학교 계정 대신 개인 계정을 사용합니다.
Google Cloud 콘솔에 로그인
개인 Google 계정을 사용하여 Google Cloud 콘솔에 로그인합니다.
결제 사용 설정
Google Cloud 크레딧 사용 (선택사항)
이 워크숍을 진행하려면 크레딧이 있는 결제 계정이 필요합니다. 이 Codelab 상단의 배너에 있는 크레딧을 사용하여 시작하세요. 이미 결제 계정에 연결되어 있다면 이 단계를 건너뛰어도 됩니다.
개인 결제 계정 설정
Google Cloud 크레딧을 사용하여 결제를 설정한 경우 이 단계를 건너뛸 수 있습니다.
개인 결제 계정을 설정하려면 Cloud 콘솔에서 여기에서 결제를 사용 설정하세요.
참고 사항:
- 이 실습을 완료하는 데 드는 Cloud 리소스 비용은 1달러 미만입니다.
- 이 실습이 끝나면 단계에 따라 리소스를 삭제하여 추가 요금이 발생하지 않도록 할 수 있습니다.
- 신규 사용자는 미화$300 상당의 무료 체험판을 사용할 수 있습니다.
프로젝트 만들기(선택사항)
이 실습에 사용할 현재 프로젝트가 없는 경우 여기에서 새 프로젝트를 만드세요.
3. Cloud Shell 편집기 열기
- 이 링크를 클릭하여 Cloud Shell 편집기로 바로 이동합니다.
- 오늘 언제든지 승인하라는 메시지가 표시되면 승인을 클릭하여 계속합니다.

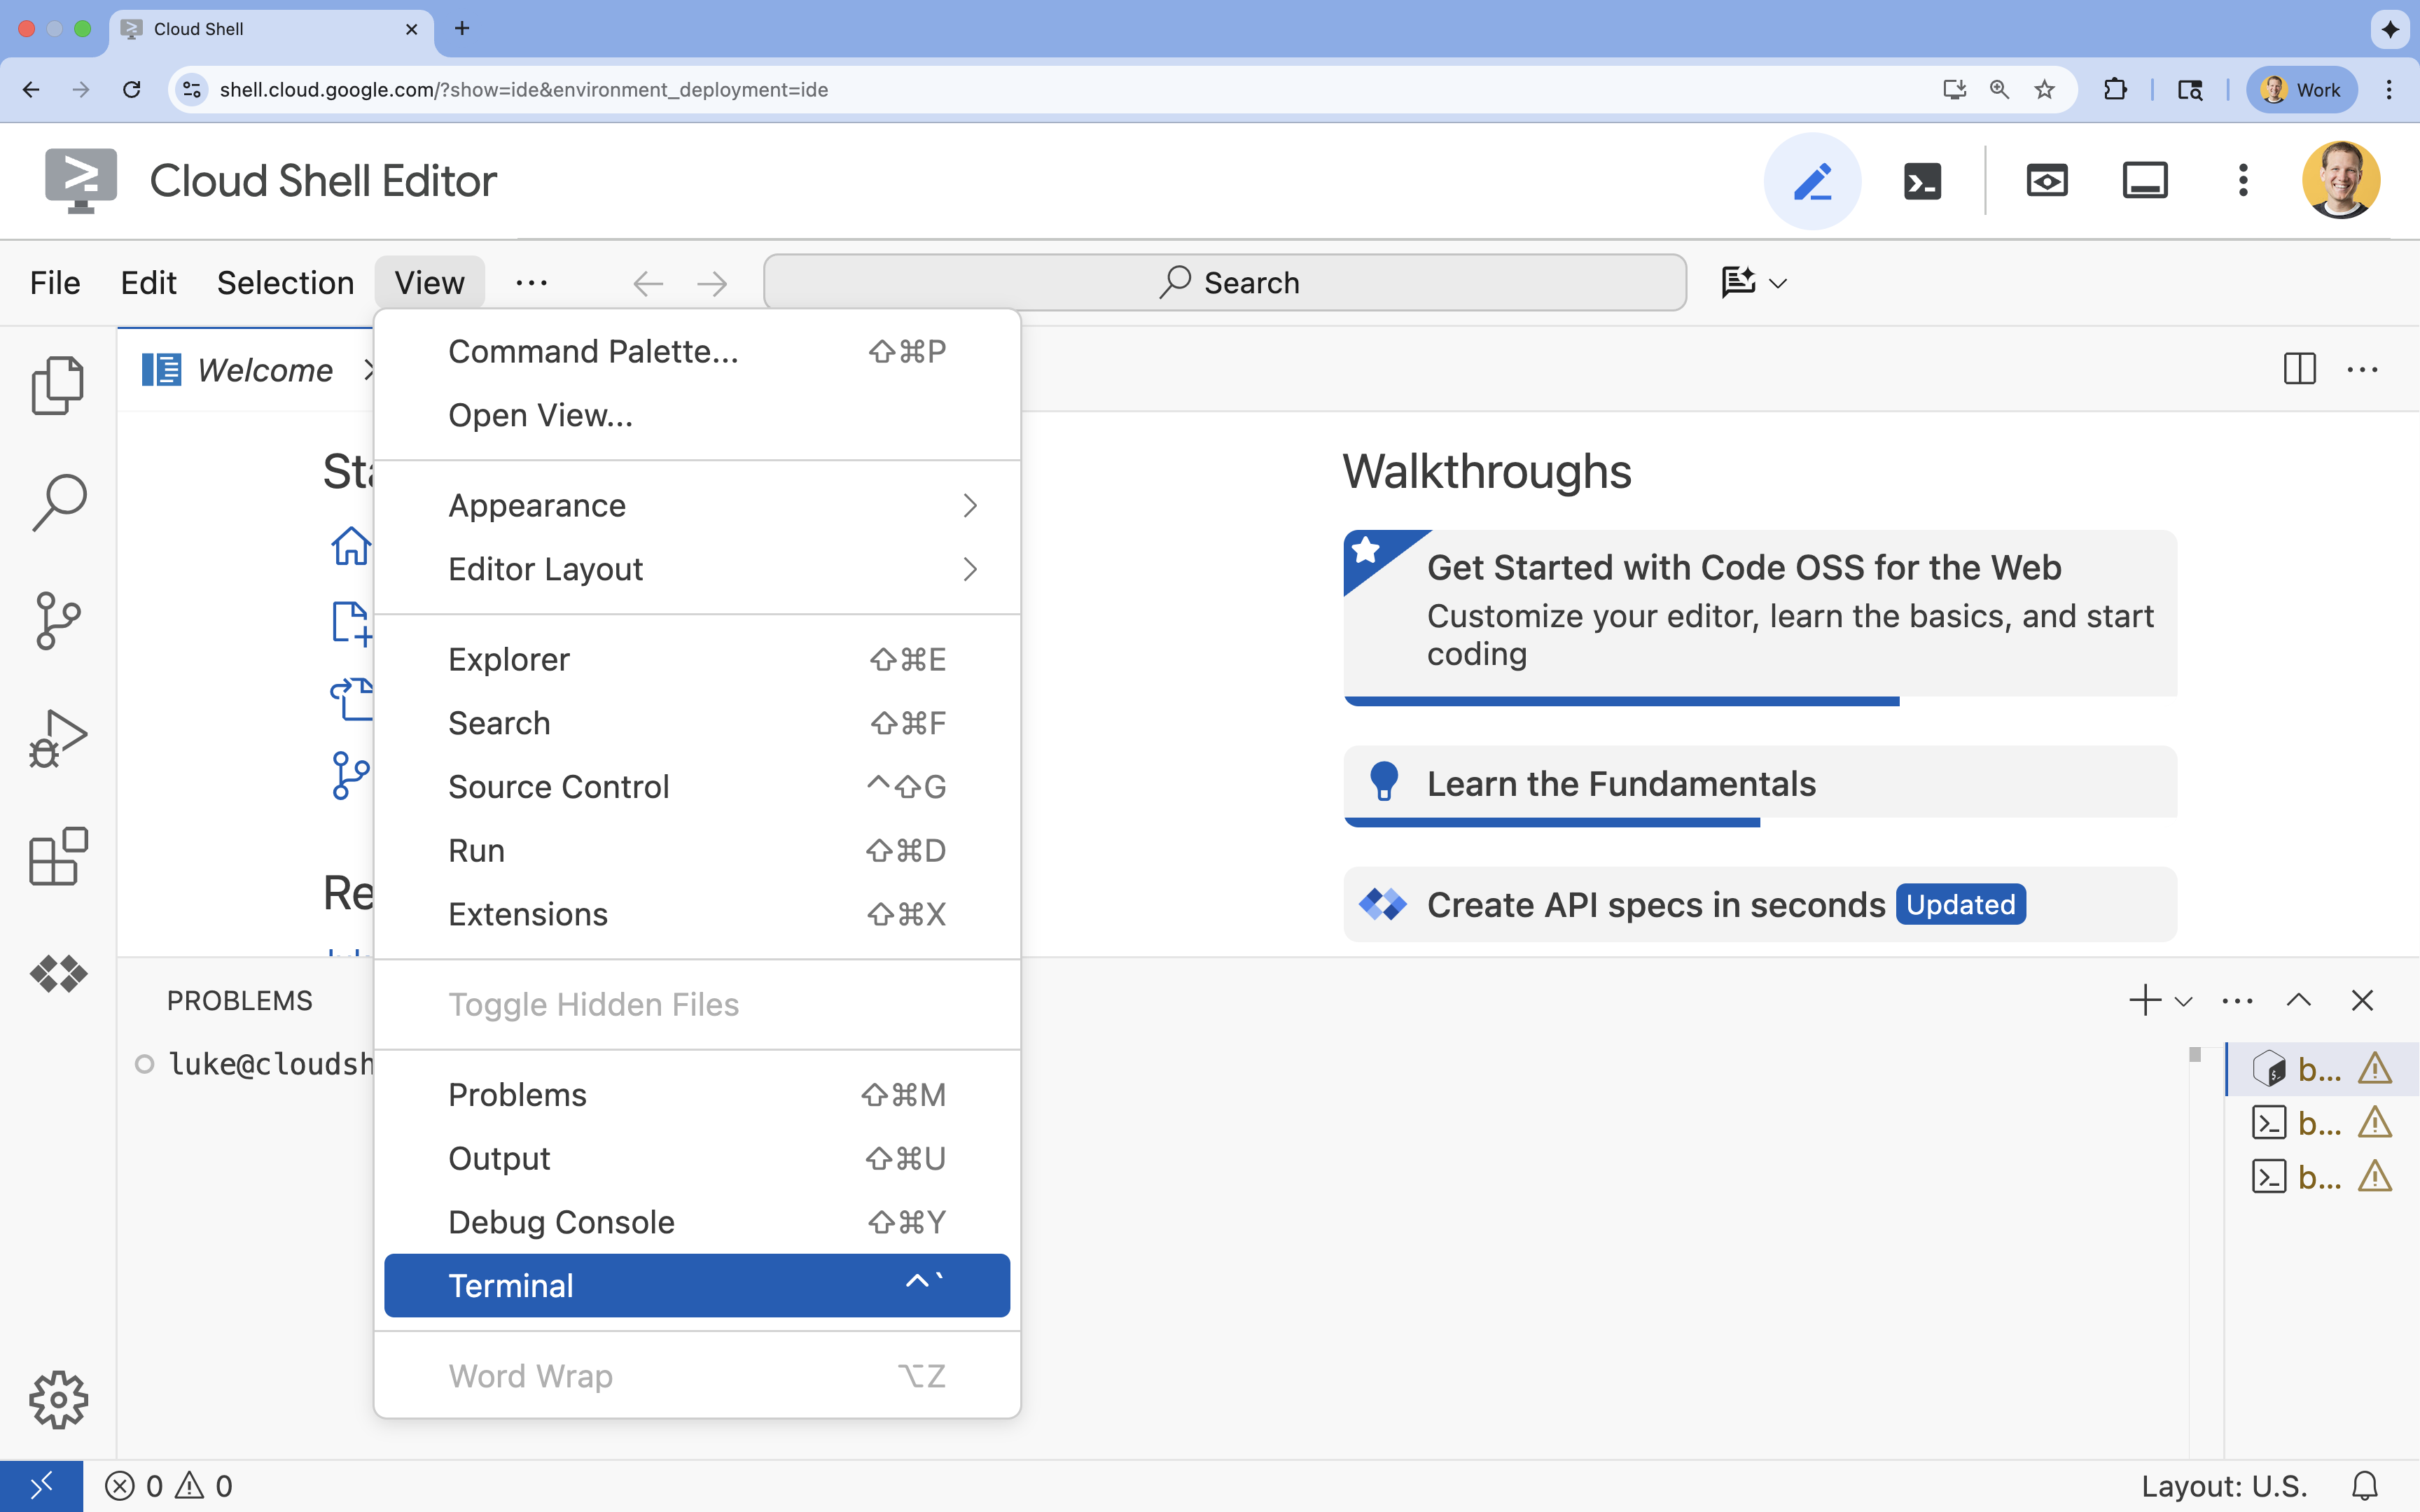
- 터미널이 화면 하단에 표시되지 않으면 다음 단계에 따라 엽니다.
- 보기를 클릭합니다.
- 터미널을 클릭합니다.
- 터미널에서 다음 명령어를 사용하여 프로젝트를 설정합니다.
gcloud config set project [PROJECT_ID]- 예:
gcloud config set project lab-project-id-example - 프로젝트 ID가 기억나지 않는 경우 다음을 사용하여 모든 프로젝트 ID를 나열할 수 있습니다.
gcloud projects list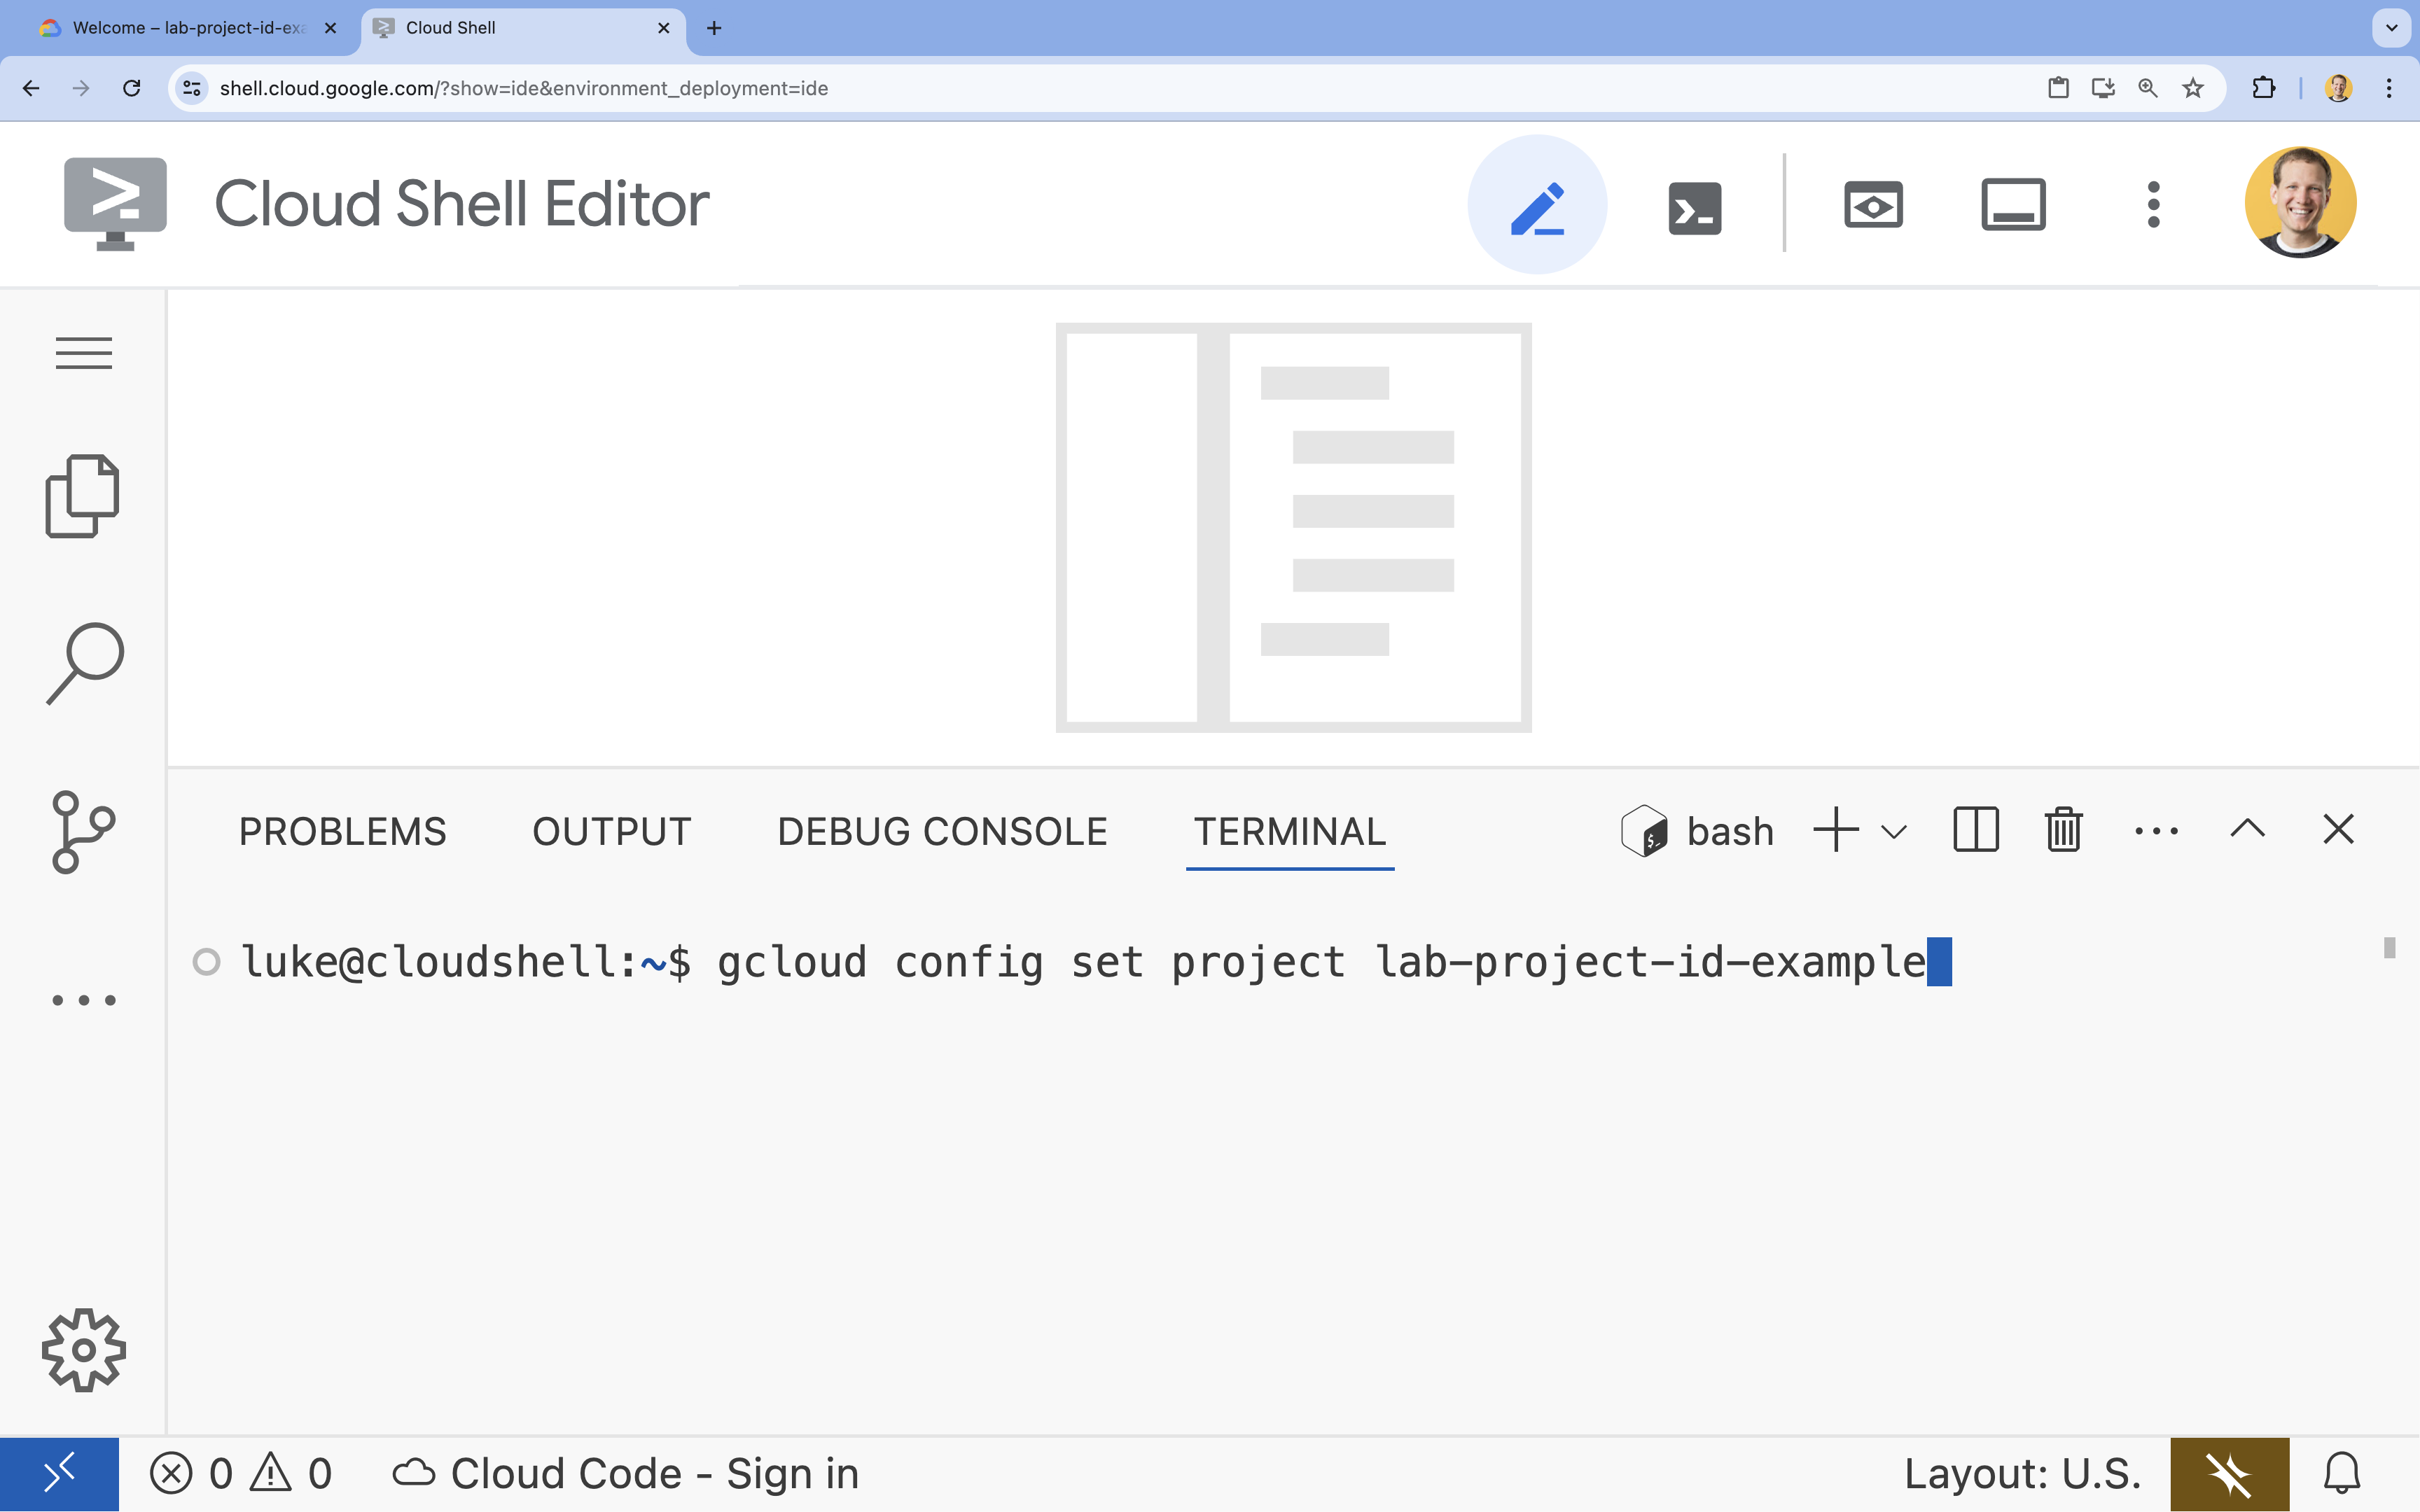
- 예:
- 다음 메시지가 표시되어야 합니다.
Updated property [core/project].
4. API 사용 설정
Vertex AI SDK를 사용하고 Gemini 모델과 상호작용하려면 Google Cloud 프로젝트에서 Vertex AI API를 사용 설정해야 합니다.
- 터미널에서 API를 사용 설정합니다.
gcloud services enable \
  aiplatform.googleapis.com
Python용 Vertex AI SDK 소개
Python 애플리케이션에서 Vertex AI에 호스팅된 모델과 상호작용하려면 Python용 Vertex AI SDK를 사용합니다. 이 SDK를 사용하면 기본 API 호출의 복잡성을 직접 처리하지 않고도 프롬프트를 전송하고, 모델 매개변수를 지정하고, 응답을 수신하는 프로세스를 간소화할 수 있습니다.
Python용 Vertex AI SDK에 관한 포괄적인 문서는 Python용 Vertex AI SDK 소개 | Google Cloud에서 확인할 수 있습니다.
5. 가상 환경 생성 및 종속 항목 설치
Python 프로젝트를 시작하기 전에 가상 환경을 만드는 것이 좋습니다. 이렇게 하면 프로젝트의 종속 항목이 격리되어 다른 프로젝트나 시스템의 전역 Python 패키지와의 충돌을 방지할 수 있습니다.
- 여행 도우미 앱의 코드를 저장할
wanderbot라는 폴더를 만듭니다. 터미널에서 다음 코드를 실행합니다.mkdir wanderbot && cd wanderbot - 가상 환경 만들기 및 활성화
uv venv --python 3.12 source .venv/bin/activatewanderbot)가 표시되어 가상 환경이 활성 상태임을 나타냅니다. 다음과 같이 표시됩니다.
6. wanderbot의 시작 파일 만들기
- 애플리케이션의 새
app.py파일을 만들고 엽니다. 터미널에서 다음 코드를 실행합니다.cloudshell edit app.pycloudshell edit명령어를 사용하면 터미널 위의 편집기에서app.py파일이 열립니다. - 다음 앱 시작 코드 스니펫을
app.py에 붙여넣습니다.import streamlit as st from google import genai from google.genai import types import requests import logging # --- Defining variables and parameters --- REGION = "global" PROJECT_ID = None # TODO: Insert Project ID GEMINI_MODEL_NAME = "gemini-2.5-flash" temperature = .2 top_p = 0.95 system_instructions = None # --- Tooling --- # TODO: Define the weather tool function declaration # TODO: Define the get_current_temperature function # --- Initialize the Vertex AI Client --- try: # TODO: Initialize the Vertex AI client print(f"VertexAI Client initialized successfully with model {GEMINI_MODEL_NAME}") except Exception as e: st.error(f"Error initializing VertexAI client: {e}") st.stop() # TODO: Add the get_chat function here in Task 15. # --- Call the Model --- def call_model(prompt: str, model_name: str) -> str: """ This function interacts with a large language model (LLM) to generate text based on a given prompt and system instructions. It will be replaced in a later step with a more advanced version that handles tooling. """ try: # TODO: Prepare the content for the model # TODO: Define generate_content configuration (needed for system instructions and parameters) # TODO: Define response logging.info(f"[call_model_response] LLM Response: \"{response.text}\"") # TODO: Uncomment the below "return response.text" line # return response.text except Exception as e: return f"Error: {e}" # --- Presentation Tier (Streamlit) --- # Set the title of the Streamlit application st.title("Travel Chat Bot") # Initialize session state variables if they don't exist if "messages" not in st.session_state: # Initialize the chat history with a welcome message st.session_state["messages"] = [ {"role": "assistant", "content": "How can I help you today?"} ] # Display the chat history for msg in st.session_state.messages: st.chat_message(msg["role"]).write(msg["content"]) # Get user input if prompt := st.chat_input(): # Add the user's message to the chat history st.session_state.messages.append({"role": "user", "content": prompt}) # Display the user's message st.chat_message("user").write(prompt) # Show a spinner while waiting for the model's response with st.spinner("Thinking..."): # Get the model's response using the call_model function model_response = call_model(prompt, GEMINI_MODEL_NAME) # Add the model's response to the chat history st.session_state.messages.append( {"role": "assistant", "content": model_response} ) # Display the model's response st.chat_message("assistant").write(model_response) - 애플리케이션 코드용 새
requirements.txt파일을 만들고 엽니다. 터미널에서 다음 코드를 실행합니다.cloudshell edit requirements.txtcloudshell edit명령어를 사용하면 터미널 위의 편집기에서requirements.txt파일이 열립니다. - 다음 앱 시작 코드
requirements.txt에 붙여넣습니다.google-genai streamlit requests - 이 프로젝트에 필요한 Python 종속 항목을 설치합니다. 터미널에서 다음 코드를 실행합니다.
uv pip install -r requirements.txt
7. 코드 살펴보기
생성한 파일에는 기본 채팅 애플리케이션 프런트엔드가 포함되어 있습니다. 소개합니다.
app.py: 이 파일에서 작업합니다. 현재 다음이 포함되어 있습니다.- 필요한 가져오기
- 환경 변수 및 매개변수 (일부는 자리표시자)
- 빈
call_model함수(채울 예정) - 프런트엔드 채팅 앱의 Streamlit 코드
requirements.txt:app.py실행을 위한 설치 요구사항이 포함됩니다.
이제 코드를 살펴볼 차례입니다.
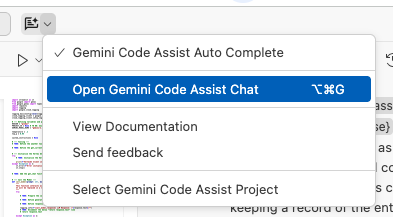
Gemini Code Assist 채팅 열기
Gemini Code Assist 채팅이 Cloud Shell 편집기의 오른쪽 패널에 이미 열려 있어야 합니다. Gemini Code Assist 채팅이 아직 열려 있지 않은 경우 다음 단계에 따라 열 수 있습니다.
- 화면 상단 근처에 있는 Gemini Code Assist 버튼 (
 )을 클릭합니다.
 - Gemini Code Assist 채팅 열기를 선택합니다.
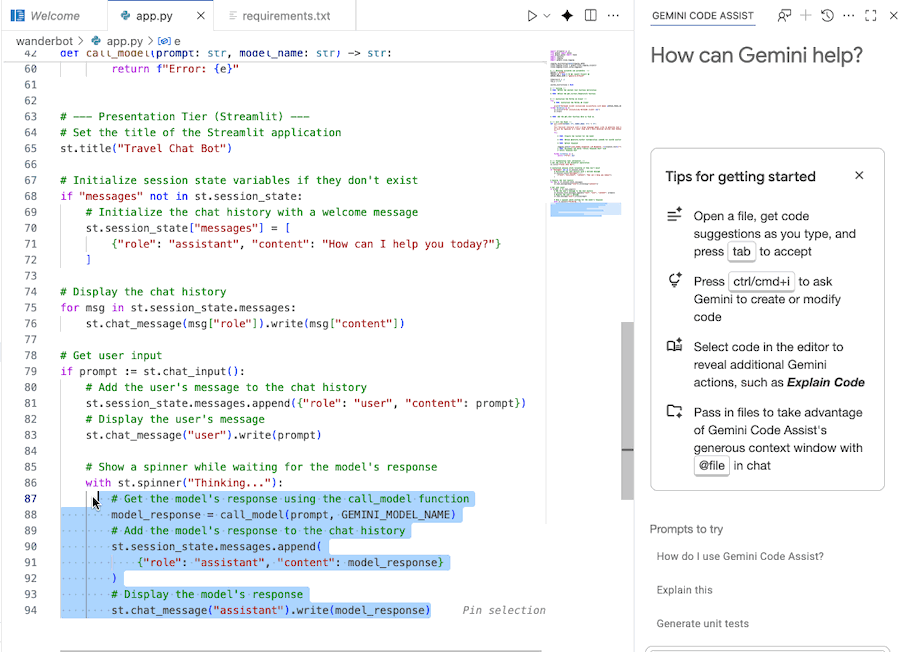
Gemini Code Assist를 사용하여 코드 이해
Gemini Code Assist Chat을 사용하여 코드를 더 잘 이해할 수 있습니다.
- 원하는 코드 섹션을 강조 표시하거나 선택합니다.
- Gemini 채팅에 '이 코드를 설명해 줘'라고 입력합니다.
- Enter를 클릭하여 제출
8. 웹 앱 실행
이 앱을 LLM에 연결하기 전에 실행하여 초기 동작을 확인하세요.
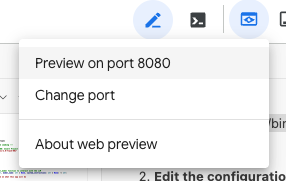
wanderbot디렉터리 내에서 터미널에서 다음 명령어를 실행하여 Streamlit 애플리케이션을 시작하고 Cloud Shell 환경 내에서 로컬로 액세스할 수 있도록 합니다.streamlit run app.py --browser.serverAddress=localhost --server.enableCORS=false --server.enableXsrfProtection=false --server.port 8080- 명령어를 실행한 후 Cloud Shell 편집기 상단에 있는 웹 미리보기 버튼을 클릭하고 포트 8080에서 미리보기를 선택합니다.
여행 앱의 간단한 채팅 인터페이스가 표시됩니다. - 메시지 (예:
Hi!)를 입력하고 Enter 키를 누릅니다.
메시지가 채팅 기록에 표시되지만 어시스턴트의 대답 대신 오류 메시지가 표시됩니다. 애플리케이션이 아직 대규모 언어 모델에 연결되어 있지 않기 때문입니다. 이 동작을 관찰하여 실습의 시작점을 파악합니다.
9. Vertex AI 클라이언트 초기화
Vertex AI에서 사용 가능한 모델 살펴보기
Google Cloud의 Vertex AI 플랫폼은 다양한 생성형 AI 모델에 대한 액세스를 제공합니다. 통합하기 전에 Google Cloud 콘솔에서 사용 가능한 옵션을 살펴볼 수 있습니다.
- Google Cloud 콘솔에서 Model Garden으로 이동합니다. 화면 상단의 검색창에 'Model Garden'을 검색하고 Vertex AI를 선택하면 됩니다.(
 )
) - 사용 가능한 모델을 둘러봅니다. 모달리티, 작업 유형, 기능 등을 기준으로 필터링할 수 있습니다.
이 실습에서는 속도가 빨라 반응형 채팅 애플리케이션을 빌드하는 데 적합한 Gemini 2.5 Flash 모델을 사용합니다.
Vertex AI 클라이언트 초기화
이제 app.py에서 --- Initialize the Vertex AI Client --- 섹션을 수정하여 Vertex AI 클라이언트를 초기화합니다. 이 클라이언트 객체는 모델에 프롬프트를 전송하는 데 사용됩니다.
- Cloud Shell 편집기에서
app.py를 엽니다. app.py에서PROJECT_ID = None행을 찾습니다.None를 따옴표로 묶인 Google Cloud 프로젝트 ID로 바꿉니다. (예:PROJECT_ID = "google-cloud-labs")
프로젝트 ID가 기억나지 않는 경우 다음을 사용하여 모든 프로젝트 ID를 나열할 수 있습니다.gcloud projects list | awk '/PROJECT_ID/{print $2}'- 클라이언트 정의:
try블록 내에서 Vertex AI 클라이언트를 초기화합니다.client = genai.Client( vertexai=True, project=PROJECT_ID, location=REGION, )
업데이트된 Vertex AI 클라이언트 초기화
이 시점에서 Vertex AI 클라이언트 초기화 섹션은 다음과 같이 표시됩니다.
# --- Initialize the Vertex AI Client ---
try:
    client = genai.Client(
        vertexai=True,
        project=PROJECT_ID,
        location=REGION,
    )
print(f"VertexAI Client initialized successfully with model {GEMINI_MODEL_NAME}")
except Exception as e:
st.error(f"Error initializing VertexAI client: {e}")
st.stop()
10. 데이터 준비 및 모델 호출
이제 모델에 전송할 콘텐츠를 준비하고 Gemini 모델을 호출합니다.
call_model함수가 정의된--- Call the Model ---섹션을 찾습니다.- 콘텐츠 정의:
# TODO: Prepare the content for the model에서 모델에 전송될 입력 콘텐츠를 정의합니다. 기본 프롬프트의 경우 사용자의 입력 메시지입니다.contents = [prompt] - 대답 정의:
# TODO: Define response아래에 다음 코드를 붙여넣습니다.response = client.models.generate_content( model=model_name, contents=contents, ) - 응답 반환: 다음 줄의 주석 처리를 삭제합니다.
return response.text with블록의 파일 하단에서call_model함수가 호출되는 줄을 검토합니다. 여기에서 어떤 일이 일어나는지 이해가 안 되면 해당 줄을 강조 표시하고 Gemini Code Assist에 설명을 요청하세요.
contents를 정의하는 더 명시적인 방법
문자열이 포함된 목록이 사용자 텍스트 입력을 나타낸다는 것을 SDK가 이해할 수 있을 만큼 스마트하기 때문에 위의 contents 정의 방식이 작동합니다. 모델 API에 맞게 자동으로 올바르게 형식을 지정합니다.
하지만 입력을 구조화하는 더 명시적이고 기본적인 방법은 다음과 같이 types.Part 및 types.Content 객체를 사용하는 것입니다.
user_message_parts = [types.Part.from_text(text=prompt)]
contents = [
types.Content(
role="user", # Indicates the content is from the user
parts=user_message_parts, # A list, allowing multiple types of content
),
]
call_model 함수 업데이트
이 시점에서 call_model 함수는 다음과 같습니다.
def call_model(prompt: str, model_name: str) -> str:
"""
This function interacts with a large language model (LLM) to generate text based on a given prompt and system instructions.
It will be replaced in a later step with a more advanced version that handles tooling.
"""
try:
contents = [prompt]
# TODO: Define generate_content configuration (needed later for system instructions and parameters)
        response = client.models.generate_content(
            model=model_name,
            contents=contents,
        )
logging.info(f"[call_model_response] LLM Response: \"{response.text}\"")
return response.text
except Exception as e:
return f"Error: {e}"
11. 연결된 앱 테스트
- 터미널에서 현재 실행 중인 프로세스를 종료합니다 (CTRL+C).
- 명령어를 다시 실행하여 Streamlit 애플리케이션을 다시 시작합니다.
streamlit run app.py --browser.serverAddress=localhost --server.enableCORS=false --server.enableXsrfProtection=false --server.port 8080 - Streamlit 애플리케이션을 새로고침합니다. Streamlit 애플리케이션이 계속 실행 중인 경우 브라우저에서 웹 미리보기 페이지를 새로고침하면 됩니다.
- 이제 다음과 같은 질문을 채팅 입력에 입력합니다.
What is the best time of year to go to Iceland? - Enter 키를 누릅니다.
애플리케이션에 메시지, '생각 중...' 스피너, Gemini 모델에서 생성된 대답이 표시됩니다. 그렇다면 웹 애플리케이션이 Vertex AI의 LLM에 성공적으로 연결된 것입니다. 🙌 🥳
12. 시스템 요청 사항 정의
기본적인 연결은 작동하지만 LLM의 응답 품질과 스타일은 입력에 큰 영향을 받습니다. 프롬프트 엔지니어링은 모델이 원하는 출력을 생성하도록 이러한 입력 (프롬프트)을 설계하고 미세 조정하는 프로세스입니다.
이를 위해 먼저 시스템 안내를 만들어 모델에 전달합니다.
Gemini에게 물어보기를 사용하여 유용한 시스템 요청 사항을 작성합니다.
app.py에서 현재None로 설정된system_instructions변수를 찾습니다.system_instructions = NoneNone를 Google 여행 어시스턴트 봇에 대한 안내를 제공하는 여러 줄 문자열로 대체합니다.- Gemini Code Assist에 질문하기: 다음 프롬프트를 Gemini Code Assist에 전달합니다 (또는 직접 작성해도 됨).
I am a developer at a travel marketing company, and my sales department has decided that they need a new chat application to keep up with the bigger booking and search companies. I'm building a simple travel assistant chatbot using the Gemini 2.5 Flash model on Vertex AI. The application should: - Helps users ask questions about travel, book travel, and learn about places they are going to go - Provides users ways to get help about their specific travel plans - Provides all this in a production quality way (multiple environments, logging and monitoring, etc.) Please create system instructions appropriate for that chat app. Be thorough. Do not alter the code in any way beyond providing me with system instructions. - 정의
system_instructions: Gemini Code Assist를 사용하여 생성한 시스템 명령어를system_instructions와 동일하게 설정합니다. 또는 Gemini가 유사한 프롬프트로 만든 다음 시스템 요청 사항을 사용할 수도 있습니다.system_instructions = """ You are a sophisticated travel assistant chatbot designed to provide comprehensive support to users throughout their travel journey. Your capabilities include answering travel-related questions, assisting with booking travel arrangements, offering detailed information about destinations, and providing support for existing travel plans. **Core Functionalities:** 1. **Travel Information and Recommendations:** * Answer user inquiries about travel destinations, including popular attractions, local customs, visa requirements, weather conditions, and safety advice. * Provide personalized recommendations for destinations, activities, and accommodations based on user preferences, interests, and budget. * Offer insights into the best times to visit specific locations, considering factors like weather, crowds, and pricing. * Suggest alternative destinations or activities if the user's initial choices are unavailable or unsuitable. 2. **Booking Assistance:** * Facilitate the booking of flights, hotels, rental cars, tours, and activities. * Search for available options based on user-specified criteria such as dates, destinations, budget, and preferences. * Present clear and concise information about available options, including pricing, amenities, and booking terms. * Guide users through the booking process, ensuring accurate information and secure transactions. * Provide booking confirmations and relevant details, such as booking references and contact information. 3. **Travel Planning and Itinerary Management:** * Assist users in creating detailed travel itineraries, including flights, accommodations, activities, and transportation. * Offer suggestions for optimizing travel plans, such as minimizing travel time or maximizing sightseeing opportunities. * Provide tools for managing and modifying existing itineraries, including adding or removing activities, changing booking dates, or upgrading accommodations. * Offer reminders and notifications for upcoming travel events, such as flight check-in or tour departure times. 4. **Customer Support and Troubleshooting:** * Provide prompt and helpful support to users with questions or issues related to their travel plans. * Assist with resolving booking discrepancies, cancellations, or modifications. * Offer guidance on travel-related emergencies, such as lost luggage or travel delays. * Provide access to relevant contact information for airlines, hotels, and other travel providers. **Interaction Guidelines:** * **Professionalism:** Maintain a polite, respectful, and professional tone in all interactions. * **Clarity and Conciseness:** Provide clear, concise, and easy-to-understand information. Avoid jargon or technical terms unless necessary and always explain them. * **Accuracy:** Ensure all information provided is accurate and up-to-date. Double-check details before sharing them with users. If unsure about something, admit that you don't know and offer to find the information. * **Personalization:** Tailor your responses and recommendations to the specific needs and preferences of each user. * **Proactive Assistance:** Anticipate user needs and offer relevant information or suggestions proactively. * **Error Handling:** Gracefully handle user errors or misunderstandings. Provide helpful guidance and alternative options when necessary. * **Confidentiality:** Respect user privacy and handle personal information with the utmost confidentiality and in compliance with data protection regulations. **Example Interactions:** **User:** "I want to go on a beach vacation in the Caribbean. I have a budget of $2000 per person for a week." **Chatbot:** "Certainly! The Caribbean offers many beautiful beach destinations within your budget. Some popular options include Punta Cana in the Dominican Republic, Cancun in Mexico, and Montego Bay in Jamaica. These destinations offer stunning beaches, all-inclusive resorts, and various activities. Would you like me to search for flights and accommodations for these locations based on your travel dates?" **User:** "My flight is delayed. What should I do?" **Chatbot:** "I'm sorry to hear about the delay. Please check with the airline for the updated departure time and any assistance they can offer. You may be entitled to compensation or rebooking options depending on the length of the delay and the airline's policy. Do you have your flight number handy so I can look up the current status for you?" **User:** "Tell me about the best time to visit Japan." **Chatbot:** "Japan is a fantastic destination with distinct seasons offering unique experiences. Spring (March-May) is famous for the beautiful cherry blossoms, while autumn (September-November) boasts stunning fall foliage. Both seasons have pleasant temperatures, making them ideal for sightseeing. Summer (June-August) can be hot and humid, but it's a great time for festivals and outdoor activities in the mountains. Winter (December-February) offers opportunities for skiing and snowboarding in the Japanese Alps, though some areas may experience heavy snowfall. To recommend the best time for you, could you tell me what you'd like to experience in Japan?" By following these instructions, you will be able to provide exceptional travel assistance and create a positive experience for every user. """ - generate_content 구성 정의: 이러한 시스템 안내를 전달할 구성 객체를 초기화합니다.
system_instructions는 스크립트에서 전역으로 정의되므로 함수가 직접 액세스할 수 있습니다.generate_content_config = types.GenerateContentConfig( system_instruction=[ types.Part.from_text(text=system_instructions) ], ) logging.info(f"[generate_config_details] System Instruction: {generate_content_config.system_instruction[0].text}") - 대답에 시스템 안내를 추가하려면
generate_content메서드에config매개변수를 추가하고 위에 만든generate_content_config객체와 동일하게 설정합니다.response = client.models.generate_content( model=model_name, contents=contents, config=generate_content_config, # This is the new line )
call_model 함수 업데이트
이제 전체 call_model 함수는 다음과 같습니다.
def call_model(prompt: str, model_name: str) -> str:
"""
This function interacts with a large language model (LLM) to generate text based on a given prompt and system instructions.
It will be replaced in a later step with a more advanced version that handles tooling.
"""
try:
contents = [prompt]
        generate_content_config = types.GenerateContentConfig(
            system_instruction=[
                types.Part.from_text(text=system_instructions)
            ],
        )
        logging.info(f"[generate_config_details] System Instruction: {generate_content_config.system_instruction[0].text}")
response = client.models.generate_content(
model=model_name,
contents=contents,
config=generate_content_config,
)
logging.info(f"[call_model_response] LLM Response: \"{response.text}\"")
return response.text
except Exception as e:
return f"Error: {e}"
13. 시스템 안내로 앱 테스트
- 터미널에서 현재 실행 중인 프로세스를 종료합니다 (CTRL+C).
- 명령어를 다시 실행하여 Streamlit 애플리케이션을 다시 시작합니다.
streamlit run app.py --browser.serverAddress=localhost --server.enableCORS=false --server.enableXsrfProtection=false --server.port 8080 - Streamlit 애플리케이션을 새로고침합니다. Streamlit 애플리케이션이 계속 실행 중인 경우 브라우저에서 웹 미리보기 페이지를 새로고침하면 됩니다.
- 이전과 동일한 질문을 해 보세요.
What is the best time of year to go to Iceland? - Enter 키를 누릅니다.
이번 대답과 지난번 대답을 비교해 줘.
14. 날씨 도구 정의
지금까지 챗봇은 지식이 풍부하지만 지식은 학습된 데이터로 제한됩니다. 실시간 정보에 액세스할 수 없습니다. 여행 봇의 경우 일기예보와 같은 실시간 데이터를 가져올 수 있다는 것은 큰 이점입니다.
이때 도구(함수 호출이라고도 함)이 유용합니다. LLM이 외부 정보를 가져오기 위해 호출할 수 있는 도구 (Python 함수) 집합을 정의할 수 있습니다.
도구 작동 방식
- 도구가 하는 일과 도구가 사용하는 파라미터를 포함하여 도구를 모델에 설명합니다.
- 사용자가 프롬프트를 전송합니다 (예: "런던 날씨는 어때?").
- 모델은 프롬프트를 수신하고 사용자가 모델의 도구 중 하나를 사용하여 알아낼 수 있는 사항에 대해 질문하고 있음을 확인합니다.
- 모델은 텍스트로 응답하는 대신 호출하려는 도구와 인수를 나타내는 특수
function_call객체로 응답합니다. - Python 코드는 이
function_call를 수신하고 제공된 인수로 실제get_current_temperature함수를 실행하여 결과 (예: 15°C)를 가져옵니다. - 이 결과를 모델에 다시 전송합니다.
- 모델은 결과를 수신하고 사용자를 위한 자연어 응답을 생성합니다 (예: '현재 런던의 온도는 15°C입니다.').
이 과정을 통해 모델은 학습 데이터 범위를 훨씬 넘어서는 질문에 대답할 수 있으므로 훨씬 더 강력하고 유용한 어시스턴트가 됩니다.
날씨 도구 정의
여행자가 할 일에 대한 조언을 구하고 날씨의 영향을 받는 활동 중에서 선택하는 경우 날씨 도구가 유용할 수 있습니다. 모델이 현재 날씨를 가져올 수 있는 도구를 만들어 보겠습니다. 두 부분이 필요합니다. 모델에 도구를 설명하는 함수 선언과 이를 구현하는 실제 Python 함수입니다.
app.py에서# TODO: Define the weather tool function declaration댓글을 찾습니다.- 이 주석 아래에
weather_function변수를 추가합니다. 이는 모델에 함수의 목적, 매개변수, 필수 인수에 관해 알아야 할 모든 것을 알려주는 사전입니다.weather_function = { "name": "get_current_temperature", "description": "Gets the current temperature for a given location.", "parameters": { "type": "object", "properties": { "location": { "type": "string", "description": "The city name, e.g. San Francisco", }, }, "required": ["location"], }, } - 그런 다음
# TODO: Define the get_current_temperature function댓글을 찾습니다. 아래에 다음 Python 코드를 추가합니다. 이 함수는 다음을 수행합니다.def get_current_temperature(location: str) -> str: """Gets the current temperature for a given location.""" try: # --- Get Latitude and Longitude for the location --- geocode_url = f"https://geocoding-api.open-meteo.com/v1/search?name={location}&count=1&language=en&format=json" geocode_response = requests.get(geocode_url) geocode_data = geocode_response.json() if not geocode_data.get("results"): return f"Could not find coordinates for {location}." lat = geocode_data["results"][0]["latitude"] lon = geocode_data["results"][0]["longitude"] # --- Get Weather for the coordinates --- weather_url = f"https://api.open-meteo.com/v1/forecast?latitude={lat}&longitude={lon}¤t_weather=true" weather_response = requests.get(weather_url) weather_data = weather_response.json() temperature = weather_data["current_weather"]["temperature"] unit = "°C" return f"{temperature}{unit}" except Exception as e: return f"Error fetching weather: {e}"
15. 채팅 및 도구 리팩터링
현재 call_model 함수는 간단한 일회성 generate_content 호출을 사용합니다. 단일 질문에는 적합하지만 멀티턴 대화, 특히 도구와 관련된 주고받는 대화에는 적합하지 않습니다.
대화의 컨텍스트를 유지하는 채팅 세션을 사용하는 것이 좋습니다. 이제 도구를 올바르게 구현하는 데 필요한 채팅 세션을 사용하도록 코드를 리팩터링합니다.
- 기존
call_model함수를 삭제합니다. 더 고급 버전으로 대체할 예정입니다. - 대신 아래 코드 블록에서 새
call_model함수를 추가합니다. 이 새로운 함수에는 앞에서 설명한 도구 호출 루프를 처리하는 로직이 포함되어 있습니다. 다음 단계에서 완료할 TODO 주석이 여러 개 있습니다.# --- Call the Model --- def call_model(prompt: str, model_name: str) -> str: """ This function interacts with a large language model (LLM) to generate text based on a given prompt. It maintains a chat session and handles function calls from the model to external tools. """ try: # TODO: Get the existing chat session or create a new one. message_content = prompt # Start the tool-calling loop while True: # TODO: Send the message to the model. # Check if the model wants to call a tool has_tool_calls = False for part in response.candidates[0].content.parts: if part.function_call: has_tool_calls = True function_call = part.function_call logging.info(f"Function to call: {function_call.name}") logging.info(f"Arguments: {function_call.args}") # TODO: Call the appropriate function if the model requests it. elif part.text: logging.info("No function call found in the response.") logging.info(response.text) # If no tool call was made, break the loop if not has_tool_calls: break # TODO: Return the model's final text response. except Exception as e: return f"Error: {e}" - 이제 채팅 세션을 관리하는 도우미 함수를 추가해 보겠습니다. 새
call_model함수 위에get_chat함수를 추가합니다. 이 함수는 시스템 안내 및 도구 정의를 사용하여 새 채팅 세션을 만들거나 기존 세션을 가져옵니다. 이는 코드를 정리하는 데 유용한 방법입니다.def get_chat(model_name: str): if f"chat-{model_name}" not in st.session_state: # TODO: Define the tools configuration for the model # TODO: Define the generate_content configuration, including tools # TODO: Create a new chat session st.session_state[f"chat-{model_name}"] = chat return st.session_state[f"chat-{model_name}"]
이제 고급 도구 지원 채팅 로직의 스캐폴딩을 설정했습니다.
16. 도구 호출 로직 구현
이제 TODOs을 채워 도구 호출 로직이 완전히 작동하도록 하겠습니다.
get_chat 구현
# TODO: Define the tools configuration...주석 아래의get_chat함수에서weather_function선언에서types.Tool인스턴스를 만들어tools객체를 정의합니다.tools = types.Tool(function_declarations=[weather_function])# TODO: Define the generate_content configuration...에서generate_content_config를 정의하고tools객체를 모델에 전달해야 합니다. 이러한 방식으로 모델은 사용할 수 있는 도구에 대해 학습합니다.generate_content_config = types.GenerateContentConfig( system_instruction=[types.Part.from_text(text=system_instructions)], tools=[tools] # Pass the tool definition here )# TODO: Create a new chat session에서client.chats.create()을 사용하여 채팅 객체를 만들고 모델 이름과 구성을 전달합니다.chat = client.chats.create( model=model_name, config=generate_content_config, )
call_model 구현
call_model함수의# TODO: Get the existing chat session...아래에서 새get_chat도우미 함수를 호출합니다.chat = get_chat(model_name)- 그런 다음
# TODO: Send the message to the model을 찾습니다.chat.send_message()메서드를 사용하여 사용자의 메시지를 전송합니다.response = chat.send_message(message_content) # TODO: Call the appropriate function...를 찾습니다. 여기에서 모델이 원하는 함수를 확인하고 실행합니다.
if function_call.name == "get_current_temperature":
result = get_current_temperature(**function_call.args)
function_response_part = types.Part.from_function_response(
name=function_call.name,
response={"result": result},
)
message_content = [function_response_part]
- 마지막으로
# TODO: Return the model's final text response를 찾아 반환 문을 추가합니다.return response.text
get_chat 함수 업데이트
이제 업데이트된 get_chat 함수는 다음과 같습니다.
def get_chat(model_name: str):
if f"chat-{model_name}" not in st.session_state:
# Tools
tools = types.Tool(function_declarations=[weather_function])
# Initialize a configuration object
generate_content_config = types.GenerateContentConfig(
system_instruction=[types.Part.from_text(text=system_instructions)],
tools=[tools]
)
        chat = client.chats.create(
            model=model_name,
            config=generate_content_config,
        )
st.session_state[f"chat-{model_name}"] = chat
return st.session_state[f"chat-{model_name}"]
call_model 함수 업데이트
이제 업데이트된 call_model 함수는 다음과 같습니다.
def call_model(prompt: str, model_name: str) -> str:
try:
chat = get_chat(model_name)
message_content = prompt
while True:
response = chat.send_message(message_content)
has_tool_calls = False
for part in response.candidates[0].content.parts:
if part.function_call:
has_tool_calls = True
function_call = part.function_call
logging.info(f"Function to call: {function_call.name}")
logging.info(f"Arguments: {function_call.args}")
                    if function_call.name == "get_current_temperature":
                      result = get_current_temperature(**function_call.args)
                    function_response_part = types.Part.from_function_response(
                        name=function_call.name,
                        response={"result": result},
                    )
                    message_content = [function_response_part]
elif part.text:
logging.info("No function call found in the response.")
logging.info(response.text)
if not has_tool_calls:
break
return response.text
except Exception as e:
return f"Error: {e}"
17. 도구가 사용 설정된 앱 테스트
새 기능을 직접 확인해 보세요.
- 터미널에서 현재 실행 중인 프로세스를 종료합니다 (CTRL+C).
- 명령어를 다시 실행하여 Streamlit 애플리케이션을 다시 시작합니다.
streamlit run app.py --browser.serverAddress=localhost --server.enableCORS=false --server.enableXsrfProtection=false --server.port 8080 - Streamlit 애플리케이션을 새로고침합니다. Streamlit 애플리케이션이 계속 실행 중인 경우 브라우저에서 웹 미리보기 페이지를 새로고침하면 됩니다.
- 이제 다음과 같이 새 도구를 트리거하는 질문을 합니다.
I'm looking for something to do in New York today. What do you recommend? Would it be a good day to go to Ellis Island? - Enter 키를 누릅니다.
이 대답을 이전 대답과 비교합니다. 차이점이 무엇인가요?
함수에서 가져온 온도가 포함된 대답이 표시됩니다. Cloud Shell 터미널도 확인하세요. Python 함수가 실행되었음을 확인하는 print 문이 표시됩니다.
18. 파라미터로 모델 출력 개선
수고하셨습니다. 이제 여행 어시스턴트가 도구를 사용하여 실시간 외부 데이터를 가져올 수 있어 훨씬 더 강력해졌습니다.
이제 모델의 기능을 개선했으니 대답 방식을 미세 조정해 보겠습니다. 모델 파라미터를 사용하면 LLM이 생성하는 텍스트의 스타일과 무작위성을 제어할 수 있습니다. 이 설정을 조정하면 봇의 출력을 더 제한적이고 결정론적으로 만들거나 더 창의적이고 다양하게 만들 수 있습니다.
이 실습에서는 temperature와 top_p에 중점을 둡니다. (구성 가능한 매개변수와 설명의 전체 목록은 API 참조의 GenerateContentConfig를 참고하세요.)
temperature: 출력의 무작위성을 제어합니다. 값이 낮을수록 (0에 가까울수록) 출력이 더 결정론적이고 제한적이며, 값이 높을수록 (2에 가까울수록) 무작위성과 창의성이 증가합니다. Q&A 또는 어시스턴트 봇의 경우 일관되고 사실에 기반한 대답을 위해 낮은 온도가 선호되는 경우가 많습니다.top_p: 샘플링 시 고려할 토큰의 최대 누적 확률입니다. 토큰은 할당된 확률에 따라 정렬되므로 가능성이 가장 높은 토큰만 고려됩니다. 모델은 확률의 합이top_p값인 가장 가능성이 높은 토큰을 고려합니다. 값이 낮을수록 토큰 선택이 제한되어 출력이 다양하지 않습니다.
호출 매개변수
app.py상단에 정의된 변수temperature와top_p를 찾습니다. 아직 어디에서도 호출되지 않았습니다.get_chat함수의GenerateContentConfig내에 정의된 매개변수에temperature및top_p를 추가합니다.generate_content_config = types.GenerateContentConfig( temperature=temperature, top_p=top_p, system_instruction=[types.Part.from_text(text=system_instructions)], tools=[tools] # Pass the tool definition here )
get_chat 함수 업데이트
이제 get_chat 앱이 다음과 같이 표시됩니다.
def get_chat(model_name: str):
    if f"chat-{model_name}" not in st.session_state:
        # Tools
        tools = types.Tool(function_declarations=[weather_function])

        # Initialize a configuration object
        generate_content_config = types.GenerateContentConfig(
            temperature=temperature,
            top_p=top_p,
            system_instruction=[types.Part.from_text(text=system_instructions)],
            tools=[tools]
        )
        chat = client.chats.create(
            model=model_name,
            config=generate_content_config,
        )
        st.session_state[f"chat-{model_name}"] = chat
    return st.session_state[f"chat-{model_name}"]
19. 모델 파라미터로 테스트
- 터미널에서 현재 실행 중인 프로세스를 종료합니다 (CTRL+C).
- 명령어를 다시 실행하여 Streamlit 애플리케이션을 다시 시작합니다.
streamlit run app.py --browser.serverAddress=localhost --server.enableCORS=false --server.enableXsrfProtection=false --server.port 8080 - Streamlit 애플리케이션을 새로고침합니다. Streamlit 애플리케이션이 계속 실행 중인 경우 브라우저에서 웹 미리보기 페이지를 새로고침하면 됩니다.
- 이전과 동일한 질문을 해 보세요.
I'm looking for something to do in New York today. What do you recommend? Would it be a good day to go to Ellis Island? - Enter 키를 누릅니다.
이 대답을 이전 대답과 비교합니다.
20. 축하합니다.
도구를 사용하여 Q&A 애플리케이션을 업그레이드했습니다. 도구는 Gemini 기반 앱이 외부 시스템과 상호작용하고 실시간 정보에 액세스할 수 있도록 지원하는 강력한 기능입니다.
지속적인 실험
프롬프트를 계속 최적화할 수 있는 방법은 다양합니다. 다음과 같은 사항을 고려해 보세요.
temperature및top_p를 조정하여 LLM에서 제공하는 대답이 어떻게 달라지는지 확인합니다.- 구성 가능한 매개변수와 설명의 전체 목록은 API 참조의
GenerateContentConfig을 참고하세요. 더 많은 매개변수를 정의하고 조정하여 어떤 결과가 나오는지 확인해 보세요.
요약
이 실습에서는 다음 작업을 수행했습니다.
- 개발에 Cloud Shell 편집기와 터미널을 사용했습니다.
- Vertex AI Python SDK를 사용하여 애플리케이션을 Gemini 모델에 연결했습니다.
- LLM의 대답을 안내하기 위해 시스템 요청 사항과 모델 파라미터를 적용했습니다.
- 도구 (함수 호출)의 개념과 이점을 배웠습니다.
- 대화형 AI의 권장사항인 스테이트풀 채팅 세션을 사용하도록 코드를 리팩터링했습니다.
- 함수 선언을 사용하여 모델의 도구를 정의했습니다.
- 도구의 로직을 제공하는 Python 함수를 구현했습니다.
- 모델의 함수 호출 요청을 처리하고 결과를 반환하는 코드를 작성했습니다.