
1. บทนำ
ภาพรวม
คุณเป็นนักพัฒนาซอฟต์แวร์ที่บริษัทการตลาดด้านการท่องเที่ยว ฝ่ายขายตัดสินใจว่าต้องมีแอปพลิเคชันแชทใหม่เพื่อตามให้ทันบริษัทการจองและค้นหาที่ใหญ่ขึ้น นอกจากนี้ พวกเขายังเคยได้ยินเกี่ยวกับ Generative AI แต่ไม่ทราบข้อมูลมากนัก แผนกอื่นๆ ได้ยินเรื่องโครงการริเริ่มนี้และสงสัยว่าโครงการนี้จะช่วยปรับปรุงประสบการณ์ของลูกค้าได้หรือไม่
สิ่งที่คุณต้องดำเนินการ
ในแล็บนี้ คุณจะได้สร้างแชทบ็อตผู้ช่วยด้านการเดินทางโดยใช้โมเดล Gemini 2.5 Flash ใน Vertex AI
แอปพลิเคชันควรมีลักษณะดังนี้
- ช่วยให้ผู้ใช้ถามคำถามเกี่ยวกับการเดินทาง จองการเดินทาง และดูข้อมูลเกี่ยวกับสถานที่ที่วางแผนจะไป
- ให้วิธีแก่ผู้ใช้ในการขอรับความช่วยเหลือเกี่ยวกับแผนการเดินทางที่เฉพาะเจาะจง
- ดึงข้อมูลแบบเรียลไทม์ เช่น สภาพอากาศ โดยใช้เครื่องมือได้
คุณจะทำงานในสภาพแวดล้อม Google Cloud ที่กำหนดค่าไว้ล่วงหน้า โดยเฉพาะภายใน Cloud Shell Editor เราได้ตั้งค่าส่วนหน้าของเว็บแอปพลิเคชันพื้นฐานให้คุณแล้ว พร้อมด้วยสิทธิ์ที่จำเป็นในการเข้าถึง Vertex AI แอปนี้สร้างขึ้นโดยใช้ Streamlit
สิ่งที่คุณจะได้เรียนรู้
ในแล็บนี้ คุณจะได้เรียนรู้วิธีทำงานต่อไปนี้
- สำรวจแพลตฟอร์ม Vertex AI เพื่อระบุโมเดล Generative AI ที่พร้อมใช้งาน
- พัฒนาใน Cloud Shell Editor และเทอร์มินัล
- ใช้ Gemini Code Assist เพื่อทำความเข้าใจโค้ด
- ใช้ Vertex AI SDK ใน Python เพื่อส่งพรอมต์ไปยัง Gemini LLM และรับคำตอบจากโมเดล
- ใช้วิศวกรรมพรอมต์ (Prompt Engineering)พื้นฐาน (คำสั่งของระบบ พารามิเตอร์ของโมเดล) เพื่อปรับแต่งเอาต์พุตของ LLM ของ Gemini
- ทดสอบและปรับแต่งแอปพลิเคชันแชทที่ทำงานด้วย LLM ซ้ำๆ โดยการแก้ไขพรอมต์และพารามิเตอร์เพื่อปรับปรุงคำตอบ
- กำหนดและใช้เครื่องมือกับโมเดล Gemini เพื่อเปิดใช้การเรียกใช้ฟังก์ชัน
- ปรับโครงสร้างโค้ดเพื่อใช้เซสชันการแชทแบบมีสถานะ ซึ่งเป็นแนวทางปฏิบัติแนะนำสำหรับแอปสนทนาโต้ตอบ
2. การตั้งค่าโปรเจ็กต์
บัญชี Google
หากยังไม่มีบัญชี Google ส่วนบุคคล คุณต้องสร้างบัญชี Google
ใช้บัญชีส่วนตัวแทนบัญชีของที่ทำงานหรือบัญชีโรงเรียน
ลงชื่อเข้าใช้คอนโซล Google Cloud
ลงชื่อเข้าใช้ คอนโซล Google Cloud โดยใช้บัญชี Google ส่วนบุคคล
เปิดใช้การเรียกเก็บเงิน
แลกรับเครดิต Google Cloud (ไม่บังคับ)
หากต้องการจัดเวิร์กช็อปนี้ คุณต้องมีบัญชีสำหรับการเรียกเก็บเงินที่มีเครดิตอยู่บ้าง ใช้เครดิตจากแบนเนอร์ที่ด้านบนของ Codelab นี้เพื่อเริ่มต้นใช้งาน หากเชื่อมต่อกับบัญชีสำหรับการเรียกเก็บเงินอยู่แล้ว ให้ข้ามขั้นตอนนี้
ตั้งค่าบัญชีสำหรับการเรียกเก็บเงินส่วนตัว
หากตั้งค่าการเรียกเก็บเงินโดยใช้เครดิต Google Cloud คุณจะข้ามขั้นตอนนี้ได้
หากต้องการตั้งค่าบัญชีสำหรับการเรียกเก็บเงินส่วนตัว ให้ไปที่นี่เพื่อเปิดใช้การเรียกเก็บเงินใน Cloud Console
ข้อควรทราบ
- การทำ Lab นี้ควรมีค่าใช้จ่ายน้อยกว่า $1 USD ในทรัพยากรระบบคลาวด์
- คุณสามารถทำตามขั้นตอนที่ส่วนท้ายของแล็บนี้เพื่อลบทรัพยากรเพื่อหลีกเลี่ยงการเรียกเก็บเงินเพิ่มเติม
- ผู้ใช้ใหม่มีสิทธิ์ใช้ช่วงทดลองใช้ฟรีมูลค่า$300 USD
สร้างโปรเจ็กต์ (ไม่บังคับ)
หากไม่มีโปรเจ็กต์ปัจจุบันที่ต้องการใช้สำหรับแล็บนี้ ให้สร้างโปรเจ็กต์ใหม่ที่นี่
3. เปิดเครื่องมือแก้ไข Cloud Shell
- คลิกลิงก์นี้เพื่อไปยัง Cloud Shell Editor โดยตรง
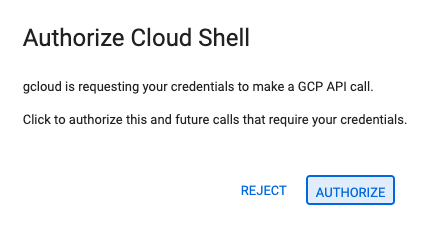
- หากระบบแจ้งให้ให้สิทธิ์ในขั้นตอนใดก็ตามในวันนี้ ให้คลิกให้สิทธิ์เพื่อดำเนินการต่อ
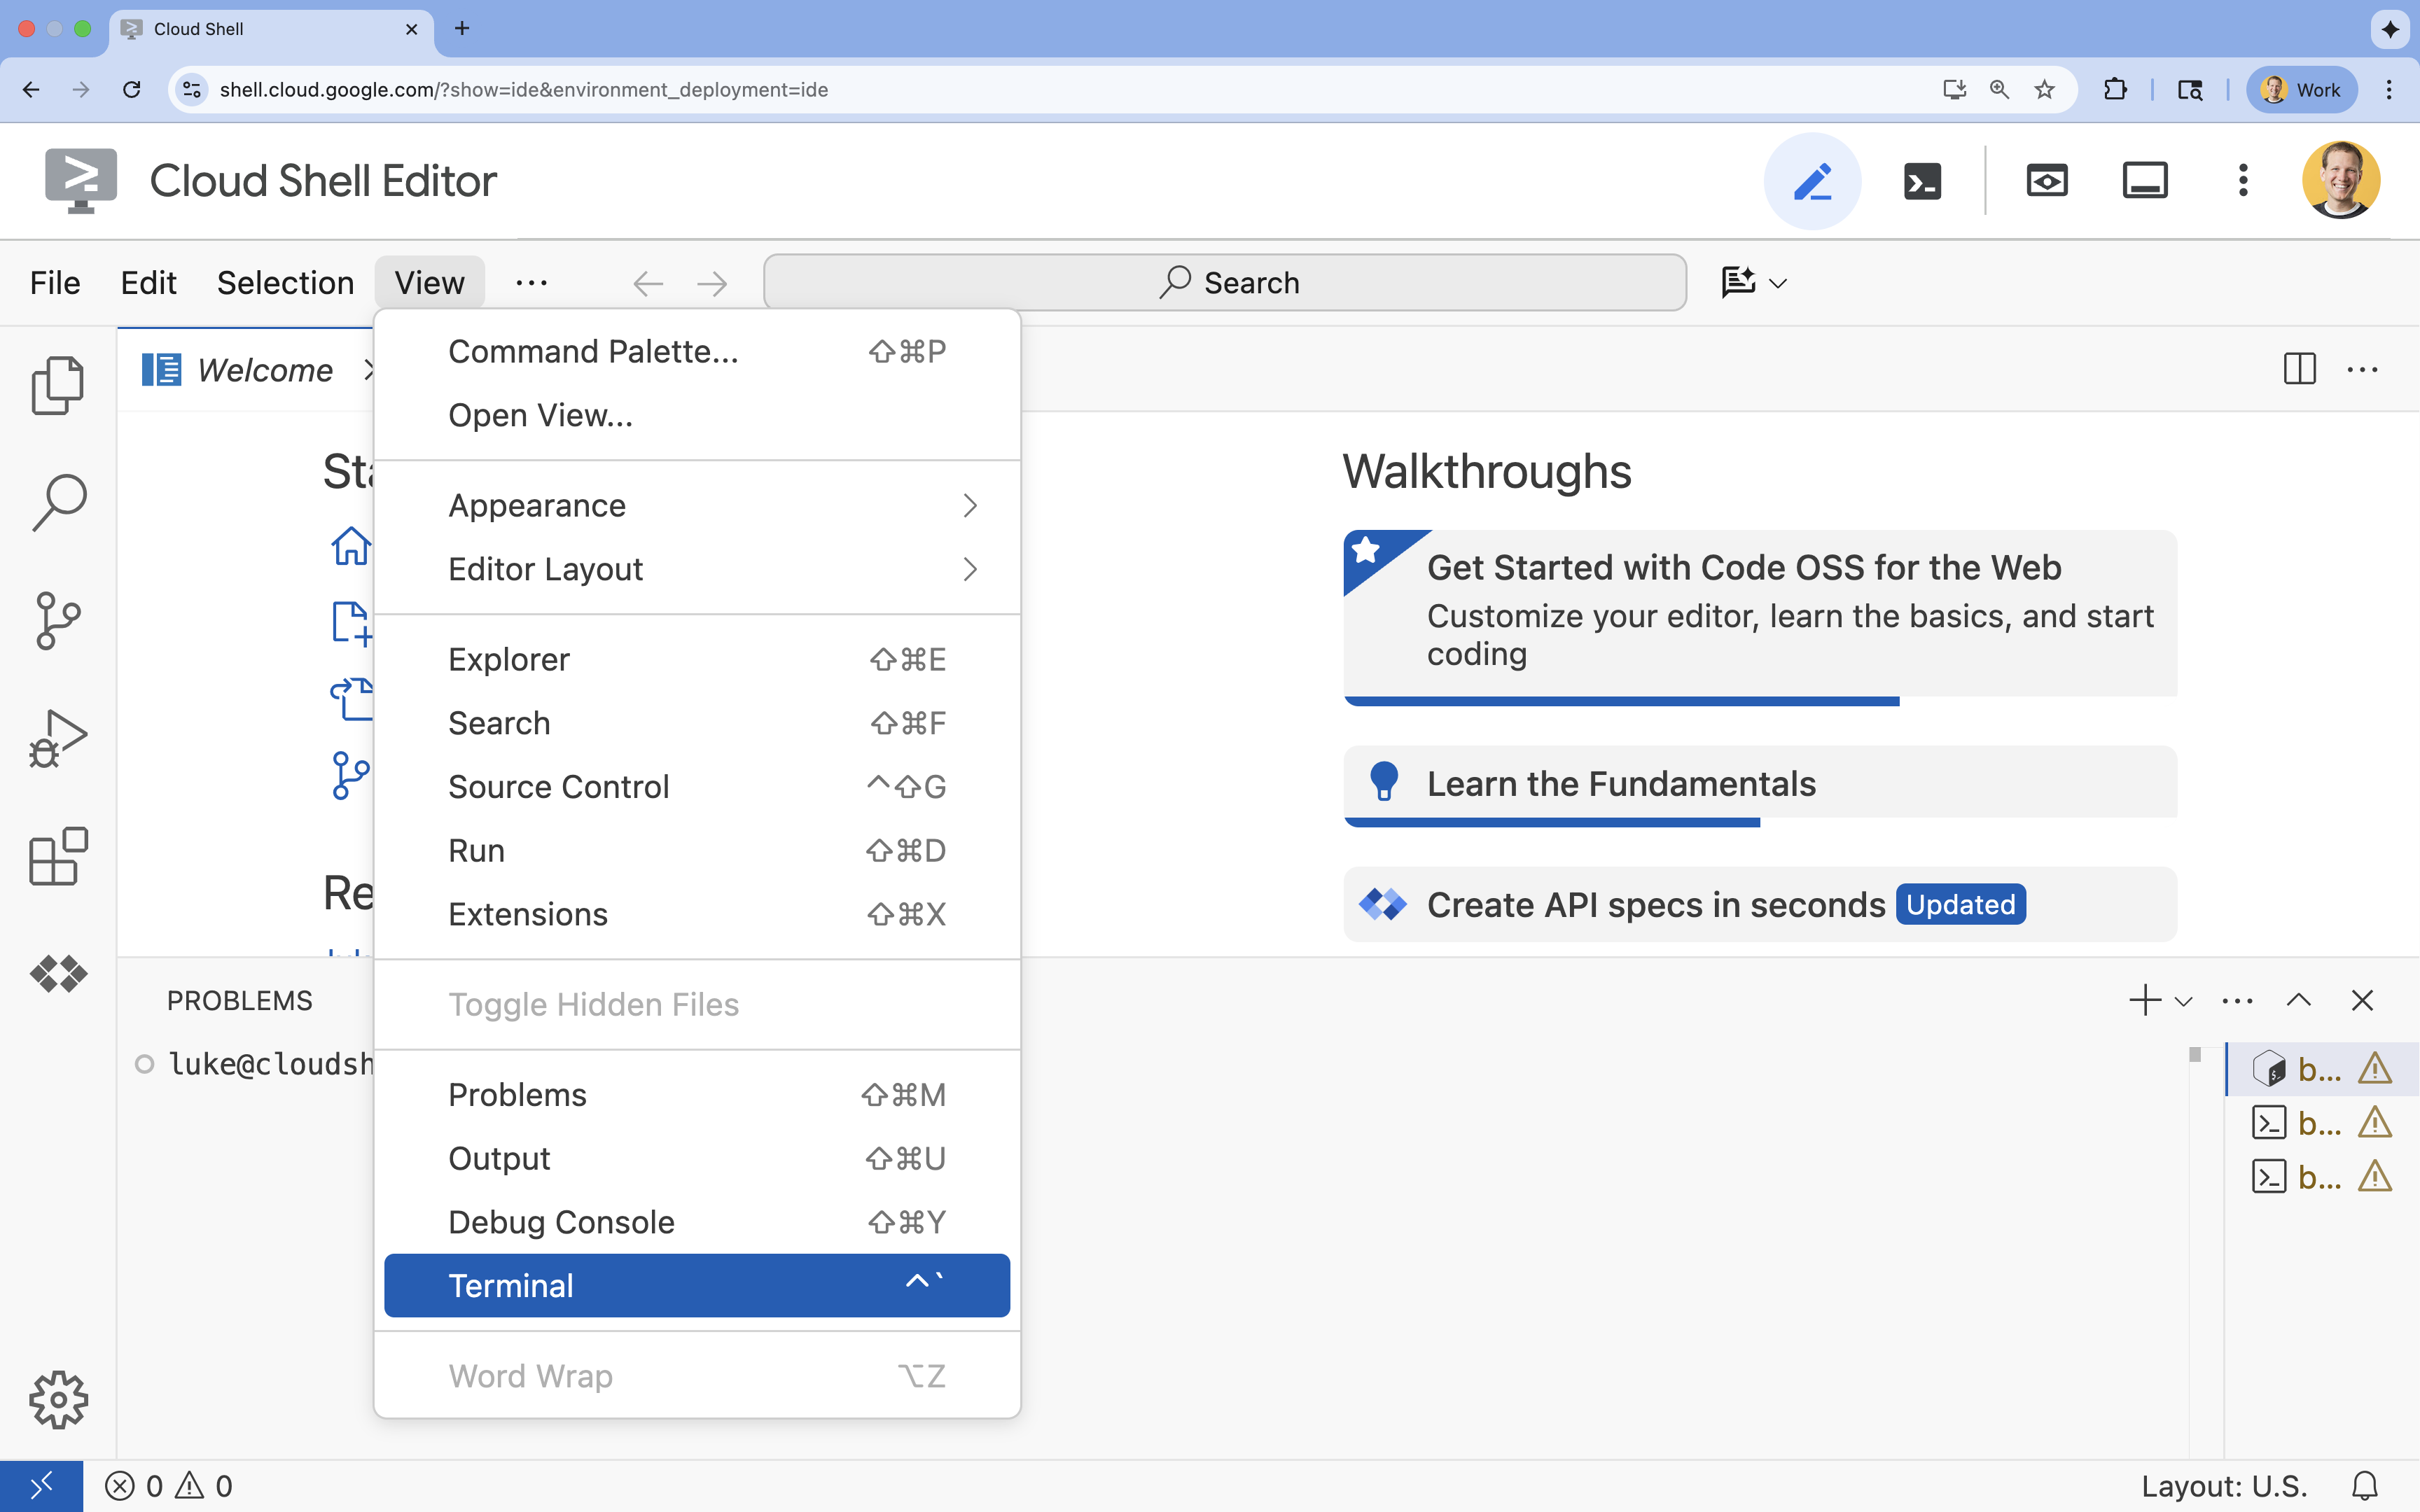
- หากเทอร์มินัลไม่ปรากฏที่ด้านล่างของหน้าจอ ให้เปิดโดยทำดังนี้
- คลิกดู
- คลิก Terminal
- ในเทอร์มินัล ให้ตั้งค่าโปรเจ็กต์ด้วยคำสั่งนี้
gcloud config set project [PROJECT_ID]- ตัวอย่าง
gcloud config set project lab-project-id-example - หากจำรหัสโปรเจ็กต์ไม่ได้ คุณสามารถแสดงรหัสโปรเจ็กต์ทั้งหมดได้โดยใช้คำสั่งต่อไปนี้
gcloud projects list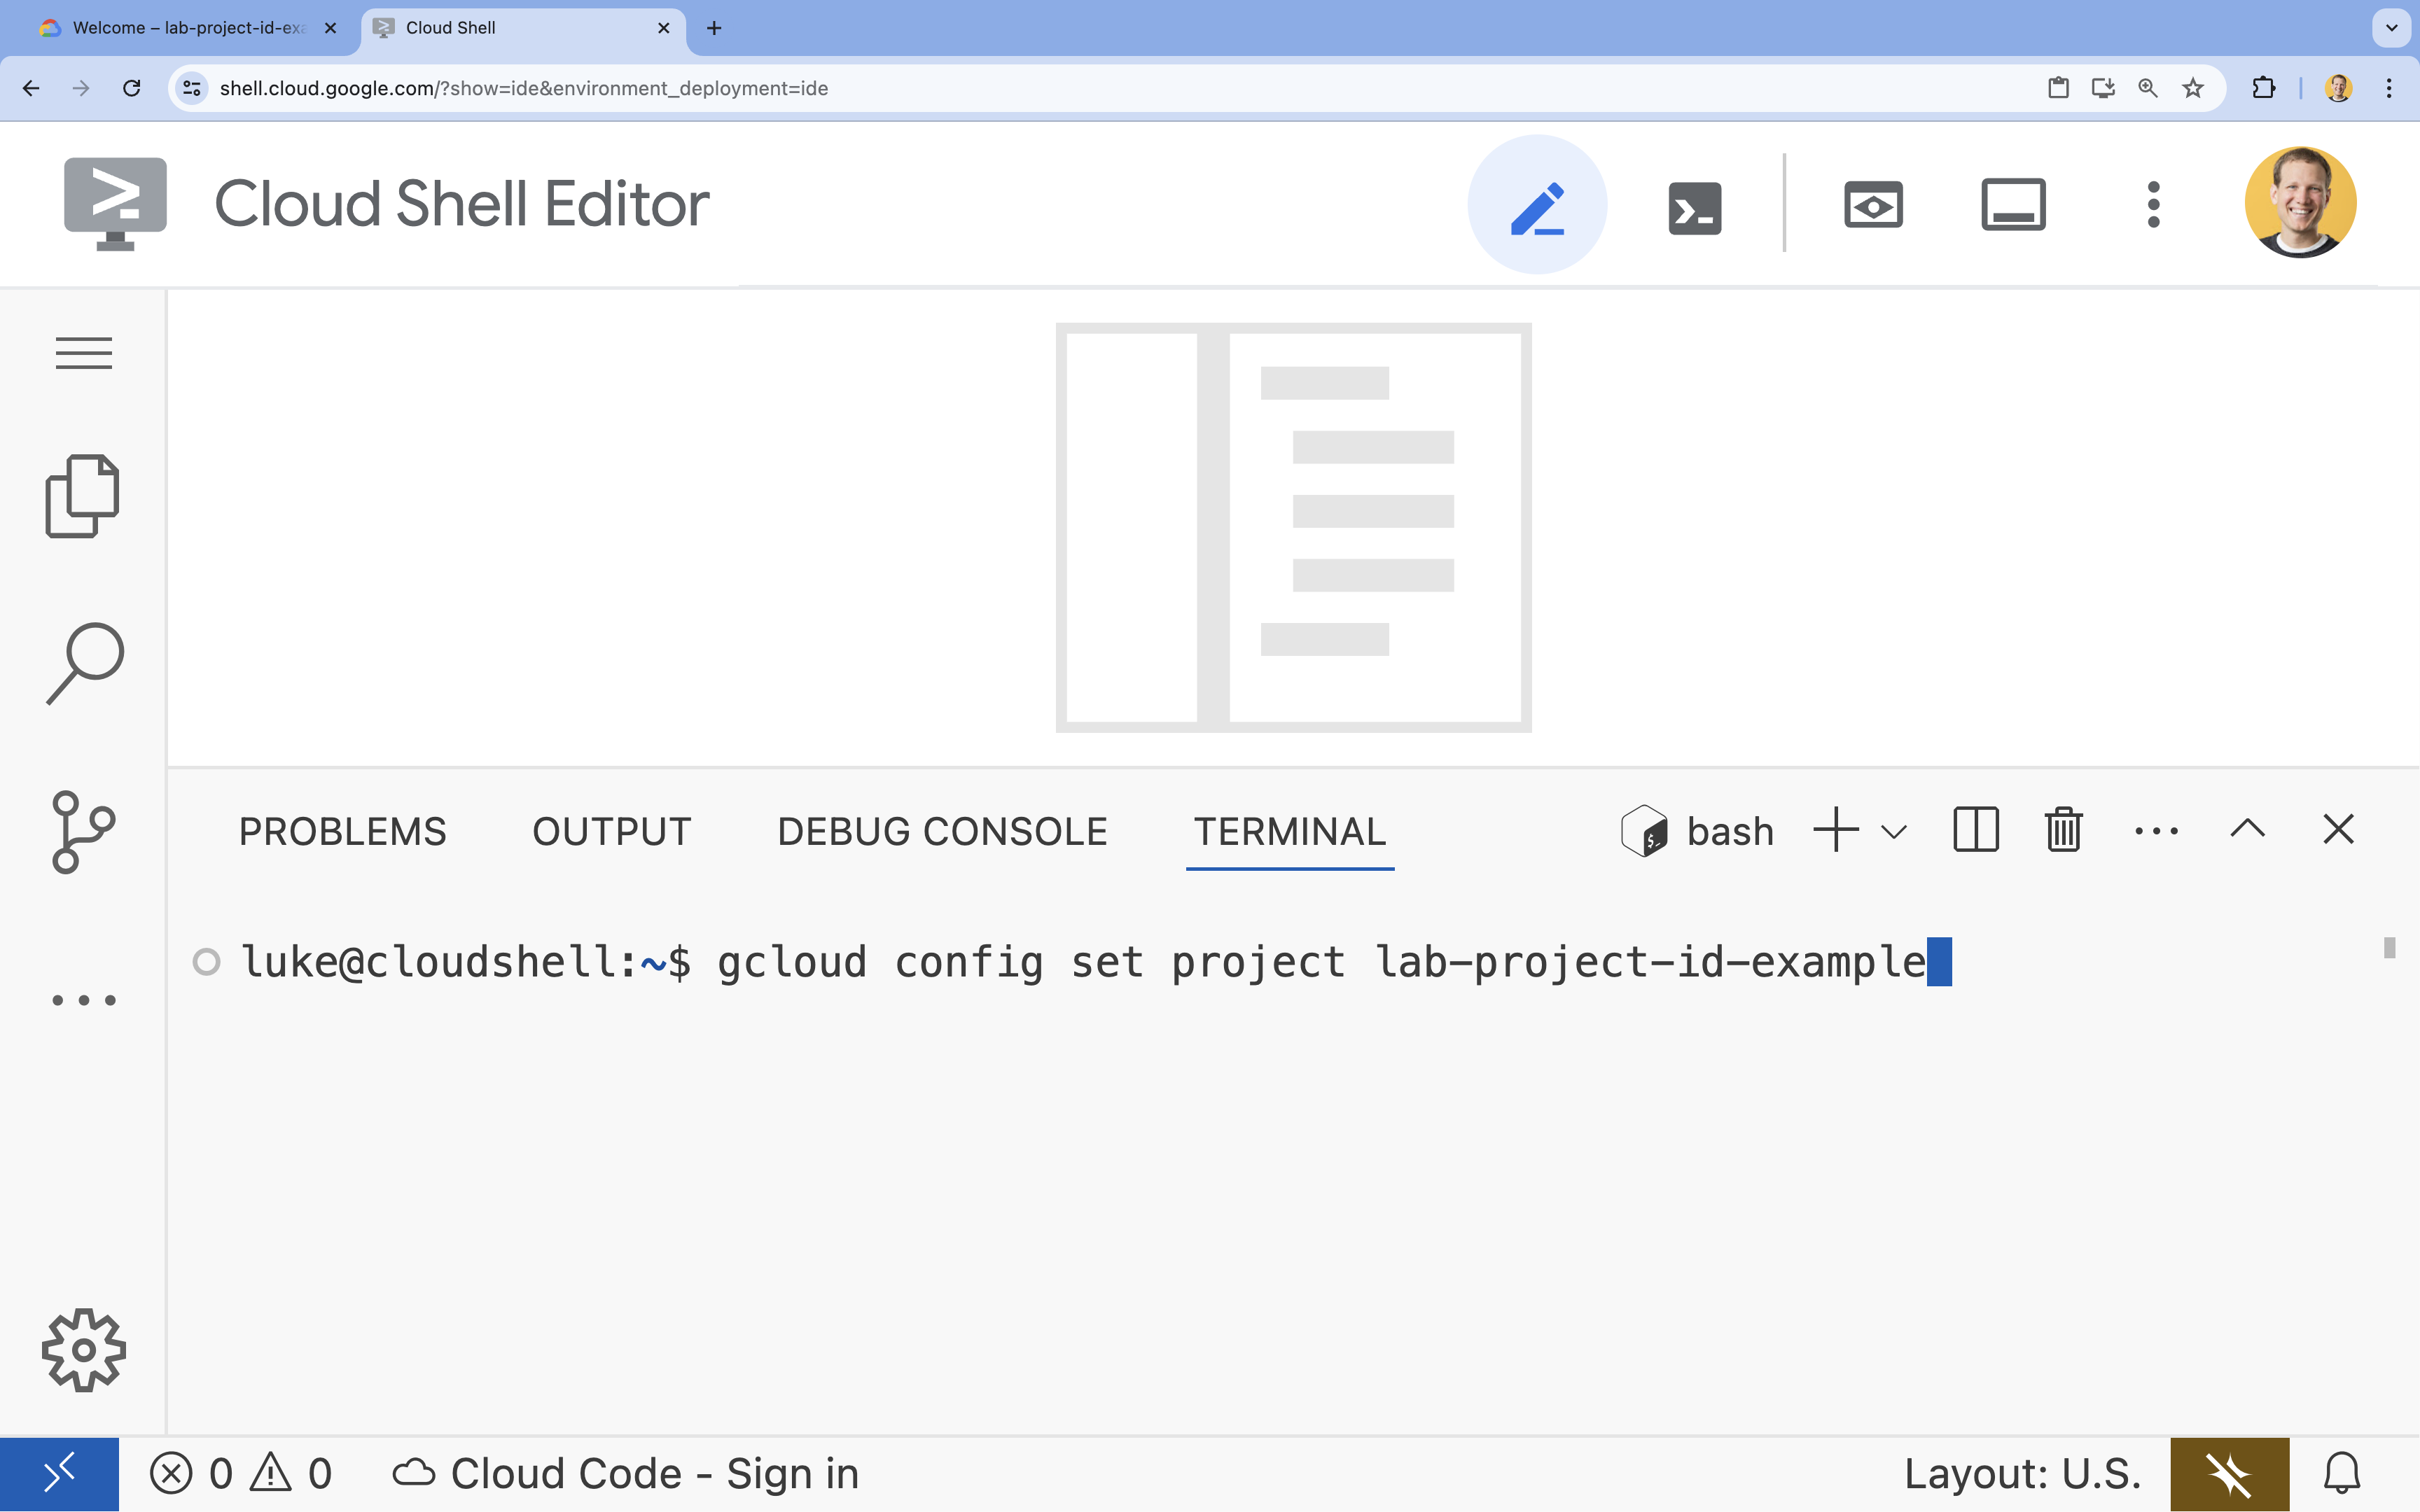
- ตัวอย่าง
- คุณควรเห็นข้อความต่อไปนี้
Updated property [core/project].
4. เปิดใช้ API
หากต้องการใช้ Vertex AI SDK และโต้ตอบกับโมเดล Gemini คุณต้องเปิดใช้ Vertex AI API ในโปรเจ็กต์ที่อยู่ในระบบคลาวด์ของ Google
- เปิดใช้ API ในเทอร์มินัลโดยทำดังนี้
gcloud services enable \
  aiplatform.googleapis.com
ข้อมูลเบื้องต้นเกี่ยวกับ Vertex AI SDK สำหรับ Python
หากต้องการโต้ตอบกับโมเดลที่โฮสต์ใน Vertex AI จากแอปพลิเคชัน Python คุณจะต้องใช้ Vertex AI SDK สำหรับ Python SDK นี้ช่วยลดความซับซ้อนของกระบวนการส่งพรอมต์ การระบุพารามิเตอร์ของโมเดล และการรับการตอบกลับโดยไม่ต้องจัดการความซับซ้อนของการเรียก API พื้นฐานโดยตรง
คุณดูเอกสารประกอบที่ครอบคลุมสำหรับ Vertex AI SDK สำหรับ Python ได้ที่ข้อมูลเบื้องต้นเกี่ยวกับ Vertex AI SDK สำหรับ Python | Google Cloud
5. สร้างสภาพแวดล้อมเสมือนและติดตั้งการอ้างอิง
ก่อนเริ่มโปรเจ็กต์ Python ใดๆ คุณควรสร้างสภาพแวดล้อมเสมือน ซึ่งจะแยกการอ้างอิงของโปรเจ็กต์เพื่อป้องกันไม่ให้เกิดความขัดแย้งกับโปรเจ็กต์อื่นๆ หรือแพ็กเกจ Python ทั่วโลกของระบบ
- สร้างโฟลเดอร์ชื่อ
wanderbotเพื่อจัดเก็บโค้ดสำหรับแอปผู้ช่วยด้านการเดินทาง เรียกใช้โค้ดต่อไปนี้ในเทอร์มินัลmkdir wanderbot && cd wanderbot - สร้างและเปิดใช้งานสภาพแวดล้อมเสมือนโดยใช้คำสั่งต่อไปนี้
uv venv --python 3.12 source .venv/bin/activatewanderbot) ในพรอมต์เทอร์มินัล ซึ่งบ่งบอกว่าสภาพแวดล้อมเสมือนใช้งานอยู่ ซึ่งจะมีลักษณะดังนี้
6. สร้างไฟล์เริ่มต้นสำหรับ wanderbot
- สร้างและเปิดไฟล์
app.pyใหม่สำหรับแอปพลิเคชัน เรียกใช้โค้ดต่อไปนี้ในเทอร์มินัลcloudshell edit app.pycloudshell editจะเปิดไฟล์app.pyในเครื่องมือแก้ไขเหนือเทอร์มินัล - วางโค้ดเริ่มต้นของแอปต่อไปนี้ลงใน
app.pyimport streamlit as st from google import genai from google.genai import types import requests import logging # --- Defining variables and parameters --- REGION = "global" PROJECT_ID = None # TODO: Insert Project ID GEMINI_MODEL_NAME = "gemini-2.5-flash" temperature = .2 top_p = 0.95 system_instructions = None # --- Tooling --- # TODO: Define the weather tool function declaration # TODO: Define the get_current_temperature function # --- Initialize the Vertex AI Client --- try: # TODO: Initialize the Vertex AI client print(f"VertexAI Client initialized successfully with model {GEMINI_MODEL_NAME}") except Exception as e: st.error(f"Error initializing VertexAI client: {e}") st.stop() # TODO: Add the get_chat function here in Task 15. # --- Call the Model --- def call_model(prompt: str, model_name: str) -> str: """ This function interacts with a large language model (LLM) to generate text based on a given prompt and system instructions. It will be replaced in a later step with a more advanced version that handles tooling. """ try: # TODO: Prepare the content for the model # TODO: Define generate_content configuration (needed for system instructions and parameters) # TODO: Define response logging.info(f"[call_model_response] LLM Response: \"{response.text}\"") # TODO: Uncomment the below "return response.text" line # return response.text except Exception as e: return f"Error: {e}" # --- Presentation Tier (Streamlit) --- # Set the title of the Streamlit application st.title("Travel Chat Bot") # Initialize session state variables if they don't exist if "messages" not in st.session_state: # Initialize the chat history with a welcome message st.session_state["messages"] = [ {"role": "assistant", "content": "How can I help you today?"} ] # Display the chat history for msg in st.session_state.messages: st.chat_message(msg["role"]).write(msg["content"]) # Get user input if prompt := st.chat_input(): # Add the user's message to the chat history st.session_state.messages.append({"role": "user", "content": prompt}) # Display the user's message st.chat_message("user").write(prompt) # Show a spinner while waiting for the model's response with st.spinner("Thinking..."): # Get the model's response using the call_model function model_response = call_model(prompt, GEMINI_MODEL_NAME) # Add the model's response to the chat history st.session_state.messages.append( {"role": "assistant", "content": model_response} ) # Display the model's response st.chat_message("assistant").write(model_response) - สร้างและเปิดไฟล์
requirements.txtใหม่สำหรับโค้ดของแอปพลิเคชัน เรียกใช้โค้ดต่อไปนี้ในเทอร์มินัลcloudshell edit requirements.txtcloudshell editจะเปิดไฟล์requirements.txtในเครื่องมือแก้ไขเหนือเทอร์มินัล - วางโค้ดเริ่มต้นของแอปต่อไปนี้ลงใน
requirements.txtgoogle-genai streamlit requests - ติดตั้งการอ้างอิง Python ที่จำเป็นสำหรับโปรเจ็กต์นี้ เรียกใช้โค้ดต่อไปนี้ในเทอร์มินัล
uv pip install -r requirements.txt
7. สำรวจโค้ด
ไฟล์ที่คุณสร้างมีส่วนหน้าของแอปพลิเคชันแชทพื้นฐาน ดังนี้
app.py: นี่คือไฟล์ที่เราจะใช้ทำงาน ปัจจุบันมีข้อมูลต่อไปนี้- การนำเข้าที่จำเป็น
- ตัวแปรสภาพแวดล้อมและพารามิเตอร์ (บางส่วนเป็นตัวยึดตำแหน่ง)
- ฟังก์ชัน
call_modelที่ว่างเปล่า ซึ่งเราจะกรอกข้อมูลในภายหลัง - โค้ด Streamlit สำหรับแอปแชทส่วนหน้า
requirements.txt:- มีข้อกำหนดในการติดตั้งเพื่อเรียกใช้
app.py
- มีข้อกำหนดในการติดตั้งเพื่อเรียกใช้
ตอนนี้ได้เวลาสำรวจโค้ดแล้ว
เปิดแชท Gemini Code Assist
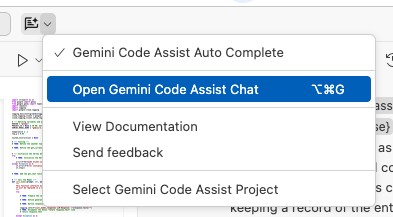
แชทของ Gemini Code Assist ควรเปิดอยู่ในแผงทางด้านขวาใน Cloud Shell Editor อยู่แล้ว หากยังไม่ได้เปิดแชท Gemini Code Assist คุณสามารถเปิดได้โดยทำตามขั้นตอนต่อไปนี้
- คลิกปุ่ม Gemini Code Assist (
 ) ที่อยู่ใกล้ด้านบนของหน้าจอ
 - เลือกเปิดแชท Gemini Code Assist
ใช้ Gemini Code Assist เพื่อทำความเข้าใจโค้ด
คุณสามารถใช้แชทของ Gemini Code Assist เพื่อทำความเข้าใจโค้ดได้ดียิ่งขึ้น
- ไฮไลต์หรือเลือกส่วนโค้ดที่ต้องการ
- พิมพ์ "อธิบายโค้ดนี้" ในแชทกับ Gemini
- คลิก Enter เพื่อส่ง
8. เปิดเว็บแอป
ก่อนเชื่อมต่อแอปนี้กับ LLM ให้เปิดแอปเพื่อดูพฤติกรรมเริ่มต้น
- จากภายในไดเรกทอรี
wanderbotให้เรียกใช้คำสั่งต่อไปนี้ในเทอร์มินัลเพื่อเริ่มแอปพลิเคชัน Streamlit และทำให้เข้าถึงได้ในเครื่องภายในสภาพแวดล้อมของ Shell ใน Cloud Shellstreamlit run app.py --browser.serverAddress=localhost --server.enableCORS=false --server.enableXsrfProtection=false --server.port 8080 - หลังจากเรียกใช้คำสั่งแล้ว ให้คลิกปุ่มตัวอย่างเว็บที่ด้านบนของโปรแกรมแก้ไข Cloud Shell แล้วเลือกแสดงตัวอย่างบนพอร์ต 8080
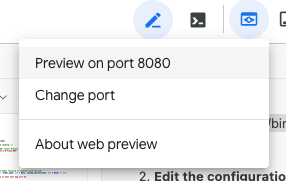
คุณจะเห็นอินเทอร์เฟซแชทที่เรียบง่ายสำหรับแอปการเดินทาง - พิมพ์ข้อความ (เช่น
Hi!) แล้วกด ENTER
คุณจะเห็นว่าข้อความจะปรากฏในประวัติการแชท แต่คุณจะได้รับข้อความแสดงข้อผิดพลาดแทนที่จะเป็นการตอบกลับจากผู้ช่วย เนื่องจากแอปพลิเคชันยังไม่ได้เชื่อมต่อกับโมเดลภาษาขนาดใหญ่ สังเกตลักษณะการทำงานนี้เพื่อทำความเข้าใจจุดเริ่มต้นของห้องทดลอง
9. เริ่มต้นไคลเอ็นต์ Vertex AI
สำรวจโมเดลที่มีให้บริการใน Vertex AI
แพลตฟอร์ม Vertex AI ของ Google Cloud ช่วยให้เข้าถึงโมเดล Generative AI ได้หลากหลาย ก่อนที่จะผสานรวม คุณสามารถดูตัวเลือกที่มีในคอนโซล Google Cloud ได้
- จากคอนโซล Google Cloud ให้ไปที่ Model Garden โดยทำได้โดยค้นหา "Model Garden" ในแถบค้นหาที่ด้านบนของหน้าจอ แล้วเลือก Vertex AI(
 )
) - เรียกดูโมเดลที่มีให้ใช้งาน คุณสามารถกรองตามสิ่งต่างๆ เช่น รูปแบบ งานประเภทต่างๆ และฟีเจอร์
สำหรับวัตถุประสงค์ของ Lab นี้ คุณจะใช้โมเดล Gemini 2.5 Flash ซึ่งเป็นตัวเลือกที่ดีสำหรับการสร้างแอปพลิเคชันแชทที่ตอบสนองได้เนื่องจากมีความเร็วสูง
เริ่มต้นไคลเอ็นต์ Vertex AI
ตอนนี้คุณจะแก้ไขส่วน --- Initialize the Vertex AI Client --- ใน app.py เพื่อเริ่มต้นไคลเอ็นต์ Vertex AI ระบบจะใช้ออบเจ็กต์ไคลเอ็นต์นี้เพื่อส่งพรอมต์ไปยังโมเดล
- เปิด
app.pyใน Cloud Shell Editor - ใน
app.pyให้ค้นหาบรรทัดPROJECT_ID = None - แทนที่
Noneด้วยรหัสโปรเจ็กต์ Google Cloud ในเครื่องหมายคำพูด (เช่นPROJECT_ID = "google-cloud-labs")
หากจำรหัสโปรเจ็กต์ไม่ได้ คุณสามารถแสดงรหัสโปรเจ็กต์ทั้งหมดได้โดยใช้คำสั่งต่อไปนี้gcloud projects list | awk '/PROJECT_ID/{print $2}' - กำหนดไคลเอ็นต์: เริ่มต้นไคลเอ็นต์ Vertex AI ภายในบล็อก
tryclient = genai.Client( vertexai=True, project=PROJECT_ID, location=REGION, )
การเริ่มต้นไคลเอ็นต์ Vertex AI ที่อัปเดตแล้ว
ในตอนนี้ ส่วนเริ่มต้นไคลเอ็นต์ Vertex AI จะมีลักษณะดังนี้
# --- Initialize the Vertex AI Client ---
try:
    client = genai.Client(
        vertexai=True,
        project=PROJECT_ID,
        location=REGION,
    )
print(f"VertexAI Client initialized successfully with model {GEMINI_MODEL_NAME}")
except Exception as e:
st.error(f"Error initializing VertexAI client: {e}")
st.stop()
10. เตรียมข้อมูลและเรียกใช้โมเดล
ตอนนี้คุณจะเตรียมเนื้อหาเพื่อส่งไปยังโมเดลและเรียกใช้โมเดล Gemini
- ค้นหาส่วน
--- Call the Model ---ที่กำหนดฟังก์ชันcall_model - กำหนดเนื้อหา: ในส่วน
# TODO: Prepare the content for the modelให้กำหนดเนื้อหาอินพุตที่จะส่งไปยังโมเดล สำหรับพรอมต์พื้นฐาน ข้อความนี้จะเป็นข้อความที่ผู้ใช้ป้อนcontents = [prompt] - กำหนดคำตอบ: วางโค้ดนี้ไว้ใต้
# TODO: Define responseresponse = client.models.generate_content( model=model_name, contents=contents, ) - ส่งคืนการตอบกลับ: ยกเลิกการแสดงความคิดเห็นในบรรทัดต่อไปนี้
return response.text - ตรวจสอบบรรทัดที่มีการเรียกใช้ฟังก์ชัน
call_modelที่ด้านล่างของไฟล์ในบล็อกwithหากไม่เข้าใจสิ่งที่เกิดขึ้นที่นี่ ให้ไฮไลต์บรรทัดและขอความช่วยเหลือจาก Gemini Code Assist เพื่ออธิบาย
วิธีที่ชัดเจนยิ่งขึ้นในการกำหนด contents
วิธีข้างต้นในการกำหนด contents ใช้งานได้เนื่องจาก SDK มีความสามารถเพียงพอที่จะเข้าใจว่าลิสต์ที่มีสตริงแสดงถึงข้อความที่ผู้ใช้ป้อน โดยจะจัดรูปแบบให้ถูกต้องโดยอัตโนมัติสำหรับ Model API
อย่างไรก็ตาม วิธีที่ชัดเจนและพื้นฐานกว่าในการจัดโครงสร้างอินพุตคือการใช้ออบเจ็กต์ types.Part และ types.Content ดังนี้
user_message_parts = [types.Part.from_text(text=prompt)]
contents = [
types.Content(
role="user", # Indicates the content is from the user
parts=user_message_parts, # A list, allowing multiple types of content
),
]
ฟังก์ชัน call_model ที่อัปเดตแล้ว
ณ จุดนี้ ฟังก์ชัน call_model ควรมีลักษณะดังนี้
def call_model(prompt: str, model_name: str) -> str:
"""
This function interacts with a large language model (LLM) to generate text based on a given prompt and system instructions.
It will be replaced in a later step with a more advanced version that handles tooling.
"""
try:
contents = [prompt]
# TODO: Define generate_content configuration (needed later for system instructions and parameters)
        response = client.models.generate_content(
            model=model_name,
            contents=contents,
        )
logging.info(f"[call_model_response] LLM Response: \"{response.text}\"")
return response.text
except Exception as e:
return f"Error: {e}"
11. ทดสอบแอปที่เชื่อมต่อ
- ในเทอร์มินัล ให้สิ้นสุดกระบวนการที่กำลังทำงานอยู่ (CTRL+C)
- เรียกใช้คำสั่งอีกครั้งเพื่อเริ่มแอปพลิเคชัน Streamlit อีกครั้ง
streamlit run app.py --browser.serverAddress=localhost --server.enableCORS=false --server.enableXsrfProtection=false --server.port 8080 - รีเฟรชแอปพลิเคชัน Streamlit หากแอปพลิเคชัน Streamlit ยังทำงานอยู่ คุณก็เพียงแค่รีเฟรชหน้าแสดงตัวอย่างเว็บในเบราว์เซอร์
- ตอนนี้ให้พิมพ์คำถามลงในช่องป้อนข้อมูลแชท เช่น คำถามต่อไปนี้
What is the best time of year to go to Iceland? - กด Enter
คุณควรเห็นแอปพลิเคชันแสดงข้อความของคุณ ไอคอนหมุน "กำลังคิด..." และคำตอบที่โมเดล Gemini สร้างขึ้น หากคุณทำเช่นนั้น แสดงว่าคุณเชื่อมต่อเว็บแอปพลิเคชันกับ LLM ใน Vertex AI เรียบร้อยแล้ว 🙌 🥳
12. กำหนดวิธีการของระบบ
แม้ว่าการเชื่อมต่อพื้นฐานจะใช้งานได้ แต่คุณภาพและรูปแบบของคำตอบจาก LLM จะได้รับผลกระทบอย่างมากจากอินพุตที่ได้รับ วิศวกรรมพรอมต์คือกระบวนการออกแบบและปรับแต่งอินพุต (พรอมต์) เหล่านี้เพื่อชี้นำโมเดลให้สร้างเอาต์พุตที่ต้องการ
ด้วยเหตุนี้ คุณจึงต้องเริ่มต้นด้วยการสร้างคำสั่งของระบบและส่งไปยังโมเดล
คุณจะใช้ขอความช่วยเหลือจาก Gemini เพื่อช่วยคิดคำสั่งของระบบที่เป็นประโยชน์
- ใน
app.pyให้ค้นหาตัวแปรsystem_instructionsซึ่งปัจจุบันตั้งค่าเป็นNonesystem_instructions = NoneNoneด้วยสตริงแบบหลายบรรทัดซึ่งมีวิธีการสำหรับบ็อตผู้ช่วยด้านการเดินทางของเรา - ขอความช่วยเหลือจาก Gemini Code Assist: ส่งพรอมต์ต่อไปนี้ไปยัง Gemini Code Assist (หรือจะคิดพรอมต์ของคุณเองก็ได้)
I am a developer at a travel marketing company, and my sales department has decided that they need a new chat application to keep up with the bigger booking and search companies. I'm building a simple travel assistant chatbot using the Gemini 2.5 Flash model on Vertex AI. The application should: - Helps users ask questions about travel, book travel, and learn about places they are going to go - Provides users ways to get help about their specific travel plans - Provides all this in a production quality way (multiple environments, logging and monitoring, etc.) Please create system instructions appropriate for that chat app. Be thorough. Do not alter the code in any way beyond providing me with system instructions. - กำหนด
system_instructions: ตั้งค่าsystem_instructionsให้เท่ากับคำสั่งของระบบที่คุณสร้างขึ้นโดยใช้ Gemini Code Assist หรือคุณจะใช้คำสั่งระบบเหล่านี้แทนก็ได้ ซึ่ง Gemini สร้างขึ้นโดยใช้พรอมต์ที่คล้ายกันsystem_instructions = """ You are a sophisticated travel assistant chatbot designed to provide comprehensive support to users throughout their travel journey. Your capabilities include answering travel-related questions, assisting with booking travel arrangements, offering detailed information about destinations, and providing support for existing travel plans. **Core Functionalities:** 1. **Travel Information and Recommendations:** * Answer user inquiries about travel destinations, including popular attractions, local customs, visa requirements, weather conditions, and safety advice. * Provide personalized recommendations for destinations, activities, and accommodations based on user preferences, interests, and budget. * Offer insights into the best times to visit specific locations, considering factors like weather, crowds, and pricing. * Suggest alternative destinations or activities if the user's initial choices are unavailable or unsuitable. 2. **Booking Assistance:** * Facilitate the booking of flights, hotels, rental cars, tours, and activities. * Search for available options based on user-specified criteria such as dates, destinations, budget, and preferences. * Present clear and concise information about available options, including pricing, amenities, and booking terms. * Guide users through the booking process, ensuring accurate information and secure transactions. * Provide booking confirmations and relevant details, such as booking references and contact information. 3. **Travel Planning and Itinerary Management:** * Assist users in creating detailed travel itineraries, including flights, accommodations, activities, and transportation. * Offer suggestions for optimizing travel plans, such as minimizing travel time or maximizing sightseeing opportunities. * Provide tools for managing and modifying existing itineraries, including adding or removing activities, changing booking dates, or upgrading accommodations. * Offer reminders and notifications for upcoming travel events, such as flight check-in or tour departure times. 4. **Customer Support and Troubleshooting:** * Provide prompt and helpful support to users with questions or issues related to their travel plans. * Assist with resolving booking discrepancies, cancellations, or modifications. * Offer guidance on travel-related emergencies, such as lost luggage or travel delays. * Provide access to relevant contact information for airlines, hotels, and other travel providers. **Interaction Guidelines:** * **Professionalism:** Maintain a polite, respectful, and professional tone in all interactions. * **Clarity and Conciseness:** Provide clear, concise, and easy-to-understand information. Avoid jargon or technical terms unless necessary and always explain them. * **Accuracy:** Ensure all information provided is accurate and up-to-date. Double-check details before sharing them with users. If unsure about something, admit that you don't know and offer to find the information. * **Personalization:** Tailor your responses and recommendations to the specific needs and preferences of each user. * **Proactive Assistance:** Anticipate user needs and offer relevant information or suggestions proactively. * **Error Handling:** Gracefully handle user errors or misunderstandings. Provide helpful guidance and alternative options when necessary. * **Confidentiality:** Respect user privacy and handle personal information with the utmost confidentiality and in compliance with data protection regulations. **Example Interactions:** **User:** "I want to go on a beach vacation in the Caribbean. I have a budget of $2000 per person for a week." **Chatbot:** "Certainly! The Caribbean offers many beautiful beach destinations within your budget. Some popular options include Punta Cana in the Dominican Republic, Cancun in Mexico, and Montego Bay in Jamaica. These destinations offer stunning beaches, all-inclusive resorts, and various activities. Would you like me to search for flights and accommodations for these locations based on your travel dates?" **User:** "My flight is delayed. What should I do?" **Chatbot:** "I'm sorry to hear about the delay. Please check with the airline for the updated departure time and any assistance they can offer. You may be entitled to compensation or rebooking options depending on the length of the delay and the airline's policy. Do you have your flight number handy so I can look up the current status for you?" **User:** "Tell me about the best time to visit Japan." **Chatbot:** "Japan is a fantastic destination with distinct seasons offering unique experiences. Spring (March-May) is famous for the beautiful cherry blossoms, while autumn (September-November) boasts stunning fall foliage. Both seasons have pleasant temperatures, making them ideal for sightseeing. Summer (June-August) can be hot and humid, but it's a great time for festivals and outdoor activities in the mountains. Winter (December-February) offers opportunities for skiing and snowboarding in the Japanese Alps, though some areas may experience heavy snowfall. To recommend the best time for you, could you tell me what you'd like to experience in Japan?" By following these instructions, you will be able to provide exceptional travel assistance and create a positive experience for every user. """ - กำหนดค่า generate_content: เริ่มต้นออบเจ็กต์การกำหนดค่าที่คุณจะส่งคำสั่งของระบบเหล่านี้ เนื่องจากเรากำหนด
system_instructionsไว้ทั่วโลกในสคริปต์ ฟังก์ชันจึงเข้าถึงได้โดยตรงgenerate_content_config = types.GenerateContentConfig( system_instruction=[ types.Part.from_text(text=system_instructions) ], ) logging.info(f"[generate_config_details] System Instruction: {generate_content_config.system_instruction[0].text}") - หากต้องการเพิ่มคำสั่งของระบบลงในคำตอบ ให้เพิ่มพารามิเตอร์
configลงในเมธอดgenerate_contentและตั้งค่าให้เท่ากับออบเจ็กต์generate_content_configที่สร้างไว้ข้างต้นresponse = client.models.generate_content( model=model_name, contents=contents, config=generate_content_config, # This is the new line )
ฟังก์ชัน call_model ที่อัปเดตแล้ว
ตอนนี้ฟังก์ชัน call_model แบบเต็มจะมีลักษณะดังนี้
def call_model(prompt: str, model_name: str) -> str:
"""
This function interacts with a large language model (LLM) to generate text based on a given prompt and system instructions.
It will be replaced in a later step with a more advanced version that handles tooling.
"""
try:
contents = [prompt]
        generate_content_config = types.GenerateContentConfig(
            system_instruction=[
                types.Part.from_text(text=system_instructions)
            ],
        )
        logging.info(f"[generate_config_details] System Instruction: {generate_content_config.system_instruction[0].text}")
response = client.models.generate_content(
model=model_name,
contents=contents,
config=generate_content_config,
)
logging.info(f"[call_model_response] LLM Response: \"{response.text}\"")
return response.text
except Exception as e:
return f"Error: {e}"
13. ทดสอบแอปด้วยคำสั่งของระบบ
- ในเทอร์มินัล ให้สิ้นสุดกระบวนการที่กำลังทำงานอยู่ (CTRL+C)
- เรียกใช้คำสั่งอีกครั้งเพื่อเริ่มแอปพลิเคชัน Streamlit อีกครั้ง
streamlit run app.py --browser.serverAddress=localhost --server.enableCORS=false --server.enableXsrfProtection=false --server.port 8080 - รีเฟรชแอปพลิเคชัน Streamlit หากแอปพลิเคชัน Streamlit ยังทำงานอยู่ คุณก็เพียงแค่รีเฟรชหน้าแสดงตัวอย่างเว็บในเบราว์เซอร์
- ลองถามคำถามเดิมอีกครั้ง
What is the best time of year to go to Iceland? - กด Enter
เปรียบเทียบว่าครั้งนี้มีการตอบสนองอย่างไรเมื่อเทียบกับครั้งที่แล้ว
14. กำหนดเครื่องมือสภาพอากาศ
ปัจจุบันแชทบ็อตของเรามีความรู้ แต่ความรู้ดังกล่าวจำกัดอยู่เพียงข้อมูลที่ใช้ในการฝึก โดยจะเข้าถึงข้อมูลแบบเรียลไทม์ไม่ได้ สำหรับบอทการเดินทาง การดึงข้อมูลแบบเรียลไทม์ เช่น พยากรณ์อากาศ ถือเป็นข้อได้เปรียบอย่างมาก
เครื่องมือหรือที่เรียกว่าการเรียกใช้ฟังก์ชันจึงเข้ามามีบทบาทในจุดนี้ เราสามารถกำหนดชุดเครื่องมือ (ฟังก์ชัน Python) ที่ LLM สามารถเลือกเรียกใช้เพื่อรับข้อมูลภายนอกได้
วิธีการทำงานของเครื่องมือ
- เราอธิบายเครื่องมือของเราให้โมเดลทราบ รวมถึงสิ่งที่เครื่องมือทำและพารามิเตอร์ที่ใช้
- ผู้ใช้ส่งพรอมต์ (เช่น "สภาพอากาศของลอนดอนเป็นอย่างไร")
- โมเดลจะได้รับพรอมต์และเห็นว่าผู้ใช้กำลังถามเกี่ยวกับสิ่งที่โมเดลค้นหาได้โดยใช้เครื่องมืออย่างใดอย่างหนึ่ง
- โมเดลจะตอบกลับด้วย
function_callออบเจ็กต์พิเศษแทนที่จะตอบกลับด้วยข้อความ ซึ่งจะระบุเครื่องมือที่ต้องการเรียกใช้และอาร์กิวเมนต์ที่จะใช้ - โค้ด Python ของเราจะรับ
function_callนี้ ดำเนินการฟังก์ชันget_current_temperatureจริงด้วยอาร์กิวเมนต์ที่ระบุ และรับผลลัพธ์ (เช่น 15°C) - เราจะส่งผลลัพธ์นี้กลับไปยังโมเดล
- โมเดลจะรับผลลัพธ์และสร้างคำตอบเป็นภาษาที่เป็นธรรมชาติสำหรับผู้ใช้ (เช่น "อุณหภูมิปัจจุบันในลอนดอนคือ 15°C")
กระบวนการนี้ช่วยให้โมเดลตอบคำถามได้มากกว่าข้อมูลฝึกฝนมาก ซึ่งทำให้เป็นผู้ช่วยที่มีประสิทธิภาพและเป็นประโยชน์มากขึ้น
กำหนดเครื่องมือสภาพอากาศ
หากนักท่องเที่ยวต้องการคำแนะนำเกี่ยวกับสิ่งที่ควรทำและกำลังเลือกกิจกรรมที่ได้รับผลกระทบจากสภาพอากาศ เครื่องมือสภาพอากาศอาจมีประโยชน์ มาสร้างเครื่องมือให้โมเดลของเราเพื่อดูสภาพอากาศปัจจุบันกัน เราต้องการ 2 ส่วน ได้แก่ การประกาศฟังก์ชันที่อธิบายเครื่องมือให้โมเดล และฟังก์ชัน Python จริงที่ใช้ฟังก์ชันนั้น
- ใน
app.pyให้ค้นหาความคิดเห็น# TODO: Define the weather tool function declaration - เพิ่มตัวแปร
weather_functionใต้ความคิดเห็นนี้ พจนานุกรมนี้จะบอกทุกสิ่งที่โมเดลต้องรู้เกี่ยวกับวัตถุประสงค์ พารามิเตอร์ และอาร์กิวเมนต์ที่จำเป็นของฟังก์ชันweather_function = { "name": "get_current_temperature", "description": "Gets the current temperature for a given location.", "parameters": { "type": "object", "properties": { "location": { "type": "string", "description": "The city name, e.g. San Francisco", }, }, "required": ["location"], }, } - จากนั้นค้นหาความคิดเห็น
# TODO: Define the get_current_temperature functionเพิ่มโค้ด Python ต่อไปนี้ใต้บรรทัดดังกล่าว ฟังก์ชันนี้จะทำสิ่งต่อไปนี้- เรียกใช้ Geocoding API เพื่อรับพิกัดของสถานที่
- ใช้พิกัดเหล่านั้นเพื่อเรียก API สภาพอากาศ
- แสดงผลสตริงอย่างง่ายที่มีอุณหภูมิและหน่วย
def get_current_temperature(location: str) -> str: """Gets the current temperature for a given location.""" try: # --- Get Latitude and Longitude for the location --- geocode_url = f"https://geocoding-api.open-meteo.com/v1/search?name={location}&count=1&language=en&format=json" geocode_response = requests.get(geocode_url) geocode_data = geocode_response.json() if not geocode_data.get("results"): return f"Could not find coordinates for {location}." lat = geocode_data["results"][0]["latitude"] lon = geocode_data["results"][0]["longitude"] # --- Get Weather for the coordinates --- weather_url = f"https://api.open-meteo.com/v1/forecast?latitude={lat}&longitude={lon}¤t_weather=true" weather_response = requests.get(weather_url) weather_data = weather_response.json() temperature = weather_data["current_weather"]["temperature"] unit = "°C" return f"{temperature}{unit}" except Exception as e: return f"Error fetching weather: {e}"
15. การปรับโครงสร้างสำหรับแชทและเครื่องมือ
ฟังก์ชัน call_model ปัจจุบันของเราใช้การเรียก generate_content แบบครั้งเดียวที่เรียบง่าย ซึ่งเหมาะสำหรับคำถามเดียว แต่ไม่เหมาะสำหรับการสนทนาแบบหลายรอบ โดยเฉพาะอย่างยิ่งการสนทนาที่ต้องมีการโต้ตอบเพื่อใช้เครื่องมือ
แนวทางปฏิบัติที่ดีกว่าคือการใช้เซสชันการแชท ซึ่งจะรักษาบริบทของการสนทนาไว้ ตอนนี้เราจะปรับโครงสร้างโค้ดเพื่อใช้เซสชันการแชท ซึ่งจำเป็นต่อการติดตั้งใช้งานเครื่องมืออย่างถูกต้อง
- ลบฟังก์ชัน
call_modelที่มีอยู่ เราจะแทนที่ด้วยเวอร์ชันที่ทันสมัยกว่า - ให้เพิ่มฟังก์ชัน
call_modelใหม่จากโค้ดบล็อกด้านล่างแทน ฟังก์ชันใหม่นี้มีตรรกะในการจัดการลูปการเรียกใช้เครื่องมือที่เราพูดถึงก่อนหน้านี้ คุณจะเห็นว่ามีความคิดเห็น TODO หลายรายการที่เราจะดำเนินการให้เสร็จสมบูรณ์ในขั้นตอนถัดไป# --- Call the Model --- def call_model(prompt: str, model_name: str) -> str: """ This function interacts with a large language model (LLM) to generate text based on a given prompt. It maintains a chat session and handles function calls from the model to external tools. """ try: # TODO: Get the existing chat session or create a new one. message_content = prompt # Start the tool-calling loop while True: # TODO: Send the message to the model. # Check if the model wants to call a tool has_tool_calls = False for part in response.candidates[0].content.parts: if part.function_call: has_tool_calls = True function_call = part.function_call logging.info(f"Function to call: {function_call.name}") logging.info(f"Arguments: {function_call.args}") # TODO: Call the appropriate function if the model requests it. elif part.text: logging.info("No function call found in the response.") logging.info(response.text) # If no tool call was made, break the loop if not has_tool_calls: break # TODO: Return the model's final text response. except Exception as e: return f"Error: {e}" - ตอนนี้เรามาเพิ่มฟังก์ชันตัวช่วยเพื่อจัดการเซสชันการแชทกัน เพิ่มฟังก์ชัน
get_chatเหนือฟังก์ชันcall_modelใหม่ ฟังก์ชันนี้จะสร้างเซสชันการแชทใหม่พร้อมคำสั่งของระบบและคำจำกัดความของเครื่องมือ หรือดึงเซสชันที่มีอยู่ ซึ่งเป็นแนวทางปฏิบัติที่ดีในการจัดระเบียบโค้ดdef get_chat(model_name: str): if f"chat-{model_name}" not in st.session_state: # TODO: Define the tools configuration for the model # TODO: Define the generate_content configuration, including tools # TODO: Create a new chat session st.session_state[f"chat-{model_name}"] = chat return st.session_state[f"chat-{model_name}"]
ตอนนี้คุณได้ตั้งค่าโครงสร้างพื้นฐานสำหรับตรรกะการแชทขั้นสูงที่เปิดใช้เครื่องมือแล้ว
16. ใช้ตรรกะการเรียกใช้เครื่องมือ
ตอนนี้มาใส่ TODOs เพื่อให้ตรรกะการเรียกใช้เครื่องมือทำงานได้อย่างสมบูรณ์กัน
ใช้งาน get_chat
- ในฟังก์ชัน
get_chatภายใต้ความคิดเห็น# TODO: Define the tools configuration...ให้กำหนดออบเจ็กต์toolsโดยสร้างอินสแตนซ์types.Toolจากการประกาศweather_functionของเราtools = types.Tool(function_declarations=[weather_function]) - ในส่วน
# TODO: Define the generate_content configuration...ให้กำหนดgenerate_content_configโดยตรวจสอบว่าได้ส่งออบเจ็กต์toolsไปยังโมเดลแล้ว วิธีนี้จะช่วยให้โมเดลเรียนรู้เกี่ยวกับเครื่องมือที่ใช้ได้generate_content_config = types.GenerateContentConfig( system_instruction=[types.Part.from_text(text=system_instructions)], tools=[tools] # Pass the tool definition here ) - ในส่วน
# TODO: Create a new chat sessionให้สร้างออบเจ็กต์แชทโดยใช้client.chats.create()แล้วส่งชื่อโมเดลและการกำหนดค่าของเราchat = client.chats.create( model=model_name, config=generate_content_config, )
ใช้งาน call_model
- เรียกใช้ฟังก์ชันตัวช่วย
get_chatใหม่ของเราในฟังก์ชันcall_modelภายใน# TODO: Get the existing chat session...chat = get_chat(model_name) - จากนั้นค้นหา
# TODO: Send the message to the modelส่งข้อความของผู้ใช้โดยใช้เมธอดchat.send_message()response = chat.send_message(message_content) - ค้นหา
# TODO: Call the appropriate function...ในขั้นตอนนี้ เราจะตรวจสอบว่าโมเดลต้องการฟังก์ชันใดและดำเนินการ
if function_call.name == "get_current_temperature":
result = get_current_temperature(**function_call.args)
function_response_part = types.Part.from_function_response(
name=function_call.name,
response={"result": result},
)
message_content = [function_response_part]
- สุดท้าย ให้ค้นหา
# TODO: Return the model's final text responseและเพิ่มคำสั่ง returnreturn response.text
ฟังก์ชัน get_chat ที่อัปเดตแล้ว
ตอนนี้ฟังก์ชัน get_chat ที่อัปเดตแล้วควรมีลักษณะดังนี้
def get_chat(model_name: str):
if f"chat-{model_name}" not in st.session_state:
# Tools
tools = types.Tool(function_declarations=[weather_function])
# Initialize a configuration object
generate_content_config = types.GenerateContentConfig(
system_instruction=[types.Part.from_text(text=system_instructions)],
tools=[tools]
)
        chat = client.chats.create(
            model=model_name,
            config=generate_content_config,
        )
st.session_state[f"chat-{model_name}"] = chat
return st.session_state[f"chat-{model_name}"]
ฟังก์ชัน call_model ที่อัปเดตแล้ว
ตอนนี้ฟังก์ชัน call_model ที่อัปเดตแล้วควรมีลักษณะดังนี้
def call_model(prompt: str, model_name: str) -> str:
try:
chat = get_chat(model_name)
message_content = prompt
while True:
response = chat.send_message(message_content)
has_tool_calls = False
for part in response.candidates[0].content.parts:
if part.function_call:
has_tool_calls = True
function_call = part.function_call
logging.info(f"Function to call: {function_call.name}")
logging.info(f"Arguments: {function_call.args}")
                    if function_call.name == "get_current_temperature":
                      result = get_current_temperature(**function_call.args)
                    function_response_part = types.Part.from_function_response(
                        name=function_call.name,
                        response={"result": result},
                    )
                    message_content = [function_response_part]
elif part.text:
logging.info("No function call found in the response.")
logging.info(response.text)
if not has_tool_calls:
break
return response.text
except Exception as e:
return f"Error: {e}"
17. ทดสอบแอปที่เปิดใช้เครื่องมือ
มาดูการทำงานของฟีเจอร์ใหม่กัน
- ในเทอร์มินัล ให้สิ้นสุดกระบวนการที่กำลังทำงานอยู่ (CTRL+C)
- เรียกใช้คำสั่งอีกครั้งเพื่อเริ่มแอปพลิเคชัน Streamlit อีกครั้ง
streamlit run app.py --browser.serverAddress=localhost --server.enableCORS=false --server.enableXsrfProtection=false --server.port 8080 - รีเฟรชแอปพลิเคชัน Streamlit หากแอปพลิเคชัน Streamlit ยังทำงานอยู่ คุณก็เพียงแค่รีเฟรชหน้าแสดงตัวอย่างเว็บในเบราว์เซอร์
- ตอนนี้ให้ถามคำถามที่จะเรียกใช้เครื่องมือใหม่ เช่น คำถามต่อไปนี้
I'm looking for something to do in New York today. What do you recommend? Would it be a good day to go to Ellis Island? - กด ENTER
เปรียบเทียบคำตอบนี้กับคำตอบก่อนหน้า มีอะไรแตกต่างบ้าง
คุณควรเห็นคำตอบที่มีอุณหภูมิจากฟังก์ชันของคุณ โปรดตรวจสอบเทอร์มินัล Cloud Shell ด้วย คุณควรเห็นคำสั่งพิมพ์ที่ยืนยันว่าฟังก์ชัน Python ทำงานแล้ว
18. ปรับแต่งเอาต์พุตของโมเดลด้วยพารามิเตอร์
ทำได้ดีมาก ตอนนี้ผู้ช่วยด้านการเดินทางสามารถใช้เครื่องมือเพื่อดึงข้อมูลภายนอกแบบเรียลไทม์ได้แล้ว ซึ่งจะช่วยเพิ่มประสิทธิภาพได้อย่างมาก
ตอนนี้เราได้ปรับปรุงสิ่งที่โมเดลทำได้แล้ว มาปรับแต่งวิธีที่โมเดลตอบกัน พารามิเตอร์ของโมเดลช่วยให้คุณควบคุมสไตล์และความสุ่มของข้อความที่ LLM สร้างขึ้นได้ การปรับการตั้งค่าเหล่านี้จะช่วยให้เอาต์พุตของบอทมีความเฉพาะเจาะจงและกำหนดได้มากขึ้น หรือมีความสร้างสรรค์และหลากหลายมากขึ้น
สำหรับห้องทดลองนี้ เราจะมุ่งเน้นที่ temperature และ top_p (ดูรายการพารามิเตอร์ที่กำหนดค่าได้ทั้งหมดและคำอธิบายของพารามิเตอร์เหล่านั้นได้ที่ GenerateContentConfig ในเอกสารอ้างอิง API)
temperature: ควบคุมความสุ่มของเอาต์พุต ค่าที่ต่ำกว่า (ใกล้กับ 0) จะทําให้เอาต์พุตมีความแน่นอนและมุ่งเน้นมากขึ้น ขณะที่ค่าที่สูงกว่า (ใกล้กับ 2) จะเพิ่มความสุ่มและความคิดสร้างสรรค์ สำหรับบอทถามตอบหรือบอทผู้ช่วย โดยปกติแล้วควรใช้อุณหภูมิที่ต่ำกว่าเพื่อให้ได้คำตอบที่สอดคล้องและเป็นข้อเท็จจริงมากขึ้นtop_p: ความน่าจะเป็นสะสมสูงสุดของโทเค็นที่จะพิจารณาเมื่อทำการสุ่ม ระบบจะจัดเรียงโทเค็นตามความน่าจะเป็นที่กำหนด เพื่อให้พิจารณาเฉพาะโทเค็นที่มีแนวโน้มมากที่สุด โมเดลจะพิจารณาโทเค็นที่มีแนวโน้มมากที่สุดซึ่งมีความน่าจะเป็นรวมกันเป็นค่าtop_pค่าที่ต่ำกว่าจะจำกัดตัวเลือกโทเค็น ส่งผลให้เอาต์พุตมีความหลากหลายน้อยลง
พารามิเตอร์การโทร
- ค้นหาตัวแปร
temperatureและtop_pที่กำหนดไว้ที่ด้านบนของapp.pyโปรดสังเกตว่ายังไม่มีการเรียกใช้ที่ใดเลย - เพิ่ม
temperatureและtop_pลงในพารามิเตอร์ที่กำหนดภายในGenerateContentConfigในฟังก์ชันget_chatgenerate_content_config = types.GenerateContentConfig( temperature=temperature, top_p=top_p, system_instruction=[types.Part.from_text(text=system_instructions)], tools=[tools] # Pass the tool definition here )
ฟังก์ชัน get_chat ที่อัปเดตแล้ว
ตอนนี้แอป get_chat มีลักษณะดังนี้
def get_chat(model_name: str):
    if f"chat-{model_name}" not in st.session_state:
        # Tools
        tools = types.Tool(function_declarations=[weather_function])

        # Initialize a configuration object
        generate_content_config = types.GenerateContentConfig(
            temperature=temperature,
            top_p=top_p,
            system_instruction=[types.Part.from_text(text=system_instructions)],
            tools=[tools]
        )
        chat = client.chats.create(
            model=model_name,
            config=generate_content_config,
        )
        st.session_state[f"chat-{model_name}"] = chat
    return st.session_state[f"chat-{model_name}"]
19. ทดสอบด้วยพารามิเตอร์โมเดล
- ในเทอร์มินัล ให้สิ้นสุดกระบวนการที่กำลังทำงานอยู่ (CTRL+C)
- เรียกใช้คำสั่งอีกครั้งเพื่อเริ่มแอปพลิเคชัน Streamlit อีกครั้ง
streamlit run app.py --browser.serverAddress=localhost --server.enableCORS=false --server.enableXsrfProtection=false --server.port 8080 - รีเฟรชแอปพลิเคชัน Streamlit หากแอปพลิเคชัน Streamlit ยังทำงานอยู่ คุณก็เพียงแค่รีเฟรชหน้าแสดงตัวอย่างเว็บในเบราว์เซอร์
- ลองถามคำถามเดิมอีกครั้ง
I'm looking for something to do in New York today. What do you recommend? Would it be a good day to go to Ellis Island? - กด ENTER
เปรียบเทียบคำตอบนี้กับคำตอบก่อนหน้า
20. ยินดีด้วย
คุณอัปเกรดแอปพลิเคชันถามและตอบด้วยเครื่องมือเรียบร้อยแล้ว ซึ่งเป็นฟีเจอร์ที่มีประสิทธิภาพที่ช่วยให้แอปที่ทำงานด้วย Gemini โต้ตอบกับระบบภายนอกและเข้าถึงข้อมูลแบบเรียลไทม์ได้
การทดสอบอย่างต่อเนื่อง
คุณมีตัวเลือกมากมายในการเพิ่มประสิทธิภาพพรอมต์ต่อไป ตัวอย่างเช่น
- ปรับ
temperatureและtop_pแล้วดูว่า LLM จะตอบสนองอย่างไร - ดูรายการพารามิเตอร์ที่กำหนดค่าได้ทั้งหมดและคำอธิบายได้ที่
GenerateContentConfigในเอกสารอ้างอิง API ลองกําหนดพารามิเตอร์เพิ่มเติมและปรับพารามิเตอร์เหล่านั้นเพื่อดูผลลัพธ์
สรุป
ในแล็บนี้ คุณได้ทำสิ่งต่อไปนี้
- ใช้โปรแกรมแก้ไข Cloud Shell และเทอร์มินัลในการพัฒนา
- ใช้ Vertex AI Python SDK เพื่อเชื่อมต่อแอปพลิเคชันกับโมเดล Gemini
- ใช้คำสั่งของระบบและพารามิเตอร์ของโมเดลเพื่อเป็นแนวทางในการตอบกลับของ LLM
- เรียนรู้แนวคิดของเครื่องมือ (การเรียกใช้ฟังก์ชัน) และประโยชน์ของเครื่องมือ
- ปรับโครงสร้างโค้ดเพื่อใช้เซสชันการแชทแบบเก็บสถานะ ซึ่งเป็นแนวทางปฏิบัติแนะนำสำหรับ AI แบบสนทนา
- กำหนดเครื่องมือสำหรับโมเดลโดยใช้การประกาศฟังก์ชัน
- ใช้ฟังก์ชัน Python เพื่อให้ตรรกะของเครื่องมือ
- เขียนโค้ดเพื่อจัดการคำขอการเรียกใช้ฟังก์ชันของโมเดลและแสดงผลลัพธ์