
1. 簡介
總覽
您是旅遊行銷公司的開發人員,貴公司的銷售部門決定需要新的即時通訊應用程式,才能跟上大型預訂和搜尋公司的腳步。他們也聽過生成式 AI,但對這項技術瞭解不多。其他部門聽聞這項計畫後,也想知道這項計畫如何提升客戶體驗。
學習內容
在本實驗室中,您將使用 Vertex AI 的 Gemini 2.5 Flash 模型,建構旅遊助理聊天機器人。
應用程式應符合下列條件:
- 協助使用者詢問旅遊相關問題、預訂行程,以及瞭解他們打算前往的地點
- 提供使用者取得特定旅遊計畫相關協助的方式
- 使用工具擷取天氣等即時資料
您將在預先設定的 Google Cloud 環境中工作,具體來說是在 Cloud Shell 編輯器中。我們已為您設定基本的網頁應用程式前端,以及存取 Vertex AI 的必要權限。這個應用程式是使用 Streamlit 建構。
課程內容
在本實驗室中,您將瞭解如何執行下列工作:
- 探索 Vertex AI 平台,找出可用的生成式 AI 模型。
- 在 Cloud Shell 編輯器和終端機中開發
- 使用 Gemini Code Assist 瞭解程式碼。
- 使用 Python 中的 Vertex AI SDK,向 Gemini LLM 傳送提示並接收回覆。
- 運用基本的提示工程 (系統指令、模型參數) 自訂 Gemini LLM 的輸出內容。
- 修改提示詞和參數,改善回覆內容,測試並反覆修正 LLM 輔助的即時通訊應用程式。
- 定義及使用 Gemini 模型工具,啟用函式呼叫。
- 重構程式碼,使用有狀態的即時通訊工作階段,這是對話式應用程式的最佳做法。
2. 專案設定
Google 帳戶
如果沒有個人 Google 帳戶,請建立 Google 帳戶。
請使用個人帳戶,而非公司或學校帳戶。
登入 Google Cloud 控制台
使用個人 Google 帳戶登入 Google Cloud 控制台。
啟用計費功能
兌換 Google Cloud 抵免額 (選用)
如要參加這個研討會,您需要有具備抵免額的帳單帳戶。請使用本程式碼研究室頂端橫幅中的抵免額開始操作。如果已連結帳單帳戶,可以略過這個步驟。
設定個人帳單帳戶
如果使用 Google Cloud 抵免額設定計費,可以略過這個步驟。
如要設定個人帳單帳戶,請前往這裡在 Cloud 控制台中啟用帳單。
注意事項:
- 完成本實驗室的 Cloud 資源費用應不到 $1 美元。
- 您可以按照本實驗室結尾的步驟刪除資源,以免產生後續費用。
- 新使用者可獲得價值 $300 美元的免費試用期。
建立專案 (選用)
如果沒有要用於本實驗室的現有專案,請在這裡建立新專案。
3. 開啟 Cloud Shell 編輯器
- 按一下這個連結,直接前往 Cloud Shell 編輯器
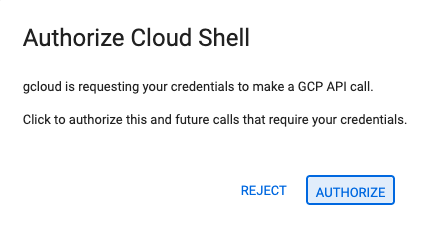
- 如果系統在今天任何時間提示您授權,請點選「授權」繼續操作。
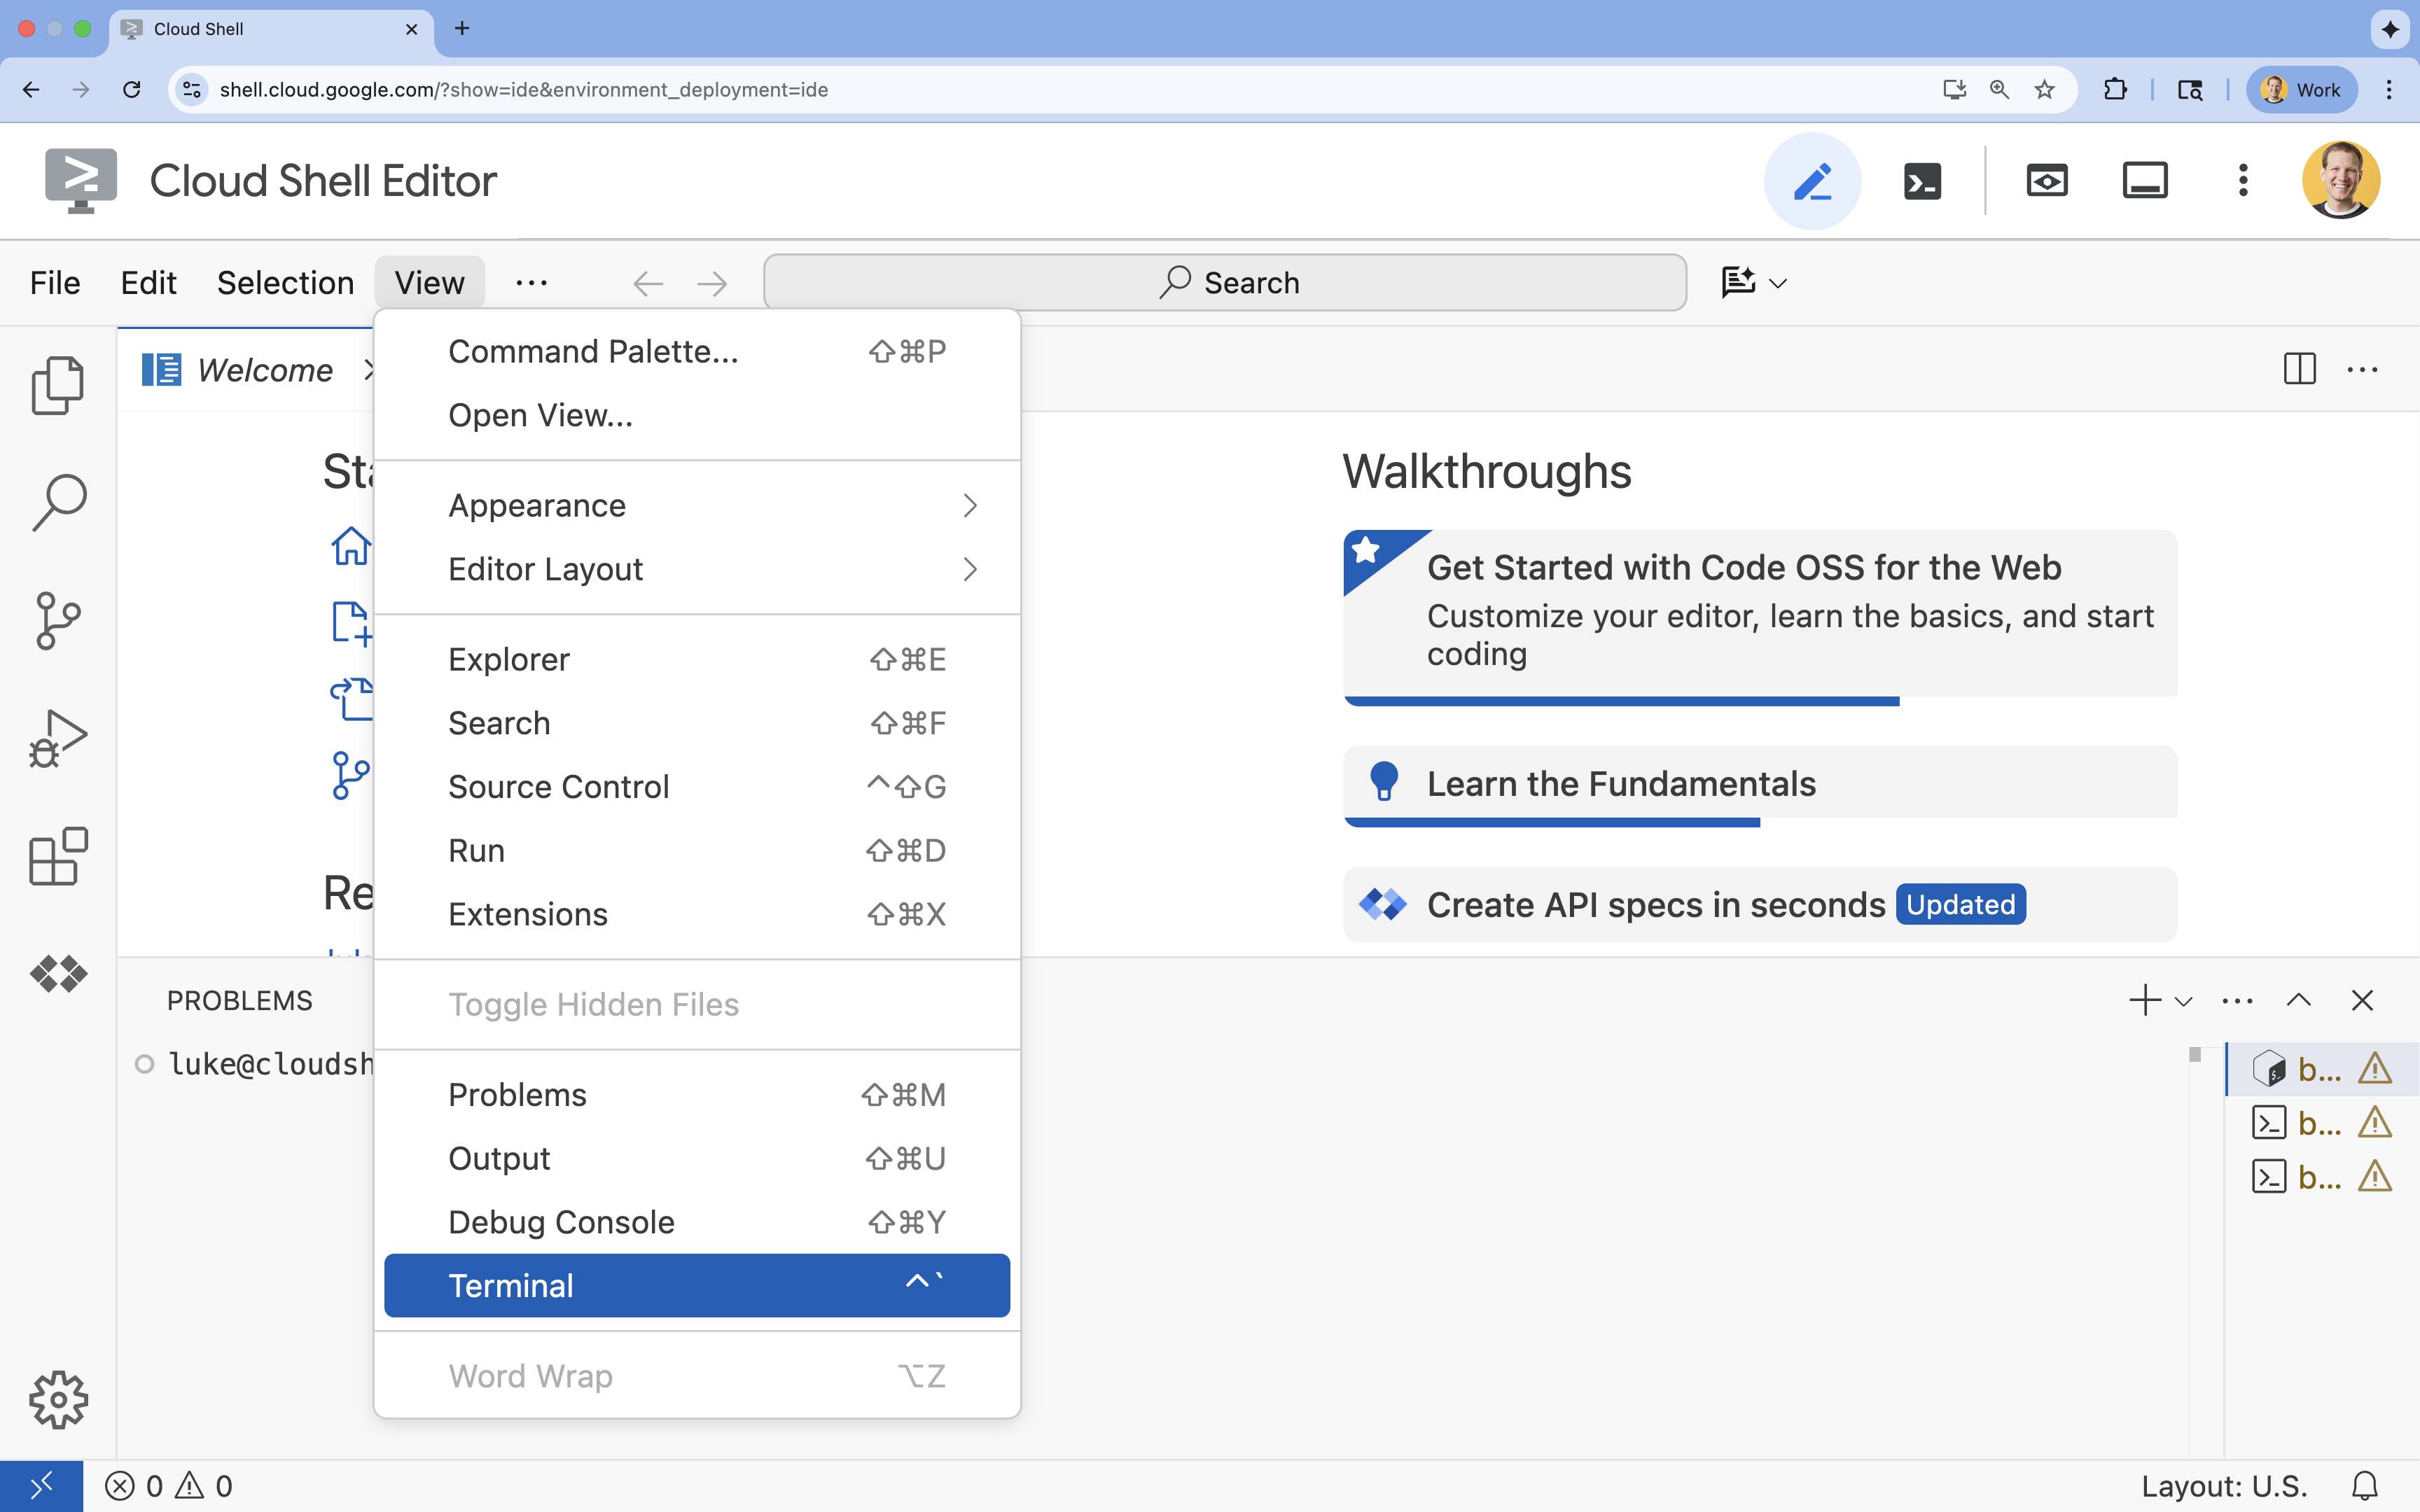
- 如果畫面底部未顯示終端機,請開啟終端機:
- 按一下「查看」
- 按一下「終端機」
- 在終端機中,使用下列指令設定專案:
gcloud config set project [PROJECT_ID]- 範例:
gcloud config set project lab-project-id-example - 如果忘記專案 ID,可以使用下列指令列出所有專案 ID:
gcloud projects list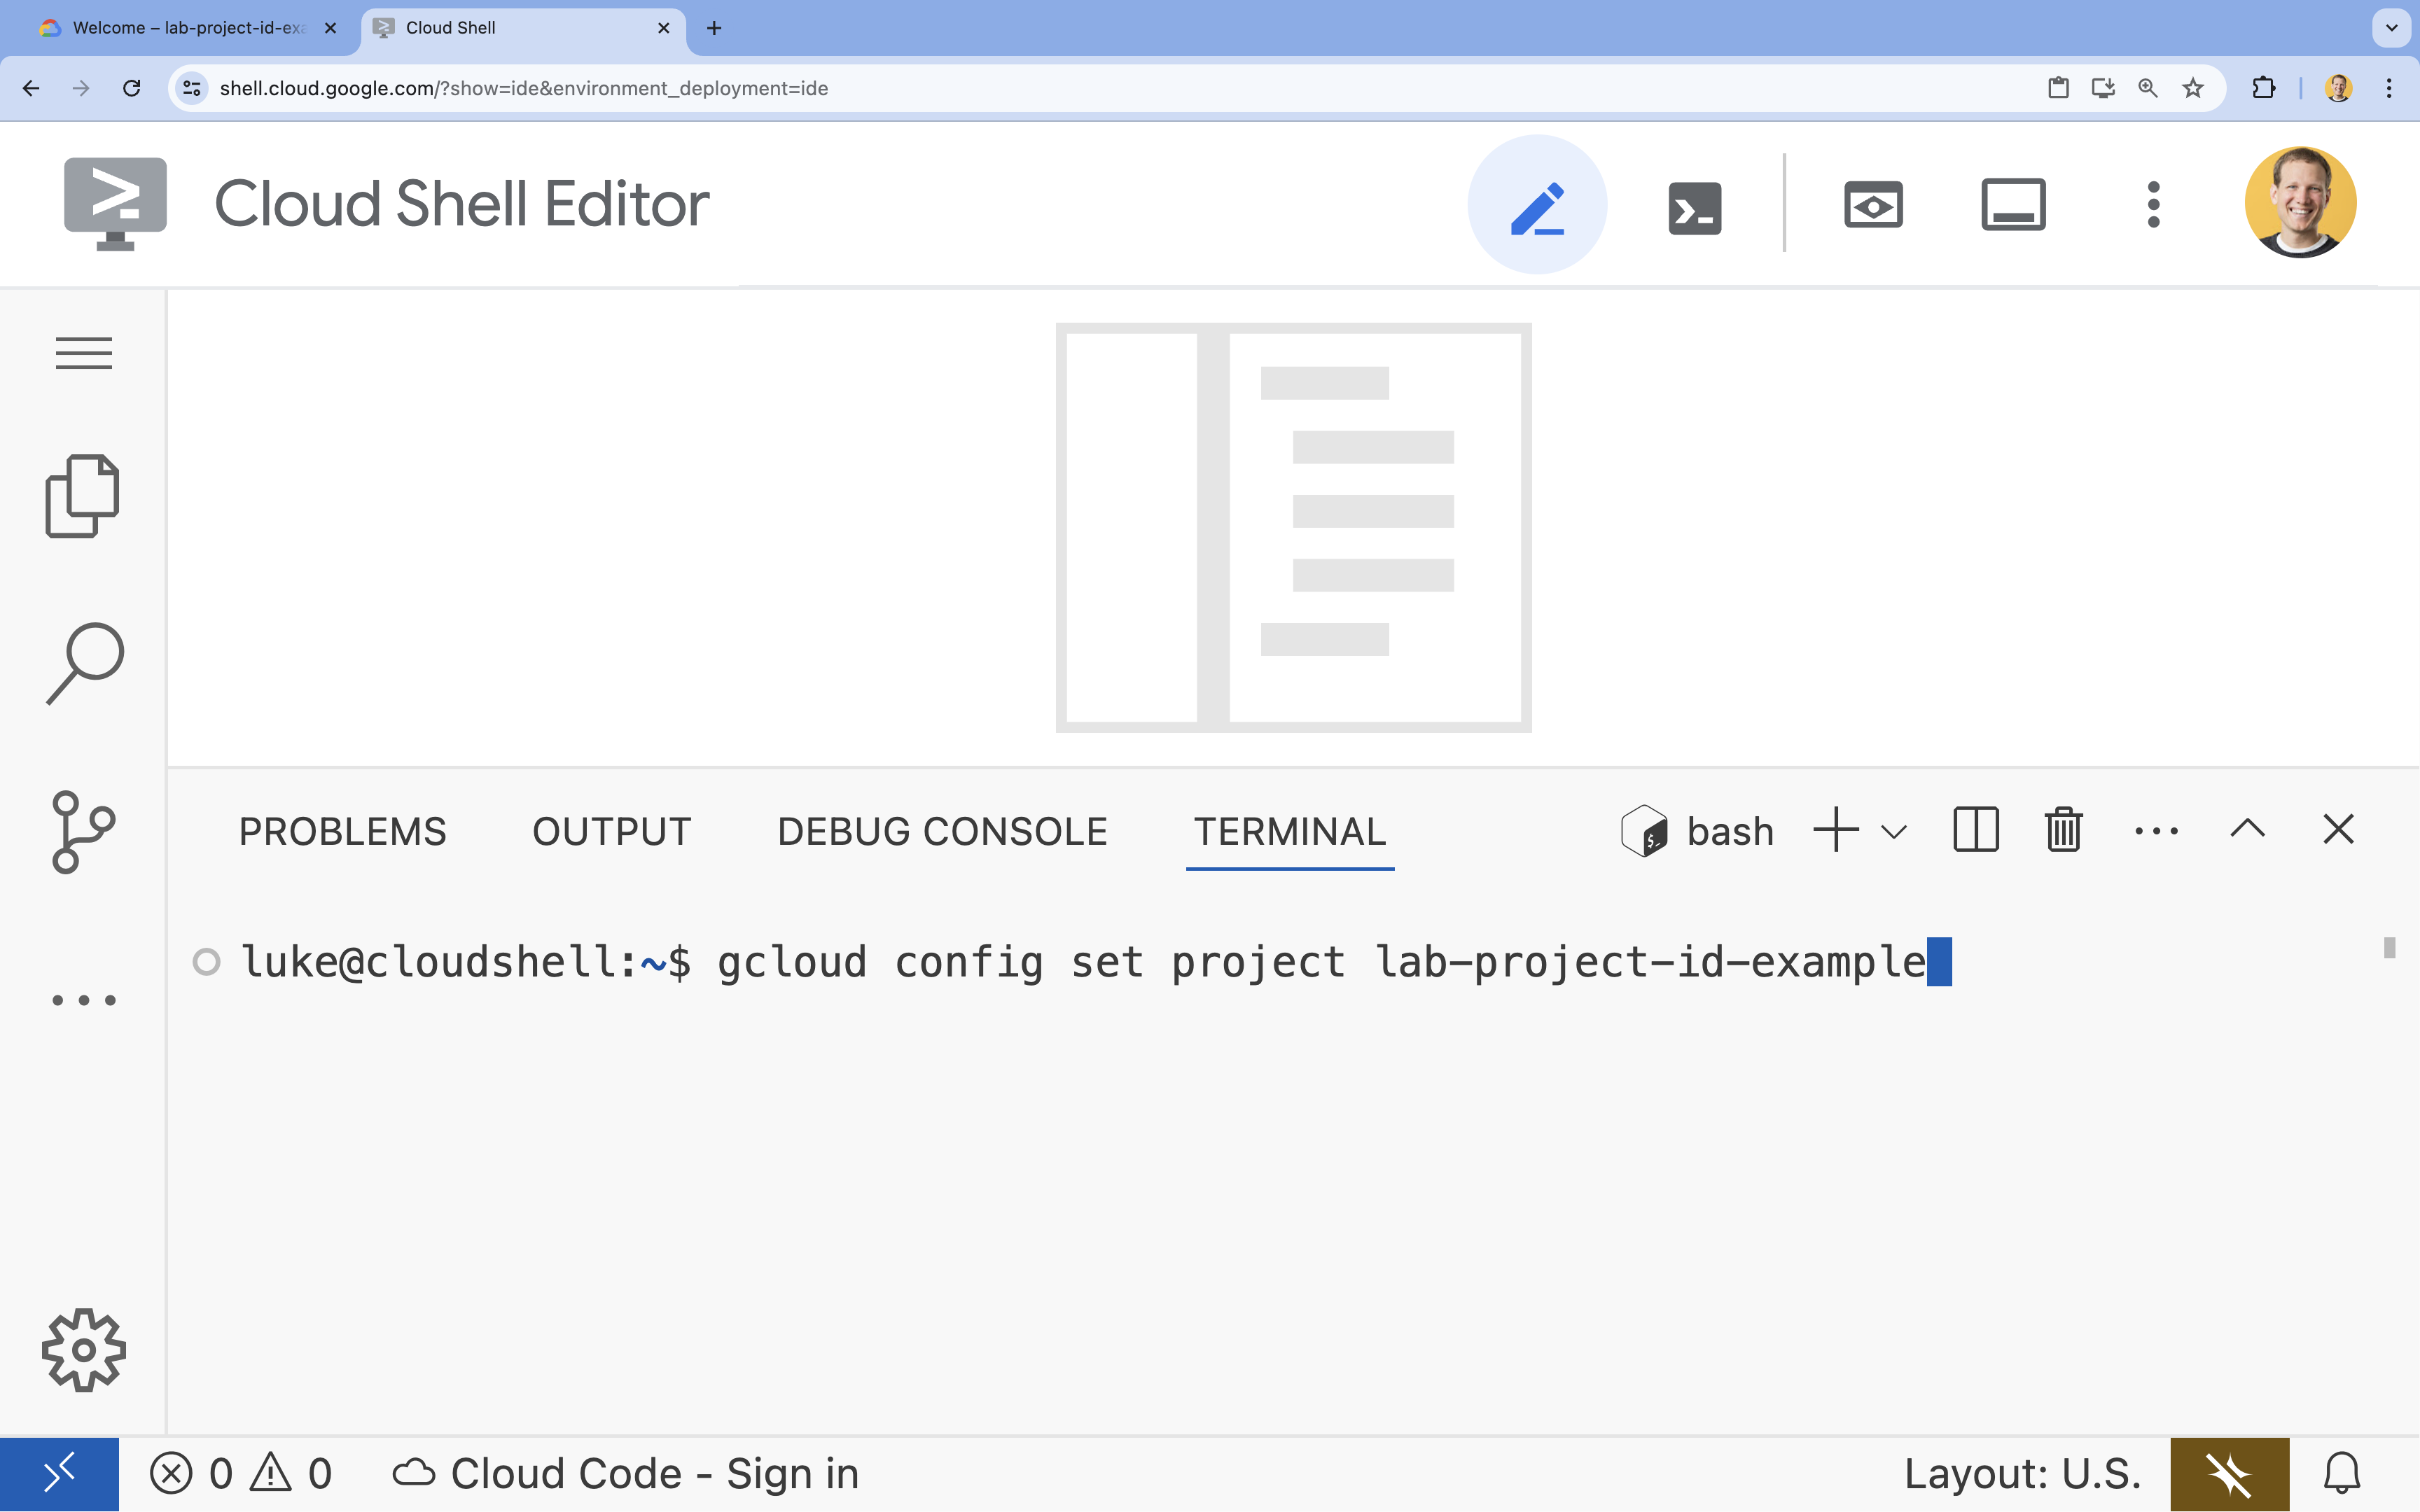
- 範例:
- 您應會看到下列訊息:
Updated property [core/project].
4. 啟用 API
如要使用 Vertex AI SDK 與 Gemini 模型互動,您需要在 Google Cloud 雲端專案中啟用 Vertex AI API。
- 在終端機中啟用 API:
gcloud services enable \
  aiplatform.googleapis.com
Python 適用的 Vertex AI SDK 簡介
如要從 Python 應用程式與 Vertex AI 上代管的模型互動,請使用 Vertex AI SDK for Python。這個 SDK 可簡化傳送提示、指定模型參數及接收回覆的程序,不必直接處理基礎 API 呼叫的複雜性。
如需 Python 適用的 Vertex AI SDK 完整說明文件,請參閱「Python 適用的 Vertex AI SDK 簡介 | Google Cloud」。
5. 建立虛擬環境並安裝依附元件
開始任何 Python 專案前,建議您先建立虛擬環境。這樣一來,專案的依附元件就會與其他專案或系統的全域 Python 套件隔離,避免發生衝突。
- 建立名為
wanderbot的資料夾,用於儲存旅遊助理應用程式的程式碼。在終端機中執行下列程式碼:mkdir wanderbot && cd wanderbot - 建立並啟動虛擬環境:
uv venv --python 3.12 source .venv/bin/activatewanderbot) 前置字元,表示虛擬環境已啟動。程式碼應如下所示:
6. 為 wanderbot 建立入門檔案
- 建立及開啟應用程式的新
app.py檔案。在終端機中執行下列程式碼:cloudshell edit app.pycloudshell edit指令會在終端機上方的編輯器中開啟app.py檔案。 - 將下列應用程式範例程式碼貼入
app.py:import streamlit as st from google import genai from google.genai import types import requests import logging # --- Defining variables and parameters --- REGION = "global" PROJECT_ID = None # TODO: Insert Project ID GEMINI_MODEL_NAME = "gemini-2.5-flash" temperature = .2 top_p = 0.95 system_instructions = None # --- Tooling --- # TODO: Define the weather tool function declaration # TODO: Define the get_current_temperature function # --- Initialize the Vertex AI Client --- try: # TODO: Initialize the Vertex AI client print(f"VertexAI Client initialized successfully with model {GEMINI_MODEL_NAME}") except Exception as e: st.error(f"Error initializing VertexAI client: {e}") st.stop() # TODO: Add the get_chat function here in Task 15. # --- Call the Model --- def call_model(prompt: str, model_name: str) -> str: """ This function interacts with a large language model (LLM) to generate text based on a given prompt and system instructions. It will be replaced in a later step with a more advanced version that handles tooling. """ try: # TODO: Prepare the content for the model # TODO: Define generate_content configuration (needed for system instructions and parameters) # TODO: Define response logging.info(f"[call_model_response] LLM Response: \"{response.text}\"") # TODO: Uncomment the below "return response.text" line # return response.text except Exception as e: return f"Error: {e}" # --- Presentation Tier (Streamlit) --- # Set the title of the Streamlit application st.title("Travel Chat Bot") # Initialize session state variables if they don't exist if "messages" not in st.session_state: # Initialize the chat history with a welcome message st.session_state["messages"] = [ {"role": "assistant", "content": "How can I help you today?"} ] # Display the chat history for msg in st.session_state.messages: st.chat_message(msg["role"]).write(msg["content"]) # Get user input if prompt := st.chat_input(): # Add the user's message to the chat history st.session_state.messages.append({"role": "user", "content": prompt}) # Display the user's message st.chat_message("user").write(prompt) # Show a spinner while waiting for the model's response with st.spinner("Thinking..."): # Get the model's response using the call_model function model_response = call_model(prompt, GEMINI_MODEL_NAME) # Add the model's response to the chat history st.session_state.messages.append( {"role": "assistant", "content": model_response} ) # Display the model's response st.chat_message("assistant").write(model_response) - 建立及開啟新的
requirements.txt檔案,用於存放應用程式程式碼。在終端機中執行下列程式碼:cloudshell edit requirements.txtcloudshell edit指令會在終端機上方的編輯器中開啟requirements.txt檔案。 - 將下列應用程式範例程式碼貼入
requirements.txt。google-genai streamlit requests - 為這個專案安裝必要的 Python 依附元件。在終端機中執行下列程式碼:
uv pip install -r requirements.txt
7. 探索程式碼
您建立的檔案包括基本聊天應用程式前端。包括:
app.py:這是我們將使用的檔案。目前包含下列項目:- 必要匯入項目
- 環境變數和參數 (部分為預留位置)
- 空白的
call_model函式,我們將在後續填入內容 - 前端聊天室應用程式的 Streamlit 程式碼
requirements.txt:- 包含執行
app.py的安裝需求
- 包含執行
現在來探索程式碼!
開啟 Gemini Code Assist Chat
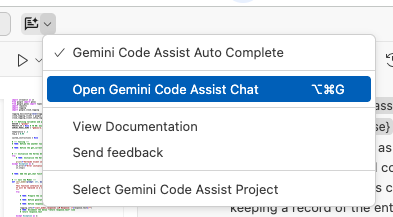
Gemini Code Assist Chat 應該已在 Cloud Shell 編輯器右側的面板中開啟。如果 Gemini Code Assist Chat 尚未開啟,請按照下列步驟開啟:
- 點選畫面頂端的 Gemini Code Assist 按鈕 (
 )。
)。 - 選取「Open Gemini Code Assist Chat」。
使用 Gemini Code Assist 瞭解程式碼
你可以使用 Gemini Code Assist Chat 深入瞭解程式碼。
- 醒目顯示或選取所需的程式碼區段。
- 在 Gemini 對話中輸入「解釋這段程式碼」。
- 按 Enter 鍵即可提交
8. 啟動網頁應用程式
將這個應用程式連結至 LLM 之前,請先啟動應用程式,瞭解初始行為。
- 在
wanderbot目錄中,於終端機執行下列指令,啟動 Streamlit 應用程式,並在 Cloud Shell 殼層環境中提供本機存取權:streamlit run app.py --browser.serverAddress=localhost --server.enableCORS=false --server.enableXsrfProtection=false --server.port 8080 - 執行指令後,按一下 Cloud Shell 編輯器頂端的「網頁預覽」按鈕,然後選取「透過以下通訊埠預覽:8080」。
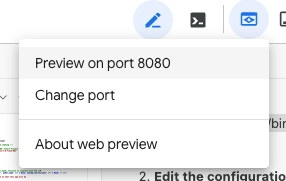
畫面上會顯示旅遊應用程式的簡易聊天介面。 - 輸入任何訊息 (例如
Hi!) 並按下 ENTER 鍵。
你會發現訊息會顯示在對話記錄中,但你會收到錯誤訊息,而不是 Google 助理的回覆。這是因為應用程式尚未連結至大型語言模型。觀察這項行為,瞭解實驗室的起點。
9. 初始化 Vertex AI 用戶端
探索 Vertex AI 中的可用模型
Google Cloud 的 Vertex AI 平台提供各種生成式 AI 模型。整合前,您可以先在 Google Cloud 控制台中探索可用選項。
- 前往 Google Cloud 控制台的 Model Garden,方法是在畫面頂端的搜尋列中搜尋「Model Garden」,然後選取 Vertex AI。(
 )
) - 瀏覽可用的模型。你可以依模態、工作類型和功能等條件篩選。
在本實驗室中,您將使用 Gemini 2.5 Flash 模型,這個模型速度快,很適合用來建構回應迅速的對話應用程式。
初始化 Vertex AI 用戶端
現在請修改 app.py 中的 --- Initialize the Vertex AI Client --- 部分,初始化 Vertex AI 用戶端。這個用戶端物件會用於將提示傳送至模型。
- 在 Cloud Shell 編輯器中開啟
app.py。 - 在
app.py中,找出PROJECT_ID = None行。 - 將
None替換為以引號括住的 Google Cloud 專案 ID。(例如PROJECT_ID = "google-cloud-labs")
如果不記得專案 ID,可以使用下列指令列出所有專案 ID:gcloud projects list | awk '/PROJECT_ID/{print $2}' - 定義用戶端:在
try區塊中,初始化 Vertex AI 用戶端。client = genai.Client( vertexai=True, project=PROJECT_ID, location=REGION, )
更新 Vertex AI 用戶端初始化
此時,「Initialize the Vertex AI Client」部分應如下所示:
# --- Initialize the Vertex AI Client ---
try:
    client = genai.Client(
        vertexai=True,
        project=PROJECT_ID,
        location=REGION,
    )
print(f"VertexAI Client initialized successfully with model {GEMINI_MODEL_NAME}")
except Exception as e:
st.error(f"Error initializing VertexAI client: {e}")
st.stop()
10. 準備資料並呼叫模型
現在請準備要傳送至模型的內容,並呼叫 Gemini 模型。
- 找到定義
call_model函式的--- Call the Model ---區段。 - 定義內容:在
# TODO: Prepare the content for the model下方,定義要傳送至模型的輸入內容。如果是基本提示,這會是使用者的輸入訊息。contents = [prompt] - 定義回應:將這段程式碼貼到
# TODO: Define response下方。response = client.models.generate_content( model=model_name, contents=contents, ) - 傳回回應:取消註解以下這一行:
return response.text - 在
with區塊中,檢查檔案底部的call_model函式呼叫行。如果您不瞭解這裡發生了什麼事,請醒目顯示該行,然後問問 Gemini Code Assist 解釋。
更明確的 contents 定義方式
上述定義 contents 的方式之所以可行,是因為 SDK 夠聰明,可瞭解含有字串的清單代表使用者輸入的文字。並自動將其格式調整為模型 API 適用的格式。
不過,更明確且基本的方式是使用 types.Part 和 types.Content 物件來建構輸入內容,如下所示:
user_message_parts = [types.Part.from_text(text=prompt)]
contents = [
types.Content(
role="user", # Indicates the content is from the user
parts=user_message_parts, # A list, allowing multiple types of content
),
]
更新 call_model 函式
此時,call_model 函式應如下所示:
def call_model(prompt: str, model_name: str) -> str:
"""
This function interacts with a large language model (LLM) to generate text based on a given prompt and system instructions.
It will be replaced in a later step with a more advanced version that handles tooling.
"""
try:
contents = [prompt]
# TODO: Define generate_content configuration (needed later for system instructions and parameters)
        response = client.models.generate_content(
            model=model_name,
            contents=contents,
        )
logging.info(f"[call_model_response] LLM Response: \"{response.text}\"")
return response.text
except Exception as e:
return f"Error: {e}"
11. 測試連結的應用程式
- 在終端機中,終止目前執行的程序 (CTRL+C)
- 再次執行指令,重新啟動 Streamlit 應用程式。
streamlit run app.py --browser.serverAddress=localhost --server.enableCORS=false --server.enableXsrfProtection=false --server.port 8080 - 重新整理 Streamlit 應用程式。如果 Streamlit 應用程式仍在執行,只要重新整理瀏覽器中的網頁預覽頁面即可。
- 現在,在對話輸入框中輸入問題,例如:
What is the best time of year to go to Iceland? - 按下 Enter 鍵。
應用程式應該會顯示您的訊息、「正在思考...」旋轉圖示,然後顯示 Gemini 模型生成的回覆!如果可以,表示您已成功將網頁應用程式連結至 Vertex AI 的 LLM。🙌 🥳
12. 定義系統指令
雖然基本連線運作正常,但 LLM 回覆的品質和風格會受到輸入內容的影響。提示工程是指設計及調整這些輸入內容 (提示),引導模型生成所需輸出內容的過程。
為此,您會先建立一些系統指令,並將這些指令傳遞至模型。
您可以使用「問問 Gemini」產生實用的系統指令。
- 在
app.py中,找出目前設為None的system_instructions變數。system_instructions = NoneNone,為旅遊助理機器人提供指示。 - 問問 Gemini Code Assist:將下列提示詞傳送至 Gemini Code Assist (或自行發想提示詞!):
I am a developer at a travel marketing company, and my sales department has decided that they need a new chat application to keep up with the bigger booking and search companies. I'm building a simple travel assistant chatbot using the Gemini 2.5 Flash model on Vertex AI. The application should: - Helps users ask questions about travel, book travel, and learn about places they are going to go - Provides users ways to get help about their specific travel plans - Provides all this in a production quality way (multiple environments, logging and monitoring, etc.) Please create system instructions appropriate for that chat app. Be thorough. Do not alter the code in any way beyond providing me with system instructions. - 定義
system_instructions:將system_instructions設為使用 Gemini Code Assist 生成的系統指令。您也可以使用這些系統指令,這些指令是 Gemini 透過類似的提示建立。system_instructions = """ You are a sophisticated travel assistant chatbot designed to provide comprehensive support to users throughout their travel journey. Your capabilities include answering travel-related questions, assisting with booking travel arrangements, offering detailed information about destinations, and providing support for existing travel plans. **Core Functionalities:** 1. **Travel Information and Recommendations:** * Answer user inquiries about travel destinations, including popular attractions, local customs, visa requirements, weather conditions, and safety advice. * Provide personalized recommendations for destinations, activities, and accommodations based on user preferences, interests, and budget. * Offer insights into the best times to visit specific locations, considering factors like weather, crowds, and pricing. * Suggest alternative destinations or activities if the user's initial choices are unavailable or unsuitable. 2. **Booking Assistance:** * Facilitate the booking of flights, hotels, rental cars, tours, and activities. * Search for available options based on user-specified criteria such as dates, destinations, budget, and preferences. * Present clear and concise information about available options, including pricing, amenities, and booking terms. * Guide users through the booking process, ensuring accurate information and secure transactions. * Provide booking confirmations and relevant details, such as booking references and contact information. 3. **Travel Planning and Itinerary Management:** * Assist users in creating detailed travel itineraries, including flights, accommodations, activities, and transportation. * Offer suggestions for optimizing travel plans, such as minimizing travel time or maximizing sightseeing opportunities. * Provide tools for managing and modifying existing itineraries, including adding or removing activities, changing booking dates, or upgrading accommodations. * Offer reminders and notifications for upcoming travel events, such as flight check-in or tour departure times. 4. **Customer Support and Troubleshooting:** * Provide prompt and helpful support to users with questions or issues related to their travel plans. * Assist with resolving booking discrepancies, cancellations, or modifications. * Offer guidance on travel-related emergencies, such as lost luggage or travel delays. * Provide access to relevant contact information for airlines, hotels, and other travel providers. **Interaction Guidelines:** * **Professionalism:** Maintain a polite, respectful, and professional tone in all interactions. * **Clarity and Conciseness:** Provide clear, concise, and easy-to-understand information. Avoid jargon or technical terms unless necessary and always explain them. * **Accuracy:** Ensure all information provided is accurate and up-to-date. Double-check details before sharing them with users. If unsure about something, admit that you don't know and offer to find the information. * **Personalization:** Tailor your responses and recommendations to the specific needs and preferences of each user. * **Proactive Assistance:** Anticipate user needs and offer relevant information or suggestions proactively. * **Error Handling:** Gracefully handle user errors or misunderstandings. Provide helpful guidance and alternative options when necessary. * **Confidentiality:** Respect user privacy and handle personal information with the utmost confidentiality and in compliance with data protection regulations. **Example Interactions:** **User:** "I want to go on a beach vacation in the Caribbean. I have a budget of $2000 per person for a week." **Chatbot:** "Certainly! The Caribbean offers many beautiful beach destinations within your budget. Some popular options include Punta Cana in the Dominican Republic, Cancun in Mexico, and Montego Bay in Jamaica. These destinations offer stunning beaches, all-inclusive resorts, and various activities. Would you like me to search for flights and accommodations for these locations based on your travel dates?" **User:** "My flight is delayed. What should I do?" **Chatbot:** "I'm sorry to hear about the delay. Please check with the airline for the updated departure time and any assistance they can offer. You may be entitled to compensation or rebooking options depending on the length of the delay and the airline's policy. Do you have your flight number handy so I can look up the current status for you?" **User:** "Tell me about the best time to visit Japan." **Chatbot:** "Japan is a fantastic destination with distinct seasons offering unique experiences. Spring (March-May) is famous for the beautiful cherry blossoms, while autumn (September-November) boasts stunning fall foliage. Both seasons have pleasant temperatures, making them ideal for sightseeing. Summer (June-August) can be hot and humid, but it's a great time for festivals and outdoor activities in the mountains. Winter (December-February) offers opportunities for skiing and snowboarding in the Japanese Alps, though some areas may experience heavy snowfall. To recommend the best time for you, could you tell me what you'd like to experience in Japan?" By following these instructions, you will be able to provide exceptional travel assistance and create a positive experience for every user. """ - 定義 generate_content 設定:初始化設定物件,您將把這些系統指令傳遞至該物件。由於
system_instructions是在指令碼中全域定義,因此函式可以直接存取。generate_content_config = types.GenerateContentConfig( system_instruction=[ types.Part.from_text(text=system_instructions) ], ) logging.info(f"[generate_config_details] System Instruction: {generate_content_config.system_instruction[0].text}") - 如要將系統指令新增至回應,請將
config參數新增至generate_content方法,並將其設為上方建立的generate_content_config物件。response = client.models.generate_content( model=model_name, contents=contents, config=generate_content_config, # This is the new line )
更新 call_model 函式
完整的 call_model 函式現在如下所示:
def call_model(prompt: str, model_name: str) -> str:
"""
This function interacts with a large language model (LLM) to generate text based on a given prompt and system instructions.
It will be replaced in a later step with a more advanced version that handles tooling.
"""
try:
contents = [prompt]
        generate_content_config = types.GenerateContentConfig(
            system_instruction=[
                types.Part.from_text(text=system_instructions)
            ],
        )
        logging.info(f"[generate_config_details] System Instruction: {generate_content_config.system_instruction[0].text}")
response = client.models.generate_content(
model=model_name,
contents=contents,
config=generate_content_config,
)
logging.info(f"[call_model_response] LLM Response: \"{response.text}\"")
return response.text
except Exception as e:
return f"Error: {e}"
13. 使用系統指令測試應用程式
- 在終端機中,終止目前執行的程序 (CTRL+C)
- 再次執行指令,重新啟動 Streamlit 應用程式。
streamlit run app.py --browser.serverAddress=localhost --server.enableCORS=false --server.enableXsrfProtection=false --server.port 8080 - 重新整理 Streamlit 應用程式。如果 Streamlit 應用程式仍在執行,只要重新整理瀏覽器中的網頁預覽頁面即可。
- 嘗試提出與先前相同的問題:
What is the best time of year to go to Iceland? - 按下 Enter 鍵。
比較這次的回覆與上次的回覆。
14. 定義天氣工具
到目前為止,我們的聊天機器人知識豐富,但知識範圍僅限於訓練資料。無法存取即時資訊。以旅遊機器人為例,能夠擷取天氣預報等即時資料是一大優勢。
這時就需要工具,也就是函式呼叫。我們可以定義一組工具 (Python 函式),供 LLM 選擇呼叫以取得外部資訊。
工具的運作方式
- 我們會向模型說明工具,包括工具的功能和採用的參數。
- 使用者傳送提示 (例如「倫敦的天氣如何?」)。
- 模型收到提示,並發現使用者詢問的內容可透過其中一項工具取得。
- 模型不會以文字回覆,而是以特殊的
function_call物件回覆,指出要呼叫的工具和使用的引數。 - 我們的 Python 程式碼會接收這個
function_call,使用提供的引數執行實際的get_current_temperature函式,並取得結果 (例如 15°C)。 - 然後將結果傳回模型。
- 模型收到結果後,會以自然語言生成使用者的回覆 (例如「倫敦目前的氣溫為攝氏 15 度」)。
模型可透過這個程序回答訓練資料以外的問題,成為更強大實用的助理。
定義天氣工具
如果旅客想尋求活動建議,並在受天氣影響的活動之間做選擇,天氣工具就能派上用場!讓我們為模型建立工具,取得目前天氣。我們需要兩個部分:描述工具的模型函式宣告,以及實作該工具的實際 Python 函式。
- 在
app.py中找出註解# TODO: Define the weather tool function declaration。 - 在這個註解下方新增
weather_function變數。這個字典會向模型說明函式的用途、參數和必要引數。weather_function = { "name": "get_current_temperature", "description": "Gets the current temperature for a given location.", "parameters": { "type": "object", "properties": { "location": { "type": "string", "description": "The city name, e.g. San Francisco", }, }, "required": ["location"], }, } - 接著找出註解
# TODO: Define the get_current_temperature function。在下方新增下列 Python 程式碼。這項功能會:def get_current_temperature(location: str) -> str: """Gets the current temperature for a given location.""" try: # --- Get Latitude and Longitude for the location --- geocode_url = f"https://geocoding-api.open-meteo.com/v1/search?name={location}&count=1&language=en&format=json" geocode_response = requests.get(geocode_url) geocode_data = geocode_response.json() if not geocode_data.get("results"): return f"Could not find coordinates for {location}." lat = geocode_data["results"][0]["latitude"] lon = geocode_data["results"][0]["longitude"] # --- Get Weather for the coordinates --- weather_url = f"https://api.open-meteo.com/v1/forecast?latitude={lat}&longitude={lon}¤t_weather=true" weather_response = requests.get(weather_url) weather_data = weather_response.json() temperature = weather_data["current_weather"]["temperature"] unit = "°C" return f"{temperature}{unit}" except Exception as e: return f"Error fetching weather: {e}"
15. 重構聊天室和工具
目前的 call_model 函式會使用簡單的一次性 generate_content 呼叫。這很適合單一問題,但不適合多輪對話,尤其是需要來回使用工具的對話。
建議使用即時通訊工作階段,這樣就能保留對話內容。現在我們要重構程式碼來使用即時通訊工作階段,這是正確實作工具的必要步驟。
- 刪除現有的
call_model函式。我們會以更進階的版本取代。 - 請改為新增下列程式碼區塊中的新
call_model函式。這個新函式包含處理我們稍早討論的工具呼叫迴圈邏輯。請注意,其中有幾個 TODO 註解,我們會在後續步驟中完成。# --- Call the Model --- def call_model(prompt: str, model_name: str) -> str: """ This function interacts with a large language model (LLM) to generate text based on a given prompt. It maintains a chat session and handles function calls from the model to external tools. """ try: # TODO: Get the existing chat session or create a new one. message_content = prompt # Start the tool-calling loop while True: # TODO: Send the message to the model. # Check if the model wants to call a tool has_tool_calls = False for part in response.candidates[0].content.parts: if part.function_call: has_tool_calls = True function_call = part.function_call logging.info(f"Function to call: {function_call.name}") logging.info(f"Arguments: {function_call.args}") # TODO: Call the appropriate function if the model requests it. elif part.text: logging.info("No function call found in the response.") logging.info(response.text) # If no tool call was made, break the loop if not has_tool_calls: break # TODO: Return the model's final text response. except Exception as e: return f"Error: {e}" - 現在,讓我們新增輔助函式來管理即時通訊工作階段。在新的
call_model函式上方,新增get_chat函式。這項函式會建立新的即時通訊工作階段 (包含系統指令和工具定義),或擷取現有的即時通訊工作階段。這是整理程式碼的良好做法。def get_chat(model_name: str): if f"chat-{model_name}" not in st.session_state: # TODO: Define the tools configuration for the model # TODO: Define the generate_content configuration, including tools # TODO: Create a new chat session st.session_state[f"chat-{model_name}"] = chat return st.session_state[f"chat-{model_name}"]
您現在已為進階的工具啟用型即時通訊邏輯設定架構!
16. 實作工具呼叫邏輯
現在,我們可以填入 TODOs,讓工具呼叫邏輯發揮完整功能。
實作 get_chat
- 在
# TODO: Define the tools configuration...註解下方的get_chat函式中,從weather_function宣告建立types.Tool例項,藉此定義tools物件。tools = types.Tool(function_declarations=[weather_function]) - 在
# TODO: Define the generate_content configuration...下方定義generate_content_config,請務必將tools物件傳遞至模型。模型會透過這種方式瞭解可使用的工具。generate_content_config = types.GenerateContentConfig( system_instruction=[types.Part.from_text(text=system_instructions)], tools=[tools] # Pass the tool definition here ) - 在
# TODO: Create a new chat session下方,使用client.chats.create()建立即時通訊物件,並傳入模型名稱和設定。chat = client.chats.create( model=model_name, config=generate_content_config, )
實作 call_model
- 在
call_model函式的# TODO: Get the existing chat session...下方,呼叫新的get_chat輔助函式。chat = get_chat(model_name) - 接著找出
# TODO: Send the message to the model。使用chat.send_message()方法傳送使用者的訊息。response = chat.send_message(message_content) - 找出
# TODO: Call the appropriate function...。我們會在這裡檢查模型需要哪個函式,並執行該函式。
if function_call.name == "get_current_temperature":
result = get_current_temperature(**function_call.args)
function_response_part = types.Part.from_function_response(
name=function_call.name,
response={"result": result},
)
message_content = [function_response_part]
- 最後,找出
# TODO: Return the model's final text response並新增回傳敘述。return response.text
更新 get_chat 函式
更新後的 get_chat 函式應如下所示:
def get_chat(model_name: str):
if f"chat-{model_name}" not in st.session_state:
# Tools
tools = types.Tool(function_declarations=[weather_function])
# Initialize a configuration object
generate_content_config = types.GenerateContentConfig(
system_instruction=[types.Part.from_text(text=system_instructions)],
tools=[tools]
)
        chat = client.chats.create(
            model=model_name,
            config=generate_content_config,
        )
st.session_state[f"chat-{model_name}"] = chat
return st.session_state[f"chat-{model_name}"]
更新 call_model 函式
更新後的 call_model 函式應如下所示:
def call_model(prompt: str, model_name: str) -> str:
try:
chat = get_chat(model_name)
message_content = prompt
while True:
response = chat.send_message(message_content)
has_tool_calls = False
for part in response.candidates[0].content.parts:
if part.function_call:
has_tool_calls = True
function_call = part.function_call
logging.info(f"Function to call: {function_call.name}")
logging.info(f"Arguments: {function_call.args}")
                    if function_call.name == "get_current_temperature":
                      result = get_current_temperature(**function_call.args)
                    function_response_part = types.Part.from_function_response(
                        name=function_call.name,
                        response={"result": result},
                    )
                    message_content = [function_response_part]
elif part.text:
logging.info("No function call found in the response.")
logging.info(response.text)
if not has_tool_calls:
break
return response.text
except Exception as e:
return f"Error: {e}"
17. 測試已啟用工具的應用程式
來看看新功能的實際運作情形吧!
- 在終端機中,終止目前執行的程序 (CTRL+C)
- 再次執行指令,重新啟動 Streamlit 應用程式。
streamlit run app.py --browser.serverAddress=localhost --server.enableCORS=false --server.enableXsrfProtection=false --server.port 8080 - 重新整理 Streamlit 應用程式。如果 Streamlit 應用程式仍在執行,只要重新整理瀏覽器中的網頁預覽頁面即可。
- 現在,請提出應會觸發新工具的問題,例如:
I'm looking for something to do in New York today. What do you recommend? Would it be a good day to go to Ellis Island? - 按下 Enter 鍵
比較這項回覆與先前的回覆。有什麼不同?
您應該會看到回應,其中包含函式的溫度!同時檢查 Cloud Shell 終端機,您應該會看到確認 Python 函式已執行的列印陳述式。
18. 使用參數調整模型輸出內容
真厲害!現在,旅遊助理可以運用工具擷取即時外部資料,功能更加強大。
現在我們已提升模型能力,接下來要微調模型的回覆方式。模型參數可控制大型語言模型生成文字的風格和隨機性。調整這些設定可讓機器人的輸出內容更精確、更具確定性,或更具創意、更多元。
在本實驗室中,我們將著重於 temperature 和 top_p。(如需可設定參數的完整清單及其說明,請參閱 API 參考資料中的 GenerateContentConfig)。
temperature:控制輸出內容的隨機程度。值越低 (越接近 0),輸出內容就越精確且確定;值越高 (越接近 2),隨機性和創意就越高。如果是問與答或助理機器人,通常會將溫度調低,以生成更一致且符合事實的回覆。top_p:取樣時要考量的詞元累積機率上限。系統會根據指派的機率排序符記,只考慮最有可能的符記。模型會考慮機率最高的詞元,且這些詞元的機率總和必須達到top_p值。值越小,可選擇的符記就越少,輸出內容的變化也就越少
通話參數
- 找出
app.py頂端定義的變數temperature和top_p。請注意,這些函式尚未在任何位置呼叫。 - 在
get_chat函式的GenerateContentConfig中,將temperature和top_p新增至定義的參數。generate_content_config = types.GenerateContentConfig( temperature=temperature, top_p=top_p, system_instruction=[types.Part.from_text(text=system_instructions)], tools=[tools] # Pass the tool definition here )
更新 get_chat 函式
現在 get_chat 應用程式應如下所示:
def get_chat(model_name: str):
    if f"chat-{model_name}" not in st.session_state:
        # Tools
        tools = types.Tool(function_declarations=[weather_function])

        # Initialize a configuration object
        generate_content_config = types.GenerateContentConfig(
            temperature=temperature,
            top_p=top_p,
            system_instruction=[types.Part.from_text(text=system_instructions)],
            tools=[tools]
        )
        chat = client.chats.create(
            model=model_name,
            config=generate_content_config,
        )
        st.session_state[f"chat-{model_name}"] = chat
    return st.session_state[f"chat-{model_name}"]
19. 使用模型參數進行測試
- 在終端機中,終止目前執行的程序 (CTRL+C)
- 再次執行指令,重新啟動 Streamlit 應用程式。
streamlit run app.py --browser.serverAddress=localhost --server.enableCORS=false --server.enableXsrfProtection=false --server.port 8080 - 重新整理 Streamlit 應用程式。如果 Streamlit 應用程式仍在執行,只要重新整理瀏覽器中的網頁預覽頁面即可。
- 嘗試提出與先前相同的問題,
I'm looking for something to do in New York today. What do you recommend? Would it be a good day to go to Ellis Island? - 按下 Enter 鍵
比較這項回覆與先前的回覆。
20. 恭喜!
您已成功使用工具升級問答應用程式。這項強大功能可讓 Gemini 支援的應用程式與外部系統互動,並存取即時資訊。
持續進行實驗
您可以透過多種方式持續最佳化提示。以下是幾項建議:
- 調整
temperature和top_p,看看 LLM 的回覆有何變化。 - 如需可設定參數的完整清單及其說明,請參閱 API 參考資料中的
GenerateContentConfig。請嘗試定義更多參數並調整,看看會發生什麼情況!
重點回顧
在本實驗室中,您完成了下列工作:
- 使用 Cloud Shell 編輯器和終端機進行開發。
- 使用 Vertex AI Python SDK 將應用程式連線至 Gemini 模型。
- 套用系統指令和模型參數,引導 LLM 回覆。
- 瞭解工具的概念 (函式呼叫) 及其優點。
- 重構程式碼,使用有狀態的即時通訊工作階段,這是對話式 AI 的最佳做法。
- 使用函式宣告為模型定義工具。
- 實作 Python 函式,提供工具的邏輯。
- 編寫程式碼,處理模型函式呼叫要求並傳回結果。