
1. Introduction
Overview
This lab bridges the critical gap between developing a powerful multi-agent system and deploying it for real-world use. While building agents locally is a great start, production applications require a platform that is scalable, reliable, and secure.
In this lab, you will take a multi-agent system built with the Google Agent Development Kit (ADK) and deploy it to a production-grade environment on Google Kubernetes Engine (GKE).
Film concept team agent
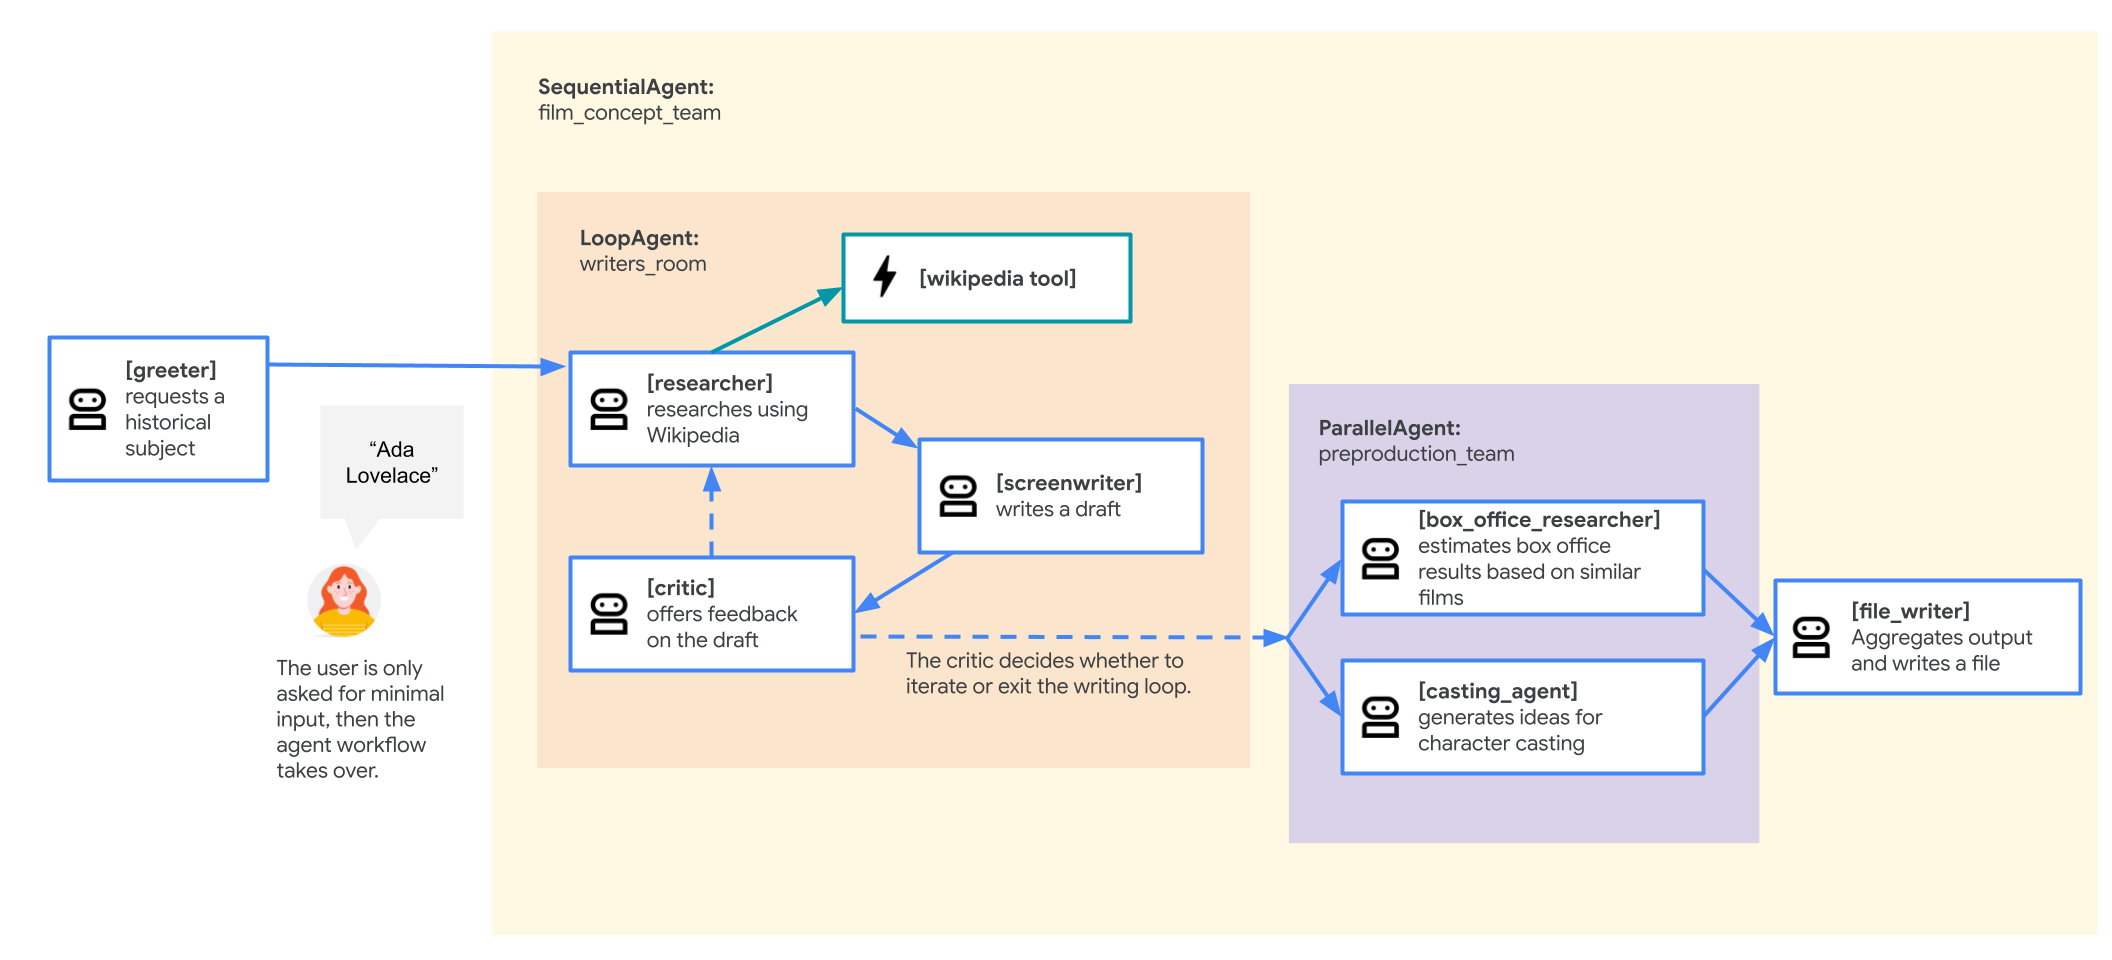
The sample application used in this lab is a "film concept team" composed of multiple collaborating agents: a researcher, a screenwriter, and a file writer. These agents work together to help a user brainstorm and outline a movie pitch about a historical figure.
Why deploy to GKE?
To prepare your agent for the demands of a production environment, you need a platform built for scalability, security, and cost-efficiency. Google Kubernetes Engine (GKE) provides this powerful and flexible foundation for running your containerized application.
This provides several advantages for your production workload:
- Automatic scaling & performance: Handle unpredictable traffic with the HorizontalPodAutoscaler (HPA), which automatically adds or removes agent replicas based on load. For more demanding AI workloads, you can attach hardware accelerators like GPUs and TPUs.
- Cost-effective resource management: Optimize costs with GKE Autopilot, which automatically manages the underlying infrastructure so you only pay for the resources your application requests.
- Integrated security & observability: Securely connect to other Google Cloud services using Workload Identity, which avoids the need to manage and store service account keys. All application logs are automatically streamed to Cloud Logging for centralized monitoring and debugging.
- Control & portability: Avoid vendor lock-in with open-source Kubernetes. Your application is portable and can run on any Kubernetes cluster, on-premises or in other clouds.
What you'll learn
In this lab, you learn how to perform the following tasks:
- Provision a GKE Autopilot cluster.
- Containerize an application with a Dockerfile and push the image to Artifact Registry.
- Securely connect your application to Google Cloud APIs using Workload Identity.
- Write and apply Kubernetes manifests for a Deployment and Service.
- Expose an application to the internet with a LoadBalancer.
- Configure autoscaling with a HorizontalPodAutoscaler (HPA).
2. Project setup
Google Account
If you don't already have a personal Google Account, you must create a Google Account.
Use a personal account instead of a work or school account.
Sign-in to the Google Cloud Console
Sign-in to the Google Cloud Console using a personal Google account.
Enable Billing
Set up a personal billing account
If you set up billing using Google Cloud credits, you can skip this step.
To set up a personal billing account, go here to enable billing in the Cloud Console.
Some Notes:
- Completing this lab should cost less than $1 USD in Cloud resources.
- You can follow the steps at the end of this lab to delete resources to avoid further charges.
- New users are eligible for the $300 USD Free Trial.
Create a project (optional)
If you do not have a current project you'd like to use for this lab, create a new project here.
3. Open Cloud Shell Editor
- Click this link to navigate directly to Cloud Shell Editor
- If prompted to authorize at any point today, click Authorize to continue.
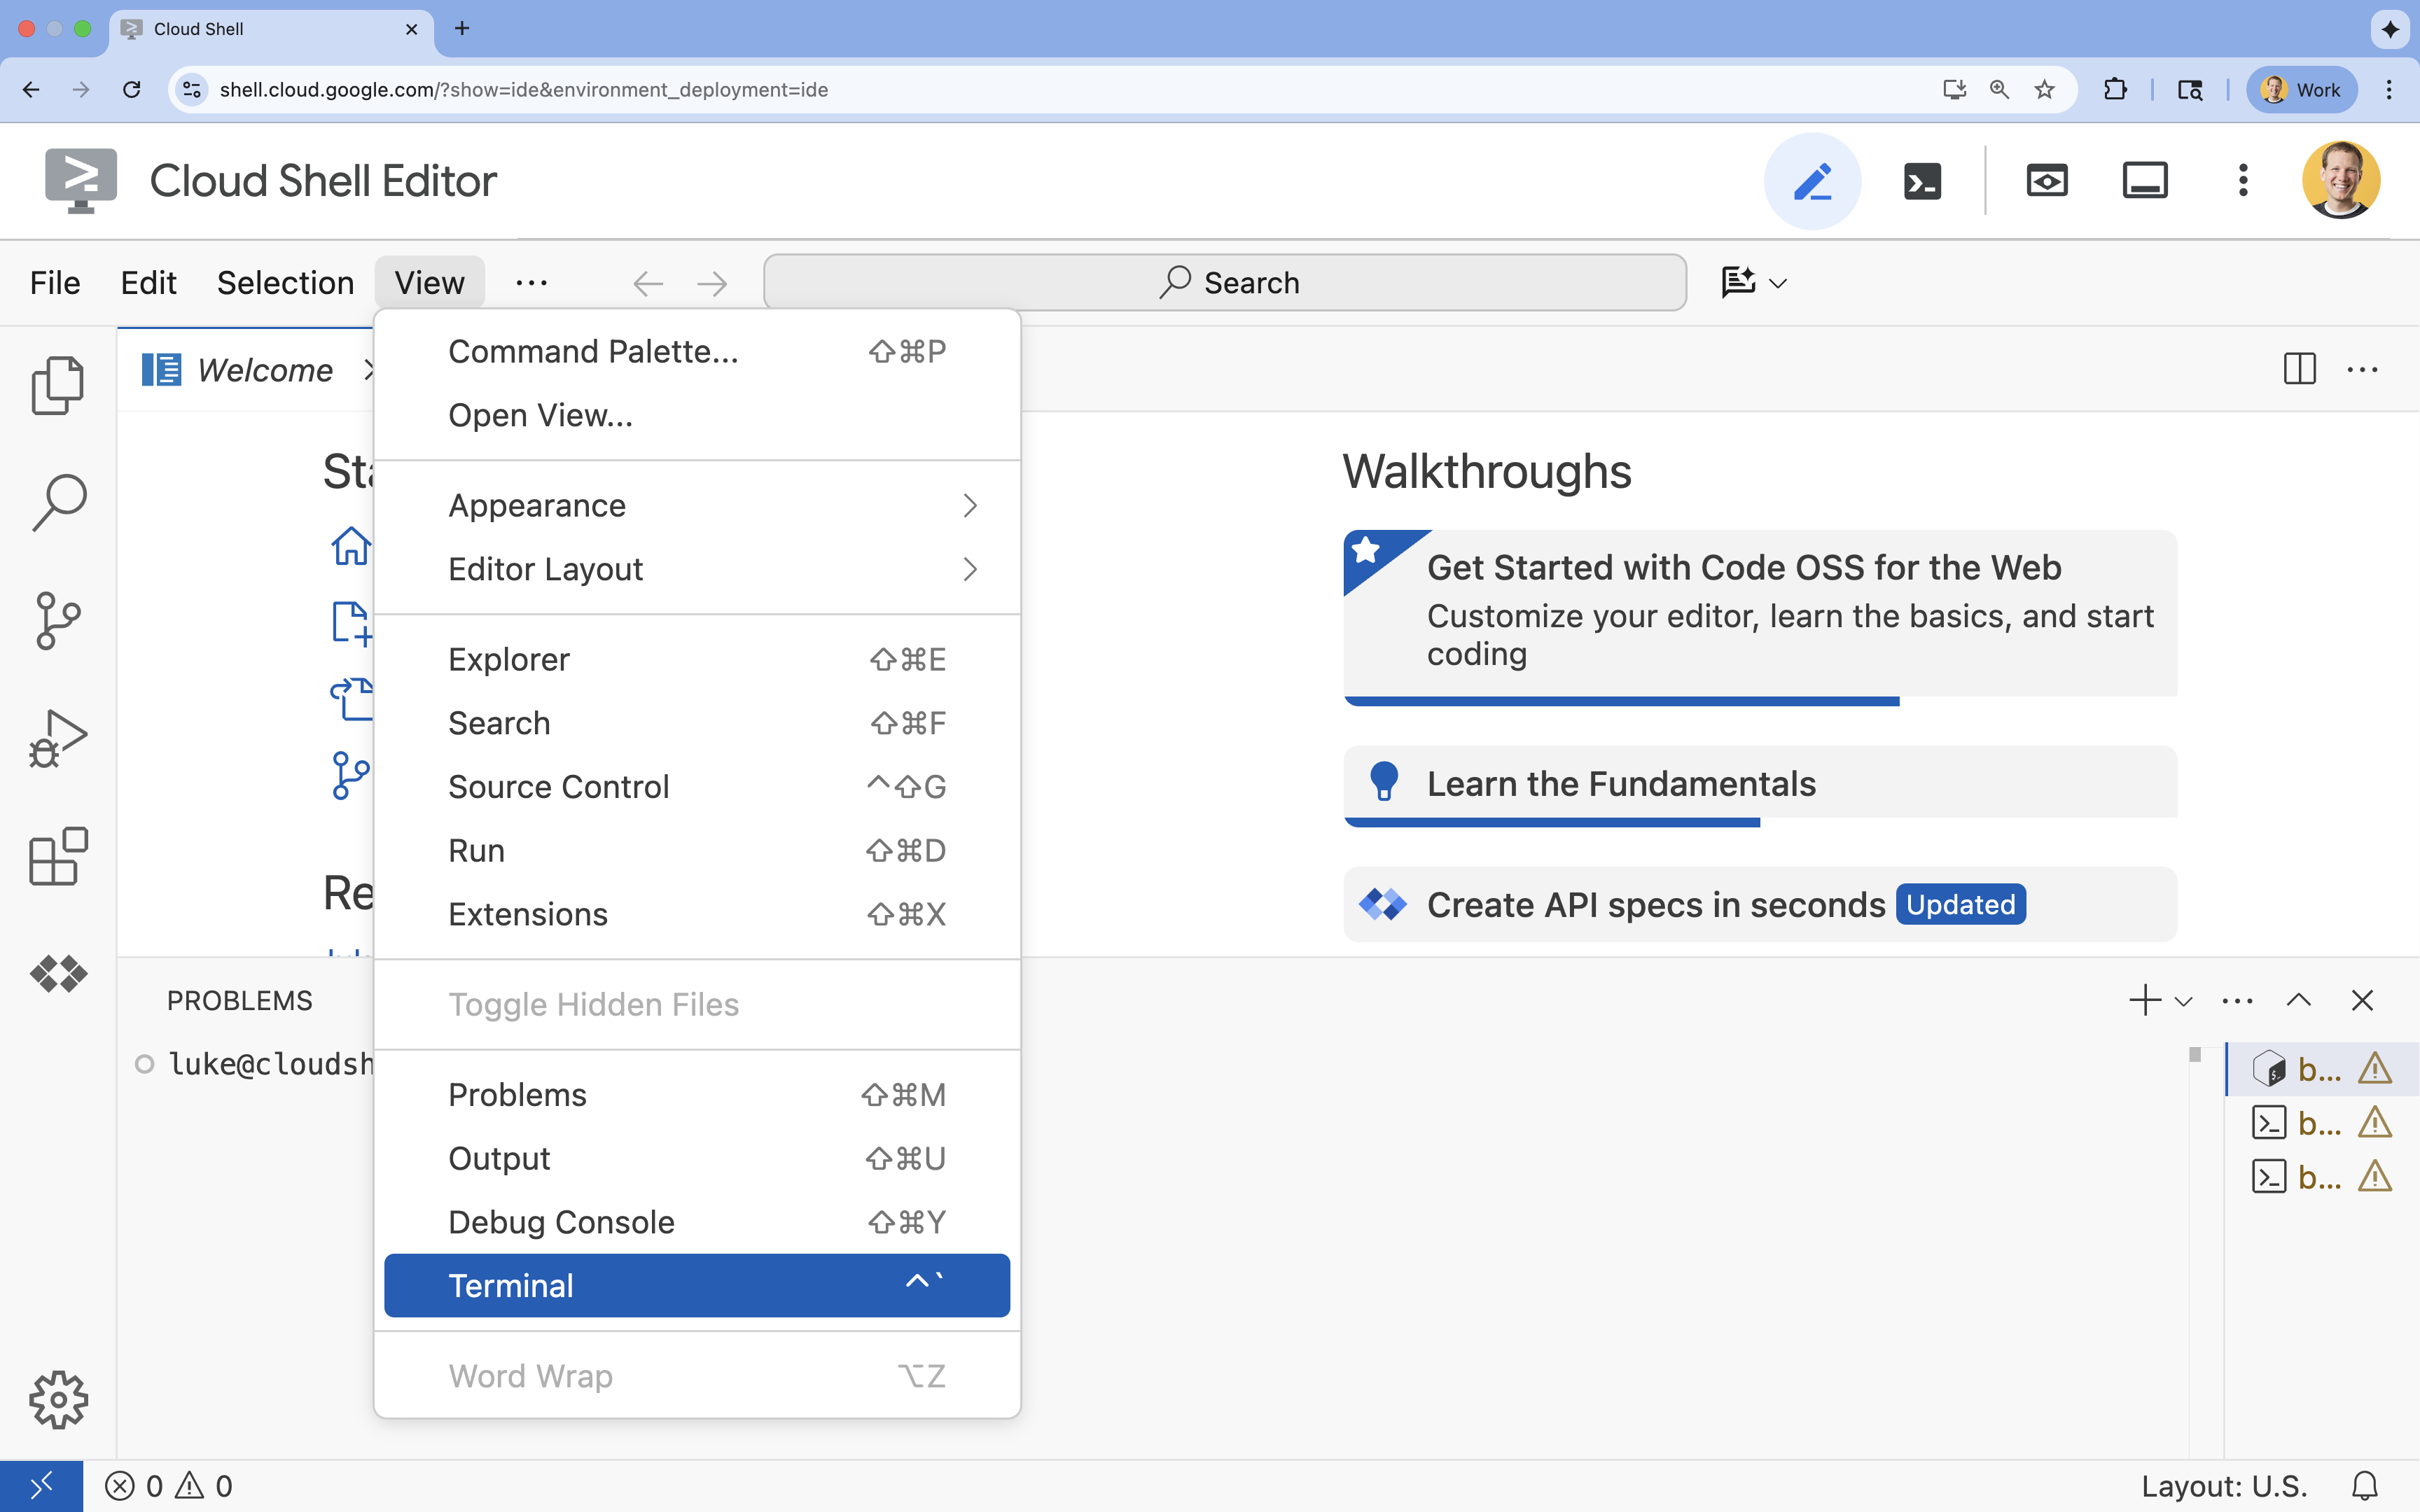
- If the terminal doesn't appear at the bottom of the screen, open it:
- Click View
- Click Terminal
- In the terminal, set your project with this command:
gcloud config set project [PROJECT_ID]- Example:
gcloud config set project lab-project-id-example - If you can't remember your project ID, you can list all your project IDs with:
gcloud projects list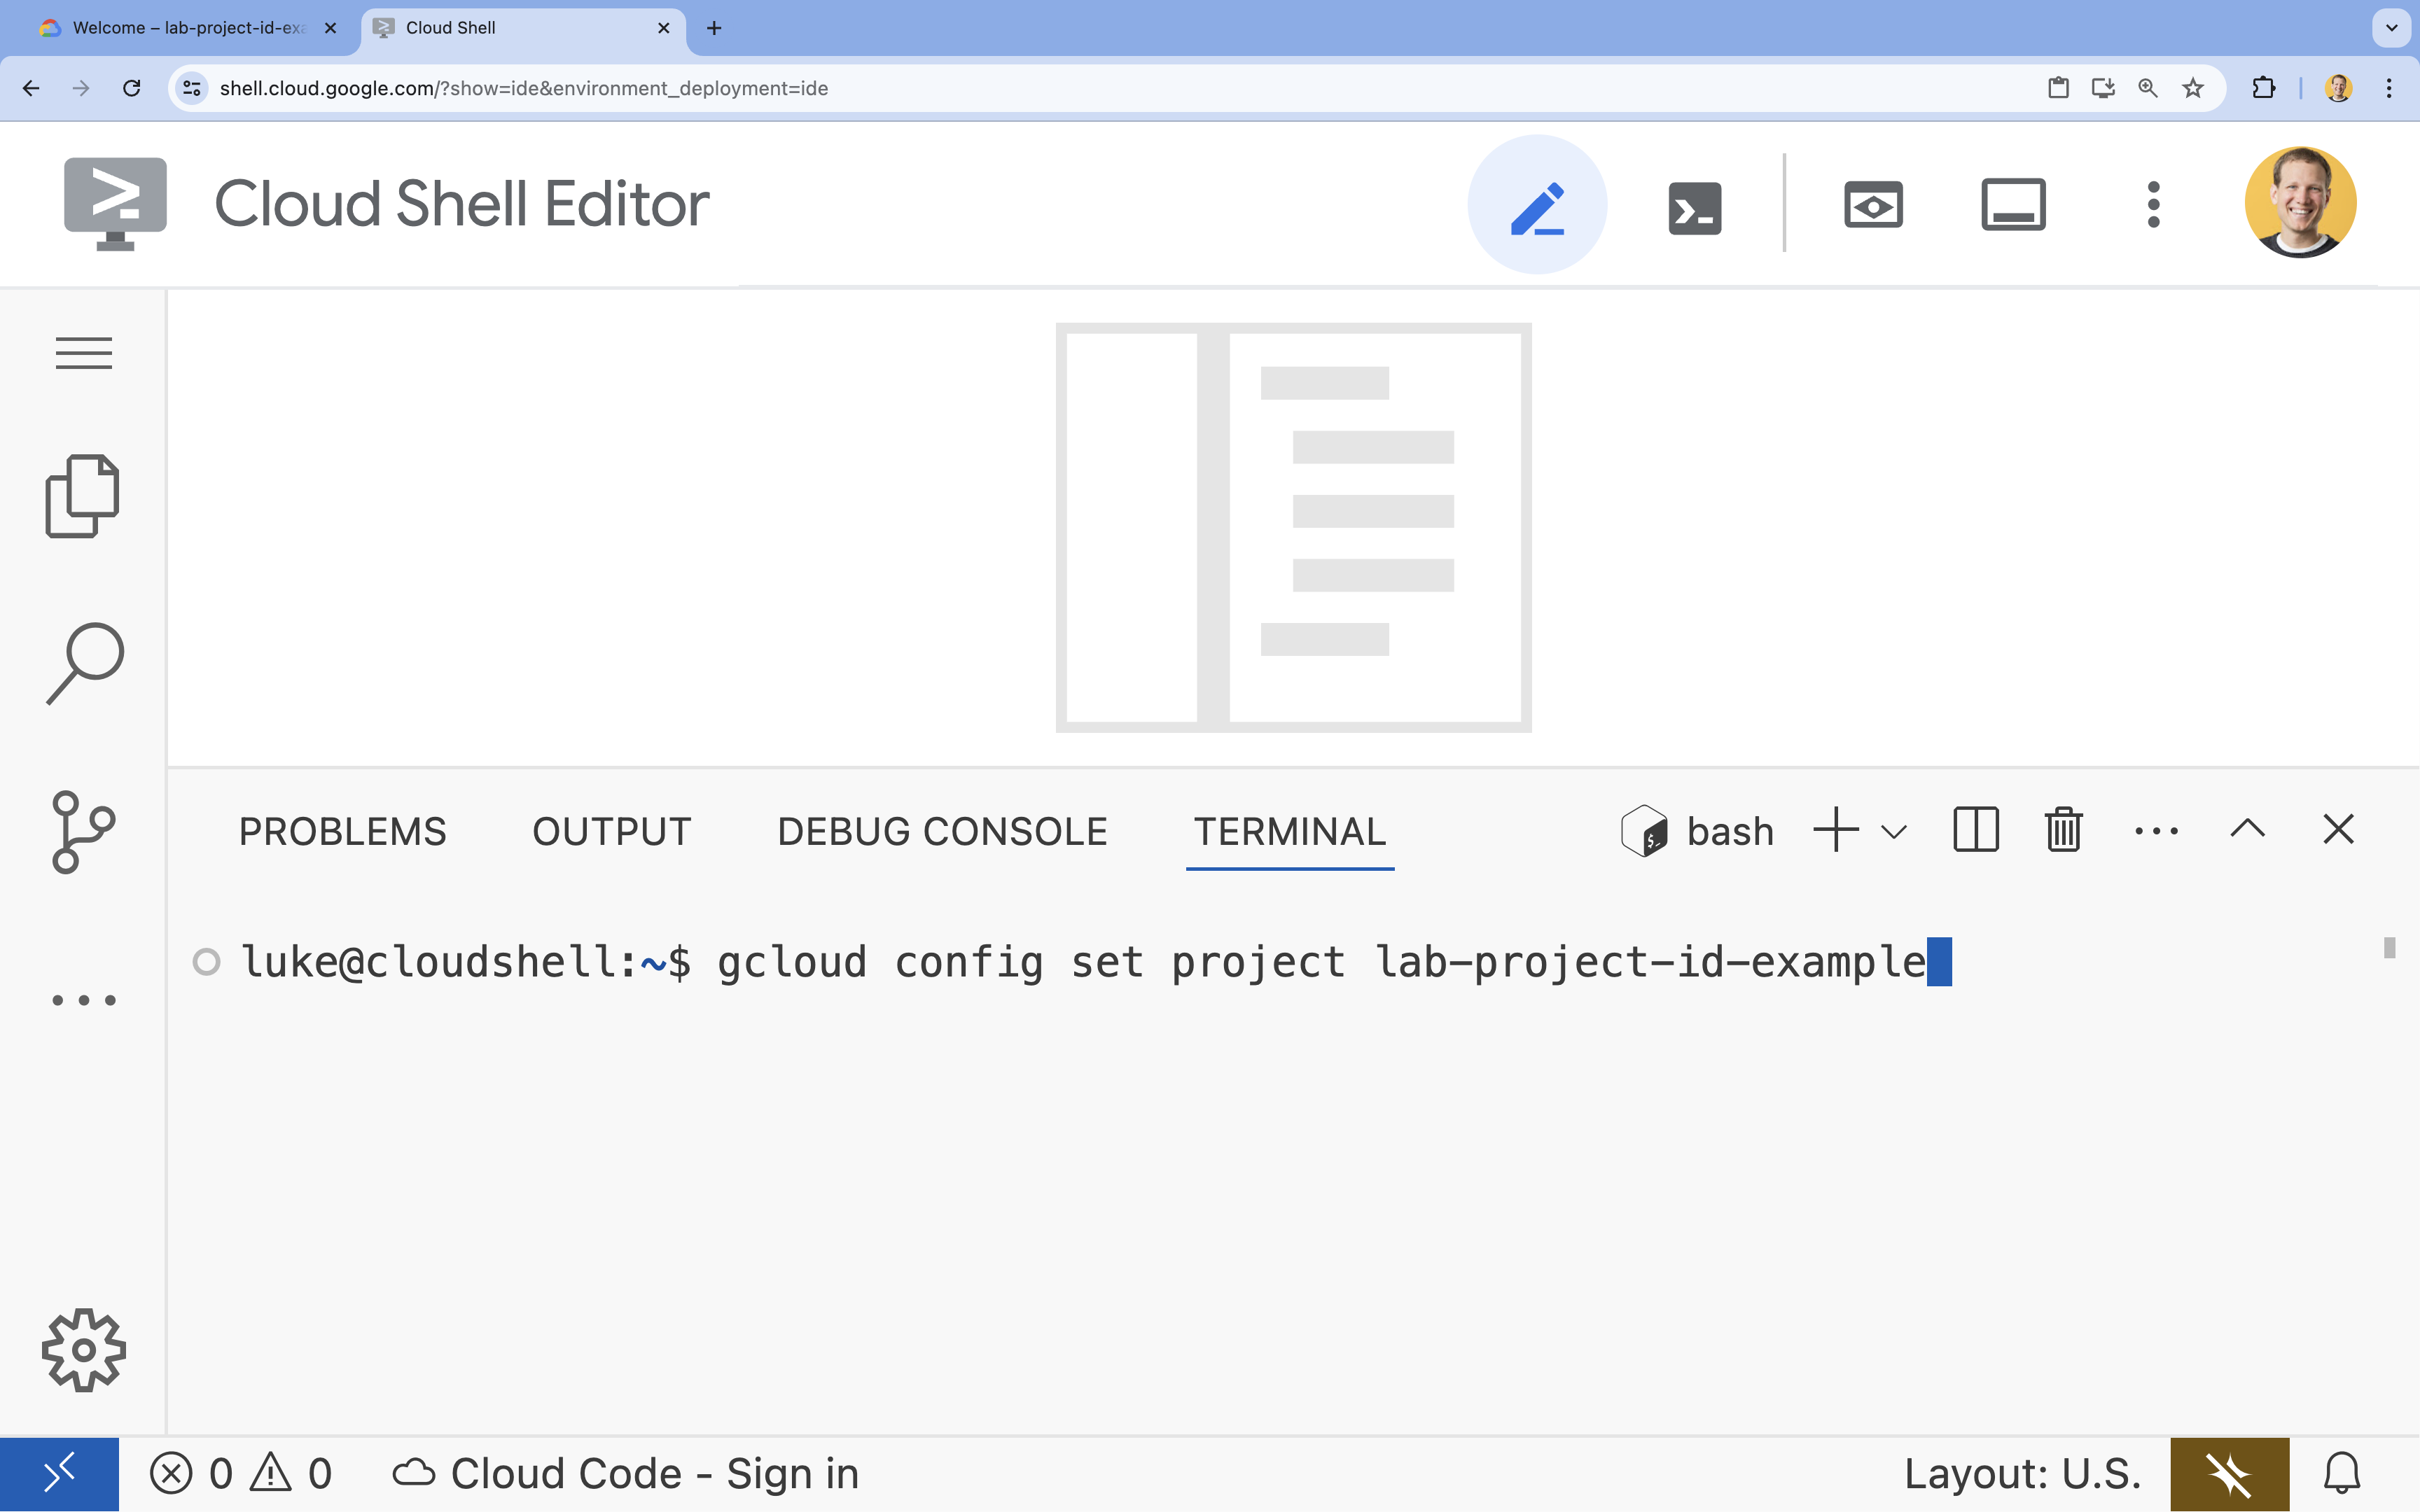
- Example:
- You should see this message:
Updated property [core/project].
4. Enable APIs
To use GKE, Artifact Registry, Cloud Build, and Vertex AI, you need to enable their respective APIs in your Google Cloud project.
- In the terminal, enable the APIs:
gcloud services enable \ container.googleapis.com \ artifactregistry.googleapis.com \ cloudbuild.googleapis.com \ aiplatform.googleapis.comOperation "operations/acf.p2-176675280136-b03ab5e4-3483-4ebf-9655-43dc3b345c63" finished successfully.
Introducing the APIs
- Google Kubernetes Engine API (
container.googleapis.com) allows you to create and manage the GKE cluster that runs your agent. GKE provides a managed environment for deploying, managing, and scaling your containerized applications using Google infrastructure. - Artifact Registry API (
artifactregistry.googleapis.com) provides a secure, private repository to store your agent's container image. It is the evolution of Container Registry and integrates seamlessly with GKE and Cloud Build. - Cloud Build API (
cloudbuild.googleapis.com) is used by thegcloud builds submitcommand to build your container image in the cloud from your Dockerfile. It is a serverless CI/CD platform that executes your builds on Google Cloud infrastructure. - Vertex AI API (
aiplatform.googleapis.com) enables your deployed agent to communicate with Gemini models to perform its core tasks. It provides the unified API for all of Google Cloud's AI services.
5. Prepare your development environment
Create the directory structure
- In the terminal, create the project directory and the necessary subdirectories:
mkdir -p ~/adk_multiagent_systems/workflow_agents cd ~/adk_multiagent_systems - In the terminal, run the following command to open the directory in the Cloud Shell Editor explorer.
cloudshell open-workspace ~/adk_multiagent_systems - The explorer panel on the left will refresh. You should now see the directories you created.
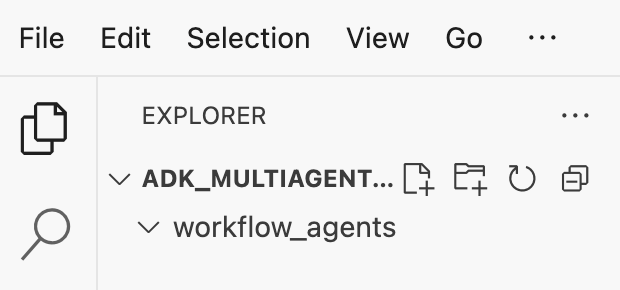
As you create files in the following steps, you will see the files populate in this directory.
Create starter files
You will now create the necessary starter files for the application.
- Create
callback_logging.pyby running the following in the terminal. This file handles logging for observability.cat <<EOF > ~/adk_multiagent_systems/callback_logging.py """ Provides helper functions for observability. Handles formatting and sending agent queries, responses, and tool calls to Google Cloud Logging to aid in monitoring and debugging. """ import logging import google.cloud.logging from google.adk.agents.callback_context import CallbackContext from google.adk.models import LlmResponse, LlmRequest def log_query_to_model(callback_context: CallbackContext, llm_request: LlmRequest): cloud_logging_client = google.cloud.logging.Client() cloud_logging_client.setup_logging() if llm_request.contents and llm_request.contents[-1].role == 'user': if llm_request.contents[-1].parts and "text" in llm_request.contents[-1].parts: last_user_message = llm_request.contents[-1].parts[0].text logging.info(f"[query to {callback_context.agent_name}]: " + last_user_message) def log_model_response(callback_context: CallbackContext, llm_response: LlmResponse): cloud_logging_client = google.cloud.logging.Client() cloud_logging_client.setup_logging() if llm_response.content and llm_response.content.parts: for part in llm_response.content.parts: if part.text: logging.info(f"[response from {callback_context.agent_name}]: " + part.text) elif part.function_call: logging.info(f"[function call from {callback_context.agent_name}]: " + part.function_call.name) EOF - Create
workflow_agents/__init__.pyby running the following in the terminal. This marks the directory as a Python package.cat <<EOF > ~/adk_multiagent_systems/workflow_agents/__init__.py """ Marks the directory as a Python package and exposes the agent module, allowing the ADK to discover and register the agents defined within. """ from . import agent EOF - Create
workflow_agents/agent.pyby running the following in the terminal. This file contains the core logic for your multi-agent team.cat <<EOF > ~/adk_multiagent_systems/workflow_agents/agent.py """ Defines the core multi-agent workflow. Configures individual agents (Researcher, Screenwriter, File Writer), assigns their specific tools, and orchestrates their collaboration using the ADK's SequentialAgent pattern. """ import os import logging import google.cloud.logging from callback_logging import log_query_to_model, log_model_response from dotenv import load_dotenv from google.adk import Agent from google.adk.agents import SequentialAgent, LoopAgent, ParallelAgent from google.adk.tools.tool_context import ToolContext from google.adk.tools.langchain_tool import LangchainTool # import from google.genai import types from langchain_community.tools import WikipediaQueryRun from langchain_community.utilities import WikipediaAPIWrapper cloud_logging_client = google.cloud.logging.Client() cloud_logging_client.setup_logging() load_dotenv() model_name = os.getenv("MODEL") print(model_name) # Tools def append_to_state( tool_context: ToolContext, field: str, response: str ) -> dict[str, str]: """Append new output to an existing state key. Args: field (str): a field name to append to response (str): a string to append to the field Returns: dict[str, str]: {"status": "success"} """ existing_state = tool_context.state.get(field, []) tool_context.state[field] = existing_state + [response] logging.info(f"[Added to {field}] {response}") return {"status": "success"} def write_file( tool_context: ToolContext, directory: str, filename: str, content: str ) -> dict[str, str]: target_path = os.path.join(directory, filename) os.makedirs(os.path.dirname(target_path), exist_ok=True) with open(target_path, "w") as f: f.write(content) return {"status": "success"} # Agents file_writer = Agent( name="file_writer", model=model_name, description="Creates marketing details and saves a pitch document.", instruction=""" PLOT_OUTLINE: { PLOT_OUTLINE? } INSTRUCTIONS: - Create a marketable, contemporary movie title suggestion for the movie described in the PLOT_OUTLINE. If a title has been suggested in PLOT_OUTLINE, you can use it, or replace it with a better one. - Use your 'write_file' tool to create a new txt file with the following arguments: - for a filename, use the movie title - Write to the 'movie_pitches' directory. - For the 'content' to write, extract the following from the PLOT_OUTLINE: - A logline - Synopsis or plot outline """, generate_content_config=types.GenerateContentConfig( temperature=0, ), tools=[write_file], ) screenwriter = Agent( name="screenwriter", model=model_name, description="As a screenwriter, write a logline and plot outline for a biopic about a historical character.", instruction=""" INSTRUCTIONS: Your goal is to write a logline and three-act plot outline for an inspiring movie about a historical character(s) described by the PROMPT: { PROMPT? } - If there is CRITICAL_FEEDBACK, use those thoughts to improve upon the outline. - If there is RESEARCH provided, feel free to use details from it, but you are not required to use it all. - If there is a PLOT_OUTLINE, improve upon it. - Use the 'append_to_state' tool to write your logline and three-act plot outline to the field 'PLOT_OUTLINE'. - Summarize what you focused on in this pass. PLOT_OUTLINE: { PLOT_OUTLINE? } RESEARCH: { research? } CRITICAL_FEEDBACK: { CRITICAL_FEEDBACK? } """, generate_content_config=types.GenerateContentConfig( temperature=0, ), tools=[append_to_state], ) researcher = Agent( name="researcher", model=model_name, description="Answer research questions using Wikipedia.", instruction=""" PROMPT: { PROMPT? } PLOT_OUTLINE: { PLOT_OUTLINE? } CRITICAL_FEEDBACK: { CRITICAL_FEEDBACK? } INSTRUCTIONS: - If there is a CRITICAL_FEEDBACK, use your wikipedia tool to do research to solve those suggestions - If there is a PLOT_OUTLINE, use your wikipedia tool to do research to add more historical detail - If these are empty, use your Wikipedia tool to gather facts about the person in the PROMPT - Use the 'append_to_state' tool to add your research to the field 'research'. - Summarize what you have learned. Now, use your Wikipedia tool to do research. """, generate_content_config=types.GenerateContentConfig( temperature=0, ), tools=[ LangchainTool(tool=WikipediaQueryRun(api_wrapper=WikipediaAPIWrapper())), append_to_state, ], ) film_concept_team = SequentialAgent( name="film_concept_team", description="Write a film plot outline and save it as a text file.", sub_agents=[ researcher, screenwriter, file_writer ], ) root_agent = Agent( name="greeter", model=model_name, description="Guides the user in crafting a movie plot.", instruction=""" - Let the user know you will help them write a pitch for a hit movie. Ask them for a historical figure to create a movie about. - When they respond, use the 'append_to_state' tool to store the user's response in the 'PROMPT' state key and transfer to the 'film_concept_team' agent """, generate_content_config=types.GenerateContentConfig( temperature=0, ), tools=[append_to_state], sub_agents=[film_concept_team], ) EOF
Your file structure should now look like this: 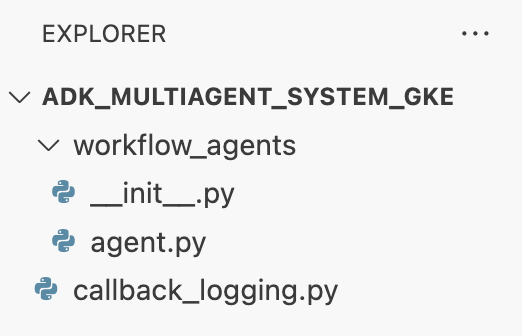
Set up the virtual environment
- In the terminal, create and activate a virtual environment using
uv. This ensures your project dependencies don't conflict with the system Python.uv venv source .venv/bin/activate
Install requirements
- Run the following command in the terminal to create the
requirements.txtfile.cat <<EOF > ~/adk_multiagent_systems/requirements.txt # Lists all Python dependencies required to run the multi-agent system, # including the Google ADK, LangChain community tools, and web server libraries. langchain-community==0.4.1 wikipedia==1.4.0 google-adk==1.27.5 fastapi==0.135.2 uvicorn==0.42.0 EOF - Install the required packages into your virtual environment in the terminal.
uv pip install -r requirements.txt
Set up environment variables
- Use the following command in the terminal to create the
.envfile, automatically inserting your project ID and region.cat <<EOF > ~/adk_multiagent_systems/.env GOOGLE_CLOUD_PROJECT="$(gcloud config get-value project)" GOOGLE_CLOUD_PROJECT_NUMBER="$(gcloud projects describe $(gcloud config get-value project) --format='value(projectNumber)')" GOOGLE_CLOUD_LOCATION="us-central1" GOOGLE_GENAI_USE_VERTEXAI=true MODEL="gemini-2.5-flash" EOF - In the terminal, load the variables into your shell session.
source .env
Recap
In this section, you established the local foundation for your project:
- Created the directory structure and necessary agent starter files (
agent.py,callback_logging.py,requirements.txt). - Isolated your dependencies using a virtual environment (
uv). - Configured environment variables (
.env) to store project-specific details like your Project ID and Region.
6. Explore the agent file
You have set up the source code for the lab, including a pre-written, multi-agent system. Before you deploy the application, it's helpful to understand how the agents are defined. The core agent logic resides in workflow_agents/agent.py.
- In the Cloud Shell Editor, use the file explorer on the left to navigate to
adk_multiagent_systems/workflow_agents/and open theagent.pyfile. - Take a moment to look through the file. You don't need to understand every line, but notice the high-level structure:
- Individual agents: The file defines three distinct
Agentobjects:researcher,screenwriter, andfile_writer. Each agent is given a specificinstruction(its prompt) and a list oftoolsit is allowed to use (like theWikipediaQueryRuntool or a customwrite_filetool). - Agent composition: The individual agents are chained together into a
SequentialAgentcalledfilm_concept_team. This tells the ADK to run these agents one after another, passing the state from one to the next. - The root agent: A
root_agent(named "greeter") is defined to handle the initial user interaction. When the user provides a prompt, this agent saves it to the application's state and then transfers control to thefilm_concept_teamworkflow.
- Individual agents: The file defines three distinct
Understanding this structure helps clarify what you are about to deploy: not just a single agent, but a coordinated team of specialized agents orchestrated by the ADK.
7. Create a GKE Autopilot cluster
With your environment prepared, the next step is to provision the infrastructure where your agent application will run. You will create a GKE Autopilot cluster, which serves as the foundation for your deployment. We use Autopilot mode because it handles the complex management of the cluster's underlying nodes, scaling, and security, allowing you to focus purely on deploying your application.
- In the terminal, create a new GKE Autopilot cluster named
adk-cluster.gcloud container clusters create-auto adk-cluster \ --location=$GOOGLE_CLOUD_LOCATION \ --project=$GOOGLE_CLOUD_PROJECT - Once the cluster is created, configure
kubectlto connect to it by running this in the terminal:gcloud container clusters get-credentials adk-cluster \ --location=$GOOGLE_CLOUD_LOCATION \ --project=$GOOGLE_CLOUD_PROJECT~/.kube/config). From this point on, thekubectlcommand-line tool will be authenticated and directed to communicate with youradk-cluster.
Recap
In this section, you provisioned the infrastructure:
- Created a fully managed GKE Autopilot cluster using
gcloud. - Configured your local
kubectltool to authenticate and communicate with the new cluster.
8. Containerize and push the application
Your agent's code currently exists only in your Cloud Shell environment. To run it on GKE, you must first package it into a container image. A container image is a static, portable file that bundles your application's code with all its dependencies. When you run this image, it becomes a live container.
This process involves three key steps:
- Create an entry point: Define a
main.pyfile to turn your agent logic into a runnable web server. - Define the container image: Create a Dockerfile that acts as a blueprint for building your container image.
- Build and push: Use Cloud Build to execute the Dockerfile, creating the container image and pushing it to Google Artifact Registry, a secure repository for your images.
Prepare the application for deployment
Your ADK agent needs a web server to receive requests. The main.py file will serve as this entry point, using the FastAPI framework to expose your agent's functionality over HTTP.
- In the root of the
adk_multiagent_systemsdirectory in the terminal, create a new file calledmain.py.cat <<EOF > ~/adk_multiagent_systems/main.py """ Serves as the application entry point. Initializes the FastAPI web server, discovers the agents defined in the workflow directory, and exposes them via HTTP endpoints for interaction. """ import os import uvicorn from fastapi import FastAPI from google.adk.cli.fast_api import get_fast_api_app # Get the directory where main.py is located AGENT_DIR = os.path.dirname(os.path.abspath(__file__)) # Configure the session service (e.g., SQLite for local storage) SESSION_SERVICE_URI = "sqlite:///./sessions.db" # Configure CORS to allow requests from various origins for this lab ALLOWED_ORIGINS = ["http://localhost", "http://localhost:8080", "*"] # Enable the ADK's built-in web interface SERVE_WEB_INTERFACE = True # Call the ADK function to discover agents and create the FastAPI app app: FastAPI = get_fast_api_app( agents_dir=AGENT_DIR, session_service_uri=SESSION_SERVICE_URI, allow_origins=ALLOWED_ORIGINS, web=SERVE_WEB_INTERFACE, ) # You can add more FastAPI routes or configurations below if needed # Example: # @app.get("/hello") # async def read_root(): # return {"Hello": "World"} if __name__ == "__main__": # Get the port from the PORT environment variable provided by the container runtime # Run the Uvicorn server, listening on all available network interfaces (0.0.0.0) uvicorn.run(app, host="0.0.0.0", port=int(os.environ.get("PORT", 8080))) EOFuvicornserver runs this application, listening on host0.0.0.0to accept connections from any IP address and on the port specified by thePORTenvironment variable, which we will set later in our Kubernetes manifest.
At this point, your file structure as seen in the explorer panel in the Cloud Shell Editor should look like this: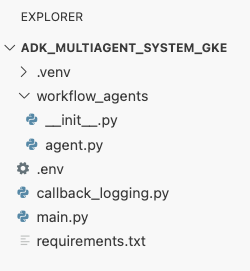
Containerize the ADK agent with Docker
To deploy our application to GKE, we first need to package it into a container image, which bundles our application's code with all the libraries and dependencies it needs to run. We will use Docker to create this container image.
- In the root of the
adk_multiagent_systemsdirectory in the terminal, create a new file calledDockerfile.cat <<'EOF' > ~/adk_multiagent_systems/Dockerfile # Defines the blueprint for the container image. Installs dependencies, # sets up a secure non-root user, and specifies the startup command to run the # agent web server. # Use an official lightweight Python image as the base FROM python:3.13-slim # Set the working directory inside the container WORKDIR /app # Create a non-root user for security best practices RUN adduser --disabled-password --gecos "" myuser # Copy and install dependencies first to leverage Docker's layer caching COPY requirements.txt . RUN pip install --no-cache-dir -r requirements.txt # Copy all application code into the container COPY . . # Create the directory where the agent will write files at runtime # The -p flag ensures the command doesn't fail if the directory already exists RUN mkdir -p movie_pitches # Change ownership of EVERYTHING in /app to the non-root user # Without this, the running agent would be denied permission to write files. RUN chown -R myuser:myuser /app # Switch the active user from root to the non-root user USER myuser # Add the user's local binary directory to the system's PATH ENV PATH="/home/myuser/.local/bin:$PATH" # Define the command to run when the container starts CMD ["sh", "-c", "uvicorn main:app --host 0.0.0.0 --port $PORT"] EOF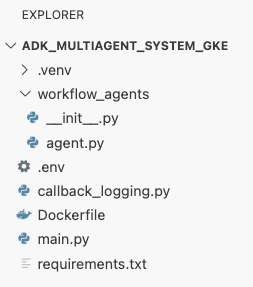
Build and push the container image to Artifact Registry
Now that you have a Dockerfile, you will use Cloud Build to build the image and push it to Artifact Registry, a secure, private registry integrated with Google Cloud services. GKE will pull the image from this registry to run your application.
- In the terminal, create a new Artifact Registry repository to store your container image.
gcloud artifacts repositories create adk-repo \ --repository-format=docker \ --location=$GOOGLE_CLOUD_LOCATION \ --description="ADK repository" - In the terminal, use
gcloud builds submitto build your container image and push it to the repository.gcloud builds submit \ --tag $GOOGLE_CLOUD_LOCATION-docker.pkg.dev/$GOOGLE_CLOUD_PROJECT/adk-repo/adk-agent:latest \ --project=$GOOGLE_CLOUD_PROJECT \ .Dockerfile. It builds the image in the cloud, tags it with the address of your Artifact Registry repository, and pushes it there automatically. - From the terminal, verify the image is built:
gcloud artifacts docker images list \
  $GOOGLE_CLOUD_LOCATION-docker.pkg.dev/$GOOGLE_CLOUD_PROJECT/adk-repo \
  --project=$GOOGLE_CLOUD_PROJECT
Recap
In this section, you packaged your code for deployment:
- Created a
main.pyentry point to wrap your agents in a FastAPI web server. - Defined a
Dockerfileto bundle your code and dependencies into a portable image. - Used Cloud Build to build the image and push it to a secure Artifact Registry repository.
9. Create Kubernetes manifests
Now that your container image is built and stored in Artifact Registry, you need to instruct GKE on how to run it. This involves two main activities:
- Configuring permissions: You will create a dedicated identity for your agent within the cluster and grant it secure access to the Google Cloud APIs it needs (specifically, Vertex AI).
- Defining the application state: You will write a Kubernetes manifest file, a YAML document that declaratively defines everything your application needs to run, including the container image, environment variables, and how it should be exposed to the network.
Configure Kubernetes Service Account for Vertex AI
Your agent needs permission to communicate with the Vertex AI API to access Gemini models. The most secure, recommended method for granting this permission in GKE is Workload Identity. Workload Identity allows you to link a Kubernetes-native identity (a Kubernetes Service Account) with a Google Cloud identity (an IAM Service Account), completely avoiding the need to download, manage, and store static JSON keys.
- In the terminal, create the Kubernetes Service Account (
adk-agent-sa). This creates an identity for your agent inside the GKE cluster that your pods can use.kubectl create serviceaccount adk-agent-sa - In the terminal, link your Kubernetes Service Account to Google Cloud IAM by creating a policy binding. This command grants the
aiplatform.userrole to youradk-agent-sa, allowing it to securely invoke the Vertex AI API.gcloud projects add-iam-policy-binding projects/${GOOGLE_CLOUD_PROJECT} \ --role=roles/aiplatform.user \ --member=principal://iam.googleapis.com/projects/${GOOGLE_CLOUD_PROJECT_NUMBER}/locations/global/workloadIdentityPools/${GOOGLE_CLOUD_PROJECT}.svc.id.goog/subject/ns/default/sa/adk-agent-sa \ --condition=None
Create the Kubernetes manifest files
Kubernetes uses YAML manifest files to define the desired state of your application. You will create a deployment.yaml file containing two essential Kubernetes objects: a Deployment and a Service.
- From the terminal, generate the
deployment.yamlfile.cat <<EOF > ~/adk_multiagent_systems/deployment.yaml # Defines the Kubernetes resources required to deploy the application to GKE. # Includes the Deployment (to run the container pods) and the Service # (to expose the application via a Load Balancer). apiVersion: apps/v1 kind: Deployment metadata: name: adk-agent spec: replicas: 1 selector: matchLabels: app: adk-agent template: metadata: labels: app: adk-agent spec: # Assign the Kubernetes Service Account for Workload Identity serviceAccountName: adk-agent-sa containers: - name: adk-agent imagePullPolicy: Always # The path to the container image in Artifact Registry image: ${GOOGLE_CLOUD_LOCATION}-docker.pkg.dev/${GOOGLE_CLOUD_PROJECT}/adk-repo/adk-agent:latest # Define the resources for GKE Autopilot to provision resources: limits: memory: "1Gi" cpu: "1000m" ephemeral-storage: "512Mi" requests: memory: "1Gi" cpu: "1000m" ephemeral-storage: "512Mi" ports: - containerPort: 8080 # Environment variables passed to the application env: - name: PORT value: "8080" - name: GOOGLE_CLOUD_PROJECT value: ${GOOGLE_CLOUD_PROJECT} - name: GOOGLE_CLOUD_LOCATION value: ${GOOGLE_CLOUD_LOCATION} - name: GOOGLE_GENAI_USE_VERTEXAI value: "true" - name: MODEL value: "gemini-2.5-flash" --- apiVersion: v1 kind: Service metadata: name: adk-agent spec: # Create a public-facing Network Load Balancer with an external IP type: LoadBalancer ports: - port: 80 targetPort: 8080 selector: app: adk-agent EOF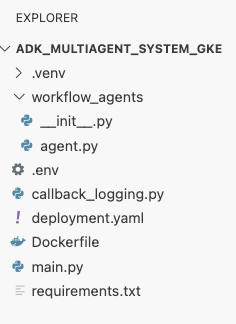
Recap
In this section, you defined the security and deployment configuration:
- Created a Kubernetes Service Account and linked it to Google Cloud IAM using Workload Identity, allowing your pods to securely access Vertex AI without managing keys.
- Generated a
deployment.yamlfile that defines the Deployment (how to run the pods) and the Service (how to expose them via a Load Balancer).
10. Deploy the application to GKE
With your manifest file defined and your container image pushed to Artifact Registry, you are now ready to deploy your application. In this task, you will use kubectl to apply your configuration to the GKE cluster and then monitor the status to ensure your agent starts up correctly.
- In your terminal, apply the
deployment.yamlmanifest to your cluster.kubectl apply -f deployment.yamlkubectl applycommand sends yourdeployment.yamlfile to the Kubernetes API server. The server then reads your configuration and orchestrates the creation of the Deployment and Service objects. - In the terminal, check the status of your deployment in real-time. Wait for the pods to be in the
Runningstate.kubectl get pods -l=app=adk-agent --watch- Pending: The pod has been accepted by the cluster, but the container hasn't been created yet.
- Container creating: GKE is pulling your container image from Artifact Registry and starting the container.
- Running: Success! The container is running, and your agent application is live.
- Once the status shows
Running, press CTRL+C in the terminal to stop the watch command and return to the command prompt.
Recap
In this section, you launched the workload:
- Used
kubectlapply to send your manifest to the cluster. - Monitored the Pod lifecycle (Pending -> ContainerCreating -> Running) to ensure the application started successfully.
11. Interact with the agent
Your ADK agent is now running live on GKE and is exposed to the internet via a public Load Balancer. You will connect to the agent's web interface to interact with it and verify that the entire system is working correctly.
Find the external IP Address of your service
To access the agent, you first need to get the public IP address that GKE provisioned for your Service.
- In the terminal, run the following command to get the details of your service.
kubectl get service adk-agent - Look for the value in the
EXTERNAL-IPcolumn. It may take a minute or two for the IP address to be assigned after you first deploy the service. If it shows aspending, wait a minute and run the command again. The output will look similar to this:NAME TYPE CLUSTER-IP EXTERNAL-IP PORT(S) AGE adk-agent-service LoadBalancer 10.120.12.234 34.123.45.67 80:31234/TCP 5mEXTERNAL-IP(e.g., 34.123.45.67) is the public entry point to your agent.
Test the deployed agent
Now you can use the public IP address to access the ADK's built-in web UI directly from your browser.
- Copy the external IP address (
EXTERNAL-IP) from the terminal. - Open a new tab in your web browser and type in
http://[EXTERNAL-IP], replacing[EXTERNAL-IP]with the IP address you copied. - You should now see the ADK web interface.
- Ensure workflow_agents is selected in the agent drop-down menu.
- Toggle on Token Streaming.
- Type
helloand hit enter to begin a new conversation. - Observe the result. The agent should respond quickly with its greeting: "I can help you write a pitch for a hit movie. What historical figure would you like to make a movie about?"
- When prompted to choose a historical character, choose one that interests you. Some ideas include:
the most successful female pirate in historythe woman who invented the first computer compilera legendary lawman of the American Wild West
Recap
In this section, you verified the deployment:
- Retrieved the External IP address allocated by the LoadBalancer.
- Accessed the ADK Web UI via a browser to confirm the multi-agent system is responsive and functional.
12. Configure autoscaling
A key challenge in production is handling unpredictable user traffic. Hard-coding a fixed number of replicas, as you did in the previous task, means you either overpay for idle resources or risk poor performance during traffic spikes. GKE solves this with automatic scaling.
You will configure a HorizontalPodAutoscaler (HPA), a Kubernetes controller that automatically adjusts the number of running pods in your Deployment based on real-time CPU utilization.
- In the Cloud Shell Editor terminal, create a new
hpa.yamlfile in the root of theadk_multiagent_systemsdirectory.cloudshell edit ~/adk_multiagent_systems/hpa.yaml - Add the following content to the new
hpa.yamlfile:# Configures the HorizontalPodAutoscaler (HPA) to automatically scale # the number of running agent pods up or down based on CPU utilization # to handle varying traffic loads. apiVersion: autoscaling/v1 kind: HorizontalPodAutoscaler metadata: name: adk-agent-hpa spec: scaleTargetRef: apiVersion: apps/v1 kind: Deployment name: adk-agent minReplicas: 1 maxReplicas: 5 targetCPUUtilizationPercentage: 50adk-agentDeployment. It ensures there is always at least 1 pod running, sets a maximum of 5 pods, and will add/remove replicas to keep average CPU utilization around 50%.At this point, your file structure as seen in the explorer panel in the Cloud Shell Editor should look like this: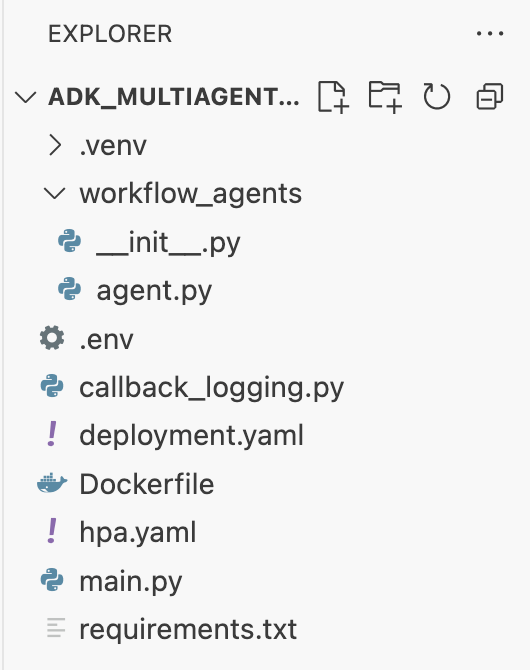
- Apply the HPA to your cluster by pasting this into the terminal.
kubectl apply -f hpa.yaml
Verify the autoscaler
The HPA is now active and monitoring your deployment. You can inspect its status to see it in action.
- Run the following command in the terminal to get the status of your HPA.
kubectl get hpa adk-agent-hpaNAME REFERENCE TARGETS MINPODS MAXPODS REPLICAS AGE adk-agent-hpa Deployment/adk-agent 0%/50% 1 5 1 30s
Recap
In this section, you optimized for production traffic:
- Created an
hpa.yamlmanifest to define scaling rules. - Deployed the HorizontalPodAutoscaler (HPA) to automatically adjust the number of pod replicas based on CPU utilization.
13. Preparing for production
Note: The following sections are for informational purposes only and do not contain further steps to execute. They are designed to provide context and best practices for taking your application to production.
Tune performance with resource allocation
In GKE Autopilot, you control the amount of CPU and memory provisioned for your application by specifying resource requests in your deployment.yaml.
If you find your agent is slow or crashing due to a lack of memory, you can increase its resource allocation by editing the resources block in your deployment.yaml and reapplying the file with kubectl apply.
For example, to double the memory:
# In deployment.yaml
# ...
        resources:
          requests:
            memory: "2Gi"  # Increased from 1Gi
            cpu: "1000m"
# ...
Automate your workflow with CI/CD
In this lab, you ran commands manually. The professional practice is to create a CI/CD (Continuous Integration/Continuous Deployment) pipeline. By connecting a source code repository (like GitHub) to a Cloud Build trigger, you can automate the entire deployment.
With a pipeline, every time you push a code change, Cloud Build can automatically:
- Build the new container image.
- Push the image to Artifact Registry.
- Apply the updated Kubernetes manifests to your GKE cluster.
Manage secrets securely
In this lab, you stored configuration in a .env file and passed it to your application. This is convenient for development but is not secure for sensitive data like API keys. The recommended best practice is to use Secret Manager to securely store secrets.
GKE has a native integration with Secret Manager that allows you to mount secrets directly into your pods as either environment variables or files, without them ever being checked into your source code.
Here is the Clean up resources section you requested, inserted just before the Conclusion section.
14. Clean up resources
To avoid incurring charges to your Google Cloud account for the resources used in this tutorial, either delete the project that contains the resources, or keep the project and delete the individual resources.
Delete the GKE cluster
The GKE cluster is the primary cost driver in this lab. Deleting it stops the compute charges.
- In the terminal, run the following command:
gcloud container clusters delete adk-cluster \
  --location=$GOOGLE_CLOUD_LOCATION \
  --quiet
Delete the Artifact Registry repository
Container images stored in Artifact Registry incur storage costs.
- In the terminal, run the following command:
gcloud artifacts repositories delete adk-repo \
  --location=$GOOGLE_CLOUD_LOCATION \
  --quiet
Delete the project (Optional)
If you created a new project specifically for this lab and don't plan to use it again, the easiest way to clean up is to delete the entire project.
- In the terminal, run the following command (replace
[YOUR_PROJECT_ID]with your actual project ID):gcloud projects delete [YOUR_PROJECT_ID]
15. Conclusion
Congratulations! You have successfully deployed a multi-agent ADK application to a production-grade GKE cluster. This is a significant achievement that covers the core lifecycle of a modern cloud-native application, providing you with a solid foundation for deploying your own complex agentic systems.
Recap
In this lab, you've learned to:
- Provision a GKE Autopilot cluster.
- Build a container image with a
Dockerfileand push it to Artifact Registry - Securely connect to Google Cloud APIs using Workload Identity.
- Write Kubernetes manifests for a Deployment and Service.
- Expose an application to the internet with a LoadBalancer.
- Configure autoscaling with a HorizontalPodAutoscaler (HPA).