
1. 簡介
總覽
本實驗室將協助您跨越重要鴻溝,從開發強大的多代理系統,到部署系統以供實際使用。雖然在本地建構代理是個好的開始,但正式環境應用程式需要可擴充、可靠且安全的平台。
在本實驗室中,您會使用 Google Agent Development Kit (ADK) 建構多代理系統,並將其部署至 Google Kubernetes Engine (GKE) 的正式環境。
電影概念團隊代理
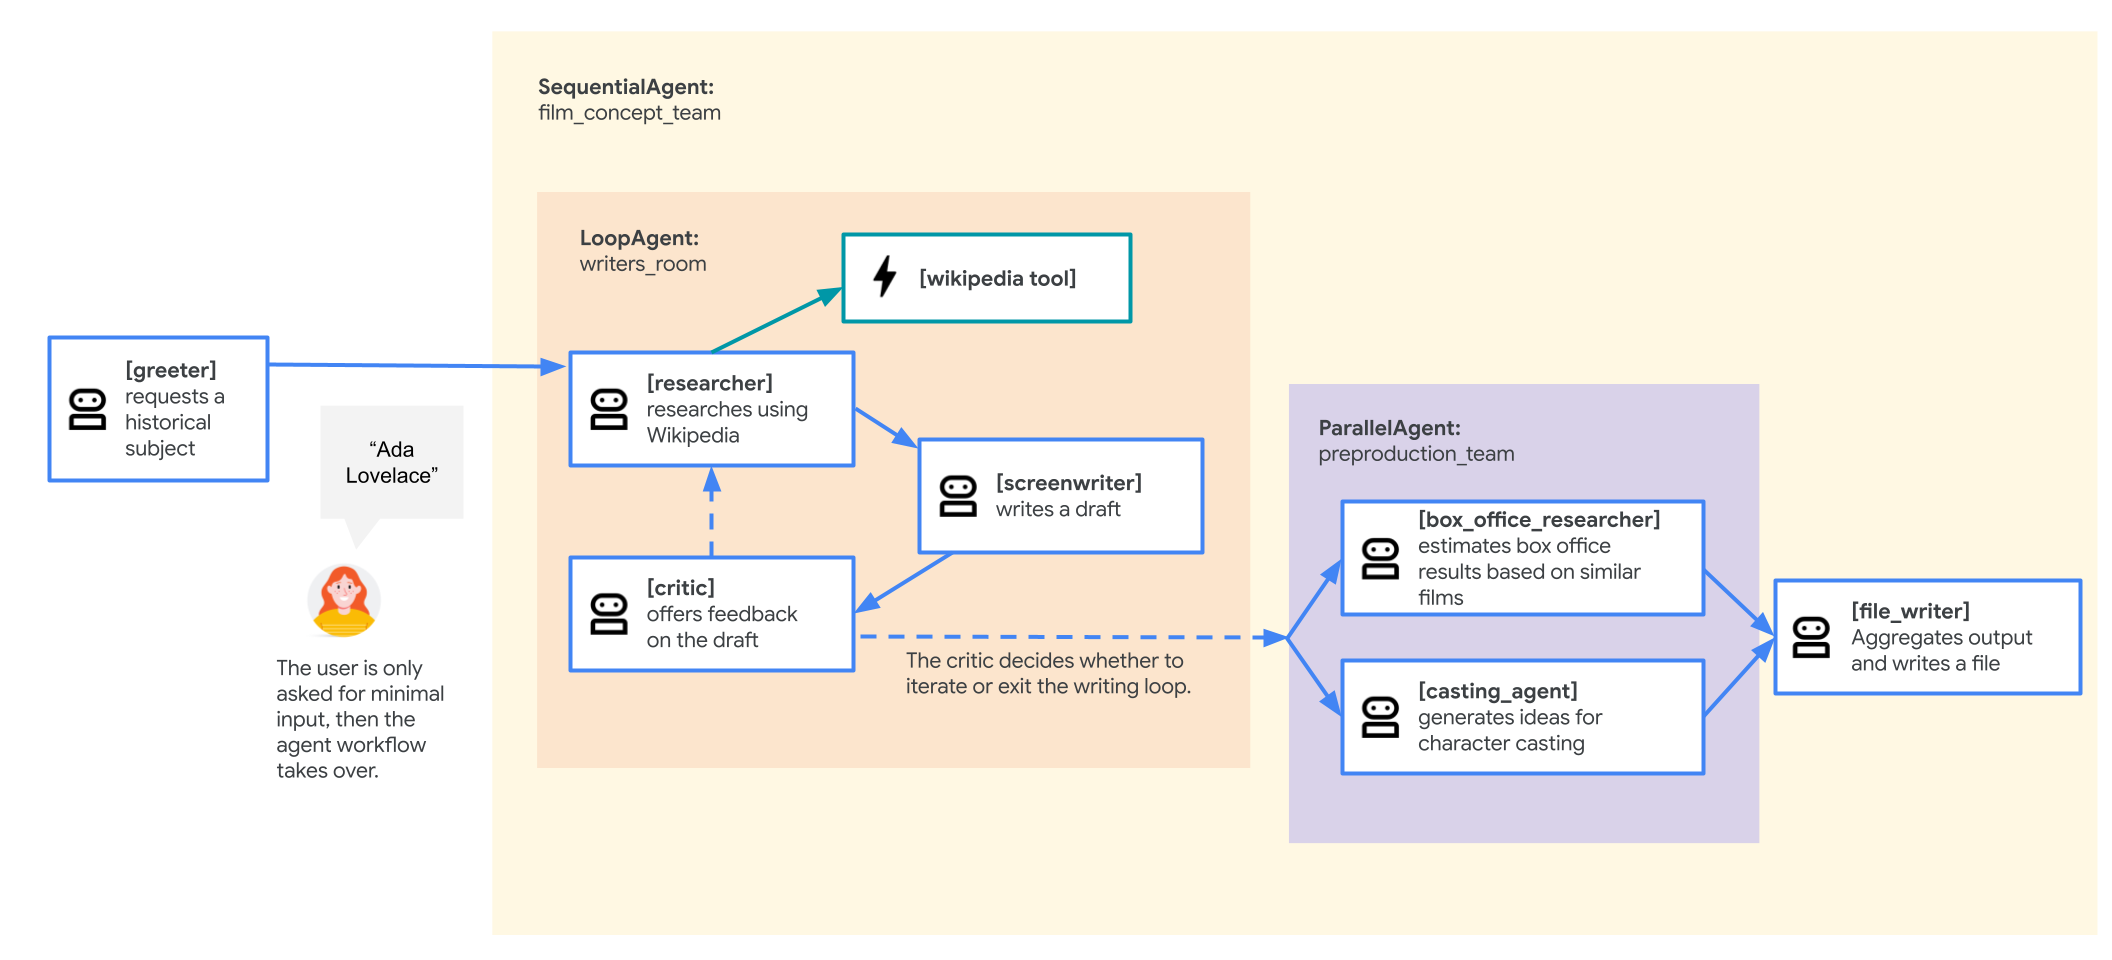
本實驗室使用的範例應用程式是「電影概念團隊」,由多個協作代理組成:研究人員、編劇和檔案撰寫者。這些代理程式會共同協助使用者集思廣益,並為有關歷史人物的電影提案擬定大綱。
為何要部署至 GKE?
如要讓代理因應正式環境的需求,您需要一個專為擴充性、安全性和成本效益而建構的平台。Google Kubernetes Engine (GKE) 提供強大且彈性的基礎,可執行容器化應用程式。
這項功能可為正式環境工作負載帶來多項優勢:
- 自動調整資源配置和效能:使用 HorizontalPodAutoscaler (HPA) 處理無法預測的流量,系統會根據負載自動新增或移除代理程式副本。如要處理要求較高的 AI 工作負載,可以連結 GPU 和 TPU 等硬體加速器。
- 經濟實惠的資源管理:透過 GKE Autopilot 節省成本,這項服務會自動管理基礎架構,因此您只需支付應用程式要求的資源費用。
- 整合式安全性和可觀測性:使用 Workload Identity 安全地連線至其他 Google Cloud 服務,不必管理及儲存服務帳戶金鑰。所有應用程式記錄都會自動串流至 Cloud Logging,方便集中監控及偵錯。
- 控管與可攜性:使用開放原始碼 Kubernetes,避免受制於單一供應商。您的應用程式可攜式,且可在任何 Kubernetes 叢集 (地端部署或在其他雲端中) 上執行。
課程內容
在本實驗室中,您將瞭解如何執行下列工作:
- 佈建 GKE Autopilot 叢集。
- 使用 Dockerfile 將應用程式容器化,並將映像檔推送至 Artifact Registry。
- 使用 Workload Identity,安全地將應用程式連線至 Google Cloud API。
- 為 Deployment 和 Service 編寫及套用 Kubernetes 資訊清單。
- 使用 LoadBalancer 將應用程式公開發布到網際網路。
- 使用 HorizontalPodAutoscaler (HPA) 設定自動調度。
2. 專案設定
Google 帳戶
如果沒有個人 Google 帳戶,請建立 Google 帳戶。
請使用個人帳戶,而非公司或學校帳戶。
登入 Google Cloud 控制台
使用個人 Google 帳戶登入 Google Cloud 控制台。
啟用計費功能
設定個人帳單帳戶
如果使用 Google Cloud 抵免額設定計費,可以略過這個步驟。
如要設定個人帳單帳戶,請前往這裡在 Cloud 控制台中啟用帳單。
注意事項:
- 完成本實驗室的 Cloud 資源費用應不到 $1 美元。
- 您可以按照本實驗室結尾的步驟刪除資源,以免產生後續費用。
- 新使用者可獲得價值 $300 美元的免費試用期。
建立專案 (選用)
如果沒有要用於本實驗室的現有專案,請在這裡建立新專案。
3. 開啟 Cloud Shell 編輯器
- 按一下這個連結,直接前往 Cloud Shell 編輯器
- 如果系統在今天任何時間提示您授權,請點選「授權」繼續操作。
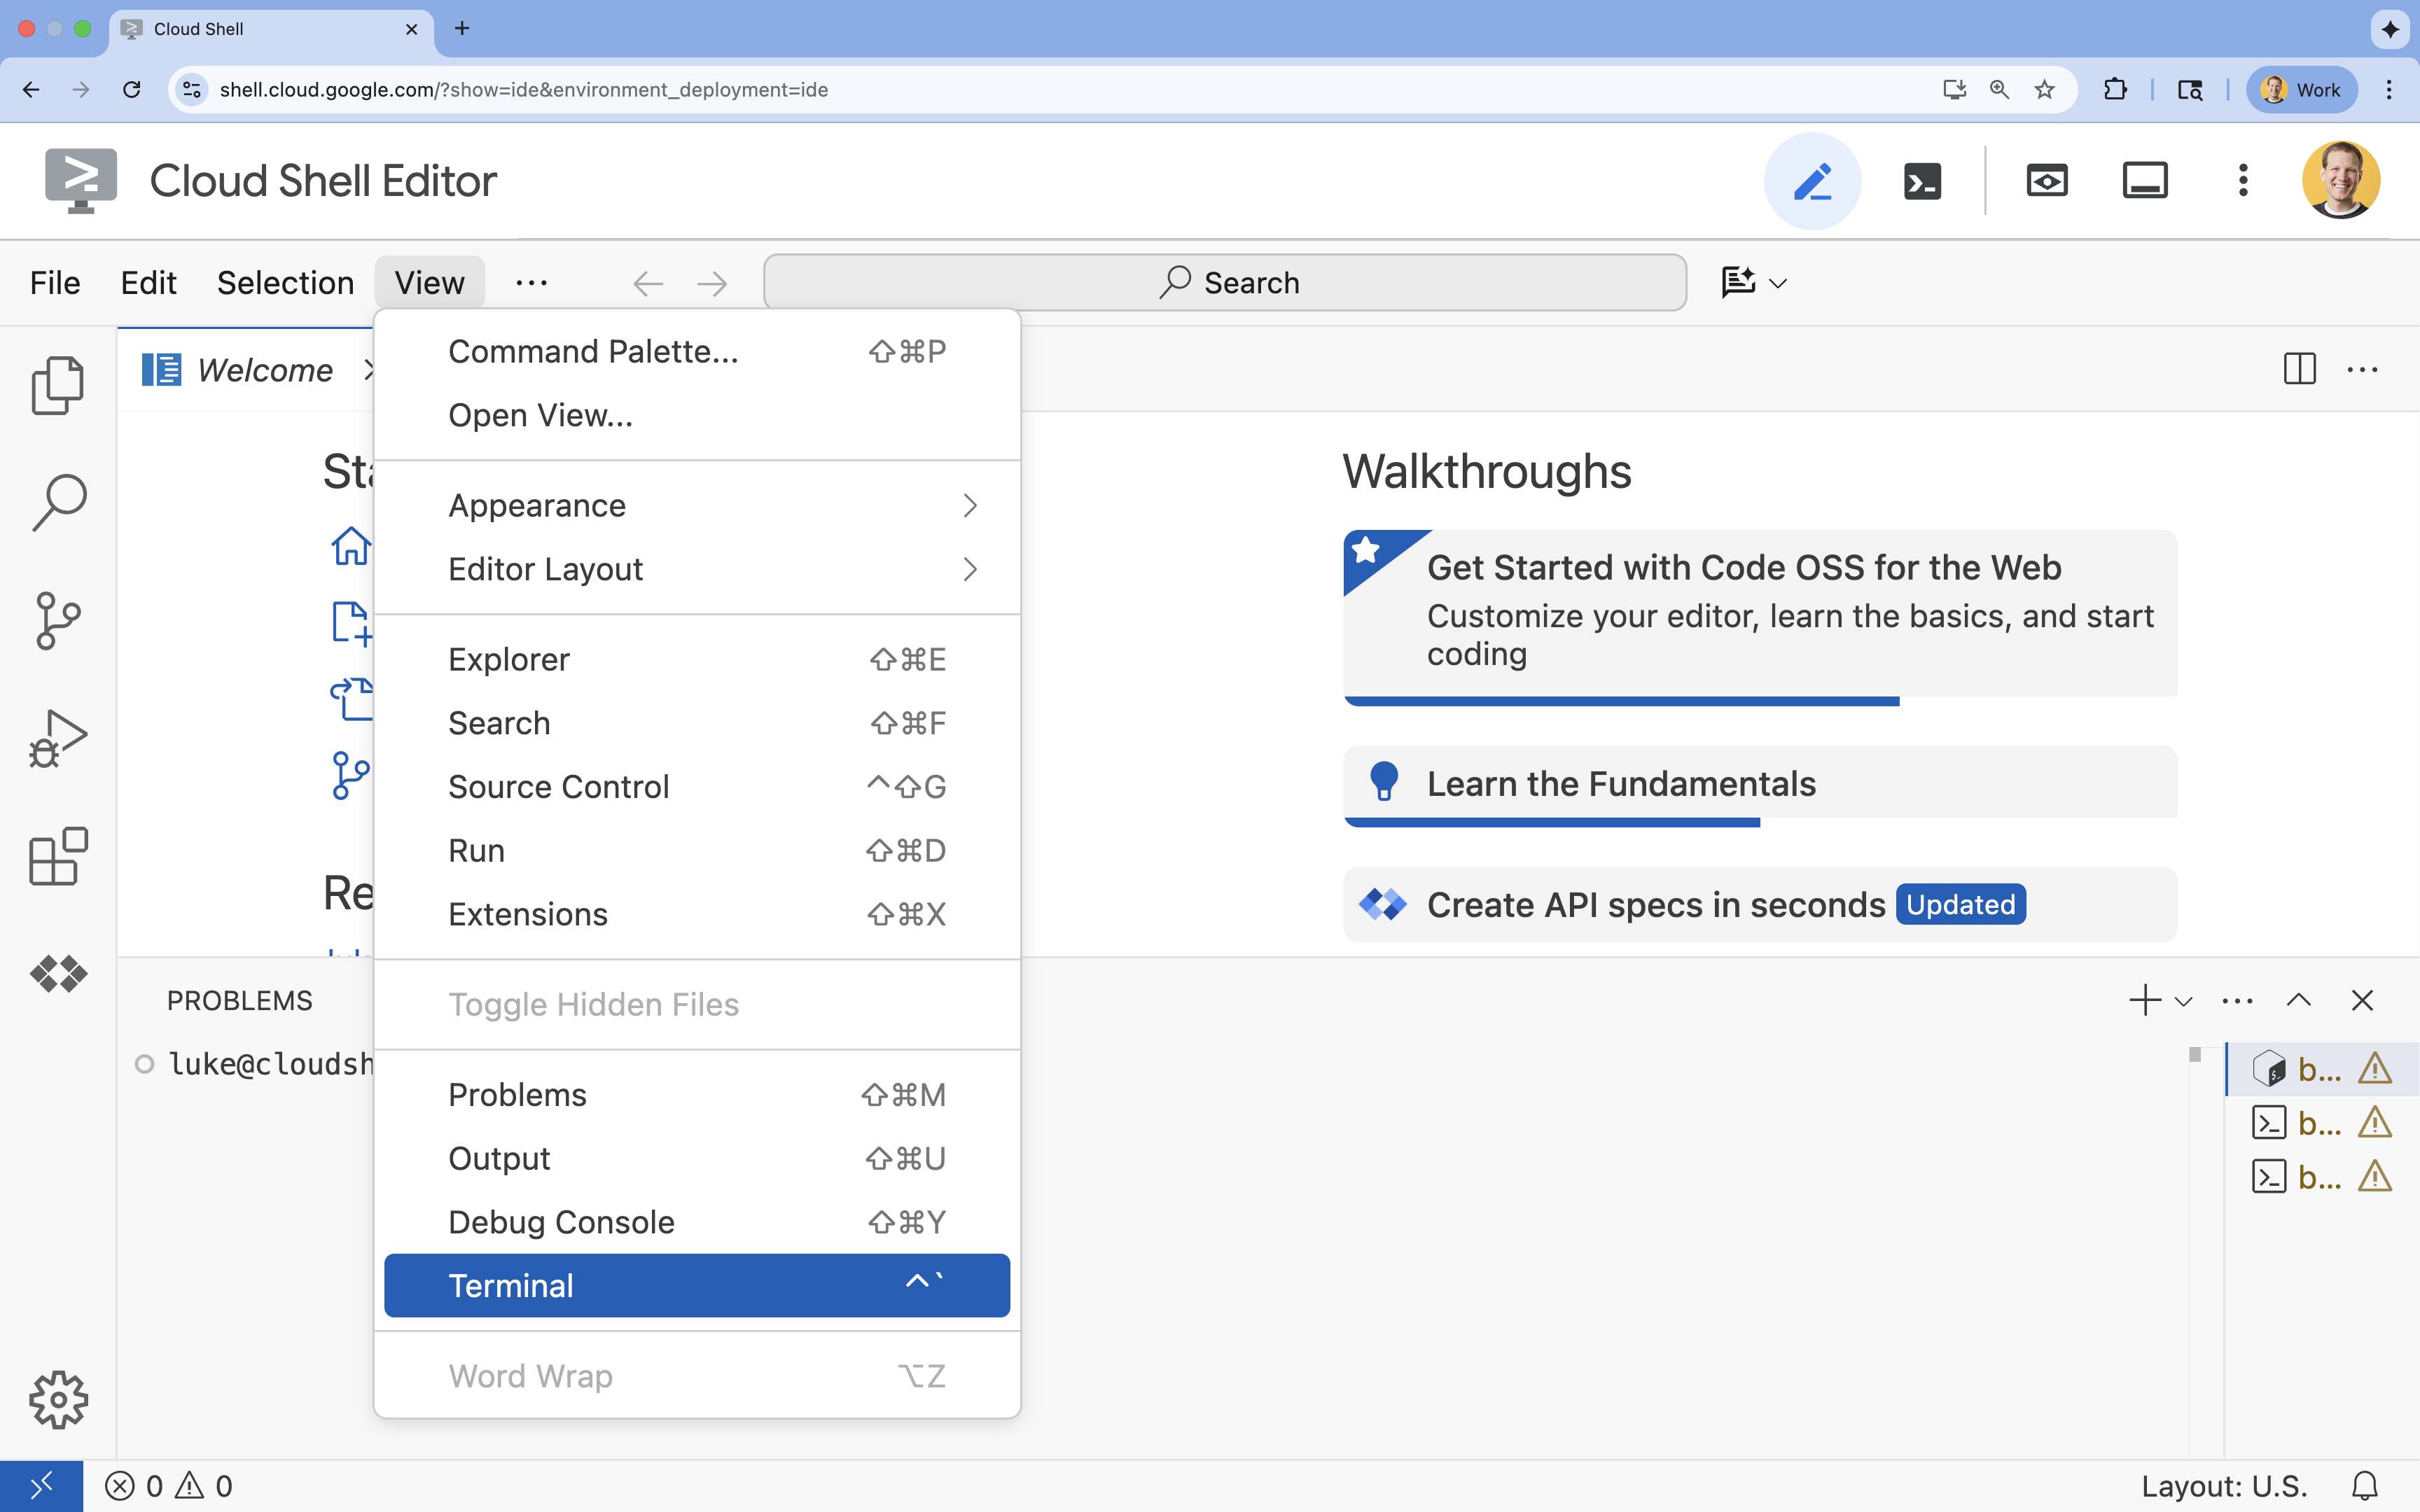
- 如果畫面底部未顯示終端機,請開啟終端機:
- 按一下「查看」
- 按一下「終端機」
- 在終端機中,使用下列指令設定專案:
gcloud config set project [PROJECT_ID]- 範例:
gcloud config set project lab-project-id-example - 如果忘記專案 ID,可以使用下列指令列出所有專案 ID:
gcloud projects list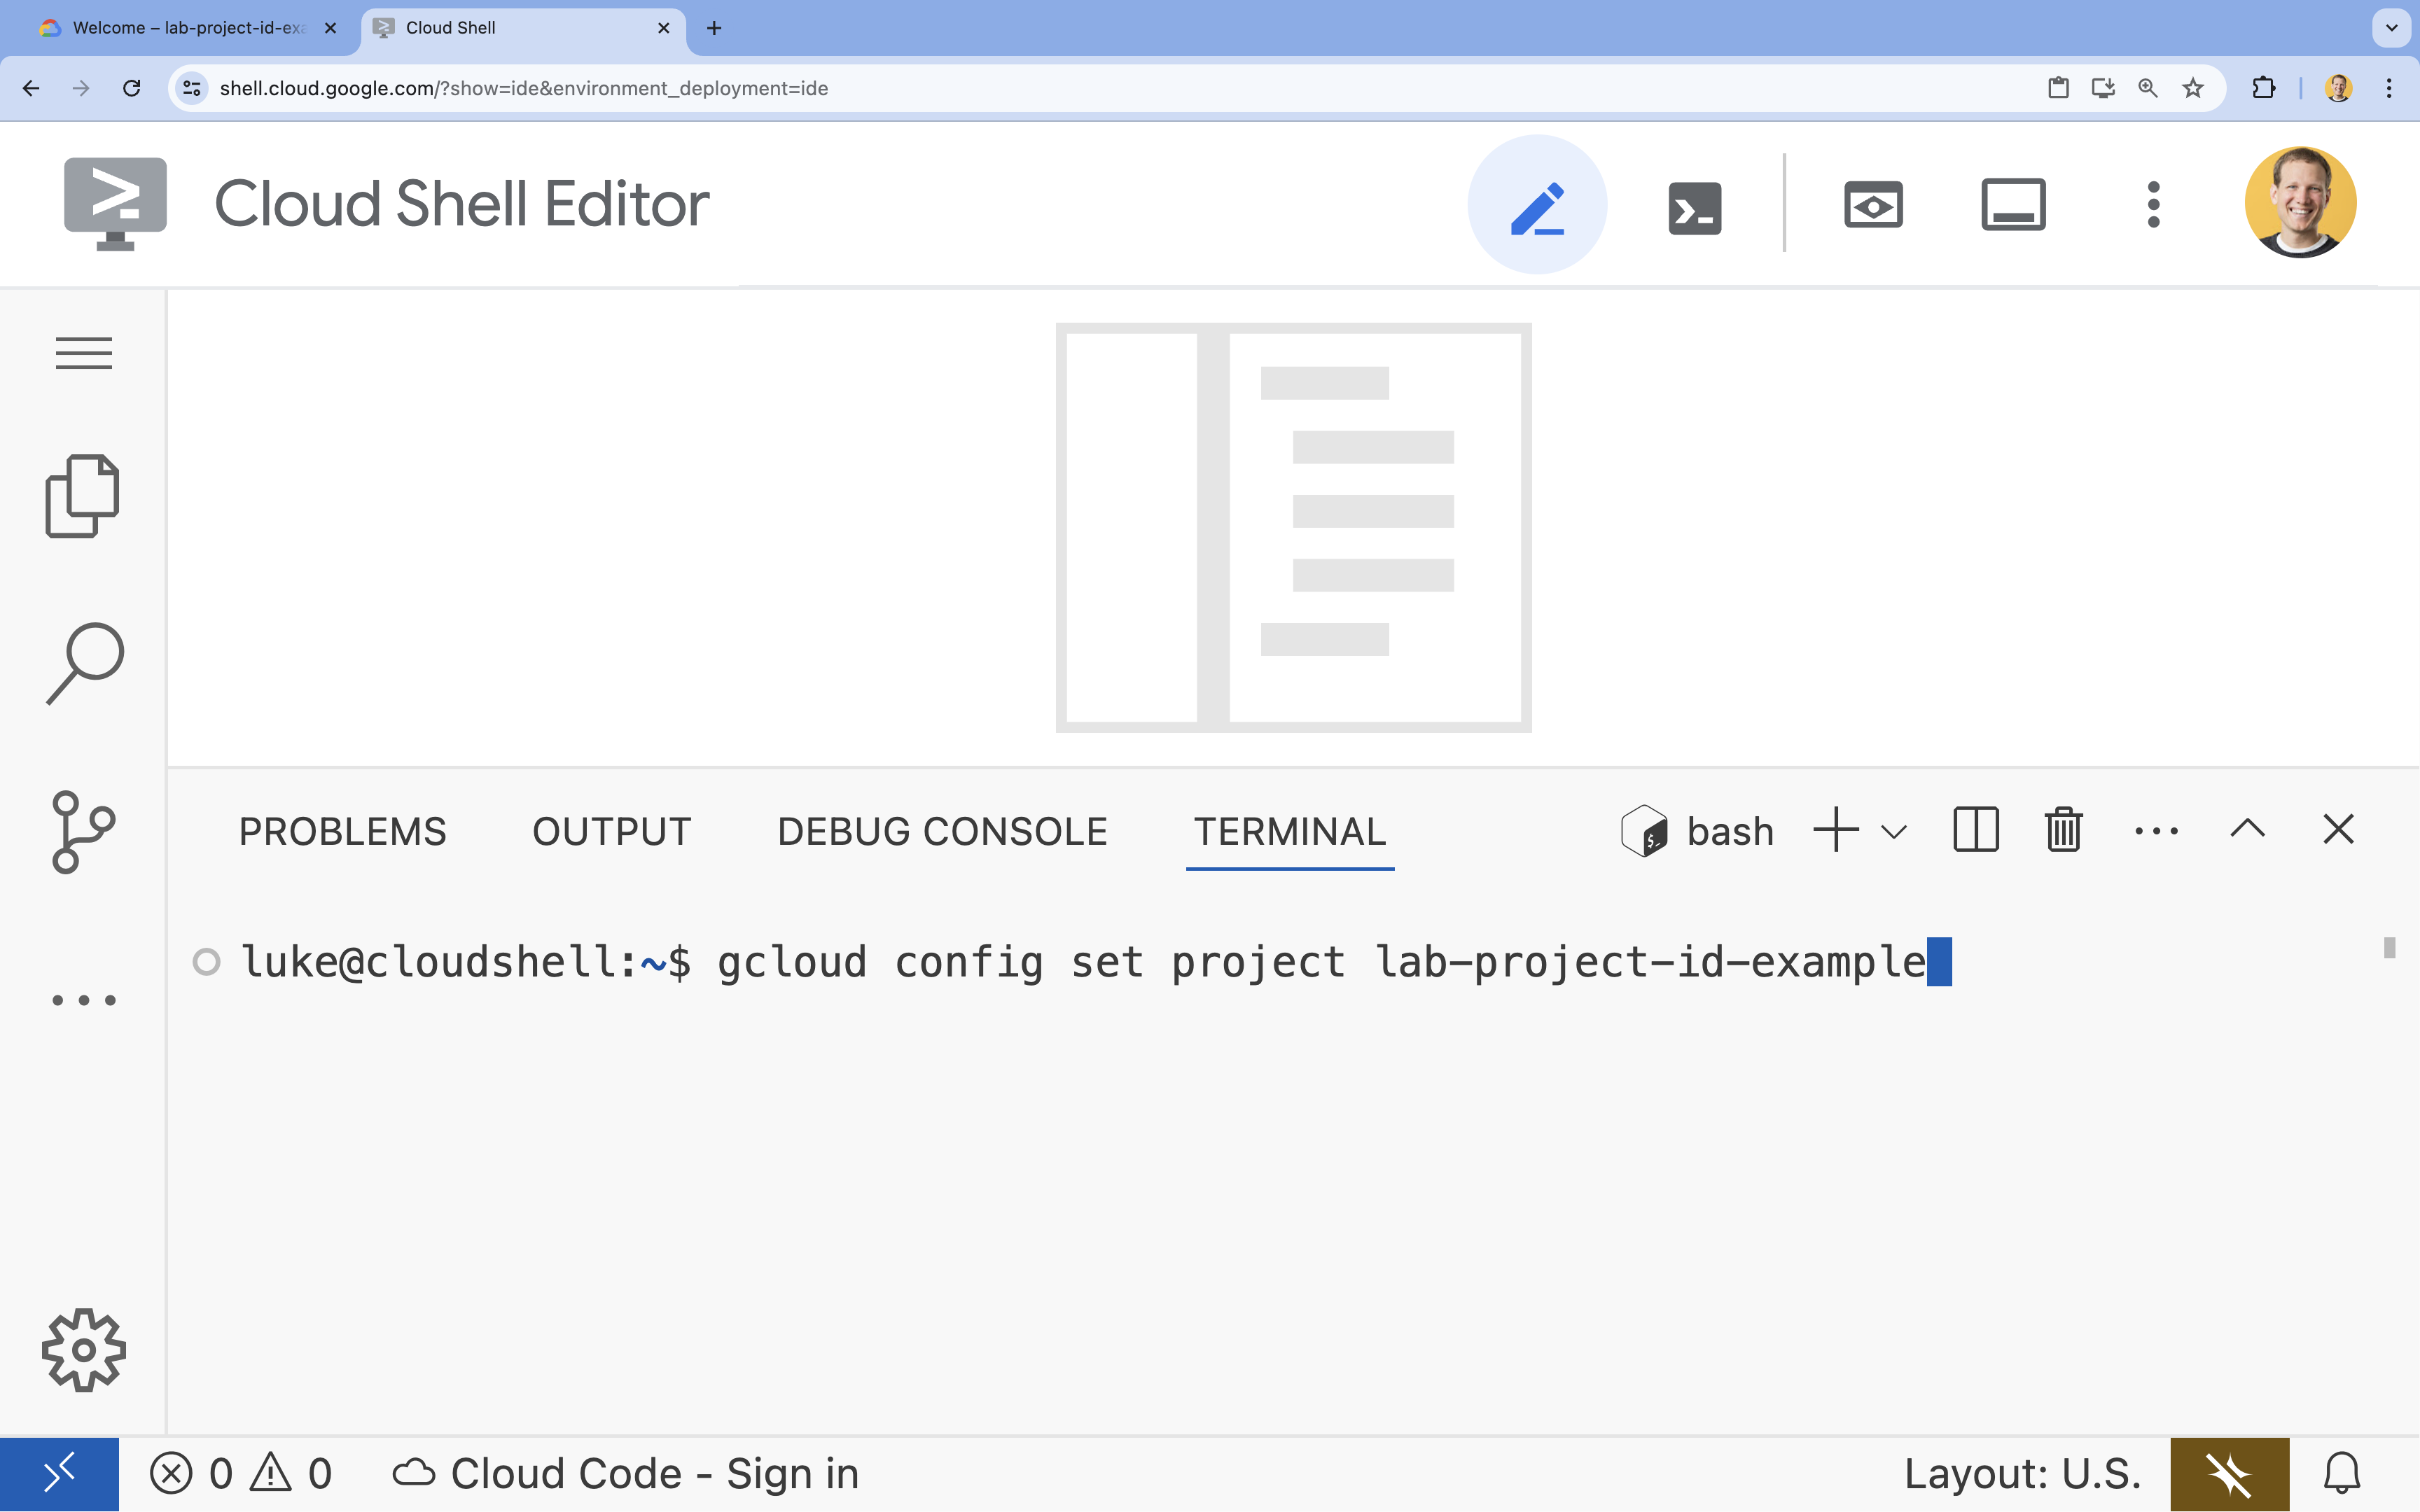
- 範例:
- 您應會看到下列訊息:
Updated property [core/project].
4. 啟用 API
如要使用 GKE、Artifact Registry、Cloud Build 和 Vertex AI,您需要在 Google Cloud 雲端專案中啟用各自的 API。
- 在終端機中啟用 API:
gcloud services enable \ container.googleapis.com \ artifactregistry.googleapis.com \ cloudbuild.googleapis.com \ aiplatform.googleapis.comOperation "operations/acf.p2-176675280136-b03ab5e4-3483-4ebf-9655-43dc3b345c63" finished successfully.
API 簡介
- Google Kubernetes Engine API (
container.googleapis.com) 可讓您建立及管理執行代理程式的 GKE 叢集。GKE 提供代管環境,讓您透過 Google 基礎架構部署、管理容器化應用程式及調度資源。 - Artifact Registry API (
artifactregistry.googleapis.com) 提供安全、私密的存放區,可儲存代理程式的容器映像檔。這是 Container Registry 的進階版,可與 GKE 和 Cloud Build 完美整合。 gcloud builds submit指令會使用 Cloud Build API (cloudbuild.googleapis.com),從 Dockerfile 在雲端建構容器映像檔。這項無伺服器 CI/CD 平台可在 Google Cloud 雲端基礎架構上執行建構作業。- Vertex AI API (
aiplatform.googleapis.com) 可讓已部署的代理程式與 Gemini 模型通訊,執行核心工作。這個 API 可用於所有 Google Cloud AI 服務。
5. 準備開發環境
建立目錄結構
- 在終端機中,建立專案目錄和必要的子目錄:
mkdir -p ~/adk_multiagent_systems/workflow_agents cd ~/adk_multiagent_systems - 在終端機中執行下列指令,在 Cloud Shell 編輯器檔案總管中開啟目錄。
cloudshell open-workspace ~/adk_multiagent_systems - 左側的「探索」面板會重新整理。現在應該會看到您建立的目錄。
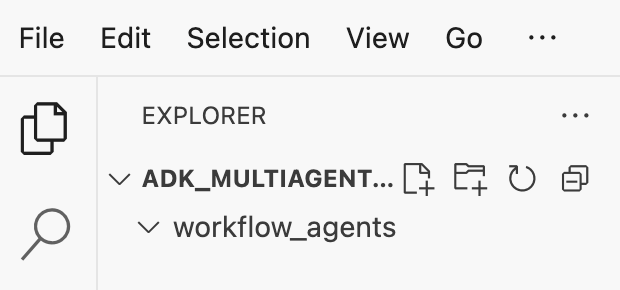
建立檔案時,您會看到檔案填入這個目錄。
建立入門檔案
現在請為應用程式建立必要的啟動檔案。
- 在終端機中執行下列指令,建立
callback_logging.py。這個檔案會處理可觀測性的記錄作業。cat <<EOF > ~/adk_multiagent_systems/callback_logging.py """ Provides helper functions for observability. Handles formatting and sending agent queries, responses, and tool calls to Google Cloud Logging to aid in monitoring and debugging. """ import logging import google.cloud.logging from google.adk.agents.callback_context import CallbackContext from google.adk.models import LlmResponse, LlmRequest def log_query_to_model(callback_context: CallbackContext, llm_request: LlmRequest): cloud_logging_client = google.cloud.logging.Client() cloud_logging_client.setup_logging() if llm_request.contents and llm_request.contents[-1].role == 'user': if llm_request.contents[-1].parts and "text" in llm_request.contents[-1].parts: last_user_message = llm_request.contents[-1].parts[0].text logging.info(f"[query to {callback_context.agent_name}]: " + last_user_message) def log_model_response(callback_context: CallbackContext, llm_response: LlmResponse): cloud_logging_client = google.cloud.logging.Client() cloud_logging_client.setup_logging() if llm_response.content and llm_response.content.parts: for part in llm_response.content.parts: if part.text: logging.info(f"[response from {callback_context.agent_name}]: " + part.text) elif part.function_call: logging.info(f"[function call from {callback_context.agent_name}]: " + part.function_call.name) EOF - 在終端機中執行下列指令,建立
workflow_agents/__init__.py。這會將目錄標示為 Python 套件。cat <<EOF > ~/adk_multiagent_systems/workflow_agents/__init__.py """ Marks the directory as a Python package and exposes the agent module, allowing the ADK to discover and register the agents defined within. """ from . import agent EOF - 在終端機中執行下列指令,建立
workflow_agents/agent.py。這個檔案包含多重代理程式團隊的核心邏輯。cat <<EOF > ~/adk_multiagent_systems/workflow_agents/agent.py """ Defines the core multi-agent workflow. Configures individual agents (Researcher, Screenwriter, File Writer), assigns their specific tools, and orchestrates their collaboration using the ADK's SequentialAgent pattern. """ import os import logging import google.cloud.logging from callback_logging import log_query_to_model, log_model_response from dotenv import load_dotenv from google.adk import Agent from google.adk.agents import SequentialAgent, LoopAgent, ParallelAgent from google.adk.tools.tool_context import ToolContext from google.adk.tools.langchain_tool import LangchainTool # import from google.genai import types from langchain_community.tools import WikipediaQueryRun from langchain_community.utilities import WikipediaAPIWrapper cloud_logging_client = google.cloud.logging.Client() cloud_logging_client.setup_logging() load_dotenv() model_name = os.getenv("MODEL") print(model_name) # Tools def append_to_state( tool_context: ToolContext, field: str, response: str ) -> dict[str, str]: """Append new output to an existing state key. Args: field (str): a field name to append to response (str): a string to append to the field Returns: dict[str, str]: {"status": "success"} """ existing_state = tool_context.state.get(field, []) tool_context.state[field] = existing_state + [response] logging.info(f"[Added to {field}] {response}") return {"status": "success"} def write_file( tool_context: ToolContext, directory: str, filename: str, content: str ) -> dict[str, str]: target_path = os.path.join(directory, filename) os.makedirs(os.path.dirname(target_path), exist_ok=True) with open(target_path, "w") as f: f.write(content) return {"status": "success"} # Agents file_writer = Agent( name="file_writer", model=model_name, description="Creates marketing details and saves a pitch document.", instruction=""" PLOT_OUTLINE: { PLOT_OUTLINE? } INSTRUCTIONS: - Create a marketable, contemporary movie title suggestion for the movie described in the PLOT_OUTLINE. If a title has been suggested in PLOT_OUTLINE, you can use it, or replace it with a better one. - Use your 'write_file' tool to create a new txt file with the following arguments: - for a filename, use the movie title - Write to the 'movie_pitches' directory. - For the 'content' to write, extract the following from the PLOT_OUTLINE: - A logline - Synopsis or plot outline """, generate_content_config=types.GenerateContentConfig( temperature=0, ), tools=[write_file], ) screenwriter = Agent( name="screenwriter", model=model_name, description="As a screenwriter, write a logline and plot outline for a biopic about a historical character.", instruction=""" INSTRUCTIONS: Your goal is to write a logline and three-act plot outline for an inspiring movie about a historical character(s) described by the PROMPT: { PROMPT? } - If there is CRITICAL_FEEDBACK, use those thoughts to improve upon the outline. - If there is RESEARCH provided, feel free to use details from it, but you are not required to use it all. - If there is a PLOT_OUTLINE, improve upon it. - Use the 'append_to_state' tool to write your logline and three-act plot outline to the field 'PLOT_OUTLINE'. - Summarize what you focused on in this pass. PLOT_OUTLINE: { PLOT_OUTLINE? } RESEARCH: { research? } CRITICAL_FEEDBACK: { CRITICAL_FEEDBACK? } """, generate_content_config=types.GenerateContentConfig( temperature=0, ), tools=[append_to_state], ) researcher = Agent( name="researcher", model=model_name, description="Answer research questions using Wikipedia.", instruction=""" PROMPT: { PROMPT? } PLOT_OUTLINE: { PLOT_OUTLINE? } CRITICAL_FEEDBACK: { CRITICAL_FEEDBACK? } INSTRUCTIONS: - If there is a CRITICAL_FEEDBACK, use your wikipedia tool to do research to solve those suggestions - If there is a PLOT_OUTLINE, use your wikipedia tool to do research to add more historical detail - If these are empty, use your Wikipedia tool to gather facts about the person in the PROMPT - Use the 'append_to_state' tool to add your research to the field 'research'. - Summarize what you have learned. Now, use your Wikipedia tool to do research. """, generate_content_config=types.GenerateContentConfig( temperature=0, ), tools=[ LangchainTool(tool=WikipediaQueryRun(api_wrapper=WikipediaAPIWrapper())), append_to_state, ], ) film_concept_team = SequentialAgent( name="film_concept_team", description="Write a film plot outline and save it as a text file.", sub_agents=[ researcher, screenwriter, file_writer ], ) root_agent = Agent( name="greeter", model=model_name, description="Guides the user in crafting a movie plot.", instruction=""" - Let the user know you will help them write a pitch for a hit movie. Ask them for a historical figure to create a movie about. - When they respond, use the 'append_to_state' tool to store the user's response in the 'PROMPT' state key and transfer to the 'film_concept_team' agent """, generate_content_config=types.GenerateContentConfig( temperature=0, ), tools=[append_to_state], sub_agents=[film_concept_team], ) EOF
您的檔案結構現在應如下所示: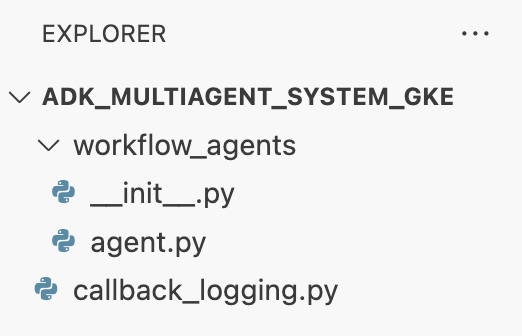
設定虛擬環境
- 在終端機中,使用
uv建立並啟動虛擬環境。確保專案依附元件不會與系統 Python 發生衝突。uv venv source .venv/bin/activate
安裝需求
- 在終端機中執行下列指令,建立
requirements.txt檔案。cat <<EOF > ~/adk_multiagent_systems/requirements.txt # Lists all Python dependencies required to run the multi-agent system, # including the Google ADK, LangChain community tools, and web server libraries. langchain-community==0.4.1 wikipedia==1.4.0 google-adk==1.27.5 fastapi==0.135.2 uvicorn==0.42.0 EOF - 在終端機中,將必要套件安裝到虛擬環境。
uv pip install -r requirements.txt
設定環境變數
- 在終端機中使用下列指令建立
.env檔案,系統會自動插入專案 ID 和區域。cat <<EOF > ~/adk_multiagent_systems/.env GOOGLE_CLOUD_PROJECT="$(gcloud config get-value project)" GOOGLE_CLOUD_PROJECT_NUMBER="$(gcloud projects describe $(gcloud config get-value project) --format='value(projectNumber)')" GOOGLE_CLOUD_LOCATION="us-central1" GOOGLE_GENAI_USE_VERTEXAI=true MODEL="gemini-2.5-flash" EOF - 在終端機中,將變數載入殼層工作階段。
source .env
重點回顧
在本節中,您已為專案建立本機基礎:
- 建立目錄結構和必要的代理程式啟動器檔案 (
agent.py、callback_logging.py、requirements.txt)。 - 使用虛擬環境 (
uv) 隔離依附元件。 - 已設定環境變數 (
.env),用於儲存專案專屬詳細資料,例如專案 ID 和區域。
6. 探索代理程式檔案
您已設定實驗室的原始碼,包括預先編寫的多代理系統。部署應用程式前,建議您先瞭解如何定義代理程式。核心代理程式邏輯位於 workflow_agents/agent.py 中。
- 在 Cloud Shell 編輯器中,使用左側的檔案總管前往
adk_multiagent_systems/workflow_agents/,然後開啟agent.py檔案。 - 請花點時間瀏覽檔案。您不需要瞭解每一行,但請注意高階結構:
- 個別代理程式:這個檔案定義了三個不同的
Agent物件:researcher、screenwriter和file_writer。每個代理程式都會獲得特定instruction(提示) 和允許使用的tools清單 (例如WikipediaQueryRun工具或自訂write_file工具)。 - 代理程式組合:個別代理程式會串連成
SequentialAgent,稱為film_concept_team。這會告知 ADK 依序執行這些代理,並將狀態從一個代理傳遞至下一個代理。 - 根層級代理程式:定義
root_agent(名為「greeter」),用於處理初始使用者互動。使用者提供提示時,這個代理會將提示儲存至應用程式的狀態,然後將控制權轉移至film_concept_team工作流程。
- 個別代理程式:這個檔案定義了三個不同的
瞭解這個架構有助於釐清您即將部署的內容:不只是單一代理,而是由 ADK 協調的專用代理團隊。
7. 建立 GKE Autopilot 叢集
環境準備就緒後,下一步是佈建基礎架構,以利執行代理程式應用程式。您將建立 GKE Autopilot 叢集,做為部署作業的基礎。我們使用 Autopilot 模式,因為這種模式可處理叢集基礎節點、資源調度和安全性的複雜管理作業,讓您專心部署應用程式。
- 在終端機中,建立名為
adk-cluster的新 GKE Autopilot 叢集。gcloud container clusters create-auto adk-cluster \ --location=$GOOGLE_CLOUD_LOCATION \ --project=$GOOGLE_CLOUD_PROJECT - 叢集建立完成後,請在終端機中執行下列指令,設定
kubectl以連線至叢集:gcloud container clusters get-credentials adk-cluster \ --location=$GOOGLE_CLOUD_LOCATION \ --project=$GOOGLE_CLOUD_PROJECT~/.kube/config)。從此之後,kubectl指令列工具就會通過驗證,並導向與adk-cluster通訊。
重點回顧
在本節中,您已佈建基礎架構:
- 使用
gcloud建立全代管 GKE Autopilot 叢集。 - 設定本機
kubectl工具,以便驗證及與新叢集通訊。
8. 將應用程式容器化並推送
您的代理程式碼目前只存在於 Cloud Shell 殼層環境中。如要在 GKE 上運作執行,您必須先將其封裝至「容器映像檔」。容器映像檔是靜態的可攜式檔案,當中包含應用程式的程式碼和所有依附元件。執行這個映像檔時,就會變成即時容器。
這個程序包含三個主要步驟:
- 建立進入點:定義
main.py檔案,將代理程式邏輯轉換為可執行的網路伺服器。 - 定義容器映像檔:建立 Dockerfile,做為建構容器映像檔的藍圖。
- 建構及推送:使用 Cloud Build 執行 Dockerfile,建立容器映像檔並推送至 Google Artifact Registry,這是映像檔的安全存放區。
準備部署要用的應用程式
ADK 代理程式需要網路伺服器才能接收要求。main.py 檔案會做為進入點,使用 FastAPI 框架透過 HTTP 公開代理程式的功能。
- 在終端機的
adk_multiagent_systems目錄根層級中,建立名為main.py的新檔案。cat <<EOF > ~/adk_multiagent_systems/main.py """ Serves as the application entry point. Initializes the FastAPI web server, discovers the agents defined in the workflow directory, and exposes them via HTTP endpoints for interaction. """ import os import uvicorn from fastapi import FastAPI from google.adk.cli.fast_api import get_fast_api_app # Get the directory where main.py is located AGENT_DIR = os.path.dirname(os.path.abspath(__file__)) # Configure the session service (e.g., SQLite for local storage) SESSION_SERVICE_URI = "sqlite:///./sessions.db" # Configure CORS to allow requests from various origins for this lab ALLOWED_ORIGINS = ["http://localhost", "http://localhost:8080", "*"] # Enable the ADK's built-in web interface SERVE_WEB_INTERFACE = True # Call the ADK function to discover agents and create the FastAPI app app: FastAPI = get_fast_api_app( agents_dir=AGENT_DIR, session_service_uri=SESSION_SERVICE_URI, allow_origins=ALLOWED_ORIGINS, web=SERVE_WEB_INTERFACE, ) # You can add more FastAPI routes or configurations below if needed # Example: # @app.get("/hello") # async def read_root(): # return {"Hello": "World"} if __name__ == "__main__": # Get the port from the PORT environment variable provided by the container runtime # Run the Uvicorn server, listening on all available network interfaces (0.0.0.0) uvicorn.run(app, host="0.0.0.0", port=int(os.environ.get("PORT", 8080))) EOFuvicorn伺服器會執行這個應用程式,監聽主機0.0.0.0,接受來自任何 IP 位址的連線,以及PORT環境變數指定的通訊埠 (我們稍後會在 Kubernetes 資訊清單中設定)。
此時,Cloud Shell 編輯器探索面板中顯示的檔案結構應如下所示: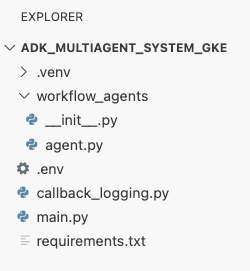
使用 Docker 將 ADK 代理容器化
如要將應用程式部署至 GKE,我們首先需要將其封裝成容器映像檔,其中會將應用程式的程式碼與執行所需的所有程式庫和依附元件搭配成套。我們會使用 Docker 建立這個容器映像檔。
- 在終端機的
adk_multiagent_systems目錄根層級中,建立名為Dockerfile的新檔案。cat <<'EOF' > ~/adk_multiagent_systems/Dockerfile # Defines the blueprint for the container image. Installs dependencies, # sets up a secure non-root user, and specifies the startup command to run the # agent web server. # Use an official lightweight Python image as the base FROM python:3.13-slim # Set the working directory inside the container WORKDIR /app # Create a non-root user for security best practices RUN adduser --disabled-password --gecos "" myuser # Copy and install dependencies first to leverage Docker's layer caching COPY requirements.txt . RUN pip install --no-cache-dir -r requirements.txt # Copy all application code into the container COPY . . # Create the directory where the agent will write files at runtime # The -p flag ensures the command doesn't fail if the directory already exists RUN mkdir -p movie_pitches # Change ownership of EVERYTHING in /app to the non-root user # Without this, the running agent would be denied permission to write files. RUN chown -R myuser:myuser /app # Switch the active user from root to the non-root user USER myuser # Add the user's local binary directory to the system's PATH ENV PATH="/home/myuser/.local/bin:$PATH" # Define the command to run when the container starts CMD ["sh", "-c", "uvicorn main:app --host 0.0.0.0 --port $PORT"] EOF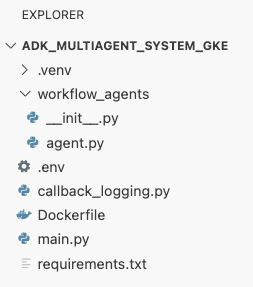
建構容器映像檔並推送至 Artifact Registry
有了 Dockerfile 後,您可以使用 Cloud Build 建構映像檔,並推送至 Artifact Registry。Artifact Registry 是與 Google Cloud 服務整合的私人安全存放區。GKE 會從這個登錄檔提取映像檔,以執行應用程式。
- 在終端機中,建立新的 Artifact Registry 存放區來儲存容器映像檔。
gcloud artifacts repositories create adk-repo \ --repository-format=docker \ --location=$GOOGLE_CLOUD_LOCATION \ --description="ADK repository" - 在終端機中,使用
gcloud builds submit建構容器映像檔,並推送至存放區。gcloud builds submit \ --tag $GOOGLE_CLOUD_LOCATION-docker.pkg.dev/$GOOGLE_CLOUD_PROJECT/adk-repo/adk-agent:latest \ --project=$GOOGLE_CLOUD_PROJECT \ .Dockerfile中的步驟。這項工具會在雲端建構映像檔,並使用 Artifact Registry 存放區的位址標記映像檔,然後自動推送至該處。 - 在終端機中,確認映像檔已建構完成:
gcloud artifacts docker images list \
  $GOOGLE_CLOUD_LOCATION-docker.pkg.dev/$GOOGLE_CLOUD_PROJECT/adk-repo \
  --project=$GOOGLE_CLOUD_PROJECT
重點回顧
在本節中,您已將程式碼封裝以進行部署:
- 建立
main.py進入點,將代理程式封裝在 FastAPI 網路伺服器中。 - 定義
Dockerfile,將程式碼和依附元件放在同一個可攜式映像檔中。 - 使用 Cloud Build 建構映像檔,並推送至安全的 Artifact Registry 存放區。
9. 建立 Kubernetes 資訊清單
容器映像檔建構完成並儲存在 Artifact Registry 後,您需要指示 GKE 如何運作執行該映像檔。這項作業包含兩項主要活動:
- 設定權限:您將在叢集內為代理程式建立專屬身分,並授予該身分安全存取權,以便存取所需的 Google Cloud API (具體來說是 Vertex AI)。
- 定義應用程式狀態:您將編寫 Kubernetes 資訊清單檔案 (YAML 文件),以宣告方式定義應用程式執行所需的一切項目,包括容器映像檔、環境變數,以及應用程式應如何向網路公開。
為 Vertex AI 設定 Kubernetes 服務帳戶
代理需要有權與 Vertex AI API 通訊,才能存取 Gemini 模型。在 GKE 中授予這項權限時,最安全且建議使用的方法是 Workload Identity。Workload Identity 可讓您將 Kubernetes 原生身分 (Kubernetes 服務帳戶) 連結至 Google Cloud 身分 (IAM 服務帳戶),完全不必下載、管理及儲存靜態 JSON 金鑰。
- 在終端機中,建立 Kubernetes 服務帳戶 (
adk-agent-sa)。這會在 GKE 叢集中為代理程式建立身分,供 Pod 使用。kubectl create serviceaccount adk-agent-sa - 在終端機中建立政策繫結,將 Kubernetes 服務帳戶連結至 Google Cloud IAM。這項指令會將
aiplatform.user角色授予adk-agent-sa,允許安全地叫用 Vertex AI API。gcloud projects add-iam-policy-binding projects/${GOOGLE_CLOUD_PROJECT} \ --role=roles/aiplatform.user \ --member=principal://iam.googleapis.com/projects/${GOOGLE_CLOUD_PROJECT_NUMBER}/locations/global/workloadIdentityPools/${GOOGLE_CLOUD_PROJECT}.svc.id.goog/subject/ns/default/sa/adk-agent-sa \ --condition=None
建立 Kubernetes 資訊清單檔案
Kubernetes 會使用 YAML 資訊清單檔案定義應用程式的所需狀態。您將建立 deployment.yaml 檔案,其中包含兩個重要的 Kubernetes 物件:Deployment 和 Service。
- 在終端機中產生
deployment.yaml檔案。cat <<EOF > ~/adk_multiagent_systems/deployment.yaml # Defines the Kubernetes resources required to deploy the application to GKE. # Includes the Deployment (to run the container pods) and the Service # (to expose the application via a Load Balancer). apiVersion: apps/v1 kind: Deployment metadata: name: adk-agent spec: replicas: 1 selector: matchLabels: app: adk-agent template: metadata: labels: app: adk-agent spec: # Assign the Kubernetes Service Account for Workload Identity serviceAccountName: adk-agent-sa containers: - name: adk-agent imagePullPolicy: Always # The path to the container image in Artifact Registry image: ${GOOGLE_CLOUD_LOCATION}-docker.pkg.dev/${GOOGLE_CLOUD_PROJECT}/adk-repo/adk-agent:latest # Define the resources for GKE Autopilot to provision resources: limits: memory: "1Gi" cpu: "1000m" ephemeral-storage: "512Mi" requests: memory: "1Gi" cpu: "1000m" ephemeral-storage: "512Mi" ports: - containerPort: 8080 # Environment variables passed to the application env: - name: PORT value: "8080" - name: GOOGLE_CLOUD_PROJECT value: ${GOOGLE_CLOUD_PROJECT} - name: GOOGLE_CLOUD_LOCATION value: ${GOOGLE_CLOUD_LOCATION} - name: GOOGLE_GENAI_USE_VERTEXAI value: "true" - name: MODEL value: "gemini-2.5-flash" --- apiVersion: v1 kind: Service metadata: name: adk-agent spec: # Create a public-facing Network Load Balancer with an external IP type: LoadBalancer ports: - port: 80 targetPort: 8080 selector: app: adk-agent EOF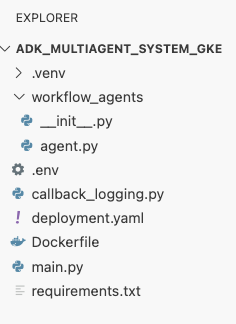
重點回顧
在本節中,您定義了安全性與部署設定:
- 建立 Kubernetes 服務帳戶,並使用 Workload Identity 連結至 Google Cloud IAM,讓 Pod 安全存取 Vertex AI,不必管理金鑰。
- 產生
deployment.yaml檔案,定義 Deployment (如何執行 Pod) 和 Service (如何透過負載平衡器公開 Pod)。
10. 將應用程式部署至 GKE
定義資訊清單檔案並將容器映像檔推送至 Artifact Registry 後,您現在可以部署應用程式。在這項工作中,您會使用 kubectl 將設定套用至 GKE 叢集,然後監控狀態,確保代理程式正確啟動。
- 在終端機中,將
deployment.yaml資訊清單套用至叢集。kubectl apply -f deployment.yamlkubectl apply指令會將deployment.yaml檔案傳送至 Kubernetes API 伺服器。伺服器隨後會讀取您的設定,並協調建立 Deployment 和 Service 物件。 - 在終端機中,即時查看部署狀態。等待 Pod 進入
Running狀態。kubectl get pods -l=app=adk-agent --watch- 擱置中:叢集已接受 Pod,但尚未建立容器。
- 建立容器:GKE 會從 Artifact Registry 提取容器映像檔,並啟動容器。
- 跑步:成功!容器正在執行,且代理程式應用程式已上線。
- 狀態顯示
Running後,請在終端機中按下 CTRL+C,停止監控指令並返回命令提示字元。
重點回顧
在本節中,您啟動了工作負載:
- 使用
kubectlapply 將資訊清單傳送至叢集。 - 監控 Pod 生命週期 (Pending -> ContainerCreating -> Running),確保應用程式順利啟動。
11. 與代理程式互動
您的 ADK 代理程式現已在 GKE 上線,並透過公開負載平衡器公開發布到網際網路。您將連線至代理程式的網頁介面,與其互動並確認整個系統運作正常。
找出服務的外部 IP 位址
如要存取代理程式,請先取得 GKE 為服務佈建的公開 IP 位址。
- 在終端機中執行下列指令,取得服務詳細資料。
kubectl get service adk-agent - 在
EXTERNAL-IP欄中尋找該值。首次部署服務後,系統可能需要一到兩分鐘的時間才能指派 IP 位址。如果顯示為pending,請稍候片刻再重新執行指令。輸出內容會與下列內容相似:NAME TYPE CLUSTER-IP EXTERNAL-IP PORT(S) AGE adk-agent-service LoadBalancer 10.120.12.234 34.123.45.67 80:31234/TCP 5mEXTERNAL-IP下方列出的位址 (例如 34.123.45.67) 是代理程式的公開進入點。
測試已部署的代理
現在,您可以使用公開 IP 位址,直接透過瀏覽器存取 ADK 的內建網頁 UI。
- 從終端機複製外部 IP 位址 (
EXTERNAL-IP)。 - 在網路瀏覽器中開啟新分頁,然後輸入
http://[EXTERNAL-IP],並將[EXTERNAL-IP]換成您複製的 IP 位址。 - 您現在應該會看到 ADK 網頁介面。
- 確認已在代理程式下拉式選單中選取「workflow_agents」workflow_agents。
- 開啟「詞元串流」。
- 輸入
hello並按下 Enter 鍵,即可開始新對話。 - 請查看結果,代理應會迅速回覆問候語:「我可以協助你撰寫熱門電影的宣傳文案。你想製作哪位歷史人物的電影?"
- 代理提示您選擇歷史人物時,請選擇有興趣的人物,例如:
the most successful female pirate in historythe woman who invented the first computer compilera legendary lawman of the American Wild West
重點回顧
在本節中,您已驗證部署作業:
- 擷取 LoadBalancer 分配的外部 IP 位址。
- 透過瀏覽器存取 ADK 網頁 UI,確認多代理系統可回應且正常運作。
12. 設定自動調度資源功能
在實際執行環境中,處理無法預測的使用者流量是一大挑戰。如先前工作所述,硬式編碼固定數量的副本,表示您要為閒置資源支付過多費用,或是在流量高峰期間面臨效能不佳的風險。GKE 會自動調整資源配置,解決這個問題。
您將設定 HorizontalPodAutoscaler (HPA),這項 Kubernetes 控制器會根據即時 CPU 使用率,自動調整 Deployment 中執行的 Pod 數量。
- 在 Cloud Shell 編輯器終端機中,於
adk_multiagent_systems目錄的根目錄建立新的hpa.yaml檔案。cloudshell edit ~/adk_multiagent_systems/hpa.yaml - 將下列內容新增至新的
hpa.yaml檔案:# Configures the HorizontalPodAutoscaler (HPA) to automatically scale # the number of running agent pods up or down based on CPU utilization # to handle varying traffic loads. apiVersion: autoscaling/v1 kind: HorizontalPodAutoscaler metadata: name: adk-agent-hpa spec: scaleTargetRef: apiVersion: apps/v1 kind: Deployment name: adk-agent minReplicas: 1 maxReplicas: 5 targetCPUUtilizationPercentage: 50adk-agentDeployment 為目標。這可確保至少有 1 個 Pod 正在執行,最多可設定 5 個 Pod,並會新增/移除副本,讓平均 CPU 使用率維持在 50% 左右。此時,Cloud Shell 編輯器的「Explorer」面板中,檔案結構應如下所示: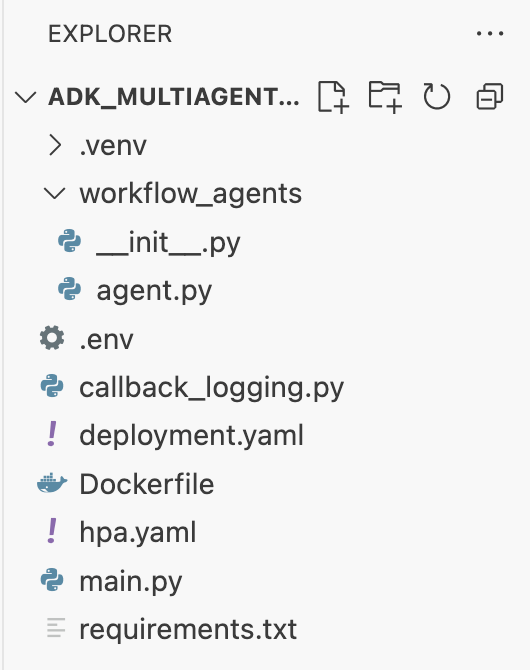
- 將這段程式碼貼到終端機,即可將 HPA 套用至叢集。
kubectl apply -f hpa.yaml
驗證自動調度器
HPA 現已啟用,並監控您的部署作業。您可以檢查狀態,瞭解實際運作情形。
- 在終端機中執行下列指令,即可取得 HPA 的狀態。
kubectl get hpa adk-agent-hpaNAME REFERENCE TARGETS MINPODS MAXPODS REPLICAS AGE adk-agent-hpa Deployment/adk-agent 0%/50% 1 5 1 30s
重點回顧
在本節中,您已針對正式版流量進行最佳化:
- 已建立
hpa.yaml資訊清單來定義縮放規則。 - 部署 HorizontalPodAutoscaler (HPA),根據 CPU 使用率自動調整 Pod 副本數量。
13. 準備供實際運作
注意:以下各節僅供參考,不包含後續執行步驟。這些指南旨在提供脈絡資訊和最佳做法,協助您將應用程式投入實際工作環境。
透過資源分配調整效能
在 GKE Autopilot 中,您可以透過在 deployment.yaml 中指定資源 requests,控管為應用程式佈建的 CPU 和記憶體用量。
如果發現代理程式因記憶體不足而速度緩慢或當機,您可以編輯 deployment.yaml 中的 resources 區塊,然後使用 kubectl apply 重新套用檔案,藉此增加資源分配。
舉例來說,如要將記憶體容量加倍:
# In deployment.yaml
# ...
        resources:
          requests:
            memory: "2Gi"  # Increased from 1Gi
            cpu: "1000m"
# ...
使用 CI/CD 自動執行工作流程
在本實驗室中,您手動執行了指令。專業做法是建立 CI/CD (持續整合/持續部署) 管道。將程式碼存放區 (例如 GitHub) 連結至 Cloud Build 自動建構觸發條件,即可自動完成整個部署作業。
有了管道,每當您推送程式碼變更時,Cloud Build 就能自動執行下列動作:
- 建構新的容器映像檔。
- 將映像檔推送至 Artifact Registry。
- 將更新後的 Kubernetes 資訊清單套用至 GKE 叢集。
安全地管理密鑰
在本實驗室中,您將設定儲存在 .env 檔案中,並傳遞至應用程式。這項做法方便開發,但對於 API 金鑰等機密資料並不安全。建議的最佳做法是使用 Secret Manager 安全地儲存密鑰。
GKE 原生整合了 Secret Manager,可讓您直接將密鑰掛接至 Pod,做為環境變數或檔案,完全不必簽入來源程式碼。
您要求的「清理資源」一節如下,已插入「結論」一節之前。
14. 清理資源
如要避免系統向您的 Google Cloud 帳戶收取本教學課程所用資源的費用,請刪除含有相關資源的專案,或者保留專案但刪除個別資源。
刪除 GKE 叢集
本實驗室的主要費用支出是 GKE 叢集。刪除後,系統就會停止收取運算費用。
- 在終端機執行下列指令:
gcloud container clusters delete adk-cluster \
  --location=$GOOGLE_CLOUD_LOCATION \
  --quiet
刪除 Artifact Registry 存放區
儲存在 Artifact Registry 中的容器映像檔會產生儲存空間費用。
- 在終端機執行下列指令:
gcloud artifacts repositories delete adk-repo \
  --location=$GOOGLE_CLOUD_LOCATION \
  --quiet
刪除專案 (選用)
如果您是為了這個實驗室建立新專案,而且不打算再使用,最簡單的清理方式就是刪除整個專案。
- 在終端機中執行下列指令 (將
[YOUR_PROJECT_ID]替換為實際專案 ID):gcloud projects delete [YOUR_PROJECT_ID]
15. 結語
恭喜!您已成功將多代理程式 ADK 應用程式部署至實際工作環境等級的 GKE 叢集。這項重大成就涵蓋現代雲端原生應用程式的核心生命週期,為您部署複雜的代理程式系統奠定堅實基礎。
重點回顧
在本實驗室中,您已學會如何:
- 佈建 GKE Autopilot 叢集。
- 使用
Dockerfile建構容器映像檔,並將其推送至 Artifact Registry - 使用 Workload Identity 安全連線至 Google Cloud API。
- 為 Deployment 和 Service 編寫 Kubernetes 資訊清單。
- 使用 LoadBalancer 將應用程式公開發布到網際網路。
- 使用 HorizontalPodAutoscaler (HPA) 設定自動調度。