
1. 개요
이 실습에서는 Vertex AI Gen AI Evaluation Service를 사용하여 대규모 언어 모델을 평가하는 방법을 알아봅니다. SDK를 사용하여 평가 작업을 실행하고, 결과를 비교하고, 모델 성능 및 프롬프트 설계에 관한 데이터 기반 결정을 내립니다.
이 실습에서는 간단한 계산 기반 측정항목부터 시작하여 더 미묘한 모델 기반 평가로 진행하는 일반적인 평가 워크플로를 안내합니다. 또한 특정 목표에 맞게 맞춤 측정항목을 만들고 Vertex AI 실험을 사용하여 작업을 추적하는 방법도 알아봅니다.
학습할 내용
이 실습에서는 다음 작업을 수행하는 방법을 알아봅니다.
- 계산 기반 및 모델 기반 측정항목으로 모델을 평가합니다.
- 평가를 제품 목표에 맞추기 위해 맞춤 측정항목을 만듭니다.
- 다양한 프롬프트 템플릿을 나란히 비교합니다.
- 여러 페르소나 기반 프롬프트를 테스트하여 가장 효과적인 버전을 찾습니다.
- Vertex AI Experiments를 사용하여 평가 실행을 추적하고 시각화합니다.
참조
- 코드 샘플: 이 실습은 Google Cloud 생성형 AI 저장소의 예시를 기반으로 합니다.
- 기반: Vertex AI 생성형 AI 평가 문서
- 데이터 세트: 명령 준수 평가를 위한 OpenOrca 데이터 세트
2. 프로젝트 설정
Google 계정
아직 개인 Google 계정이 없다면 Google 계정을 만들어야 합니다.
직장 또는 학교 계정 대신 개인 계정을 사용합니다.
Google Cloud 콘솔에 로그인
개인 Google 계정을 사용하여 Google Cloud 콘솔에 로그인합니다.
결제 사용 설정
결제를 사용 설정하는 방법에는 두 가지가 있습니다. 개인 결제 계정을 사용하거나 다음 단계에 따라 크레딧을 사용할 수 있습니다.
Google Cloud 크레딧 사용 (선택사항)
이 워크숍을 진행하려면 크레딧이 있는 결제 계정이 필요합니다. 이 Codelab 상단의 배너에 있는 크레딧을 사용하여 시작하세요. 이미 결제 계정에 연결되어 있다면 이 단계를 건너뛰어도 됩니다.
개인 결제 계정 설정
Google Cloud 크레딧을 사용하여 결제를 설정한 경우 이 단계를 건너뛸 수 있습니다.
개인 결제 계정을 설정하려면 Cloud 콘솔에서 여기에서 결제를 사용 설정하세요.
참고 사항:
- 이 실습을 완료하는 데 드는 Cloud 리소스 비용은 1달러 미만입니다.
- 이 실습이 끝나면 단계에 따라 리소스를 삭제하여 추가 요금이 발생하지 않도록 할 수 있습니다.
- 신규 사용자는 미화$300 상당의 무료 체험판을 사용할 수 있습니다.
프로젝트 만들기(선택사항)
이 실습에 사용할 현재 프로젝트가 없는 경우 여기에서 새 프로젝트를 만드세요.
3. Vertex AI Workbench 환경 설정
사전 구성된 노트북 환경에 액세스하고 필요한 종속 항목을 설치하는 것으로 시작하겠습니다.
Vertex AI Workbench 액세스
- Google Cloud 콘솔에서 탐색 메뉴 ☰ > Vertex AI > 대시보드를 클릭하여 Vertex AI로 이동합니다.
- 모든 권장 API 사용 설정을 클릭합니다. 참고: 이 단계가 완료될 때까지 기다려 주세요.
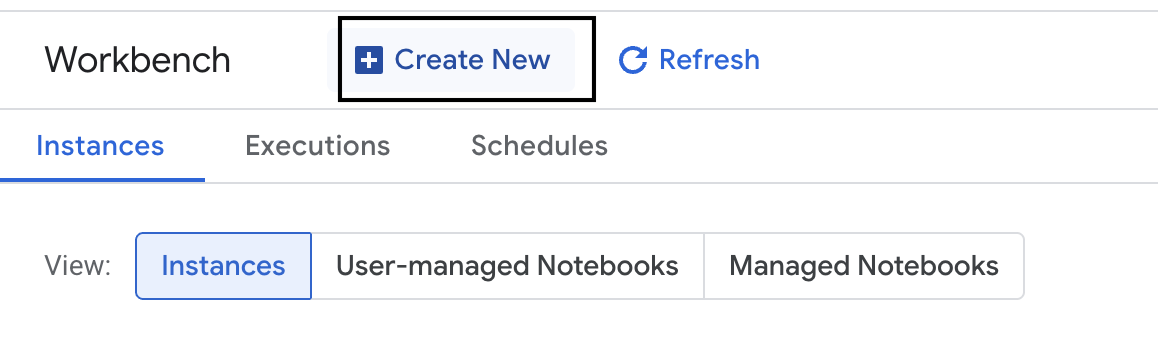
- 왼쪽에서 Workbench를 클릭하여 새 워크벤치 인스턴스를 만듭니다.
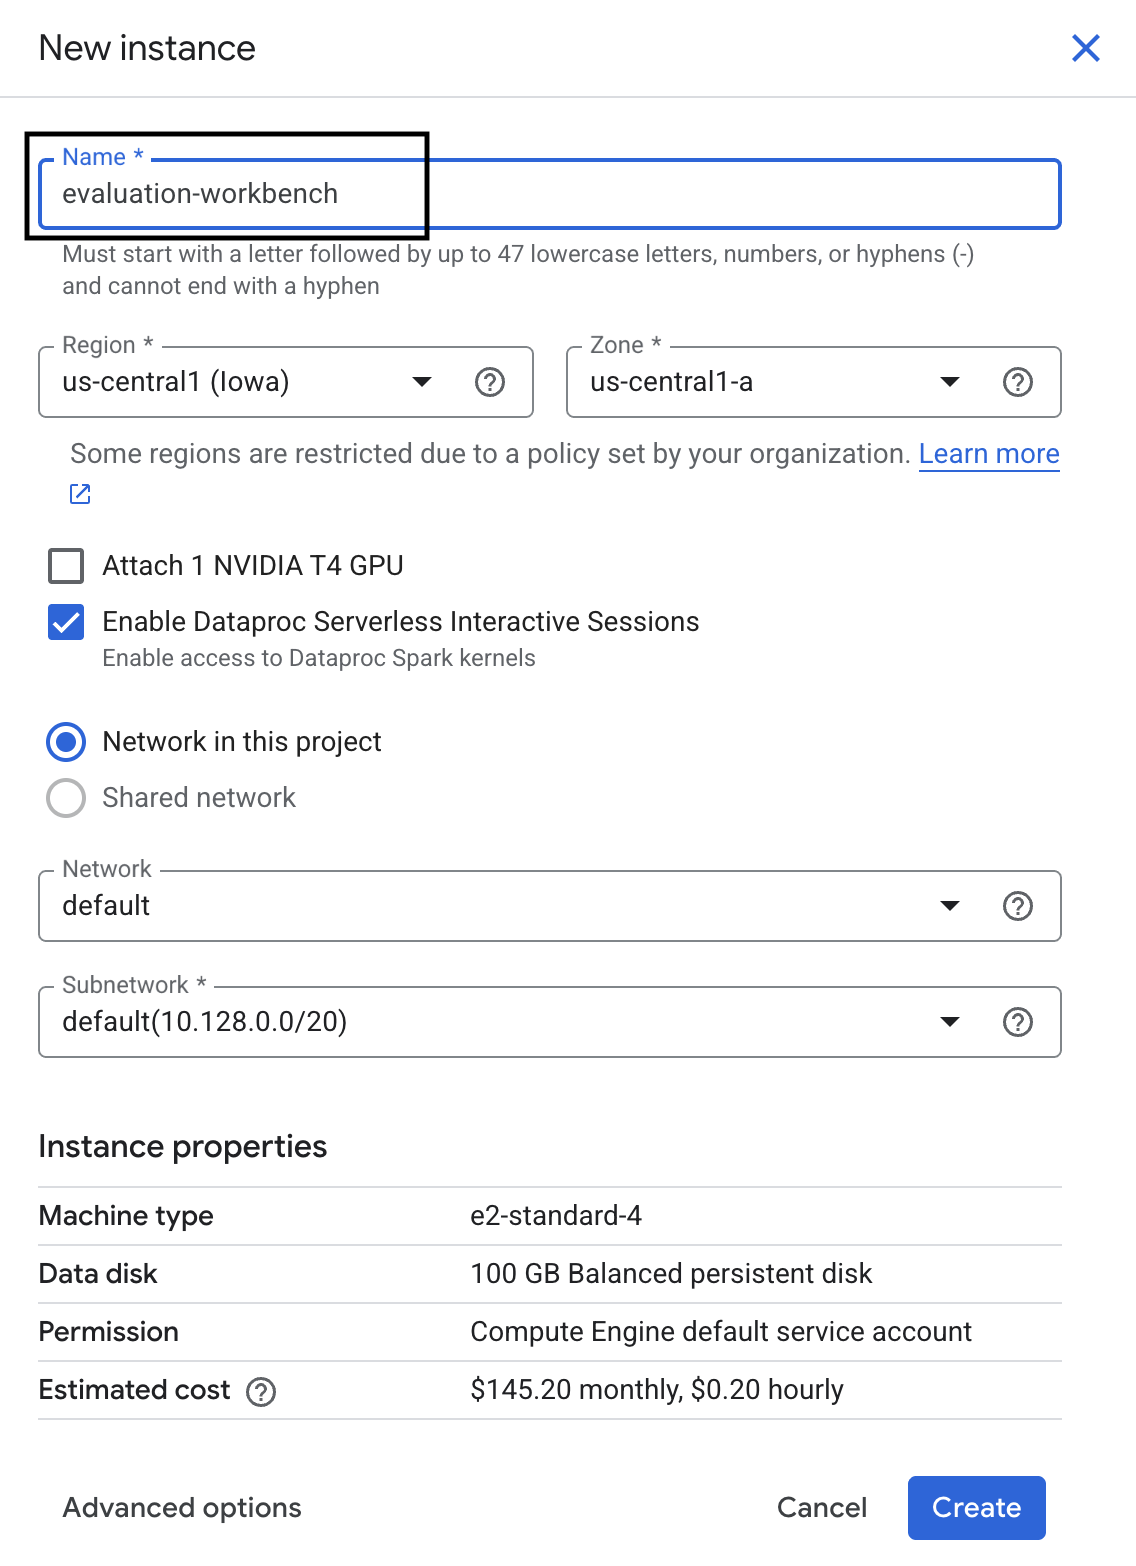
- 워크벤치 인스턴스 이름을 evaluation-workbench로 지정하고 만들기를 클릭합니다.
- 워크벤치가 설정될 때까지 기다립니다. 몇 분 정도 걸릴 수 있습니다.

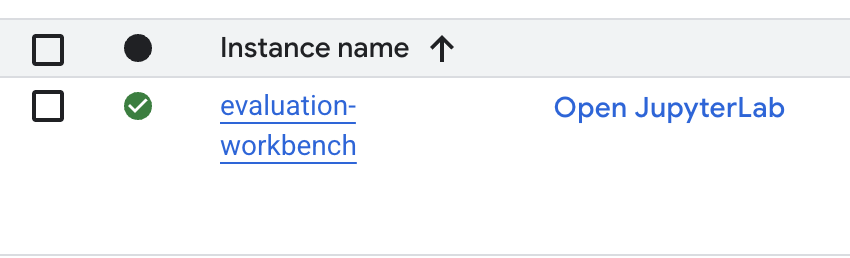
- 워크벤치가 프로비저닝되면 JupyterLab 열기를 클릭합니다.
- 워크벤치에서 새 Python3 노트북을 만듭니다.
이 환경의 기능에 대해 자세히 알아보려면 Vertex AI Workbench의 공식 문서를 참고하세요.
패키지 설치 및 환경 구성
- 노트북의 첫 번째 셀에서 아래 가져오기 문을 추가하고 실행 (SHIFT+ENTER)하여 Vertex AI SDK (평가 구성요소 포함) 및 기타 필수 패키지를 설치합니다.
%pip install -U -q google-cloud-aiplatform[evaluation] %pip install -U -q datasets anthropic[vertex] openai - 새로 설치된 패키지를 사용하려면 아래 코드 스니펫을 실행하여 커널을 다시 시작하는 것이 좋습니다.
# Automatically restart kernel after installation so that your environment can access the new packages. import IPython app = IPython.Application.instance() app.kernel.do_shutdown(True) - 다음 항목을 프로젝트 ID와 위치로 바꾸고 다음 셀을 실행합니다. 기본 위치는
europe-west1로 설정되어 있지만 Vertex AI Workbench 인스턴스가 있는 동일한 위치를 사용해야 합니다.# Configure your project settings PROJECT_ID = "YOUR PROJECT ID" LOCATION = "europe-west1" - 새 셀에서 다음 코드를 실행하여 이 실습에 필요한 모든 Python 라이브러리를 가져옵니다.
from anthropic import AnthropicVertex
from google.auth import default, transport
import openai
import pandas as pd
from vertexai.evaluation import (
   EvalTask,
   MetricPromptTemplateExamples,
   PairwiseMetric,
   PointwiseMetric,
   PointwiseMetricPromptTemplate,
)
from vertexai.generative_models import GenerativeModel
from vertexai.preview.evaluation import notebook_utils
4. 평가 데이터 세트 설정
이 튜토리얼에서는 OpenOrca 데이터 세트의 샘플 10개를 사용합니다. 이렇게 하면 평가 시간을 관리 가능한 수준으로 유지하면서 모델 간의 의미 있는 차이를 확인할 수 있는 충분한 데이터를 얻을 수 있습니다.
💡 전문가 팁: 프로덕션에서는 통계적으로 유의미한 결과를 얻기 위해 100~500개의 예가 필요하지만 학습 및 신속한 프로토타입 제작에는 10개의 샘플이 적합합니다.
데이터 세트 준비
- 새 셀에서 다음 셀을 실행하여 데이터를 로드하고, pandas DataFrame으로 변환하고, 평가 작업의 명확성을 위해
response열의 이름을reference로 변경하고, 10개 예시의 무작위 샘플을 만듭니다.from datasets import load_dataset ds = ( load_dataset( "Open-Orca/OpenOrca", data_files="1M-GPT4-Augmented.parquet", split="train[:100]", ) .to_pandas() .drop(columns=["id"]) .rename(columns={"response": "reference"}) ) dataset = ds.sample(n=10) - 이전 셀의 실행이 완료되면 다음 셀에서 다음 코드를 추가하고 실행하여 평가 데이터 세트의 처음 몇 행을 표시합니다.
dataset.head()
5. 계산 기반 측정항목으로 기준 설정
이 작업에서는 계산 기반 측정항목을 사용하여 기준 점수를 설정합니다. 이 접근 방식은 빠르며 향후 개선사항을 측정할 수 있는 객관적인 기준을 제공합니다.
요약 작업의 표준 측정항목인 ROUGE (Recall-Oriented Understudy for Gisting Evaluation)를 사용합니다. 모델 생성 대답의 단어 시퀀스 (n-그램)를 정답 reference 텍스트의 단어와 비교하는 방식으로 작동합니다.
계산 기반 측정항목에 대해 자세히 알아보세요.
기준 평가 실행
- 새 셀에서 다음 셀을 추가하고 실행하여 테스트할 모델(
gemini-2.0-flash)을 정의합니다.generation_config에는 모델의 출력에 영향을 미치는temperature,max_output_tokens과 같은 파라미터가 포함됩니다.# Model to be evaluated model = GenerativeModel( "gemini-2.0-flash", generation_config={"temperature": 0.6, "max_output_tokens": 256, "top_k": 1}, )GenerativeModel클래스는 Vertex AI SDK에서 대규모 언어 모델과 상호작용하기 위한 기본 인터페이스입니다. - 다음 셀에서 다음 코드를 추가하고 실행하여
EvalTask를 만들고 실행합니다. Vertex AI Evaluation SDK의 이 객체는 평가를 오케스트레이션합니다. 데이터 세트와 계산할 측정항목(이 경우rouge_l_sum)으로 구성합니다.# Define an EvalTask with ROUGE-L-SUM metric rouge_eval_task = EvalTask( dataset=dataset, metrics=["rouge_l_sum"], ) rouge_result = rouge_eval_task.evaluate( model=model, prompt_template="# System_prompt\n{system_prompt} # Question\n{question}", ) - 다음 셀에서 이 코드를 실행하여 결과를 표시합니다.
notebook_utils.display_eval_result(rouge_result)display_eval_result()유틸리티는 평균 점수와 행별 결과를 보여줍니다.
6. 선택사항: 모델 기반 점별 측정항목으로 평가
참고: 이 섹션은 제공된 무료 크레딧 한도 내에서 실행되지 않을 수 있습니다.
ROUGE는 유용하지만 어휘 중복만 측정합니다. 즉, 일치하는 단어만 계산하고 컨텍스트, 동의어 또는 의역은 이해하지 못합니다. 따라서 대답이 유창한지 또는 논리적인지 판단하는 데는 적합하지 않습니다. 모델의 성능을 자세히 이해하려면 모델 기반 포인트별 측정항목을 사용합니다.
이 방법을 사용하면 다른 LLM('심사 모델')이 유창성이나 일관성과 같은 사전 정의된 기준에 따라 각 대답을 개별적으로 평가합니다.
모델 기반 측정항목에 대해 자세히 알아보세요.
점별 평가 실행
- 새 셀에서 다음을 실행하여 대화형 드롭다운 메뉴를 만듭니다. 이 실행의 경우 목록에서 coherence를 선택합니다.
#Select a pointwise metric to use import ipywidgets as widgets pointwise_single_turn_metrics = [ metric for metric in MetricPromptTemplateExamples.list_example_metric_names() if not metric.startswith("pairwise") and not metric.startswith("multi_turn") ] dropdown = widgets.Dropdown( options=pointwise_single_turn_metrics, description="Select a metric:", font_weight="bold", style={"description_width": "initial"}, ) def dropdown_eventhandler(change): global POINTWISE_METRIC if change["type"] == "change" and change["name"] == "value": POINTWISE_METRIC = change.new print("Selected:", change.new) POINTWISE_METRIC = dropdown.value dropdown.observe(dropdown_eventhandler, names="value") display(dropdown) - 새 셀에서
EvalTask을 다시 실행하되 이번에는 선택한 모델 기반 측정항목을 사용합니다. Vertex AI Evaluation Service는 원본 프롬프트, 참조 답변, 후보 모델의 응답, 선택한 측정항목의 안내가 포함된 평가 모델의 프롬프트를 구성합니다. 심사 모델은 숫자 점수와 평가에 대한 설명을 반환합니다. 참고: 이 단계를 실행하는 데 몇 분 정도 걸립니다.pointwise_result = EvalTask( dataset=dataset, metrics=[POINTWISE_METRIC], ).evaluate( model=model, prompt_template="# System_prompt\n{system_prompt} # Question\n{question}", )
결과 표시
평가가 완료되면 다음 단계는 출력을 분석하는 것입니다.
- 새 셀에서 다음 코드를 실행하여 선택한 측정항목의 평균 점수를 보여주는 요약 측정항목을 확인합니다.
notebook_utils.display_eval_result(pointwise_result) - 다음 셀에서 다음을 실행하여 평가 모델의 점수에 대한 서면 근거가 포함된 행별 분석을 확인합니다. 이 정성적 의견은 대답에 특정 점수가 부여된 이유를 이해하는 데 도움이 됩니다.
notebook_utils.display_explanations(pointwise_result, num=1, metrics=[POINTWISE_METRIC])
7. 더 심층적인 통계를 위해 맞춤 측정항목 만들기
유창성과 같은 사전 빌드된 측정항목은 유용하지만 특정 제품의 경우 자체 목표에 대한 성능을 측정해야 하는 경우가 많습니다. 맞춤 포인트별 측정항목을 사용하면 자체 평가 기준과 루브릭을 정의할 수 있습니다.
이 작업에서는 summarization_helpfulness라는 새 측정항목을 처음부터 만듭니다.
맞춤 측정항목 정의 및 실행
- 새 셀에서 다음을 실행하여 맞춤 측정항목을 정의합니다.
PointwiseMetricPromptTemplate에는 측정항목의 구성요소가 포함되어 있습니다.- criteria: 평가 모델에 평가할 구체적인 기준('핵심 정보', '간결성', '왜곡 없음')을 알려줍니다.
- rating_rubric: 각 점수의 의미를 정의하는 5점 스코어링 척도를 제공합니다.
- input_variables: 평가를 수행하는 데 필요한 컨텍스트가 있도록 데이터 세트의 추가 열을 심사 모델에 전달합니다.
# This new custom metric evaluates the actual quality and usefulness of the summary. summarization_helpfulness_metric = PointwiseMetric( metric="summarization_helpfulness", metric_prompt_template=PointwiseMetricPromptTemplate( criteria={ "Key Information": "Does the summary capture the most critical pieces of information from the original text? It should not miss the main topic or key takeaways.", "Conciseness": "Is the summary brief and to the point? It should avoid unnecessary words or repetitive information.", "No Distortion": "Does the summary introduce information or opinions that were NOT present in the original text? It must accurately reflect the source material without adding hallucinations." }, rating_rubric={ "5": "Excellent: Captures all key information, is highly concise, and has zero distortion.", "4": "Good: Captures most key information with minor omissions, is concise, and has no distortion.", "3": "Satisfactory: Captures the main idea but misses some key details OR is not very concise.", "2": "Unsatisfactory: Misses the main idea of the original text OR contains minor distortions/hallucinations.", "1": "Poor: Is completely irrelevant, fails to summarize the text, OR contains significant distortions.", }, input_variables=["prompt", "reference"], ), ) - 다음 셀에서 다음 코드를 실행하여 새 맞춤 측정항목으로
EvalTask를 실행합니다.# You would then update the EvalTask to use this new metric pointwise_result = EvalTask( dataset=dataset, metrics=[summarization_helpfulness_metric], ).evaluate( model=model, prompt_template="# System_prompt\n{system_prompt} # Question\n{question}", ) - 새 셀에서 다음을 실행하여 결과를 표시합니다.
notebook_utils.display_eval_result(pointwise_result)
8. 쌍별 평가로 모델 비교
특정 작업에서 두 모델 중 어떤 모델이 더 나은 성능을 보이는지 결정해야 하는 경우 쌍별 모델 기반 평가를 사용할 수 있습니다. 이 방법은 심판 모델이 승자를 결정하는 A/B 테스트의 한 형태로, 데이터 기반 모델 선택을 위한 직접적인 비교를 제공합니다.
모델:
- 후보 모델: 모델 변수 (이전에
gemini-2.0-flash로 정의됨)가.evaluate()메서드에 전달됩니다. 테스트하는 기본 모델입니다. - 기준 모델: 두 번째 모델
gemini-2.0-flash-lite이 PairwiseMetric 클래스 내에 지정됩니다. 비교 대상 모델입니다.
쌍별 평가 실행
- 새 셀에서 다음 코드를 추가하고 실행하여 대화형 드롭다운 메뉴를 만듭니다. 이를 통해 비교에 사용할 쌍별 측정항목을 선택할 수 있습니다. 이번 실행에서는 pairwise_summarization_quality를 선택합니다.
from IPython.display import display import ipywidgets as widgets pairwise_single_turn_metrics = [ metric for metric in MetricPromptTemplateExamples.list_example_metric_names() if metric.startswith("pairwise") and "multi_turn" not in metric ] dropdown = widgets.Dropdown( options=pairwise_single_turn_metrics, description="Select a metric:", font_weight="bold", style={"description_width": "initial"}, ) def dropdown_eventhandler(change): global POINTWISE_METRIC if change["type"] == "change" and change["name"] == "value": POINTWISE_METRIC = change.new print("Selected:", change.new) def dropdown_eventhandler(change): global PAIRWISE_METRIC_NAME if change["type"] == "change" and change["name"] == "value": PAIRWISE_METRIC_NAME = change.new print("Selected:", change.new) PAIRWISE_METRIC_NAME = dropdown.value dropdown.observe(dropdown_eventhandler, names="value") display(dropdown) - 다음 셀에 다음 코드를 추가하고 실행하여
EvalTask를 구성하고 실행합니다.PairwiseMetric클래스를 사용하여 기준 모델 (gemini-2.0-flash-lite)을 정의하는 반면 후보 모델 (gemini-2.0-flash)은.evaluate()메서드에 전달됩니다.pairwise_result = EvalTask( dataset=dataset, metrics=[ PairwiseMetric( metric=PAIRWISE_METRIC_NAME, metric_prompt_template=MetricPromptTemplateExamples.get_prompt_template( PAIRWISE_METRIC_NAME ), # Define a baseline model to compare against baseline_model=GenerativeModel("gemini-2.0-flash-lite"), ) ], ).evaluate( # Specify a candidate model for pairwise comparison model=model, prompt_template="# System_prompt\n{system_prompt} # Question\n{question}", ) - 새 셀에 다음 코드를 추가하고 실행하여 결과를 표시합니다. 요약 표에는 각 모델의 '승률'이 표시되어 심판 모델이 더 자주 선호하는 모델을 나타냅니다.
notebook_utils.display_eval_result(pairwise_result)
9. 선택사항: 페르소나 기반 프롬프트 평가
참고: 이 섹션은 제공된 무료 크레딧 한도 내에서 실행되지 않을 수 있습니다.
이 작업에서는 모델이 다양한 페르소나를 채택하도록 지시하는 여러 프롬프트 템플릿을 테스트합니다. 이 프로세스(프롬프트 엔지니어링 또는 프롬프트 설계라고도 함)를 사용하면 특정 사용 사례에 가장 효과적인 프롬프트를 체계적으로 찾을 수 있습니다.
요약 데이터 세트 준비
이 평가를 수행하려면 데이터 세트에 다음 필드가 포함되어야 합니다.
instruction: 모델에 제공하는 핵심 작업입니다. 이 경우 간단한 '다음 기사를 요약해 줘'입니다.context: 모델이 처리해야 하는 소스 텍스트입니다. 여기에서는 4가지 뉴스 스니펫을 제공했습니다.reference: 그라운드 트루스 또는 '골드 스탠더드' 요약입니다. 모델에서 생성된 출력은 이 텍스트와 비교되어 ROUGE 및 요약 품질과 같은 측정항목의 점수를 계산합니다.
- 새 셀에서 다음 코드를 추가하고 실행하여 요약 작업을 위한
pandas.DataFrame를 만듭니다.instruction = "Summarize the following article: \n" context = [ "Typhoon Phanfone has killed at least one person, a US airman on Okinawa who was washed away by high waves. Thousands of households have lost power and Japan's two largest airlines have suspended many flights. The storm also forced the suspension of the search for people missing after last week's volcanic eruption. The storm-tracking website Tropical Storm Risk forecasts that Phanfone will rapidly lose power over the next few hours as it goes further into the Pacific Ocean. Typhoon Phanfone was downgraded from an earlier status of a super typhoon, but the Japan Meteorological Agency had warned it was still a dangerous storm. Japan averages 11 typhoons a year, according to its weather agency. The typhoon made landfall on Monday morning near the central city of Hamamatsu, with winds of up to 180 km/h (112 mph). The airman was one of three US military personnel swept away by high waves whipped up by the typhoon off southern Okinawa island, where the US has a large military base. The remaining two are still missing. A police spokesman said they had been taking photographs of the sea. A university student who was surfing off the seas of Kanagawa Prefecture, south of Tokyo, was also missing, national broadcast NHK reports. It said at least 10 people had been injured and 9,500 houses were without power. The storm was expected to deposit about 100mm of rain on Tokyo over 24 hours, according to the Transport Ministry website. Many schools were closed on Monday and two car companies in Japan halted production at some plants ahead of the storm. More than 174 domestic flights were affected nationwide, NHK state broadcaster said on Sunday. On Sunday, heavy rain delayed the Japanese Formula One Grand Prix in Suzaka. French driver Jules Bianchi lost control in the wet conditions and crashed, sustaining a severe head injury.", "The blaze started at the detached building in Drivers End in Codicote, near Welwyn, during the morning. There was another fire at the building 20 years ago, after which fire-proof foil was placed under the thatch, which is protecting the main building. More than 15 fire engines and support vehicles were called to tackle the blaze. Roads in the area were closed and traffic diverted.", 'The 18-year-old fell at the New Charter Academy on Broadoak Road in Ashton-under-Lyne at about 09:10 BST, Greater Manchester Police (GMP) said. GMP said he had gone to Manchester Royal Infirmary and his condition was "serious". Principal Jenny Langley said the school would remain "fully open" while police investigated. "Our thoughts are with the family and we\'re doing everything we can to support them along with staff and pupils," she said.', 'But Belgian-born Dutchman Max Verstappen was unable to drive a car legally on his own in either country. That all changed on Wednesday when the youngster turned 18 and passed his driving test at the first attempt. Despite having competed in 14 grands prix since his debut in Australia in March, Verstappen admitted to feeling the pressure during his test. "It\'s a relief," said the Toro Rosso driver, who finished ninth in Japan on Sunday and had only started driving lessons a week ago. "I was a bit nervous to make mistakes, but the exam went well." A bonus of turning 18 is that Verstappen will now be able to drink the champagne if he ever makes it onto the podium.', ] reference = [ "A powerful typhoon has brought many parts of Japan to a standstill and briefly battered Tokyo before heading out to sea.", "A major fire has been burning in the thatched roof of a large property in Hertfordshire.", "A student has been taken to hospital after falling from a balcony at a Greater Manchester school.", "He is Formula 1's youngest ever driver and in charge of a car that can reach over 200mph.", ] response = [ "Typhoon Phanfone, while downgraded from super typhoon status, caused significant disruption and tragedy in Japan. One US airman died after being swept away by high waves, with two more missing. The storm caused power outages for thousands, flight cancellations, and the suspension of rescue efforts for missing volcano victims. Heavy rain and strong winds led to school and factory closures, transportation disruptions, and at least 10 injuries. The typhoon is expected to weaken as it moves over the Pacific Ocean.", "A large fire broke out in a detached thatched building in Codicote, near Welwyn. This is the second fire at the building in 20 years. Thankfully, fire-proof foil installed after the previous fire is protecting the main building. Over 15 fire engines and support vehicles responded, closing roads and diverting traffic in the area.", "An 18-year-old student at New Charter Academy in Ashton-under-Lyne suffered a serious fall and was hospitalized. The incident is under investigation by Greater Manchester Police, but the school remains open. The principal expressed support for the student's family and the school community.", "Max Verstappen, a Formula One driver, was finally able to get his driver's license at age 18. Despite already competing in 14 Grand Prix races, he was not of legal driving age in his native countries. He admitted to being nervous but passed the test on his first attempt. As an added bonus of turning 18, Verstappen can now enjoy champagne on the podium if he places.", ] eval_dataset = pd.DataFrame( { "instruction": instruction, "context": context, "reference": reference, } )
프롬프트 평가 작업 실행
요약 데이터 세트가 준비되면 이 작업의 핵심 실험을 실행할 수 있습니다. 여러 프롬프트 템플릿을 비교하여 모델에서 가장 고품질의 출력을 생성하는 템플릿을 확인합니다.
- 다음 셀에서 각 프롬프트 실험에 재사용될 단일
EvalTask를 만듭니다.experiment매개변수를 설정하면 이 작업의 모든 평가 실행이 Vertex AI Experiments에 자동으로 로깅되고 그룹화됩니다.EXPERIMENT_NAME = "eval-sdk-prompt-engineering" # @param {type:"string"} summarization_eval_task = EvalTask( dataset=eval_dataset, metrics=[ "rouge_l_sum", "bleu", "fluency", "coherence", "safety", "groundedness", "summarization_quality", "verbosity", "instruction_following", "text_quality", ], experiment=EXPERIMENT_NAME, )rouge_l_sum,bleu과 같은 계산 측정항목부터 다양한 모델 기반 측정항목 (fluency,coherence,summarization_quality,instruction_following등)까지 모든 것을 계산하도록 서비스에 지시합니다. 이를 통해 각 프롬프트가 모델의 출력 품질에 미치는 영향을 전체적으로 파악할 수 있습니다. - 새 셀에서 다음 코드를 추가하고 실행하여 페르소나 기반 프롬프트 전략 4개를 정의하고 평가합니다.
for루프는 각 템플릿을 반복하고 평가를 실행합니다. 각 템플릿은 모델에 특정 페르소나 또는 목표를 제공하여 다양한 스타일의 요약을 유도하도록 설계되었습니다.- 페르소나 1 (표준): 중립적이고 간단한 요약 요청입니다.
- 페르소나 2 (임원): 바쁜 임원이 선호하는 것처럼 결과와 영향에 중점을 두고 글머리 기호로 요약을 요청합니다.
- 페르소나 3 (5학년): 모델에 간단한 언어를 사용하도록 지시하여 출력의 복잡성을 조정하는 능력을 테스트합니다.
- 페르소나 4 (기술 분석가): 주요 통계와 항목이 보존된 매우 사실적인 요약을 요구하여 모델의 정확성을 테스트합니다. 이러한 새 템플릿의 자리표시자(예:
{context}및{instruction})는 이 작업에서 만든eval_dataset의 새 열 이름과 일치합니다.
        # Define prompt templates that target different user personas
    prompt_templates = [
        # Persona 1: Standard, neutral summary
        "Article: {context}. Task: {instruction}. Summary:",

        # Persona 2: For a busy executive (bullet points)
        "Instruction: {instruction} into three key bullet points for a busy executive. Focus on the main outcome and impact. Article: {context}. Summary:",

        # Persona 3: For a 5th grader (simple language)
        "Instruction: {instruction} such that you're explaining it to a 10-year-old. Use simple words. Article: {context}. Summary:",

        # Persona 4: For a technical analyst (fact-focused)
        "Instruction: Provide a detailed, factual summary of the following text, ensuring all key statistics, names, and locations are preserved. Article: {context}. Summary:",
    ]

    eval_results = []
    for i, prompt_template in enumerate(prompt_templates):
        eval_result = summarization_eval_task.evaluate(
            prompt_template=prompt_template,
            model=GenerativeModel(
                "gemini-2.0-flash",
                generation_config={
                    "temperature": 0.3,
                    "max_output_tokens": 256,
                    "top_k": 1,
                },
            ),
            evaluation_service_qps=5,
        )


        eval_results.append((f"Prompt Persona #{i+1}", eval_result))
결과 분석 및 시각화
실험을 실행하는 것이 첫 번째 단계입니다. 실질적인 가치는 결과를 분석하여 데이터 기반 결정을 내리는 데서 비롯됩니다. 이 작업에서는 SDK의 시각화 도구를 사용하여 프롬프트 페르소나 실험의 출력을 해석합니다.
- 새 셀에서 다음 코드를 실행하여 테스트한 네 가지 프롬프트 페르소나 각각의 요약 결과를 표시합니다. 이를 통해 실적을 대략적으로 정량적으로 파악할 수 있습니다.
for title, eval_result in eval_results: notebook_utils.display_eval_result(title=title, eval_result=eval_result) - 새 셀에 다음 코드를 추가하고 실행하여 각 페르소나의
summarization_quality측정항목에 대한 근거를 확인합니다.for title, eval_result in eval_results: notebook_utils.display_explanations( eval_result, metrics=["summarization_quality"], num=2 ) - 각 프롬프트의 다양한 품질 측정항목 간의 절충을 시각화하는 방사형 차트를 생성합니다. 새 셀에 다음 코드를 추가하고 실행합니다.
notebook_utils.display_radar_plot( eval_results, metrics=["instruction_following", "fluency", "coherence", "text_quality"], ) - 더 직접적인 나란히 비교를 위해 막대 그래프를 만드세요. 새 셀에 다음 코드를 추가하고 실행합니다.
notebook_utils.display_bar_plot(
    eval_results,
    metrics=["instruction_following", "fluency", "coherence", "text_quality"],
)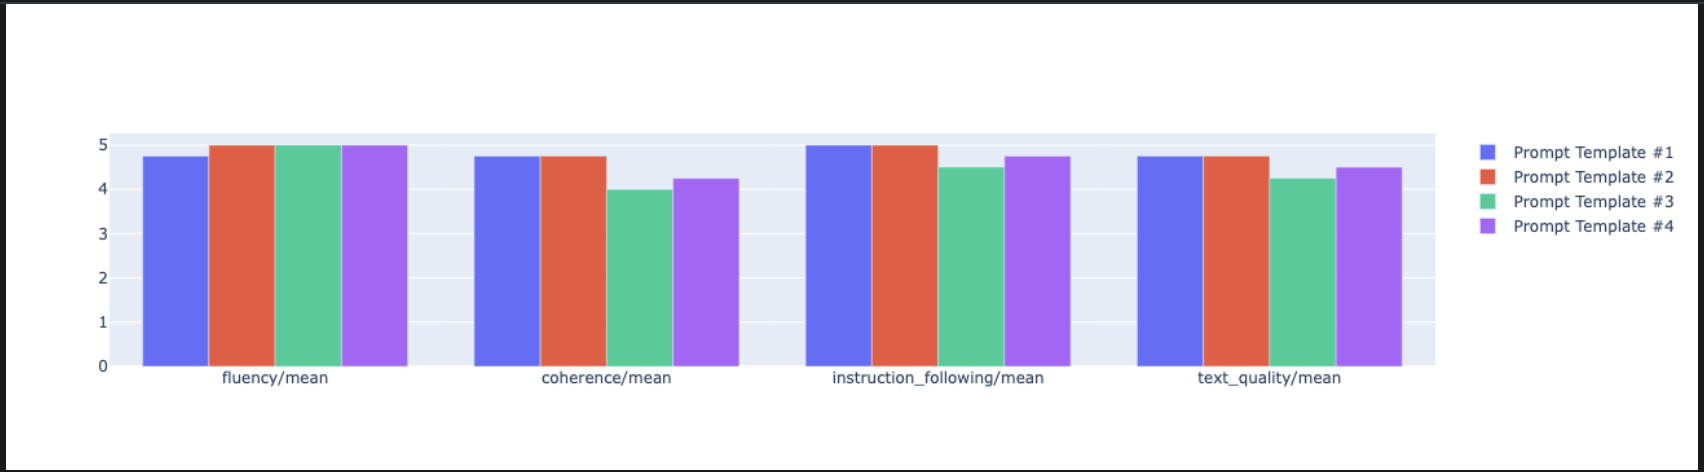
- 이제 이 작업에 대해 Vertex AI 실험에 로깅된 모든 실행의 요약을 볼 수 있습니다. 이는 시간 경과에 따른 작업을 추적하는 데 유용합니다. 새 셀에 다음 코드를 추가하고 실행합니다.
summarization_eval_task.display_runs()
10. 실험 정리
프로젝트를 정리하고 불필요한 요금이 청구되지 않도록 하려면 생성한 리소스를 정리하는 것이 좋습니다. 이 실습 전반에 걸쳐 모든 평가 실행이 Vertex AI 실험에 로깅되었습니다. 다음 코드는 이 상위 실험을 삭제하며, 이 경우 연결된 모든 실행과 기본 데이터도 삭제됩니다.
- 새 셀에서 이 코드를 실행하여 Vertex AI 실험과 연결된 실행을 삭제합니다.
delete_experiment = True

# Please set your LOCATION to the same one used during Vertex AI SDK initialization.
LOCATION = "YOUR LOCATION" # @param {type:"string"}

if delete_experiment:

    from google.cloud import aiplatform

    aiplatform.init(project=PROJECT_ID, location=LOCATION)
    experiment = aiplatform.Experiment(EXPERIMENT_NAME)
    experiment.delete()
11. 연습에서 프로덕션으로
이 실습에서 배운 기술은 신뢰할 수 있는 AI 애플리케이션을 만드는 데 필요한 기본 요소입니다. 하지만 수동으로 실행되는 노트북에서 프로덕션 등급 평가 시스템으로 전환하려면 추가 인프라와 더 체계적인 접근 방식이 필요합니다. 이 섹션에서는 확장할 때 고려해야 할 주요 사례와 전략적 프레임워크를 간략히 설명합니다.
프로덕션 평가 전략 수립
프로덕션 환경에서 이 실습의 기술을 적용하려면 반복 가능한 전략으로 공식화하는 것이 좋습니다. 다음 프레임워크에서는 모델 선택, 프롬프트 최적화, 지속적인 모니터링과 같은 일반적인 시나리오에 대한 주요 고려사항을 설명합니다.
모델 선택의 경우:
   # Evaluation strategy for choosing models
   evaluation_strategy = {
      "dataset_size": "100+ examples for statistical significance",
      "metrics": ["task-specific", "general quality", "efficiency"],
      "comparison_type": "pairwise with statistical testing",
      "baseline": "established_model_or_human_benchmark"
   }
프롬프트 최적화
   # Systematic prompt improvement workflow
   prompt_optimization = {
      "hypothesis": "Clear statement of what you're testing",
      "variants": "3-5 different prompt strategies",
      "evaluation": "Same metrics across all variants",
      "analysis": "Statistical significance + qualitative review"
   }
지속적 모니터링
   # Production evaluation pipeline
   production_eval = {
      "frequency": "Every model update + weekly monitoring",
      "automation": "CI/CD integration with quality gates",
      "metrics": "Speed + quality + cost tracking",
      "alerting": "Performance degradation detection"
   }
비용 효율성 고려사항
모델 기반 평가는 규모가 커지면 비용이 많이 들 수 있습니다. 비용 효율적인 생산 전략은 목적에 따라 다양한 방법을 사용합니다. 다음 표에는 다양한 평가 유형의 속도, 비용, 사용 사례 간의 절충안이 요약되어 있습니다.
평가 유형 | 시간 | 샘플당 비용 | 권장 용도 |
ROUGE/BLEU | 초 | ~$0.001 | 대량 스크리닝 |
모델 기반 Pointwise | 약 1~2초 | 약 0.01달러 | 품질 평가 |
쌍별 비교 | 약 2~3초 | ~$0.02 | 모델 선택 |
인간 평가 | 분 | $1~$10 | 최우선 기준 검증 |
CI/CD 및 모니터링으로 자동화
수동 노트북 실행은 확장할 수 없습니다. 지속적 통합/지속적 배포 (CI/CD) 파이프라인에서 평가를 자동화합니다.
- 품질 게이트 만들기: 평가 작업을 CI/CD 파이프라인 (예: Cloud Build)에 통합합니다. 새 프롬프트 또는 모델에 대한 평가를 자동으로 실행하고 주요 품질 점수가 정의된 기준점 아래로 떨어지면 배포를 차단합니다.
- 추세 모니터링: 평가 실행에서 Google Cloud Monitoring과 같은 서비스로 요약 측정항목을 내보냅니다. 대시보드를 빌드하여 시간 경과에 따른 품질을 추적하고 자동 알림을 설정하여 팀에 중요한 성능 저하를 알립니다.
12. 결론
실습을 완료했습니다. 생성형 AI 모델을 평가하는 데 필요한 필수 기술을 배웠습니다.
이 실습은 Google Cloud를 사용한 프로덕션 레디 AI 학습 과정의 일부입니다.
- 전체 커리큘럼을 살펴보고 프로토타입에서 프로덕션으로 전환하세요.
ProductionReadyAI해시태그를 사용하여 진행 상황을 공유하세요.
요약
이 실습에서는 다음을 수행하는 방법을 배웠습니다.
EvalTask프레임워크를 사용하여 평가 권장사항을 적용합니다.- 계산 기반 심사자부터 모델 기반 심사자까지 다양한 측정항목 유형을 사용합니다.
- 다양한 버전을 테스트하여 프롬프트를 최적화합니다.
- 실험 추적을 사용하여 재현 가능한 워크플로를 빌드합니다.
지속적인 학습을 위한 리소스
이 실습에서 배운 체계적인 평가 접근 방식은 신뢰할 수 있는 고품질 AI 애플리케이션을 빌드하는 기반이 됩니다. 좋은 평가는 실험적 AI와 프로덕션 성공을 연결하는 다리 역할을 합니다.