
1. Introduction
Overview
The goal of this lab is to learn how to develop end-to-end Agentic Retrieval-Augmented Generation (RAG) applications in Google Cloud. In this lab, you will build a financial analysis agent that can answer questions by combining information from two different sources: unstructured documents (Alphabet's quarterly SEC filings - financial statements and operational details that every public company in the U.S. submits to the Securities and Exchange Commission), and structured data (historical stock prices).
You will use Vertex AI Search to build a powerful semantic search engine for the unstructured financial reports. For the structured data, you will create a custom Python tool. Finally, you will use the Agent Development Kit (ADK) to build an intelligent agent that can reason about a user's query, decide which tool to use, and synthesize the information into a coherent answer.
What you'll do
- Set up a Vertex AI Search data store for semantic search over private documents.
- Create a custom Python function as a tool for an agent.
- Use the Agent Development Kit (ADK) to build a multi-tool agent.
- Combine retrieval from unstructured and structured data sources to answer complex questions.
- Test and interact with an agent that exhibits reasoning capabilities.
What you'll learn
In this lab, you will learn:
- The core concepts of Retrieval-Augmented Generation (RAG) and Agentic RAG.
- How to implement semantic search over documents using Vertex AI Search.
- How to expose structured data to an agent by creating custom tools.
- How to build and orchestrate a multi-tool agent with the Agent Development Kit (ADK).
- How agents use reasoning and planning to answer complex questions using multiple data sources.
2. Understanding Retrieval-Augmented Generation
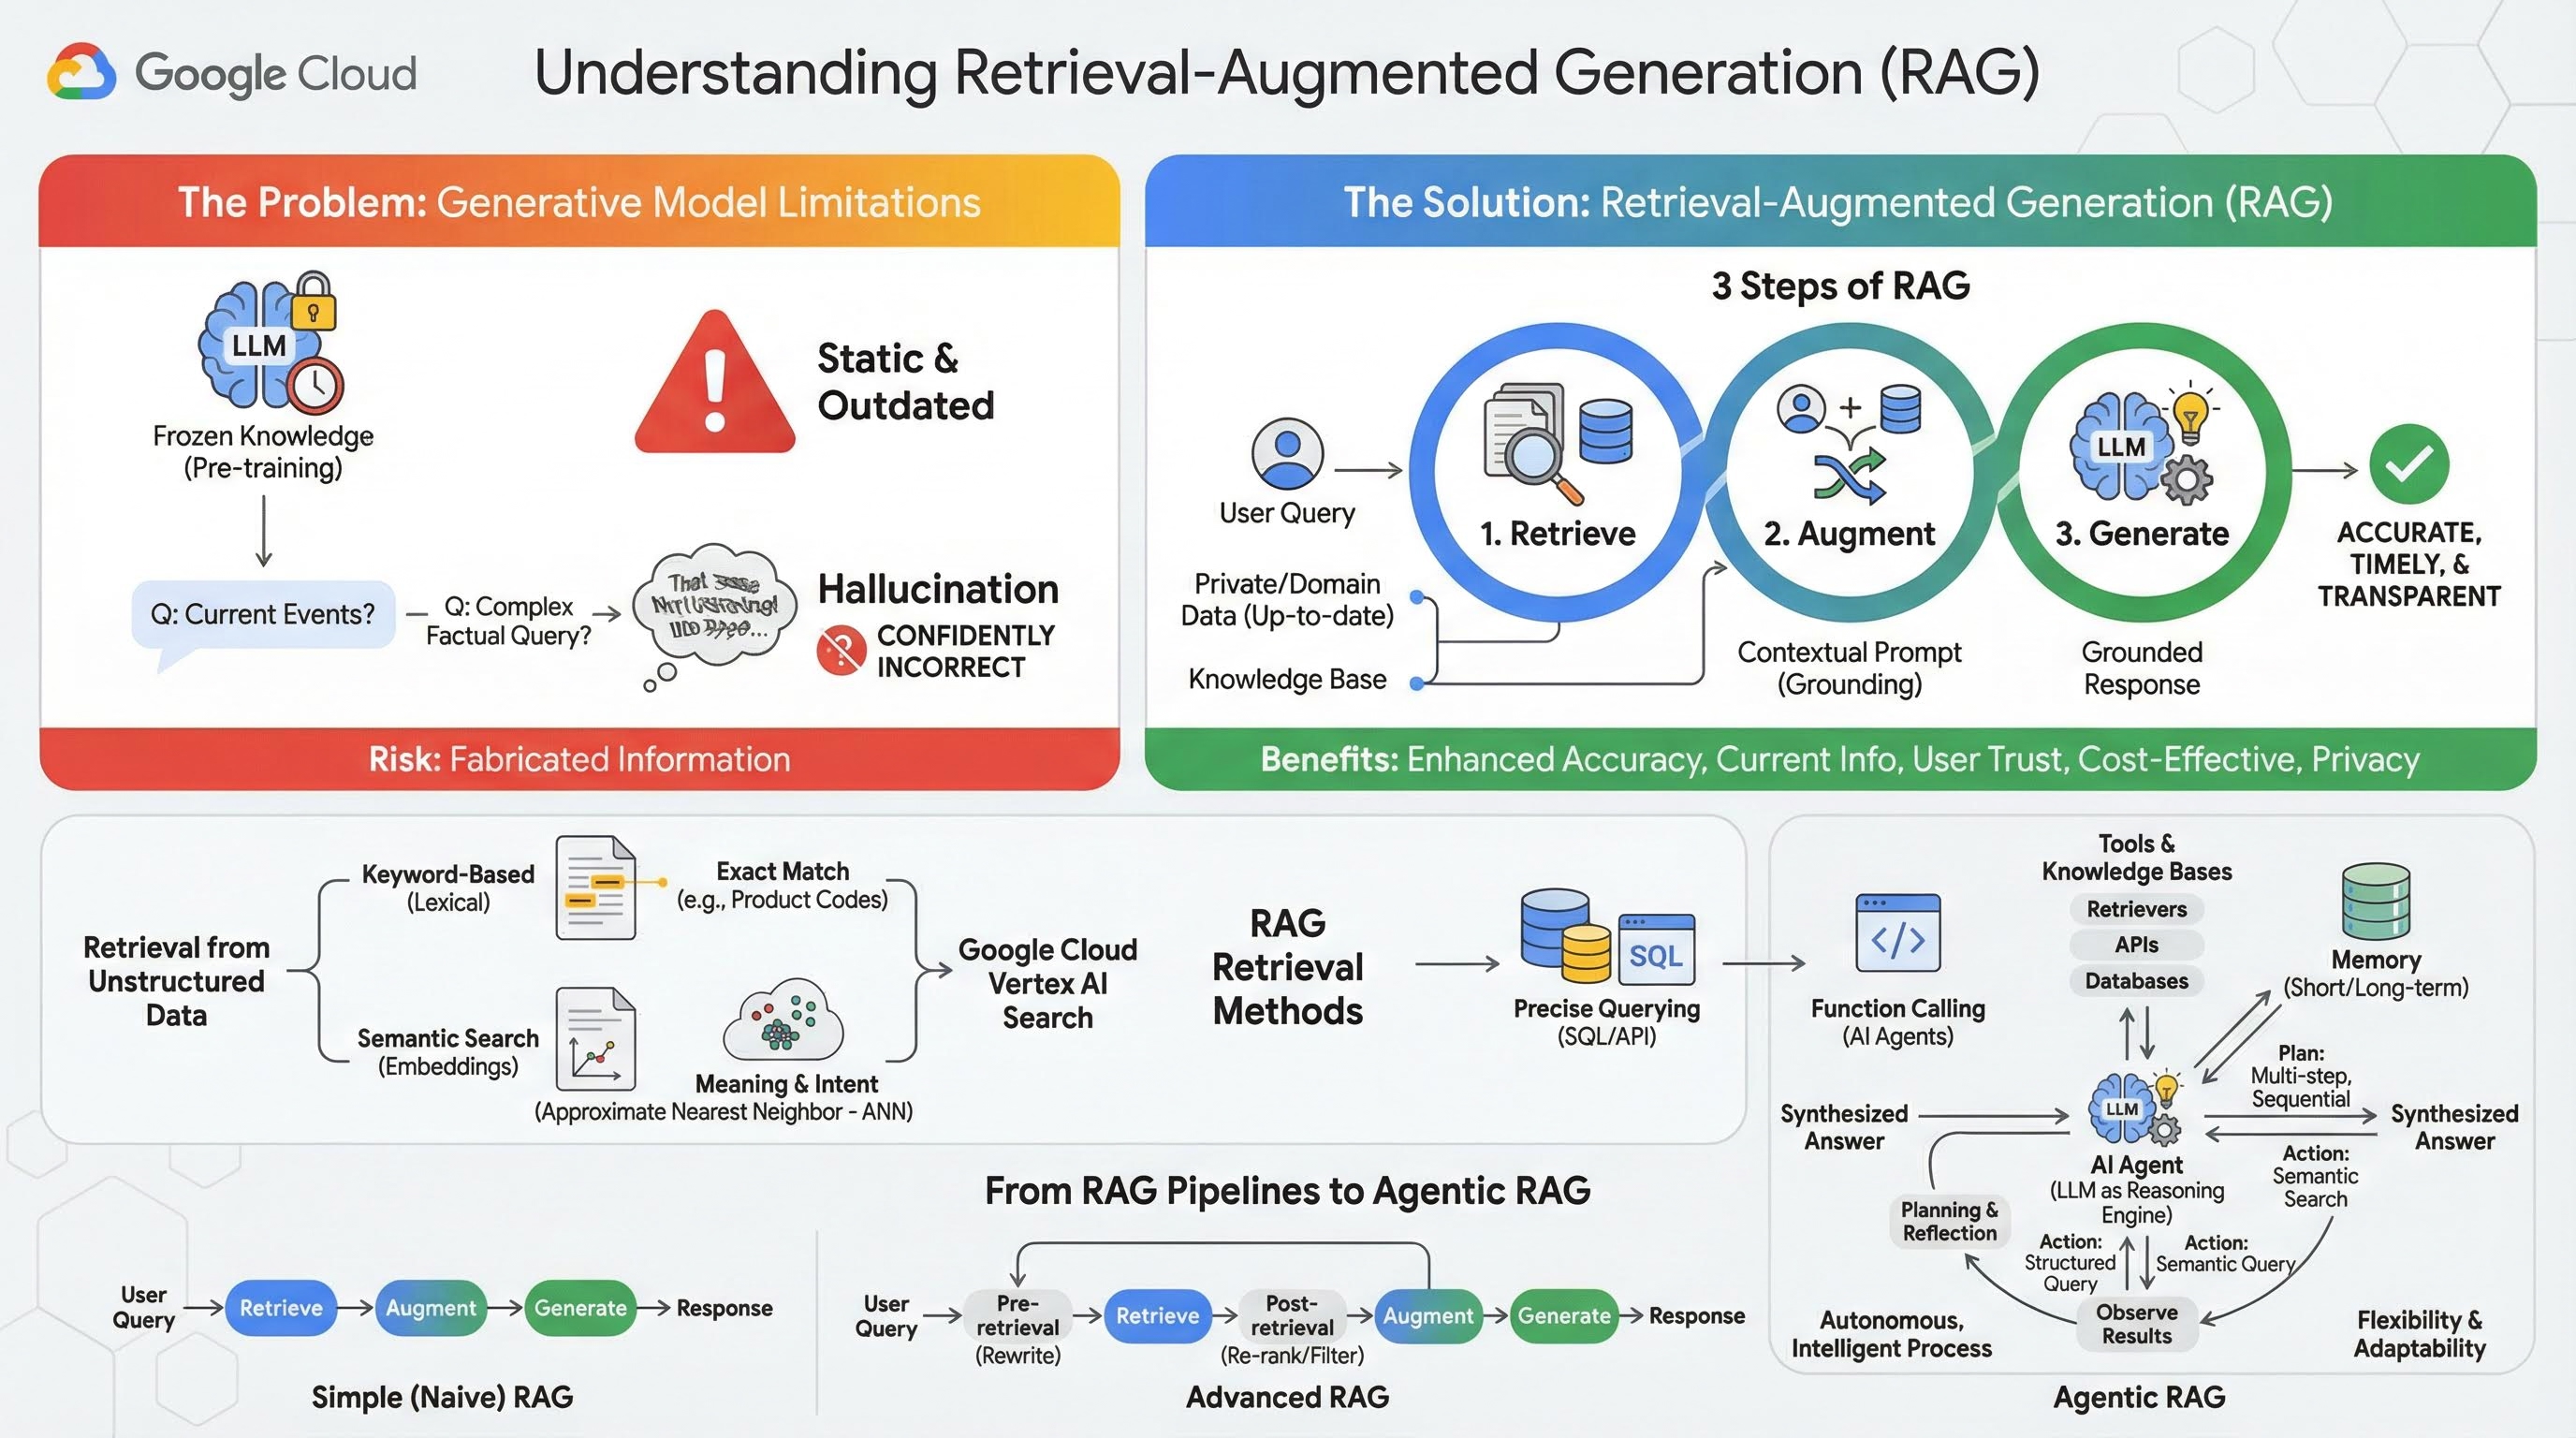
Large Generative Models (Large Language Models or LLMs for short, Vision-Language Models, etc.) are incredibly powerful, but they have inherent limitations. Their knowledge is frozen at the time of their pre-training, making it static and instantly outdated. Even after fine-tuning, the model's knowledge doesn't become much more recent, as this is not the goal of the post-training stages.
The way Large Language Models are trained, especially "thinking" models, they are "rewarded" for giving some answer even if the model itself doesn't have factual information that would support such answer. This is when they say that a model "hallucinates" - confidently generates plausible-sounding but factually incorrect information.
Retrieval-Augmented Generation is a powerful architectural pattern designed to solve these exact problems. It is an architectural framework that enhances the capabilities of Large Language Models by connecting them to external, authoritative knowledge sources in real-time. Instead of relying solely on its static, pre-trained knowledge, an LLM in a RAG system first retrieves relevant information related to a user's query and then uses that information to generate a more accurate, timely, and context-aware response.
This approach directly addresses the most significant weaknesses of generative models: their knowledge is fixed at a point in time, and they are prone to generating incorrect information, or "hallucinations". RAG effectively gives the LLM an "open-book exam," where the "book" is your private, domain-specific, and up-to-date data. This process of providing factual context to the LLM is known as "grounding."
3 steps of RAG
The standard Retrieval-Augmented Generation process can be broken down into three simple steps:
- Retrieve: When a user submits a query, the system first searches an external knowledge base (like a document repository, database, or website) to find information that is relevant to the query.
- Augment: The retrieved information is then combined with the original user query into an expanded prompt. This technique is sometimes called "prompt stuffing," as it enriches the prompt with factual context.
- Generate: This augmented prompt is fed to the LLM, which then generates a response. Because the model has been provided with relevant, factual data, its output is "grounded" and far less likely to be inaccurate or outdated.
Benefits of RAG
The introduction of the RAG framework has been transformative for building practical and trustworthy AI applications. Its key benefits include:
- Enhanced Accuracy and Reduced Hallucinations: By grounding responses in verifiable, external facts, RAG dramatically reduces the risk of the LLM fabricating information.
- Access to Current Information: RAG systems can be connected to constantly updated knowledge bases, allowing them to provide responses based on the very latest information, something impossible for a statically trained LLM.
- Increased User Trust and Transparency: Because the LLM's response is based on retrieved documents, the system can provide citations and links to its sources. This allows users to verify the information for themselves, building confidence in the application.
- Cost-Effectiveness: Continuously fine-tuning or retraining an LLM with new data is computationally and financially expensive. With RAG, updating the model's knowledge is as simple as updating the external data source, which is far more efficient.
- Domain Specialization and Privacy: RAG allows people and organizations to make their private, proprietary data available to an LLM at query time without needing to include that sensitive data in the model's training set. This enables powerful, domain-specific applications while maintaining data privacy and security.
Retrieval
The "Retrieval" step is the heart of any RAG system. The quality and relevance of the information retrieved directly determines the quality and relevance of the final generated answer. An effective RAG application often needs to retrieve information from different types of data sources using various techniques. The primary retrieval methods fall into three categories: keyword-based, semantic, and structured.
Retrieval from Unstructured Data
Historically, unstructured data retrieval is another name for traditional Search. It went through multiple transformations, and you can benefit from both major approaches.
Semantic search is the most efficient technique that you can run on scale in Google Cloud with state-of-the-art performance and high degree of control.
- Keyword-Based (Lexical) Search: This is the traditional approach to search, dating back to the earliest information retrieval systems of the 1970s. Lexical search works by matching the literal words (or "tokens") in a user's query to the exact same words in the documents within a knowledge base. It is highly effective for queries where precision on specific terms, like product codes, legal clauses, or unique names, is critical.
- Semantic Search: Semantic search, or "search with meaning," is a more modern approach that aims to understand the user's intent and the contextual meaning of their query, not just the literal keywords. Modern semantic search is powered by embedding - a machine learning technique that maps complex, high-dimensional data into a lower-dimensional vector space of numerical vectors. These vectors are designed such that texts with similar meanings are located close to each other in the vector space. A search for "What are the best dog breeds for families?" is converted into a vector, and the system then searches for document vectors that are its "nearest neighbors" in that space. This allows it to find documents that talk about "golden retrievers" or "friendly canines," even if they don't contain the exact word "dog." This high-dimensional search is made efficient by Approximate Nearest Neighbor (ANN) algorithms. Instead of comparing the query vector to every single document vector (which would be too slow for large datasets), ANN algorithms use clever indexing structures to quickly find vectors that are probably the closest.
Retrieval from Structured Data
Not all critical knowledge is stored in unstructured documents. Often, the most precise and valuable information resides in structured formats like relational databases, NoSQL databases, or some kind of API, such as a REST API for weather data or stock price.
Retrieval from structured data is typically more direct and exact than searching unstructured text. Instead of searching for semantic similarity, language models can be given the ability to formulate and execute a precise query, such as a SQL query on a database or an API call to a weather API for certain location and date.
Implemented via function-calling, the same technique that powers AI Agents, it enables language models to interact with executable code and external systems in a deterministic structural way.
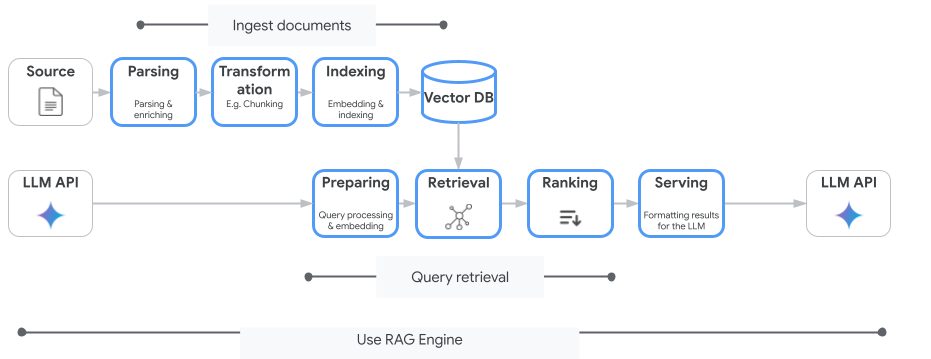
3. From RAG Pipelines to Agentic RAG
Just as the concept of RAG itself has evolved, so have the architectures for implementing it. What began as a simple, linear pipeline has matured into a dynamic, intelligent system orchestrated by AI agents.
- Simple (or Naive) RAG: This is the foundational architecture we've discussed so far: a linear, three-step process of retrieve, augment, and generate. It is reactive; it follows a fixed path for every query and is highly effective for straightforward Q&A tasks.
- Advanced RAG: This represents an evolution where additional steps are added to the pipeline to improve the quality of the retrieved context. These enhancements can occur before or after the retrieval step.
- Pre-retrieval: Techniques like query rewriting or expansion can be used. The system might analyze the initial query and rephrase it to be more effective for the retrieval system.
- Post-retrieval: After retrieving an initial set of documents, a re-ranking model can be applied to score the documents for relevance and push the best ones to the top. This is especially important in hybrid search. Another post-retrieval step is to filter or compress the retrieved context to ensure only the most salient information is passed to the LLM.
- Agentic RAG: This is the cutting edge of RAG architecture, representing a paradigm shift from a fixed pipeline to an autonomous, intelligent process. In an Agentic RAG system, the entire workflow is managed by one or more AI Agents that can reason, plan, and dynamically choose their actions.
To understand Agentic RAG, one must first understand what constitutes an AI agent. An agent is more than just an LLM. It is a system with several key components:
- An LLM as a Reasoning Engine: The agent uses a powerful LLM like Gemini not just to generate text, but as its central "brain" for planning, making decisions, and decomposing complex tasks.
- A Set of Tools: An agent is given access to a toolkit of functions it can decide to use to accomplish its goals. These tools can be anything: a calculator, a web search API, a function to send an email, or most importantly for this lab - retrievers for our various knowledge bases.
- Memory: Agents can be designed with both short-term memory (to remember the context of the current conversation) and long-term memory (to recall information from past interactions), allowing for more personalized and coherent experiences.
- Planning and Reflection: The most advanced agents exhibit sophisticated reasoning patterns. They can receive a complex goal and create a multi-step plan to achieve it. They can then execute this plan, and even reflect on the results of their actions, identify errors, and self-correct their approach to improve the final outcome.
Agentic RAG is a game-changer because it introduces a layer of autonomy and intelligence that static pipelines lack.
- Flexibility and Adaptability: An agent is not locked into a single retrieval path. Given a user query, it can reason about the best source of information. It might decide to first query the structured database, then perform a semantic search on unstructured documents, and if it still can't find an answer, use a Google Search tool to look on the public web, all within the context of a single user request.
- Complex, Multi-Step Reasoning: This architecture excels at handling complex queries that require multiple, sequential retrieval and processing steps.
Consider the query: "Find the top 3 sci-fi movies directed by Christopher Nolan, and for each, provide a brief plot summary." A simple RAG pipeline would fail.
An agent, however, can break this down:
- Plan: First, I need to find the movies. Then, for each movie, I need to find its plot.
- Action 1: Use the structured data tool to query a movie database for Nolan's sci-fi films: top 3 movies, ordered by rating descending.
- Observation 1: The tool returns "Inception," "Interstellar," and "Tenet."
- Action 2: Use the unstructured data tool (semantic search) to find the plot for "Inception."
- Observation 2: The plot is retrieved.
- Action 3: Repeat for "Interstellar."
- Action 4: Repeat for "Tenet."
- Final Synthesis: Combine all the retrieved information into a single, coherent answer for the user.
4. Project setup
Google Account
If you don't already have a personal Google Account, you must create a Google Account.
Use a personal account instead of a work or school account.
Sign-in to the Google Cloud Console
Sign-in to the Google Cloud Console using a personal Google account.
Enable Billing
Use Trial Billing Account (optional)
To run this workshop, you need a billing account with some credit. Use the credits from the banner at the top of this codelab to get started. If you are already connected to a billing account, you can skip this step.
Set up a personal billing account
If you set up billing using Google Cloud credits, you can skip this step.
To set up a personal billing account, go here to enable billing in the Cloud Console.
Some Notes:
- Completing this lab should cost less than $1 USD in Cloud resources.
- You can follow the steps at the end of this lab to delete resources to avoid further charges.
- New users are eligible for the $300 USD Free Trial.
Create a project (optional)
If you do not have a current project you'd like to use for this lab, create a new project here.
5. Open Cloud Shell Editor
- Click this link to navigate directly to Cloud Shell Editor
- If prompted to authorize at any point today, click Authorize to continue.
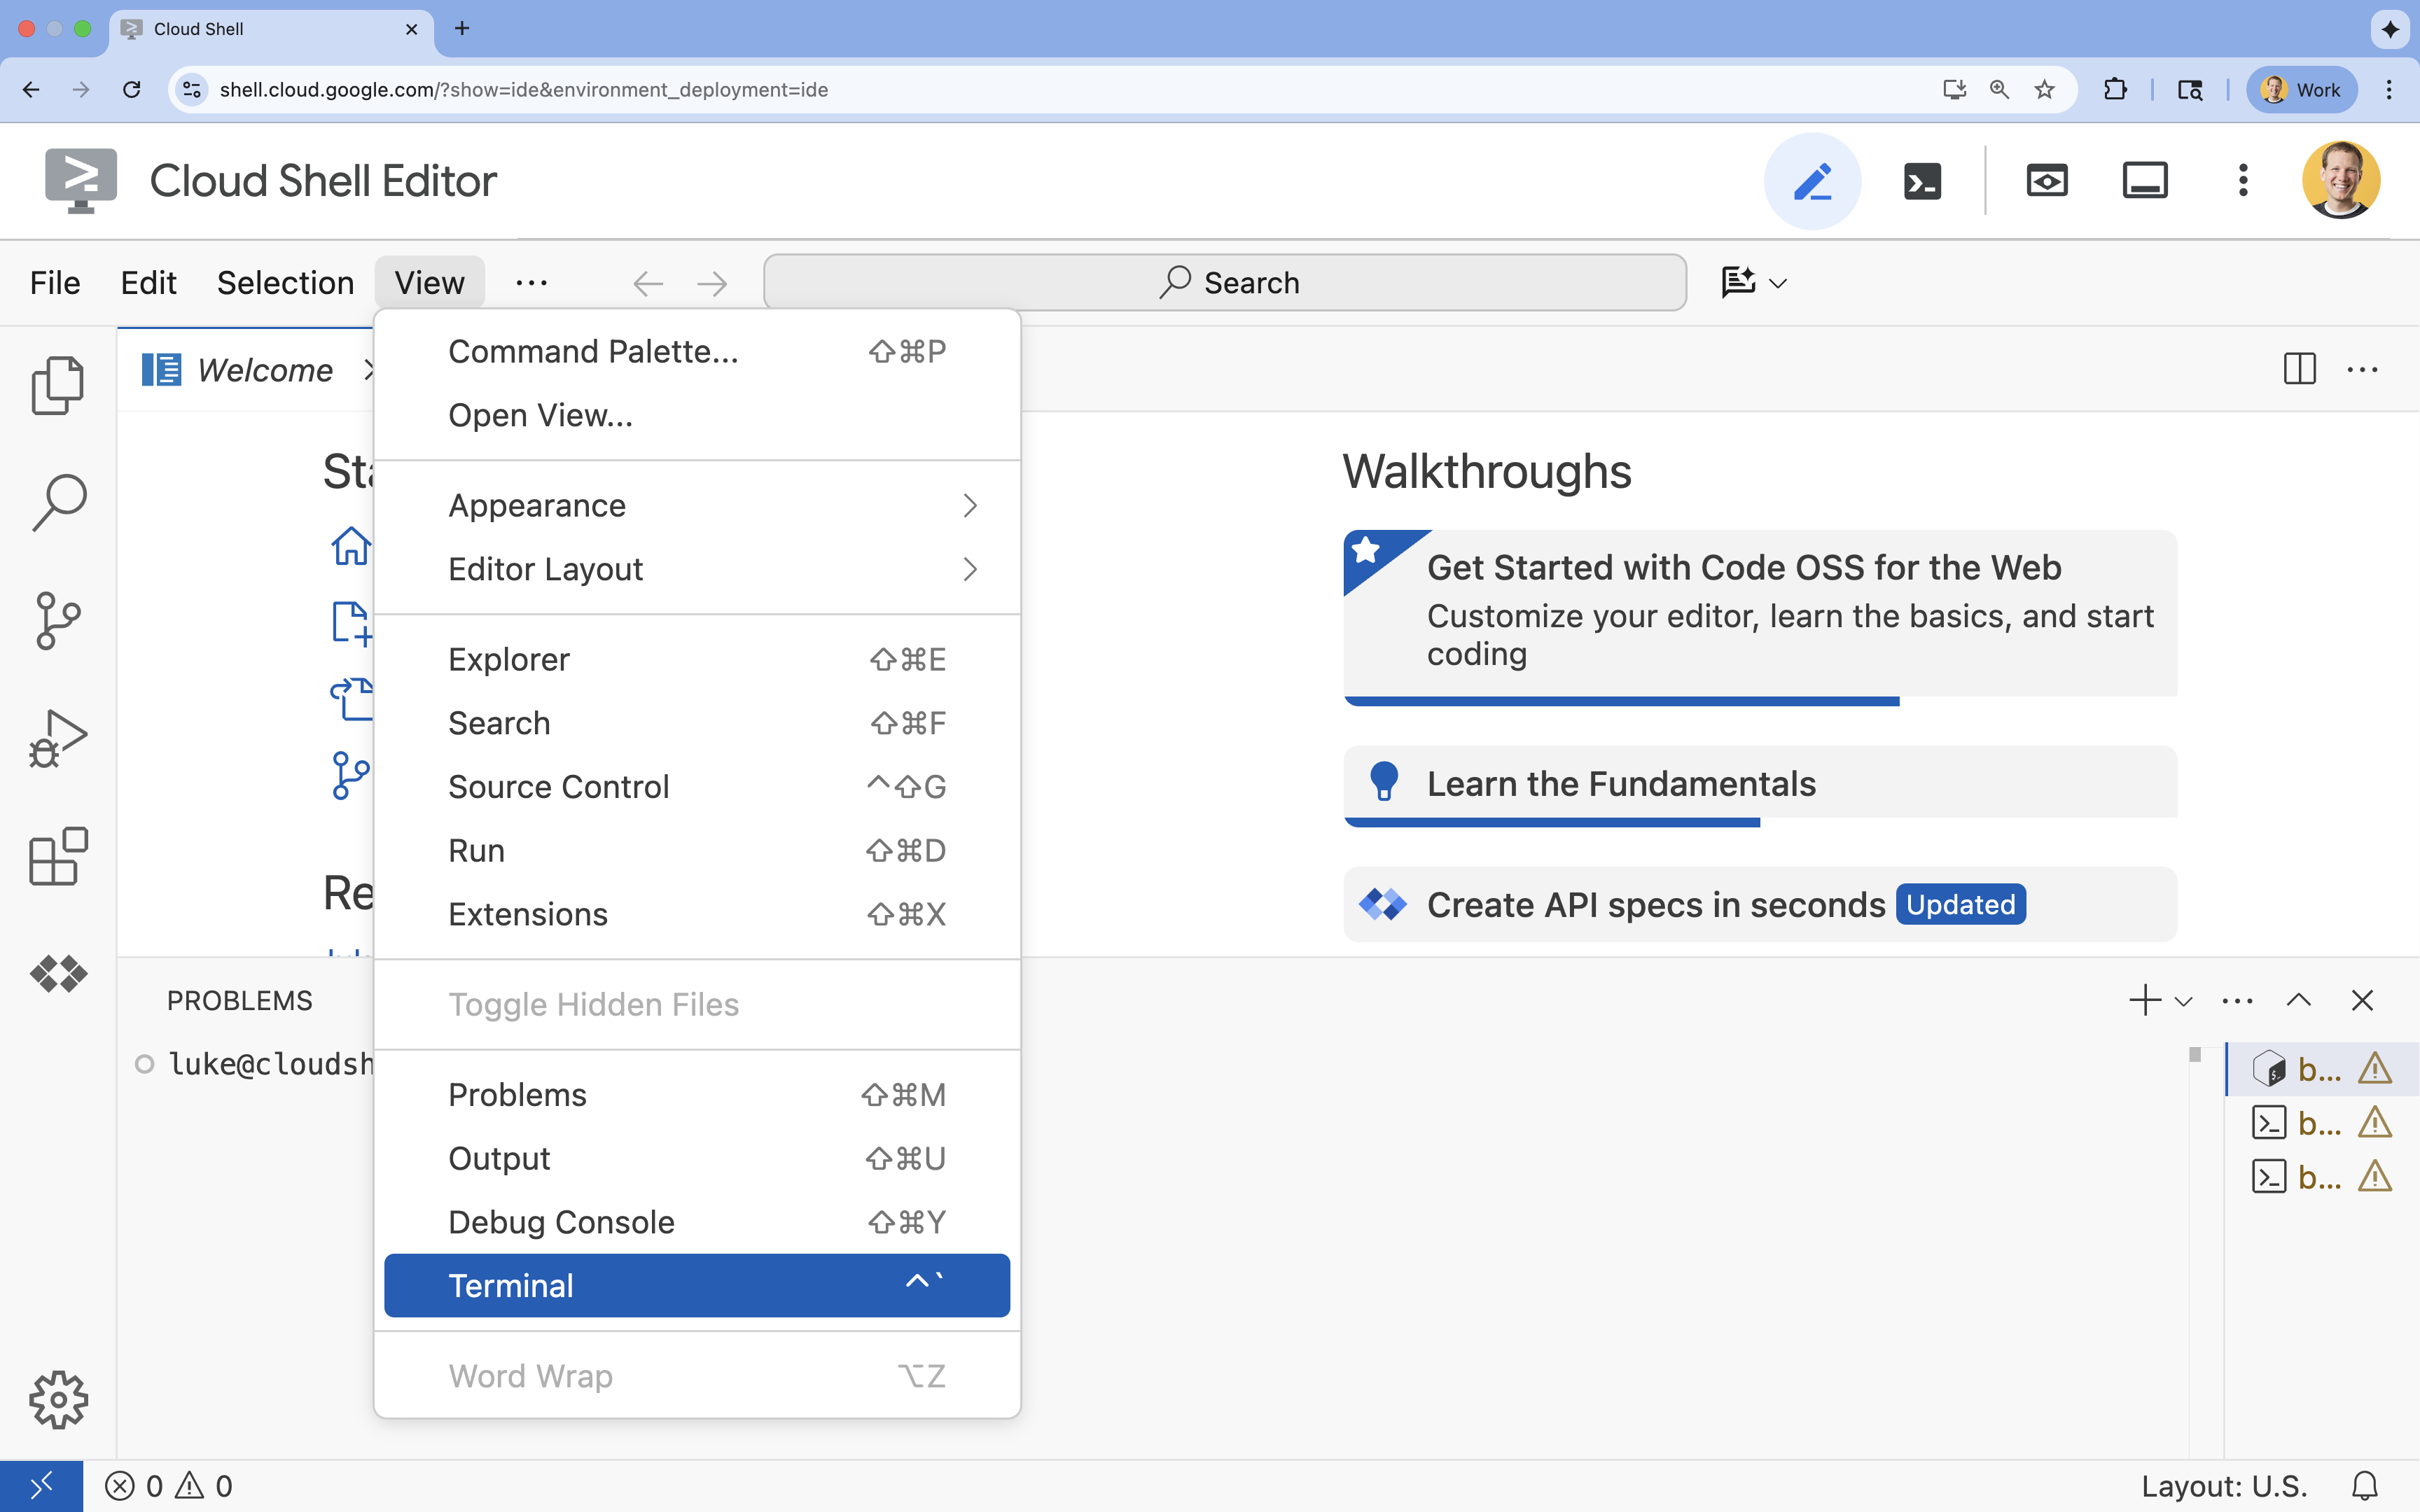
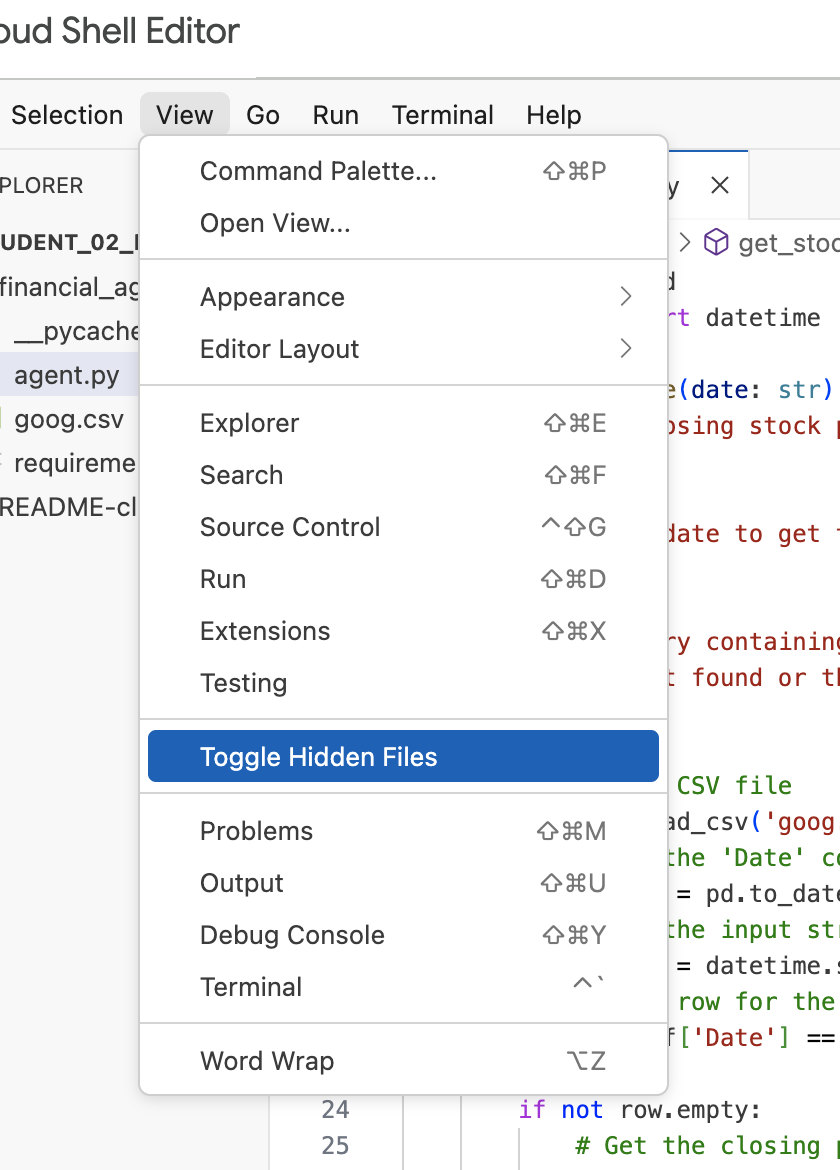
- If the terminal doesn't appear at the bottom of the screen, open it:
- Click View
- Click Terminal
- In the terminal, set your project with this command:
gcloud config set project [PROJECT_ID]- Example:
gcloud config set project lab-project-id-example - If you can't remember your project ID, you can list all your project IDs with:
gcloud projects list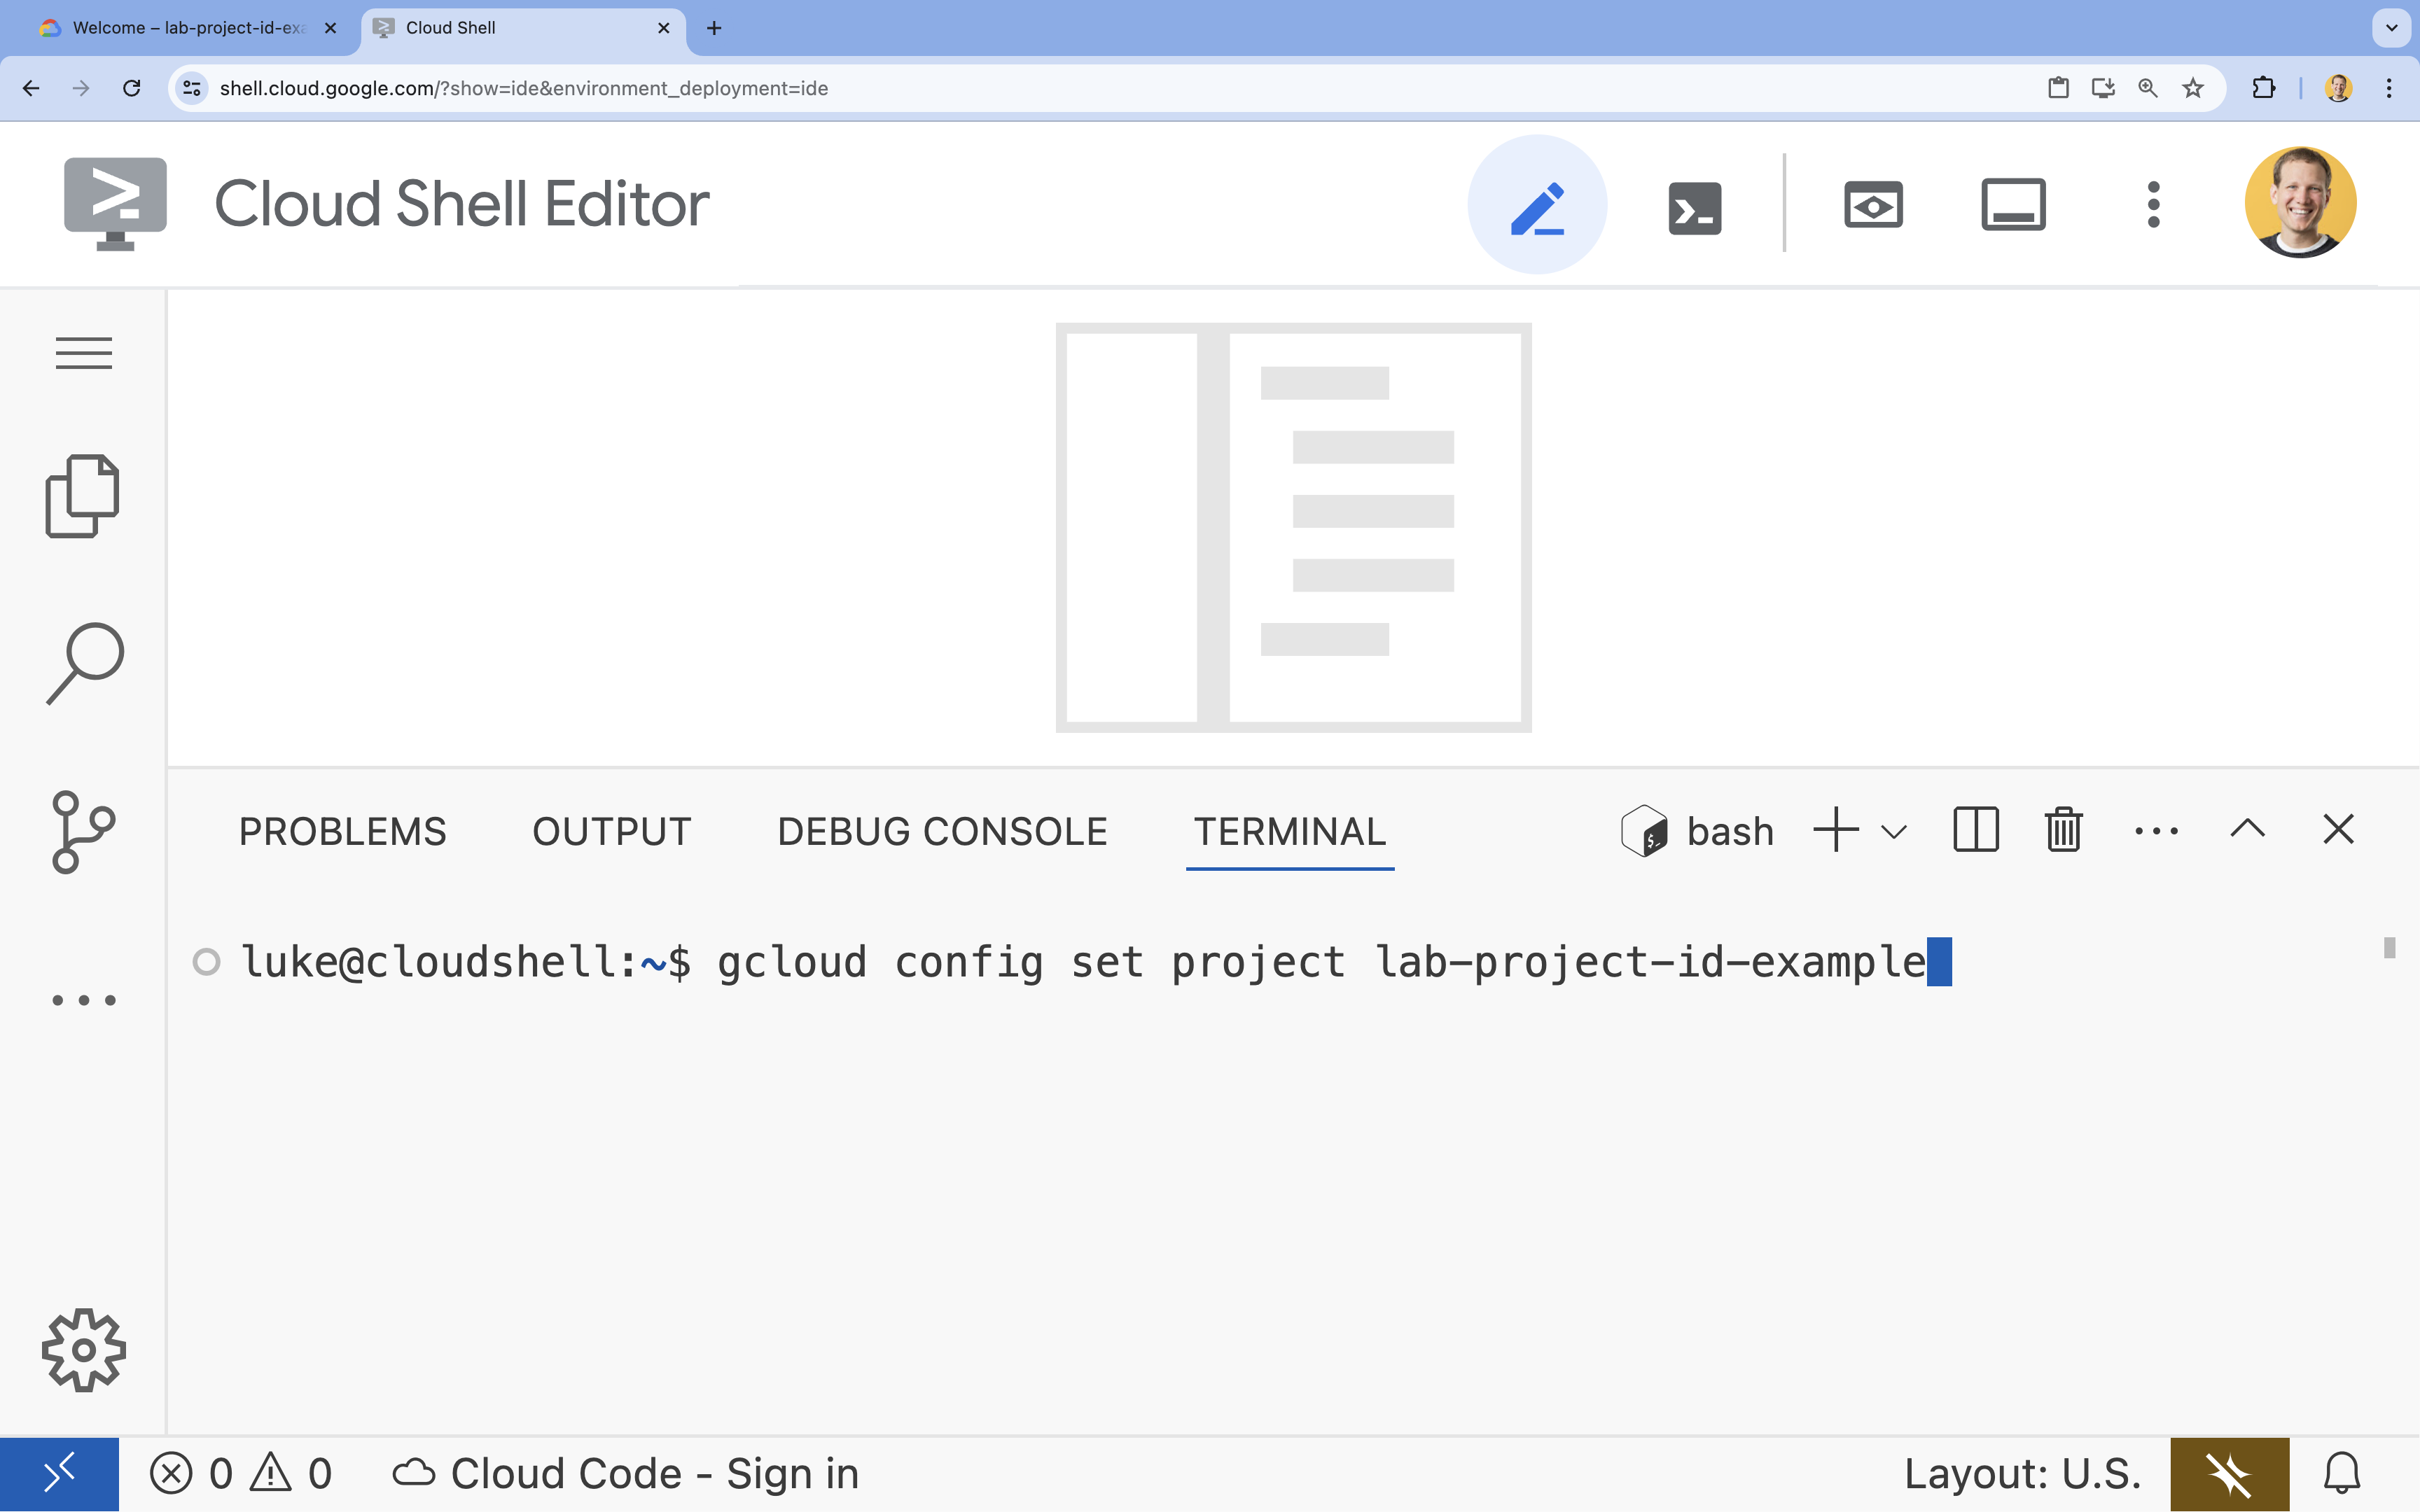
- Example:
- You should see this message:
Updated property [core/project].
6. Enable APIs
To use the Agent Development Kit and Vertex AI Search, you need to enable the necessary APIs in your Google Cloud project.
- In the terminal, enable the APIs:
gcloud services enable \
    aiplatform.googleapis.com \
    discoveryengine.googleapis.com
Introducing the APIs
- Vertex AI API (
aiplatform.googleapis.com) enables the agent to communicate with Gemini models for reasoning and generation. - Discovery Engine API (
discoveryengine.googleapis.com) powers Vertex AI Search, allowing you to create data stores and perform semantic searches on your unstructured documents.
7. Set up the environment
Before you start coding the AI Agent, you need to prepare your development environment, install the necessary libraries, and create the required data files.
Create a virtual environment & install dependencies
- Create a directory for your agent and navigate into it. Run the following code in the terminal:
mkdir financial_agent cd financial_agent - Create a virtual environment:
uv venv --python 3.12 - Activate the virtual environment:
source .venv/bin/activate - Install the Agent Development Kit (ADK) and pandas.
uv pip install google-adk pandas
Create the stock price data
Since the lab requires specific historical stock data to demonstrate the agent's ability to use structured tools, you will create a CSV file containing this data.
- In the
financial_agentdirectory, create thegoog.csvfile by running the following command in the terminal:cat <<EOF > goog.csv Date,Open,High,Low,Close,Adj Close,Volume 2023-01-03,89.830002,91.550003,89.019997,89.699997,89.699997,20738500 2023-03-31,101.440002,103.889999,101.040001,103.730003,103.730003,36823200 2023-06-30,120.870003,122.029999,120.300003,120.970001,120.970001,23824700 2023-09-29,134.080002,134.550003,131.320007,131.850006,131.850006,21124200 2025-07-10,185.000000,188.000000,184.500000,186.500000,186.500000,25000000 EOF
Configure environment variables
- In the
financial_agentdirectory, create a.envfile to configure your agent's environment variables. This tells the ADK which project, location, and model to use. Run the following code in the terminal:# Create the .env file using the captured variables cat << EOF > .env GOOGLE_GENAI_USE_VERTEXAI=TRUE GOOGLE_CLOUD_PROJECT="${GOOGLE_CLOUD_PROJECT}" GOOGLE_CLOUD_LOCATION="us-central1" EOF
Note: Later in the lab, if you need to modify the .env file but don't see it in the financial_agent directory, try toggling hidden files visibility in Cloud Shell Editor using the "View / Toggle Hidden Files" menu item.
8. Create a Vertex AI Search Data Store
To enable the agent to answer questions about Alphabet's financial reports, you will create a Vertex AI Search data store containing their public SEC filings.
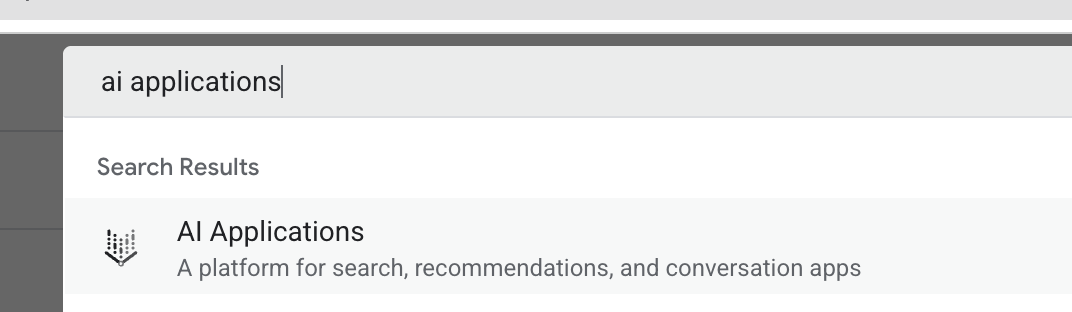
- In a new browser tab, open the Cloud Console (console.cloud.google.com), navigate to AI Applications by using the search bar at the top.
- If prompted, select the terms and conditions checkbox and click Continue and Activate the API.
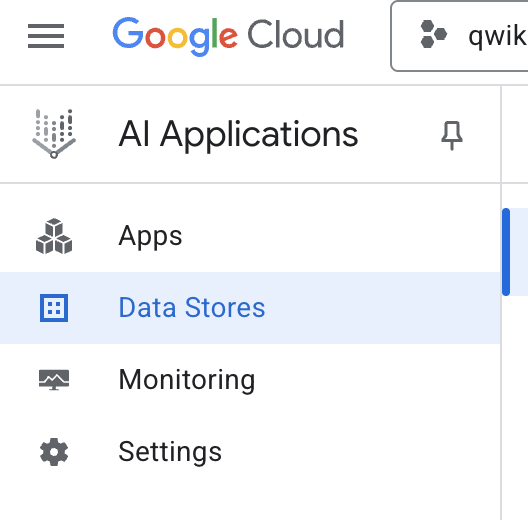
- From the left-hand navigation menu, select Data Stores.
- Click + Create Data Store.
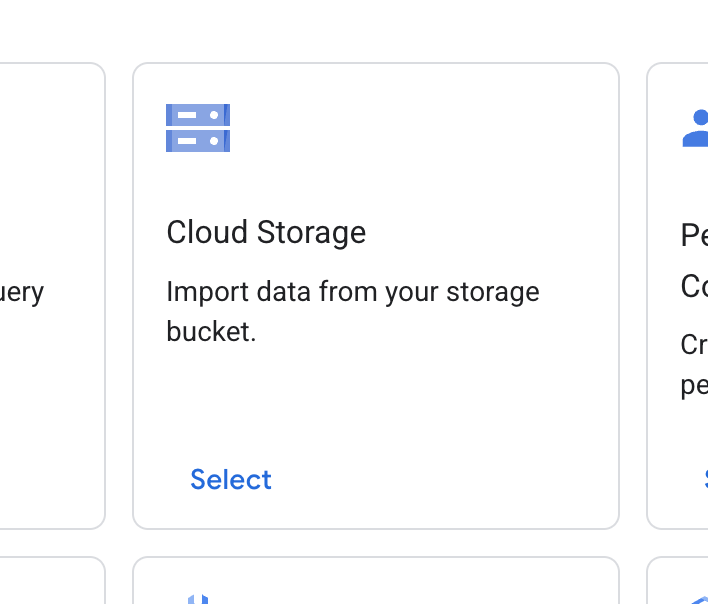
- Find the Cloud Storage card and click Select.
- For the data source, select Unstructured documents.

- For the import source (Select a folder or a file you want to import), enter Google Cloud Storage path
cloud-samples-data/gen-app-builder/search/alphabet-sec-filings. - Click Continue.
- Keep the location set to global.
- For the data store name, enter
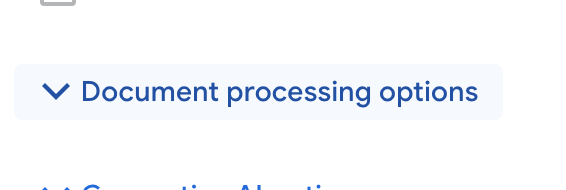
alphabet-sec-filings - Expand the Document processing options section.
- In the Default document parser dropdown list, select Layout Parser.
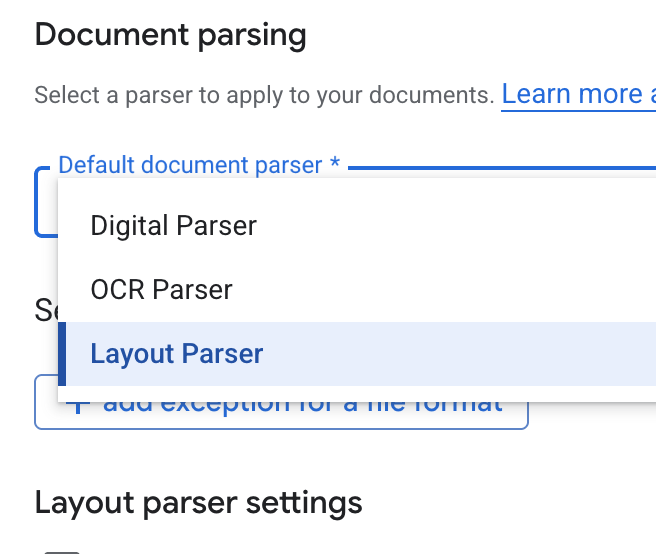
- In the Layout parser settings options, select Enable table annotation and Enable image annotation.
- Click Continue.
- Select General pricing as the pricing model (a pay-as-you-go, consumption-based model), and click Create.
- Your data store will begin importing the documents.
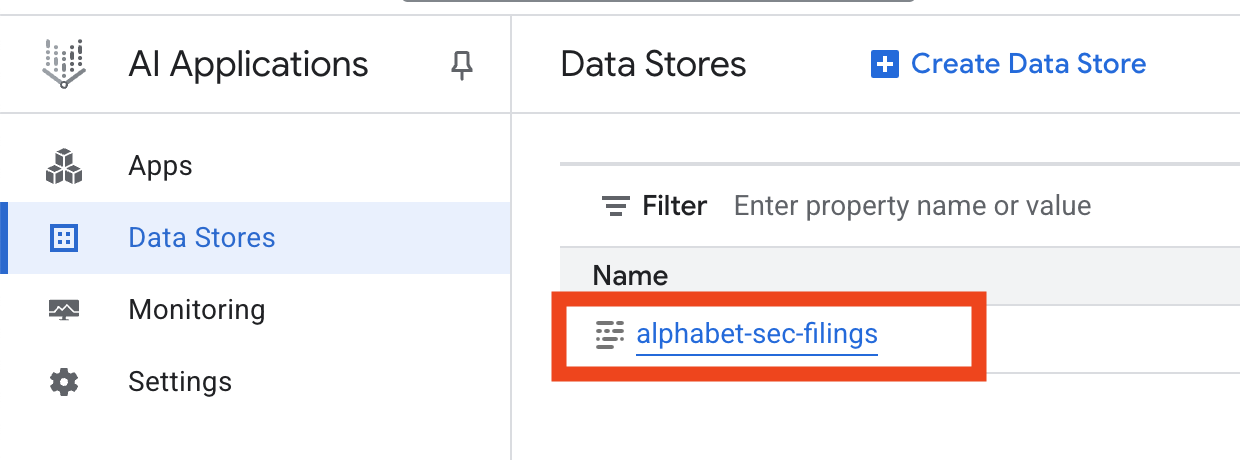
- Click on the data store name, and copy its ID from the Data Stores table. You will need it in the next step.
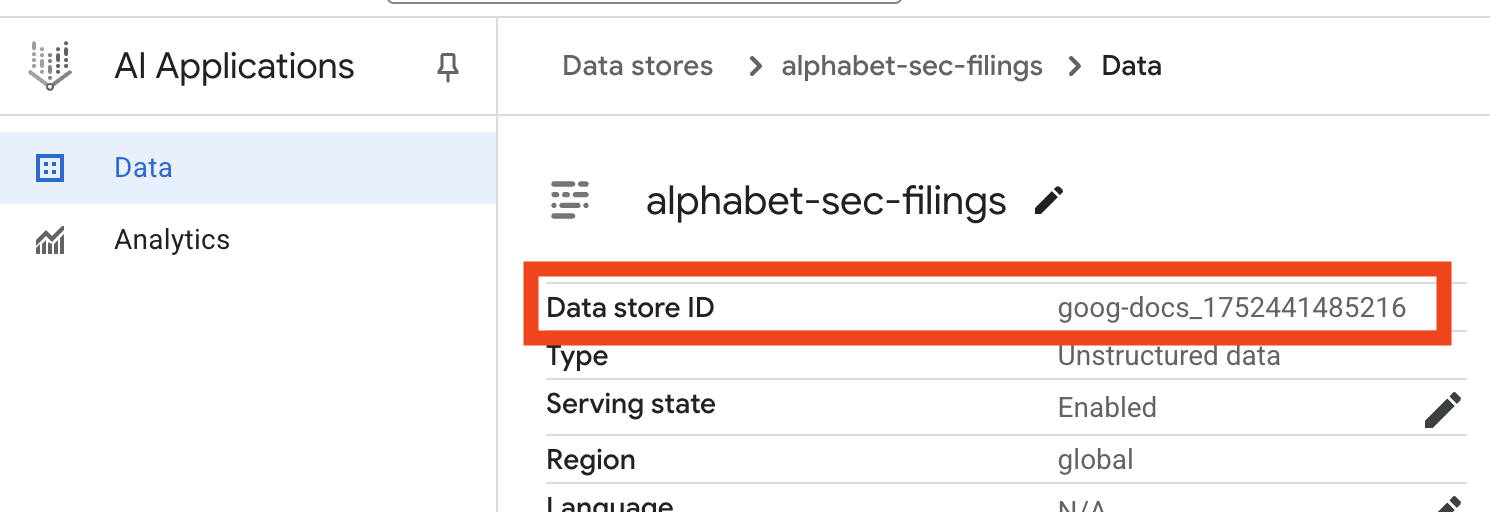
- Open the
.envfile in Cloud Shell Editor and append the data store ID asDATA_STORE_ID="YOUR_DATA_STORE_ID"(replaceYOUR_DATA_STORE_IDwith the actual ID from the previous step.Note: Importing, parsing, & indexing data in the datastore will take a few minutes. To check the process, click on the data store name to open its properties, then open the Activity tab. Wait for the status to become "Import completed."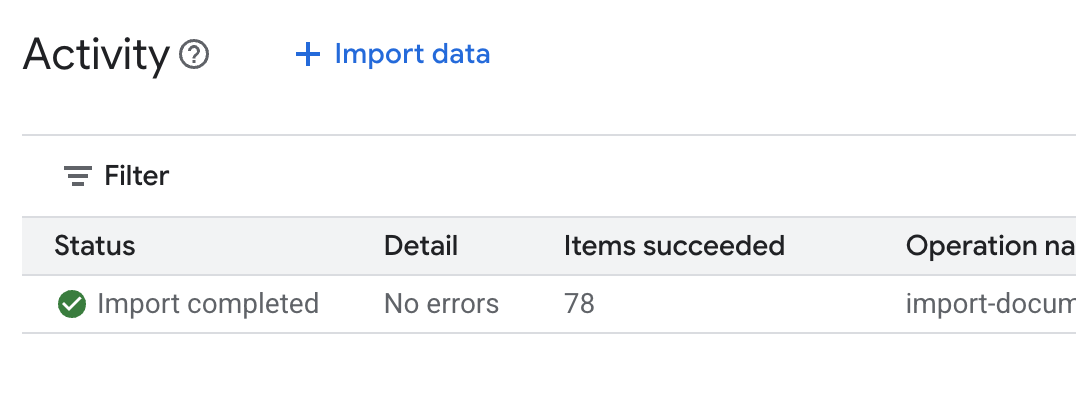
9. Create a custom tool for structured data
Next, you will create a Python function that will act as a tool for the agent. This tool will read the goog.csv file to retrieve historical stock prices for a given date.
- In your
financial_agentdirectory, create a new file namedagent.py. Run the following command in the terminal:cloudshell edit agent.py - Add the following Python code to
agent.py. This code imports dependencies and defines theget_stock_pricefunction.from datetime import datetime import os import logging import google.cloud.logging from google.adk.tools import VertexAiSearchTool from google.adk.tools.agent_tool import AgentTool from google.adk.agents import LlmAgent import pandas as pd def get_stock_price(date: str) -> dict: """Gets the closing stock price for a given date. Args: date: The date to get the stock price for, in YYYY-MM-DD format. Returns: A dictionary containing the closing price, or an error message if the date is not found or the format is incorrect. """ try: # Load the CSV file df = pd.read_csv('goog.csv') # Convert the 'Date' column to datetime objects df['Date'] = pd.to_datetime(df['Date']) # Convert the input string to a datetime object query_date = datetime.strptime(date, '%Y-%m-%d') # Find the row for the given date row = df[df['Date'] == query_date] if not row.empty: # Get the closing price close_price = row['Close'].iloc[0] return {"status": "success", "date": date, "closing_price": close_price} else: return {"status": "error", "message": f"No data found for date: {date}"} except FileNotFoundError: return {"status": "error", "message": "Stock data file (goog.csv) not found."} except Exception as e: return {"status": "error", "message": f"An error occurred: {str(e)}"}
Notice the detailed docstring of the function. It explains what the function does, its parameters (Args), and what it returns (Returns). The ADK uses this docstring to teach the agent how and when to use this tool.
10. Build and run the RAG agent
Now it's time to assemble the agent. You will combine the Vertex AI Search tool for unstructured data with your custom get_stock_price tool for structured data.
- Append the following code to your
agent.pyfile. This code imports the necessary ADK classes, creates instances of the tools, and defines the agent.logging.basicConfig(level=logging.INFO) cloud_logging_client = google.cloud.logging.Client() cloud_logging_client.setup_logging() # 1. Create the Vertex AI Search tool full_datastore_id = f"projects/{os.environ['GOOGLE_CLOUD_PROJECT']}/locations/global/collections/default_collection/dataStores/{os.environ['DATA_STORE_ID']}" vertex_ai_search_tool = VertexAiSearchTool( data_store_id=full_datastore_id ) # 2. Define the Search+Q&A agent # Since we cannot combine tools with other tools in a single agent, # we create a separate Search+Q&A agent which will be used as a tool by the main root agent. doc_qa_agent = LlmAgent( name="search_and_qna_agent", model="gemini-2.5-flash", tools=[vertex_ai_search_tool], instruction="""You are a helpful assistant that answers questions based on information found in the document store. Use the search tool to find relevant information before answering. If the answer isn't in the documents, say that you couldn't find the information. """, description="Answers questions using a specific Vertex AI Search datastore.", ) # 3. Define the root agent with 2 tools. root_agent = LlmAgent( name="financial_agent", model="gemini-2.5-flash", tools=[ AgentTool(doc_qa_agent), get_stock_price, ], instruction="""You are an Financial Analytics Agent that answers question about Alphabet stock prices (using get_stock_price tool) and historical performance based on the data in Vertex AI Search datastore (using doc_qa_agent tool).""" ) - From your terminal, inside the
financial_agentdirectory, launch the ADK web interface to interact with your agent:adk web ~ - Click the link provided in the terminal output (usually
http://127.0.0.1:8000) to open the ADK Dev UI in your browser.
11. Test the agent
Now you can test your agent's ability to reason and use its tools to answer complex questions.
- In the ADK Dev UI, make sure your
financial_agentis selected from the dropdown menu. - Try asking a question that requires information from the SEC filings (unstructured data). Enter the following query in the chat:
What were the total revenues for the quarter ending on March 31, 2023?search_and_qna_agent, which usesVertexAiSearchToolto find the answer in the financial documents. - Next, ask a question that requires using your custom tool (structured data). Note that the date format in the prompt does not have to exactly match the format required by the function; the LLM is smart enough to reformat it.
What was the closing stock price for Alphabet on July 10, 2025?get_stock_pricetool. You can click the tool icon in the chat to inspect the function call and its result. - Finally, ask a complex question that requires the agent to use both tools and synthesize the results.
According to the 10-Q filing for the period ending March 31, 2023, what were the company's net cash provided by operating activities, and what was the stock's closing price on that date?- First, it will use the
VertexAiSearchToolto find the cash flow information in the SEC filings. - Then, it will recognize the need for the stock price and call the
get_stock_pricefunction with the date2023-03-31. - Finally, it will combine both pieces of information into a single, comprehensive answer.
- First, it will use the
- When you are finished, you can close the browser tab and press
CTRL+Cin the terminal to stop the ADK server.
12. Choosing a service for your task
Vertex AI Search is not the only vector search service you can use. You can also use a managed service that automates the entire flow of Retrieval-Augmented Generation: Vertex AI RAG Engine.
It handles everything from document ingestion to retrieval and re-ranking. RAG Engine supports multiple vector stores including Pinecone and Weaviate.
You can also self-host many specialized Vector Databases or leverage vector index capabilities in database engines, such as pgvector in PostgreSQL service (such as AlloyDB or BigQuery Vector Search.
A few other services that support Vector Search are:
The general guidance on choosing a particular service on Google Cloud is the following:
- If you already have working and well-scaled Vector Search Do-It-Yourself infrastructure, deploy it to Google Kubernetes Engine, such as Weaviate or DIY PostgreSQL.
- If your data is in BigQuery, AlloyDB, Firestore or any other database, consider using its Vector Search capabilities if semantic search can be performed at scale as part of a larger query in that database. For example, if you have product descriptions and/or images in a BigQuery table, adding a text and/or image embedding column will enable using similarity search at scale. Vector Indexes with ScANN search support billions of items in the index.
- If you need to get started quickly with minimal effort and on a managed platform, choose Vertex AI Search - a fully managed search engine and retriever API ideal for complex enterprise use cases requiring high out-of-the-box quality, scalability, and fine-grained access controls. It simplifies connecting to diverse enterprise data sources and enables searching across multiple sources.
- Use Vertex AI RAG Engine if you are looking for a sweet spot for developers seeking a balance between ease of use and customization. It empowers rapid prototyping and development without sacrificing flexibility.
- Explore Reference Architectures for Retrieval-Augmented Generation.
13. Conclusion
Congratulations! You have successfully built and tested an AI Agent with Retrieval-Augmented Generation. You learned how to:
- Create a knowledge base for unstructured documents using the powerful semantic search capabilities of Vertex AI Search.
- Develop a custom Python function to act as a tool for retrieving structured data.
- Use the Agent Development Kit (ADK) to create a multi-tool agent powered by Gemini.
- Build an agent capable of complex, multi-step reasoning to answer queries that require synthesizing information from multiple sources.
This lab demonstrates the core principles of Agentic RAG, a powerful architecture for building intelligent, accurate, and context-aware AI applications on Google Cloud.
From Prototype to Production
This lab is part of the Production-Ready AI with Google Cloud Learning Path.
- Explore the full curriculum to bridge the gap from prototype to production.
- Share your progress with the hashtag #ProductionReadyAI.