
1. Objetivo de este lab
En este lab práctico, instalarás y autenticarás Gemini CLI, y probarás algunos casos de uso básicos.
Qué aprenderás
- Comprender los aspectos básicos de Gemini CLI.
- Aprender a realizar tareas básicas con Gemini CLI.
2. Antes de comenzar
- Si aún no tienes un proyecto que puedas usar, deberás crear uno nuevo en la consola de GCP.
- En este lab, usaremos GCP Cloud Shell para realizar los siguientes pasos. Abre Cloud Shell y configura el proyecto con Cloud Shell.
- Para abrir el editor de GCP Cloud Shell, presiona el botón Editor de Cloud Shell o usa este vínculo. Si ves la ventana emergente "Autorizar shell", haz clic para autorizar el editor de Cloud Shell.
- Puedes verificar si el proyecto ya está autenticado con el siguiente comando.
gcloud auth list
- Ejecuta el siguiente comando en Cloud Shell para confirmar tu proyecto.
gcloud config list project
- Si no recuerdas el ID del proyecto, puedes enumerar todos tus IDs de proyecto con
gcloud projects list
- Si tu proyecto no está configurado, usa el siguiente comando para hacerlo.
gcloud config set project <YOUR_PROJECT_ID>
- Debemos habilitar algunos servicios para ejecutar este lab. Ejecuta el siguiente comando en Cloud Shell.
gcloud services enable aiplatform.googleapis.com
gcloud services enable cloudresourcemanager.googleapis.com
3. Instalación y autenticación
Instalación
Gemini CLI viene preinstalada en el editor de GCP Cloud Shell . Si quieres usarla, puedes comenzar de inmediato.
También puedes instalar Gemini CLI en tu entorno local.
Para instalar Gemini CLI en tu entorno local, necesitas Nodejs 20+. Puedes ejecutar el siguiente comando para instalar Gemini CLI.
npm install -g @google/gemini-cli
Para actualizar a la versión más reciente , usa el siguiente comando.
npm update -g @google/gemini-cli
Ejecuta Gemini con el siguiente comando en tu terminal.
gemini
Autenticación
Si usas el editor de GCP Cloud Shell, ya deberías estar autenticado si aceptaste autenticar el shell mientras lo ejecutabas.
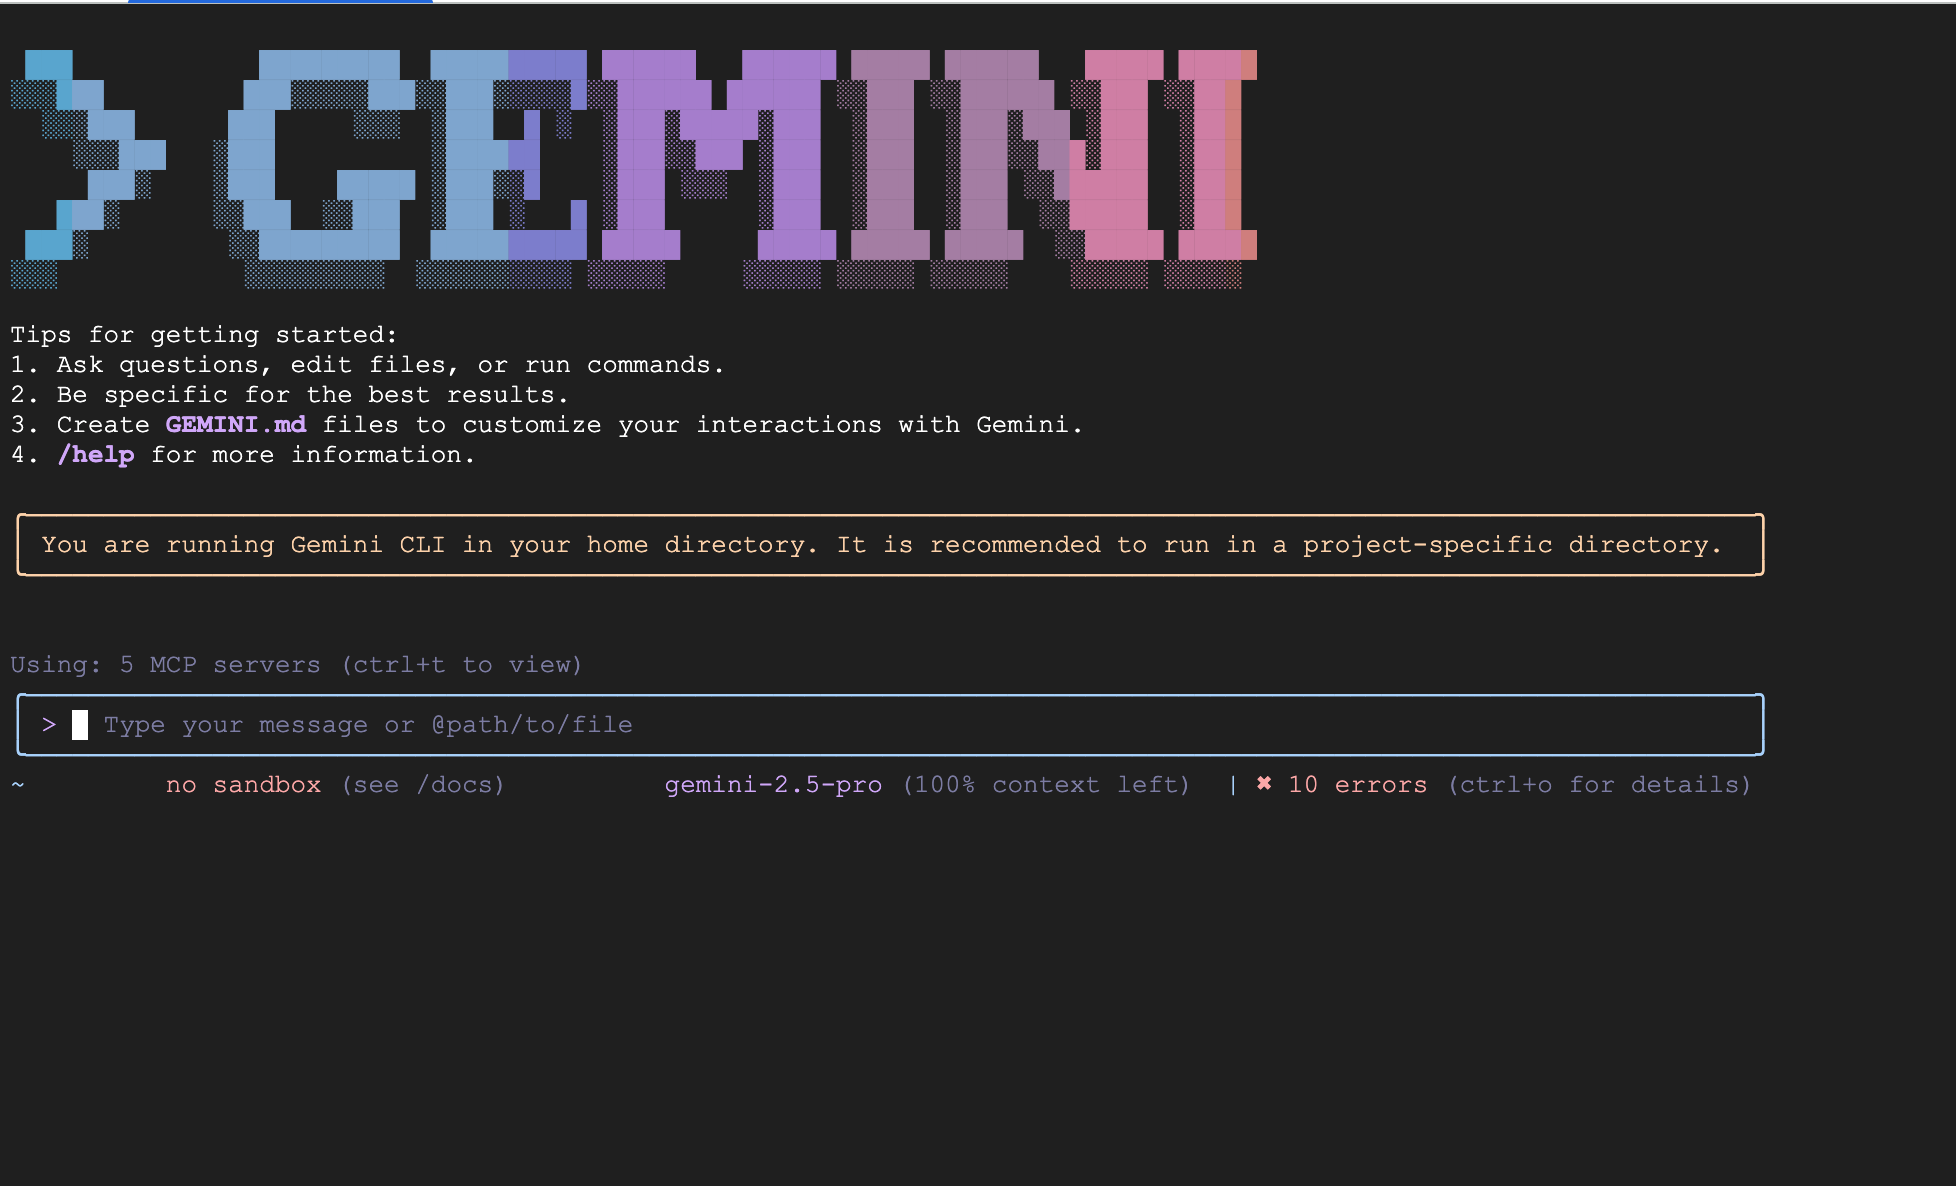
Si ejecutas de forma local y aún no te autenticaste, verás una pantalla como la siguiente.
También puedes escribir /auth para mostrar la siguiente pantalla.
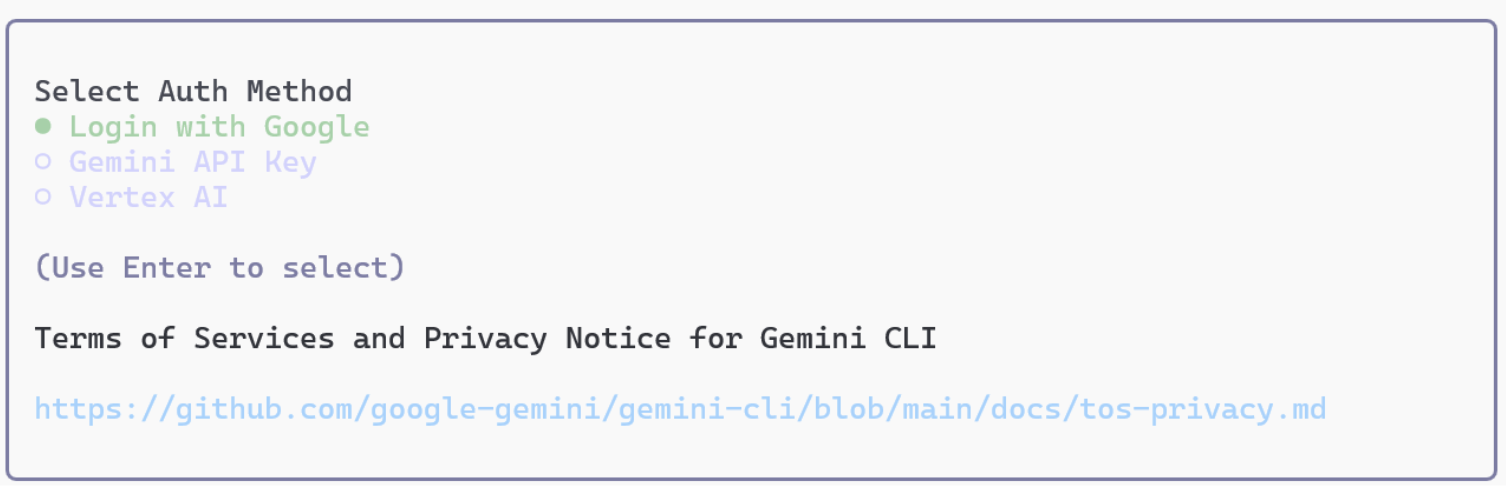
Figura 1: Gemini CLI te proporcionará 3 métodos para autenticarte.
Primero, sal de Gemini CLI con el comando /quit.
Autenticar con Google : Si ejecutas /auth en la consola, aparecerán las opciones de autenticación. Selecciona "Acceder con Google" en las opciones. Luego, aparecerá la pantalla de autenticación de Google en tu navegador. Una vez que completes el acceso allí, la consola también se autenticará. Aunque la autenticación se completa, para usar Gemini CLI, debes especificar un proyecto de Google Cloud. Vuelve a la pantalla de la consola y ejecuta el siguiente comando para especificar el proyecto (también es posible especificarlo en un archivo .env).
export GOOGLE_CLOUD_PROJECT=xxxxxxxxxxxxxxxxxxxxxxxxxxxxxxxxxxxxxxxxxxx
Autenticar con clave de API : Para autenticarte con una clave de API, necesitarás una clave de API. Puedes generar una clave de API desde aistudio.google.com . Una vez que se emita la clave de API, configúrala en la consola de la siguiente manera:
export GEMINI_API_KEY=xxxxxxxxxxxxxxxxxxxxxxxxxxxxxxxxxxxxxxxxxxxx
Autenticar con Vertex AI : Para usar la API de Gemini a través de Vertex AI, sigue los siguientes pasos.
Primero, usa el siguiente comando para autenticarte en Google Cloud.
gcloud auth application-default login
Después de eso, ejecuta los siguientes comandos en tu terminal.
export GOOGLE_GENAI_USE_VERTEXAI=true
export GOOGLE_CLOUD_PROJECT=Your GCP Project Name
export GOOGLE_CLOUD_LOCATION=us-central1
4. Prueba Gemini CLI
Ahora estás listo para probar Gemini CLI. Prueba los siguientes casos de uso.
Primero, crea una carpeta de proyecto, my_cli_project.
mkdir ~/my_cli_project
cd ~/my_cli_project
Si ejecutas Gemini desde una carpeta de proyecto, puedes ejecutar Gemini CLI de forma segura dentro de los límites de esa carpeta.
- Si aún no estás dentro de Gemini CLI, escribe lo siguiente en la terminal de Cloud Shell para ingresar a Gemini CLI.
gemini
- Ejecuta una instrucción simple:
What is the weather today in Tokyo
今日の東京の天気について教えてください
Deberías obtener el clima en Tokio. Ten en cuenta que, si ejecutas esto, se usa automáticamente
Herramienta de GoogleSearch.
- Confirma las herramientas instaladas: Ejecuta el siguiente comando en Gemini CLI Termilan. Deberías poder ver la lista de herramientas instaladas.
/tools
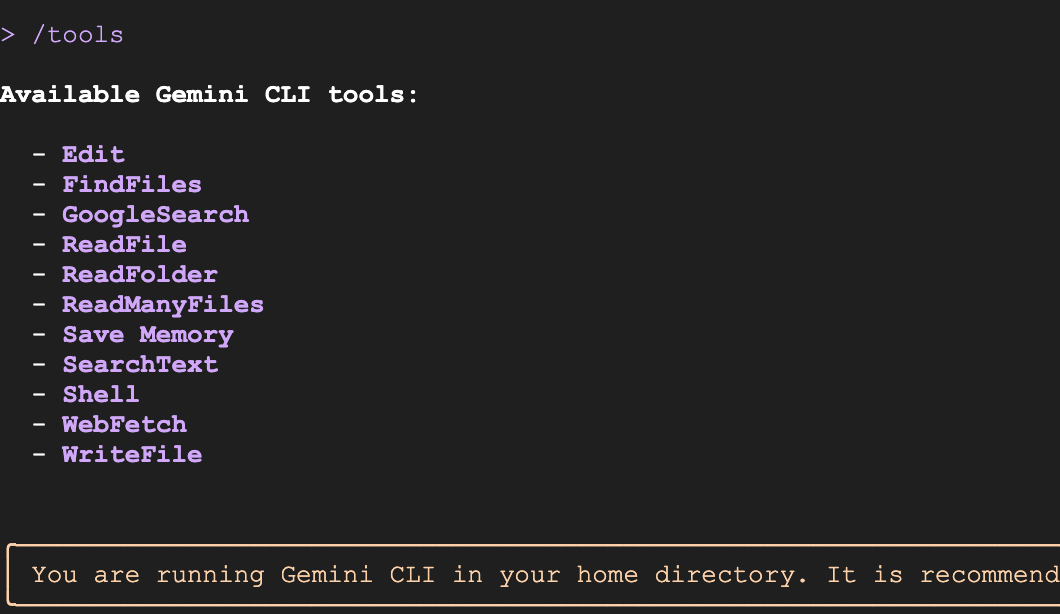
Figura 2: Lista de herramientas que se muestran
- Obtén noticias de un sitio de noticias local: (p.ej., https://mainichi.jp, cámbialo a tu sitio de noticias local).
Get me the news summary from https://mainichi.jp/
このサイトからニュースのサマリーを教えてください https://mainichi.jp/
Deberías obtener un resumen de noticias del sitio de noticias local. Ten en cuenta que el agente usa automáticamente la herramienta WebFetch para descargar el contenido del sitio de noticias y crear el resumen.
- Ejecuta una tarea de varios pasos(cámbiala a tu sitio local): Get me the news from https://mainichi.jp/ and filter in only the sports news and summarize that for me.
Get me the news from https://mainichi.jp/ and filter in only the sports news and summarize that for me.
https://mainichi.jp/ からニュースを取得し、スポーツニュースのみを抽出して、その要約を作成してください。
- Ejecuta comandos del sistema : Para ejecutar comandos del sistema, presiona ! y escribe los comandos. Para volver al modo normal, escribe ! nuevamente.
Type ! and Enter key. This starts the command mode.
ls
pwd
Type ! to go back to normal mode.
- Para crear un juego de Tic-Tac-Toe, ingresa la siguiente instrucción (versión en inglés).
Please develop a Tic-Tac-Toe game that meets the following requirements. The solution should be split into separate HTML, CSS, and JavaScript files, with the JavaScript file handling the majority of the game logic independently.
1. General Requirements
The game format should be a match between one human player and one computer player.
When the game ends (a win/loss is determined, or a draw occurs), display "GAME OVER" on the screen along with the winner's name ("X wins!," "O wins!," or "Draw!").
Provide a "Reset" button to start a new game.
2. HTML (index.html)
Create the basic page structure.
The game board should consist of nine squares (cells). Each cell should be clickable and display the player's mark (X or O).
Provide an element to display the game status (e.g., current player's turn, game result).
Place the reset button for starting a new game.
Link the CSS and JavaScript files appropriately.
3. CSS (style.css)
Style the game board and cells so they are visually clear and easy to understand.
Add borders to the cells to indicate they are clickable areas.
Set appropriate font size and color for the X and O marks to ensure good visibility.
Style the game status display and the "GAME OVER" message to make them stand out.
Consider responsive design to ensure appropriate display on various screen sizes.
4. JavaScript (script.js)
It is strongly requested that the JavaScript file handle all the game logic.
4.1. Game State Management
Define an array or object to manage the game board state (e.g., ['', '', '', '', '', '', '', '', '']).
Define a variable to track the current player (X or O). The initial value should be X.
Define a boolean value to track whether the game has ended (win/loss or draw).
4.2. Game Initialization
Create a function to initialize the game board upon page load.
Clear all cells.
Set the current player to X.
Reset the game end flag.
Clear the game result display.
4.3. Player Interaction
Set up event listeners for cell clicks.
Only place the current player's mark and update the board state if the clicked cell is empty.
After placing the mark, execute the following:
Call the win/draw check function.
If a winner is not yet determined, switch the player (X to O, O to X).
4.4. Computer AI Logic
Create a function that is called when it is the computer's (O) turn.
Implement a simple logic where the computer randomly selects an empty cell to place its mark. (While difficulty can be increased in the future, random selection is sufficient initially.)
After the computer places its mark, perform the win/draw check, and if the game is not over, switch the turn back to the human player.
4.5. Win/Draw Determination
Create a function that determines the win/draw status based on the current board state.
Check the following winning conditions:
Three rows
Three columns
Two diagonals
If a player meets a winning condition, declare that player the winner.
If all cells are filled and no player meets a winning condition, declare a draw.
If a win or draw is determined, set the game end flag to true and display the "GAME OVER" message and the result.
4.6. Game End Handling
When the game ends (win/loss or draw), prevent further clicks on the cells.
Display the text "GAME OVER" followed by the message "X wins!," "O wins!," or "Draw!" underneath it.
4.7. Reset Functionality
When the "Reset" button is clicked, call the function to return the game to its initial state.
Ingresa la siguiente instrucción (versión en japonés).
以下の要件を満たす三目並べ(Tic-Tac-Toe)ゲームを開発してください。HTML、CSS、JavaScriptの各ファイルに分割し、JavaScriptはゲームロジックの大部分を単独で処理するようにしてください。
1. 全体要件
プレイヤーは人間1人、コンピューター1人の対戦形式とする。
ゲーム終了時(勝敗が決まった場合、または引き分けの場合)は、画面上に「GAME OVER」と表示し、勝者の名前(「Xの勝利!」「Oの勝利!」または「引き分け!」)も併記すること。
新しいゲームを開始するための「リセット」ボタンを設けること。
2. HTML (index.html)
基本的なページ構造を作成してください。
ゲームボードは、9つのマス目(セル)で構成されるようにしてください。各セルはクリック可能で、プレイヤーのマーク(XまたはO)が表示されるようにします。
ゲームの状態(現在のプレイヤーのターン、ゲーム結果など)を表示する要素を設けてください。
ゲームをリセットするためのボタンを配置してください。
CSSファイルとJavaScriptファイルを適切にリンクしてください。
3. CSS (style.css)
ゲームボードとマス目が視覚的に分かりやすいようにスタイルを設定してください。
マス目には枠線をつけ、クリック可能な領域であることがわかるようにする。
XとOの表示は、見やすいように適切なフォントサイズと色を設定する。
ゲームの状態表示、および「GAME OVER」メッセージが目立つようにスタイルを設定してください。
レスポンシブデザインを考慮し、様々な画面サイズで適切に表示されるようにしてください。
4. JavaScript (script.js)
JavaScriptファイルがゲームロジックの全てを処理することを強く要請します。
4.1. ゲームの状態管理
ゲームボードの状態を管理する配列またはオブジェクト(例: ['', '', '', '', '', '', '', '', ''])を定義してください。
現在のプレイヤー(XまたはO)を追跡する変数を定義してください。初期値はXとする。
ゲームが終了したかどうか(勝敗が決まったか、引き分けか)を追跡するブール値を定義してください。
4.2. ゲームの初期化
ページ読み込み時にゲームボードを初期化する関数を作成してください。
全てのマス目を空にする。
現在のプレイヤーをXに設定する。
ゲーム終了フラグをリセットする。
ゲーム結果表示をクリアする。
4.3. プレイヤーの操作
マス目をクリックした際のイベントリスナーを設定してください。
クリックされたマス目が空の場合のみ、現在のプレイヤーのマークを配置し、ボードの状態を更新する。
マークを配置した後、以下の処理を実行する。
勝敗判定関数を呼び出す。
勝敗が決まっていない場合、プレイヤーを交代する(XからO、OからXへ)。
4.4. コンピューターの思考ロジック
コンピューター(O)が手番の時に呼び出される関数を作成してください。
コンピューターは、空いているマス目の中からランダムに選択してマークを配置するシンプルなロジックを実装してください。(将来的に難易度を上げることも考慮できるが、最初はランダムで十分です)
コンピューターがマークを配置した後、勝敗判定を行い、勝敗が決まっていない場合はプレイヤーを人間に戻す。
4.5. 勝敗判定
現在のボードの状態に基づいて勝敗を判定する関数を作成してください。
以下の勝利条件をチェックする。
3つの行
3つの列
2つの対角線
勝利条件を満たすプレイヤーがいる場合、そのプレイヤーの勝利とする。
全てのマス目が埋まり、かつ勝利条件を満たすプレイヤーがいない場合、引き分けとする。
勝敗または引き分けが決まった場合、ゲーム終了フラグをtrueに設定し、「GAME OVER」メッセージと結果を表示する。
4.6. ゲーム終了時の処理
ゲームが終了した場合(勝敗が決まったか、引き分けか)は、それ以上マス目をクリックできないようにする。
「GAME OVER」というテキストと、その下に「Xの勝利!」「Oの勝利!」または「引き分け!」というメッセージを表示する。
4.7. リセット機能
「リセット」ボタンがクリックされた際に、ゲームを初期状態に戻す関数を呼び出す。
- Para crear una terminal nueva, haz clic en Terminal>Nueva en la terminal del editor de Cloud Shell. Primero, configura el ID del proyecto si aún no lo hiciste.
gcloud projects list
gcloud config set project <YOUR_PROJECT_ID>
cd ~/my_cli_project
python3 -m http.server 8080
Esto debería iniciar un servidor de Python. En el navegador, abre (CTRL + clic si estás en Cloud Shell):
http://localhost:8080
Esto debería iniciar un servidor de Python. En el navegador, abre (CTRL + clic si estás en Cloud Shell):
5. Ejecuta extensiones de Gemini CLI
Gemini CLI proporciona algunas extensiones muy útiles que se pueden instalar y ejecutar con facilidad. Estas extensiones te permiten conectarte a varios servicios y usarlos. https://geminicli.com/extensions/ es una lista de extensiones disponibles que crece cada día. Para obtener más información sobre las extensiones de Gemini CLI, consulta esta página: https://medium.com/google-cloud/gemini-cli-tutorial-series-part-11-gemini-cli-extensions-69a6f2abb659
Instalemos una extensión de Gemini Nanobanana y ejecutémosla.
Para instalar la extensión, ejecuta el siguiente comando.
gemini extensions install https://github.com/gemini-cli-extensions/nanobanana
Una vez que se instale la extensión, reinicia Gemini CLI y podrás ejecutar los siguientes comandos de nanobanana desde Gemini CLI.
/generate: Generación de una o varias imágenes con opciones de estilo o variación/edit: Edición de imágenes/restore: Restauración de imágenes/icon: Genera íconos de apps, favicons y elementos de la IU en varios tamaños/pattern: Genera patrones y texturas sin interrupciones para fondos/story: Genera imágenes secuenciales que cuentan una historia o un proceso visual/diagram: Genera diagramas técnicos, diagramas de flujo y maquetas de arquitectura/nanobanana: Interfaz de lenguaje natural
Ejecutemos algunos comandos.
Antes de ejecutar Nanobanana, debes obtener una clave de API de Gemini de aistudio.google.com y configurarla aquí.
export NANOBANANA_GEMINI_API_KEY=YOUR_API_KEY
Versión en inglés
# Single image
/generate "a watercolor painting of a fox in a snowy forest"

# Multiple variations with preview
/generate "sunset over mountains" --count=3 --preview

# Style variations
/generate "mountain landscape" --styles="watercolor,oil-painting" --count=4

# Specific variations with auto-preview
/generate "coffee shop interior" --variations="lighting,mood" --preview
Versión en japonés
# Single image
/generate "雪の森のキツネの水彩画"

# Multiple variations with preview
/generate "山にかかる夕焼け" --count=3 --preview

# Style variations
/generate "山岳風景" --styles="watercolor,oil-painting" --count=4

# Specific variations with auto-preview
/generate "コーヒーショップのインテリア" --variations="lighting,mood" --preview
Editar imágenes
Cambia el nombre del archivo por el nombre de tu archivo local.
/edit my_photo.png "change the color of fox to blue"
6. ¡Desafío!
Piensa en la instrucción para crear estas aplicaciones.
-Your favorite game
-A photo gallery application
-A Manga generator App
-お気に入りのゲーム
-フォトギャラリーアプリケーション
-マンガ生成アプリ
7. Completado
¡Terminaste! ¡Bien hecho! Para obtener más información, consulta los siguientes recursos.