
1. 本實驗室的目標
在本實作實驗室中,您將安裝 Gemini CLI、進行驗證,並試用一些基本用途。
課程內容
- 瞭解 Gemini CLI 的基本概念。
- 瞭解如何使用 Gemini CLI 執行基本工作。
2. 事前準備
- 如果沒有可用的專案,請在 GCP 主控台中建立新專案。
- 在本實驗室中,我們將使用 GCP Cloud Shell 執行下列步驟。開啟 Cloud Shell,並使用 Cloud Shell 設定專案。
- 按下 Cloud Shell 編輯器按鈕或使用這個連結,開啟 GCP Cloud Shell 編輯器。如果看到「授權 Shell」彈出式視窗,請點選授權 Cloud Shell 編輯器。
- 您可以使用下列指令,檢查專案是否已通過驗證。
gcloud auth list
- 在 Cloud Shell 中執行下列指令,確認專案
gcloud config list project
- 如果忘記專案 ID,可以使用下列指令列出所有專案 ID:
gcloud projects list
- 如果未設定專案,請使用下列指令設定
gcloud config set project <YOUR_PROJECT_ID>
- 我們需要啟用一些服務才能執行本實驗室。在 Cloud Shell 中執行下列指令。
gcloud services enable aiplatform.googleapis.com
gcloud services enable cloudresourcemanager.googleapis.com
3. 安裝與驗證
安裝
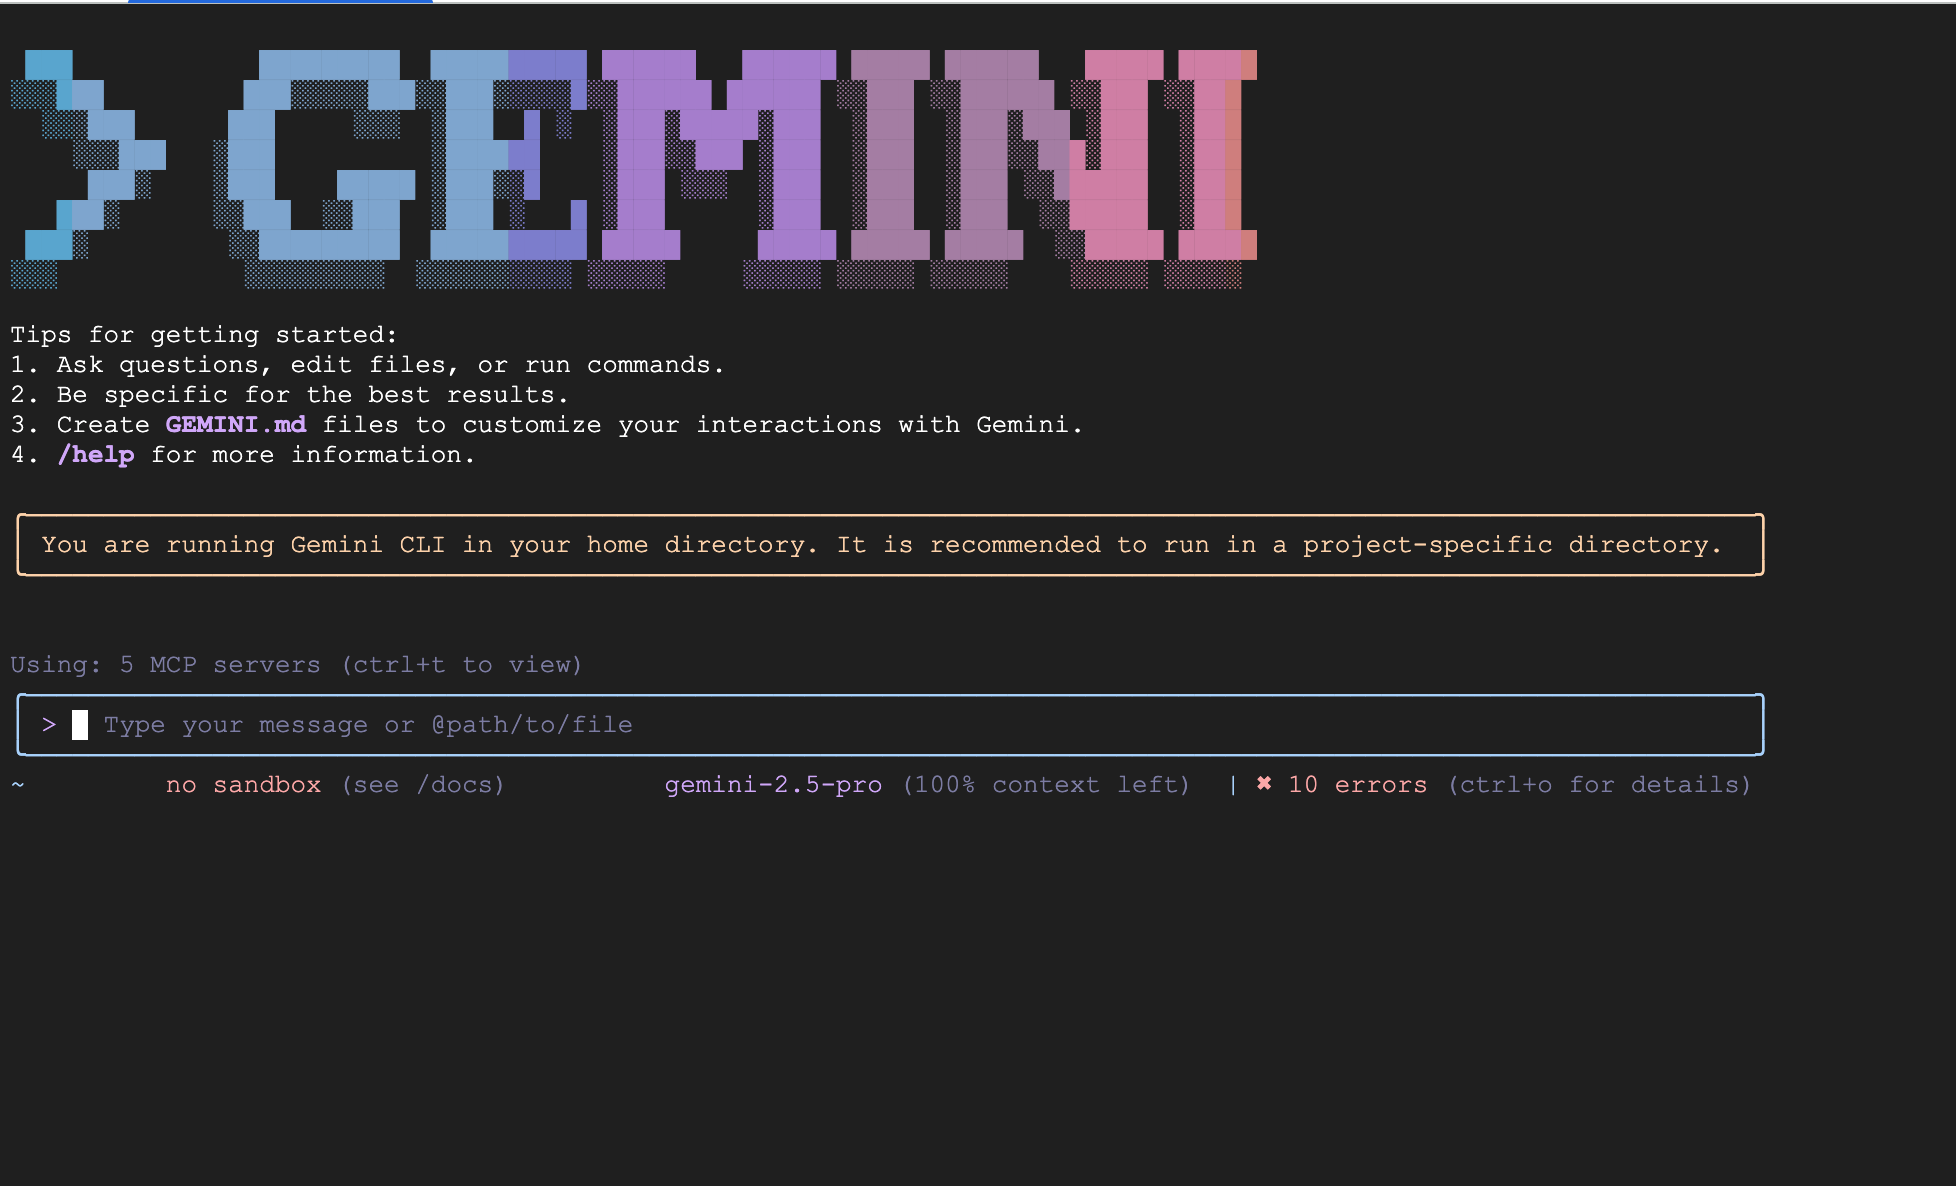
GCP Cloud Shell 編輯器已預先安裝 Gemini CLI。如要使用,可以立即開始。
您也可以在本機環境中安裝 Gemini CLI。
如要在本機環境中安裝 Gemini CLI,必須使用 Node.js 20 以上版本。您可以執行下列指令來安裝 Gemini CLI。
npm install -g @google/gemini-cli
如要升級至最新版,請使用下列指令:
npm update -g @google/gemini-cli
在終端機執行下列指令,即可執行 Gemini。
gemini
驗證
如果您使用 GCP Cloud Shell 編輯器,在執行 Shell 時接受驗證,應該就已通過驗證。
如果您在本機執行,但尚未完成驗證,畫面會如下所示。
你也可以輸入 /auth,開啟下方的畫面。
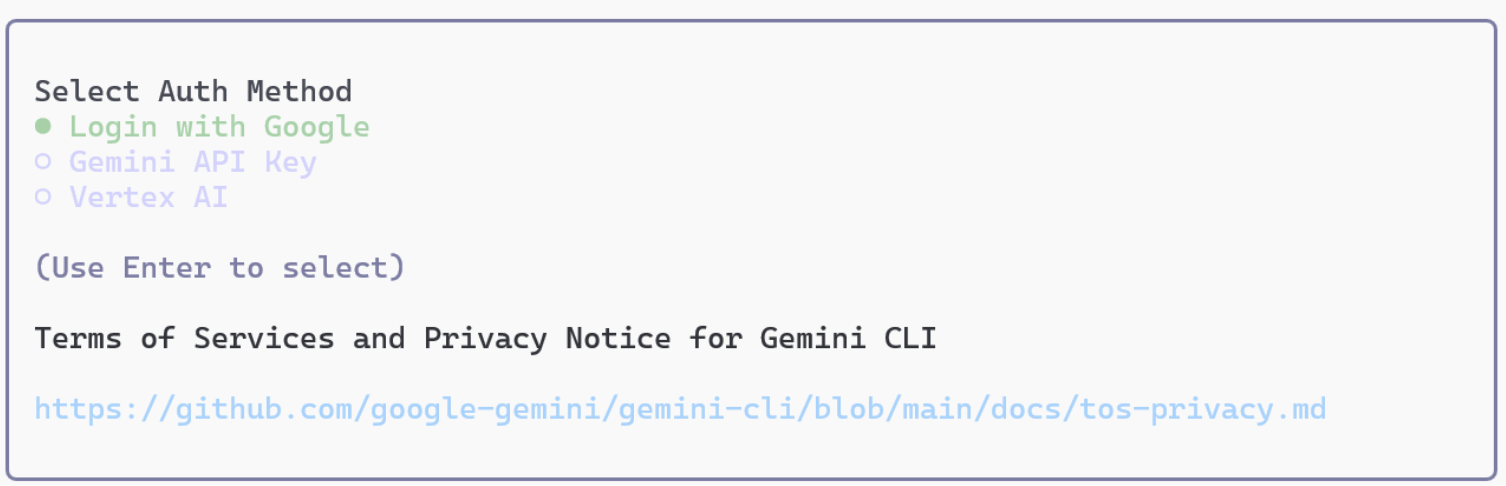
圖 1:Gemini CLI 會提供 3 種驗證方式。
首先,使用 /quit 指令退出 Gemini CLI。
透過 Google 驗證:在控制台中執行 /auth 會顯示驗證選項。從選項中選取「使用 Google 帳戶登入」。瀏覽器隨即會顯示 Google 驗證畫面。登入完成後,控制台也會通過驗證。雖然驗證已完成,但如要實際使用 Gemini CLI,您必須指定 Google Cloud 專案。返回控制台畫面,執行下列指令來指定專案 (也可以在 .env 檔案中指定)。
export GOOGLE_CLOUD_PROJECT=xxxxxxxxxxxxxxxxxxxxxxxxxxxxxxxxxxxxxxxxxxx
使用 API 金鑰進行驗證:如要使用 API 金鑰進行驗證,您需要 API 金鑰。您可以前往 aistudio.google.com 產生 API 金鑰。發行 API 金鑰後,請在控制台中設定,步驟如下:
export GEMINI_API_KEY=xxxxxxxxxxxxxxxxxxxxxxxxxxxxxxxxxxxxxxxxxxxx
透過 Vertex AI 進行驗證:如要透過 Vertex AI 使用 Gemini API,請按照下列步驟操作。
首先,請使用下列指令驗證 Google Cloud。
gcloud auth application-default login
接著在終端機中執行下列指令
export GOOGLE_GENAI_USE_VERTEXAI=true
export GOOGLE_CLOUD_PROJECT=Your GCP Project Name
export GOOGLE_CLOUD_LOCATION=us-central1
4. 試用 Gemini CLI
現在可以試用 Gemini CLI 了。請參考下列應用實例。
首先建立專案資料夾 my_cli_project。
mkdir ~/my_cli_project
cd ~/my_cli_project
從專案資料夾執行 Gemini,可確保 Gemini CLI 在該資料夾的界線內安全執行。
- 如果尚未進入 Gemini CLI,請在 Cloud Shell 終端機中輸入下列內容,進入 Gemini CLI
gemini
- 執行簡單的提示:
What is the weather today in Tokyo
今日の東京の天気について教えてください
系統隨即會顯示東京的天氣。請注意,自動執行這項作業會使用
Google 搜尋工具!
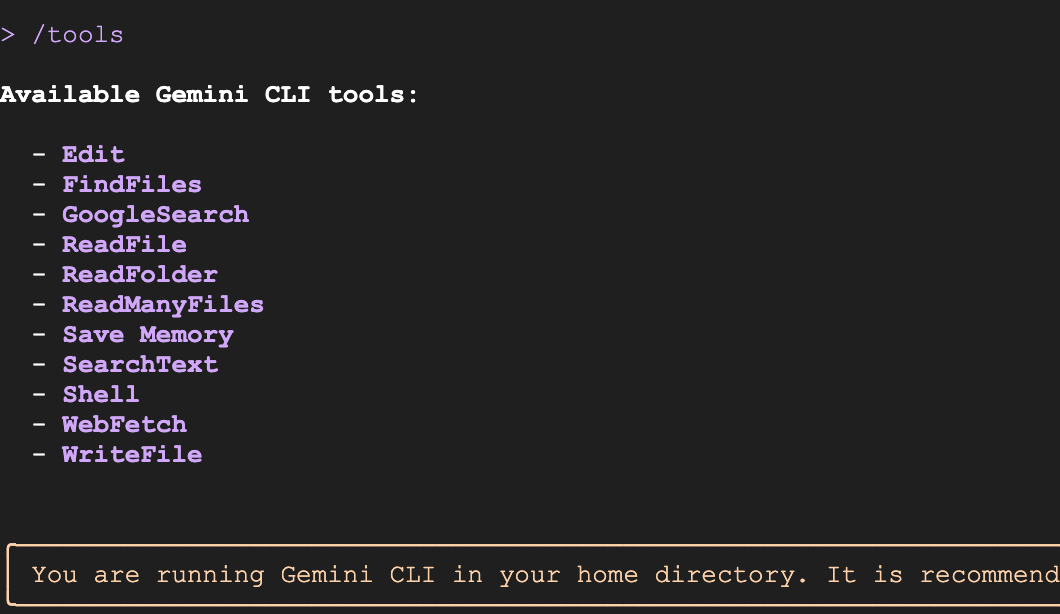
- 確認已安裝的工具:在 Gemini CLI 終端機中執行下列指令。畫面上應會顯示已安裝的工具清單。
/tools
- 從當地新聞網站取得新聞: (例如 https://mainichi.jp,請改為您所在地區的新聞網站)。
Get me the news summary from https://mainichi.jp/
このサイトからニュースのサマリーを教えてください https://mainichi.jp/
您應該會收到當地新聞網站提供的新聞摘要。請注意,代理程式會自動使用 WebFetch 工具從新聞網站下載內容,並建立摘要。
- 執行多步驟工作(請改用您當地網站):從 https://mainichi.jp/ 取得新聞,只篩選體育新聞,然後為我摘要。
Get me the news from https://mainichi.jp/ and filter in only the sports news and summarize that for me.
https://mainichi.jp/ からニュースを取得し、スポーツニュースのみを抽出して、その要約を作成してください。
- 執行系統指令:如要執行系統指令,請按 ! 然後輸入指令。如要還原為一般模式,請輸入 ! 詳閱職位說明
Type ! and Enter key. This starts the command mode.
ls
pwd
Type ! to go back to normal mode.
- 建立井字遊戲。輸入下列提示 (英文版)。
Please develop a Tic-Tac-Toe game that meets the following requirements. The solution should be split into separate HTML, CSS, and JavaScript files, with the JavaScript file handling the majority of the game logic independently.
1. General Requirements
The game format should be a match between one human player and one computer player.
When the game ends (a win/loss is determined, or a draw occurs), display "GAME OVER" on the screen along with the winner's name ("X wins!," "O wins!," or "Draw!").
Provide a "Reset" button to start a new game.
2. HTML (index.html)
Create the basic page structure.
The game board should consist of nine squares (cells). Each cell should be clickable and display the player's mark (X or O).
Provide an element to display the game status (e.g., current player's turn, game result).
Place the reset button for starting a new game.
Link the CSS and JavaScript files appropriately.
3. CSS (style.css)
Style the game board and cells so they are visually clear and easy to understand.
Add borders to the cells to indicate they are clickable areas.
Set appropriate font size and color for the X and O marks to ensure good visibility.
Style the game status display and the "GAME OVER" message to make them stand out.
Consider responsive design to ensure appropriate display on various screen sizes.
4. JavaScript (script.js)
It is strongly requested that the JavaScript file handle all the game logic.
4.1. Game State Management
Define an array or object to manage the game board state (e.g., ['', '', '', '', '', '', '', '', '']).
Define a variable to track the current player (X or O). The initial value should be X.
Define a boolean value to track whether the game has ended (win/loss or draw).
4.2. Game Initialization
Create a function to initialize the game board upon page load.
Clear all cells.
Set the current player to X.
Reset the game end flag.
Clear the game result display.
4.3. Player Interaction
Set up event listeners for cell clicks.
Only place the current player's mark and update the board state if the clicked cell is empty.
After placing the mark, execute the following:
Call the win/draw check function.
If a winner is not yet determined, switch the player (X to O, O to X).
4.4. Computer AI Logic
Create a function that is called when it is the computer's (O) turn.
Implement a simple logic where the computer randomly selects an empty cell to place its mark. (While difficulty can be increased in the future, random selection is sufficient initially.)
After the computer places its mark, perform the win/draw check, and if the game is not over, switch the turn back to the human player.
4.5. Win/Draw Determination
Create a function that determines the win/draw status based on the current board state.
Check the following winning conditions:
Three rows
Three columns
Two diagonals
If a player meets a winning condition, declare that player the winner.
If all cells are filled and no player meets a winning condition, declare a draw.
If a win or draw is determined, set the game end flag to true and display the "GAME OVER" message and the result.
4.6. Game End Handling
When the game ends (win/loss or draw), prevent further clicks on the cells.
Display the text "GAME OVER" followed by the message "X wins!," "O wins!," or "Draw!" underneath it.
4.7. Reset Functionality
When the "Reset" button is clicked, call the function to return the game to its initial state.
輸入下列提示詞 (日文版)
以下の要件を満たす三目並べ(Tic-Tac-Toe)ゲームを開発してください。HTML、CSS、JavaScriptの各ファイルに分割し、JavaScriptはゲームロジックの大部分を単独で処理するようにしてください。
1. 全体要件
プレイヤーは人間1人、コンピューター1人の対戦形式とする。
ゲーム終了時(勝敗が決まった場合、または引き分けの場合)は、画面上に「GAME OVER」と表示し、勝者の名前(「Xの勝利!」「Oの勝利!」または「引き分け!」)も併記すること。
新しいゲームを開始するための「リセット」ボタンを設けること。
2. HTML (index.html)
基本的なページ構造を作成してください。
ゲームボードは、9つのマス目(セル)で構成されるようにしてください。各セルはクリック可能で、プレイヤーのマーク(XまたはO)が表示されるようにします。
ゲームの状態(現在のプレイヤーのターン、ゲーム結果など)を表示する要素を設けてください。
ゲームをリセットするためのボタンを配置してください。
CSSファイルとJavaScriptファイルを適切にリンクしてください。
3. CSS (style.css)
ゲームボードとマス目が視覚的に分かりやすいようにスタイルを設定してください。
マス目には枠線をつけ、クリック可能な領域であることがわかるようにする。
XとOの表示は、見やすいように適切なフォントサイズと色を設定する。
ゲームの状態表示、および「GAME OVER」メッセージが目立つようにスタイルを設定してください。
レスポンシブデザインを考慮し、様々な画面サイズで適切に表示されるようにしてください。
4. JavaScript (script.js)
JavaScriptファイルがゲームロジックの全てを処理することを強く要請します。
4.1. ゲームの状態管理
ゲームボードの状態を管理する配列またはオブジェクト(例: ['', '', '', '', '', '', '', '', ''])を定義してください。
現在のプレイヤー(XまたはO)を追跡する変数を定義してください。初期値はXとする。
ゲームが終了したかどうか(勝敗が決まったか、引き分けか)を追跡するブール値を定義してください。
4.2. ゲームの初期化
ページ読み込み時にゲームボードを初期化する関数を作成してください。
全てのマス目を空にする。
現在のプレイヤーをXに設定する。
ゲーム終了フラグをリセットする。
ゲーム結果表示をクリアする。
4.3. プレイヤーの操作
マス目をクリックした際のイベントリスナーを設定してください。
クリックされたマス目が空の場合のみ、現在のプレイヤーのマークを配置し、ボードの状態を更新する。
マークを配置した後、以下の処理を実行する。
勝敗判定関数を呼び出す。
勝敗が決まっていない場合、プレイヤーを交代する(XからO、OからXへ)。
4.4. コンピューターの思考ロジック
コンピューター(O)が手番の時に呼び出される関数を作成してください。
コンピューターは、空いているマス目の中からランダムに選択してマークを配置するシンプルなロジックを実装してください。(将来的に難易度を上げることも考慮できるが、最初はランダムで十分です)
コンピューターがマークを配置した後、勝敗判定を行い、勝敗が決まっていない場合はプレイヤーを人間に戻す。
4.5. 勝敗判定
現在のボードの状態に基づいて勝敗を判定する関数を作成してください。
以下の勝利条件をチェックする。
3つの行
3つの列
2つの対角線
勝利条件を満たすプレイヤーがいる場合、そのプレイヤーの勝利とする。
全てのマス目が埋まり、かつ勝利条件を満たすプレイヤーがいない場合、引き分けとする。
勝敗または引き分けが決まった場合、ゲーム終了フラグをtrueに設定し、「GAME OVER」メッセージと結果を表示する。
4.6. ゲーム終了時の処理
ゲームが終了した場合(勝敗が決まったか、引き分けか)は、それ以上マス目をクリックできないようにする。
「GAME OVER」というテキストと、その下に「Xの勝利!」「Oの勝利!」または「引き分け!」というメッセージを表示する。
4.7. リセット機能
「リセット」ボタンがクリックされた際に、ゲームを初期状態に戻す関数を呼び出す。
- 在 Cloud Shell 編輯器終端機中,依序點選「Terminal」>「New」,建立新的終端機。如果尚未設定專案 ID,請先設定,
gcloud projects list
gcloud config set project <YOUR_PROJECT_ID>
cd ~/my_cli_project
python3 -m http.server 8080
這項操作應會啟動 Python 伺服器。在瀏覽器中開啟 (如果您使用 Cloud Shell,請按住 Ctrl 鍵並點按):
http://localhost:8080
這項操作應會啟動 Python 伺服器。在瀏覽器中開啟 (如果您使用 Cloud Shell,請按住 Ctrl 鍵並點按):
5. 執行 Gemini CLI 擴充功能
Gemini CLI 提供一些非常實用的擴充功能,可輕鬆安裝及執行。這些擴充功能可讓您連線及使用各種服務。https://geminicli.com/extensions/,查看可用擴充功能清單 (每天都會新增)。如要進一步瞭解 Gemini CLI 擴充功能,請參閱這篇文章:https://medium.com/google-cloud/gemini-cli-tutorial-series-part-11-gemini-cli-extensions-69a6f2abb659
讓我們安裝 Gemini Nanobanana 擴充功能並運作執行。
如要安裝擴充功能,請執行下列指令。
gemini extensions install https://github.com/gemini-cli-extensions/nanobanana
安裝擴充功能後,請重新啟動 Gemini CLI,即可從 Gemini CLI 執行下列 nanobanana 指令。
/generate- 透過樣式/變化選項生成單一或多張圖片/edit- 圖片編輯/restore- 圖片修復/icon- 生成多種尺寸的應用程式圖示、網站圖示和 UI 元素/pattern- 生成無縫的背景圖案和紋理/story- 生成一系列圖片,述說影像故事或過程/diagram- 生成技術圖表、流程圖和架構模擬圖/nanobanana- 自然語言介面
執行幾個指令
執行 Nanobanana 前,請先前往 aistudio.google.com 取得 Gemini API 金鑰,並在此處設定,
export NANOBANANA_GEMINI_API_KEY=YOUR_API_KEY
英文版請見
# Single image
/generate "a watercolor painting of a fox in a snowy forest"

# Multiple variations with preview
/generate "sunset over mountains" --count=3 --preview

# Style variations
/generate "mountain landscape" --styles="watercolor,oil-painting" --count=4

# Specific variations with auto-preview
/generate "coffee shop interior" --variations="lighting,mood" --preview
日文版
# Single image
/generate "雪の森のキツネの水彩画"

# Multiple variations with preview
/generate "山にかかる夕焼け" --count=3 --preview

# Style variations
/generate "山岳風景" --styles="watercolor,oil-painting" --count=4

# Specific variations with auto-preview
/generate "コーヒーショップのインテリア" --variations="lighting,mood" --preview
編輯圖像
將檔案名稱改為本機檔案名稱。
/edit my_photo.png "change the color of fox to blue"
6. 挑戰!
請想出提示,讓 AI 製作這些應用程式!
-Your favorite game
-A photo gallery application
-A Manga generator App
-お気に入りのゲーム
-フォトギャラリーアプリケーション
-マンガ生成アプリ
7. 完成
這樣就完成了!非常好!詳情請參閱下列資源。