
1. Introduction
Last Updated: 2021-03-09
What is Firebase Remote Config?
Firebase Remote Config is a cloud service that lets you change the behavior and appearance of your app without requiring users to download an app update at no cost. When using Remote Config, you create in-app default values that control the behavior and appearance of your app. Then, you can later use the Firebase console or the Remote Config backend APIs to override in-app default values for all app users or for segments of your user base. Your app controls when updates are applied, and it can frequently check for updates and apply them with a negligible impact on performance.
How does it work?
Remote Config includes a client library that handles important tasks like fetching parameter values and caching them, while still giving you control over when new values are activated so that they affect your app's user experience. This lets you safeguard your app experience by controlling the timing of any changes.
The Remote Config client library get methods provide a single access point for parameter values. Your app gets server-side values using the same logic it uses to get in-app default values, so you can add the capabilities of Remote Config to your app without writing a lot of code.
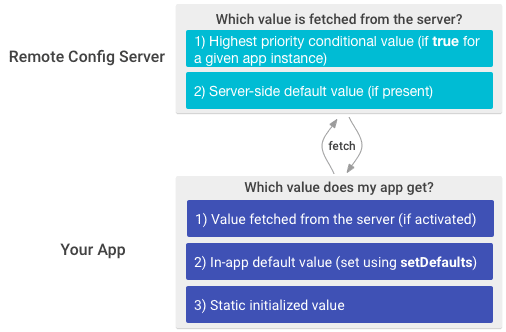
To override in-app default values, you use the Firebase console or the Remote Config backend APIs to create parameters with the same names as the parameters used in your app. For each parameter, you can set a server-side default value to override the in-app default value, and you can also create conditional values to override the in-app default value for app instances that meet certain conditions. This graphic shows how parameter values are prioritized in the Remote Config backend and in your app:
What you'll learn
- How to implement Firebase Remote Config
- How to use Firebase Remote Config to change values without updating your app
What you'll need
- The latest version of Android Studio
- A Firebase account
- (recommended, but optional) A physical Android device to run your app
- Basic knowledge of Java or Kotlin
2. Getting Set Up
(Optional) Download the sample code
In this codelab, you will build your own test app, but if you want to see and run the existing sample app, you can download the quickstart sample code.
Click the following button to download all the code for this codelab:
Unpack the downloaded zip file. This will unpack a root folder named quickstart-android-master.
...or clone the GitHub repository from the command line.
$ git clone https://github.com/firebase/quickstart-android.git
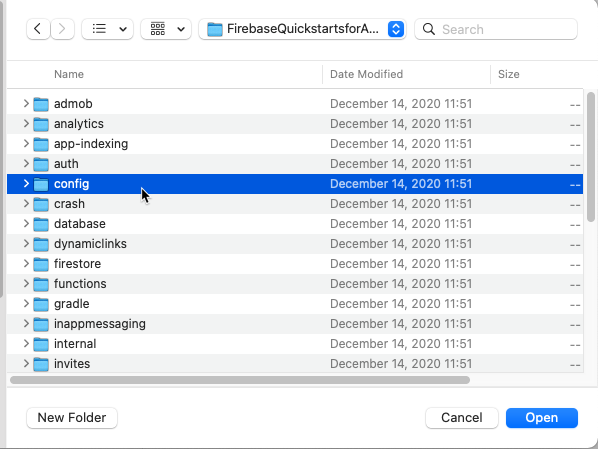
The repository contains multiple folders. We will be using the  config folder.
(Optional) Import the sample code
Launch Android Studio, choose "Import project" in the welcome screen. Then open the downloaded folder and select the config folder. Then click "open".
Create New Android Project
- In Android Studio, start new project
- Select Basic Activity
- In the "Configure Your Project" screen:
- Name your project. The package name and Save location will be automatically generated for you.
- Language: Java
- Minimum SDK 16
3. Add Firebase and Firebase Analytics to your Android Project
Create a Firebase project
Before you can add Firebase to your Android app, you need to create a Firebase project to connect to your iOS app. Visit Understand Firebase Projects to learn more about Firebase projects.
- In the Firebase console, click Add project, then select or enter a Project name.
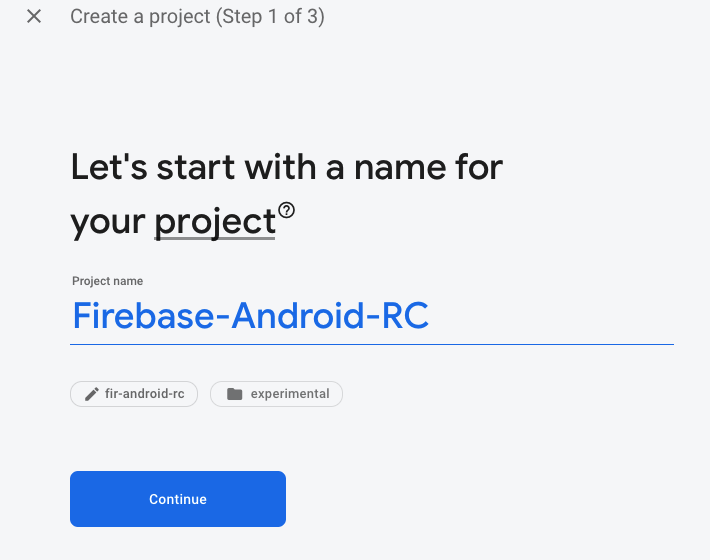
If you have an existing Google Cloud Platform (GCP) project, you can select the project from the dropdown menu to add Firebase resources to that project.
- (Optional) If you are creating a new project, you can edit the Project ID.
Firebase automatically assigns a unique ID to your Firebase project. Visit Understand Firebase Projects to learn about how Firebase uses the project ID.
- Click Continue.
- Set up Google Analytics for your project, which enables you to have an optimal experience using any of the following Firebase products:
- Firebase Crashlytics
- Firebase Predictions
- Firebase Cloud Messaging
- Firebase In-App Messaging
- Firebase Remote Config
- Firebase A/B Testing
When prompted, select to use an existing Google Analytics account or to create a new account. If you choose to create a new account, select your Analytics reporting location, then accept the data sharing settings and Google Analytics terms for your project.
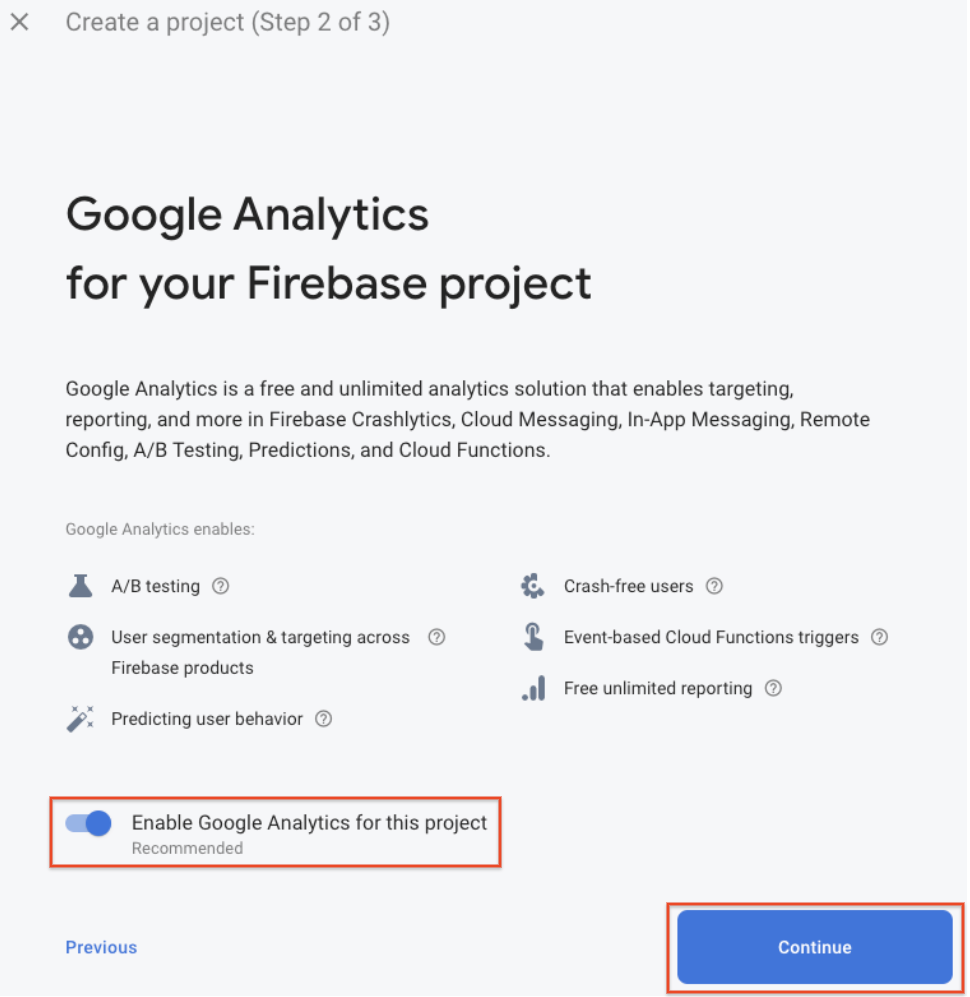
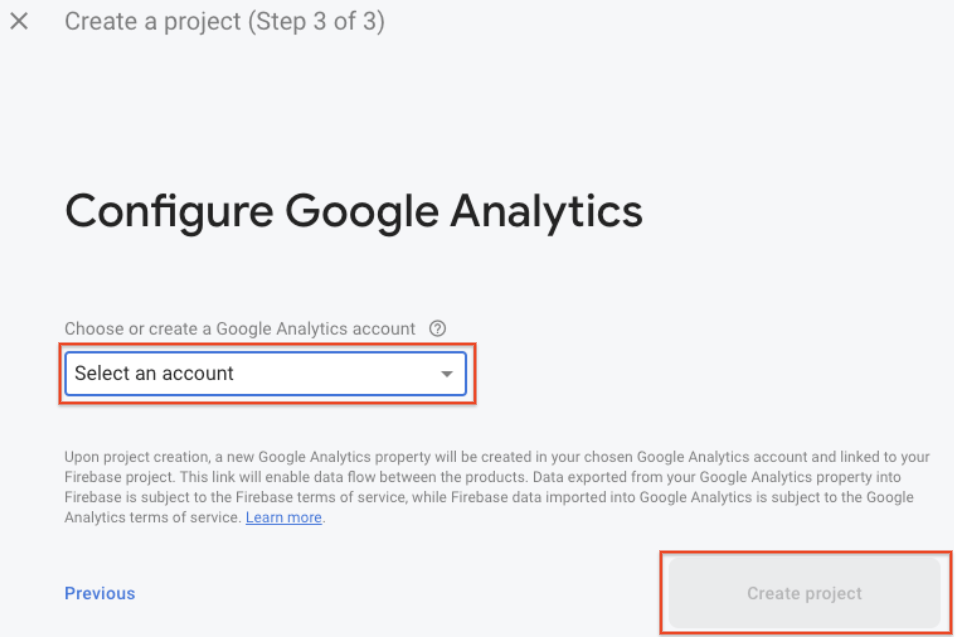
- Click Create project (or Add Firebase, if you're using an existing GCP project).
Firebase automatically provisions resources for your Firebase project. When the process completes, you'll be taken to the overview page for your Firebase project in the Firebase console.
Register your app with Firebase
After you have a Firebase project, you can add your Android app to it.
Visit Understand Firebase Projects to learn more about best practices and considerations for adding apps to a Firebase project, including how to handle multiple build variants.
- Go to the Firebase console.
- At the top of the Project Overview page, click the Android icon to launch the setup workflow. If you've already added an app to your Firebase project, click Add app to display the platform options.
- Enter your app's package name in the Android package name field.
- (Optional) Enter App nickname.
- Leave the SHA-1 field blank since SHA-1 is not required for this project.
- Click Register app.
Add the Firebase Configuration File
Next, you will be prompted to download a configuration file that contains all the necessary Firebase metadata for your app. Click Download google-services.json to obtain your Firebase Android config file (google-services.json).

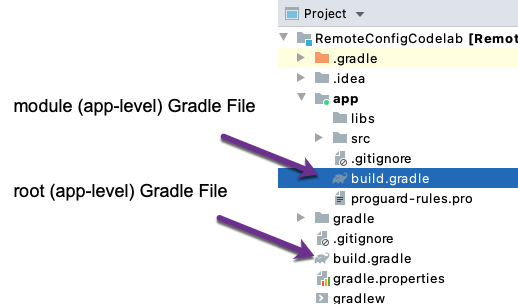
In your project-level Gradle file (build.gradle), add rules to include the Google Services Gradle plugin. Check that you have Google's Maven repository, as well.
Project-level build.gradle (<project>/build.gradle):
buildscript {

  repositories {
    // Check that you have the following line (if not, add it):
    google()  // Google's Maven repository
  }

  dependencies {
    // ...

    // Add the following line:
    classpath 'com.google.gms:google-services:4.3.5'  // Google Services plugin
  }
}

allprojects {
  // ...

  repositories {
    // Check that you have the following line (if not, add it):
    google()  // Google's Maven repository
    // ...
  }
}
In your module (app-level) Gradle file (usually app/build.gradle), apply the Google Services Gradle plugin:
App-level build.gradle (<project>/<app-module>/build.gradle):
apply plugin: ‘com.android.application'
// Add the following line:
apply plugin: ‘com.google.gms.google-services' // Google Services plugin
android {
// ...
}
Add the Firebase SDK to your Android App
For Remote Config, Google Analytics is required for the conditional targeting of app instances to user properties and audiences. Make sure that you enable Google Analytics in your project.
(This is already done in the sample quickstart code)
Using the Firebase Android BoM, declare the dependency for the Remote Config Android library in your module (app-level) Gradle file (usually app/build.gradle). By using the Firebase Android BoM, your app will always use compatible versions of the Firebase Android libraries.
Also, as part of setting up Analytics, you need to add the Firebase SDK for Google Analytics to your app. Under dependencies, add the following code:
app/build.gradle
dependencies {
    // Import the BoM for the Firebase platform
    implementation platform('com.google.firebase:firebase-bom:26.6.0')

    // Declare the dependencies for the Remote Config and Analytics libraries
    // When using the BoM, you don't specify versions in Firebase library dependencies
    implementation 'com.google.firebase:firebase-config'
    implementation 'com.google.firebase:firebase-analytics'
}
Sync your project with gradle files
To make sure that all dependencies are available to your app, sync your project with gradle files by selecting File > Sync Project with Gradle Files.
4. Review the main components for Remote Config
We are now going to review the steps to use Remote Config in an app. These steps have already been completed in the quickstart codelab code. Please use this section while reviewing the quickstart codelab code to understand what is happening.
1. Get the Remote Config Singleton Object
Get a Remote Config object instance and set the minimum fetch interval to allow for frequent refreshes:
MainActivity.java
mFirebaseRemoteConfig = FirebaseRemoteConfig.getInstance();
FirebaseRemoteConfigSettings configSettings = new FirebaseRemoteConfigSettings.Builder()
        .setMinimumFetchIntervalInSeconds(3600)
        .build();
mFirebaseRemoteConfig.setConfigSettingsAsync(configSettings);
The singleton object is used to store in-app default parameter values, fetch updated parameter values from the backend, and control when fetched values are made available to your app.
During development, it's recommended to set a relatively low minimum fetch interval. See Throttling for more information.
2. Set in-app default parameter values
You can set in-app default parameter values in the Remote Config object, so that your app behaves as intended before it connects to the Remote Config backend, and so that default values are available if none are set in the backend.
You can define a set of parameter names and default parameter values using a Map object or an XML resource file stored in your app's res/xml folder. The Remote Config quickstart sample app uses an XML file to define default parameter names and values. Here is how you would create an XML file of your own:
- Create an
xmlfolder under theresfolder.
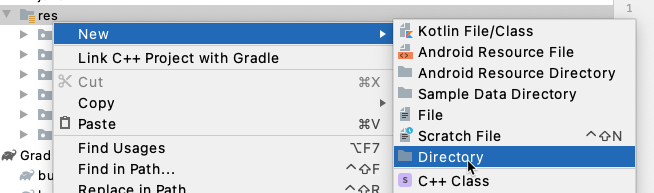
- Right-click on the newly created
xmlfolder and create a file.
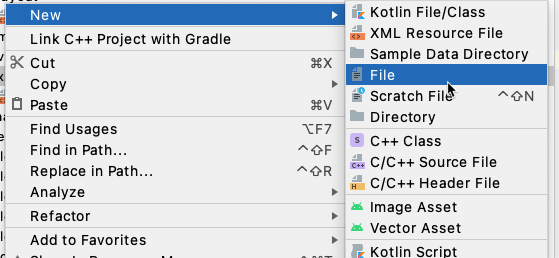
- Set the default values. In the next section, you will try changing the default values in the Remote Config quickstart XML file.
- Add these values to the Remote Config object using setDefaultsAsync(int), as shown:
MainActivity.java
mFirebaseRemoteConfig.setDefaultsAsync(R.xml.remote_config_defaults);
3. Get parameter values to use in your app
Now you can get parameter values from the Remote Config object. If you set values in the backend, fetch them, and then activate them, those values are available to your app. Otherwise, you get the in-app parameter values configured using setDefaultsAsync(int). To get these values, call the method listed below that maps to the data type expected by your app, providing the parameter key as an argument:
4. Fetch and activate values
- To fetch parameter values from the Remote Config backend, call the fetch() method. Any values that you set in the backend are fetched and stored in the Remote Config object.
- To make fetched parameter values available to your app, call the activate() method. For cases where you want to fetch and activate values in one call, you can use a fetchAndActivate() request to fetch values from the Remote Config backend and make them available to the app:
MainActivity.java
mFirebaseRemoteConfig.fetchAndActivate()
        .addOnCompleteListener(this, new OnCompleteListener<Boolean>() {
            @Override
            public void onComplete(@NonNull Task<Boolean> task) {
                if (task.isSuccessful()) {
                    boolean updated = task.getResult();
                    Log.d(TAG, "Config params updated: " + updated);
                    Toast.makeText(MainActivity.this, "Fetch and activate succeeded",
                            Toast.LENGTH_SHORT).show();

                } else {
                    Toast.makeText(MainActivity.this, "Fetch failed",
                            Toast.LENGTH_SHORT).show();
                }
                displayWelcomeMessage();
            }
        });
Because these updated parameter values affect the behavior and appearance of your app, you should activate the fetched values at a time that ensures a smooth experience for your user, such as the next time that the user opens your app. See Remote Config loading strategies for more information and examples.
Throttling
If an app fetches too many times in a short time period, fetch calls are throttled and the SDK returns FirebaseRemoteConfigFetchThrottledException. Before SDK version 17.0.0, the limit was 5 fetch requests in a 60 minute window (newer versions have more permissive limits).
During app development, you might want to fetch and activate configs very frequently (many times per hour) to let you rapidly iterate as you develop and test your app. To accommodate rapid iteration on a project with up to 10 developers, you can temporarily set a FirebaseRemoteConfigSettings object with a low minimum fetch interval (setMinimumFetchIntervalInSeconds) in your app.
The default minimum fetch interval for Remote Config is 12 hours, which means that configs won't be fetched from the backend more than once in a 12 hour window, regardless of how many fetch calls are actually made. Specifically, the minimum fetch interval is determined in this following order:
- The parameter in
fetch(long) - The parameter in
FirebaseRemoteConfigSettings.setMinimumFetchIntervalInSeconds(long) - The default value of 12 hours
To set the minimum fetch interval to a custom value, use FirebaseRemoteConfigSettings.Builder.setMinimumFetchIntervalInSeconds(long).
5. Change the app behavior with the Remote Config
Change the in-app default parameters
Open res/xml/remote_config_defaults.xml and change the default values to something else.
res/xml/remote_config_defaults.xml
<?xml version="1.0" encoding="utf-8"?>
<!-- START xml_defaults -->
<defaultsMap>
    <entry>
        <key>loading_phrase</key>
        <value>Fetching config...</value>
    </entry>
    <entry>
        <key>welcome_message_caps</key>
        <value>false</value>
    </entry>
    <entry>
        <key>welcome_message</key>
        <value>Welcome to my awesome app!</value>
    </entry>
</defaultsMap>
    <!-- END xml_defaults -->
Verify the in-app default value change
- Run the project in an emulator or using a test device to confirm the behavior.
- Click Open on either the Java or Kotlin version.
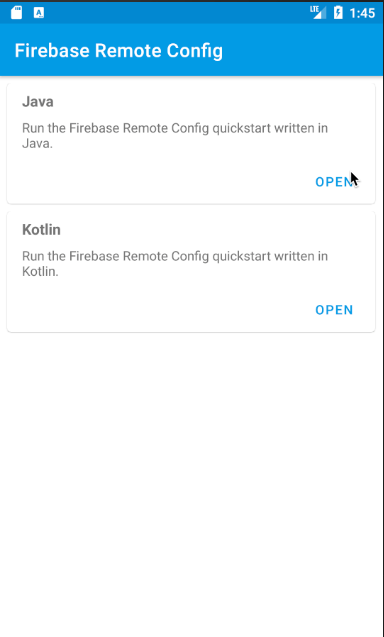
- Review the welcome message on the main view.
Set parameter values in the Remote Config backend
Now let's test sending values via Remote Config. Using the Firebase console or the Remote Config backend APIs, you can create new server-side default values that override the in-app values according to your desired conditional logic or user targeting. This section describes the Firebase console steps to create these values.
- Open the Firebase console, open your project.
- Select Remote Config from the left-hand side menu in the Engage section to view the Remote Config dashboard.
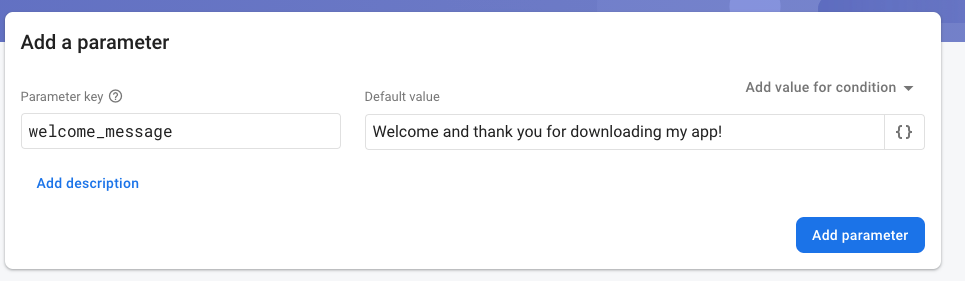
- Under Add a parameter enter the
Parameter key.UnderDefault valueadd whatever text you would like. Then click Add Parameter. For this codelab, we'll be using the parameter keys in theres/xml/remote_config_defaults.xmlfile. See the table below for details:
Parameter key | Default value ( | Description |
loading_phrase | Fetching config... | String; Displayed when fetching Remote Config values. |
welcome_message_caps | false | Boolean; If true, changes welcome_message to all caps |
welcome_message | Welcome to my awesome app! | String; Welcome message |
Example screenshot:
- When you have finished adding parameters, click "Publish Changes."
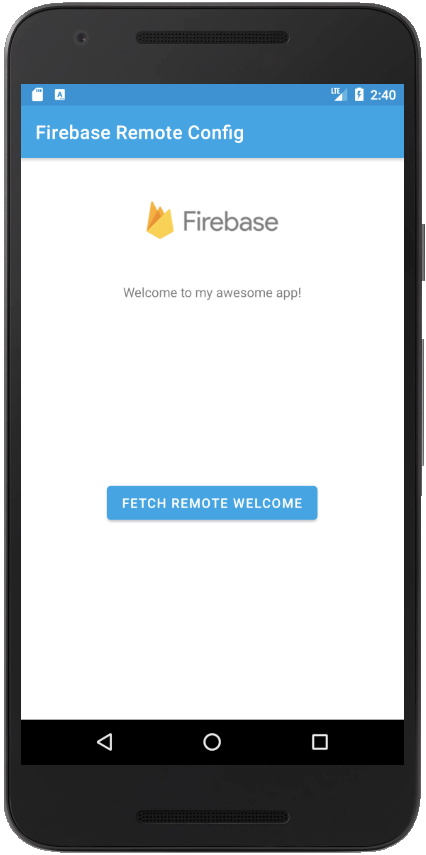
- Run your app on an emulator or a device again and click the "Fetch Remote Welcome" button this time.
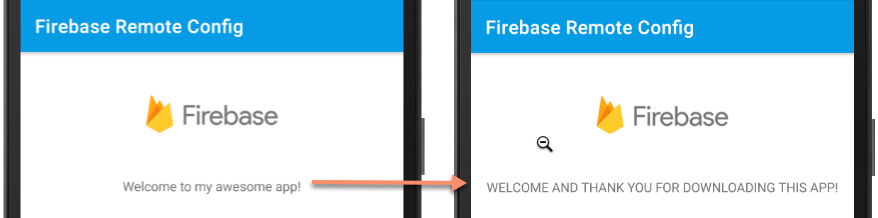
- The Welcome Message should be updated based on your Remote Config parameter and values!
6. Congratulations
Congratulations, you've successfully used Remote Config to change the welcome message! There are many more ways to utilize Remote Config to change and customize apps. Please see the below additional resources: