
1. 概要
この Codelab では、Python で Secret Manager を使用することに焦点を当てます。
Secret Manager を使用すると、シークレットをバイナリ blob またはテキスト文字列として保存、管理、アクセスできます。適切な権限を使用して、シークレットのコンテンツを表示できます。
Secret Manager は、実行時にアプリケーションが必要とする構成情報(データベース パスワード、API キー、TLS 証明書など)を保存するのに便利です。
学習内容
- Cloud Shell の使い方
- Python 用 Secret Manager クライアント ライブラリをインストールする方法
- Python クライアント ライブラリを使用してシークレットを作成してアクセスする方法
- Python クライアント ライブラリを使用して Cloud Functions のシークレットにアクセスする方法
必要なもの
アンケート
このチュートリアルをどのように使用されますか?
Python のご利用経験はどの程度ありますか?
Google Cloud サービスの使用経験はどの程度ありますか?
2. 設定と要件
セルフペース型の環境設定
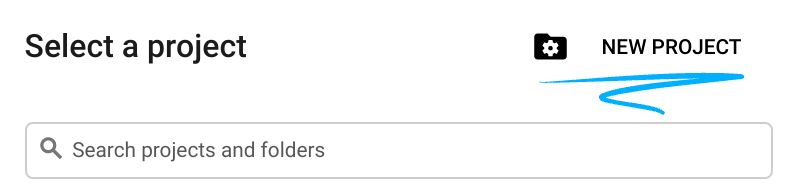
- Google Cloud Console にログインして、プロジェクトを新規作成するか、既存のプロジェクトを再利用します。Gmail アカウントも Google Workspace アカウントもまだお持ちでない場合は、アカウントを作成してください。

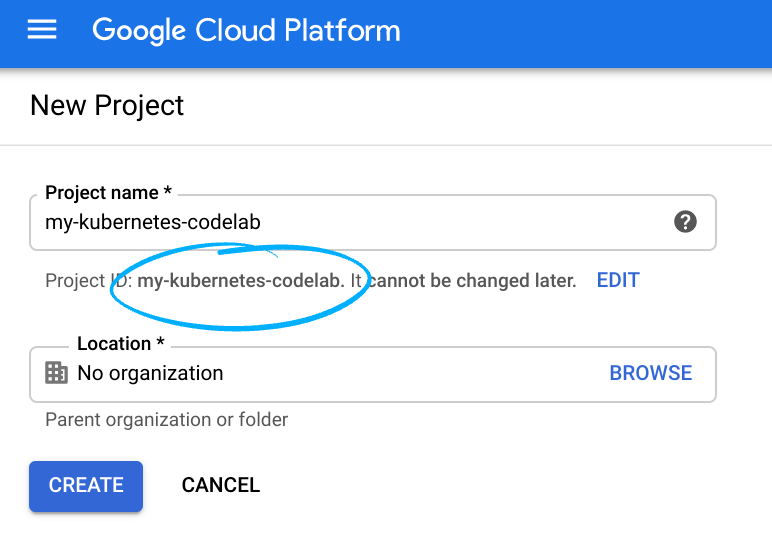
- プロジェクト名は、このプロジェクトの参加者に表示される名称です。Google API では使用されない文字列です。この設定はいつでも変更できます。
- プロジェクト ID は、すべての Google Cloud プロジェクトにおいて一意でなければならず、不変です(設定後は変更できません)。Cloud コンソールでは一意の文字列が自動生成されます。通常は、この内容を意識する必要はありません。ほとんどの Codelab では、プロジェクト ID(通常は
PROJECT_IDと識別されます)を参照する必要があります。生成された ID が好みではない場合は、ランダムに別の ID を生成できます。または、ご自身で試して、利用可能かどうかを確認することもできます。このステップ以降は変更できず、プロジェクトを通して同じ ID になります。 - なお、3 つ目の値として、一部の API が使用するプロジェクト番号があります。これら 3 つの値について詳しくは、こちらのドキュメントをご覧ください。
- 次に、Cloud のリソースや API を使用するために、Cloud コンソールで課金を有効にする必要があります。この Codelab の操作をすべて行って、費用が生じたとしても、少額です。このチュートリアルの終了後に請求が発生しないようにリソースをシャットダウンするには、作成したリソースを削除するか、プロジェクト全体を削除します。Google Cloud の新規ユーザーは、300 米ドル分の無料トライアル プログラムをご利用いただけます。
Cloud Shell の起動
Google Cloud はノートパソコンからリモートで操作できますが、この Codelab では、Google Cloud Shell(Cloud 上で動作するコマンドライン環境)を使用します。
Cloud Shell をアクティブにする
- Cloud Console で、[Cloud Shell をアクティブにする]
 をクリックします。

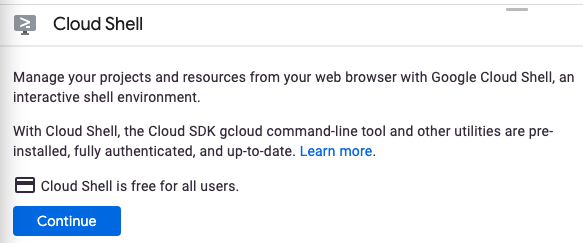
Cloud Shell を初めて起動した場合は、その内容を説明する画面が(スクロールしなければ見えない位置に)表示されます。その場合は、[続行] をクリックしてください(以後表示されなくなります)。この中間画面は次のようになります。
すぐにプロビジョニングが実行され、Cloud Shell に接続されます。

この仮想マシンには、必要な開発ツールがすべて用意されています。仮想マシンは Google Cloud で稼働し、永続的なホーム ディレクトリが 5 GB 用意されているため、ネットワークのパフォーマンスと認証が大幅に向上しています。このコードラボでの作業のほとんどは、ブラウザまたは Chromebook から実行できます。
Cloud Shell に接続すると、すでに認証は完了しており、プロジェクトに各自のプロジェクト ID が設定されていることがわかります。
- Cloud Shell で次のコマンドを実行して、認証されたことを確認します。
gcloud auth list
コマンド出力
 Credentialed Accounts
ACTIVE  ACCOUNT
*       <my_account>@<my_domain.com>

To set the active account, run:
    $ gcloud config set account `ACCOUNT`
- Cloud Shell で次のコマンドを実行して、gcloud コマンドがプロジェクトを認識していることを確認します。
gcloud config list project
コマンド出力
[core]
project = <PROJECT_ID>
上記のようになっていない場合は、次のコマンドで設定できます。
gcloud config set project <PROJECT_ID>
コマンド出力
Updated property [core/project].
3. Secret Manager API を有効にする
Secret Manager API を使用するには、API を有効にする必要があります。Cloud Shell で、次のコマンドを使用して API を有効にできます。
gcloud services enable secretmanager.googleapis.com
次のような出力が表示されます。
Operation "operations/acf.cc11852d-40af-47ad-9d59-477a12847c9e" finished successfully.
4. Python 用 Secret Manager クライアント ライブラリをインストールする
Secret Manager クライアント ライブラリをインストールします。
pip3 install --user google-cloud-secret-manager==2.10.0
5. インタラクティブ Python を開始する
このチュートリアルの一部では、Cloud Shell にプリインストールされている IPython というインタラクティブな Python インタープリタを使用します。Cloud Shell で ipython を実行してセッションを開始します。
ipython
次のように表示されます。
Python 3.9.2 (default, Feb 28 2021, 17:03:44)
Type 'copyright', 'credits' or 'license' for more information
IPython 8.3.0 -- An enhanced Interactive Python. Type '?' for help.

In [1]:
6. Secret の作成
シークレットには 1 つ以上のシークレット バージョンが含まれています。これらは gcloud コマンドラインを使用して作成できますが、Python を使用して作成することもできます。
シークレットを使用するには、まずシークレットの名前でシークレットを作成し、シークレットの値であるシークレットのバージョンを追加する必要があります。
IPython 内でプロジェクト ID を設定します。
PROJECT_ID = "<PROJECT_ID>"
シークレットを作成する
次のコードを IPython セッションにコピーします。
from google.cloud import secretmanager

def create_secret(secret_id):
    # Create the Secret Manager client.
    client = secretmanager.SecretManagerServiceClient()

    # Build the resource name of the parent project.
    parent = f"projects/{PROJECT_ID}"

    # Build a dict of settings for the secret
    secret = {'replication': {'automatic': {}}}

    # Create the secret
    response = client.create_secret(secret_id=secret_id, parent=parent, secret=secret)

    # Print the new secret name.
    print(f'Created secret: {response.name}')
関数を呼び出して、my_secret_value という新しいシークレットを作成します。
create_secret("my_secret_value")
次の出力が表示されます。
Created secret: projects/<PROJECT_NUM>/secrets/my_secret_value
シークレット バージョンを追加する
シークレットが存在するようになったので、バージョンを作成して値を割り当てることができます。
次のコードを IPython セッションにコピーします。
def add_secret_version(secret_id, payload):
    # Create the Secret Manager client.
    client = secretmanager.SecretManagerServiceClient()

    # Build the resource name of the parent secret.
    parent = f"projects/{PROJECT_ID}/secrets/{secret_id}"

    # Convert the string payload into a bytes. This step can be omitted if you
    # pass in bytes instead of a str for the payload argument.
    payload = payload.encode('UTF-8')

    # Add the secret version.
    response = client.add_secret_version(parent=parent, payload={'data': payload})

    # Print the new secret version name.
    print(f'Added secret version: {response.name}')
関数を呼び出して、新しいシークレット バージョンを作成して追加します。
add_secret_version("my_secret_value", "Hello Secret Manager")
次の出力が表示されます。
Added secret version: projects/<PROJECT_NUM>/secrets/my_secret_value/versions/1
シークレットには複数のバージョンを設定できます。別の値で関数を再度呼び出します。
add_secret_version("my_secret_value", "Hello Again, Secret Manager")
次の出力が表示されます。
Added secret version: projects/<PROJECT_NUM>/secrets/my_secret_value/versions/2
新しいバージョンのシークレットが元のシークレットよりも大幅に長くなっていることに注目してください。この属性は後で参照されます。
7. シークレットへのアクセス
シークレット バージョンにアクセスすると、シークレットのコンテンツとシークレットのバージョンに関する追加のメタデータが返されます。シークレット バージョンにアクセスする際は、特定のバージョンを指定するか、「latest」を指定して最新バージョンをリクエストします。
シークレットは非公開にする必要があります。データベース認証情報をシークレットとして保存して認証に使用するか、証明書を保存して使用します。ただし、シークレットを直接出力しないでください。シークレットを秘密にしておくという目的が損なわれます。
シークレットに対してオペレーションを実行し、その値を直接出力せずに評価します。代わりに、シークレットの値のハッシュを出力します。
次のコードを IPython セッションにコピーします。
def access_secret_version(secret_id, version_id="latest"):
    # Create the Secret Manager client.
    client = secretmanager.SecretManagerServiceClient()

    # Build the resource name of the secret version.
    name = f"projects/{PROJECT_ID}/secrets/{secret_id}/versions/{version_id}"

    # Access the secret version.
    response = client.access_secret_version(name=name)

    # Return the decoded payload.
    return response.payload.data.decode('UTF-8')

import hashlib

def secret_hash(secret_value):
  # return the sha224 hash of the secret value
  return hashlib.sha224(bytes(secret_value, "utf-8")).hexdigest()
関数を呼び出して、値のハッシュとしてシークレットを取得します。
secret_hash(access_secret_version("my_secret_value"))
ハッシュのような出力が表示されます(正確な値はこの出力と一致しない場合があります)。
83f8a4edb555cde4271029354395c9f4b7d79706ffa90c746e021d11
バージョンを指定しなかったため、最新の値が取得されました。
想定されるバージョン番号を追加して関数を呼び出し、確認します。
secret_hash(access_secret_version("my_secret_value", version_id=2))
最後のコマンドと同じ出力が表示されます。
83f8a4edb555cde4271029354395c9f4b7d79706ffa90c746e021d11
関数を再度呼び出しますが、今回は最初のバージョンを指定します。
secret_hash(access_secret_version("my_secret_value", version_id=1))
今回は異なるハッシュが表示され、出力が異なることがわかります。
9a3fc8b809ddc611c82aee950c636c7557e220893560ec2c1eeeb177
8. Cloud Functions で Secret Manager を使用する
シークレットは、Google Cloud の多くの部分で使用できます。このセクションでは、Google のイベント ドリブン サーバーレス コンピューティング サービスである Cloud Functions に焦点を当てます。
Cloud Functions で Python を使用する場合は、Python での HTTP Google Cloud Functions の Codelab をご覧ください。
exit 関数を呼び出して IPython を閉じます。
exit
Cloud Shell に戻ります。
yourname@cloudshell:~ (<PROJECT_ID>)$
Cloud Functions API を使用するには、API を有効にする必要があります。Cloud Shell で、次のコマンドを使用して API を有効にできます。
gcloud services enable cloudfunctions.googleapis.com cloudbuild.googleapis.com
関数をビルドするための新しいフォルダを作成し、書き込み先の空のファイルを作成します。
mkdir secret-manager-api-demo
cd secret-manager-api-demo
touch main.py
touch requirements.txt
Cloud Shell の右上からコードエディタを開きます。

secret-manager-api-demo フォルダ内の main.py ファイルに移動します。ここにすべてのコードを配置します。
9. シークレットにアクセスする Cloud Functions の関数を作成する
コマンドラインまたは IPython ターミナルからシークレット値を保存して取得することは便利ですが、関数内でこれらのシークレットにアクセスできると、さらに便利になります。
前に作成した access_secret_version 関数を、Cloud Functions のベースとして使用できます。
次のコードを main.py ファイルにコピーします。
main.py
import os

from google.cloud import secretmanager

project_id = os.environ["PROJECT_ID"]

client = secretmanager.SecretManagerServiceClient()
name = f"projects/{project_id}/secrets/my_secret_value/versions/latest"
response = client.access_secret_version(name=name)
my_secret_value = response.payload.data.decode("UTF-8")


def secret_hello(request):
    if "Again" in my_secret_value:
        return "We meet again!\n"

    return "Hello there.\n"
関数をデプロイする前に、環境の設定を完了する必要があります。これには、関数依存関係を設定する必要があります。
requirements.txt という新しいファイルを作成し、google-cloud-secret-manager パッケージを追加します。
requirements.txt
google-cloud-secret-manager==2.10.0
これで、main.py と requirements.txt だけを含むフォルダが作成されました。
シークレットへのアクセスを許可する
関数をデプロイする前に、Cloud Functions がシークレットにアクセスできるようにする必要があります。
ターミナルに戻ります。

Cloud Functions サービス アカウントに Secret へのアクセス権を付与します。
export PROJECT_ID=$(gcloud config get-value core/project)

gcloud secrets add-iam-policy-binding my_secret_value \
    --role roles/secretmanager.secretAccessor \
    --member serviceAccount:${PROJECT_ID}@appspot.gserviceaccount.com
次の出力が表示されます。
Updated IAM policy for secret [my_secret_value].
bindings:
- members:
  - serviceAccount:<PROJECT_ID>@appspot.gserviceaccount.com
  role: roles/secretmanager.secretAccessor
etag: BwWiRUt2oB4=
version: 1
10. Cloud Functions のデプロイ
前のセクションで設定した内容に基づいて、Cloud Functions をデプロイしてテストできます。
作成した 2 つのファイルのみを含むフォルダ内で、関数をデプロイします。
gcloud functions deploy secret_hello \
    --runtime python39 \
    --set-env-vars PROJECT_ID=${PROJECT_ID} \
    --trigger-http \
    --allow-unauthenticated
次の出力が表示されます(切り捨てられています)。
Deploying function (may take a while - up to 2 minutes)...done.

...

entryPoint: secret_hello
httpsTrigger:
  url: https://<REGION>-<PROJECT_ID>.cloudfunctions.net/secret_hello
...
status: ACTIVE
...
次のコマンドを使用して、関数の URL(httpsTrigger.url メタデータ)を取得します。
FUNCTION_URL=$(gcloud functions describe secret_hello --format 'value(httpsTrigger.url)')
次に、関数を呼び出して、期待される戻り値で関数にアクセスできることをテストします。
curl $FUNCTION_URL
次の出力が表示されます。
We meet again!
この関数は、文字列「Again」を含むように設定されたシークレットの最新バージョンを参照しているため、想定どおりに動作しています。
11. 完了
Python を使用して Secret Manager API を使用する方法を学習しました。
クリーンアップ
このチュートリアルで使用したリソースについて、Google Cloud アカウントに課金されないようにする手順は次のとおりです。
- Cloud コンソールで、[リソースの管理] ページに移動します。
- プロジェクト リストで、プロジェクトを選択し、[削除] をクリックします。
- ダイアログでプロジェクト ID を入力し、[シャットダウン] をクリックしてプロジェクトを削除します。
詳細
- Secret Manager: https://cloud.google.com/secret-manager/
- Google Cloud 上の Python: https://cloud.google.com/python/
- Python 用 Cloud クライアント ライブラリ: https://googlecloudplatform.github.io/google-cloud-python/
ライセンス
この作業はクリエイティブ・コモンズの表示 2.0 汎用ライセンスにより使用許諾されています。