1. 概览
在此 Codelab 中,您将着重学习如何在 Python 中使用 Secret Manager。
借助 Secret Manager,您可以将 Secret 作为二进制 blob 或文本字符串存储、管理和访问。凭借适当的权限,您可以查看 Secret 的内容。
Secret Manager 非常适合存储应用在运行时所需的配置信息,例如数据库密码、API 密钥或 TLS 证书。
学习内容
- 如何使用 Cloud Shell
- 如何安装 Python 版 Secret Manager 客户端库
- 如何使用 Python 客户端库创建和访问 Secret
- 如何使用 Python 客户端库访问 Cloud Functions 中的 Secret
所需条件
调查问卷
您将如何使用本教程?
您如何评价使用 Python 的体验?
您如何评价自己在使用 Google Cloud 服务方面的经验水平?
<ph type="x-smartling-placeholder">2. 设置和要求
自定进度的环境设置
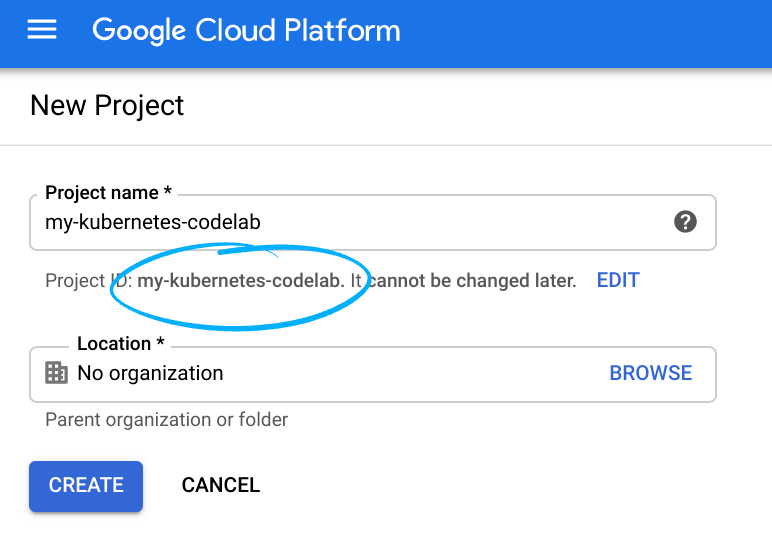
- 登录 Google Cloud 控制台,然后创建一个新项目或重复使用现有项目。如果您还没有 Gmail 或 Google Workspace 账号,则必须创建一个。


- 项目名称是此项目参与者的显示名称。它是 Google API 尚未使用的字符串。您可以随时对其进行更新。
- 项目 ID 在所有 Google Cloud 项目中必须是唯一的,并且不可变(一经设置便无法更改)。Cloud 控制台会自动生成一个唯一字符串;通常您不在乎这是什么在大多数 Codelab 中,您都需要引用项目 ID(它通常标识为
PROJECT_ID)。如果您不喜欢生成的 ID,可以再随机生成一个 ID。或者,您也可以尝试自己的项目 ID,看看是否可用。完成此步骤后便无法更改该 ID,并且该 ID 在项目期间会一直保留。 - 此外,还有第三个值,即某些 API 使用的项目编号,供您参考。如需详细了解所有这三个值,请参阅文档。
- 接下来,您需要在 Cloud 控制台中启用结算功能,以便使用 Cloud 资源/API。运行此 Codelab 应该不会产生太多的费用(如果有费用的话)。如需关停资源,以免产生超出本教程范围的结算费用,您可以删除自己创建的资源或删除整个项目。Google Cloud 的新用户符合参与 $300 USD 免费试用计划的条件。
启动 Cloud Shell
虽然可以通过笔记本电脑对 Google Cloud 进行远程操作,但在此 Codelab 中,您将使用 Google Cloud Shell,这是一个在云端运行的命令行环境。
激活 Cloud Shell
- 在 Cloud Console 中,点击激活 Cloud Shell
 。
。

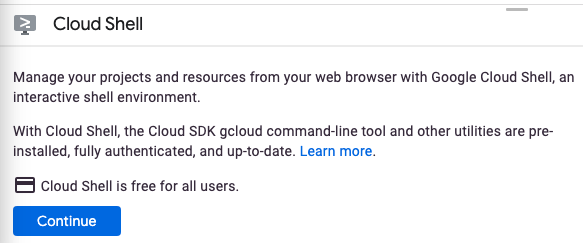
如果您以前从未启动过 Cloud Shell,系统会显示一个中间屏幕(非首屏)来介绍 Cloud Shell。如果是这种情况,请点击继续(此后您将不会再看到此通知)。一次性屏幕如下所示:

预配和连接到 Cloud Shell 只需花几分钟时间。

这个虚拟机装有您需要的所有开发工具。它提供了一个持久的 5GB 主目录,并且在 Google Cloud 中运行,大大增强了网络性能和身份验证。只需使用一个浏览器或 Google Chromebook 即可完成本 Codelab 中的大部分(甚至全部)工作。
在连接到 Cloud Shell 后,您应该会看到自己已通过身份验证,并且相关项目已设置为您的项目 ID:
- 在 Cloud Shell 中运行以下命令以确认您已通过身份验证:
gcloud auth list
命令输出
 Credentialed Accounts
ACTIVE  ACCOUNT
*       <my_account>@<my_domain.com>

To set the active account, run:
    $ gcloud config set account `ACCOUNT`
- 在 Cloud Shell 中运行以下命令,以确认 gcloud 命令了解您的项目:
gcloud config list project
命令输出
[core]
project = <PROJECT_ID>
如果不是上述结果,您可以使用以下命令进行设置:
gcloud config set project <PROJECT_ID>
命令输出
Updated property [core/project].
3. 启用 Secret Manager API
您必须先启用 Secret Manager API,然后才能开始使用该 API。使用 Cloud Shell,您可以使用以下命令启用该 API:
gcloud services enable secretmanager.googleapis.com
您应看到如下输出:
Operation "operations/acf.cc11852d-40af-47ad-9d59-477a12847c9e" finished successfully.
4. 安装 Python 版 Secret Manager 客户端库
pip3 install --user google-cloud-secret-manager==2.10.0
5. 启动交互式 Python
在本教程中,您将使用预安装在 Cloud Shell 中的名为 IPython 的交互式 Python 解释器。在 Cloud Shell 中运行 ipython 来启动会话:
ipython
您应该会看到与以下类似的内容:
Python 3.9.2 (default, Feb 28 2021, 17:03:44)
Type 'copyright', 'credits' or 'license' for more information
IPython 8.3.0 -- An enhanced Interactive Python. Type '?' for help.

In [1]:
6. 创建 Secret
一个 Secret 包含一个或多个 Secret 版本。您可以使用 gcloud 命令行创建这些代码库,但也可以使用 Python 创建此类任务。
为了使用 Secret,您首先需要使用 Secret 的名称创建 Secret,然后添加 Secret 的一个版本,将其作为 Secret 的值。
在 IPython 中设置您的项目 ID:
PROJECT_ID = "<PROJECT_ID>"
创建 Secret
将以下代码复制到您的 IPython 会话中:
from google.cloud import secretmanager

def create_secret(secret_id):
    # Create the Secret Manager client.
    client = secretmanager.SecretManagerServiceClient()

    # Build the resource name of the parent project.
    parent = f"projects/{PROJECT_ID}"

    # Build a dict of settings for the secret
    secret = {'replication': {'automatic': {}}}

    # Create the secret
    response = client.create_secret(secret_id=secret_id, parent=parent, secret=secret)

    # Print the new secret name.
    print(f'Created secret: {response.name}')
调用该函数以创建一个名为 my_secret_value 的新 Secret:
create_secret("my_secret_value")
您应该会看到以下输出内容:
Created secret: projects/<PROJECT_NUM>/secrets/my_secret_value
添加 Secret 版本
现在,相应密钥已存在,您可以通过创建版本为其分配一个值。
将以下代码复制到您的 IPython 会话中:
def add_secret_version(secret_id, payload):
    # Create the Secret Manager client.
    client = secretmanager.SecretManagerServiceClient()

    # Build the resource name of the parent secret.
    parent = f"projects/{PROJECT_ID}/secrets/{secret_id}"

    # Convert the string payload into a bytes. This step can be omitted if you
    # pass in bytes instead of a str for the payload argument.
    payload = payload.encode('UTF-8')

    # Add the secret version.
    response = client.add_secret_version(parent=parent, payload={'data': payload})

    # Print the new secret version name.
    print(f'Added secret version: {response.name}')
调用该函数以添加新的 Secret 版本:
add_secret_version("my_secret_value", "Hello Secret Manager")
您应该会看到以下输出内容:
Added secret version: projects/<PROJECT_NUM>/secrets/my_secret_value/versions/1
Secret 可以有多个版本。使用不同的值再次调用该函数:
add_secret_version("my_secret_value", "Hello Again, Secret Manager")
您应该会看到以下输出内容:
Added secret version: projects/<PROJECT_NUM>/secrets/my_secret_value/versions/2
请注意,新版本的 Secret 比原始 Secret 长得多。稍后会引用该属性。
7. 访问 Secret
访问密钥版本时,系统会返回密钥内容以及有关密钥版本的其他元数据。访问 Secret 版本时,您可以指定特定版本,也可以指定“latest”直接请求最新版本。
Secret 应保密。将数据库凭据存储为 Secret,然后使用它们进行身份验证,或存储并使用证书;但不要直接输出你的秘密,否则就违背了保守秘密的目的。
您将对 Secret 执行操作,评估其值,而不是直接输出。而是输出密文值的哈希。
将以下代码复制到您的 IPython 会话中:
def access_secret_version(secret_id, version_id="latest"):
    # Create the Secret Manager client.
    client = secretmanager.SecretManagerServiceClient()

    # Build the resource name of the secret version.
    name = f"projects/{PROJECT_ID}/secrets/{secret_id}/versions/{version_id}"

    # Access the secret version.
    response = client.access_secret_version(name=name)

    # Return the decoded payload.
    return response.payload.data.decode('UTF-8')

import hashlib

def secret_hash(secret_value):
  # return the sha224 hash of the secret value
  return hashlib.sha224(bytes(secret_value, "utf-8")).hexdigest()
调用该函数以检索 Secret,作为其值的哈希值:
secret_hash(access_secret_version("my_secret_value"))
您应该会看到类似于哈希值的输出(确切值可能与此输出不匹配):
83f8a4edb555cde4271029354395c9f4b7d79706ffa90c746e021d11
由于您未指定版本,因此检索到最新值。
调用函数以添加预期版本号进行确认:
secret_hash(access_secret_version("my_secret_value", version_id=2))
您看到的输出应该与最后一个命令相同:
83f8a4edb555cde4271029354395c9f4b7d79706ffa90c746e021d11
再次调用该函数,但这次要指定第一个版本:
secret_hash(access_secret_version("my_secret_value", version_id=1))
这次,您应该会看到一个不同的哈希值,表示不同的输出:
9a3fc8b809ddc611c82aee950c636c7557e220893560ec2c1eeeb177
8. 将 Secret Manager 与 Cloud Functions 搭配使用
您可以在 Google Cloud 的许多部分使用 Secret。在本部分,您将着重介绍 Cloud Functions,这是 Google 推出的事件驱动型无服务器计算产品。
如果您有兴趣在 Cloud Functions 中使用 Python,可以参考“在 Python 中使用 HTTP Google Cloud Functions”Codelab。
通过调用 exit 函数关闭 IPython:
exit
您应该会返回到 Cloud Shell:
yourname@cloudshell:~ (<PROJECT_ID>)$
您必须先启用 Cloud Functions API,然后才能开始使用该 API。使用 Cloud Shell,您可以使用以下命令启用该 API:
gcloud services enable cloudfunctions.googleapis.com cloudbuild.googleapis.com
创建一个新文件夹来构建我们的函数,创建空文件以写入数据:
mkdir secret-manager-api-demo
cd secret-manager-api-demo
touch main.py
touch requirements.txt
从 Cloud Shell 的右上角打开代码编辑器:

找到 secret-manager-api-demo 文件夹内的 main.py 文件。您将在此处放置所有代码。
9. 编写 Cloud Functions 函数以访问 Secret
虽然从命令行或 IPython 终端存储和检索 Secret 值很有用,但能够在函数内访问这些 Secret 更有用。
借助之前创建的 access_secret_version 函数,您可以将其用作 Cloud Functions 函数的基础。
将以下代码复制到 main.py 文件中:
main.py
import os

from google.cloud import secretmanager

project_id = os.environ["PROJECT_ID"]

client = secretmanager.SecretManagerServiceClient()
name = f"projects/{project_id}/secrets/my_secret_value/versions/latest"
response = client.access_secret_version(name=name)
my_secret_value = response.payload.data.decode("UTF-8")


def secret_hello(request):
    if "Again" in my_secret_value:
        return "We meet again!\n"

    return "Hello there.\n"
在部署函数之前,您需要先完成环境的设置。这需要您设置函数依赖项。
创建一个名为 requirements.txt 的新文件,并将 google-cloud-secret-manager 软件包添加到其中:
requirements.txt
google-cloud-secret-manager==2.10.0
您现在应该有一个仅包含 main.py 和 requirements.txt 的文件夹。
允许访问您的 Secret
在部署函数之前,您需要允许 Cloud Functions 访问您的 Secret。
切换回终端:

向 Cloud Functions 服务账号授予访问权限以访问您的密钥:
export PROJECT_ID=$(gcloud config get-value core/project)

gcloud secrets add-iam-policy-binding my_secret_value \
    --role roles/secretmanager.secretAccessor \
    --member serviceAccount:${PROJECT_ID}@appspot.gserviceaccount.com
您应该会看到以下输出内容:
Updated IAM policy for secret [my_secret_value].
bindings:
- members:
  - serviceAccount:<PROJECT_ID>@appspot.gserviceaccount.com
  role: roles/secretmanager.secretAccessor
etag: BwWiRUt2oB4=
version: 1
10. 部署 Cloud Functions 函数
根据前面部分中的设置,您现在可以部署和测试 Cloud Functions 函数了。
在仅包含您创建的两个文件的文件夹中,部署函数:
gcloud functions deploy secret_hello \
    --runtime python39 \
    --set-env-vars PROJECT_ID=${PROJECT_ID} \
    --trigger-http \
    --allow-unauthenticated
您应该会看到以下输出(已截断):
Deploying function (may take a while - up to 2 minutes)...done.

...

entryPoint: secret_hello
httpsTrigger:
  url: https://<REGION>-<PROJECT_ID>.cloudfunctions.net/secret_hello
...
status: ACTIVE
...
使用以下命令检索函数的网址(httpsTrigger.url 元数据):
FUNCTION_URL=$(gcloud functions describe secret_hello --format 'value(httpsTrigger.url)')
现在,通过调用您的函数,测试能否使用预期返回值访问该函数:
curl $FUNCTION_URL
您应该会看到以下输出内容:
We meet again!
此函数引用最新版本的 Secret,该版本设置为包含字符串“Again”,因此该函数会按预期运行。
11. 恭喜!
您已了解如何通过 Python 使用 Secret Manager API!
清理
为避免因本教程中使用的资源导致您的 Google Cloud 账号产生费用,请执行以下操作:
- 在 Cloud Console 中,转到管理资源页面。
- 在项目列表中,选择您的项目,然后点击删除。
- 在对话框中输入项目 ID,然后点击关停以删除项目。
了解详情
- Secret Manager:https://cloud.google.com/secret-manager/
- Google Cloud 上的 Python:https://cloud.google.com/python/
- Python 版 Cloud 客户端库:https://googlecloudplatform.github.io/google-cloud-python/
许可
此作品已获得 Creative Commons Attribution 2.0 通用许可授权。
