
1. Overview
You can use Antigravity CLI in both your local and virtual environments. Antigravity brings the power of Gemini directly into your terminal. From a networking point of view when you use Antigravity CLI it will make a call to the Gemini API via the API IP address which is publicly accessible.
Now what happens if you want to use Antigravity CLI on a Google Compute Engine machine but you want to connect to the API privately? In this codelabs you will see how to configure Private Service Connect endpoint to Google APIs, to route the traffic to an internal IP address you specify.
The configurations will be a combination of Terraform, gcloud and console.
In this lab you will learn how to perform the following task:
- Set up VM instance and Cloud NAT
- Install Antigravity CLI and authenticate
- Configure Private Service Connect endpoint to connect to Googleapis
- Verify connectivity path to *.googleapis
- Configure manual DNS entries
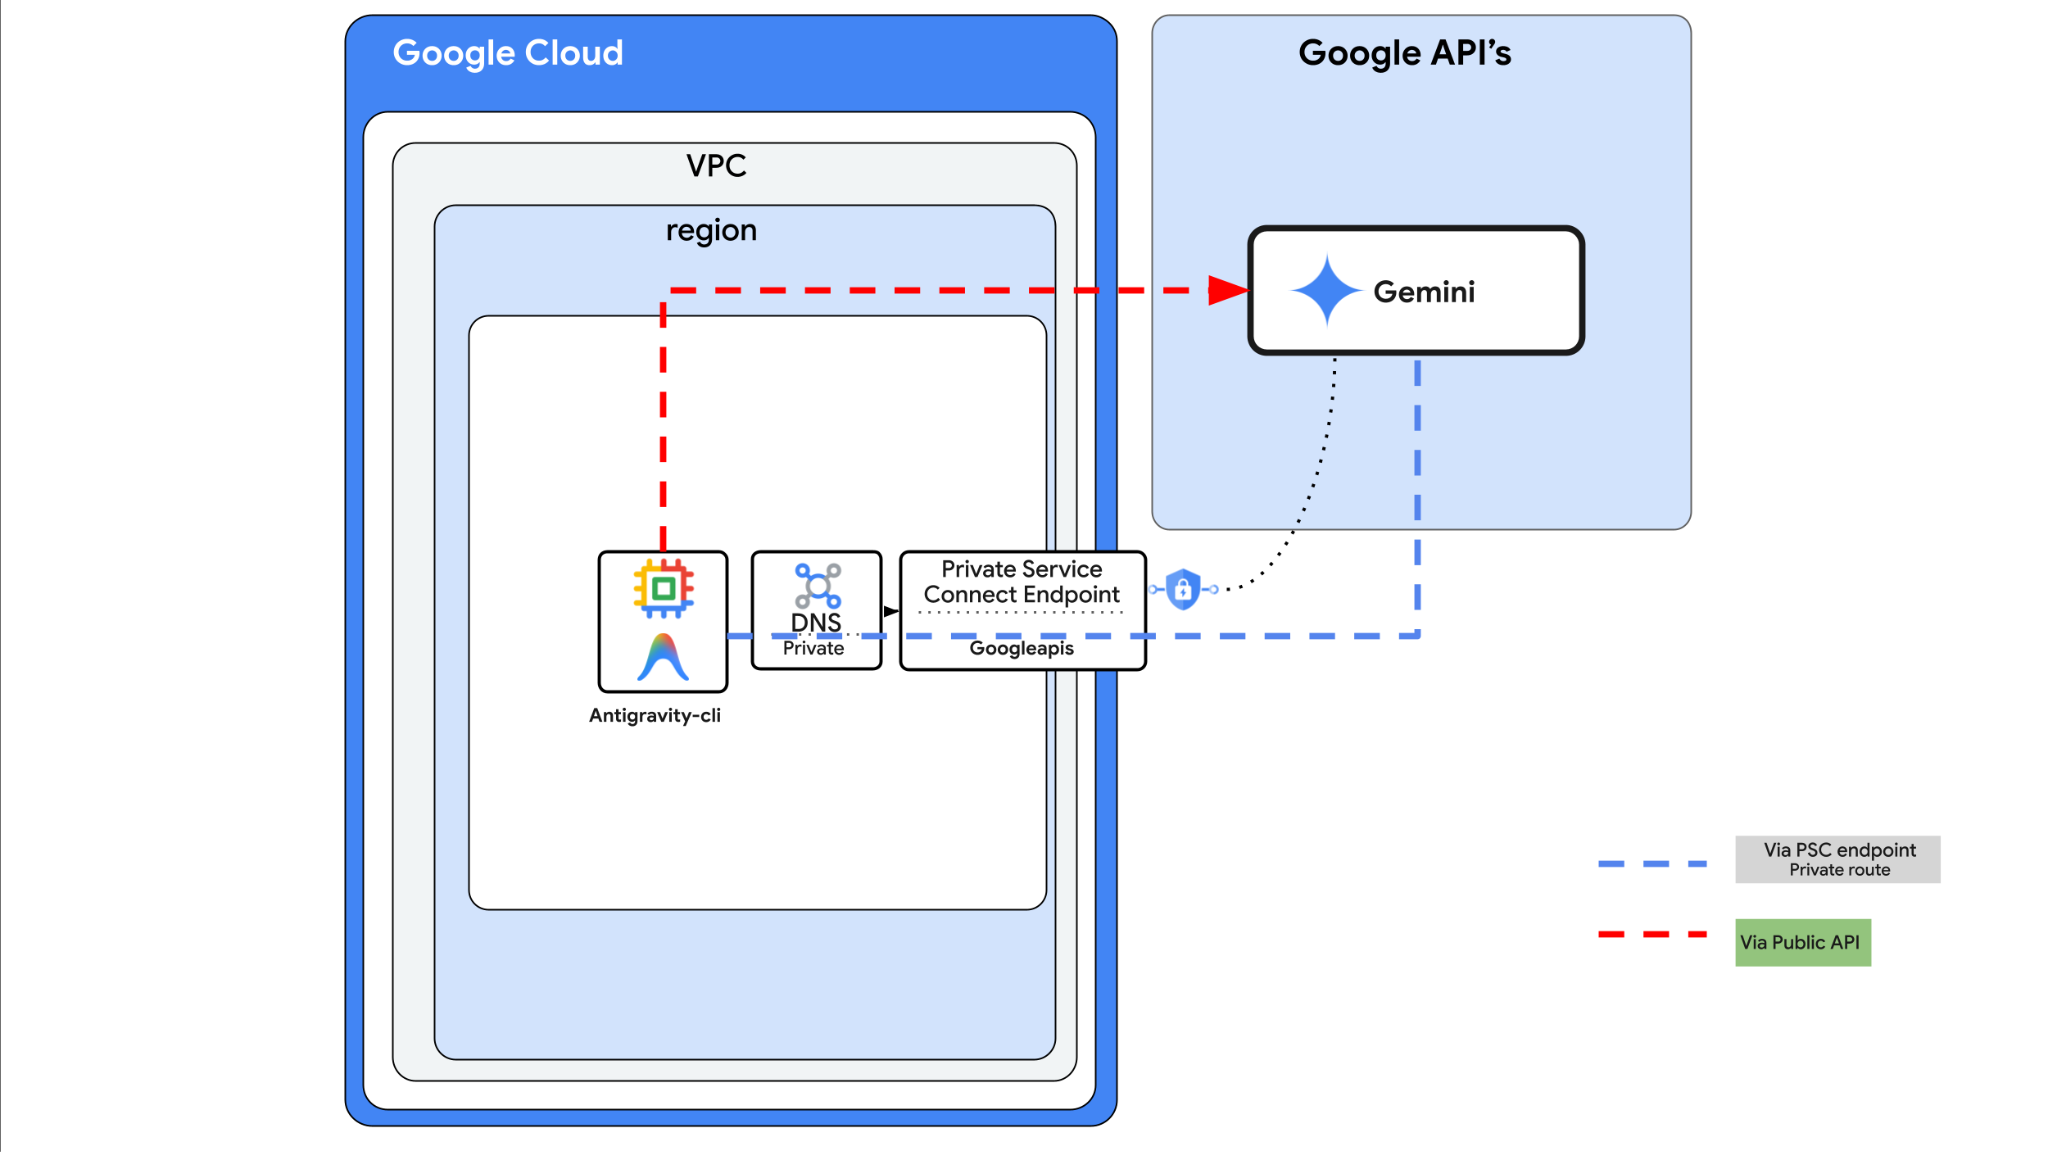
In this lab, you're going to be creating the following pattern.
Figure1.
2. Google Cloud services setup
Self-paced environment setup
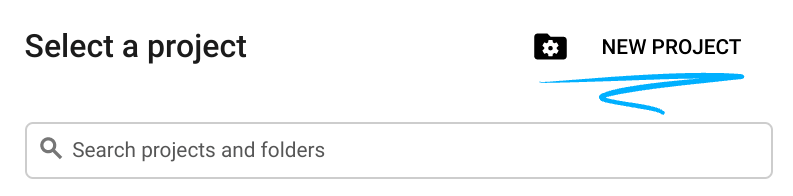
- Sign-in to the Google Cloud Console and create a new project or reuse an existing one. If you don't already have a Gmail or Google Workspace account, you must create one.

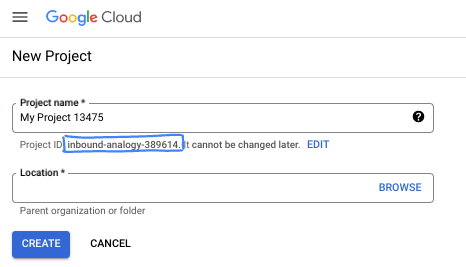
- The Project name is the display name for this project's participants. It is a character string not used by Google APIs. You can always update it.
- The Project ID is unique across all Google Cloud projects and is immutable (cannot be changed after it has been set). The Cloud Console auto-generates a unique string; usually you don't care what it is. In most codelabs, you'll need to reference your Project ID (typically identified as
PROJECT_ID). If you don't like the generated ID, you might generate another random one. Alternatively, you can try your own, and see if it's available. It can't be changed after this step and remains for the duration of the project. - For your information, there is a third value, a Project Number, which some APIs use. Learn more about all three of these values in the documentation.
- Next, you'll need to enable billing in the Cloud Console to use Cloud resources/APIs. Running through this codelab won't cost much, if anything at all. To shut down resources to avoid incurring billing beyond this tutorial, you can delete the resources you created or delete the project. New Google Cloud users are eligible for the $300 USD Free Trial program.
Start Cloud Shell
While Google Cloud can be operated remotely from your laptop, in this codelab you will be using Google Cloud Shell, a command line environment running in the Cloud.
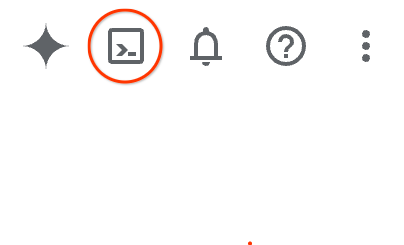
From the Google Cloud Console, click the Cloud Shell icon on the top right toolbar:
It should only take a few moments to provision and connect to the environment. When it is finished, you should see something like this:

This virtual machine is loaded with all the development tools you'll need. It offers a persistent 5GB home directory, and runs on Google Cloud, greatly enhancing network performance and authentication. All of your work in this codelab can be done within a browser. You do not need to install anything.
3. Setup environment with terraform
We will create a custom VPC with Firewall rules and subnet. Open the cloud console and select the project you will be using.
- Open Cloud Shell located at the top of your console on the right, ensure you see the correct project id in Cloud Shell, confirm any prompts to allow access.

- Create a folder called terraform-build and move to folder
mkdir terraform-build && cd terraform-build
- Create a main.tf and variable.tf file.
touch main.tf variable.tf
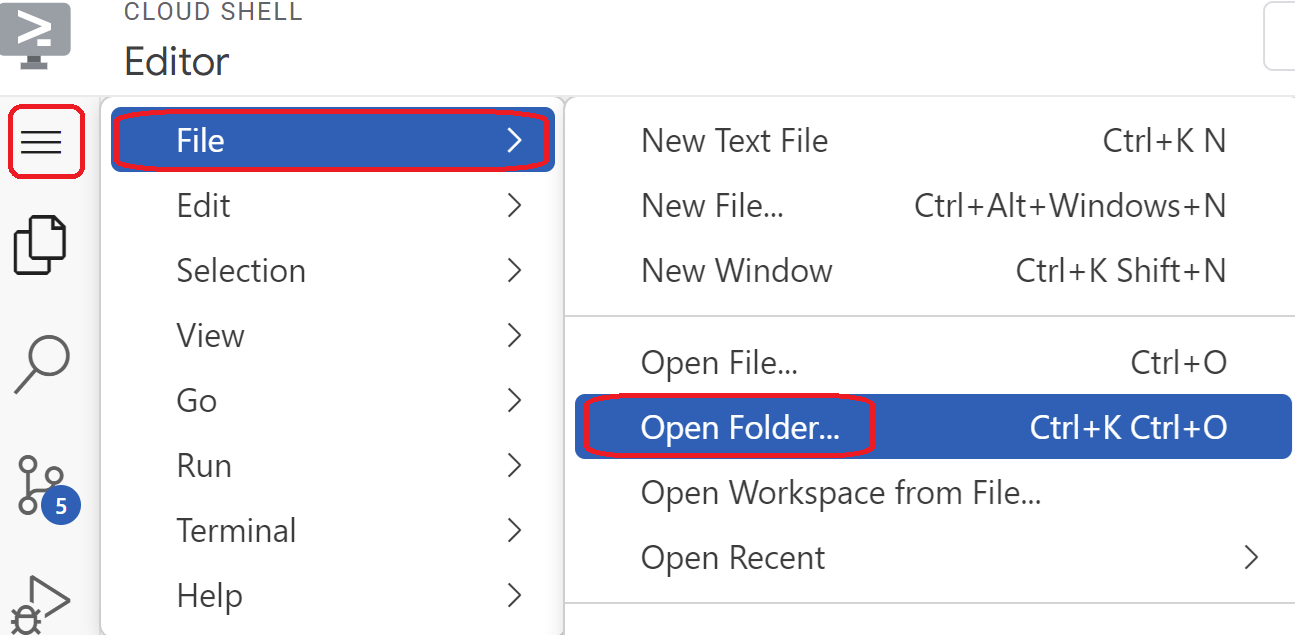
- Switch over to the Cloud Shell editor view. Select editor, ensure you allow any necessary prompts so the interface can load.
- Once loaded navigate to, File > Open Folder and go to the /home/your-user-name/terraform-build and select Ok to open the folder in the editor.
- Select the variable.tf file and add the following. Replace the
your-project-id-heretext with your actual project ID in quotes
variable "project_id" {
  type = string
  default = "your-project-id-here"
}

variable "network_id" {
  type = string
  default = "antigravity-vpc-net"
}
- Next open the main.tf file. We are going to add some terraform code to perform various actions as explained below.
Enable API's |
|
Create VPC called python-net |
|
Add a subnet |
|
Add two Firewall rules |
|
- Copy and paste the following into the main .tf file.
resource "google_project_service" "default" {
  for_each = toset([
    "dns.googleapis.com",
    "aiplatform.googleapis.com",
    "servicedirectory.googleapis.com"
  ])

  service            = each.value
  disable_on_destroy = false
}

resource "google_compute_network" "default" {
  project                 = var.project_id
  name                    = var.network_id
  auto_create_subnetworks = false
  mtu                     = 1460
  routing_mode            = "GLOBAL"
}

resource "google_compute_subnetwork" "default" {
  name          = "vm1-subnet"
  ip_cidr_range = "192.168.100.0/24"
  region        = "us-east1"
  stack_type    = "IPV4_ONLY"
  network       = google_compute_network.default.id
}

resource "google_compute_firewall" "allow_icmp" {
  name    = "allow-icmp-${google_compute_network.default.name}"
  network = google_compute_network.default.id
  project = var.project_id

  allow {
    protocol = "icmp"
  }

  source_ranges = ["0.0.0.0/0"]
  target_tags   = ["allow-icmp"]
}

resource "google_compute_firewall" "allow_ssh" {
  name    = "allow-ssh-${google_compute_network.default.name}"
  network = google_compute_network.default.id
  project = var.project_id

  allow {
    protocol = "tcp"
    ports    = ["22"]
  }

  source_ranges = ["0.0.0.0/0"]
  target_tags   = ["allow-ssh"]
}
- Switch back to Cloud Shell terminal make sure your are in the terraform-build directory
cd terraform-buildand run the following commands
terraform init
Initializes the working directory. This step downloads the providers required for the given configuration.
terraform plan
Generates an execution plan, showing what actions Terraform will take to deploy your infrastructure.
- Now to create the resources run the
terraform applycommand and typeyesto run.
4. Task 2. Create NAT gateway and VMs with Terraform
We need to grant outbound external access to the internet so lets create a Cloud NAT gateway and attach it.
- Open Cloud Shell, navigate to terraform-build folder and create the following files (total three files). We will edit these later on.
touch nat-vm.tf psc.tf dns.tf
- Switch to Cloud Shell editor view and select the nat-vm.tf file and add the following Terraform code. This will create a NAT gateway and two VMs.
Terraform nat-vm.tf
resource "google_compute_router" "default" {
  name    = "outbound-nat"
  region  = "us-east1"
  network = google_compute_network.default.id

 bgp {
  asn = 64514
  }
}

resource "google_compute_router_nat" "default" {
  name                               = "outbound-gw"
  router                             = google_compute_router.default.name
  region                             = google_compute_router.default.region
  nat_ip_allocate_option             = "AUTO_ONLY"
  source_subnetwork_ip_ranges_to_nat = "ALL_SUBNETWORKS_ALL_IP_RANGES"

  log_config {
    enable = true
    filter = "ERRORS_ONLY"
  }
}

resource "google_compute_instance" "vm1" {
  name         = "cli-vm"
  zone         = "us-east1-b"
  machine_type = "n2-standard-2"

  boot_disk {
    initialize_params {
      image = "debian-cloud/debian-12"
    }
  }

  network_interface {
    subnetwork = google_compute_subnetwork.default.id
    stack_type = "IPV4_ONLY"
  }

  tags = ["allow-ssh", "allow-icmp"]

  metadata_startup_script = <<-EOF
    sudo apt-get update
  EOF
}

resource "google_compute_instance" "vm2" {
  name         = "monitor-vm"
  zone         = "us-east1-b"
  machine_type = "n2-standard-2"

  boot_disk {
    initialize_params {
      image = "debian-cloud/debian-12"
    }
  }

  network_interface {
    subnetwork = google_compute_subnetwork.default.id
    stack_type = "IPV4_ONLY"
  }

  tags = ["allow-ssh", "allow-icmp"]

  metadata_startup_script = <<-EOF
    sudo apt-get update
    sudo apt-get install python3 python3-dev python3-venv -y
    sudo apt-get install tcpdump dnsutils -y
  EOF
}
- Switch to Cloud Shell terminal, ensure your are in the terraform-build folder and run
terraform planthis will show you that 4 items will be added, then runterraform applyand typeyesto create the NAT gateway and two vm's.
5. Task 3. Configure CLI VMs and test
- Navigate to VM instances. Select the vm starting with cli-vm. Choose SSH.
- Once you SSH you should have access to the vm let's create a folder for when we run the Gemini CLI
mkdir antigravitycli && cd antigravitycli
- To install Antigravity CLI use the following
curl -fsSL https://antigravity.google/cli/install.sh | bash && source ~/.bashrc
Check the version
agy --version
- Let's log in and authenticate this to do some testing later on.
agy
- Select option 1
Google OAuth. Now let's authenticate.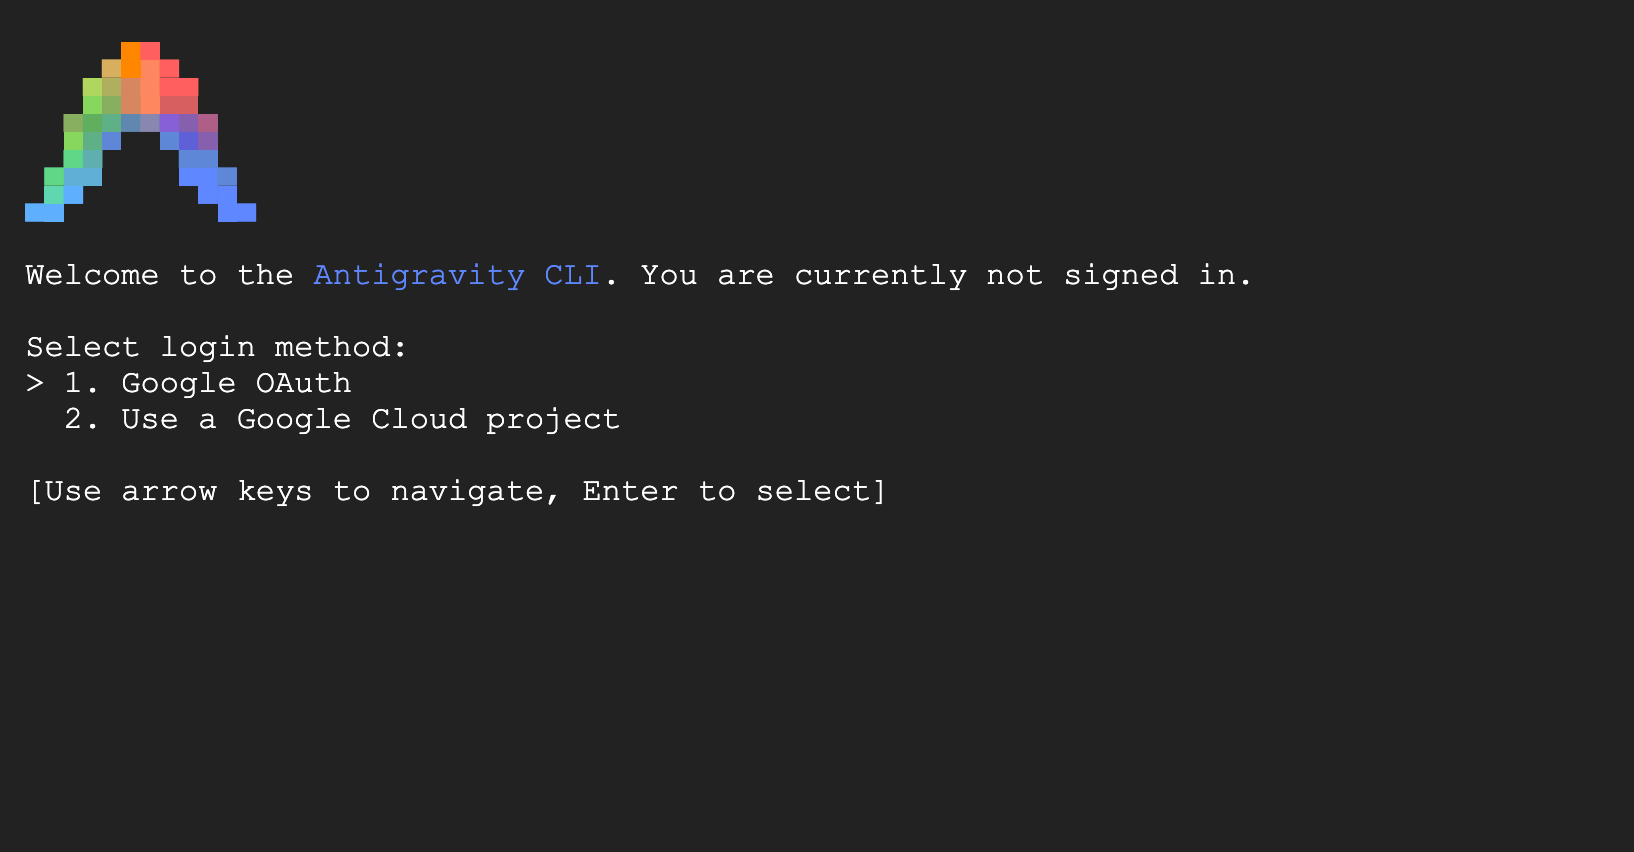
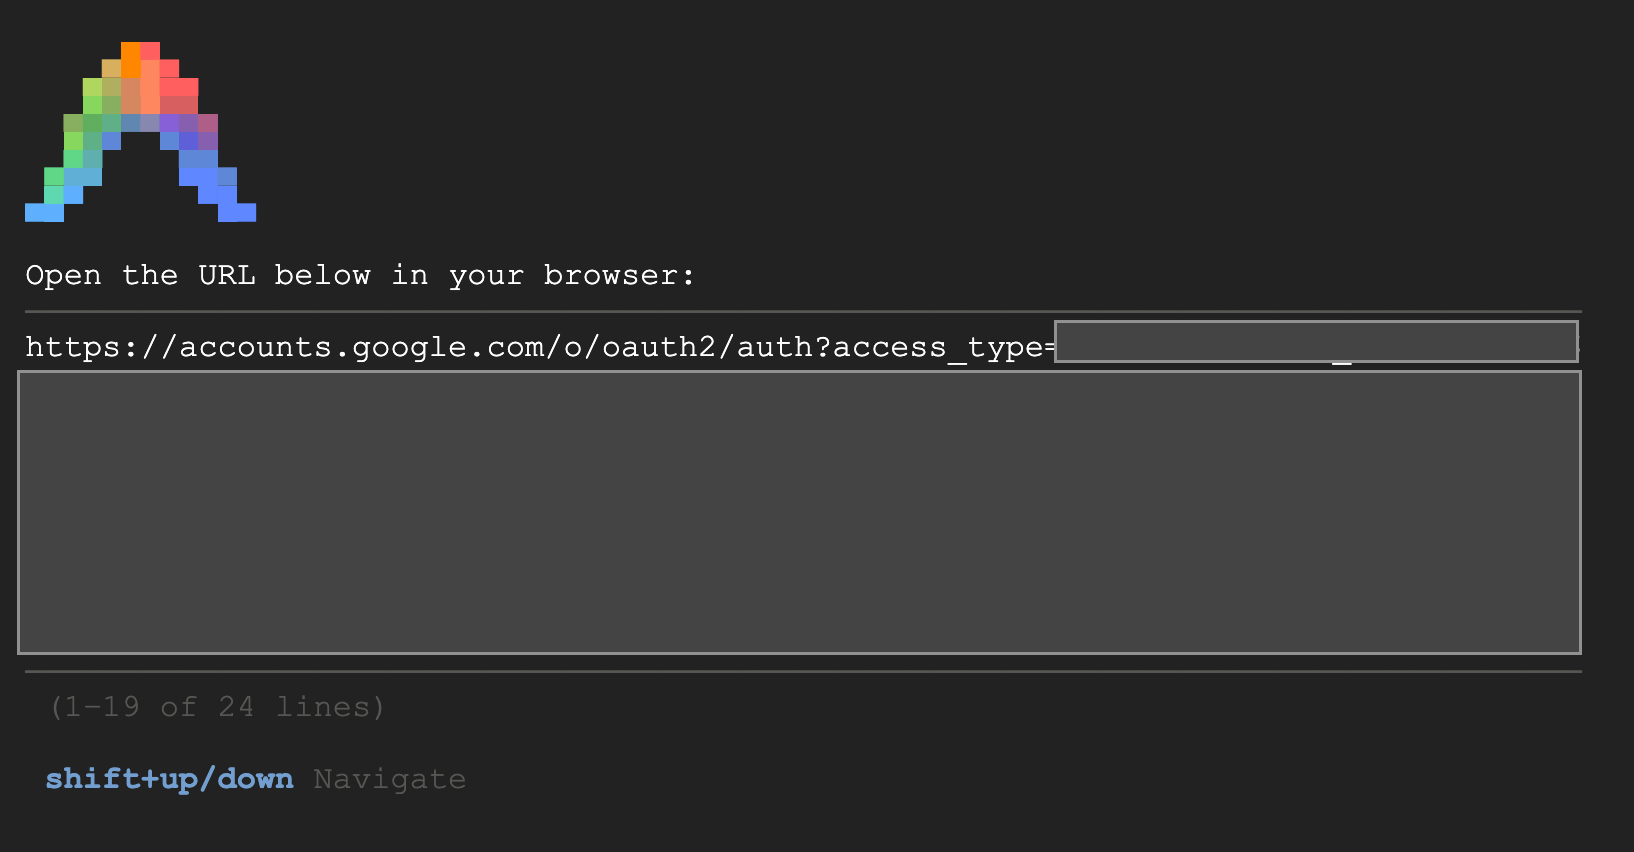
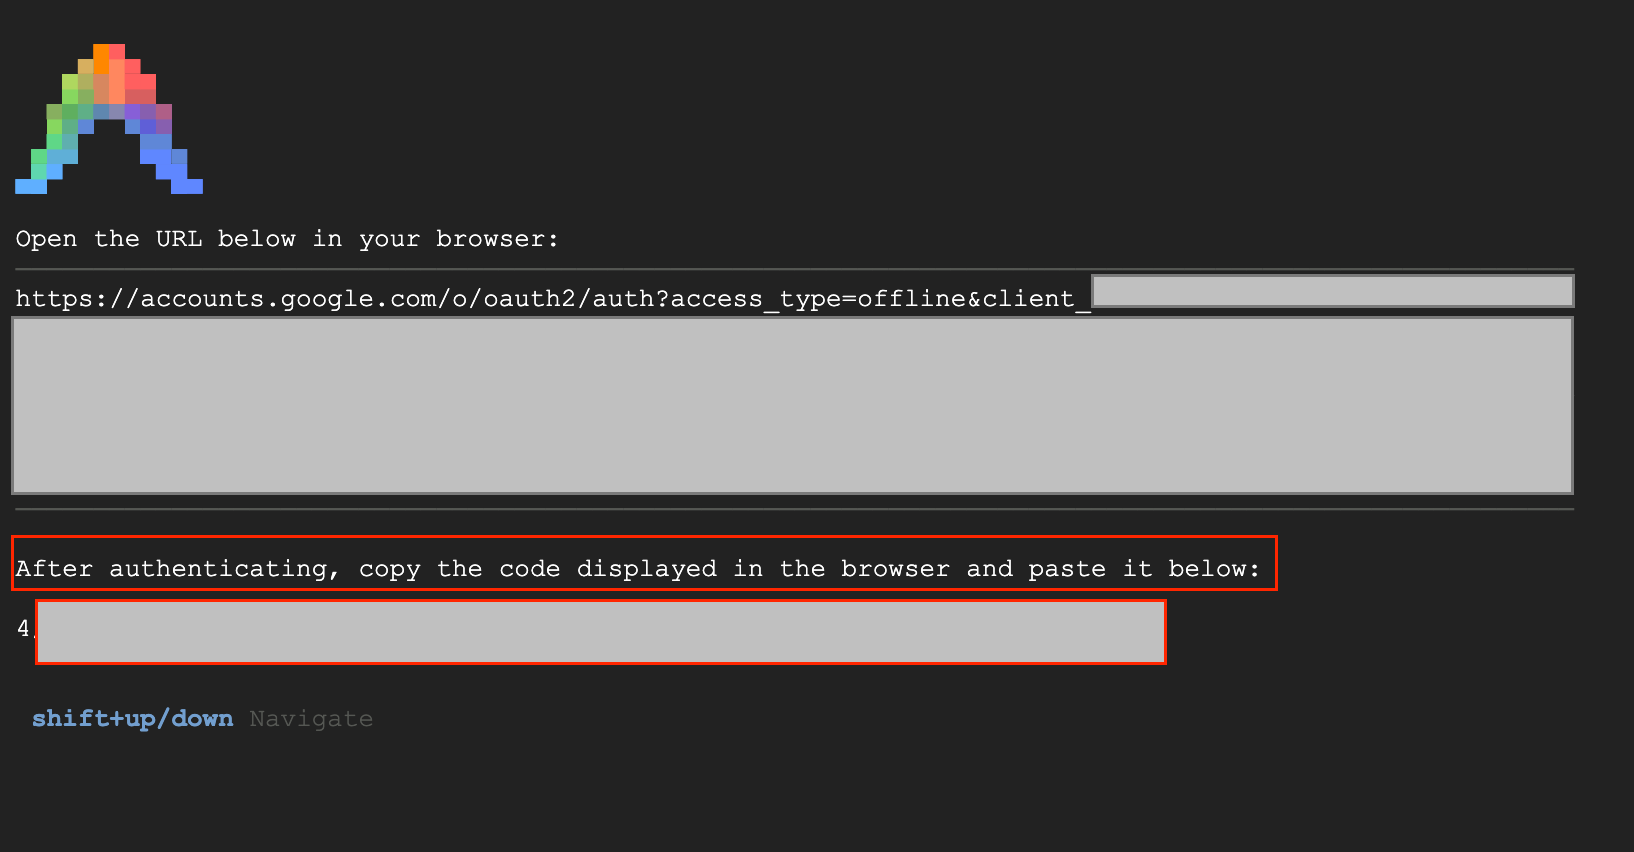
- Next copy the url which appears in the starting with https:// open a new tab in your lab browser window and paste the url. Accept the prompts.
- When you see the following select copy to clipboard, switch back to the vm cli-vm session and for Enter authorization code: paste the code you copied and press enter to authenticate.
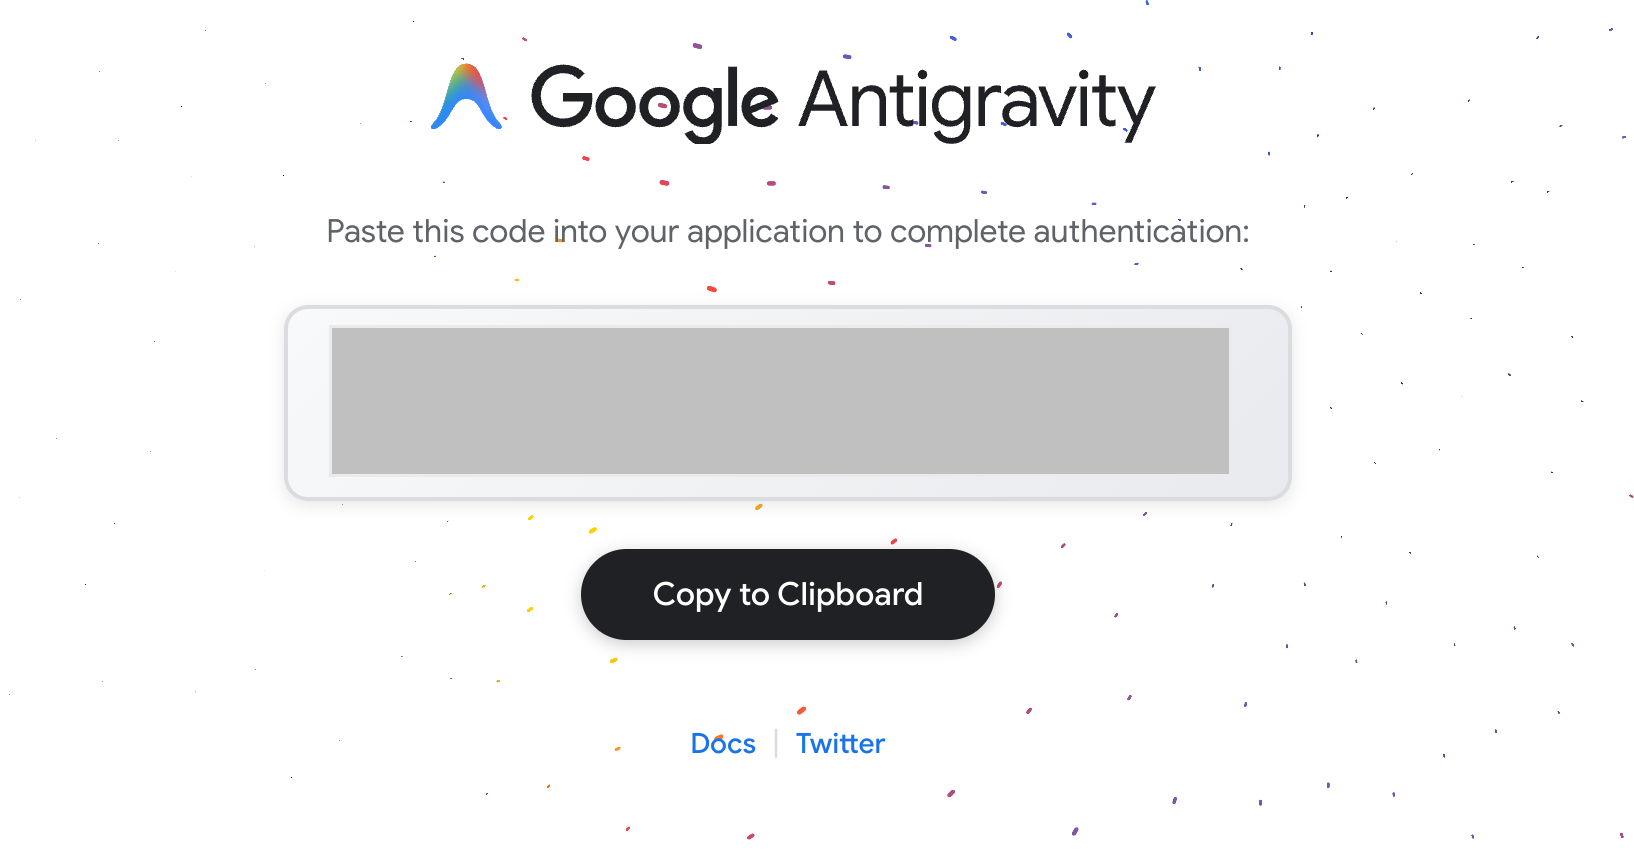
- Switch back to the vm cli-vm session and for Enter authorization code: paste the code you copied and press enter to authenticate.
- You should see the screen where you can customize and accept the agreement and go to your home directory. Select the relevant options to complete.
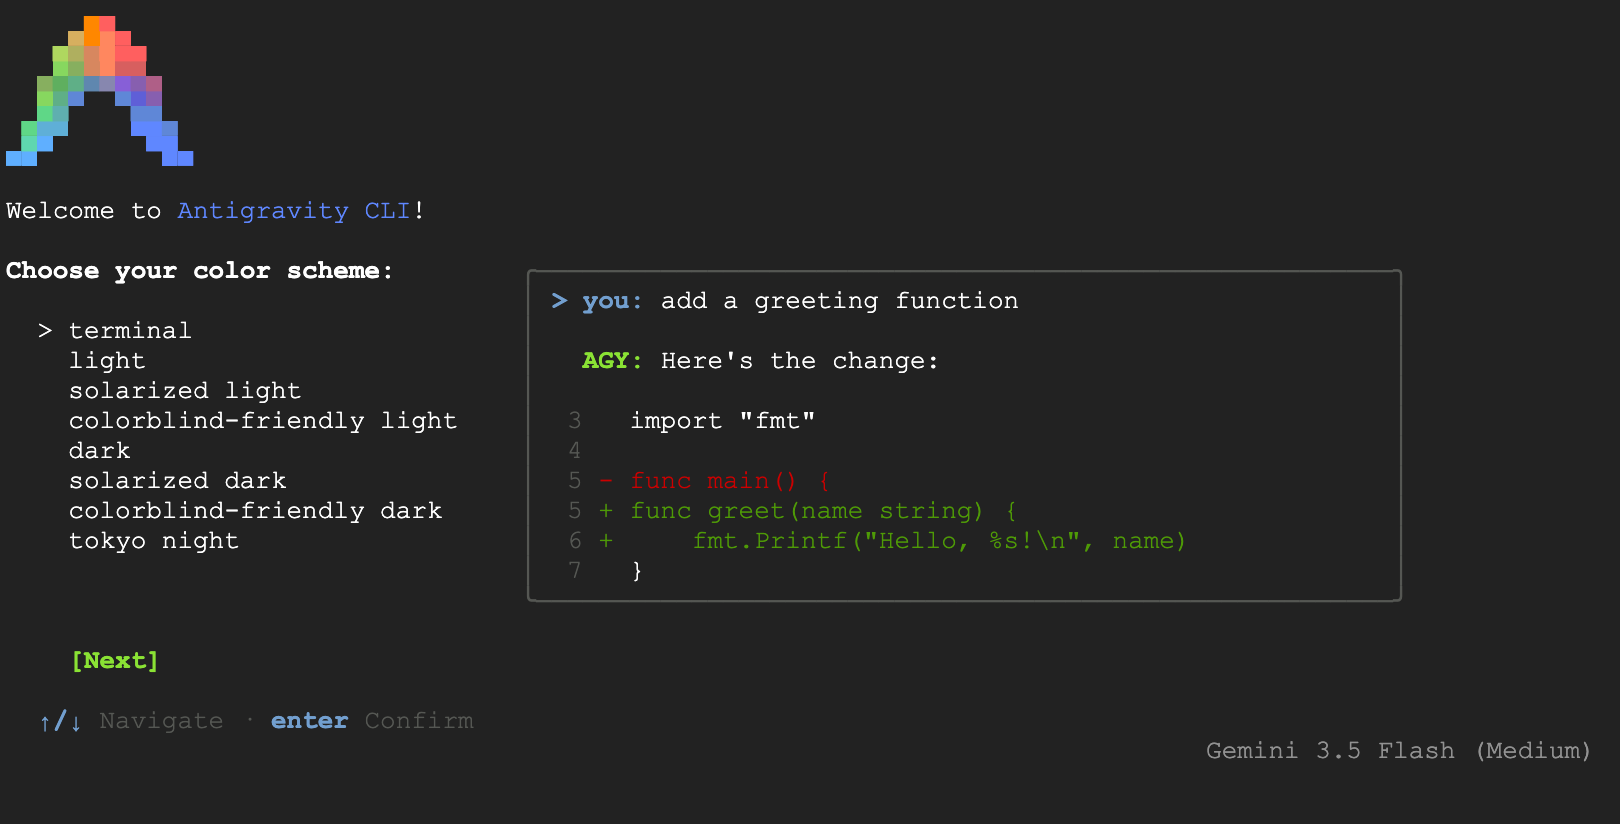
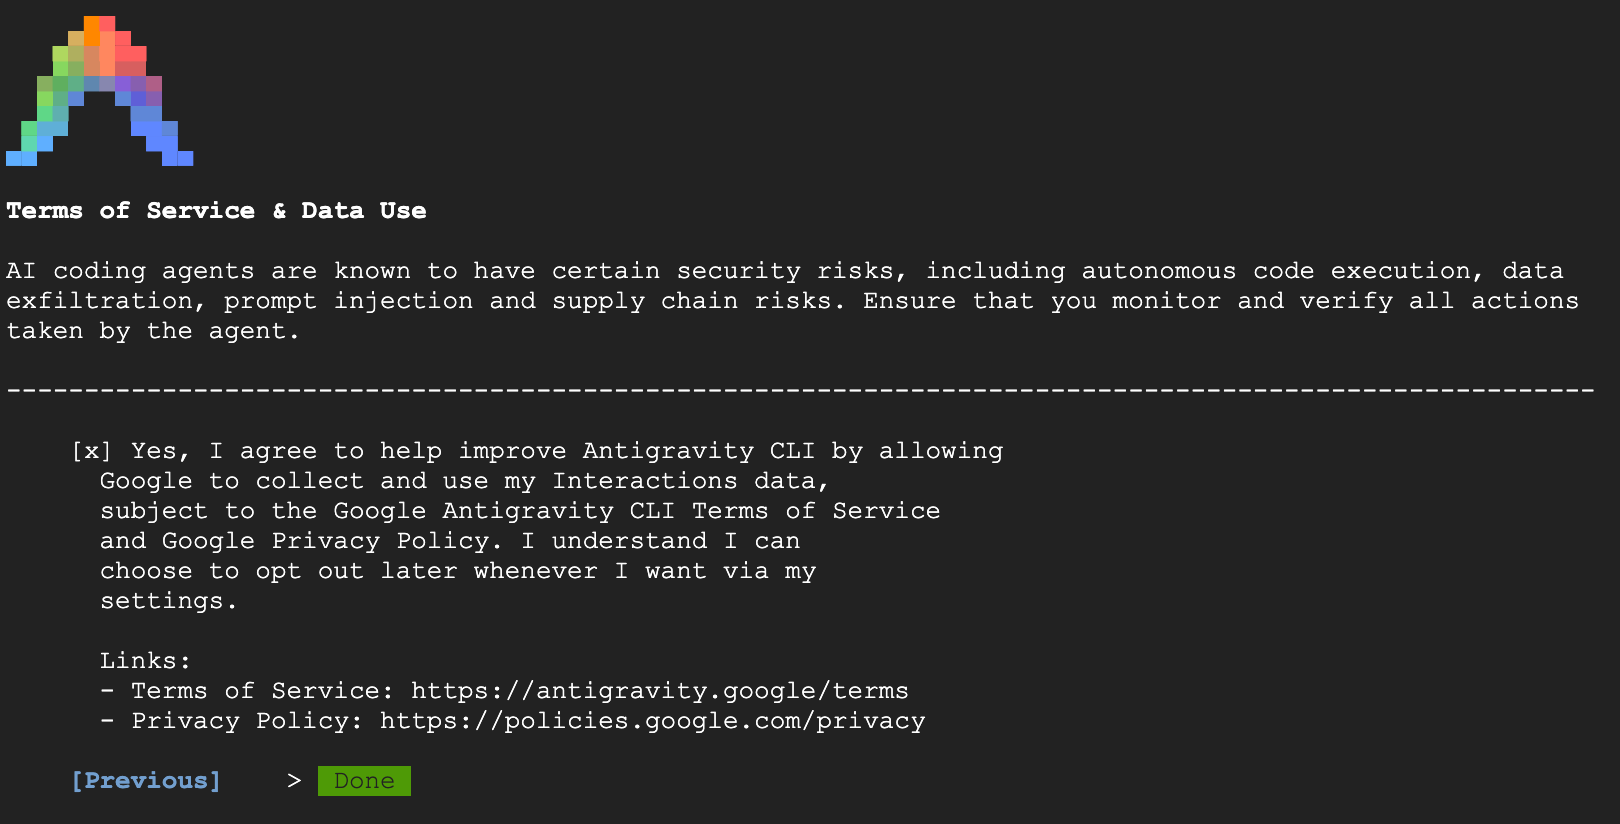
- All it complete you can start using Antigravity CLIi

Monitor traffic route to Gemini via monitor vm
- Navigate to VM instances. Select the vm starting with monitor-vm. Choose SSH.
- Once you SSH into monitor-vm you should have access
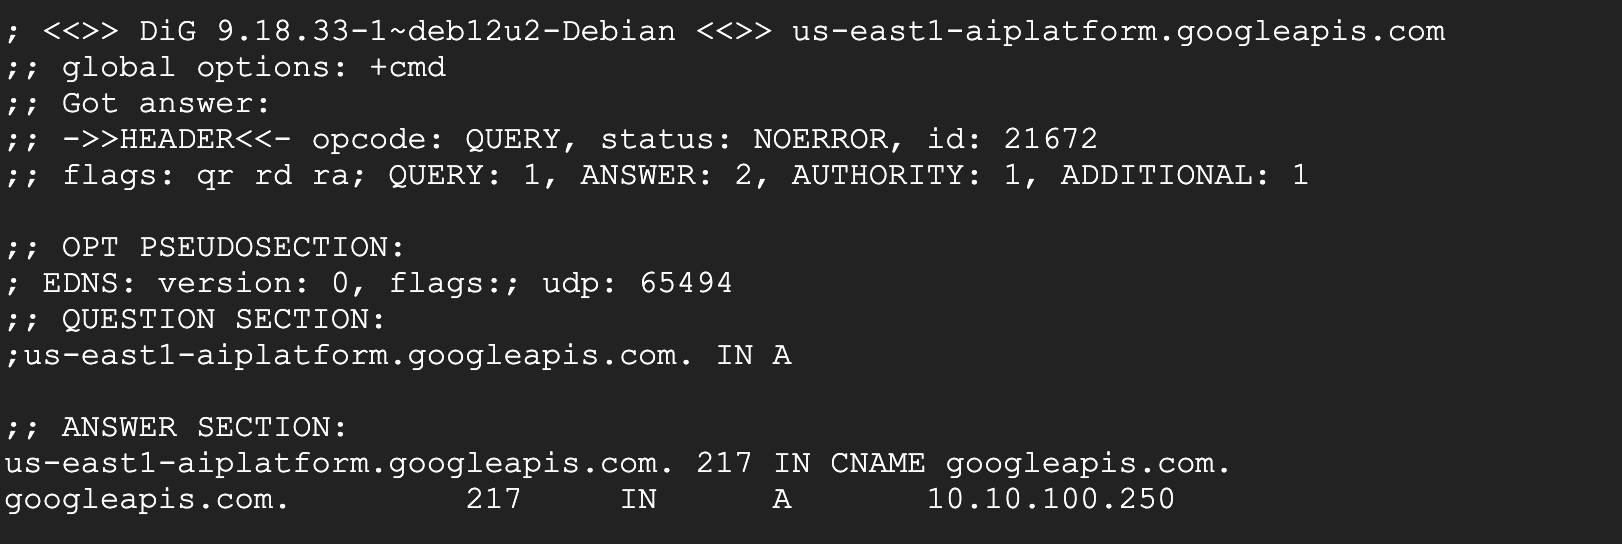
- Let's use the
digcommand to test the connection path to Gemini API. We'll use the us-east1-aiplatform.googleapis.com
dig us-east1-aiplatform.googleapis.com
You should see something similar (the address will differ). Note the path is via public IP addresses since the API is a public API.
DON'T COPY
; <<>> DiG 9.18.33-1~deb12u2-Debian <<>> us-east1-aiplatform.googleapis.com
;; global options: +cmd
;; Got answer:
;; ->>HEADER<<- opcode: QUERY, status: NOERROR, id: 58905
;; flags: qr rd ra; QUERY: 1, ANSWER: 14, AUTHORITY: 0, ADDITIONAL: 1

;; OPT PSEUDOSECTION:
; EDNS: version: 0, flags:; udp: 65494
;; QUESTION SECTION:
;us-east1-aiplatform.googleapis.com. IN A

;; ANSWER SECTION:
us-east1-aiplatform.googleapis.com. 300 IN A    216.239.38.223
us-east1-aiplatform.googleapis.com. 300 IN A    216.239.34.223
us-east1-aiplatform.googleapis.com. 300 IN A    216.239.36.223
us-east1-aiplatform.googleapis.com. 300 IN A    216.239.32.223
- Now let's do a quick
pingtest to see if we can connect to the Gemini API. This command will use 4 pings to the us-east1-aiplatform.googleapis.com so we will get a response from the public address of the API.
ping -c 4 us-east1-aiplatform.googleapis.com
- We will come back to test this VM later on. Close off the SSH session and let's continue.
6. Task 4. Create the PSC endpoint to googleapis with Terraform
To enable private connectivity to our Vertex API endpoint we will create a Private Service Connect endpoint for Google APIs. This will allow us to use a private IP address we assign to route traffic to the Google APIs we need, in this case Vertex.
- Open Cloud Shell in editor view if not open already. We are going to create the following:
- Create an IP for the PSC endpoint 10.10.100.250 (
resource "google_compute_global_address" "default") - Create a PSC endpoint to Google APIs (
resource "google_compute_global_forwarding_rule" "default")
Open the psc.tf file in the terraform-build folder. Add the following code to file.
Terraform psc.tf
resource "google_compute_global_address" "default" {
  name         = "gemini-ip"
  purpose      = "PRIVATE_SERVICE_CONNECT"
  network      = google_compute_network.default.id
  address_type = "INTERNAL"
  address      = "10.10.100.250"
}

resource "google_compute_global_forwarding_rule" "default" {
  name                  = "pscgemini"
  target                = "all-apis"
  network               = google_compute_network.default.id
  ip_address            = google_compute_global_address.default.id
  load_balancing_scheme = ""

  service_directory_registrations {
    namespace                = "googleapis"
    service_directory_region = "us-east1"
  }
}
- Switch to Cloud Shell terminal, ensure your are in the
terraform-buildfolder. Then runterraform initThen runterraform planthis will show you that 2 items will be added,
then runterraform applyand typeyesto create the IP and PSC Google APIs endpoint. - Verify endpoint exist
gcloud compute addresses list --filter="name=( 'gemini-ip' ...)"
gcloud compute forwarding-rules describe pscgemini --global
7. Task 5. Create Manual DNS entry to googleapis with Terraform
You can create a manual DNS entry to point to the PSC endpoint using private DNS. This would affect all the networks you assign to it.
- Navigate to Network services and select Cloud DNS.
- In zones you should see an automatically created zone for the Private Service Connect for Google APIs, with zone type service directory. This can be used to connect to the PSC endpoint with the format **SERVICE-ENDPOINT.p.googleapis.com Example:
aiplatform-pscgemini.p.googleapis.com - In this case we want to manually create a private DNS entry. The config will be as follows
- Create a private DNS zone named "googleapis-private" for "googleapis.com" and restrict it to the "antigravity-vpc-net" network.
- Add an A record to map "googleapis.com" to the IP address "10.10.100.250".
- Add a CNAME record to redirect all subdomains of "googleapis.com" (e.g., www.googleapis.com) to "googleapis.com".
- Open Cloud Shell in editor view if not open already. Open the dns.tf file in the terraform-build folder. Add the following code to file.
Terraform dns.tf
resource "google_dns_managed_zone" "private_zone" {
  name        = "googleapis-private"
  dns_name    = "googleapis.com."
  visibility  = "private"
  project     = var.project_id

  private_visibility_config {
    networks {
      network_url = google_compute_network.default.id
    }
  }
}

resource "google_dns_record_set" "a_record" {
  name    = "googleapis.com."
  type    = "A"
  ttl     = 300
  managed_zone = google_dns_managed_zone.private_zone.name
  project = var.project_id

  rrdatas = ["10.10.100.250"]
}

resource "google_dns_record_set" "cname_record" {
 name    = "*.googleapis.com."
 type    = "CNAME"
 ttl     = 300
 managed_zone = google_dns_managed_zone.private_zone.name
 project = var.project_id

 rrdatas = ["googleapis.com."]
}
- Switch to Cloud Shell terminal, ensure your are in the
terraform-buildfolder. Then runterraform planthis will show you what items will be added,
Then runterraform applyand typeyesto create the private DNS entry. - You should see a set up with an A record and CNAME like this see

- Next we verify connectivity with these changes on monitor-vm
8. Task 7. Verify endpoint connectivity via IP address
Let's connect using the private endpoint to connect to Gemini.
- Go to VM Instance monitor-vm. Select SSH and SSH into the VM
- Check the connectivity path to us-east1-aiplatform.googleapis.com using the
pingcommand. This will ping the IP address in the private DNS, A record for googleapis. This IP a PSC endpoint and your pings will be unsuccessful.
ping -c 2 us-east1-aiplatform.googleapis.com
- Check the connectivity path to us-east1-aiplatform.googleapis.com using the
digcommand. This should be the IP address of the PSC endpoint (10.10.100.250).
dig us-east1-aiplatform.googleapis.com
- Once completed you can close the monitor-vm SSH session.
- Go to VM Instance cli-vm. Select SSH and SSH into the VM
- Now we can run a TCP dump on the cli-vm. We would need to open two SSH sessions to the same vm. One session will run the tcpdump command the other we will use Gemini CLI.
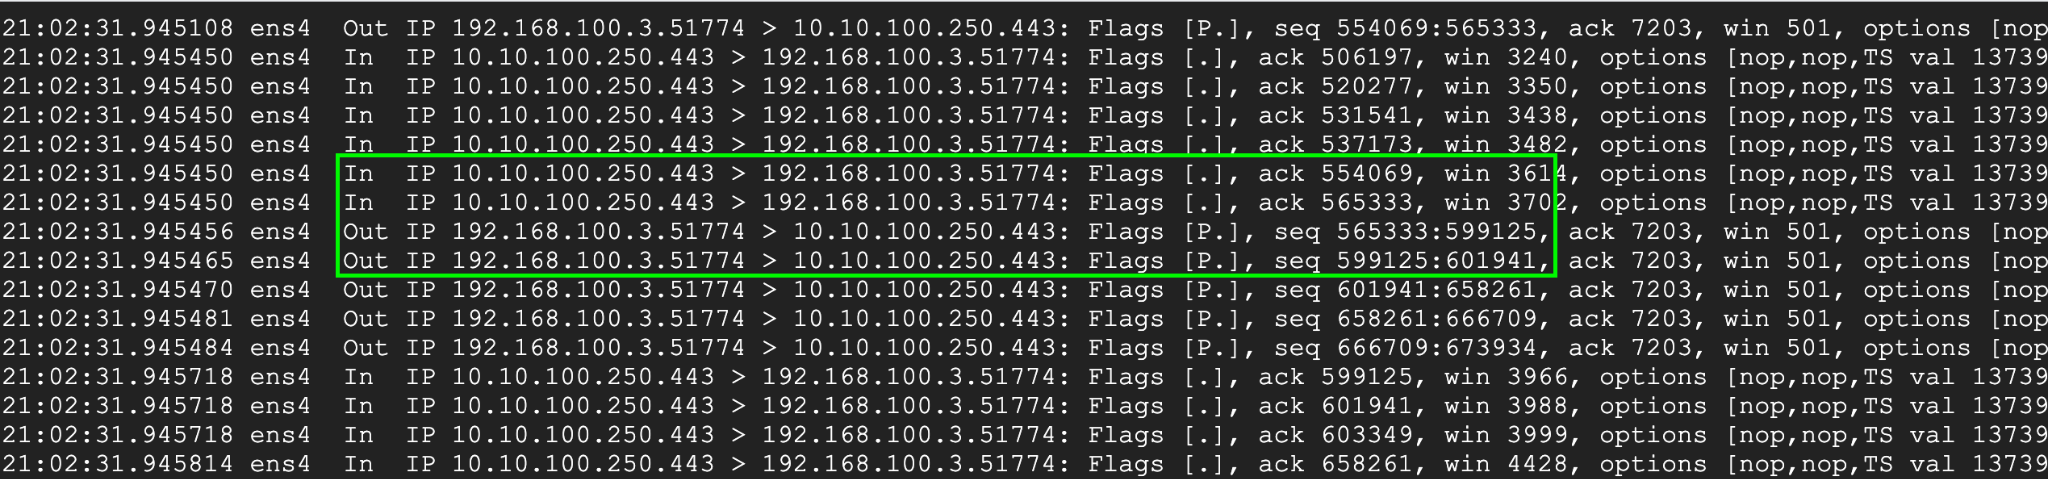
- Type the follow command to see the connectivity in a tcpdump
sudo tcpdump -i any port 53 -n or host us-east1-aiplatform.googleapis.com
- Now SSH into next session on the the cli-vm
- Navigate to the antigravitycli folder
cd antigravitycli - Activate the Antigravity CLI by typing
agy - Ask the following question;
what color is the sky?to generate a call to the Gemini API
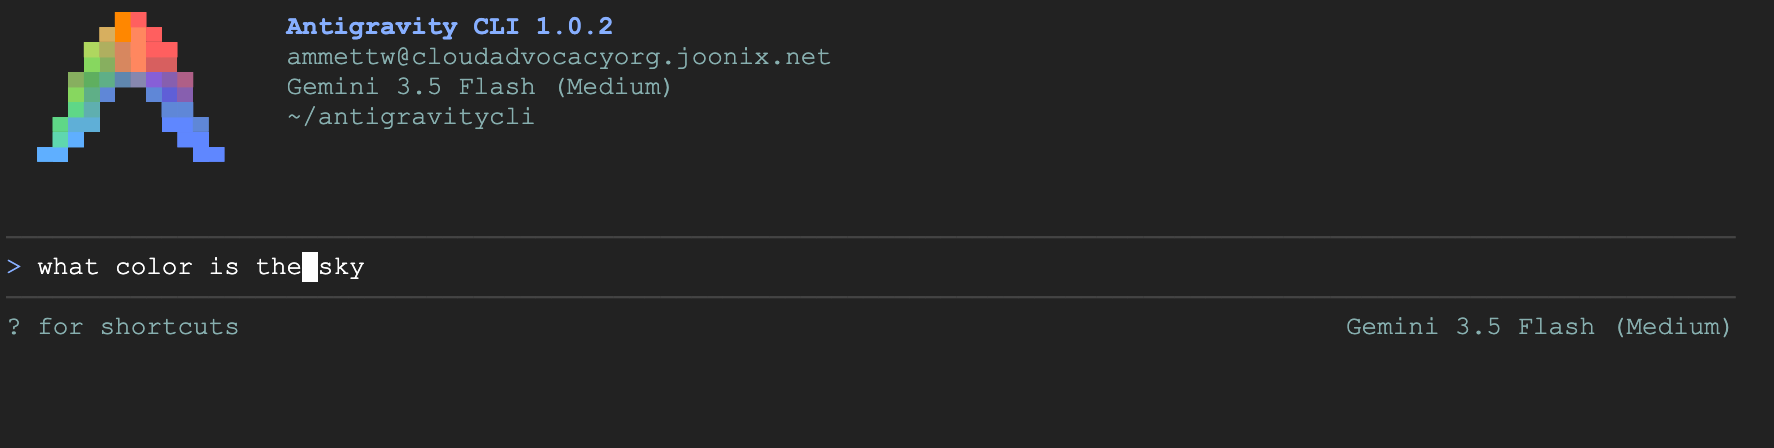
- Press enter to run and see the result.
- Switch back over to the first session on the cli-vm. You should see the result of the tcpdump. You will notice in and out and the IP address of the VM is using the PSC endpoint IP address to connect to gemini API
Close all SSH sessions to VM Instances
9. Clean Up
- Go to Cloud Shell make sure you are in the terraform-build directory
cd terraform-buildand run the following commandterraform destroyand typeyesall the resources you created in your project with Terraform will be removed.
10. Congratulations
Congratulations, you've successfully connected to Antigravity CLI using both public API address and privately using Private Service Connect Endpoint for Google APIs. This functionality can extend private API connectivity into your on-prem/other cloud environment which are connected via (Interconnect, Cross-Cloud Interconnect and VPC).
Next steps / Learn more
You can read more in the Antigravity CLI docs
Take your next lab
Continue your quest with Google Cloud, and check out these other Google Cloud labs: