
1. Introduction
Vibe coding has revolutionized the speed and way we develop frontends, but it often hits a wall when it reaches the database. Traditionally, developers have to switch contexts, write complex SQL schemas, manage connection pools, and manually configure database extensions.
In this codelab, you will experience a frictionless, conversational database development workflow. Using Model Context Protocol (MCP) and an agentic IDE, you will treat your editor as an experienced Data Engineer—going from a simple idea to a fully connected, optimized, and AI-enabled database application in minutes, all without leaving your workspace.
What you'll build
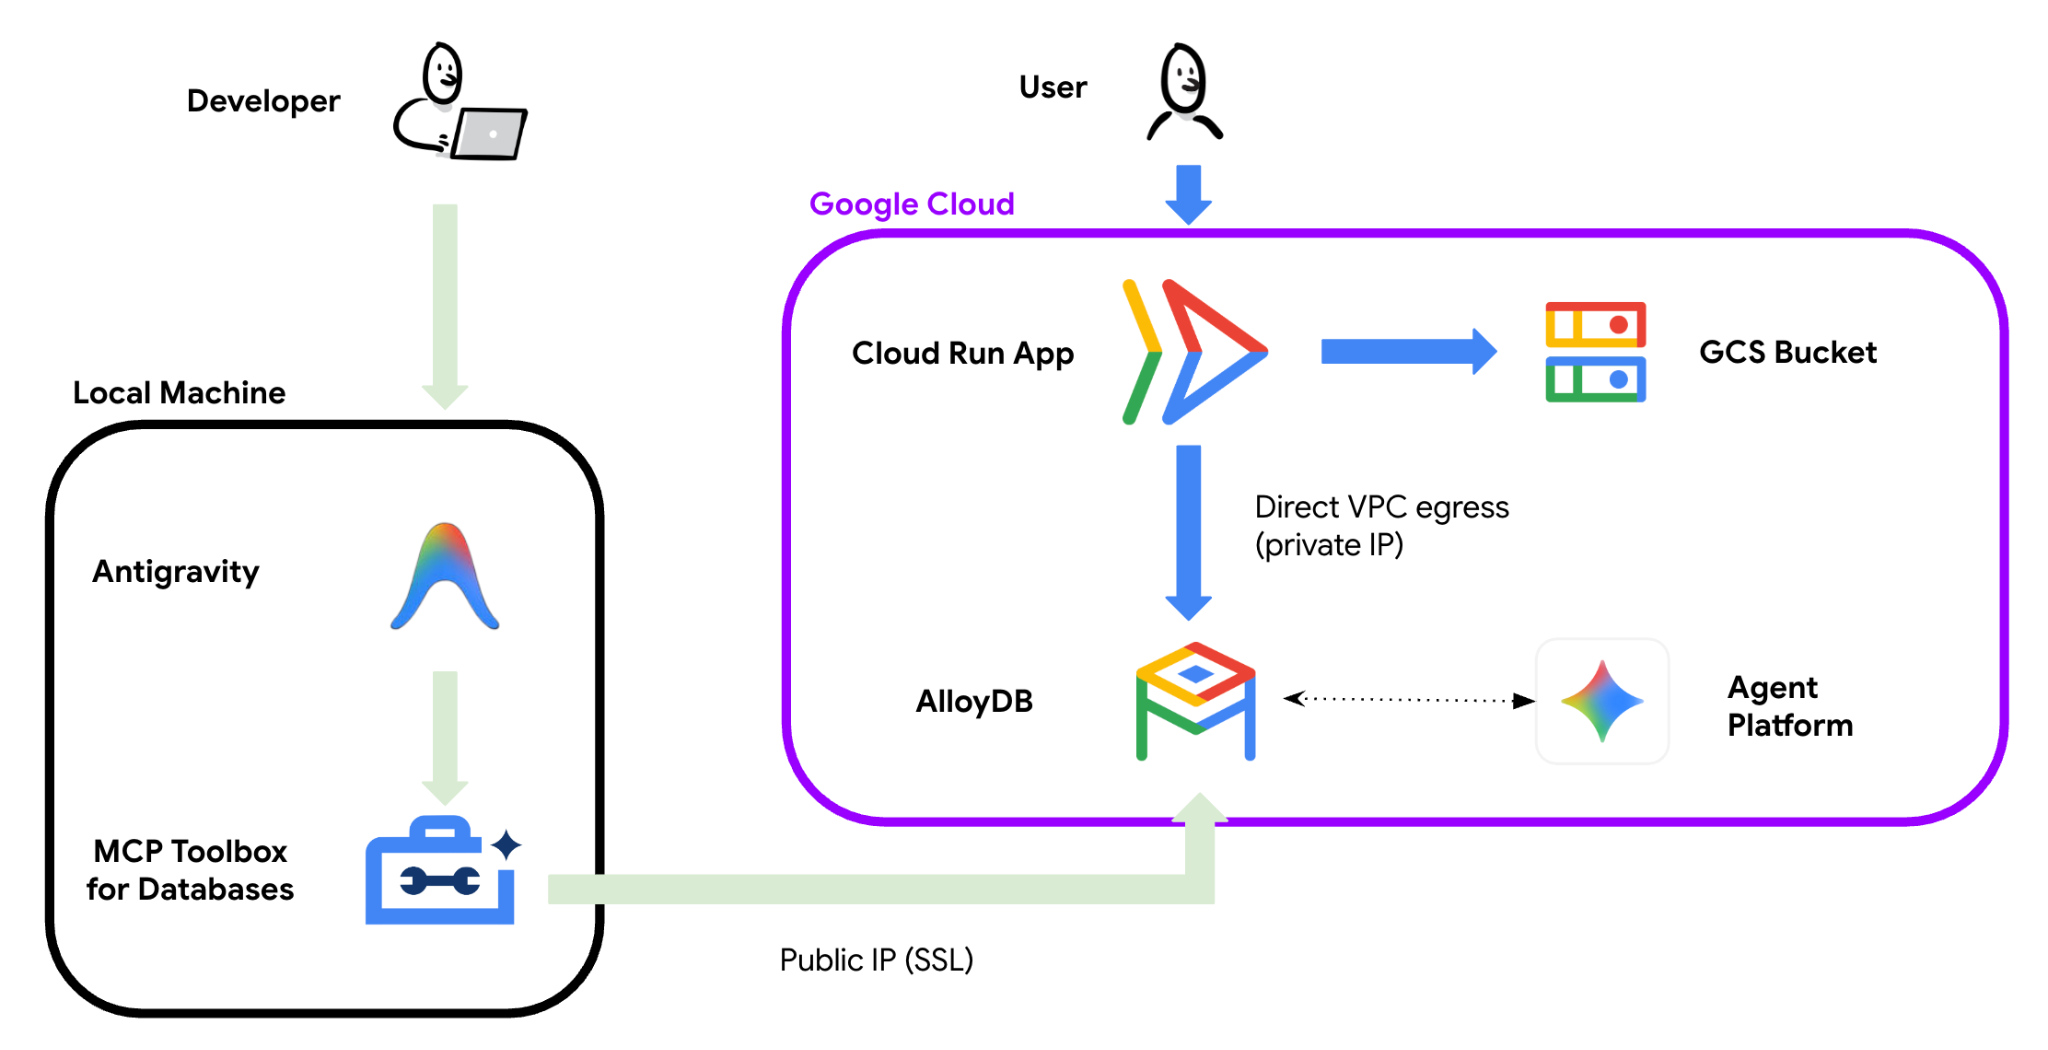
In this codelab, you'll build and deploy an AI Gastronomy Guide—a modern Next.js application backed by AlloyDB. The application will support:
- Dynamic Catalog Ingestion: Automatically importing and structuring restaurant data from raw CSV files.
- Keyword-Based Search: Querying the database dynamically using full-text search.
- AI-Powered Semantic Search: Finding restaurants by describing the "vibe" (e.g., "cozy place for a date" or "late-night quick bite") using Agent Platform embeddings.
What you'll learn
- Provisioning a Google Cloud AlloyDB instance with Public IP and VPC network configurations.
- Connecting Antigravity IDE directly to AlloyDB using Model Context Protocol (MCP) Toolbox.
- Wiring a Next.js frontend to a live database using environment variables and secure SSL connections.
- Enabling in-database Agent Platform integration to generate vector embeddings using text-embedding-004.
- Performing Vector Similarity Search using the cosine distance operator (<=>).
- Optimizing database performance for production scale using HNSW indexing and Table Partitioning—acting as a Virtual DBA.
What you'll need
To complete this codelab, you will need:
- Antigravity installed on your local machine.
- Google Cloud CLI (gcloud) and Git installed and authenticated on your local machine.
- A Google Cloud Project with billing enabled.
- A web browser (Chrome recommended).
This codelab is designed for developers of all levels, including beginners.
2. Before you begin
This section guides you through the initial setup required in your Google Cloud Project before you can start building the AI Berlin Gastronomy Guide.
Create a project
- In the Google Cloud Console, on the project selector page, select or create a Google Cloud project.
- Make sure that billing is enabled for your Cloud project. Learn how to check if billing is enabled on a project .
Install Local Prerequisites
Ensure you have the following tools installed on your local machine:
- Antigravity 2.0: Install the Antigravity
- Git: Download and install Git.
- Google Cloud CLI: Download and install gcloud
Set up Antigravity 2.0
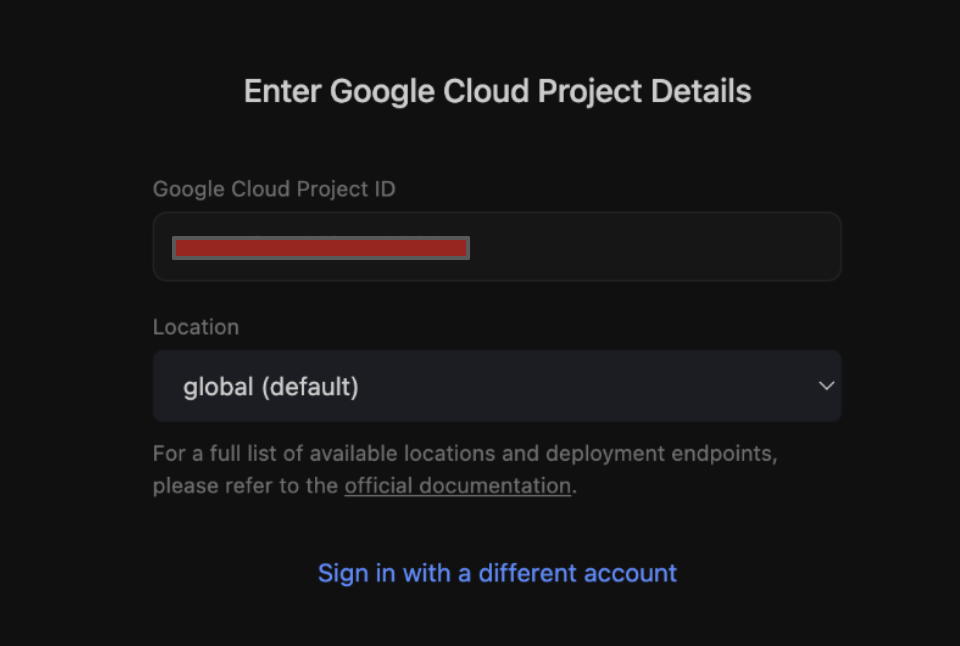
The first time you launch Antigravity 2.0, you will be prompted to introduce your Google Cloud Project ID from the previous step.
Input your Project ID to initialize your workspace:
Set up and Open Antigravity IDE
We will install and open Antigravity IDE on our local machine so we can perform our terminal commands
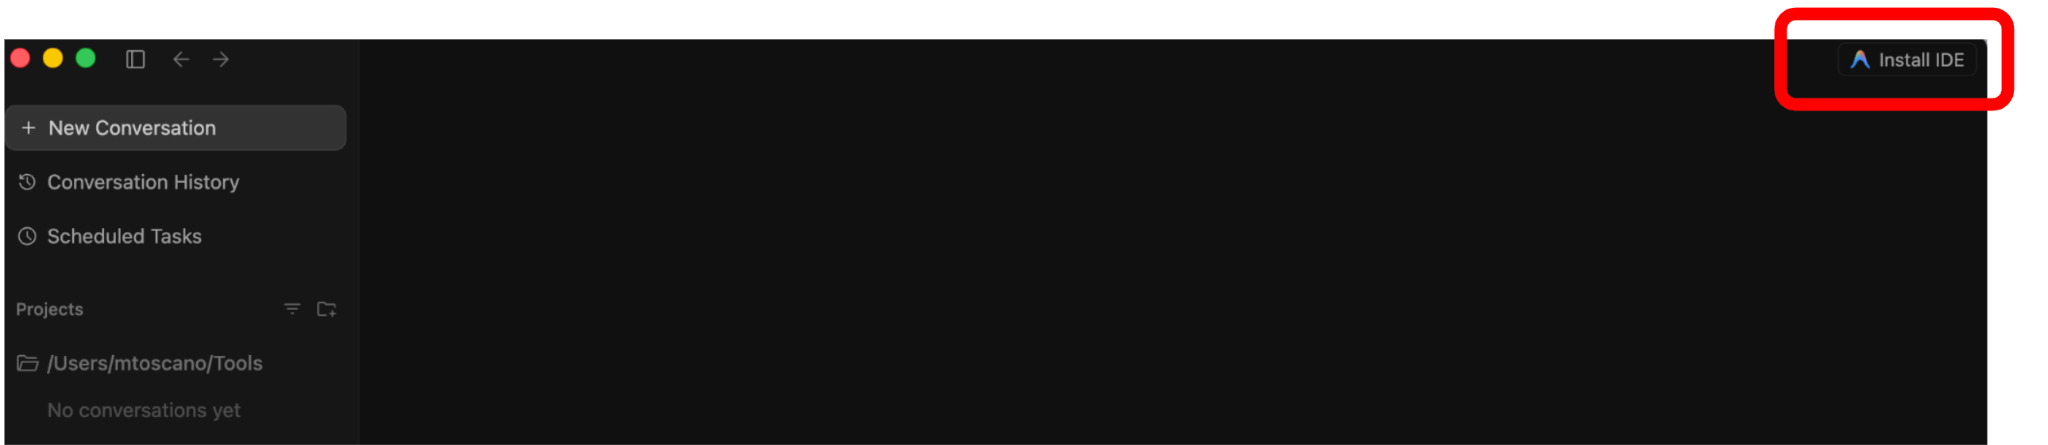
- In the Antigravity 2.0 interface, locate and click the option to Install Antigravity IDE (in the top-right corner).
- Once the download and installation prompt appears, follow the installation wizard using the default settings.
- When installation completes, launch Antigravity IDE
Clone the Repository and Authenticate with Google Cloud
You will execute all command-line instructions directly inside your IDE.
- Open the Antigravity IDE on your local machine
- Open Antigravity's terminal and clone the project repository:
git clone https://github.com/mtoscano84/vibe-coding-postgres-mcp.git
- Open the project folder:
- Go to File > Open Folder (or Open...).
- Navigate to and select the newly cloned vibe-coding-postgres-mcp folder.
- Once the project folder opens, launch a new integrated terminal in Antigravity IDE. Set the PROJECT_ID environment variable and configure the gcloud CLI to use it (replace [YOUR_PROJECT_ID] with your actual GCP project ID):
export PROJECT_ID=[YOUR_PROJECT_ID]
gcloud config set project $PROJECT_ID
- Log in to the Google Cloud CLI:
gcloud auth login
- Log in to Application Default Credentials (ADC): (This creates the local credentials file required by our AI and MCP database connectors later in the lab)
gcloud auth application-default login
- Verify your active account:
gcloud auth list
Enable required APIs
Run the following command in your Antigravity terminal to enable the necessary Google Cloud services:
gcloud services enable alloydb.googleapis.com \
                       compute.googleapis.com \
                       servicenetworking.googleapis.com \
                       aiplatform.googleapis.com \
                       run.googleapis.com \
                       artifactregistry.googleapis.com \
                       cloudbuild.googleapis.com
3. Create the AlloyDB Instance
In this section, you will run an automated script in your Antigravity terminal to provision your AlloyDB cluster and instance in Google Cloud
In your active Antigravity IDE integrated terminal (which is already inside the vibe-coding-postgres-mcp project directory), run the AlloyDB provisioning script:
source database/deploy_alloydb.sh --region us-central1 --public-ip
Note: The provisioning process takes approximately 10-15 minutes
The provision script will::
- Create a VPC network named default (if it does not exist in your project).
- Set up Private Services Access for AlloyDB.
- Deploy an AlloyDB cluster and a primary instance with both Private IP and Public IP enabled.
- Grant the necessary Agent Platform permissions to the AlloyDB service agent.
The output should be similar to:
----------------------------------------
Deployment Process Completed
Cluster:  alloydb-aip-01 (STANDARD)
Instance: alloydb-aip-01-pr
Region:   us-central1
Private IP: XX.XX.XX.XX
Public IP:  XX.XX.XX.XX
Initial Password: XXXXXXXXXX (if new cluster)
----------------------------------------
Please, make sure to copy and save these details:
- AlloyDB Private IP: Used by the Cloud Run application to connect securely within the VPC.
- AlloyDB Public IP: Used by your local Antigravity IDE to connect directly.
- Database Password: The auto-generated password for the postgres user.
4. Deploy the Frontend
In this section, you will deploy the baseline Next.js frontend (State 0) to Google Cloud Run using Antigravity IDE integrated terminal. This initial version uses mock data and does not connect to the database yet.
First, run the following commands directly in your Antigravity terminal to grant the necessary IAM roles to the Compute Engine default service account:
PROJECT_NUMBER=$(gcloud projects describe $(gcloud config get-value project) --format="value(projectNumber)")
# Grant Storage Object Viewer (to read source code)
gcloud projects add-iam-policy-binding $(gcloud config get-value project) \
    --member="serviceAccount:${PROJECT_NUMBER}-compute@developer.gserviceaccount.com" \
    --role="roles/storage.objectViewer"
# Grant Log Writer (to write build logs)
gcloud projects add-iam-policy-binding $(gcloud config get-value project) \
    --member="serviceAccount:${PROJECT_NUMBER}-compute@developer.gserviceaccount.com" \
    --role="roles/logging.logWriter"
# Grant Artifact Registry Writer (to push container images)
gcloud projects add-iam-policy-binding $(gcloud config get-value project) \
    --member="serviceAccount:${PROJECT_NUMBER}-compute@developer.gserviceaccount.com" \
    --role="roles/artifactregistry.writer"
From the root of your vibe-coding-postgres-mcp directory in your Antigravity terminal, run the following command to compile and deploy the Next.js application into your VPC network:
gcloud run deploy berlin-gastronomy-guide \
  --source frontend/ \
  --network=default \
  --subnet=default \
  --allow-unauthenticated \
  --region=us-central1
Once the deployment completes, it will print the Service URL.
Building using Dockerfile and deploying container to Cloud Run service [berlin-gastronomy-guide] in project [vibe-coding-postgres-mcp] region [us-central1]
Building and deploying...
  Validating configuration...done
  Uploading sources...done
  Building Container... Logs are available at [ https://console.cloud.google.com/cloud-build/builds;region=us-central1/46a6e834-d5e9-4dfd-885e-d39e2790f72d?project=734791203988 ]....done
  Setting IAM Policy...done
  Creating Revision...done
  Routing traffic...done
Done.
Service [berlin-gastronomy-guide] revision [berlin-gastronomy-guide-00002-n6k] has been deployed and is serving 100 percent of traffic.
Service URL: https://berlin-gastronomy-guide-[YOUR_PROJECT_NUMBER].us-central1.run.app
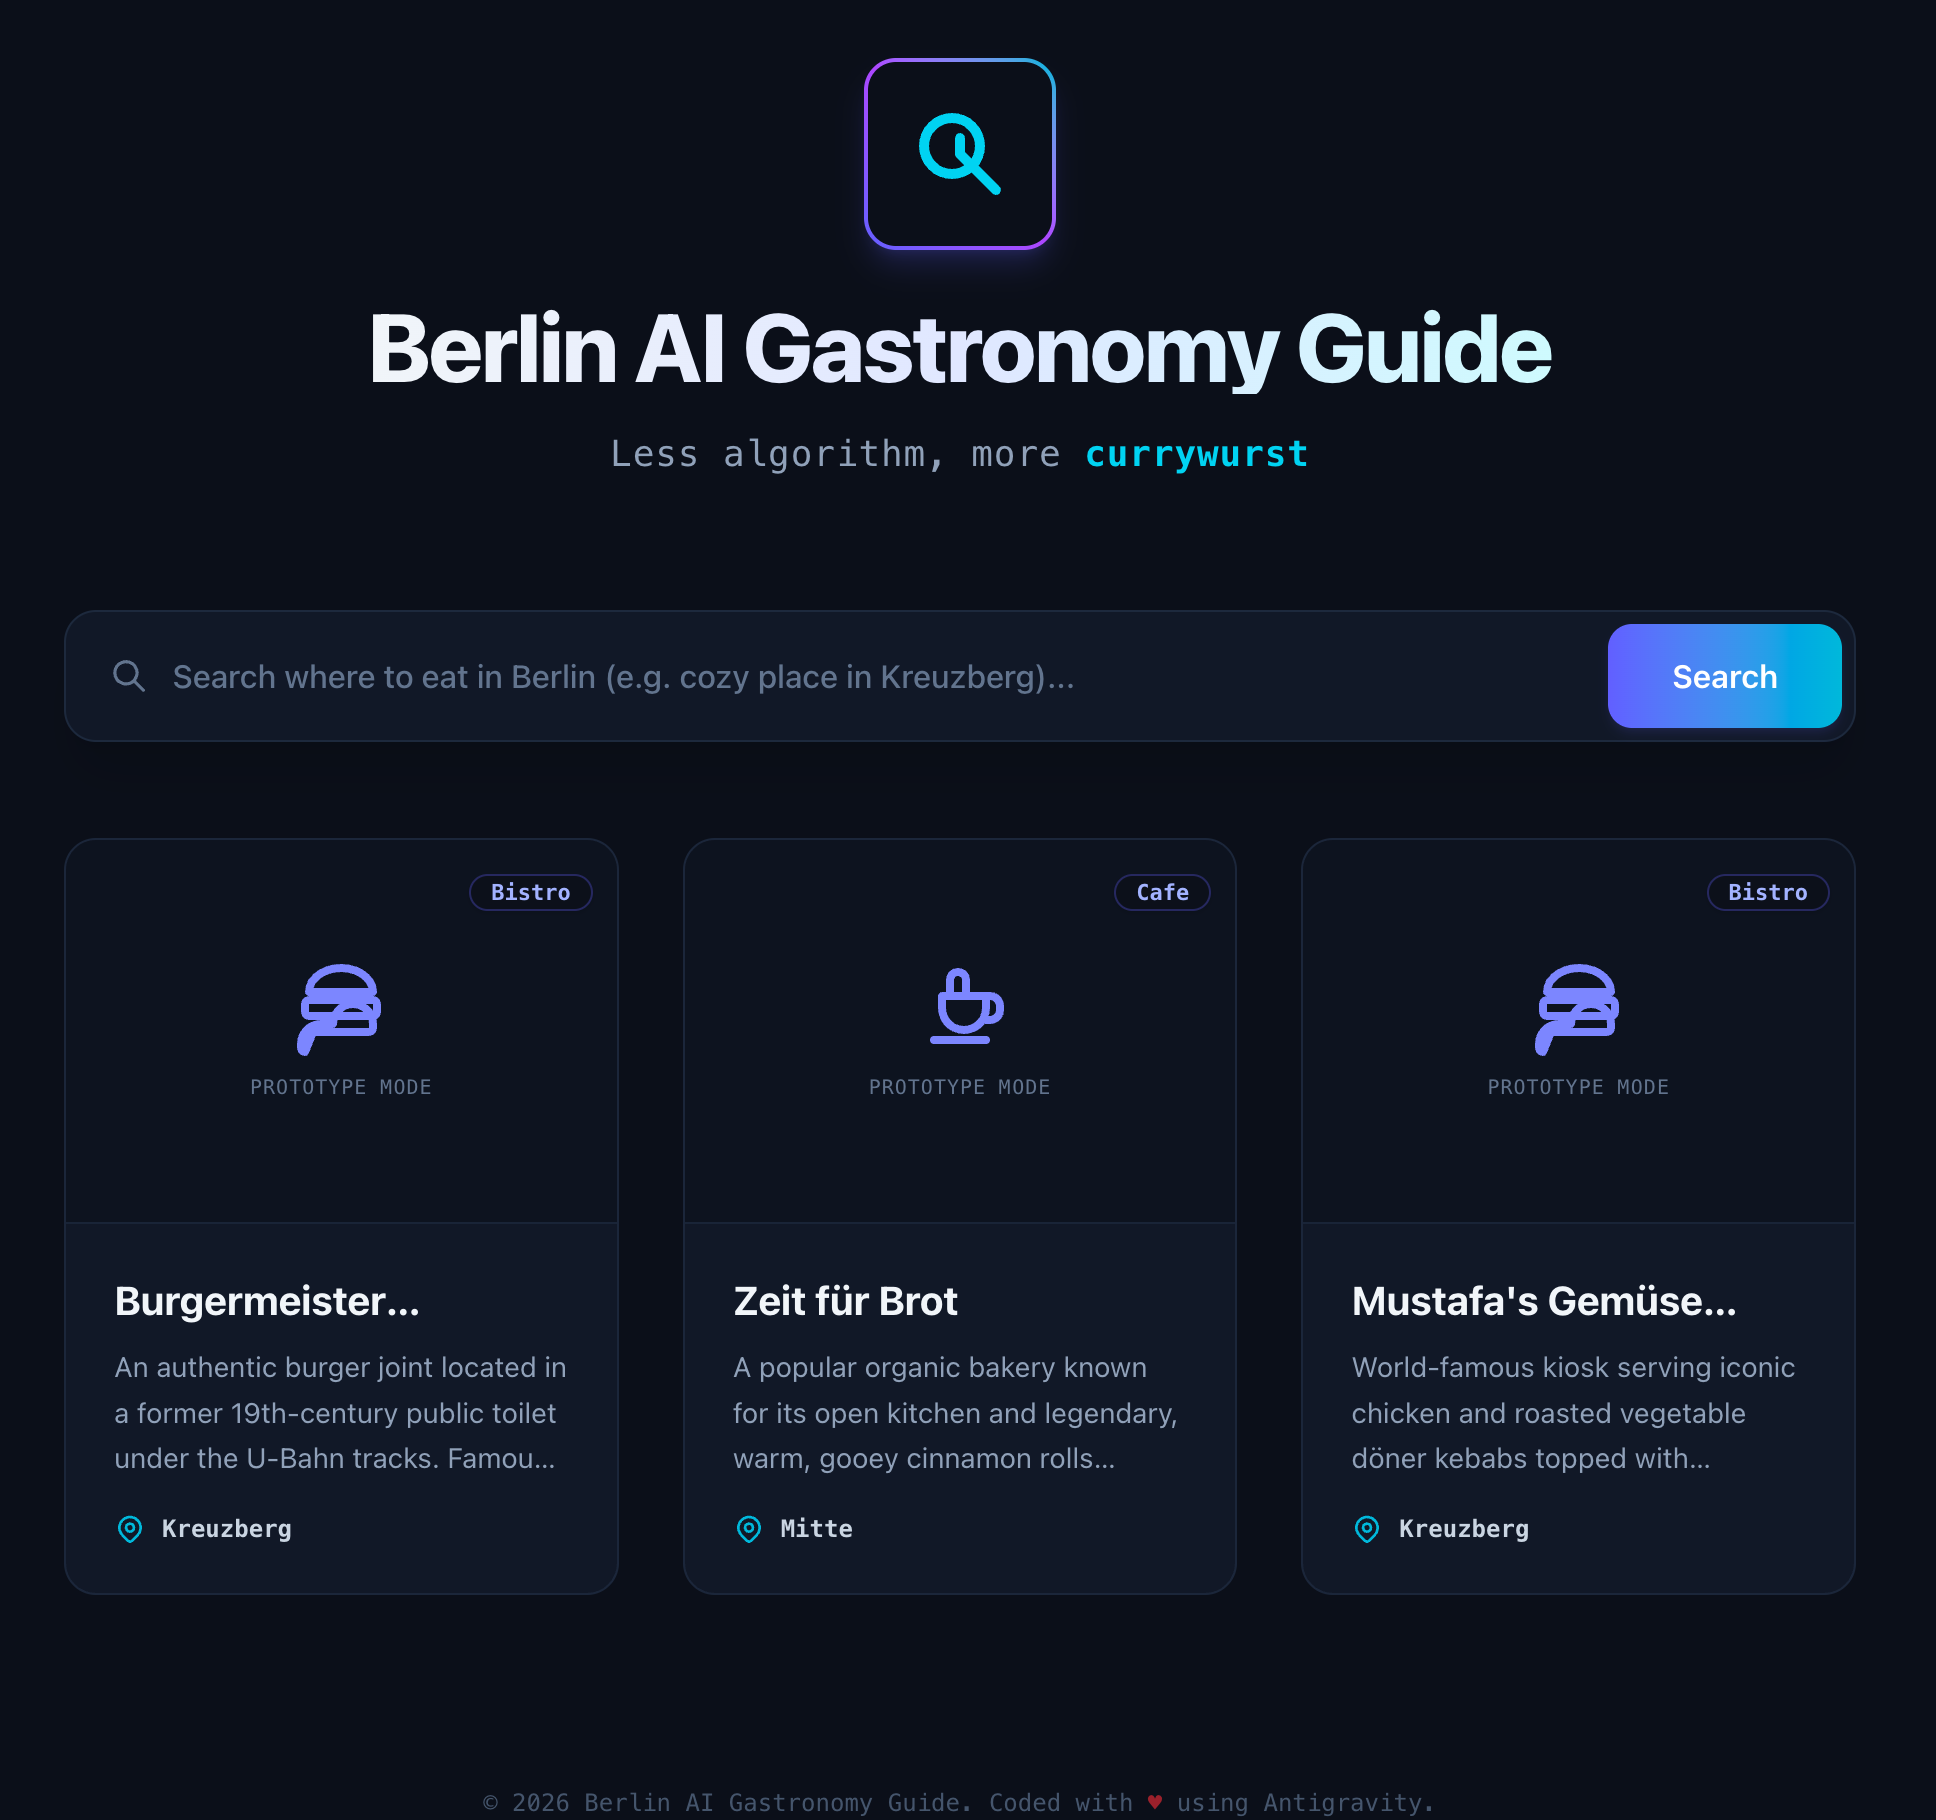
Copy the URL and open it in your browser.
Verify that you see the Berlin AI Gastronomy Guide web page showing the mock restaurant cards.
5. Connect Antigravity to Google Cloud
To allow the AI agent in your IDE (Antigravity) running locally to interact with the database, we will use the official Google Cloud AlloyDB MCP Server.
Since we enabled Public IP on the AlloyDB instance during provisioning, your local IDE can connect to it directly over the internet. The connection is secured using SSL and password authentication, and the MCP server uses your local Google Cloud credentials to authorize the connection.
Configure the MCP Server in Antigravity
- In Antigravity IDE, click the three dots menu (...) in the top right corner of the chat window.
- Select MCP Servers, and then click on Managed MCP Servers (or View raw config / Edit Configuration File).
- Add the following JSON block inside the mcpServers object. Make sure to replace [YOUR_PROJECT_ID] and [YOUR_ALLOYDB_PASSWORD] with your actual project ID and the database password you saved from the AlloyDB provisioning step:
"alloydb-postgres": {
  "command": "npx",
  "args": [
    "-y",
    "@toolbox-sdk/server@latest",
    "--prebuilt",
    "alloydb-postgres",
    "--stdio"
  ],
  "env": {
    "ALLOYDB_POSTGRES_PROJECT": "[YOUR_PROJECT_ID]",
    "ALLOYDB_POSTGRES_REGION": "us-central1",
    "ALLOYDB_POSTGRES_CLUSTER": "alloydb-aip-01",
    "ALLOYDB_POSTGRES_INSTANCE": "alloydb-aip-01-pr",
    "ALLOYDB_POSTGRES_DATABASE": "postgres",
    "ALLOYDB_POSTGRES_USER": "postgres",
    "ALLOYDB_POSTGRES_PASSWORD": "[YOUR_ALLOYDB_PASSWORD]"
  }
}
- Save the configuration file
- The IDE will automatically start the MCP server. You should see a green dot next to alloydb-postgres in the MCP panel, indicating it is successfully connected.
Open the Repository in Antigravity 2.0
For the rest of this lab, we will write and build our application using Antigravity 2.0.
- Return to Antigravity 2.0 and open the project folder you just cloned.
- Click on New Conversation > New Project > Add Folder.
- Navigate to and select the newly cloned vibe-coding-postgres-mcp folder.
- You will now see your Agent Interface inside Antigravity 2.0 pointing directly to your cloned workspace, ready for coding!
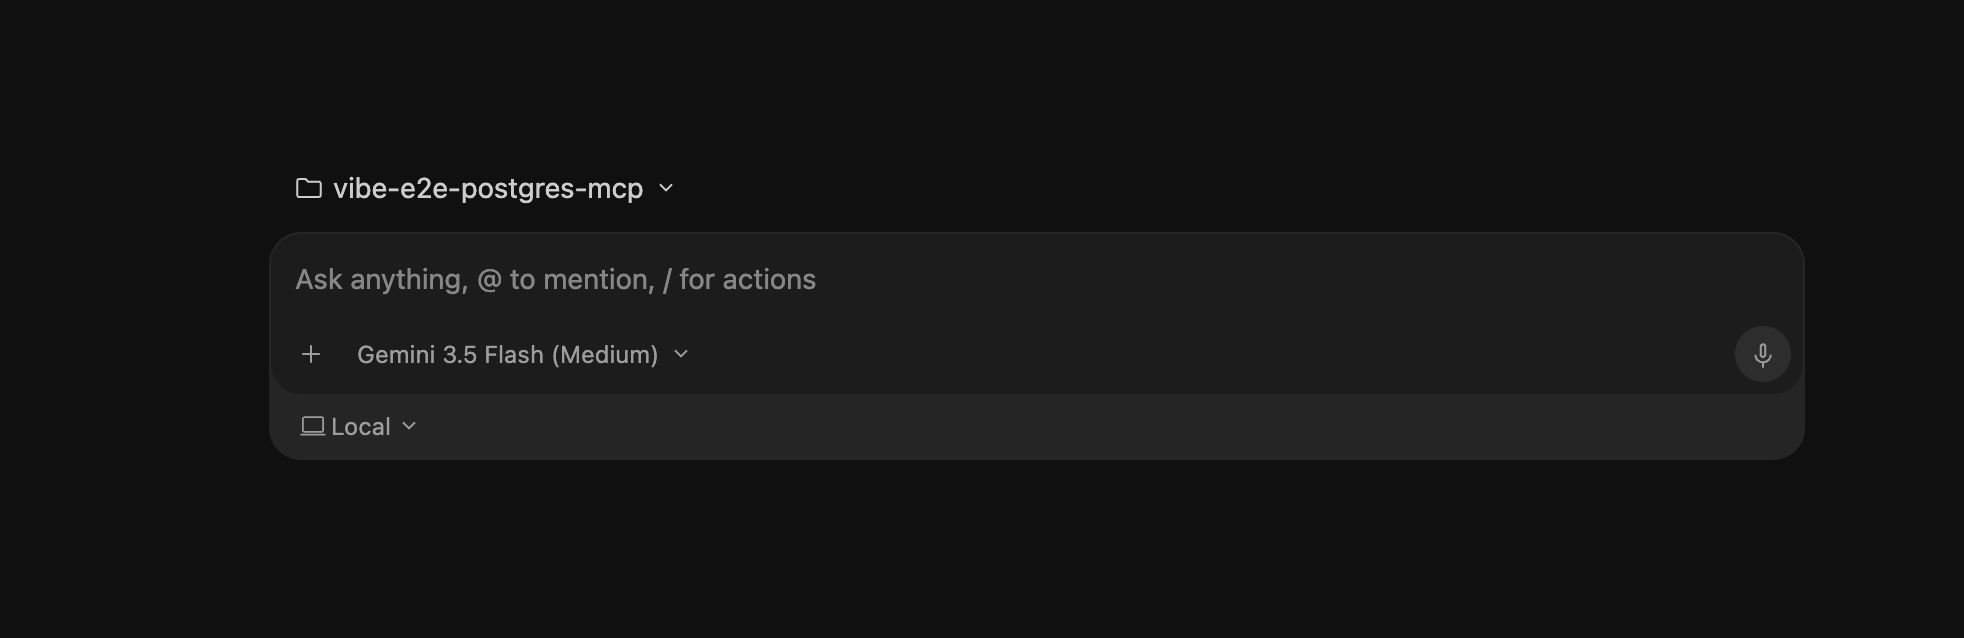
6. Vibe Coding: Database Ingestion
Now that your Antigravity is connected to your AlloyDB instance via the MCP server, you can begin the vibe-coding experience.
In this step, you will instruct the AI agent to read a local CSV file containing the Berlin gastronomy catalog and load it into your AlloyDB database.
The Task
You will use the Agent Chat in Antigravity. The agent will autonomously read the file, analyze the data types, connect to your database, create the table, and insert the records.
Then, copy and paste the following prompt into the chat and press Enter:
Read the headers of database/seed_data_berlin.csv. Connect to the database via the MCP tool, create a table named restaurants with the correct data types, and load all the records from the CSV file into it.
Observes the agent as it executes the task:
- it will first read the CSV file headers and some sample rows to determine the appropriate schema.
- It will call the AlloyDB MCP tool to create the table restaurants.
- It will batch insert the 100 restaurant records from the CSV file into the database.
Verification
Once the agent tells you it has finished, you can verify that the data has been loaded:
In the Agent Chat, ask the agent:
Show me the first 5 records from the restaurants table.
The agent will query the database and display the first 5 restaurants (such as Pub Lia's Kitchen and Cafe Clärchens), confirming that the database ingestion was successful.
7. Vibe Coding: Connect Frontend to Database
In this section, you will wire the Next.js frontend to your live AlloyDB database. You will instruct the agent to replace the mock data with a live database query and implement keyword search.
The Task
You will prompt the agent to write the connection code and update the homepage. Because we committed the database SSL rule in .agents/AGENTS.md, the agent will automatically configure the connection pool to use SSL for cloud connections without you needing to specify it in your prompt!
In Antigravity Agent chat, copy and paste the following prompt and press Enter (replace [YOUR_PASSWORD] with your actual database password):
Connect our Next.js frontend to the restaurants table in the database using the pg library. Use a connection pool configured with environment variables: DB_HOST, DB_USER (postgres), DB_PASS (password is '[YOUR_PASSWORD]'), and DB_NAME (postgres). Replace the mock data in page.tsx with a live query, and implement keyword search on the name, category, and description
Observes the agent as it executes the task:
- It will install the pg package and its TypeScript types (@types/pg).
- It will create a database connection file (or a Next.js Server Action) and configure the connection pool.
- It will read the AGENTS.md rules and automatically add the SSL configuration for non-local hosts.
- It will rewrite page.tsx to query the database and filter the results based on the search query.
Verification
To test the changes, you must redeploy the frontend to Cloud Run. Since we are using the "Cloud-Only" flow, this is how the new code is shipped.
Open the integrated terminal in Antigravity IDE (ensure you are in the root directory).
Run the deployment command, passing your AlloyDB Private IP and Password as environment variables (replace the placeholders with your actual values):
gcloud run deploy berlin-gastronomy-guide \
  --source frontend/ \
  --network=default \
  --subnet=default \
--set-env-vars="DB_HOST=[YOUR_ALLOYDB_PRIVATE_IP],DB_USER=postgres,DB_PASS=[YOUR_PASSWORD],DB_NAME=postgres" \
  --allow-unauthenticated \
  --region=us-central1
Once the deployment completes, open the Service URL in your browser.
Try searching for "Burgermeister" or "Kebab". You should see the real restaurants loaded from the database!
Notice that the restaurant cards now display their actual GCS images (since the database records contain the public GCS URLs we uploaded earlier!).
8. Vibe Coding: Enable Semantic Search
In this section, you will upgrade your application to support AI-powered Semantic Vector Search. Instead of just matching exact keywords, users will be able to search by describing the "vibe" or experience they are looking for (e.g. "romantic dinner spot" or "quick bite after clubbing").
The Task
You will instruct the agent to enable semantic search on the restaurants table. The agent will leverage the add-vector-search-alloydb custom skill in the repository to automatically handle the database extensions, Agent Platform model registration, embedding generation, and query updates.
In Antigravity Agent chat, copy and paste the following prompt and press Enter:
Upgrade our database to support Semantic Vector Search on the restaurants table based on the description column. Then, update our frontend search query to use vector similarity search.
Observes the agent as it executes the task:
- It will connect to AlloyDB and enable the vector (pgvector) and google_ml_integration extensions.
- It will register the Agent Platform embedding model (text-embedding-004) inside the database.
- It will add a new embedding column to the restaurants table.
- It will run an in-database query to generate embeddings for all 100 restaurant descriptions.
- It will update the frontend code to generate an embedding for the user's search query and perform a vector similarity search using the cosine distance operator (<=>).
Verification
Redeploy the updated code to Cloud Run.
In the Antigravity IDE integrated terminal, run the deployment command (replace the placeholders with your actual values):
gcloud run deploy berlin-gastronomy-guide \
  --source frontend/ \
  --network=default \
  --subnet=default \
--set-env-vars="DB_HOST=[YOUR_ALLOYDB_PRIVATE_IP],DB_USER=postgres,DB_PASS=[YOUR_PASSWORD],DB_NAME=postgres" \
  --allow-unauthenticated \
  --region=us-central1
Once the deployment completes, open the Service URL in your browser.
Test semantic search by entering a natural language description, such as:
- "a romantic dinner spot"
- "quick bite after clubbing"
Notice that it returns highly relevant restaurants (like Cafe Clärchens or Burgermeister) even if the exact words "romantic" or "clubbing" are not present in their name or description!
9. Vibe Coding: Database Optimization
As your application grows, the database must be optimized to handle large volumes of data (100K+ rows) and high concurrent search traffic. In this final step, you will treat your agent as a Virtual Database Administrator (DBA) to analyze and optimize your database schema.
The Task
You will ask the agent to act as a Principal Database Architect, analyze the current schema, and recommend optimizations. Once you review and approve the recommendations, the agent will use its optimize-database-alloydb custom skill to automatically apply them.
Act as a Principal Database Architect. Our semantic search is working, but we need to optimize the database for production scale. Analyze our current schema. What are the top 2 database-schema optimizations you recommend we implement right now? Explain them to me and wait for my approval before modifying the database.
The agent will analyze the database and respond with two recommendations:
- HNSW Index: An Approximate Nearest Neighbor (ANN) index on the embedding column to make vector similarity queries extremely fast.
- Table Partitioning: Partitioning the restaurants table (e.g., List Partitioning by neighborhood) to improve query performance and manageability.
Review the explanations. Once you are ready, reply to the agent in the chat:
Approved, please apply these optimizations.
Observes the agent as it executes the task:
- It will create the HNSW index on the embedding column.
- It will partition the restaurants table by neighborhood, creating child partition tables for each neighborhood and migrating the existing data.
Verification
Ask the agent to verify that the optimizations were successfully applied. In the Agent Chat, ask:
Show me the list of partitions for the restaurants table and the indexes on it.
The agent will query the database catalog and display the new partition structure (e.g., restaurants_mitte, restaurants_kreuzberg) and the HNSW index, confirming that your database is now fully optimized for production!
10. Challenge: Add Reviews and Rating
Now it's your turn to put your Vibe Coding skills to the test! In this challenge, you will extend the Berlin Gastronomy Guide to support customer reviews and star ratings.
The Task
Instead of following a copy-paste prompt, write your own prompt in the Antigravity Agent Chat to implement the following features:
- Database Schema: Create a new
reviewstable linked to therestaurantstable. It should store a rating (an integer from 1 to 5) and a short text comment. - Data Generation: Generate 3-4 realistic customer reviews for each of the 100 restaurants in the database.
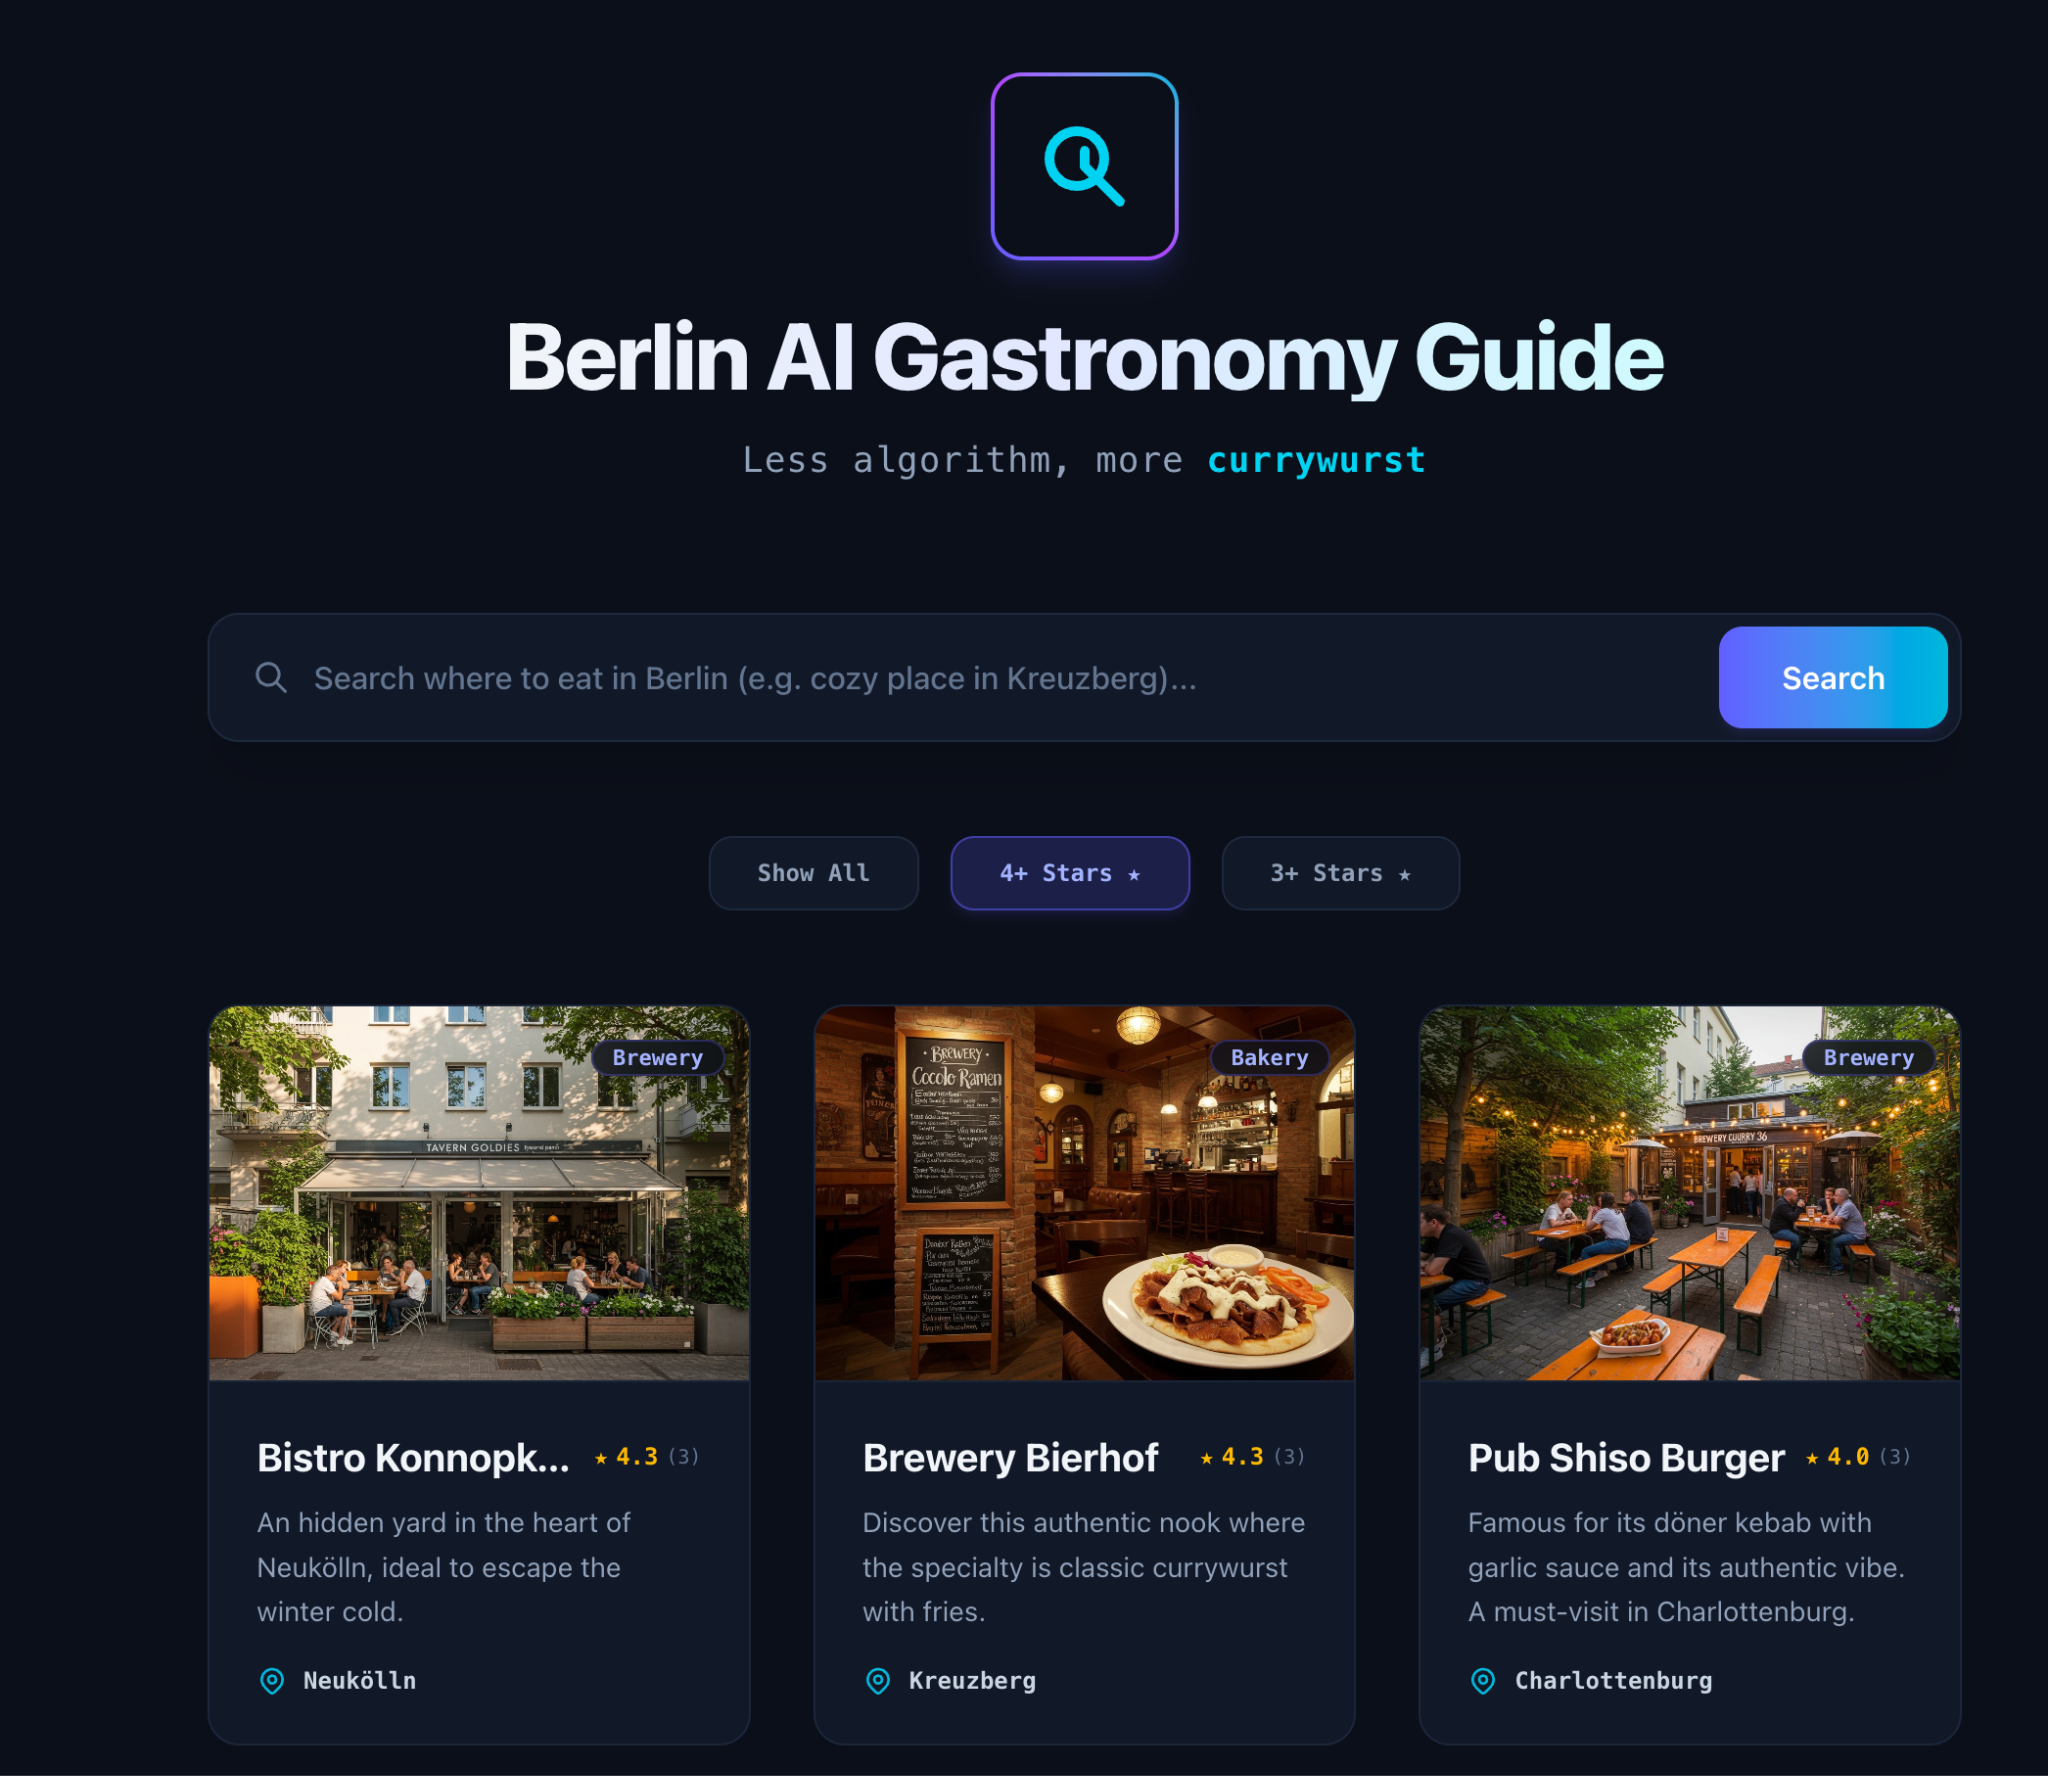
- Frontend Integration: Update the Next.js frontend to calculate and display the average star rating (e.g.,
⭐⭐⭐⭐☆) on each restaurant card. - Filtering: Add a dropdown filter at the top of the page to filter restaurants by their rating (e.g., "Show All", "4+ Stars", "3+ Stars").
Verification
Once the agent completes the task, redeploy your application to Cloud Run (replace the placeholders with your actual values) from Antigravity IDE integrated terminal:
gcloud run deploy berlin-gastronomy-guide \
  --source frontend/ \
  --network=default \
  --subnet=default \
--set-env-vars="DB_HOST=[YOUR_ALLOYDB_PRIVATE_IP],DB_USER=postgres,DB_PASS=[YOUR_PASSWORD],DB_NAME=postgres" \
  --allow-unauthenticated \
  --region=us-central1
Once the deployment completes, refresh your browser and verify that you star rating on the cards
 .
.
11. Results
Having completed the steps, you have successfully built and optimized a next-generation database-backed AI application using Vibe Coding. This section highlights the core architectural capabilities you have implemented:
Agentic Database Integration (Model Context Protocol)
Traditionally, writing database code is a manual process of context-switching between your IDE, documentation, and database clients.
In this lab, you used Model Context Protocol (MCP) Toolbox to bridge this gap. By exposing database schema inspection and SQL execution as tools directly to the AI agent, the agent was able to:
- Inspect raw CSV data and design the database schema.
- Generate and execute the DDL to create tables.
- Wire the connection pool in the Next.js application.
This shows how MCP makes database development a conversational, high-speed experience while keeping the developer in full control within the IDE.
In-Database AI (Agent Platform & Semantic Search)
Your application leverages AlloyDB's native integration with Google Cloud's Agent Platform to generate vector embeddings directly inside the database using SQL:
- Online Embedding Generation: Instead of pulling data out to an external Python service, AlloyDB calls the text-embedding-004 model in-database via SQL functions.
- Semantic Vector Search: By using the pgvector extension and the cosine distance operator (<=>), the agent can match the user's natural language "vibe" (e.g. "romantic dinner") to the nearest vector representation in the restaurant catalog, returning semantically relevant results in milliseconds.
Production-Grade Database Optimization (HNSW & Partitioning)
To ensure the application can scale to 100K+ rows and handle high traffic, you acted as a Virtual DBA to apply two advanced database optimizations:
- HNSW (Hierarchical Navigable Small World) Index: You created an HNSW index on the vector column. Unlike flat indexes, HNSW builds a multi-layered graph that allows extremely fast approximate nearest neighbor (ANN) searches with high recall.
- Declarative Table Partitioning: You partitioned the restaurants table by neighborhood. This ensures that queries targeting a specific area only scan the relevant partition rather than the entire table, drastically reducing disk I/O and query latency.
As application developers, we often shy away from complex database configurations, vector mathematics, and deep indexing strategies because they require specialized DBA expertise. By leveraging Vibe Coding with an agentic IDE, we bridge this gap. We can now confidently design, build, and optimize production-grade database applications using natural language—significantly accelerating our development cycle and letting us focus on what matters most: building amazing user experiences.
12. Clean Up
To avoid incurring charges to your Google Cloud account for the resources used in this lab, follow these steps:
- In the Google Cloud console, go to the Manage resources page.
- In the project list, select the project that you want to delete, and then click Delete.
- In the dialog, type the project ID, and then click Shut down to delete the project.
13. Congratulations
You have successfully built and deployed a data-driven, AI-powered application using Vibe Coding!
In this lab, you:
- Provisioned an AlloyDB database with both Private and Public IP access.
- Connected your Antigravity IDE directly to the database using the Model Context Protocol (MCP) Toolbox.
- Used natural language to ingest a CSV catalog, wire a Next.js frontend to the database, and deploy it to Cloud Run.
- Enabled in-database Agent Platform integration to generate vector embeddings and perform semantic search.
- Acted as a Virtual DBA to optimize your database for production scale using HNSW indexing and Table Partitioning.
All of this was accomplished through natural conversation with your AI agent, without writing a single line of manual SQL or opening external database clients!
For more information, refer to product docs: