
เกี่ยวกับ Codelab นี้
1 ข้อควรทราบก่อนที่จะเริ่มต้น
Web Authentication API หรือที่รู้จักกันในชื่อ WebAuthn ช่วยให้คุณสร้างและใช้ข้อมูลเข้าสู่ระบบที่มีขอบเขตระดับสาธารณะในการตรวจสอบสิทธิ์ผู้ใช้
API รองรับการใช้ Authenticator ของ BLE, NFC และ U2F หรือ FIDO2 ที่โรมมิ่งผ่าน USB หรือที่เรียกว่าคีย์ความปลอดภัย รวมถึง Authenticator ของแพลตฟอร์มที่ช่วยให้ผู้ใช้ตรวจสอบสิทธิ์ด้วยลายนิ้วมือหรือการล็อกหน้าจอได้
ใน Codelab นี้ คุณจะสร้างเว็บไซต์ที่มีฟังก์ชันการตรวจสอบสิทธิ์ซ้ําที่เรียบง่ายซึ่งใช้เซ็นเซอร์ลายนิ้วมือ การตรวจสอบสิทธิ์อีกครั้งจะปกป้องข้อมูลบัญชีเนื่องจากผู้ใช้ต้องที่ลงชื่อเข้าใช้เว็บไซต์แล้วต้องตรวจสอบสิทธิ์อีกครั้งเมื่อพยายามป้อนส่วนสําคัญของเว็บไซต์หรือกลับมาเข้าชมเว็บไซต์หลังจากระยะเวลาหนึ่ง
สิ่งที่ต้องมีก่อน
- ความเข้าใจเบื้องต้นเกี่ยวกับวิธีการทํางานของ WebAuthn
- ทักษะการเขียนโปรแกรมเบื้องต้นด้วย JavaScript
สิ่งที่คุณจะทํา
- สร้างเว็บไซต์ที่มีฟังก์ชันการตรวจสอบสิทธิ์ซ้ําที่เรียบง่ายซึ่งใช้เซ็นเซอร์ลายนิ้วมือ
สิ่งที่ต้องมี
- อุปกรณ์เครื่องใดเครื่องหนึ่งต่อไปนี้:
- อุปกรณ์ Android ควรมีเซ็นเซอร์ไบโอเมตริก
- iPhone หรือ iPad ที่ใช้ Touch ID หรือ Face ID ใน iOS 14 ขึ้นไป
- MacBook Pro หรือ Air ที่มี Touch ID ใน macOS Big Sur หรือสูงกว่า
- Windows 10 19H1 ขึ้นไปที่มีการตั้งค่า Windows Hello
- เบราว์เซอร์ใดเบราว์เซอร์หนึ่งต่อไปนี้
- Google Chrome 67 ขึ้นไป
- Microsoft Edge 85 ขึ้นไป
- Safari 14 ขึ้นไป
2 ตั้งค่า
ใน Codelab นี้ คุณจะใช้บริการชื่อ glitch ซึ่งเป็นที่ที่คุณจะแก้ไขโค้ดฝั่งไคลเอ็นต์และฝั่งเซิร์ฟเวอร์ด้วย JavaScript และใช้งานได้ทันที
ไปที่ https://glitch.com/editupload/webauthn-codelab-start
ดูวิธีการทำงาน
ทําตามขั้นตอนต่อไปนี้เพื่อดูสถานะเริ่มต้นของเว็บไซต์
- คลิก
 แสดง >
  ในหน้าต่างใหม่เพื่อดูเว็บไซต์ที่เผยแพร่อยู่
 - ป้อนชื่อผู้ใช้ที่ต้องการ แล้วคลิกถัดไป
- ป้อนรหัสผ่าน แล้วคลิกลงชื่อเข้าใช้
ระบบจะไม่สนใจรหัสผ่าน แต่คุณยังตรวจสอบสิทธิ์ต่อไป ระบบจะนําคุณไปที่หน้าแรก
- คลิกลองทําการตรวจสอบสิทธิ์อีกครั้ง แล้วทําตามขั้นตอนที่ 2, 3 และ 4 ซ้ํา
- คลิกออกจากระบบ
โปรดอย่าลืมว่าคุณต้องป้อนรหัสผ่านทุกครั้งที่พยายามลงชื่อเข้าใช้ วิธีนี้จะจําลองผู้ใช้ที่ต้องตรวจสอบสิทธิ์อีกครั้งก่อนที่จะเข้าถึงส่วนสําคัญของเว็บไซต์ได้
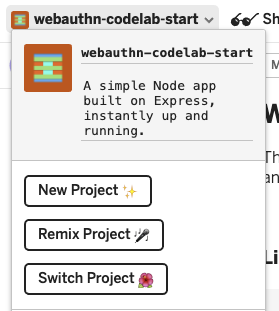
รีมิกซ์โค้ด
- ไปที่ WebAuthn / FIDO2 API Codelab
- คลิกชื่อโปรเจ็กต์ > Remix Project
 เพื่อแยกโปรเจ็กต์และดําเนินการต่อในเวอร์ชันของคุณเองที่ URL ใหม่
3 ลงทะเบียนข้อมูลรับรองด้วยลายนิ้วมือ
คุณต้องลงทะเบียนข้อมูลรับรองที่สร้างโดย UVPA ซึ่งเป็น Authenticator ที่รวมอยู่ในอุปกรณ์และยืนยันตัวตนของผู้ใช้ ซึ่งโดยปกติจะเห็นเป็นเซ็นเซอร์ลายนิ้วมือ ทั้งนี้ขึ้นอยู่กับอุปกรณ์ของผู้ใช้
คุณเพิ่มฟีเจอร์นี้ลงในหน้า /home โดยทําดังนี้
สร้างฟังก์ชัน registerCredential()
สร้างฟังก์ชัน registerCredential() ซึ่งจะลงทะเบียนข้อมูลรับรองใหม่
public/client.js
export const registerCredential = async () => {

};
รับคําท้าและตัวเลือกอื่นๆ จากปลายทางเซิร์ฟเวอร์
ก่อนขอให้ผู้ใช้ลงทะเบียนข้อมูลเข้าสู่ระบบใหม่ ให้ขอให้พารามิเตอร์ส่งพารามิเตอร์ผ่าน WebAuthn รวมถึงการยืนยันตัวตนด้วย โชคดีที่คุณมีปลายทางเซิร์ฟเวอร์ที่ตอบสนองด้วยพารามิเตอร์ดังกล่าวอยู่แล้ว
เพิ่มโค้ดต่อไปนี้ลงใน registerCredential()
public/client.js
const opts = {
  attestation: 'none',
  authenticatorSelection: {
    authenticatorAttachment: 'platform',
    userVerification: 'required',
    requireResidentKey: false
  }
};

const options = await _fetch('/auth/registerRequest', opts);
โปรโตคอลระหว่างเซิร์ฟเวอร์และไคลเอ็นต์ไม่ได้เป็นส่วนหนึ่งของข้อกําหนด WebAuthn แต่ Codelab นี้ได้รับการออกแบบมาให้สอดคล้องกับข้อกําหนดของ WebAuthn และออบเจ็กต์ JSON ที่คุณส่งไปยังเซิร์ฟเวอร์จะคล้ายกับ PublicKeyCredentialCreationOptions มาก คุณจึงใช้งานได้อย่างง่ายดาย ตารางต่อไปนี้มีพารามิเตอร์สําคัญที่คุณส่งไปยังเซิร์ฟเวอร์และอธิบายหน้าที่ของพารามิเตอร์
พารามิเตอร์ | คำอธิบาย | ||
| ค่ากําหนดสําหรับเอกสารรับรอง— | ||
| อาร์เรย์ของ | ||
|
| กรอง Authenticator ที่มีอยู่ หากต้องการให้มี Authenticator แนบไว้กับอุปกรณ์ ให้ใช้ " | |
| ระบุว่าการยืนยันผู้ใช้ Authenticator คือ " | ||
| ใช้ | ||
ดูข้อมูลเพิ่มเติมเกี่ยวกับตัวเลือกเหล่านี้ได้ที่ 5.4 ตัวเลือกสําหรับการสร้างข้อมูลเข้าสู่ระบบ (พจนานุกรม PublicKeyCredentialCreationOptions)
ต่อไปนี้เป็นตัวอย่างตัวเลือกที่คุณได้รับจากเซิร์ฟเวอร์
{
  "rp": {
    "name": "WebAuthn Codelab",
    "id": "webauthn-codelab.glitch.me"
  },
  "user": {
    "displayName": "User Name",
    "id": "...",
    "name": "test"
  },
  "challenge": "...",
  "pubKeyCredParams": [
    {
      "type": "public-key",
      "alg": -7
    }, {
      "type": "public-key",
      "alg": -257
    }
  ],
  "timeout": 1800000,
  "attestation": "none",
  "excludeCredentials": [
    {
      "id": "...",
      "type": "public-key",
      "transports": [
        "internal"
      ]
    }
  ],
  "authenticatorSelection": {
    "authenticatorAttachment": "platform",
    "userVerification": "required"
  }
}
สร้างข้อมูลรับรอง
- เนื่องจากระบบจะนําส่งตัวเลือกเหล่านี้ที่เข้ารหัสไปยังโปรโตคอล HTTP ดังนั้นให้แปลงพารามิเตอร์บางรายการกลับไปเป็นไบนารี โดยเฉพาะ
user.id,challengeและอินสแตนซ์ของidที่รวมอยู่ในอาร์เรย์excludeCredentialsดังนี้
public/client.js
options.user.id = base64url.decode(options.user.id);
options.challenge = base64url.decode(options.challenge);

if (options.excludeCredentials) {
  for (let cred of options.excludeCredentials) {
    cred.id = base64url.decode(cred.id);
  }
}
- เรียกใช้เมธอด
navigator.credentials.create()เพื่อสร้างข้อมูลเข้าสู่ระบบใหม่
การเรียกนี้ทําให้เบราว์เซอร์โต้ตอบกับตัวตรวจสอบสิทธิ์และพยายามยืนยันตัวตนกับ UVPA
public/client.js
const cred = await navigator.credentials.create({
  publicKey: options,
});
เมื่อผู้ใช้ยืนยันตัวตนแล้ว คุณจะได้รับออบเจ็กต์ข้อมูลเข้าสู่ระบบที่จะส่งไปให้เซิร์ฟเวอร์และลงทะเบียน Authenticator ได้
ลงทะเบียนข้อมูลรับรองไปยังปลายทางเซิร์ฟเวอร์
ตัวอย่างออบเจ็กต์ข้อมูลเข้าสู่ระบบที่คุณควรจะได้รับ
{
  "id": "...",
  "rawId": "...",
  "type": "public-key",
  "response": {
    "clientDataJSON": "...",
    "attestationObject": "..."
  }
}
- เช่นเดียวกับเมื่อคุณได้รับออบเจ็กต์ตัวเลือกสําหรับการลงทะเบียนข้อมูลเข้าสู่ระบบ ให้เข้ารหัสพารามิเตอร์ไบนารีของข้อมูลเข้าสู่ระบบเพื่อให้นําส่งข้อมูลไปยังเซิร์ฟเวอร์เป็นสตริงได้
public/client.js
const credential = {};
credential.id = cred.id;
credential.rawId = base64url.encode(cred.rawId);
credential.type = cred.type;

if (cred.response) {
  const clientDataJSON =
    base64url.encode(cred.response.clientDataJSON);
  const attestationObject =
    base64url.encode(cred.response.attestationObject);
  credential.response = {
    clientDataJSON,
    attestationObject,
  };
}
- จัดเก็บรหัสข้อมูลเข้าสู่ระบบไว้ในเครื่องเพื่อใช้ตรวจสอบสิทธิ์เมื่อเข้าสู่ระบบอีกครั้ง
public/client.js
localStorage.setItem(`credId`, credential.id);
- ส่งออบเจ็กต์ไปยังเซิร์ฟเวอร์ และหากมีการส่งคืน
HTTP code 200ให้พิจารณาข้อมูลเข้าสู่ระบบใหม่ว่าลงทะเบียนเรียบร้อยแล้ว
public/client.js
return await _fetch('/auth/registerResponse' , credential);
ตอนนี้คุณมีฟังก์ชัน registerCredential() ที่สมบูรณ์แล้ว
รหัสสุดท้ายของส่วนนี้
public/client.js
...
export const registerCredential = async () => {
  const opts = {
    attestation: 'none',
    authenticatorSelection: {
      authenticatorAttachment: 'platform',
      userVerification: 'required',
      requireResidentKey: false
    }
  };

  const options = await _fetch('/auth/registerRequest', opts);

  options.user.id = base64url.decode(options.user.id);
  options.challenge = base64url.decode(options.challenge);

  if (options.excludeCredentials) {
    for (let cred of options.excludeCredentials) {
      cred.id = base64url.decode(cred.id);
    }
  }

  const cred = await navigator.credentials.create({
    publicKey: options
  });

  const credential = {};
  credential.id =     cred.id;
  credential.rawId =  base64url.encode(cred.rawId);
  credential.type =   cred.type;

  if (cred.response) {
    const clientDataJSON =
      base64url.encode(cred.response.clientDataJSON);
    const attestationObject =
      base64url.encode(cred.response.attestationObject);
    credential.response = {
      clientDataJSON,
      attestationObject
    };
  }

  localStorage.setItem(`credId`, credential.id);

  return await _fetch('/auth/registerResponse' , credential);
};
...
4 สร้าง UI เพื่อลงทะเบียน รับ และนําข้อมูลเข้าสู่ระบบออก
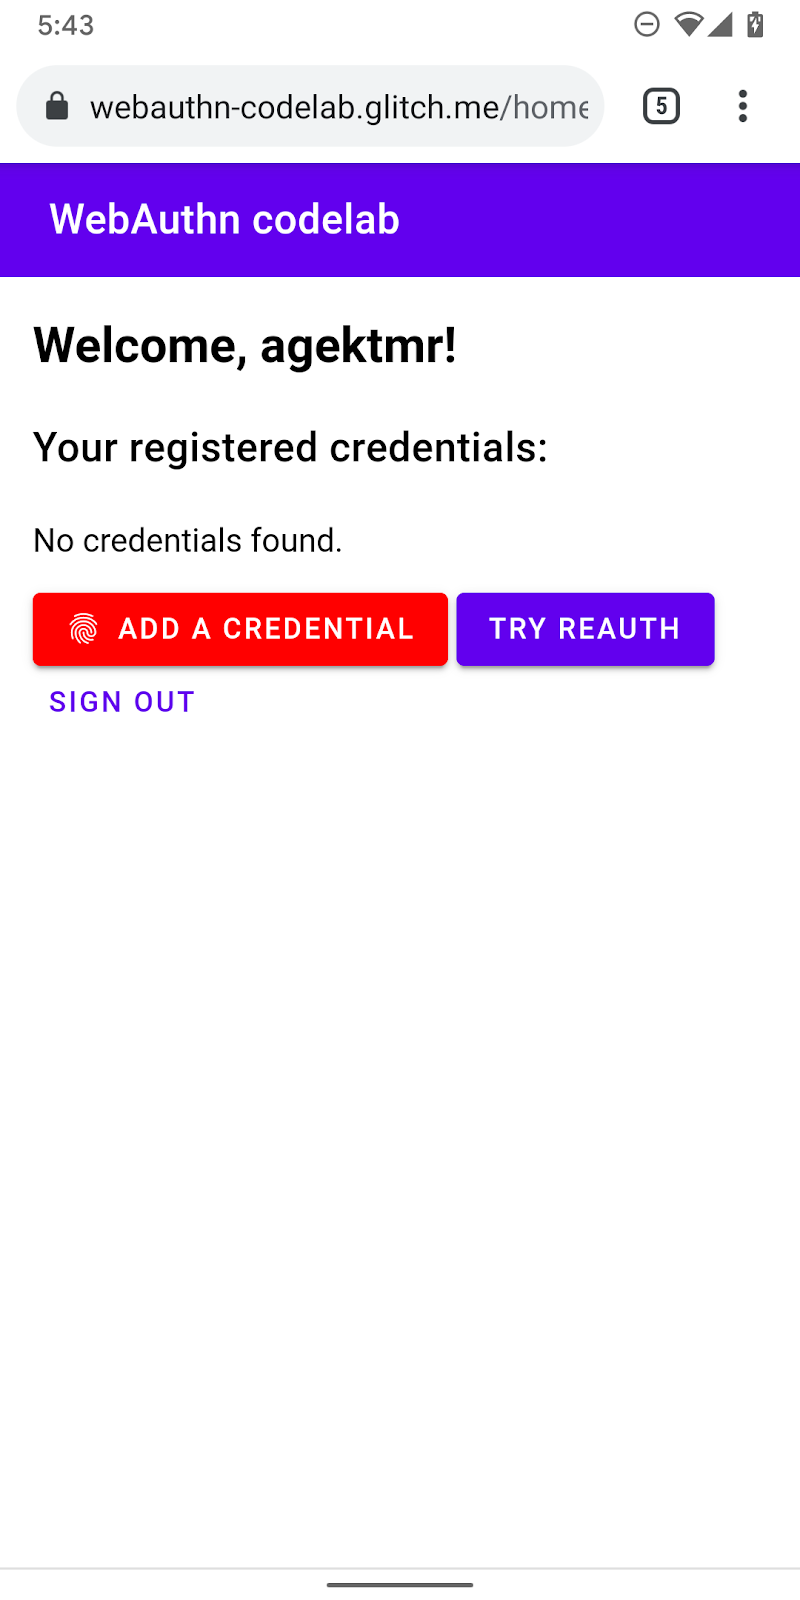
คุณควรมีรายการข้อมูลเข้าสู่ระบบและปุ่มที่ลงทะเบียนแล้วเพื่อนําข้อมูลออก
สร้างตัวยึดตําแหน่ง UI
เพิ่ม UI เพื่อแสดงข้อมูลรับรองและปุ่มสําหรับลงทะเบียนข้อมูลรับรองใหม่ คุณนําคลาส hidden ออกจากข้อความเตือนหรือปุ่มเพื่อบันทึกข้อมูลเข้าสู่ระบบใหม่ได้ ทั้งนี้ขึ้นอยู่กับฟีเจอร์นี้ว่าพร้อมใช้งานหรือไม่ ul#list เป็นตัวยึดตําแหน่งสําหรับการเพิ่มรายการข้อมูลรับรองที่ลงทะเบียน
view/home.html
<p id="uvpa_unavailable" class="hidden">
  This device does not support User Verifying Platform Authenticator. You can't register a credential.
</p>
<h3 class="mdc-typography mdc-typography--headline6">
  Your registered credentials:
</h3>
<section>
  <div id="list"></div>
</section>
<mwc-button id="register" class="hidden" icon="fingerprint" raised>Add a credential</mwc-button>
การตรวจหาฟีเจอร์และความพร้อมใช้งานของ UVPA
ทําตามขั้นตอนต่อไปนี้เพื่อตรวจสอบความพร้อมใช้งานของ UVPA
- ตรวจสอบ
window.PublicKeyCredentialเพื่อดูว่า WebAuthn พร้อมใช้งานหรือไม่ - โทรติดต่อ
PublicKeyCredential.isUserVerifyingPlatformAuthenticatorAvailable()เพื่อตรวจสอบว่า UVPA พร้อมใช้งานหรือไม่ หากมี ให้แสดงปุ่มเพื่อลงทะเบียนข้อมูลรับรองใหม่ โดยจะแสดงข้อความเตือนหากข้อความนั้นไม่มี
view/home.html
const register = document.querySelector('#register');

if (window.PublicKeyCredential) {
  PublicKeyCredential.isUserVerifyingPlatformAuthenticatorAvailable()
  .then(uvpaa => {
    if (uvpaa) {
      register.classList.remove('hidden');
    } else {
      document
        .querySelector('#uvpa_unavailable')
        .classList.remove('hidden');
    }
  });
} else {
  document
    .querySelector('#uvpa_unavailable')
    .classList.remove('hidden');
}
รับและแสดงรายการข้อมูลเข้าสู่ระบบ
- สร้างฟังก์ชัน
getCredentials()เพื่อรับข้อมูลเข้าสู่ระบบที่ลงทะเบียนและแสดงในรายการ โชคดีที่คุณมีปลายทางที่ใช้ง่ายบนเซิร์ฟเวอร์/auth/getKeysแล้ว ซึ่งคุณสามารถดึงข้อมูลเข้าสู่ระบบที่ลงทะเบียนแล้วสําหรับผู้ใช้ที่ลงชื่อเข้าใช้ได้
JSON ที่แสดงมีข้อมูลเข้าสู่ระบบ เช่น id และ publicKey คุณจะสร้าง HTML เพื่อแสดงให้ผู้ใช้เห็นได้
view/home.html
const getCredentials = async () => {
  const res = await _fetch('/auth/getKeys');
  const list = document.querySelector('#list');
  const creds = html`${res.credentials.length > 0 ? res.credentials.map(cred => html`
    <div class="mdc-card credential">
      <span class="mdc-typography mdc-typography--body2">${cred.credId}</span>
      <pre class="public-key">${cred.publicKey}</pre>
      <div class="mdc-card__actions">
        <mwc-button id="${cred.credId}" @click="${removeCredential}" raised>Remove</mwc-button>
      </div>
    </div>`) : html`
    <p>No credentials found.</p>
    `}`;
  render(creds, list);
};
- เรียกใช้
getCredentials()เพื่อแสดงข้อมูลเข้าสู่ระบบที่พร้อมใช้งานทันทีที่ผู้ใช้ไปถึงหน้า/home
view/home.html
getCredentials();
นําข้อมูลเข้าสู่ระบบออก
ในรายการข้อมูลเข้าสู่ระบบ คุณต้องเพิ่มปุ่มเพื่อนําข้อมูลรับรองแต่ละรายการออก คุณสามารถส่งคําขอไปยัง /auth/removeKey พร้อมพารามิเตอร์การค้นหา credId เพื่อนําคําขอออกได้
public/client.js
export const unregisterCredential = async (credId) => {
  localStorage.removeItem('credId');
  return _fetch(`/auth/removeKey?credId=${encodeURIComponent(credId)}`);
};
- เพิ่ม
unregisterCredentialต่อท้ายคําสั่งimportที่มีอยู่
view/home.html
import { _fetch, unregisterCredential } from '/client.js';
- เพิ่มฟังก์ชันในการโทรเมื่อผู้ใช้คลิกนําออก
view/home.html
const removeCredential = async e => {
  try {
    await unregisterCredential(e.target.id);
    getCredentials();
  } catch (e) {
    alert(e);
  }
};
ลงทะเบียนข้อมูลรับรอง
คุณสามารถเรียกใช้ registerCredential() เพื่อลงทะเบียนข้อมูลรับรองใหม่เมื่อผู้ใช้คลิกเพิ่มข้อมูลเข้าสู่ระบบ
- เพิ่ม
registerCredentialต่อท้ายคําสั่งimportที่มีอยู่
view/home.html
import { _fetch, registerCredential, unregisterCredential } from '/client.js';
- เรียกใช้
registerCredential()ด้วยตัวเลือกสําหรับnavigator.credentials.create()
อย่าลืมต่ออายุรายการข้อมูลเข้าสู่ระบบโดยโทรไปที่ getCredentials() หลังจากลงทะเบียน
view/home.html
register.addEventListener('click', e => {
  registerCredential().then(user => {
    getCredentials();
  }).catch(e => alert(e));
});
ตอนนี้คุณควรลงทะเบียนข้อมูลเข้าสู่ระบบใหม่และแสดงข้อมูลเข้าสู่ระบบได้แล้ว ลองใช้งานได้ในเว็บไซต์ที่เผยแพร่อยู่
รหัสสุดท้ายของส่วนนี้
view/home.html
...
      <p id="uvpa_unavailable" class="hidden">
        This device does not support User Verifying Platform Authenticator. You can't register a credential.
      </p>
      <h3 class="mdc-typography mdc-typography--headline6">
        Your registered credentials:
      </h3>
      <section>
        <div id="list"></div>
        <mwc-fab id="register" class="hidden" icon="add"></mwc-fab>
      </section>
      <mwc-button raised><a href="/reauth">Try reauth</a></mwc-button>
      <mwc-button><a href="/auth/signout">Sign out</a></mwc-button>
    </main>
    <script type="module">
      import { _fetch, registerCredential, unregisterCredential } from '/client.js';
      import { html, render } from 'https://unpkg.com/lit-html@1.0.0/lit-html.js?module';

      const register = document.querySelector('#register');

      if (window.PublicKeyCredential) {
        PublicKeyCredential.isUserVerifyingPlatformAuthenticatorAvailable()
        .then(uvpaa => {
          if (uvpaa) {
            register.classList.remove('hidden');
          } else {
            document
              .querySelector('#uvpa_unavailable')
              .classList.remove('hidden');
          }
        });
      } else {
        document
          .querySelector('#uvpa_unavailable')
          .classList.remove('hidden');
      }

      const getCredentials = async () => {
        const res = await _fetch('/auth/getKeys');
        const list = document.querySelector('#list');
        const creds = html`${res.credentials.length > 0 ? res.credentials.map(cred => html`
          <div class="mdc-card credential">
            <span class="mdc-typography mdc-typography--body2">${cred.credId}</span>
            <pre class="public-key">${cred.publicKey}</pre>
            <div class="mdc-card__actions">
              <mwc-button id="${cred.credId}" @click="${removeCredential}" raised>Remove</mwc-button>
            </div>
          </div>`) : html`
          <p>No credentials found.</p>
          `}`;
        render(creds, list);
      };

      getCredentials();

      const removeCredential = async e => {
        try {
          await unregisterCredential(e.target.id);
          getCredentials();
        } catch (e) {
          alert(e);
        }
      };

      register.addEventListener('click', e => {
        registerCredential({
          attestation: 'none',
          authenticatorSelection: {
            authenticatorAttachment: 'platform',
            userVerification: 'required',
            requireResidentKey: false
          }
        })
        .then(user => {
          getCredentials();
        })
        .catch(e => alert(e));
      });
    </script>
...
public/client.js
...
export const unregisterCredential = async (credId) => {
  localStorage.removeItem('credId');
  return _fetch(`/auth/removeKey?credId=${encodeURIComponent(credId)}`);
};
...
5 ตรวจสอบสิทธิ์ผู้ใช้ด้วยลายนิ้วมือ
ตอนนี้คุณได้ลบข้อมูลเข้าสู่ระบบและพร้อมวิธีตรวจสอบสิทธิ์ผู้ใช้แล้ว ตอนนี้คุณจะเพิ่มฟังก์ชันการตรวจสอบสิทธิ์ซ้ําลงในเว็บไซต์แล้ว ประสบการณ์ของผู้ใช้มีดังนี้
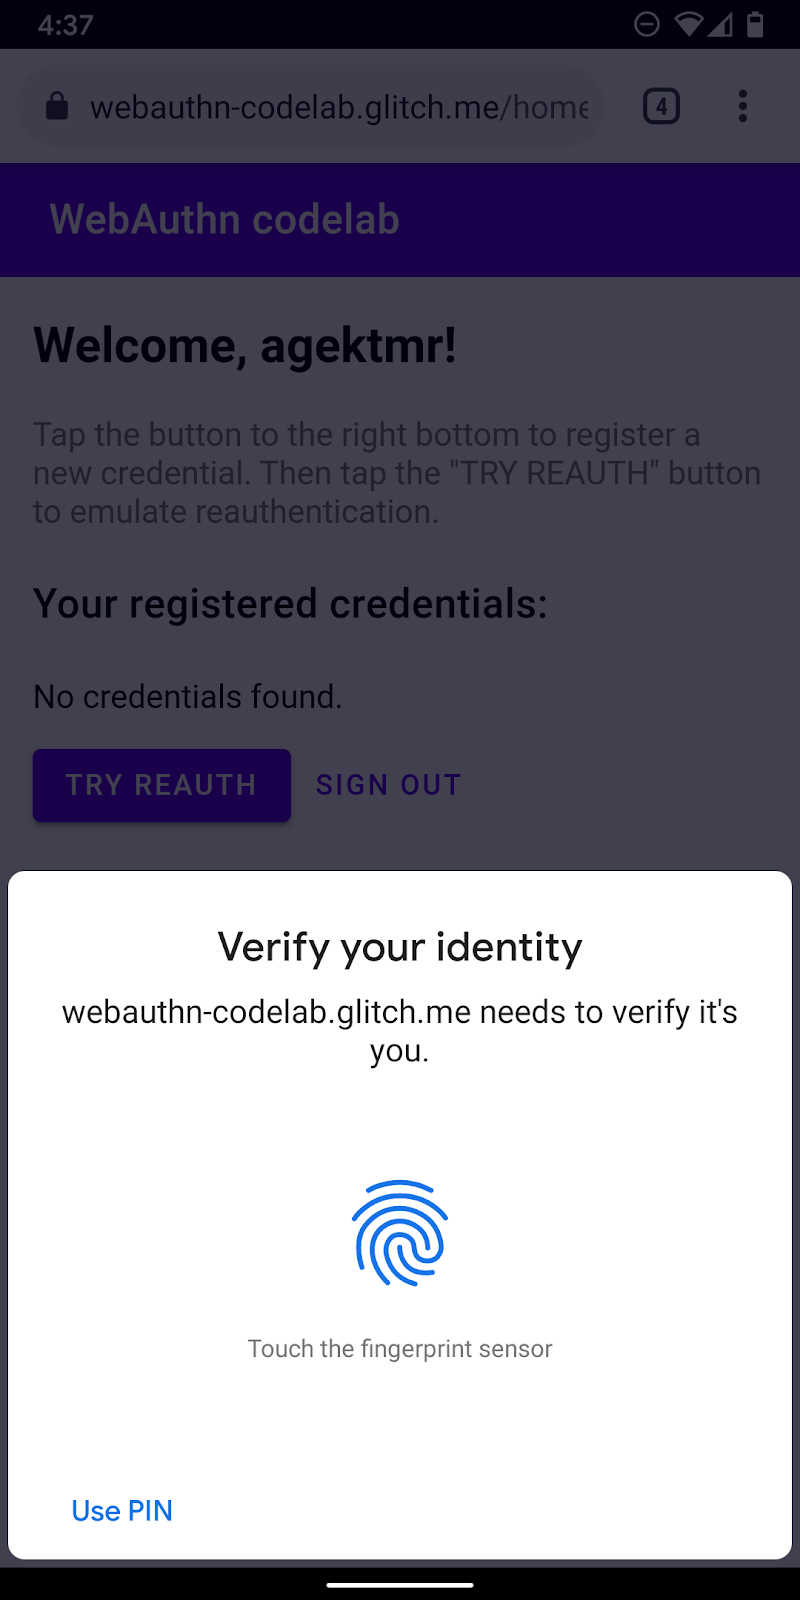
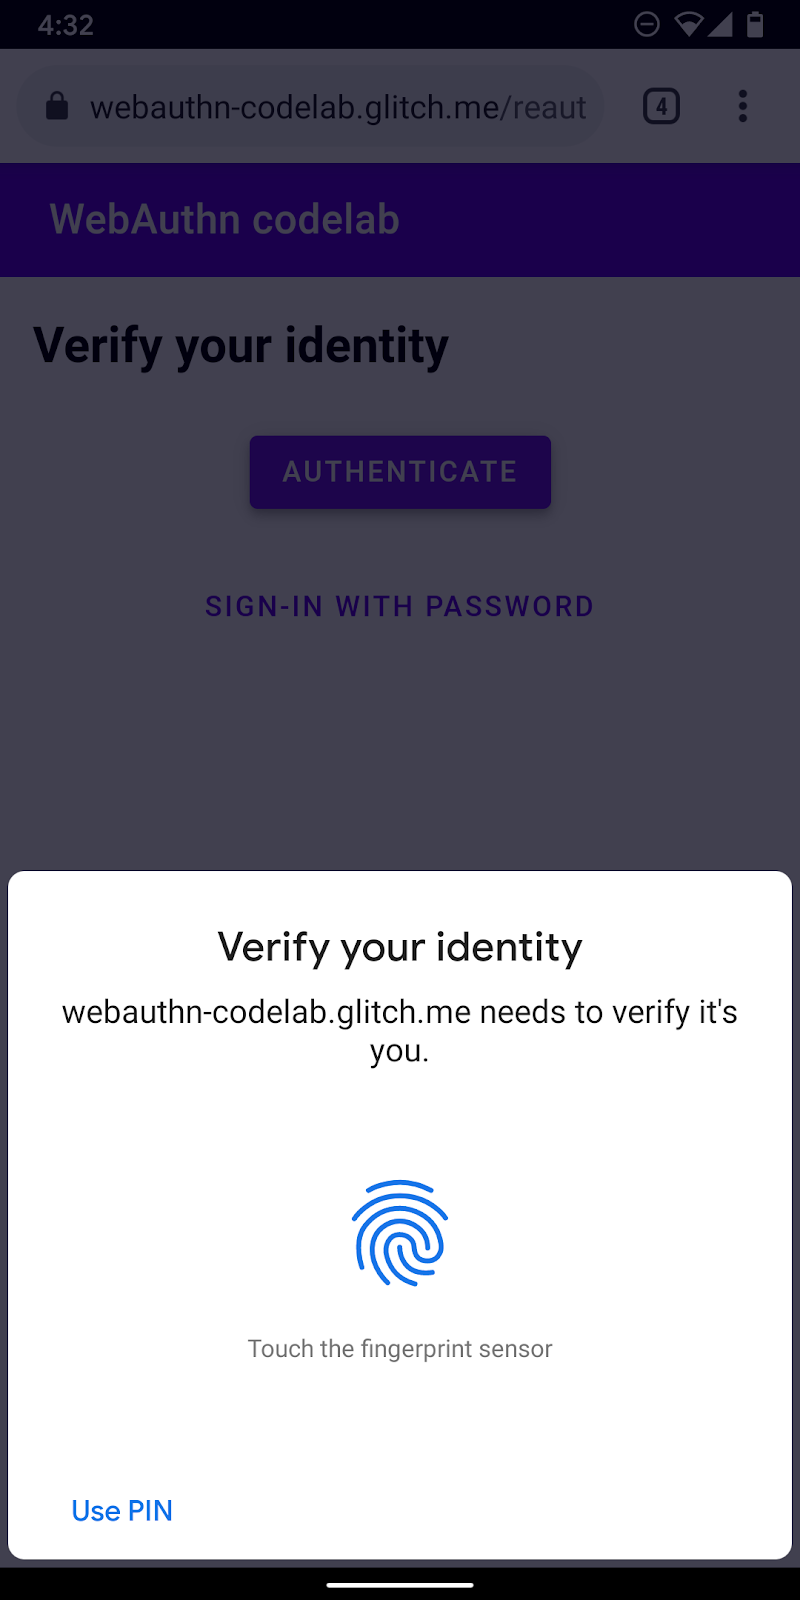
เมื่อผู้ใช้ไปถึงหน้า /reauth ผู้ใช้จะเห็นปุ่มตรวจสอบสิทธิ์หากตรวจสอบสิทธิ์ข้อมูลไบโอเมตริกได้ การตรวจสอบสิทธิ์ด้วยลายนิ้วมือ (UVPA) จะเริ่มต้นเมื่อผู้ใช้แตะตรวจสอบสิทธิ์ ตรวจสอบสิทธิ์เรียบร้อยแล้ว แล้วไปที่หน้า /home หากการตรวจสอบสิทธิ์ด้วยข้อมูลไบโอเมตริกไม่พร้อมใช้งานหรือการตรวจสอบสิทธิ์ด้วยข้อมูลไบโอเมตริกไม่สําเร็จ UI จะกลับไปใช้แบบฟอร์มรหัสผ่านที่มีอยู่
สร้างฟังก์ชัน authenticate()
สร้างฟังก์ชันชื่อ authenticate() ซึ่งจะยืนยันตัวตนของผู้ใช้ด้วยลายนิ้วมือ เพิ่มโค้ด JavaScript ที่นี่
public/client.js
export const authenticate = async () => {

};
รับคําท้าและตัวเลือกอื่นๆ จากปลายทางเซิร์ฟเวอร์
- ก่อนการตรวจสอบสิทธิ์ ให้ตรวจสอบว่าผู้ใช้มีรหัสข้อมูลที่จัดเก็บไว้หรือไม่ และตั้งค่าเป็นพารามิเตอร์การค้นหาหากมี
เมื่อคุณระบุรหัสข้อมูลรับรองพร้อมกับตัวเลือกอื่นๆ เซิร์ฟเวอร์จะสามารถให้ allowCredentials ที่เกี่ยวข้องและจะทําให้การยืนยันของผู้ใช้เชื่อถือได้
public/client.js
const opts = {};

let url = '/auth/signinRequest';
const credId = localStorage.getItem(`credId`);
if (credId) {
  url += `?credId=${encodeURIComponent(credId)}`;
}
- ก่อนขอให้ผู้ใช้ตรวจสอบสิทธิ์ ให้ขอให้เซิร์ฟเวอร์ส่งคําท้าและพารามิเตอร์อื่นๆ กลับมา เรียก
_fetch()โดยใช้optsเป็นอาร์กิวเมนต์ในการส่งคําขอ POST ไปยังเซิร์ฟเวอร์
public/client.js
const options = await _fetch(url, opts);
ตัวอย่างตัวเลือกที่ควรได้รับ (สอดคล้องกับ PublicKeyCredentialRequestOptions)
{
  "challenge": "...",
  "timeout": 1800000,
  "rpId": "webauthn-codelab.glitch.me",
  "userVerification": "required",
  "allowCredentials": [
    {
      "id": "...",
      "type": "public-key",
      "transports": [
        "internal"
      ]
    }
  ]
}
ตัวเลือกที่สําคัญที่สุดคือ allowCredentials เมื่อคุณได้รับตัวเลือกจากเซิร์ฟเวอร์ allowCredentials ควรเป็นออบเจ็กต์เดียวในอาร์เรย์หรืออาร์เรย์ที่ว่างเปล่า โดยขึ้นอยู่กับว่ามีการพบข้อมูลเข้าสู่ระบบที่มีรหัสในพารามิเตอร์การค้นหาในฝั่งเซิร์ฟเวอร์หรือไม่
- แก้ไขสัญญากับ
nullเมื่อallowCredentialsเป็นอาร์เรย์ที่ว่างเปล่าเพื่อให้ UI กลับไปขอรหัสผ่าน
if (options.allowCredentials.length === 0) {
  console.info('No registered credentials found.');
  return Promise.resolve(null);
}
ยืนยันผู้ใช้ในเครื่องและรับข้อมูลเข้าสู่ระบบ
- เนื่องจากระบบจะนําส่งตัวเลือกเหล่านี้ที่เข้ารหัสเพื่อให้โปรโตคอล HTTP แปลงพารามิเตอร์บางรายการกลับไปเป็นไบนารี โดยเฉพาะ
challengeและอินสแตนซ์ของidที่รวมอยู่ในอาร์เรย์allowCredentialsดังนี้
public/client.js
options.challenge = base64url.decode(options.challenge);

for (let cred of options.allowCredentials) {
  cred.id = base64url.decode(cred.id);
}
- เรียกใช้เมธอด
navigator.credentials.get()เพื่อยืนยันตัวตนของผู้ใช้ด้วย UVPA
public/client.js
const cred = await navigator.credentials.get({
  publicKey: options
});
เมื่อผู้ใช้ยืนยันตัวตนแล้ว คุณจะได้รับออบเจ็กต์ข้อมูลเข้าสู่ระบบที่จะส่งให้เซิร์ฟเวอร์และตรวจสอบสิทธิ์ของผู้ใช้ได้
ยืนยันข้อมูลเข้าสู่ระบบ
ตัวอย่างออบเจ็กต์ PublicKeyCredential (response คือ AuthenticatorAssertionResponse) ที่คุณควรได้รับมีดังนี้
{
  "id": "...",
  "type": "public-key",
  "rawId": "...",
  "response": {
    "clientDataJSON": "...",
    "authenticatorData": "...",
    "signature": "...",
    "userHandle": ""
  }
}
- เข้ารหัสพารามิเตอร์แบบไบนารีของข้อมูลเข้าสู่ระบบเพื่อให้ส่งไปยังเซิร์ฟเวอร์เป็นสตริงได้
public/client.js
const credential = {};
credential.id = cred.id;
credential.type = cred.type;
credential.rawId = base64url.encode(cred.rawId);

if (cred.response) {
  const clientDataJSON =
    base64url.encode(cred.response.clientDataJSON);
  const authenticatorData =
    base64url.encode(cred.response.authenticatorData);
  const signature =
    base64url.encode(cred.response.signature);
  const userHandle =
    base64url.encode(cred.response.userHandle);
  credential.response = {
    clientDataJSON,
    authenticatorData,
    signature,
    userHandle,
  };
}
- ส่งออบเจ็กต์ไปยังเซิร์ฟเวอร์ และหากมีการส่งคืน
HTTP code 200ให้พิจารณาว่าผู้ใช้ลงชื่อเข้าใช้สําเร็จ
public/client.js
return await _fetch(`/auth/signinResponse`, credential);
ตอนนี้คุณมีฟังก์ชัน authentication() ที่สมบูรณ์แล้ว
รหัสสุดท้ายของส่วนนี้
public/client.js
...
export const authenticate = async () => {
  const opts = {};

  let url = '/auth/signinRequest';
  const credId = localStorage.getItem(`credId`);
  if (credId) {
    url += `?credId=${encodeURIComponent(credId)}`;
  }

  const options = await _fetch(url, opts);

  if (options.allowCredentials.length === 0) {
    console.info('No registered credentials found.');
    return Promise.resolve(null);
  }

  options.challenge = base64url.decode(options.challenge);

  for (let cred of options.allowCredentials) {
    cred.id = base64url.decode(cred.id);
  }

  const cred = await navigator.credentials.get({
    publicKey: options
  });

  const credential = {};
  credential.id = cred.id;
  credential.type = cred.type;
  credential.rawId = base64url.encode(cred.rawId);

  if (cred.response) {
    const clientDataJSON =
      base64url.encode(cred.response.clientDataJSON);
    const authenticatorData =
      base64url.encode(cred.response.authenticatorData);
    const signature =
      base64url.encode(cred.response.signature);
    const userHandle =
      base64url.encode(cred.response.userHandle);
    credential.response = {
      clientDataJSON,
      authenticatorData,
      signature,
      userHandle,
    };
  }

  return await _fetch(`/auth/signinResponse`, credential);
};
...
6 เปิดใช้การตรวจสอบสิทธิ์อีกครั้ง
UI บิวด์
เมื่อผู้ใช้กลับมา คุณต้องการให้ผู้ใช้ตรวจสอบสิทธิ์อีกครั้งอย่างง่ายดายและปลอดภัยที่สุด หน้านี้คือที่ที่การตรวจสอบสิทธิ์ไบโอเมตริกโดดเด่น อย่างไรก็ตาม อาจมีบางกรณีที่การตรวจสอบสิทธิ์ด้วยข้อมูลไบโอเมตริกอาจไม่ทํางาน
- UVPA ไม่พร้อมใช้งาน
- ผู้ใช้ยังไม่ได้ลงทะเบียนข้อมูลเข้าสู่ระบบในอุปกรณ์
- ระบบจะล้างพื้นที่เก็บข้อมูลและอุปกรณ์จะไม่จดจํารหัสข้อมูลเข้าสู่ระบบอีกต่อไป
- ผู้ใช้ยืนยันตัวตนไม่ได้ด้วยเหตุผลบางอย่าง เช่น เมื่อนิ้วเปียกหรือสวมหน้ากาก
ด้วยเหตุนี้คุณจึงควรให้ตัวเลือกการลงชื่อเข้าใช้อื่นๆ เป็นตัวเลือกสํารอง ใน Codelab นี้ คุณจะใช้โซลูชันรหัสผ่านตามฟอร์ม
- เพิ่ม UI เพื่อแสดงปุ่มการตรวจสอบสิทธิ์ที่เรียกใช้การตรวจสอบสิทธิ์ด้วยข้อมูลไบโอเมตริกนอกเหนือจากแบบฟอร์มรหัสผ่าน
ใช้ชั้นเรียน hidden เพื่อเลือกแสดงและซ่อนคลาสทั้งหมดตามสถานะของผู้ใช้
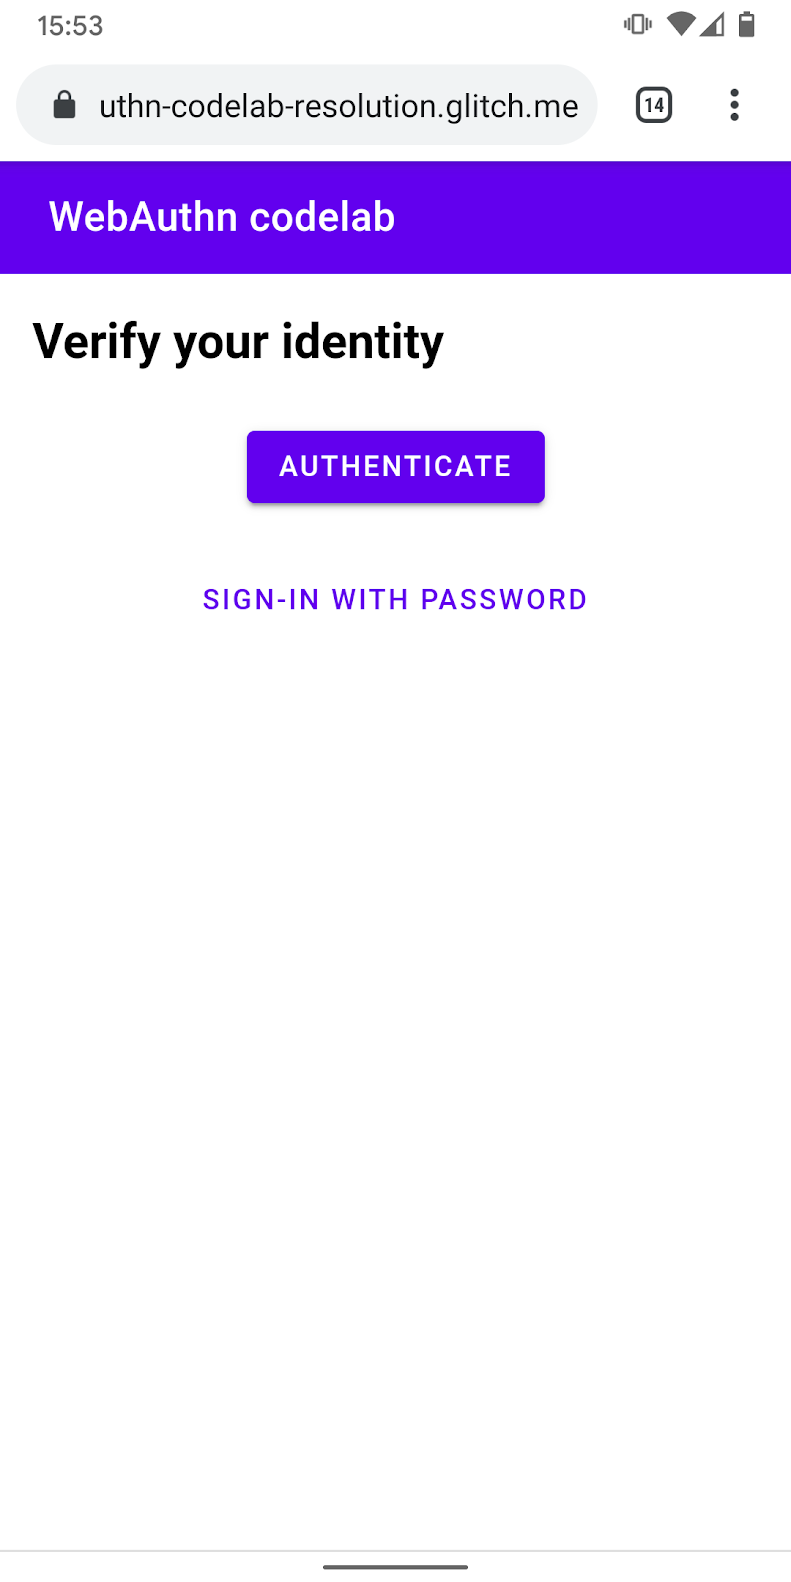
view/reauth.html
<div id="uvpa_available" class="hidden">
  <h2>
    Verify your identity
  </h2>
  <div>
    <mwc-button id="reauth" raised>Authenticate</mwc-button>
  </div>
  <div>
    <mwc-button id="cancel">Sign-in with password</mwc-button>
  </div>
</div>
- เพิ่ม
class="hidden"ลงในแบบฟอร์ม:
view/reauth.html
<form id="form" method="POST" action="/auth/password" class="hidden">
การตรวจหาฟีเจอร์และความพร้อมใช้งานของ UVPA
ผู้ใช้ต้องลงชื่อเข้าใช้ด้วยรหัสผ่านหากเป็นไปตามเงื่อนไขข้อใดข้อหนึ่งต่อไปนี้
- WebAuthn ไม่พร้อมใช้งาน
- UVPA ไม่พร้อมใช้งาน
- ไม่พบรหัสข้อมูลเข้าสู่ระบบสําหรับ UVPA นี้
เลือกแสดงปุ่มการตรวจสอบสิทธิ์หรือซ่อนไว้ ดังนี้
view/reauth.html
if (window.PublicKeyCredential) {
  PublicKeyCredential.isUserVerifyingPlatformAuthenticatorAvailable()
  .then(uvpaa => {
    if (uvpaa && localStorage.getItem(`credId`)) {
      document
        .querySelector('#uvpa_available')
        .classList.remove('hidden');
    } else {
      form.classList.remove('hidden');
    }
  });
} else {
  form.classList.remove('hidden');
}
เปลี่ยนกลับไปเป็นรูปแบบรหัสผ่าน
ผู้ใช้ควรเลือกที่จะลงชื่อเข้าใช้ด้วยรหัสผ่านได้ด้วย
แสดงแบบฟอร์มรหัสผ่านและซ่อนปุ่มการตรวจสอบสิทธิ์เมื่อผู้ใช้คลิกลงชื่อเข้าใช้ด้วยรหัสผ่าน
view/reauth.html
const cancel = document.querySelector('#cancel');
cancel.addEventListener('click', e => {
  form.classList.remove('hidden');
  document
    .querySelector('#uvpa_available')
    .classList.add('hidden');
});

เรียกใช้การตรวจสอบสิทธิ์ข้อมูลไบโอเมตริก
สุดท้าย เปิดใช้การตรวจสอบสิทธิ์ด้วยข้อมูลไบโอเมตริก
- เพิ่ม
authenticateต่อท้ายคําสั่งimportที่มีอยู่:
view/reauth.html
import { _fetch, authenticate } from '/client.js';
- เรียกใช้
authenticate()เมื่อผู้ใช้แตะ ตรวจสอบสิทธิ์ เพื่อเริ่มการตรวจสอบสิทธิ์ด้วยข้อมูลไบโอเมตริก
ตรวจสอบว่าการตรวจสอบสิทธิ์ด้วยข้อมูลไบโอเมตริกไม่กลับไปเป็นแบบฟอร์มรหัสผ่าน
view/reauth.html
const button = document.querySelector('#reauth');
button.addEventListener('click', e => {
  authenticate().then(user => {
    if (user) {
      location.href = '/home';
    } else {
      throw 'User not found.';
    }
  }).catch(e => {
    console.error(e.message || e);
    alert('Authentication failed. Use password to sign-in.');
    form.classList.remove('hidden');
    document.querySelector('#uvpa_available').classList.add('hidden');
  });
});
รหัสสุดท้ายของส่วนนี้
view/reauth.html
...
    <main class="content">
      <div id="uvpa_available" class="hidden">
        <h2>
          Verify your identity
        </h2>
        <div>
          <mwc-button id="reauth" raised>Authenticate</mwc-button>
        </div>
        <div>
          <mwc-button id="cancel">Sign-in with password</mwc-button>
        </div>
      </div>
      <form id="form" method="POST" action="/auth/password" class="hidden">
        <h2>
          Enter a password
        </h2>
        <input type="hidden" name="username" value="{{username}}" />
        <div class="mdc-text-field mdc-text-field--filled">
          <span class="mdc-text-field__ripple"></span>
          <label class="mdc-floating-label" id="password-label">password</label>
          <input type="password" class="mdc-text-field__input" aria-labelledby="password-label" name="password" />
          <span class="mdc-line-ripple"></span>
        </div>
        <input type="submit" class="mdc-button mdc-button--raised" value="Sign-In" />
        <p class="instructions">password will be ignored in this demo.</p>
      </form>
    </main>
    <script src="https://unpkg.com/material-components-web@7.0.0/dist/material-components-web.min.js"></script>
    <script type="module">
      new mdc.textField.MDCTextField(document.querySelector('.mdc-text-field'));
      import { _fetch, authenticate } from '/client.js';
      const form = document.querySelector('#form');
      form.addEventListener('submit', e => {
        e.preventDefault();
        const form = new FormData(e.target);
        const cred = {};
        form.forEach((v, k) => cred[k] = v);
        _fetch(e.target.action, cred)
        .then(user => {
          location.href = '/home';
        })
        .catch(e => alert(e));
      });

      if (window.PublicKeyCredential) {
        PublicKeyCredential.isUserVerifyingPlatformAuthenticatorAvailable()
        .then(uvpaa => {
          if (uvpaa && localStorage.getItem(`credId`)) {
            document
              .querySelector('#uvpa_available')
              .classList.remove('hidden');
          } else {
            form.classList.remove('hidden');
          }
        });
      } else {
        form.classList.remove('hidden');
      }

      const cancel = document.querySelector('#cancel');
      cancel.addEventListener('click', e => {
        form.classList.remove('hidden');
        document
          .querySelector('#uvpa_available')
          .classList.add('hidden');
      });

      const button = document.querySelector('#reauth');
      button.addEventListener('click', e => {
        authenticate().then(user => {
          if (user) {
            location.href = '/home';
          } else {
            throw 'User not found.';
          }
        }).catch(e => {
          console.error(e.message || e);
          alert('Authentication failed. Use password to sign-in.');
          form.classList.remove('hidden');
          document.querySelector('#uvpa_available').classList.add('hidden');
        });
      });
    </script>
...
7 ยินดีด้วย
คุณสิ้นสุด Codelab นี้แล้ว
ดูข้อมูลเพิ่มเติม
- การตรวจสอบสิทธิ์เว็บ: API สําหรับการเข้าถึงข้อมูลรับรองคีย์สาธารณะระดับ 1
- ข้อมูลเบื้องต้นเกี่ยวกับ WebAuthn API
- เวิร์กช็อป FIDO WebAuthn
- คู่มือ WebAuthn: DUOSEC
- Android FIDO2 API แรกของคุณ
ขอขอบคุณเป็นพิเศษสําหรับ Yuriy Ackermann จาก FIDO Alliance ที่คอยให้ความช่วยเหลือ