
1. Введение
Дополнения Google Workspace — это настраиваемые приложения, которые интегрируются с приложениями Google Workspace, такими как Gmail, Docs, Sheets и Slides. Они позволяют разработчикам создавать настраиваемые пользовательские интерфейсы, которые напрямую интегрируются в Google Workspace. Дополнения помогают пользователям работать эффективнее, реже переключаясь между задачами.
В этом практическом занятии вы узнаете, как создать и развернуть простое дополнение для списка задач, используя Node.js, Cloud Run и Datastore .
Что вы узнаете
- Используйте Cloud Shell
- Развертывание в облаке. Запуск.
- Создайте и разверните дескриптор развертывания дополнения.
- Создавайте дополнительные пользовательские интерфейсы с помощью карточного фреймворка.
- Реагировать на действия пользователей
- Используйте контекст пользователя в дополнении.
2. Настройка и требования
Следуйте инструкциям по настройке, чтобы создать проект Google Cloud и включить API и сервисы, которые будет использовать дополнение.
Настройка среды для самостоятельного обучения
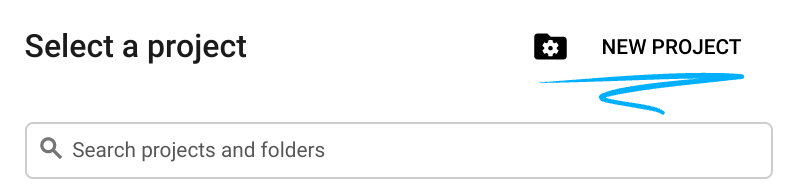
- Откройте Cloud Console и создайте новый проект. (Если у вас еще нет учетной записи Gmail или Google Workspace, создайте ее .)

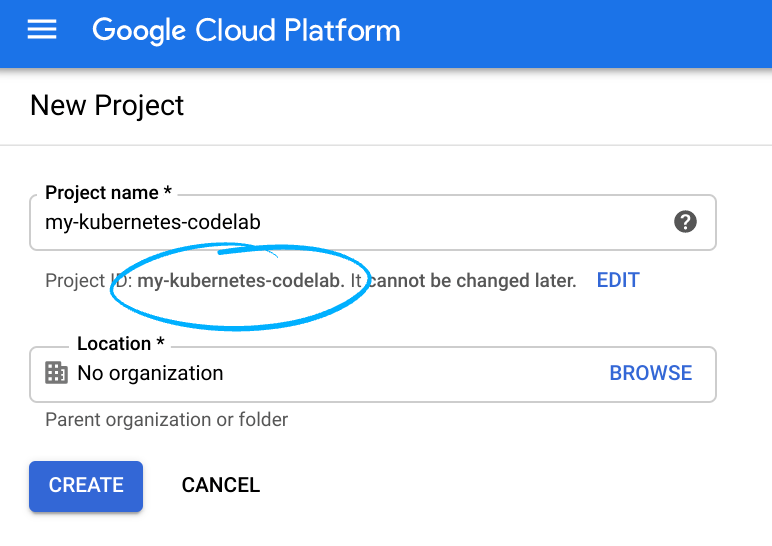
Запомните идентификатор проекта (Project ID) — уникальное имя для всех проектов Google Cloud (указанное выше имя уже занято и вам не подойдёт, извините!). В дальнейшем в этом практическом занятии оно будет обозначаться как PROJECT_ID .
- Далее, чтобы использовать ресурсы Google Cloud, включите оплату в Cloud Console.
Выполнение этого практического задания не должно стоить дорого, если вообще что-либо. Обязательно следуйте инструкциям в разделе «Очистка» в конце задания, где указано, как отключить ресурсы, чтобы избежать дополнительных расходов после завершения этого урока. Новые пользователи Google Cloud имеют право на бесплатную пробную версию стоимостью 300 долларов США .
Google Cloud Shell
Хотя Google Cloud можно запускать удаленно с ноутбука, в этом практическом занятии мы будем использовать Google Cloud Shell — среду командной строки, работающую в облаке.
Активировать Cloud Shell
- В консоли Cloud нажмите «Активировать Cloud Shell» .
.

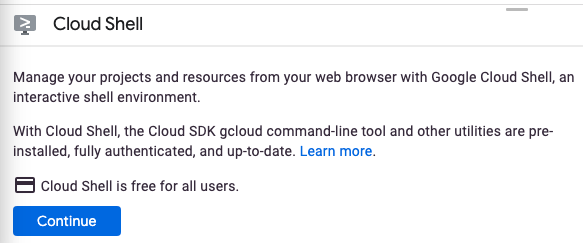
При первом запуске Cloud Shell отображается описательное приветственное сообщение. Если вы видите приветственное сообщение, нажмите «Продолжить» . После этого приветственное сообщение больше не появляется. Вот приветственное сообщение:
Подготовка и подключение к Cloud Shell займут всего несколько минут. После подключения вы увидите терминал Cloud Shell:

Эта виртуальная машина оснащена всеми необходимыми инструментами разработки. Она предоставляет постоянный домашний каталог размером 5 ГБ и работает в облаке Google, что значительно повышает производительность сети и аутентификацию. В этой практической работе вы можете использовать браузер или свой Chromebook.
После подключения к Cloud Shell вы увидите, что ваша аутентификация пройдена и проект уже настроен на ваш идентификатор проекта.
- Выполните следующую команду в Cloud Shell, чтобы подтвердить свою аутентификацию:
gcloud auth list
Если вам будет предложено авторизовать Cloud Shell для выполнения вызова API GCP, нажмите «Авторизовать» .
вывод команды
 Credentialed Accounts
ACTIVE  ACCOUNT
*       <my_account>@<my_domain.com>
Чтобы назначить активную учетную запись, выполните следующую команду:
gcloud config set account <ACCOUNT>
Чтобы убедиться, что вы выбрали правильный проект, в Cloud Shell выполните следующую команду:
gcloud config list project
вывод команды
[core]
project = <PROJECT_ID>
Если нужный проект не найден, вы можете установить его с помощью этой команды:
gcloud config set project <PROJECT_ID>
вывод команды
Updated property [core/project].
В практическом занятии используется сочетание операций командной строки и редактирования файлов. Для редактирования файлов вы можете использовать встроенный редактор кода в Cloud Shell, нажав кнопку « Открыть редактор» в правой части панели инструментов Cloud Shell. В Cloud Shell также доступны популярные редакторы, такие как vim и emacs.
3. Включите API Cloud Run, Datastore и Add-on.
Включите облачные API
В оболочке Cloud Shell включите облачные API для используемых компонентов:
gcloud services enable \
  run.googleapis.com \
  cloudbuild.googleapis.com \
  cloudresourcemanager.googleapis.com \
  datastore.googleapis.com \
  gsuiteaddons.googleapis.com
Выполнение этой операции может занять несколько минут.
После завершения появится сообщение об успешном завершении, похожее на это:
Operation "operations/acf.cc11852d-40af-47ad-9d59-477a12847c9e" finished successfully.
Создайте экземпляр хранилища данных.
Далее включите App Engine и создайте базу данных Datastore . Включение App Engine является необходимым условием для использования Datastore, но мы не будем использовать App Engine ни для чего другого.
gcloud app create --region=us-central
gcloud firestore databases create --type=datastore-mode --region=us-central
Создайте экран согласия OAuth.
Для запуска дополнения и обработки его данных требуется разрешение пользователя. Настройте экран согласия проекта, чтобы включить эту функцию. Для начала работы в рамках практического задания вам нужно будет настроить экран согласия как внутреннее приложение, то есть оно не предназначено для публичного распространения.
- Откройте консоль Google Cloud в новой вкладке или окне.
- Рядом с надписью «Консоль Google Cloud» нажмите стрелку вниз.
 и выберите свой проект.
 - В верхнем левом углу нажмите «Меню».
 .
. - Перейдите в раздел API и сервисы > Учетные данные . Откроется страница с учетными данными для вашего проекта.
- Нажмите «Экран согласия OAuth» . Откроется экран «Экран согласия OAuth».
- В разделе «Тип пользователя» выберите «Внутренний» . Если вы используете учетную запись @gmail.com, выберите «Внешний» .
- Нажмите «Создать» . Откроется страница «Редактировать регистрацию приложения».
- Заполните форму:
- В поле «Название приложения » введите «Дополнение для списка дел».
- В поле «Электронная почта службы поддержки» введите свой личный адрес электронной почты.
- В поле «Контактная информация разработчика» введите свой личный адрес электронной почты.
- Нажмите «Сохранить и продолжить» . Появится форма Scopes.
- В форме «Области применения» нажмите «Сохранить и продолжить» . Появится сводная информация.
- Нажмите «Назад на панель управления» .
4. Создайте начальное дополнение.
Инициализируйте проект
Для начала вам нужно будет создать простое дополнение "Hello world" и развернуть его. Дополнения — это веб-сервисы, которые отвечают на HTTPS-запросы и отправляют в ответ JSON-данные, описывающие пользовательский интерфейс и необходимые действия. В этом дополнении вы будете использовать Node.js и фреймворк Express .
Для создания этого шаблонного проекта используйте Cloud Shell, чтобы создать новую директорию с именем todo-add-on и перейдите в неё:
mkdir ~/todo-add-on
cd ~/todo-add-on
Всю работу над практическим заданием вы будете выполнять в этой директории.
Инициализируйте проект Node.js:
npm init
NPM задает несколько вопросов о конфигурации проекта, таких как имя и версия. Для каждого вопроса нажмите ENTER , чтобы принять значения по умолчанию. Точкой входа по умолчанию является файл с именем index.js , который мы создадим далее.
Далее установите веб-фреймворк Express:
npm install --save express express-async-handler
Создайте бэкэнд для дополнения.
Пора приступать к созданию приложения.
Создайте файл с именем index.js . Для создания файлов можно использовать редактор Cloud Shell , нажав кнопку « Открыть редактор» на панели инструментов окна Cloud Shell. Также можно редактировать и управлять файлами в Cloud Shell с помощью vim или emacs.
После создания файла index.js добавьте в него следующее содержимое:
const express = require('express');
const asyncHandler = require('express-async-handler');

// Create and configure the app
const app = express();

// Trust GCPs front end to for hostname/port forwarding
app.set("trust proxy", true);
app.use(express.json());

// Initial route for the add-on
app.post("/", asyncHandler(async (req, res) => {
    const card = {
        sections: [{
            widgets: [
                {
                    textParagraph: {
                        text: `Hello world!`
                    }
                },
            ]
        }]
    };
    const renderAction = {
        action: {
            navigations: [{
                pushCard: card
            }]
        }
    };
    res.json(renderAction);
}));

// Start the server
const port = process.env.PORT || 8080;
app.listen(port, () => {
  console.log(`Example app listening at http://localhost:${port}`)
});
Сервер, кроме отображения сообщения "Hello world", практически ничего не делает, и это нормально. Дополнительные функции вы добавите позже.
Развертывание в облаке. Запуск.
Для развертывания в Cloud Run приложение необходимо контейнеризировать.
Создайте контейнер
Создайте файл Dockerfile с именем Dockerfile , содержащий:
FROM node:12-slim

# Create and change to the app directory.
WORKDIR /usr/src/app

# Copy application dependency manifests to the container image.
# A wildcard is used to ensure copying both package.json AND package-lock.json (when available).
# Copying this first prevents re-running npm install on every code change.
COPY package*.json ./

# Install production dependencies.
# If you add a package-lock.json, speed your build by switching to 'npm ci'.
# RUN npm ci --only=production
RUN npm install --only=production

# Copy local code to the container image.
COPY . ./

# Run the web service on container startup.
CMD [ "node", "index.js" ]
Не допускайте попадания ненужных файлов в контейнер.
Чтобы контейнер оставался лёгким, создайте файл .dockerignore содержащий:
Dockerfile
.dockerignore
node_modules
npm-debug.log
Включить облачную сборку
В этом практическом задании вы будете несколько раз собирать и развертывать дополнение по мере добавления новой функциональности. Вместо того чтобы запускать отдельные команды для сборки контейнера, его отправки в реестр контейнеров и развертывания в Cloud Build, используйте Cloud Build для организации этой процедуры. Создайте файл cloudbuild.yaml с инструкциями по сборке и развертыванию приложения:
steps:
 # Build the container image
 - name: 'gcr.io/cloud-builders/docker'
   args: ['build', '-t', 'gcr.io/$PROJECT_ID/$_SERVICE_NAME', '.']
 # Push the container image to Container Registry
 - name: 'gcr.io/cloud-builders/docker'
   args: ['push', 'gcr.io/$PROJECT_ID/$_SERVICE_NAME']
 # Deploy container image to Cloud Run
 - name: 'gcr.io/google.com/cloudsdktool/cloud-sdk'
   entrypoint: gcloud
   args:
   - 'run'
   - 'deploy'
   - '$_SERVICE_NAME'
   - '--image'
   - 'gcr.io/$PROJECT_ID/$_SERVICE_NAME'
   - '--region'
   - '$_REGION'
   - '--platform'
   - 'managed'
images:
 - 'gcr.io/$PROJECT_ID/$_SERVICE_NAME'
substitutions:
   _SERVICE_NAME: todo-add-on
   _REGION: us-central1
Выполните следующие команды, чтобы предоставить Cloud Build разрешение на развертывание приложения:
PROJECT_ID=$(gcloud config list --format='value(core.project)')
PROJECT_NUMBER=$(gcloud projects describe $PROJECT_ID --format='value(projectNumber)')
gcloud projects add-iam-policy-binding $PROJECT_ID \
    --member=serviceAccount:$PROJECT_NUMBER@cloudbuild.gserviceaccount.com \
    --role=roles/run.admin
gcloud iam service-accounts add-iam-policy-binding \
    $PROJECT_NUMBER-compute@developer.gserviceaccount.com \
    --member=serviceAccount:$PROJECT_NUMBER@cloudbuild.gserviceaccount.com \
    --role=roles/iam.serviceAccountUser
Создайте и разверните дополнительный бэкэнд.
Для начала сборки в Cloud Shell выполните следующую команду:
gcloud builds submit
Процесс сборки и развертывания может занять несколько минут, особенно при первом запуске.
После завершения сборки убедитесь, что служба развернута, и найдите URL-адрес. Выполните команду:
gcloud run services list --platform managed
Скопируйте этот URL-адрес, он понадобится вам на следующем шаге — для указания Google Workspace, как активировать дополнение.
Зарегистрируйте дополнение
Теперь, когда сервер запущен и работает, опишите дополнение, чтобы Google Workspace знал, как его отображать и вызывать.
Создайте дескриптор развертывания.
Создайте файл deployment.json со следующим содержимым. Убедитесь, что вместо заполнителя URL используется URL-адрес развернутого приложения.
{
  "oauthScopes": [
    "https://www.googleapis.com/auth/gmail.addons.execute",
    "https://www.googleapis.com/auth/calendar.addons.execute"
  ],
  "addOns": {
    "common": {
      "name": "Todo Codelab",
      "logoUrl": "https://raw.githubusercontent.com/webdog/octicons-png/main/black/check.png",
      "homepageTrigger": {
        "runFunction": "URL"
      }
    },
    "gmail": {},
    "drive": {},
    "calendar": {},
    "docs": {},
    "sheets": {},
    "slides": {}
  }
}
Загрузите дескриптор развертывания, выполнив команду:
gcloud workspace-add-ons deployments create todo-add-on --deployment-file=deployment.json
Предоставьте доступ к административной панели дополнения.
Для работы надстройки также требуется разрешение на вызов сервиса. Выполните следующие команды, чтобы обновить политику IAM для Cloud Run и разрешить Google Workspace вызывать надстройку:
SERVICE_ACCOUNT_EMAIL=$(gcloud workspace-add-ons get-authorization --format="value(serviceAccountEmail)")
gcloud run services add-iam-policy-binding todo-add-on --platform managed --region us-central1 --role roles/run.invoker --member "serviceAccount:$SERVICE_ACCOUNT_EMAIL"
Установите дополнение для тестирования.
Чтобы установить дополнение в режиме разработки для вашей учетной записи, в Cloud Shell выполните следующую команду:
gcloud workspace-add-ons deployments install todo-add-on
Откройте (Gmail)[https://mail.google.com/] в новой вкладке или окне. В правой части экрана найдите дополнение со значком галочки.

Чтобы открыть дополнение, нажмите на значок галочки. Появится запрос на авторизацию дополнения.
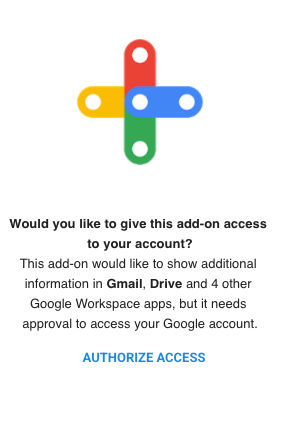
Нажмите «Авторизовать доступ» и следуйте инструкциям по авторизации во всплывающем окне. После завершения надстройка автоматически перезагрузится и отобразит сообщение «Hello world!».
Поздравляем! Теперь у вас есть простое дополнение, развернутое и установленное. Пора превратить его в приложение для составления списков задач!
5. Получите доступ к идентификационным данным пользователя.
Дополнения обычно используются многими пользователями для работы с информацией, которая является конфиденциальной для них или их организаций. В этом практическом задании дополнение должно отображать только задачи текущего пользователя. Идентификатор пользователя передается в дополнение через токен идентификации, который необходимо расшифровать.
Добавьте области действия в дескриптор развертывания.
Идентификационные данные пользователя по умолчанию не отправляются. Это пользовательские данные, и дополнению требуется разрешение на доступ к ним. Чтобы получить это разрешение, обновите файл deployment.json и добавьте области действия OAuth openid и email в список областей, необходимых дополнению. После добавления областей действия OAuth дополнение запросит у пользователей разрешение на предоставление доступа при следующем использовании дополнения.
"oauthScopes": [
      "https://www.googleapis.com/auth/gmail.addons.execute",
      "https://www.googleapis.com/auth/calendar.addons.execute",
      "openid",
      "email"
],
Затем в Cloud Shell выполните следующую команду для обновления дескриптора развертывания:
gcloud workspace-add-ons deployments replace todo-add-on --deployment-file=deployment.json
Обновите сервер дополнений.
Хотя дополнение настроено на запрос идентификатора пользователя, его реализацию все равно необходимо обновить.
Разберите токен идентификации.
Для начала добавьте в проект библиотеку аутентификации Google:
npm install --save google-auth-library
Затем отредактируйте index.js , чтобы добавить поддержку OAuth2Client :
const { OAuth2Client } = require('google-auth-library');
Затем добавьте вспомогательный метод для анализа токена идентификатора:
async function userInfo(event) {
    const idToken = event.authorizationEventObject.userIdToken;
    const authClient = new OAuth2Client();
    const ticket = await authClient.verifyIdToken({
        idToken
    });
    return ticket.getPayload();
}
Отобразить идентификационные данные пользователя
Сейчас самое время провести контрольную точку перед добавлением всего функционала списка задач. Обновите маршрут приложения, чтобы вместо сообщения «Hello world» выводился адрес электронной почты пользователя и его уникальный идентификатор.
app.post('/', asyncHandler(async (req, res) => {
    const event = req.body;
    const user = await userInfo(event);
    const card = {
        sections: [{
            widgets: [
                {
                    textParagraph: {
                        text: `Hello ${user.email} ${user.sub}`
                    }
                },
            ]
        }]
    };
    const renderAction = {
        action: {
            navigations: [{
                pushCard: card
            }]
        }
    };
    res.json(renderAction);
}));
После внесения этих изменений полученный файл index.js должен выглядеть следующим образом:
const express = require('express');
const asyncHandler = require('express-async-handler');
const { OAuth2Client } = require('google-auth-library');

// Create and configure the app
const app = express();

// Trust GCPs front end to for hostname/port forwarding
app.set("trust proxy", true);
app.use(express.json());

// Initial route for the add-on
app.post('/', asyncHandler(async (req, res) => {
    const event = req.body;
    const user = await userInfo(event);
    const card = {
        sections: [{
            widgets: [
                {
                    textParagraph: {
                        text: `Hello ${user.email} ${user.sub}`
                    }
                },
            ]
        }]
    };
    const renderAction = {
        action: {
            navigations: [{
                pushCard: card
            }]
        }
    };
    res.json(renderAction);
}));

async function userInfo(event) {
    const idToken = event.authorizationEventObject.userIdToken;
    const authClient = new OAuth2Client();
    const ticket = await authClient.verifyIdToken({
        idToken
    });
    return ticket.getPayload();
}

// Start the server
const port = process.env.PORT || 8080;
app.listen(port, () => {
  console.log(`Example app listening at http://localhost:${port}`)
});
Повторно разверните и протестируйте.
Пересоберите и повторно разверните дополнение. В Cloud Shell выполните следующую команду:
gcloud builds submit
После переразвертывания сервера откройте или перезагрузите Gmail и снова откройте дополнение. Поскольку области действия изменились, дополнение запросит повторную авторизацию. Авторизуйте дополнение еще раз, и после завершения оно отобразит ваш адрес электронной почты и идентификатор пользователя.
Теперь, когда дополнение знает, кто пользователь, вы можете начать добавлять функциональность списка задач.
6. Реализуйте список задач.
Исходная модель данных для практического занятия довольно проста: список сущностей Task , каждая из которых имеет свойства, содержащие описательный текст задачи и метку времени.
Создайте индекс хранилища данных.
Хранилище данных (Datastore) уже было включено для проекта ранее в ходе практического занятия. Схема не требуется, хотя необходимо явно создать индексы для составных запросов. Создание индекса может занять несколько минут, поэтому это следует сделать в первую очередь.
Создайте файл с именем index.yaml , содержащий следующее:
indexes:
- kind: Task
  ancestor: yes
  properties:
  - name: created
Затем обновите индексы хранилища данных:
gcloud datastore indexes create index.yaml
Когда появится запрос на продолжение, нажмите клавишу ENTER на клавиатуре. Создание индекса происходит в фоновом режиме. Пока это происходит, начните обновлять код дополнения, чтобы реализовать список задач.
Обновите административную панель дополнения.
Установите библиотеку Datastore в проект:
npm install --save @google-cloud/datastore
Чтение и запись в хранилище данных.
Обновите файл index.js , чтобы реализовать функцию "список задач", начиная с импорта библиотеки хранилища данных и создания клиента:
const {Datastore} = require('@google-cloud/datastore');
const datastore = new Datastore();
Добавьте методы для чтения и записи задач из хранилища данных:
async function listTasks(userId) {
    const parentKey = datastore.key(['User', userId]);
    const query = datastore.createQuery('Task')
        .hasAncestor(parentKey)
        .order('created')
        .limit(20);
    const [tasks] = await datastore.runQuery(query);
    return tasks;;
}

async function addTask(userId, task) {
    const key = datastore.key(['User', userId, 'Task']);
    const entity = {
        key,
        data: task,
    };
    await datastore.save(entity);
    return entity;
}

async function deleteTasks(userId, taskIds) {
    const keys = taskIds.map(id => datastore.key(['User', userId,
                                                  'Task', datastore.int(id)]));
    await datastore.delete(keys);
}
Реализовать отрисовку пользовательского интерфейса.
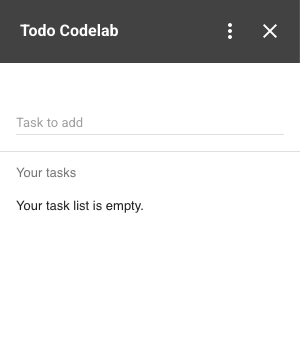
Большинство изменений коснулось пользовательского интерфейса дополнения. Ранее все карточки, возвращаемые интерфейсом, были статическими — они не менялись в зависимости от доступных данных. Здесь же карточка должна формироваться динамически на основе текущего списка задач пользователя.
Пользовательский интерфейс для практического занятия состоит из текстового поля ввода и списка задач с флажками для их отметки о выполнении. Каждая из этих задач также имеет свойство onChangeAction , которое вызывает обратный вызов на сервер дополнений, когда пользователь добавляет или удаляет задачу. В каждом из этих случаев необходимо перерисовать пользовательский интерфейс с обновленным списком задач. Для этого давайте введем новый метод для построения карточного интерфейса.
Продолжите редактирование index.js и добавьте следующий метод:
function buildCard(req, tasks) {
    const baseUrl = `${req.protocol}://${req.hostname}${req.baseUrl}`;
    // Input for adding a new task
    const inputSection = {
        widgets: [
            {
                textInput: {
                    label: 'Task to add',
                    name: 'newTask',
                    value: '',
                    onChangeAction: {
                        function: `${baseUrl}/newTask`,
                    },
                }
            }
        ]
    };
    const taskListSection = {
        header: 'Your tasks',
        widgets: []
    };
    if (tasks && tasks.length) {
        // Create text & checkbox for each task
        tasks.forEach(task => taskListSection.widgets.push({
            decoratedText: {
                text: task.text,
                wrapText: true,
                switchControl: {
                    controlType: 'CHECKBOX',
                    name: 'completedTasks',
                    value: task[datastore.KEY].id,
                    selected: false,
                    onChangeAction: {
                        function: `${baseUrl}/complete`,
                    }
                }
            }
        }));
    } else {
        // Placeholder for empty task list
        taskListSection.widgets.push({
            textParagraph: {
                text: 'Your task list is empty.'
            }
        });
    }
    const card = {
        sections: [
            inputSection,
            taskListSection,
        ]
    }
    return card;
}
Обновите маршруты
Теперь, когда появились вспомогательные методы для чтения и записи в Datastore и построения пользовательского интерфейса, давайте свяжем их в маршрутах приложения. Замените существующий маршрут и добавьте еще два: один для добавления задач и один для их удаления.
app.post('/', asyncHandler(async (req, res) => {
    const event = req.body;
    const user = await userInfo(event);
    const tasks = await listTasks(user.sub);
    const card = buildCard(req, tasks);
    const responsePayload = {
        action: {
            navigations: [{
                pushCard: card
            }]
        }
    };
    res.json(responsePayload);
}));

app.post('/newTask', asyncHandler(async (req, res) => {
    const event = req.body;
    const user = await userInfo(event);

    const formInputs = event.commonEventObject.formInputs || {};
    const newTask = formInputs.newTask;
    if (!newTask || !newTask.stringInputs) {
        return {};
    }

    const task = {
        text: newTask.stringInputs.value[0],
        created: new Date()
    };
    await addTask(user.sub, task);

    const tasks = await listTasks(user.sub);
    const card = buildCard(req, tasks);
    const responsePayload = {
        renderActions: {
            action: {
                navigations: [{
                    updateCard: card
                }],
                notification: {
                    text: 'Task added.'
                },
            }
        }
    };
    res.json(responsePayload);
}));

app.post('/complete', asyncHandler(async (req, res) => {
    const event = req.body;
    const user = await userInfo(event);

    const formInputs = event.commonEventObject.formInputs || {};
    const completedTasks = formInputs.completedTasks;
    if (!completedTasks || !completedTasks.stringInputs) {
        return {};
    }

    await deleteTasks(user.sub, completedTasks.stringInputs.value);

    const tasks = await listTasks(user.sub);
    const card = buildCard(req, tasks);
    const responsePayload = {
        renderActions: {
            action: {
                navigations: [{
                    updateCard: card
                }],
                notification: {
                    text: 'Task completed.'
                },
            }
        }
    };
    res.json(responsePayload);
}));
Вот окончательный, полностью функциональный файл index.js :
const express = require('express');
const asyncHandler = require('express-async-handler');
const { OAuth2Client } = require('google-auth-library');
const {Datastore} = require('@google-cloud/datastore');
const datastore = new Datastore();

// Create and configure the app
const app = express();

// Trust GCPs front end to for hostname/port forwarding
app.set("trust proxy", true);
app.use(express.json());

// Initial route for the add-on
app.post('/', asyncHandler(async (req, res) => {
    const event = req.body;
    const user = await userInfo(event);
    const tasks = await listTasks(user.sub);
    const card = buildCard(req, tasks);
    const responsePayload = {
        action: {
            navigations: [{
                pushCard: card
            }]
        }
    };
    res.json(responsePayload);
}));

app.post('/newTask', asyncHandler(async (req, res) => {
    const event = req.body;
    const user = await userInfo(event);

    const formInputs = event.commonEventObject.formInputs || {};
    const newTask = formInputs.newTask;
    if (!newTask || !newTask.stringInputs) {
        return {};
    }

    const task = {
        text: newTask.stringInputs.value[0],
        created: new Date()
    };
    await addTask(user.sub, task);

    const tasks = await listTasks(user.sub);
    const card = buildCard(req, tasks);
    const responsePayload = {
        renderActions: {
            action: {
                navigations: [{
                    updateCard: card
                }],
                notification: {
                    text: 'Task added.'
                },
            }
        }
    };
    res.json(responsePayload);
}));

app.post('/complete', asyncHandler(async (req, res) => {
    const event = req.body;
    const user = await userInfo(event);

    const formInputs = event.commonEventObject.formInputs || {};
    const completedTasks = formInputs.completedTasks;
    if (!completedTasks || !completedTasks.stringInputs) {
        return {};
    }

    await deleteTasks(user.sub, completedTasks.stringInputs.value);

    const tasks = await listTasks(user.sub);
    const card = buildCard(req, tasks);
    const responsePayload = {
        renderActions: {
            action: {
                navigations: [{
                    updateCard: card
                }],
                notification: {
                    text: 'Task completed.'
                },
            }
        }
    };
    res.json(responsePayload);
}));

function buildCard(req, tasks) {
    const baseUrl = `${req.protocol}://${req.hostname}${req.baseUrl}`;
    // Input for adding a new task
    const inputSection = {
        widgets: [
            {
                textInput: {
                    label: 'Task to add',
                    name: 'newTask',
                    value: '',
                    onChangeAction: {
                        function: `${baseUrl}/newTask`,
                    },
                }
            }
        ]
    };
    const taskListSection = {
        header: 'Your tasks',
        widgets: []
    };
    if (tasks && tasks.length) {
        // Create text & checkbox for each task
        tasks.forEach(task => taskListSection.widgets.push({
            decoratedText: {
                text: task.text,
                wrapText: true,
                switchControl: {
                    controlType: 'CHECKBOX',
                    name: 'completedTasks',
                    value: task[datastore.KEY].id,
                    selected: false,
                    onChangeAction: {
                        function: `${baseUrl}/complete`,
                    }
                }
            }
        }));
    } else {
        // Placeholder for empty task list
        taskListSection.widgets.push({
            textParagraph: {
                text: 'Your task list is empty.'
            }
        });
    }
    const card = {
        sections: [
            inputSection,
            taskListSection,
        ]
    }
    return card;
}

async function userInfo(event) {
    const idToken = event.authorizationEventObject.userIdToken;
    const authClient = new OAuth2Client();
    const ticket = await authClient.verifyIdToken({
        idToken
    });
    return ticket.getPayload();
}

async function listTasks(userId) {
    const parentKey = datastore.key(['User', userId]);
    const query = datastore.createQuery('Task')
        .hasAncestor(parentKey)
        .order('created')
        .limit(20);
    const [tasks] = await datastore.runQuery(query);
    return tasks;;
}

async function addTask(userId, task) {
    const key = datastore.key(['User', userId, 'Task']);
    const entity = {
        key,
        data: task,
    };
    await datastore.save(entity);
    return entity;
}

async function deleteTasks(userId, taskIds) {
    const keys = taskIds.map(id => datastore.key(['User', userId,
                                                  'Task', datastore.int(id)]));
    await datastore.delete(keys);
}

// Start the server
const port = process.env.PORT || 8080;
app.listen(port, () => {
  console.log(`Example app listening at http://localhost:${port}`)
});
Повторно разверните и протестируйте.
Для пересборки и повторного развертывания дополнения запустите сборку. В Cloud Shell выполните следующую команду:
gcloud builds submit
В Gmail перезагрузите дополнение, и появится новый интерфейс. Уделите минуту, чтобы изучить дополнение. Добавьте несколько задач, введя текст в поле ввода и нажав клавишу ENTER на клавиатуре, затем установите флажок, чтобы удалить их.
При желании вы можете сразу перейти к заключительному шагу этого практического задания и привести свой проект в порядок. Или, если вы хотите продолжить изучение дополнений, есть еще один шаг, который вы можете выполнить.
7. (Необязательно) Добавление контекста
Одна из самых мощных функций дополнений — это контекстная осведомленность. Дополнения, с разрешения пользователя, могут получать доступ к контексту Google Workspace, например, к просматриваемому электронному письму, событию календаря и документу. Дополнения также могут выполнять такие действия, как вставка контента. В этом практическом задании вы добавите поддержку контекста для редакторов Workspace (Документы, Таблицы и Презентации), чтобы прикреплять текущий документ к любым задачам, созданным в редакторах. Когда задача отображается, щелчок по ней откроет документ в новой вкладке, чтобы вернуть пользователя к документу и завершить задачу.
Обновите административную панель дополнения.
Обновите маршрут newTask
Во-первых, обновите маршрут /newTask , чтобы включить идентификатор документа в задачу, если он доступен:
app.post('/newTask', asyncHandler(async (req, res) => {
    const event = req.body;
    const user = await userInfo(event);

    const formInputs = event.commonEventObject.formInputs || {};
    const newTask = formInputs.newTask;
    if (!newTask || !newTask.stringInputs) {
        return {};
    }

    // Get the current document if it is present
    const editorInfo = event.docs || event.sheets || event.slides;
    let document = null;
    if (editorInfo && editorInfo.id) {
        document = {
            id: editorInfo.id,
        }
    }
    const task = {
        text: newTask.stringInputs.value[0],
        created: new Date(),
        document,
    };
    await addTask(user.sub, task);

    const tasks = await listTasks(user.sub);
    const card = buildCard(req, tasks);
    const responsePayload = {
        renderActions: {
            action: {
                navigations: [{
                    updateCard: card
                }],
                notification: {
                    text: 'Task added.'
                },
            }
        }
    };
    res.json(responsePayload);
}));
Вновь созданные задачи теперь включают текущий идентификатор документа. Однако контекст в редакторах по умолчанию не передается. Как и в случае с другими пользовательскими данными, пользователь должен предоставить надстройке разрешение на доступ к этим данным. Чтобы избежать чрезмерного обмена информацией, предпочтительный подход заключается в запросе и предоставлении разрешений для каждого файла отдельно.
Обновите пользовательский интерфейс.
В index.js обновите buildCard , внеся два изменения. Первое — это изменение отображения задач, чтобы они включали ссылку на документ, если она присутствует. Второе — отображение необязательного запроса авторизации, если дополнение отображается в редакторе и доступ к файлу еще не предоставлен.
function buildCard(req, tasks) {
    const baseUrl = `${req.protocol}://${req.hostname}${req.baseUrl}`;
    const inputSection = {
        widgets: [
            {
                textInput: {
                    label: 'Task to add',
                    name: 'newTask',
                    value: '',
                    onChangeAction: {
                        function: `${baseUrl}/newTask`,
                    },
                }
            }
        ]
    };
    const taskListSection = {
        header: 'Your tasks',
        widgets: []
    };
    if (tasks && tasks.length) {
        tasks.forEach(task => {
            const widget = {
                decoratedText: {
                    text: task.text,
                    wrapText: true,
                    switchControl: {
                        controlType: 'CHECKBOX',
                        name: 'completedTasks',
                        value: task[datastore.KEY].id,
                        selected: false,
                        onChangeAction: {
                            function: `${baseUrl}/complete`,
                        }
                    }
                }
            };
            // Make item clickable and open attached doc if present
            if (task.document) {
                widget.decoratedText.bottomLabel = 'Click to open  document.';
                const id = task.document.id;
                const url = `https://drive.google.com/open?id=${id}`
                widget.decoratedText.onClick = {
                    openLink: {
                        openAs: 'FULL_SIZE',
                        onClose: 'NOTHING',
                        url: url,
                    }
                }
            }
            taskListSection.widgets.push(widget)
        });
    } else {
        taskListSection.widgets.push({
            textParagraph: {
                text: 'Your task list is empty.'
            }
        });
    }
    const card = {
        sections: [
            inputSection,
            taskListSection,
        ]
    };

    // Display file authorization prompt if the host is an editor
    // and no doc ID present
    const event = req.body;
    const editorInfo = event.docs || event.sheets || event.slides;
    const showFileAuth = editorInfo && editorInfo.id === undefined;
    if (showFileAuth) {
        card.fixedFooter = {
            primaryButton: {
                text: 'Authorize file access',
                onClick: {
                    action: {
                        function: `${baseUrl}/authorizeFile`,
                    }
                }
            }
        }
    }
    return card;
}
Реализуйте механизм авторизации файлов.
Кнопка авторизации добавляет в приложение новый маршрут, давайте его реализуем. Этот маршрут вводит новое понятие — действия хост-приложения. Это специальные инструкции для взаимодействия с хост-приложением дополнения. В данном случае — для запроса доступа к текущему файлу редактора.
В index.js добавьте маршрут /authorizeFile :
app.post('/authorizeFile', asyncHandler(async (req, res) => {
    const responsePayload = {
        renderActions: {
            hostAppAction: {
                editorAction: {
                    requestFileScopeForActiveDocument: {}
                }
            },
        }
    };
    res.json(responsePayload);
}));
Вот окончательный, полностью функциональный файл index.js :
const express = require('express');
const asyncHandler = require('express-async-handler');
const { OAuth2Client } = require('google-auth-library');
const {Datastore} = require('@google-cloud/datastore');
const datastore = new Datastore();

// Create and configure the app
const app = express();

// Trust GCPs front end to for hostname/port forwarding
app.set("trust proxy", true);
app.use(express.json());

// Initial route for the add-on
app.post('/', asyncHandler(async (req, res) => {
    const event = req.body;
    const user = await userInfo(event);
    const tasks = await listTasks(user.sub);
    const card = buildCard(req, tasks);
    const responsePayload = {
        action: {
            navigations: [{
                pushCard: card
            }]
        }
    };
    res.json(responsePayload);
}));

app.post('/newTask', asyncHandler(async (req, res) => {
    const event = req.body;
    const user = await userInfo(event);

    const formInputs = event.commonEventObject.formInputs || {};
    const newTask = formInputs.newTask;
    if (!newTask || !newTask.stringInputs) {
        return {};
    }

    // Get the current document if it is present
    const editorInfo = event.docs || event.sheets || event.slides;
    let document = null;
    if (editorInfo && editorInfo.id) {
        document = {
            id: editorInfo.id,
        }
    }
    const task = {
        text: newTask.stringInputs.value[0],
        created: new Date(),
        document,
    };
    await addTask(user.sub, task);

    const tasks = await listTasks(user.sub);
    const card = buildCard(req, tasks);
    const responsePayload = {
        renderActions: {
            action: {
                navigations: [{
                    updateCard: card
                }],
                notification: {
                    text: 'Task added.'
                },
            }
        }
    };
    res.json(responsePayload);
}));

app.post('/complete', asyncHandler(async (req, res) => {
    const event = req.body;
    const user = await userInfo(event);

    const formInputs = event.commonEventObject.formInputs || {};
    const completedTasks = formInputs.completedTasks;
    if (!completedTasks || !completedTasks.stringInputs) {
        return {};
    }

    await deleteTasks(user.sub, completedTasks.stringInputs.value);

    const tasks = await listTasks(user.sub);
    const card = buildCard(req, tasks);
    const responsePayload = {
        renderActions: {
            action: {
                navigations: [{
                    updateCard: card
                }],
                notification: {
                    text: 'Task completed.'
                },
            }
        }
    };
    res.json(responsePayload);
}));

app.post('/authorizeFile', asyncHandler(async (req, res) => {
    const responsePayload = {
        renderActions: {
            hostAppAction: {
                editorAction: {
                    requestFileScopeForActiveDocument: {}
                }
            },
        }
    };
    res.json(responsePayload);
}));

function buildCard(req, tasks) {
    const baseUrl = `${req.protocol}://${req.hostname}${req.baseUrl}`;
    const inputSection = {
        widgets: [
            {
                textInput: {
                    label: 'Task to add',
                    name: 'newTask',
                    value: '',
                    onChangeAction: {
                        function: `${baseUrl}/newTask`,
                    },
                }
            }
        ]
    };
    const taskListSection = {
        header: 'Your tasks',
        widgets: []
    };
    if (tasks && tasks.length) {
        tasks.forEach(task => {
            const widget = {
                decoratedText: {
                    text: task.text,
                    wrapText: true,
                    switchControl: {
                        controlType: 'CHECKBOX',
                        name: 'completedTasks',
                        value: task[datastore.KEY].id,
                        selected: false,
                        onChangeAction: {
                            function: `${baseUrl}/complete`,
                        }
                    }
                }
            };
            // Make item clickable and open attached doc if present
            if (task.document) {
                widget.decoratedText.bottomLabel = 'Click to open  document.';
                const id = task.document.id;
                const url = `https://drive.google.com/open?id=${id}`
                widget.decoratedText.onClick = {
                    openLink: {
                        openAs: 'FULL_SIZE',
                        onClose: 'NOTHING',
                        url: url,
                    }
                }
            }
            taskListSection.widgets.push(widget)
        });
    } else {
        taskListSection.widgets.push({
            textParagraph: {
                text: 'Your task list is empty.'
            }
        });
    }
    const card = {
        sections: [
            inputSection,
            taskListSection,
        ]
    };

    // Display file authorization prompt if the host is an editor
    // and no doc ID present
    const event = req.body;
    const editorInfo = event.docs || event.sheets || event.slides;
    const showFileAuth = editorInfo && editorInfo.id === undefined;
    if (showFileAuth) {
        card.fixedFooter = {
            primaryButton: {
                text: 'Authorize file access',
                onClick: {
                    action: {
                        function: `${baseUrl}/authorizeFile`,
                    }
                }
            }
        }
    }
    return card;
}

async function userInfo(event) {
    const idToken = event.authorizationEventObject.userIdToken;
    const authClient = new OAuth2Client();
    const ticket = await authClient.verifyIdToken({
        idToken
    });
    return ticket.getPayload();
}

async function listTasks(userId) {
    const parentKey = datastore.key(['User', userId]);
    const query = datastore.createQuery('Task')
        .hasAncestor(parentKey)
        .order('created')
        .limit(20);
    const [tasks] = await datastore.runQuery(query);
    return tasks;;
}

async function addTask(userId, task) {
    const key = datastore.key(['User', userId, 'Task']);
    const entity = {
        key,
        data: task,
    };
    await datastore.save(entity);
    return entity;
}

async function deleteTasks(userId, taskIds) {
    const keys = taskIds.map(id => datastore.key(['User', userId,
                                                  'Task', datastore.int(id)]));
    await datastore.delete(keys);
}

// Start the server
const port = process.env.PORT || 8080;
app.listen(port, () => {
  console.log(`Example app listening at http://localhost:${port}`)
});
Добавьте области действия в дескриптор развертывания.
Перед пересборкой сервера обновите дескриптор развертывания дополнения, добавив в него область действия OAuth https://www.googleapis.com/auth/drive.file . Обновите deployment.json , добавив https://www.googleapis.com/auth/drive.file в список областей действия OAuth:
"oauthScopes": [
    "https://www.googleapis.com/auth/gmail.addons.execute",
    "https://www.googleapis.com/auth/calendar.addons.execute",
    "https://www.googleapis.com/auth/drive.file",
    "openid",
    "email"
]
Загрузите новую версию, выполнив следующую команду в Cloud Shell:
gcloud workspace-add-ons deployments replace todo-add-on --deployment-file=deployment.json
Повторно разверните и протестируйте.
Наконец, пересоберите сервер. В Cloud Shell выполните следующую команду:
gcloud builds submit
После завершения, вместо открытия Gmail, откройте существующий документ Google или создайте новый, открыв doc.new . При создании нового документа обязательно введите текст или дайте файлу имя.
Откройте дополнение. В нижней части дополнения отобразится кнопка « Авторизовать доступ к файлу» . Нажмите на эту кнопку, а затем авторизуйте доступ к файлу.
После авторизации добавьте задачу в редакторе. Задача будет иметь метку, указывающую на то, что документ прикреплен. Щелчок по ссылке откроет документ в новой вкладке. Конечно, открывать уже открытый документ немного неразумно. Если вы хотите оптимизировать пользовательский интерфейс, чтобы отфильтровывать ссылки для текущего документа, это будет дополнительным бонусом!
8. Поздравляем!
Поздравляем! Вы успешно создали и развернули надстройку для Google Workpace с помощью Cloud Run. Хотя в практическом задании были рассмотрены многие основные концепции создания надстройки, есть еще много чего изучить. Ознакомьтесь с ресурсами ниже и не забудьте очистить свой проект, чтобы избежать дополнительных расходов.
Уборка
Чтобы удалить надстройку из своей учетной записи, в Cloud Shell выполните следующую команду:
gcloud workspace-add-ons deployments uninstall todo-add-on
Чтобы избежать списания средств с вашего счета Google Cloud Platform за ресурсы, использованные в этом руководстве:
- В консоли Cloud перейдите на страницу «Управление ресурсами» . В верхнем левом углу нажмите «Меню». > IAM и администрирование > Управление ресурсами .
- В списке проектов выберите свой проект и нажмите «Удалить» .
- В диалоговом окне введите идентификатор проекта, а затем нажмите «Завершить» , чтобы удалить проект.
Узнать больше
- Обзор дополнений Google Workspace
- Найдите существующие приложения и дополнения на торговой площадке.