
1. 簡介
Google Workspace 外掛程式是整合 Gmail、Google 文件、試算表和簡報等 Google Workspace 應用程式的自訂應用程式。開發人員可藉此建立直接整合至 Google Workspace 的自訂使用者介面。外掛程式可協助使用者提高工作效率,減少切換情境的次數。
在本程式碼研究室中,您將瞭解如何使用 Node.js、Cloud Run 和 Datastore 建構及部署簡單的工作清單外掛程式。
課程內容
- 使用 Cloud Shell
- 部署至 Cloud Run
- 建立及部署外掛程式部署描述元
- 使用資訊卡架構建立外掛程式使用者介面
- 回應使用者互動
- 在外掛程式中運用使用者環境資訊
2. 設定和需求條件
按照設定操作說明建立 Google Cloud 雲端專案,並啟用外掛程式會使用的 API 和服務。
自修實驗室環境設定
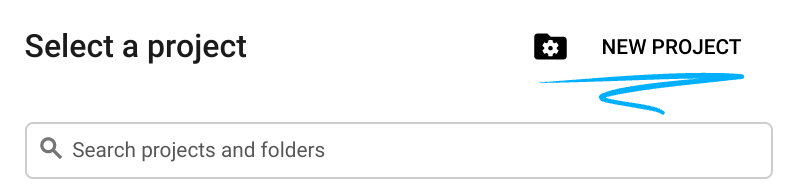
- 開啟 Cloud Console 並建立新專案。(如果沒有 Gmail 或 Google Workspace 帳戶,請建立帳戶)。

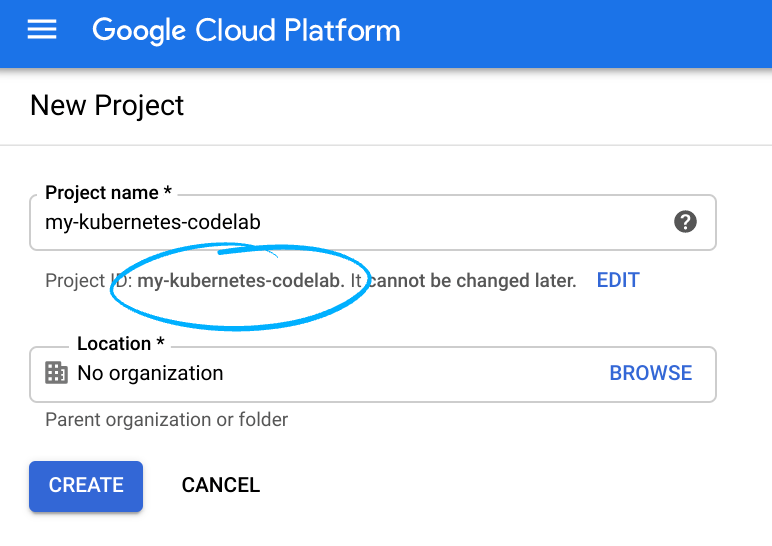
請記住專案 ID,這是所有 Google Cloud 專案中不重複的名稱 (上述名稱已遭占用,因此不適用於您,抱歉!)。本程式碼研究室稍後會將其稱為 PROJECT_ID。
- 接著,如要使用 Google Cloud 資源,請在 Cloud Console 中啟用計費功能。
完成本程式碼研究室的費用應該不高,甚至完全免費。請務必按照程式碼研究室最後「清理」部分的指示操作,瞭解如何關閉資源,避免在本教學課程結束後繼續產生帳單費用。Google Cloud 新使用者可參加價值$300 美元的免費試用計畫。
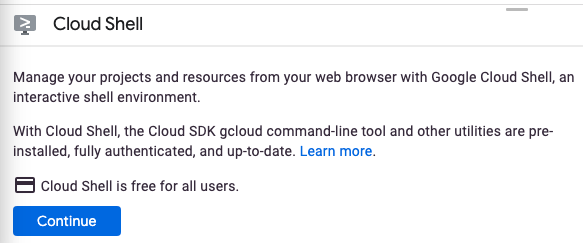
Google Cloud Shell
雖然可以透過筆電遠端操作 Google Cloud,但在本程式碼實驗室中,我們將使用 Google Cloud Shell,這是可在雲端執行的指令列環境。
啟用 Cloud Shell
- 在 Cloud 控制台,點選「啟用 Cloud Shell」 圖示
。

首次開啟 Cloud Shell 時,系統會顯示說明性質的歡迎訊息。如果看到歡迎訊息,請按一下「繼續」。系統不會再顯示歡迎訊息。歡迎訊息如下:
佈建並連至 Cloud Shell 預計只需要幾分鐘。連線後,您會看到 Cloud Shell 終端機:

這部虛擬機器搭載您需要的所有開發工具,並提供永久的 5GB 主目錄,而且可在 Google Cloud 運作,大幅提升網路效能並強化驗證功能。您可以使用瀏覽器或 Chromebook 完成本程式碼研究室的所有工作。
連線至 Cloud Shell 後,您應會發現自己通過驗證,且專案已設為您的專案 ID。
- 在 Cloud Shell 中執行下列指令,確認您已通過驗證:
gcloud auth list
如果系統提示您授權 Cloud Shell 發出 GCP API 呼叫,請按一下「Authorize」(授權)。
指令輸出
 Credentialed Accounts
ACTIVE  ACCOUNT
*       <my_account>@<my_domain.com>
如要設定使用中帳戶,請執行:
gcloud config set account <ACCOUNT>
如要確認您已選取正確的專案,請在 Cloud Shell 中執行下列指令:
gcloud config list project
指令輸出
[core]
project = <PROJECT_ID>
如未傳回正確的專案,請輸入下列指令手動設定專案:
gcloud config set project <PROJECT_ID>
指令輸出
Updated property [core/project].
本程式碼研究室會混合使用指令列作業和檔案編輯。如要編輯檔案,可以點選 Cloud Shell 工具列右側的「開啟編輯器」按鈕,使用 Cloud Shell 內建的程式碼編輯器。您也可以在 Cloud Shell 中使用 vim 和 emacs 等熱門編輯器。
3. 啟用 Cloud Run、Datastore 和外掛程式 API
啟用 Cloud API
在 Cloud Shell 中,為要使用的元件啟用 Cloud API:
gcloud services enable \
  run.googleapis.com \
  cloudbuild.googleapis.com \
  cloudresourcemanager.googleapis.com \
  datastore.googleapis.com \
  gsuiteaddons.googleapis.com
這項作業可能需要一些時間才能完成。
完成後,系統會顯示類似以下的成功訊息:
Operation "operations/acf.cc11852d-40af-47ad-9d59-477a12847c9e" finished successfully.
建立資料儲存庫執行個體
接著,啟用 App Engine,並建立 Datastore 資料庫。啟用 App Engine 是使用 Datastore 的先決條件,但我們不會將 App Engine 用於其他用途。
gcloud app create --region=us-central
gcloud firestore databases create --type=datastore-mode --region=us-central
建立 OAuth 同意畫面
外掛程式需要使用者授權,才能執行並對資料採取行動。如要啟用這項功能,請設定專案的同意畫面。在本程式碼研究室中,您將設定同意畫面為內部應用程式 (也就是不公開發布),以便開始使用。
- 在新分頁或視窗中開啟 Google Cloud 控制台。
- 按一下「Google Cloud 控制台」旁的向下箭頭
 ,然後選取專案。
 - 按一下左上角的「選單」圖示
 。
。 - 依序按一下「API 和服務」>「憑證」。專案的憑證頁面隨即顯示。
- 按一下 [OAuth consent screen] (OAuth 同意畫面)。系統會顯示「OAuth 同意畫面」。
- 在「使用者類型」下方,選取「內部」。如果使用 @gmail.com 帳戶,請選取「外部」。
- 按一下「建立」,「編輯應用程式註冊」頁面隨即顯示。
- 填寫表單:
- 在「應用程式名稱」中輸入「Todo Add-on」。
- 在「使用者支援電子郵件」部分,輸入您的個人電子郵件地址。
- 在「開發人員聯絡資訊」下方,輸入您的個人電子郵件地址。
- 按一下「儲存並繼續」。系統會顯示「範圍」表單。
- 在「範圍」表單中,按一下「儲存並繼續」。系統會顯示摘要。
- 按一下「返回資訊主頁」。
4. 建立初始外掛程式
初始化專案
首先,您要建立簡單的「Hello world」外掛程式並部署。外掛程式是網路服務,會回應 https 要求,並傳回 JSON 酬載,說明要採取的 UI 和動作。在本外掛程式中,您將使用 Node.js 和 Express 架構。
如要建立這個範本專案,請使用 Cloud Shell 建立名為 todo-add-on 的新目錄,然後前往該目錄:
mkdir ~/todo-add-on
cd ~/todo-add-on
您將在這個目錄中完成程式碼研究室的所有工作。
初始化 Node.js 專案:
npm init
NPM 會詢問專案設定的相關問題,例如名稱和版本。針對每個問題按下 ENTER,接受預設值。預設進入點是名為 index.js 的檔案,我們接下來會建立這個檔案。
接著,請安裝 Express 網路架構:
npm install --save express express-async-handler
建立外掛程式後端
現在開始建立應用程式。
建立名為 index.js 的檔案。如要建立檔案,請點選 Cloud Shell 視窗工具列中的「開啟編輯器」按鈕,使用 Cloud Shell 編輯器。或者,您也可以使用 vim 或 emacs,在 Cloud Shell 中編輯及管理檔案。
建立 index.js 檔案後,請加入下列內容:
const express = require('express');
const asyncHandler = require('express-async-handler');

// Create and configure the app
const app = express();

// Trust GCPs front end to for hostname/port forwarding
app.set("trust proxy", true);
app.use(express.json());

// Initial route for the add-on
app.post("/", asyncHandler(async (req, res) => {
    const card = {
        sections: [{
            widgets: [
                {
                    textParagraph: {
                        text: `Hello world!`
                    }
                },
            ]
        }]
    };
    const renderAction = {
        action: {
            navigations: [{
                pushCard: card
            }]
        }
    };
    res.json(renderAction);
}));

// Start the server
const port = process.env.PORT || 8080;
app.listen(port, () => {
  console.log(`Example app listening at http://localhost:${port}`)
});
伺服器除了顯示「Hello world」訊息外,不會執行其他動作,這沒問題。稍後會新增更多功能。
部署至 Cloud Run
如要在 Cloud Run 上部署應用程式,必須先將應用程式容器化。
建立容器
建立名為 Dockerfile 的 Dockerfile,其中包含:
FROM node:12-slim

# Create and change to the app directory.
WORKDIR /usr/src/app

# Copy application dependency manifests to the container image.
# A wildcard is used to ensure copying both package.json AND package-lock.json (when available).
# Copying this first prevents re-running npm install on every code change.
COPY package*.json ./

# Install production dependencies.
# If you add a package-lock.json, speed your build by switching to 'npm ci'.
# RUN npm ci --only=production
RUN npm install --only=production

# Copy local code to the container image.
COPY . ./

# Run the web service on container startup.
CMD [ "node", "index.js" ]
避免將不必要的檔案放入容器
為確保容器輕巧,請建立包含下列內容的 .dockerignore 檔案:
Dockerfile
.dockerignore
node_modules
npm-debug.log
啟用 Cloud Build
在本程式碼研究室中,您將在新增功能時多次建構及部署外掛程式。您不必分別執行指令來建構容器、將容器推送至容器登錄檔,以及將容器部署至 Cloud Build,而是使用 Cloud Build 協調程序。建立 cloudbuild.yaml 檔案,內含建構及部署應用程式的操作說明:
steps:
 # Build the container image
 - name: 'gcr.io/cloud-builders/docker'
   args: ['build', '-t', 'gcr.io/$PROJECT_ID/$_SERVICE_NAME', '.']
 # Push the container image to Container Registry
 - name: 'gcr.io/cloud-builders/docker'
   args: ['push', 'gcr.io/$PROJECT_ID/$_SERVICE_NAME']
 # Deploy container image to Cloud Run
 - name: 'gcr.io/google.com/cloudsdktool/cloud-sdk'
   entrypoint: gcloud
   args:
   - 'run'
   - 'deploy'
   - '$_SERVICE_NAME'
   - '--image'
   - 'gcr.io/$PROJECT_ID/$_SERVICE_NAME'
   - '--region'
   - '$_REGION'
   - '--platform'
   - 'managed'
images:
 - 'gcr.io/$PROJECT_ID/$_SERVICE_NAME'
substitutions:
   _SERVICE_NAME: todo-add-on
   _REGION: us-central1
執行下列指令,授予 Cloud Build 部署應用程式的權限:
PROJECT_ID=$(gcloud config list --format='value(core.project)')
PROJECT_NUMBER=$(gcloud projects describe $PROJECT_ID --format='value(projectNumber)')
gcloud projects add-iam-policy-binding $PROJECT_ID \
    --member=serviceAccount:$PROJECT_NUMBER@cloudbuild.gserviceaccount.com \
    --role=roles/run.admin
gcloud iam service-accounts add-iam-policy-binding \
    $PROJECT_NUMBER-compute@developer.gserviceaccount.com \
    --member=serviceAccount:$PROJECT_NUMBER@cloudbuild.gserviceaccount.com \
    --role=roles/iam.serviceAccountUser
建構及部署外掛程式後端
如要啟動建構作業,請在 Cloud Shell 中執行下列指令:
gcloud builds submit
完整建構及部署作業可能需要幾分鐘才能完成,尤其是第一次。
建構完成後,請確認服務已部署並找出網址。執行下列指令:
gcloud run services list --platform managed
複製這個網址,下個步驟會用到,也就是告訴 Google Workspace 如何叫用外掛程式。
註冊外掛程式
伺服器已啟動並執行,接下來請說明外掛程式,讓 Google Workspace 知道如何顯示及叫用外掛程式。
建立部署描述元
建立 deployment.json 檔案,並加入以下內容。請務必使用已部署應用程式的網址,取代 URL 預留位置。
{
  "oauthScopes": [
    "https://www.googleapis.com/auth/gmail.addons.execute",
    "https://www.googleapis.com/auth/calendar.addons.execute"
  ],
  "addOns": {
    "common": {
      "name": "Todo Codelab",
      "logoUrl": "https://raw.githubusercontent.com/webdog/octicons-png/main/black/check.png",
      "homepageTrigger": {
        "runFunction": "URL"
      }
    },
    "gmail": {},
    "drive": {},
    "calendar": {},
    "docs": {},
    "sheets": {},
    "slides": {}
  }
}
執行下列指令,上傳部署描述元:
gcloud workspace-add-ons deployments create todo-add-on --deployment-file=deployment.json
授權存取外掛程式後端
外掛程式架構也需要呼叫服務的權限。執行下列指令,更新 Cloud Run 的 IAM 政策,允許 Google Workspace 叫用外掛程式:
SERVICE_ACCOUNT_EMAIL=$(gcloud workspace-add-ons get-authorization --format="value(serviceAccountEmail)")
gcloud run services add-iam-policy-binding todo-add-on --platform managed --region us-central1 --role roles/run.invoker --member "serviceAccount:$SERVICE_ACCOUNT_EMAIL"
安裝外掛程式以進行測試
如要在帳戶的開發模式中安裝外掛程式,請在 Cloud Shell 中執行下列指令:
gcloud workspace-add-ons deployments install todo-add-on
在新分頁或視窗中開啟 (Gmail)[https://mail.google.com/]。在右側找出有勾號圖示的擴充功能。

如要開啟外掛程式,請按一下勾號圖示。系統會顯示授權外掛程式的提示。

按一下「授權存取權」,然後按照彈出式視窗中的授權流程指示操作。完成後,外掛程式會自動重新載入,並顯示「Hello world!」訊息。
恭喜!您現在已部署並安裝簡單的外掛程式。現在就將其變成工作清單應用程式吧!
5. 存取使用者身分識別資訊
許多使用者通常會使用外掛程式處理個人或機構的私人資訊。在本程式碼研究室中,外掛程式應只顯示目前使用者的工作。系統會透過需要解碼的身分權杖,將使用者身分傳送至外掛程式。
在部署描述元中新增範圍
系統預設不會傳送使用者 ID。這是使用者資料,外掛程式需要取得存取權限。如要取得這項權限,請更新 deployment.json,並將 openid 和 email OAuth 範圍新增至外掛程式所需的範圍清單。新增 OAuth 範圍後,外掛程式會在使用者下次使用時,提示他們授予存取權。
"oauthScopes": [
      "https://www.googleapis.com/auth/gmail.addons.execute",
      "https://www.googleapis.com/auth/calendar.addons.execute",
      "openid",
      "email"
],
接著,在 Cloud Shell 中執行下列指令,更新部署描述元:
gcloud workspace-add-ons deployments replace todo-add-on --deployment-file=deployment.json
更新外掛程式伺服器
雖然外掛程式已設定為要求使用者身分,但實作方式仍須更新。
剖析 ID 權杖
首先,請將 Google 驗證程式庫新增至專案:
npm install --save google-auth-library
然後編輯 index.js,要求使用 OAuth2Client:
const { OAuth2Client } = require('google-auth-library');
然後新增 Helper 方法來剖析 ID 權杖:
async function userInfo(event) {
    const idToken = event.authorizationEventObject.userIdToken;
    const authClient = new OAuth2Client();
    const ticket = await authClient.verifyIdToken({
        idToken
    });
    return ticket.getPayload();
}
顯示使用者身分
在新增所有工作清單功能之前,現在是設定檢查點的好時機。更新應用程式的路由,顯示使用者的電子郵件地址和專屬 ID,而非「Hello world」。
app.post('/', asyncHandler(async (req, res) => {
    const event = req.body;
    const user = await userInfo(event);
    const card = {
        sections: [{
            widgets: [
                {
                    textParagraph: {
                        text: `Hello ${user.email} ${user.sub}`
                    }
                },
            ]
        }]
    };
    const renderAction = {
        action: {
            navigations: [{
                pushCard: card
            }]
        }
    };
    res.json(renderAction);
}));
完成這些變更後,產生的 index.js 檔案應如下所示:
const express = require('express');
const asyncHandler = require('express-async-handler');
const { OAuth2Client } = require('google-auth-library');

// Create and configure the app
const app = express();

// Trust GCPs front end to for hostname/port forwarding
app.set("trust proxy", true);
app.use(express.json());

// Initial route for the add-on
app.post('/', asyncHandler(async (req, res) => {
    const event = req.body;
    const user = await userInfo(event);
    const card = {
        sections: [{
            widgets: [
                {
                    textParagraph: {
                        text: `Hello ${user.email} ${user.sub}`
                    }
                },
            ]
        }]
    };
    const renderAction = {
        action: {
            navigations: [{
                pushCard: card
            }]
        }
    };
    res.json(renderAction);
}));

async function userInfo(event) {
    const idToken = event.authorizationEventObject.userIdToken;
    const authClient = new OAuth2Client();
    const ticket = await authClient.verifyIdToken({
        idToken
    });
    return ticket.getPayload();
}

// Start the server
const port = process.env.PORT || 8080;
app.listen(port, () => {
  console.log(`Example app listening at http://localhost:${port}`)
});
重新部署並測試
重新建構並重新部署外掛程式。在 Cloud Shell 中執行下列指令:
gcloud builds submit
伺服器重新部署後,請開啟或重新載入 Gmail,然後再次開啟外掛程式。由於範圍已變更,外掛程式會要求重新授權。再次授權外掛程式,完成後外掛程式會顯示您的電子郵件地址和使用者 ID。
外掛程式現在知道使用者身分,您可以開始新增工作清單功能。
6. 實作工作清單
本程式碼研究室的初始資料模型很簡單:Task 實體清單,每個實體都包含工作描述文字和時間戳記的屬性。
建立資料儲存庫索引
程式碼研究室稍早已為專案啟用 Datastore。不需要結構定義,但必須明確建立複合式查詢的索引。建立索引可能需要幾分鐘,因此請先執行這項操作。
建立名為 index.yaml 的檔案,並在當中加入下列內容:
indexes:
- kind: Task
  ancestor: yes
  properties:
  - name: created
然後更新 Datastore 索引:
gcloud datastore indexes create index.yaml
系統提示您繼續操作時,請按下鍵盤上的 Enter 鍵。系統會在背景建立索引。在此期間,請開始更新外掛程式程式碼,以實作「待辦事項」。
更新外掛程式後端
將 Datastore 程式庫安裝至專案:
npm install --save @google-cloud/datastore
讀取及寫入 Datastore
更新 index.js,實作「todos」,首先匯入 Datastore 程式庫並建立用戶端:
const {Datastore} = require('@google-cloud/datastore');
const datastore = new Datastore();
新增從 Datastore 讀取及寫入工作的方法:
async function listTasks(userId) {
    const parentKey = datastore.key(['User', userId]);
    const query = datastore.createQuery('Task')
        .hasAncestor(parentKey)
        .order('created')
        .limit(20);
    const [tasks] = await datastore.runQuery(query);
    return tasks;;
}

async function addTask(userId, task) {
    const key = datastore.key(['User', userId, 'Task']);
    const entity = {
        key,
        data: task,
    };
    await datastore.save(entity);
    return entity;
}

async function deleteTasks(userId, taskIds) {
    const keys = taskIds.map(id => datastore.key(['User', userId,
                                                  'Task', datastore.int(id)]));
    await datastore.delete(keys);
}
實作 UI 的算繪作業
大部分變更都與外掛程式 UI 有關。先前 UI 傳回的所有資訊卡都是靜態的,不會根據可用資料而變更。在這裡,系統需要根據使用者的目前工作清單,動態建構卡片。
本程式碼研究室的 UI 包含文字輸入欄位,以及附有核取方塊的工作清單,方便您將工作標示為完成。每個項目也都有 onChangeAction 屬性,會在使用者新增或刪除工作時,回呼至外掛程式伺服器。在上述任一情況下,UI 都需要使用更新後的工作清單重新算繪。為處理這項問題,我們將介紹建構資訊卡 UI 的新方法。
繼續編輯 index.js,並新增下列方法:
function buildCard(req, tasks) {
    const baseUrl = `${req.protocol}://${req.hostname}${req.baseUrl}`;
    // Input for adding a new task
    const inputSection = {
        widgets: [
            {
                textInput: {
                    label: 'Task to add',
                    name: 'newTask',
                    value: '',
                    onChangeAction: {
                        function: `${baseUrl}/newTask`,
                    },
                }
            }
        ]
    };
    const taskListSection = {
        header: 'Your tasks',
        widgets: []
    };
    if (tasks && tasks.length) {
        // Create text & checkbox for each task
        tasks.forEach(task => taskListSection.widgets.push({
            decoratedText: {
                text: task.text,
                wrapText: true,
                switchControl: {
                    controlType: 'CHECKBOX',
                    name: 'completedTasks',
                    value: task[datastore.KEY].id,
                    selected: false,
                    onChangeAction: {
                        function: `${baseUrl}/complete`,
                    }
                }
            }
        }));
    } else {
        // Placeholder for empty task list
        taskListSection.widgets.push({
            textParagraph: {
                text: 'Your task list is empty.'
            }
        });
    }
    const card = {
        sections: [
            inputSection,
            taskListSection,
        ]
    }
    return card;
}
更新路線
現在有了讀取及寫入 Datastore 和建構 UI 的輔助方法,接下來要在應用程式路徑中將這些方法連結在一起。取代現有路徑,並新增兩條路徑:一條用於新增工作,另一條用於刪除工作。
app.post('/', asyncHandler(async (req, res) => {
    const event = req.body;
    const user = await userInfo(event);
    const tasks = await listTasks(user.sub);
    const card = buildCard(req, tasks);
    const responsePayload = {
        action: {
            navigations: [{
                pushCard: card
            }]
        }
    };
    res.json(responsePayload);
}));

app.post('/newTask', asyncHandler(async (req, res) => {
    const event = req.body;
    const user = await userInfo(event);

    const formInputs = event.commonEventObject.formInputs || {};
    const newTask = formInputs.newTask;
    if (!newTask || !newTask.stringInputs) {
        return {};
    }

    const task = {
        text: newTask.stringInputs.value[0],
        created: new Date()
    };
    await addTask(user.sub, task);

    const tasks = await listTasks(user.sub);
    const card = buildCard(req, tasks);
    const responsePayload = {
        renderActions: {
            action: {
                navigations: [{
                    updateCard: card
                }],
                notification: {
                    text: 'Task added.'
                },
            }
        }
    };
    res.json(responsePayload);
}));

app.post('/complete', asyncHandler(async (req, res) => {
    const event = req.body;
    const user = await userInfo(event);

    const formInputs = event.commonEventObject.formInputs || {};
    const completedTasks = formInputs.completedTasks;
    if (!completedTasks || !completedTasks.stringInputs) {
        return {};
    }

    await deleteTasks(user.sub, completedTasks.stringInputs.value);

    const tasks = await listTasks(user.sub);
    const card = buildCard(req, tasks);
    const responsePayload = {
        renderActions: {
            action: {
                navigations: [{
                    updateCard: card
                }],
                notification: {
                    text: 'Task completed.'
                },
            }
        }
    };
    res.json(responsePayload);
}));
以下是最終的完整 index.js 檔案:
const express = require('express');
const asyncHandler = require('express-async-handler');
const { OAuth2Client } = require('google-auth-library');
const {Datastore} = require('@google-cloud/datastore');
const datastore = new Datastore();

// Create and configure the app
const app = express();

// Trust GCPs front end to for hostname/port forwarding
app.set("trust proxy", true);
app.use(express.json());

// Initial route for the add-on
app.post('/', asyncHandler(async (req, res) => {
    const event = req.body;
    const user = await userInfo(event);
    const tasks = await listTasks(user.sub);
    const card = buildCard(req, tasks);
    const responsePayload = {
        action: {
            navigations: [{
                pushCard: card
            }]
        }
    };
    res.json(responsePayload);
}));

app.post('/newTask', asyncHandler(async (req, res) => {
    const event = req.body;
    const user = await userInfo(event);

    const formInputs = event.commonEventObject.formInputs || {};
    const newTask = formInputs.newTask;
    if (!newTask || !newTask.stringInputs) {
        return {};
    }

    const task = {
        text: newTask.stringInputs.value[0],
        created: new Date()
    };
    await addTask(user.sub, task);

    const tasks = await listTasks(user.sub);
    const card = buildCard(req, tasks);
    const responsePayload = {
        renderActions: {
            action: {
                navigations: [{
                    updateCard: card
                }],
                notification: {
                    text: 'Task added.'
                },
            }
        }
    };
    res.json(responsePayload);
}));

app.post('/complete', asyncHandler(async (req, res) => {
    const event = req.body;
    const user = await userInfo(event);

    const formInputs = event.commonEventObject.formInputs || {};
    const completedTasks = formInputs.completedTasks;
    if (!completedTasks || !completedTasks.stringInputs) {
        return {};
    }

    await deleteTasks(user.sub, completedTasks.stringInputs.value);

    const tasks = await listTasks(user.sub);
    const card = buildCard(req, tasks);
    const responsePayload = {
        renderActions: {
            action: {
                navigations: [{
                    updateCard: card
                }],
                notification: {
                    text: 'Task completed.'
                },
            }
        }
    };
    res.json(responsePayload);
}));

function buildCard(req, tasks) {
    const baseUrl = `${req.protocol}://${req.hostname}${req.baseUrl}`;
    // Input for adding a new task
    const inputSection = {
        widgets: [
            {
                textInput: {
                    label: 'Task to add',
                    name: 'newTask',
                    value: '',
                    onChangeAction: {
                        function: `${baseUrl}/newTask`,
                    },
                }
            }
        ]
    };
    const taskListSection = {
        header: 'Your tasks',
        widgets: []
    };
    if (tasks && tasks.length) {
        // Create text & checkbox for each task
        tasks.forEach(task => taskListSection.widgets.push({
            decoratedText: {
                text: task.text,
                wrapText: true,
                switchControl: {
                    controlType: 'CHECKBOX',
                    name: 'completedTasks',
                    value: task[datastore.KEY].id,
                    selected: false,
                    onChangeAction: {
                        function: `${baseUrl}/complete`,
                    }
                }
            }
        }));
    } else {
        // Placeholder for empty task list
        taskListSection.widgets.push({
            textParagraph: {
                text: 'Your task list is empty.'
            }
        });
    }
    const card = {
        sections: [
            inputSection,
            taskListSection,
        ]
    }
    return card;
}

async function userInfo(event) {
    const idToken = event.authorizationEventObject.userIdToken;
    const authClient = new OAuth2Client();
    const ticket = await authClient.verifyIdToken({
        idToken
    });
    return ticket.getPayload();
}

async function listTasks(userId) {
    const parentKey = datastore.key(['User', userId]);
    const query = datastore.createQuery('Task')
        .hasAncestor(parentKey)
        .order('created')
        .limit(20);
    const [tasks] = await datastore.runQuery(query);
    return tasks;;
}

async function addTask(userId, task) {
    const key = datastore.key(['User', userId, 'Task']);
    const entity = {
        key,
        data: task,
    };
    await datastore.save(entity);
    return entity;
}

async function deleteTasks(userId, taskIds) {
    const keys = taskIds.map(id => datastore.key(['User', userId,
                                                  'Task', datastore.int(id)]));
    await datastore.delete(keys);
}

// Start the server
const port = process.env.PORT || 8080;
app.listen(port, () => {
  console.log(`Example app listening at http://localhost:${port}`)
});
重新部署並測試
如要重建及重新部署外掛程式,請啟動建構作業。在 Cloud Shell 執行下列指令:
gcloud builds submit
在 Gmail 中重新載入外掛程式,即可看到新版 UI。請花點時間探索外掛程式。在輸入欄位中輸入文字,然後按下鍵盤上的 Enter 鍵,即可新增幾項工作,接著按一下核取方塊即可刪除。

您可以視需要直接跳到本程式碼研究室的最後一個步驟,然後清理專案。或者,如要進一步瞭解外掛程式,可以完成最後一個步驟。
7. (選用) 新增背景資訊
外掛程式最實用的功能之一就是「情境感知」。外掛程式可存取 Google Workspace 環境 (例如使用者正在查看的電子郵件、日曆活動和文件),但必須取得使用者授權。外掛程式也可以執行插入內容等動作。在本程式碼研究室中,您將為 Workspace 編輯器 (文件、試算表和簡報) 新增內容支援功能,以便在編輯器中建立工作時,將目前的文件附加至工作。工作顯示後,使用者只要點選工作,系統就會在新分頁中開啟文件,讓使用者返回文件完成工作。
更新外掛程式後端
更新 newTask 路線
首先,請更新 /newTask 路由,在工作 (如有) 中加入文件 ID:
app.post('/newTask', asyncHandler(async (req, res) => {
    const event = req.body;
    const user = await userInfo(event);

    const formInputs = event.commonEventObject.formInputs || {};
    const newTask = formInputs.newTask;
    if (!newTask || !newTask.stringInputs) {
        return {};
    }

    // Get the current document if it is present
    const editorInfo = event.docs || event.sheets || event.slides;
    let document = null;
    if (editorInfo && editorInfo.id) {
        document = {
            id: editorInfo.id,
        }
    }
    const task = {
        text: newTask.stringInputs.value[0],
        created: new Date(),
        document,
    };
    await addTask(user.sub, task);

    const tasks = await listTasks(user.sub);
    const card = buildCard(req, tasks);
    const responsePayload = {
        renderActions: {
            action: {
                navigations: [{
                    updateCard: card
                }],
                notification: {
                    text: 'Task added.'
                },
            }
        }
    };
    res.json(responsePayload);
}));
新建立的工作現在會包含目前的文件 ID。不過,編輯器中的內容預設不會共用。與其他使用者資料一樣,使用者必須授權外掛程式存取資料。為避免過度分享資訊,建議您逐一要求及授予檔案權限。
更新 UI
在 index.js 中更新 buildCard,進行兩項變更。首先,我們會更新工作項目的顯示方式,加入文件連結 (如有)。第二種是如果外掛程式在編輯器中算繪,且尚未授予檔案存取權,則顯示選用的授權提示。
function buildCard(req, tasks) {
    const baseUrl = `${req.protocol}://${req.hostname}${req.baseUrl}`;
    const inputSection = {
        widgets: [
            {
                textInput: {
                    label: 'Task to add',
                    name: 'newTask',
                    value: '',
                    onChangeAction: {
                        function: `${baseUrl}/newTask`,
                    },
                }
            }
        ]
    };
    const taskListSection = {
        header: 'Your tasks',
        widgets: []
    };
    if (tasks && tasks.length) {
        tasks.forEach(task => {
            const widget = {
                decoratedText: {
                    text: task.text,
                    wrapText: true,
                    switchControl: {
                        controlType: 'CHECKBOX',
                        name: 'completedTasks',
                        value: task[datastore.KEY].id,
                        selected: false,
                        onChangeAction: {
                            function: `${baseUrl}/complete`,
                        }
                    }
                }
            };
            // Make item clickable and open attached doc if present
            if (task.document) {
                widget.decoratedText.bottomLabel = 'Click to open  document.';
                const id = task.document.id;
                const url = `https://drive.google.com/open?id=${id}`
                widget.decoratedText.onClick = {
                    openLink: {
                        openAs: 'FULL_SIZE',
                        onClose: 'NOTHING',
                        url: url,
                    }
                }
            }
            taskListSection.widgets.push(widget)
        });
    } else {
        taskListSection.widgets.push({
            textParagraph: {
                text: 'Your task list is empty.'
            }
        });
    }
    const card = {
        sections: [
            inputSection,
            taskListSection,
        ]
    };

    // Display file authorization prompt if the host is an editor
    // and no doc ID present
    const event = req.body;
    const editorInfo = event.docs || event.sheets || event.slides;
    const showFileAuth = editorInfo && editorInfo.id === undefined;
    if (showFileAuth) {
        card.fixedFooter = {
            primaryButton: {
                text: 'Authorize file access',
                onClick: {
                    action: {
                        function: `${baseUrl}/authorizeFile`,
                    }
                }
            }
        }
    }
    return card;
}
實作檔案授權路徑
授權按鈕會為應用程式新增路徑,因此請實作該路徑。這個路徑會介紹新的概念:主機應用程式動作。這些是與外掛程式主機應用程式互動的特殊指令。在本例中,要求存取目前的編輯器檔案。
在 index.js 中,新增 /authorizeFile 路由:
app.post('/authorizeFile', asyncHandler(async (req, res) => {
    const responsePayload = {
        renderActions: {
            hostAppAction: {
                editorAction: {
                    requestFileScopeForActiveDocument: {}
                }
            },
        }
    };
    res.json(responsePayload);
}));
以下是最終的完整 index.js 檔案:
const express = require('express');
const asyncHandler = require('express-async-handler');
const { OAuth2Client } = require('google-auth-library');
const {Datastore} = require('@google-cloud/datastore');
const datastore = new Datastore();

// Create and configure the app
const app = express();

// Trust GCPs front end to for hostname/port forwarding
app.set("trust proxy", true);
app.use(express.json());

// Initial route for the add-on
app.post('/', asyncHandler(async (req, res) => {
    const event = req.body;
    const user = await userInfo(event);
    const tasks = await listTasks(user.sub);
    const card = buildCard(req, tasks);
    const responsePayload = {
        action: {
            navigations: [{
                pushCard: card
            }]
        }
    };
    res.json(responsePayload);
}));

app.post('/newTask', asyncHandler(async (req, res) => {
    const event = req.body;
    const user = await userInfo(event);

    const formInputs = event.commonEventObject.formInputs || {};
    const newTask = formInputs.newTask;
    if (!newTask || !newTask.stringInputs) {
        return {};
    }

    // Get the current document if it is present
    const editorInfo = event.docs || event.sheets || event.slides;
    let document = null;
    if (editorInfo && editorInfo.id) {
        document = {
            id: editorInfo.id,
        }
    }
    const task = {
        text: newTask.stringInputs.value[0],
        created: new Date(),
        document,
    };
    await addTask(user.sub, task);

    const tasks = await listTasks(user.sub);
    const card = buildCard(req, tasks);
    const responsePayload = {
        renderActions: {
            action: {
                navigations: [{
                    updateCard: card
                }],
                notification: {
                    text: 'Task added.'
                },
            }
        }
    };
    res.json(responsePayload);
}));

app.post('/complete', asyncHandler(async (req, res) => {
    const event = req.body;
    const user = await userInfo(event);

    const formInputs = event.commonEventObject.formInputs || {};
    const completedTasks = formInputs.completedTasks;
    if (!completedTasks || !completedTasks.stringInputs) {
        return {};
    }

    await deleteTasks(user.sub, completedTasks.stringInputs.value);

    const tasks = await listTasks(user.sub);
    const card = buildCard(req, tasks);
    const responsePayload = {
        renderActions: {
            action: {
                navigations: [{
                    updateCard: card
                }],
                notification: {
                    text: 'Task completed.'
                },
            }
        }
    };
    res.json(responsePayload);
}));

app.post('/authorizeFile', asyncHandler(async (req, res) => {
    const responsePayload = {
        renderActions: {
            hostAppAction: {
                editorAction: {
                    requestFileScopeForActiveDocument: {}
                }
            },
        }
    };
    res.json(responsePayload);
}));

function buildCard(req, tasks) {
    const baseUrl = `${req.protocol}://${req.hostname}${req.baseUrl}`;
    const inputSection = {
        widgets: [
            {
                textInput: {
                    label: 'Task to add',
                    name: 'newTask',
                    value: '',
                    onChangeAction: {
                        function: `${baseUrl}/newTask`,
                    },
                }
            }
        ]
    };
    const taskListSection = {
        header: 'Your tasks',
        widgets: []
    };
    if (tasks && tasks.length) {
        tasks.forEach(task => {
            const widget = {
                decoratedText: {
                    text: task.text,
                    wrapText: true,
                    switchControl: {
                        controlType: 'CHECKBOX',
                        name: 'completedTasks',
                        value: task[datastore.KEY].id,
                        selected: false,
                        onChangeAction: {
                            function: `${baseUrl}/complete`,
                        }
                    }
                }
            };
            // Make item clickable and open attached doc if present
            if (task.document) {
                widget.decoratedText.bottomLabel = 'Click to open  document.';
                const id = task.document.id;
                const url = `https://drive.google.com/open?id=${id}`
                widget.decoratedText.onClick = {
                    openLink: {
                        openAs: 'FULL_SIZE',
                        onClose: 'NOTHING',
                        url: url,
                    }
                }
            }
            taskListSection.widgets.push(widget)
        });
    } else {
        taskListSection.widgets.push({
            textParagraph: {
                text: 'Your task list is empty.'
            }
        });
    }
    const card = {
        sections: [
            inputSection,
            taskListSection,
        ]
    };

    // Display file authorization prompt if the host is an editor
    // and no doc ID present
    const event = req.body;
    const editorInfo = event.docs || event.sheets || event.slides;
    const showFileAuth = editorInfo && editorInfo.id === undefined;
    if (showFileAuth) {
        card.fixedFooter = {
            primaryButton: {
                text: 'Authorize file access',
                onClick: {
                    action: {
                        function: `${baseUrl}/authorizeFile`,
                    }
                }
            }
        }
    }
    return card;
}

async function userInfo(event) {
    const idToken = event.authorizationEventObject.userIdToken;
    const authClient = new OAuth2Client();
    const ticket = await authClient.verifyIdToken({
        idToken
    });
    return ticket.getPayload();
}

async function listTasks(userId) {
    const parentKey = datastore.key(['User', userId]);
    const query = datastore.createQuery('Task')
        .hasAncestor(parentKey)
        .order('created')
        .limit(20);
    const [tasks] = await datastore.runQuery(query);
    return tasks;;
}

async function addTask(userId, task) {
    const key = datastore.key(['User', userId, 'Task']);
    const entity = {
        key,
        data: task,
    };
    await datastore.save(entity);
    return entity;
}

async function deleteTasks(userId, taskIds) {
    const keys = taskIds.map(id => datastore.key(['User', userId,
                                                  'Task', datastore.int(id)]));
    await datastore.delete(keys);
}

// Start the server
const port = process.env.PORT || 8080;
app.listen(port, () => {
  console.log(`Example app listening at http://localhost:${port}`)
});
在部署描述元中新增範圍
重建伺服器前,請更新外掛程式部署描述元,加入 https://www.googleapis.com/auth/drive.file OAuth 範圍。更新 deployment.json,將 https://www.googleapis.com/auth/drive.file 新增至 OAuth 範圍清單:
"oauthScopes": [
    "https://www.googleapis.com/auth/gmail.addons.execute",
    "https://www.googleapis.com/auth/calendar.addons.execute",
    "https://www.googleapis.com/auth/drive.file",
    "openid",
    "email"
]
執行下列 Cloud Shell 指令,上傳新版本:
gcloud workspace-add-ons deployments replace todo-add-on --deployment-file=deployment.json
重新部署並測試
最後,請重建伺服器。在 Cloud Shell 中執行下列指令:
gcloud builds submit
完成後,請開啟現有的 Google 文件,或開啟 doc.new 建立新文件,而非開啟 Gmail。如要建立新文件,請務必輸入一些文字或為檔案命名。
開啟外掛程式。外掛程式底部會顯示「授權檔案存取權」按鈕。按一下按鈕,然後授權存取檔案。
授權後,即可在編輯器中新增工作。工作會顯示標籤,指出文件已附加。點選連結後,系統會在新的分頁中開啟文件。當然,開啟已開啟的文件有點愚蠢。如要最佳化使用者介面,篩除目前文件的連結,請將此視為額外學分!
8. 恭喜
恭喜!您已成功使用 Cloud Run 建構及部署 Google Workspace 外掛程式。雖然本程式碼研究室涵蓋了許多建構外掛程式的核心概念,但還有許多內容值得探索。請參閱下列資源,並記得清理專案,以免產生額外費用。
清除所用資源
如要從帳戶解除安裝外掛程式,請在 Cloud Shell 中執行下列指令:
gcloud workspace-add-ons deployments uninstall todo-add-on
如要避免系統向您的 Google Cloud Platform 帳戶收取您在本教學課程中所用資源的相關費用:
- 在專案清單中選取專案,然後按一下「刪除」。
- 在對話方塊中輸入專案 ID,然後按一下「Shut down」(關閉) 刪除專案。
瞭解詳情
- Google Workspace 外掛程式總覽
- 在 Marketplace 中尋找現有應用程式和外掛程式