
1. Overview
In this lab, you will walk through a complete ML workflow on GCP. From a Cloud AI Platform Notebooks environment, you'll ingest data from a BigQuery public dataset, build and train an XGBoost model, and deploy the model to AI Platform for prediction.
What you learn
You'll learn how to:
- Ingest and analyze a BigQuery dataset in AI Platform Notebooks
- Build an XGBoost model
- Deploy the XGBoost model to AI Platform and get predictions
The total cost to run this lab on Google Cloud is about $1.
2. Setup your environment
You'll need a Google Cloud Platform project with billing enabled to run this codelab. To create a project, follow the instructions here.
Step 1: Enable the Cloud AI Platform Models API
Navigate to the AI Platform Models section of your Cloud Console and click Enable if it isn't already enabled.

Step 2: Enable the Compute Engine API
Navigate to Compute Engine and select Enable if it isn't already enabled. You'll need this to create your notebook instance.
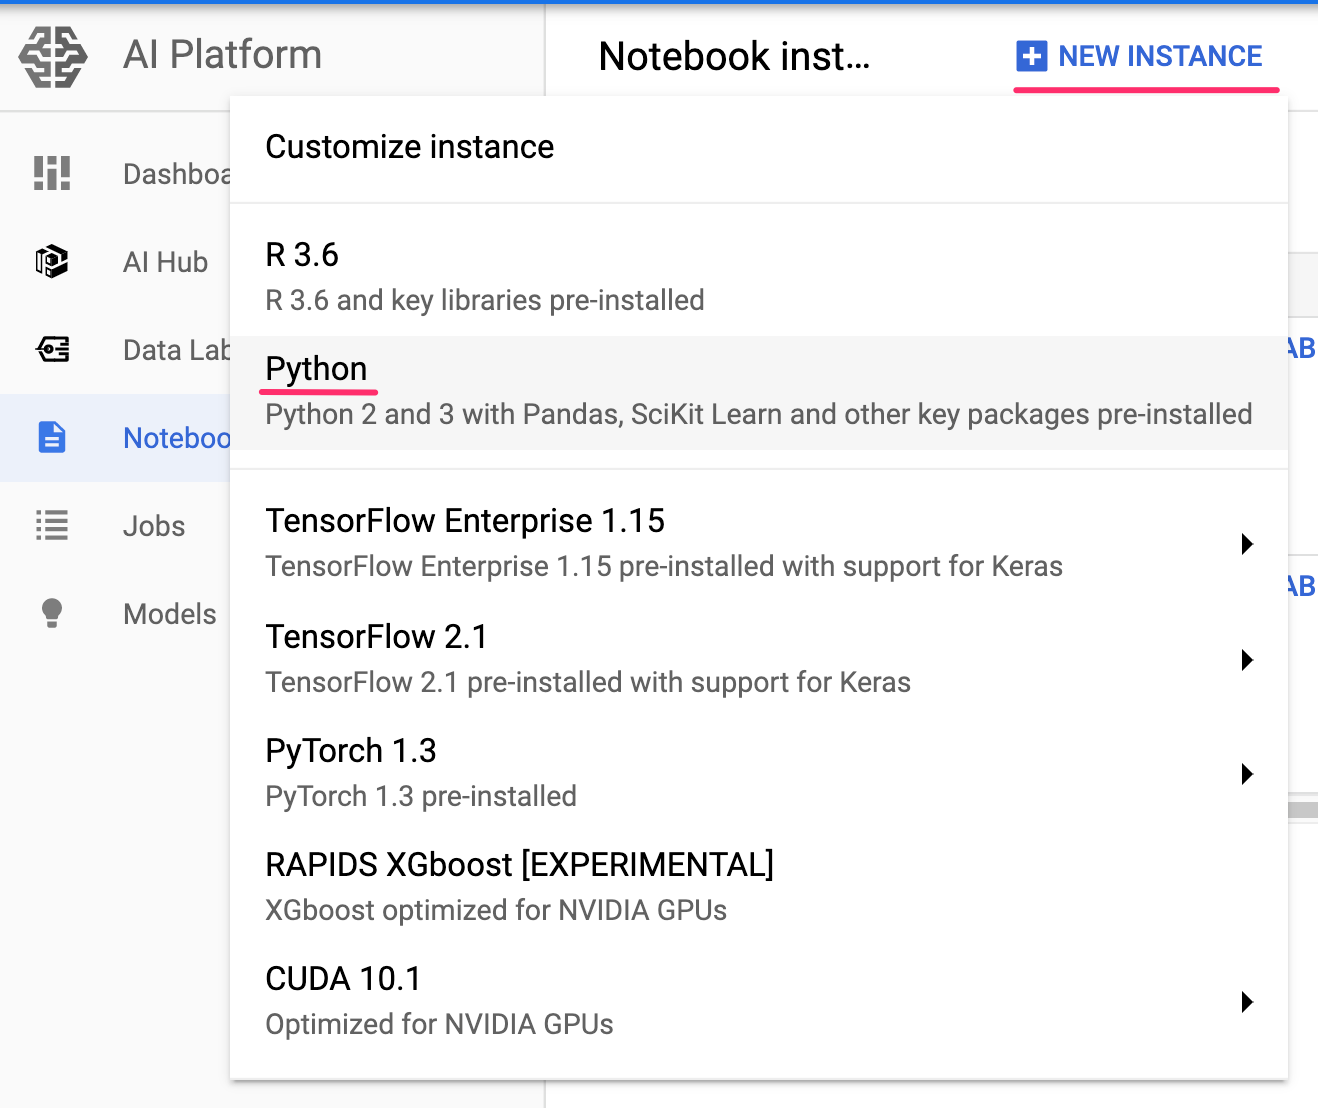
Step 3: Create an AI Platform Notebooks instance
Navigate to AI Platform Notebooks section of your Cloud Console and click New Instance. Then select the latest Python instance type:
Use the default options and then click Create. Once the instance has been created, select Open JupyterLab:
Step 4: Install XGBoost
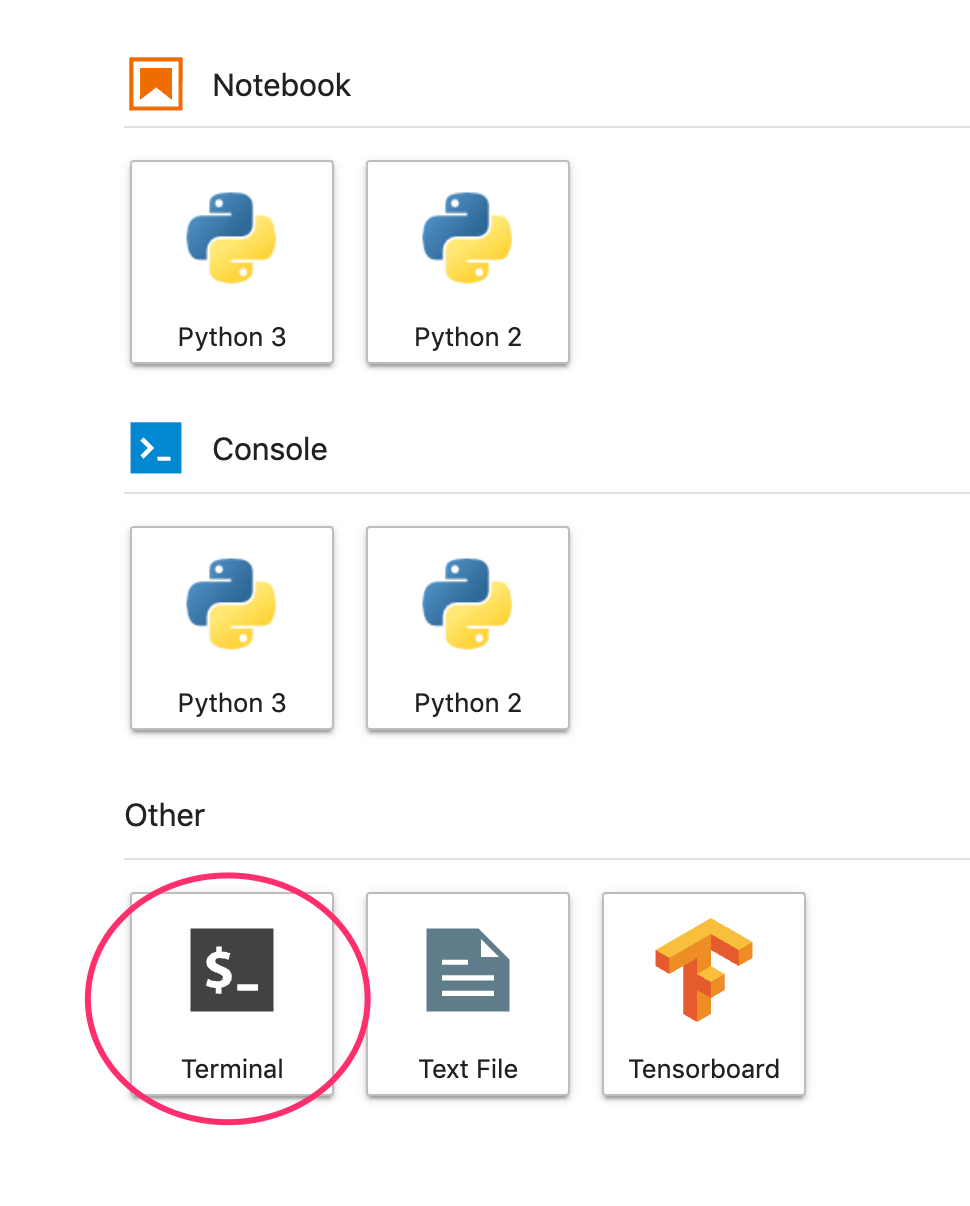
Once your JupyterLab instance has opened, you'll need to add the XGBoost package.
To do this, select Terminal from the launcher:
Then run the following to install the latest version of XGBoost supported by AI Platform:
pip3 install xgboost==0.82
After this completes, open a Python 3 Notebook instance from the launcher. You're ready to get started in your notebook!
Step 5: Import Python packages
In the first cell of your notebook, add the following imports and run the cell. You can run it by pressing the right arrow button in the top menu or pressing command-enter:
import pandas as pd
import xgboost as xgb
import numpy as np

from sklearn.model_selection import train_test_split
from sklearn.utils import shuffle
from google.cloud import bigquery
3. Exploring the BigQuery dataset
BigQuery has made many datasets publicly available for your exploration. For this lab, we'll be using the natality dataset. This contains data on nearly every birth in the US over a 40 year time period, including the birth weight of the child, and demographic information on the baby's parents. We'll be using a subset of the features to predict a baby's birth weight.
Step 1: Download the BigQuery data to our notebook
We'll be using the Python client library for BigQuery to download the data into a Pandas DataFrame. The original dataset is 21GB and contains 123M rows. To keep things simple we'll only be using 10,000 rows from the dataset.
Construct the query and preview the resulting DataFrame with the following code. Here we're getting 4 features from the original dataset, along with baby weight (the thing our model will predict). The dataset goes back many years but for this model we'll use only data from after 2000:
query="""
SELECT
  weight_pounds,
  is_male,
  mother_age,
  plurality,
  gestation_weeks
FROM
  publicdata.samples.natality
WHERE year > 2000
LIMIT 10000
"""
df = bigquery.Client().query(query).to_dataframe()
df.head()
To get a summary of the numeric features in our dataset, run:
df.describe()
This shows the mean, standard deviation, minimum, and other metrics for our numeric columns. Finally, let's get some data on our boolean column indicating the baby's gender. We can do this with Pandas' value_counts method:
df['is_male'].value_counts()
Looks like the dataset is nearly balanced 50/50 by gender.
4. Prepare the data for training
In this section, we'll divide the data into train and test sets to prepare it for training our model.
Step 1: Extract the label column
First drop rows with null values from the dataset and shuffle the data:
df = df.dropna()
df = shuffle(df, random_state=2)
Next, extract the label column into a separate variable and create a DataFrame with only our features:
labels = df['weight_pounds']
data = df.drop(columns=['weight_pounds'])
Now if you preview our dataset by running data.head(), you should see the four features we'll be using for training.
Step 2: Convert categorical features to integers
Since XGBoost requires all data to be numeric, we'll need to change how we're representing the data in the is_male column, which is currently True / False strings. We can do that simply by changing the type of that column:
data['is_male'] = data['is_male'].astype(int)
Step 3: Split data into train and test sets
We'll use Scikit Learn's train_test_split utility which we imported at the beginning of the notebook to split our data into train and test sets:
x,y = data,labels
x_train,x_test,y_train,y_test = train_test_split(x,y)
Now we're ready to build and train our model!
5. A quick XGBoost primer
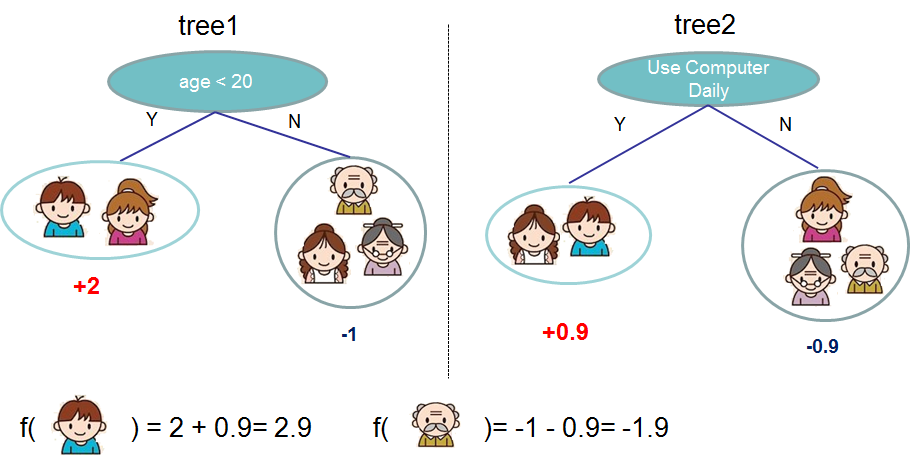
XGBoost is a machine learning framework that uses decision trees and gradient boosting to build predictive models. It works by ensembling multiple decision trees together based on the score associated with different leaf nodes in a tree.
The diagram below is a simplified visualization of an ensemble tree network for a model that evaluates whether or not someone will like a specific computer game (this is from the XGBoost docs):
Why are we using XGBoost for this model? While traditional neural networks have been shown to perform best on unstructured data like images and text, decision trees often perform extremely well on structured data like the mortgage dataset we'll be using in this codelab.
6. Build, train, and evaluate an XGBoost model
Step 1: Define and train the XGBoost model
Creating a model in XGBoost is simple. We'll use the XGBRegressor class to create the model, and just need to pass the right objective parameter for our specific task. Here we're using a regression model since we're predicting a numerical value (baby's weight). If we were instead bucketing our data to determine if a baby weighed more or less than 6 pounds, we'd use a classification model.
In this case we'll use reg:squarederror as our model's objective.
The following code will create an XGBoost model:
model = xgb.XGBRegressor(
    objective='reg:linear'
)
You can train the model with one line of code, calling the fit() method and passing it the training data and labels.
model.fit(x_train, y_train)
Step 2: Evaluate your model on test data
We can now use our trained model to generate predictions on our test data with the predict() function:
y_pred = model.predict(x_test)
Let's see how the model performed on the first 20 values from our test set. Below we'll print the predicted baby weight along with the actual baby weight for each test example:
for i in range(20):
    print('Predicted weight: ', y_pred[i])
    print('Actual weight: ', y_test.iloc[i])
    print()
Step 3: Save your model
In order to deploy the model, run the following code to save it to a local file:
model.save_model('model.bst')
7. Deploy model to Cloud AI Platform
We've got our model working locally, but it would be nice if we could make predictions on it from anywhere (not just this notebook!). In this step we'll deploy it to the cloud.
Step 1: Create a Cloud Storage bucket for our model
Let's first define some environment variables that we'll be using throughout the rest of the codelab. Fill in the values below with the name of your Google Cloud project, the name of the cloud storage bucket you'd like to create (must be globally unique), and the version name for the first version of your model:
# Update these to your own GCP project, model, and version names
GCP_PROJECT = 'your-gcp-project'
MODEL_BUCKET = 'gs://storage_bucket_name'
VERSION_NAME = 'v1'
MODEL_NAME = 'baby_weight'
Now we're ready to create a storage bucket to store our XGBoost model file. We'll point Cloud AI Platform at this file when we deploy.
Run this gsutil command from within your notebook to create a bucket:
!gsutil mb $MODEL_BUCKET
Step 2: Copy the model file to Cloud Storage
Next, we'll copy our XGBoost saved model file to Cloud Storage. Run the following gsutil command:
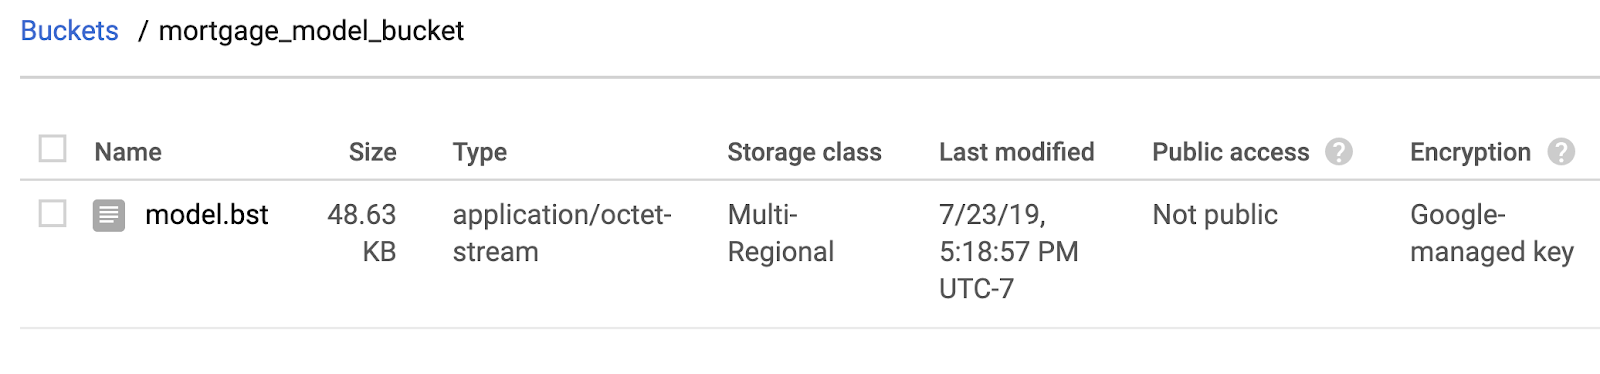
!gsutil cp ./model.bst $MODEL_BUCKET
Head over to the storage browser in your Cloud Console to confirm the file has been copied:
Step 3: Create and deploy the model
The following ai-platform gcloud command will create a new model in your project. We'll call this one xgb_mortgage:
!gcloud ai-platform models create $MODEL_NAME
Now it's time to deploy the model. We can do that with this gcloud command:
!gcloud ai-platform versions create $VERSION_NAME \
--model=$MODEL_NAME \
--framework='XGBOOST' \
--runtime-version=1.15 \
--origin=$MODEL_BUCKET \
--python-version=3.7 \
--project=$GCP_PROJECT
While this is running, check the models section of your AI Platform console. You should see your new version deploying there:
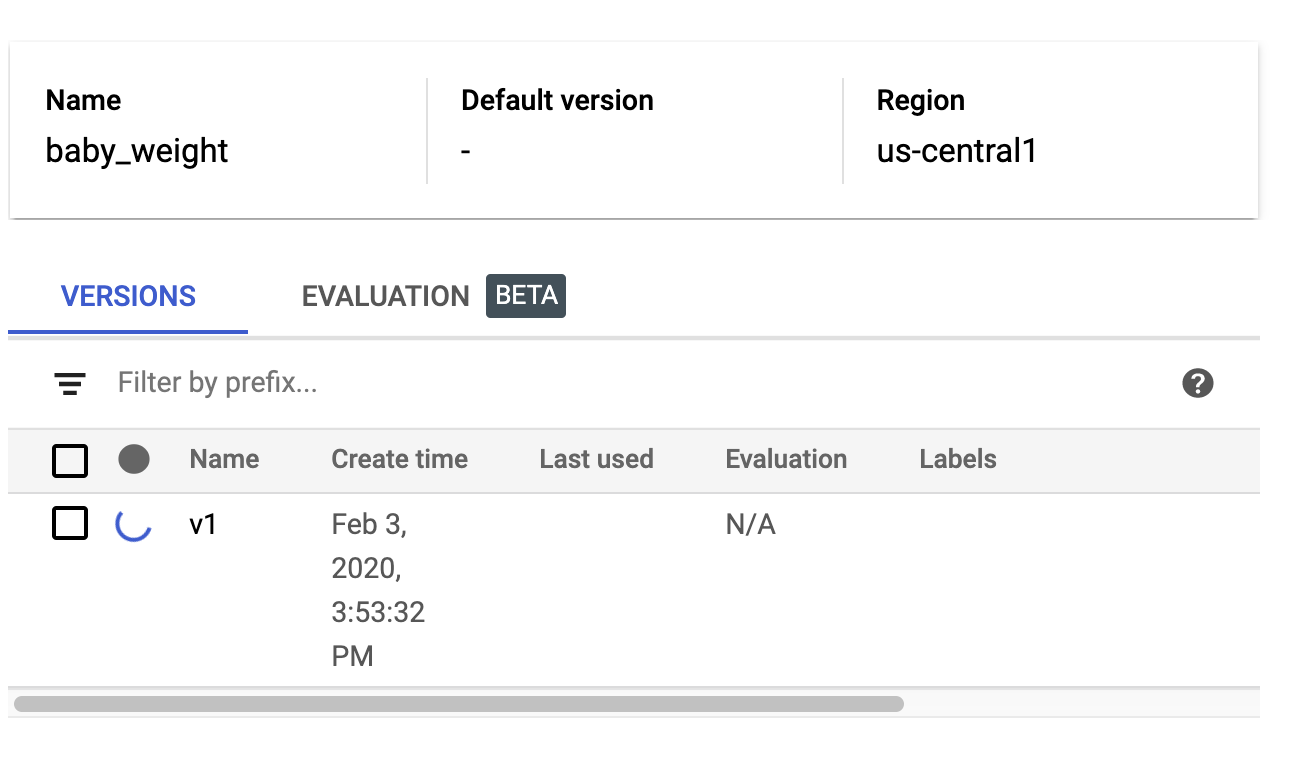
When the deploy completes successfully you'll see a green check mark where the loading spinner is. The deploy should take 2-3 minutes.
Step 4: Test the deployed model
To make sure your deployed model is working, test it out using gcloud to make a prediction. First, save a JSON file with two examples from our test set:
%%writefile predictions.json
[0.0, 33.0, 1.0, 27.0]
[1.0, 26.0, 1.0, 40.0]
Test your model by saving the output of the following gcloud command to a variable and printing it:
prediction = !gcloud ai-platform predict --model=$MODEL_NAME --json-instances=predictions.json --version=$VERSION_NAME
print(prediction.s)
You should see your model's prediction in the output. The actual baby weight for these two examples is 1.9 and 8.1 pounds respectively.
8. Cleanup
If you'd like to continue using this notebook, it is recommended that you turn it off when not in use. From the Notebooks UI in your Cloud Console, select the notebook and then select Stop:

If you'd like to delete all resources you've created in this lab, simply delete the notebook instance instead of stopping it.
Using the Navigation menu in your Cloud Console, browse to Storage and delete both buckets you created to store your model assets.