
1. Before you begin
Traditional authentication solutions pose a number of security and usability challenges.
Passwords are widely used but...
- Easily forgotten
- Users require knowledge to create strong passwords.
- Easy to phish, harvest and replay by attackers.
Android has worked towards creating Credential Manager API to simplify the sign-in experience and address security risks by supporting passkeys, the next generation industry standard for passwordless authentication.
Credential Manager brings together support for passkeys and combines it with traditional authentication methods such as passwords, Sign in with Google etc.
Users will be able to create passkeys, store them in Google Password Manager, which will sync those passkeys across the Android devices where the user is signed in. A passkey has to be created, associated with a user account, and have its public key stored on a server before a user can sign in with it.
In this codelab, you will learn how to sign up using passkeys and password using Credential Manager API and use them for future authentication purposes. There are 2 flows including:
- Sign up : using passkeys and password.
- Sign in : using passkeys & saved password.
Prerequisites
- Basic understanding of how to run apps in Android Studio.
- Basic understanding of authentication flow in Android apps.
- Basic understanding of passkeys.
What you'll learn
- How to create a passkey.
- How to save password in password manager.
- How to authenticate users with a passkey or saved password.
What you'll need
One of the following device combinations:
- An Android device that runs Android 9 or higher (for passkeys) and Android 4.4 or higher(for password authentication through Credential Manager API).
- Device preferably with a biometric sensor.
- Make sure to register a screen lock (biometric or otherwise).
- Kotlin plugin version : 1.8.10
2. Get set up
This sample app requires a digital asset linking to a website for Credential Manager to validate the linking and proceed further, so the rp id used in the mock responses is from a mocked 3P server. If you want to try your own mock response, try adding your app domain and don't forget to complete the digital asset linking as mentioned here.
Use the same debug.keystore mentioned in the project to build debug and release variants to verify the digital asset linking of the package name and sha on your mock server. (This is already being done for you for the sample app in build.gradle).
- Clone this repo on your laptop from credman_codelab branch: https://github.com/android/identity-samples/tree/credman_codelab
git clone -b credman_codelab https://github.com/android/identity-samples.git
- Go to the CredentialManager module and open the project in Android Studio.
Lets see app's initial state
To see how the initial state of the app works, follow these steps:
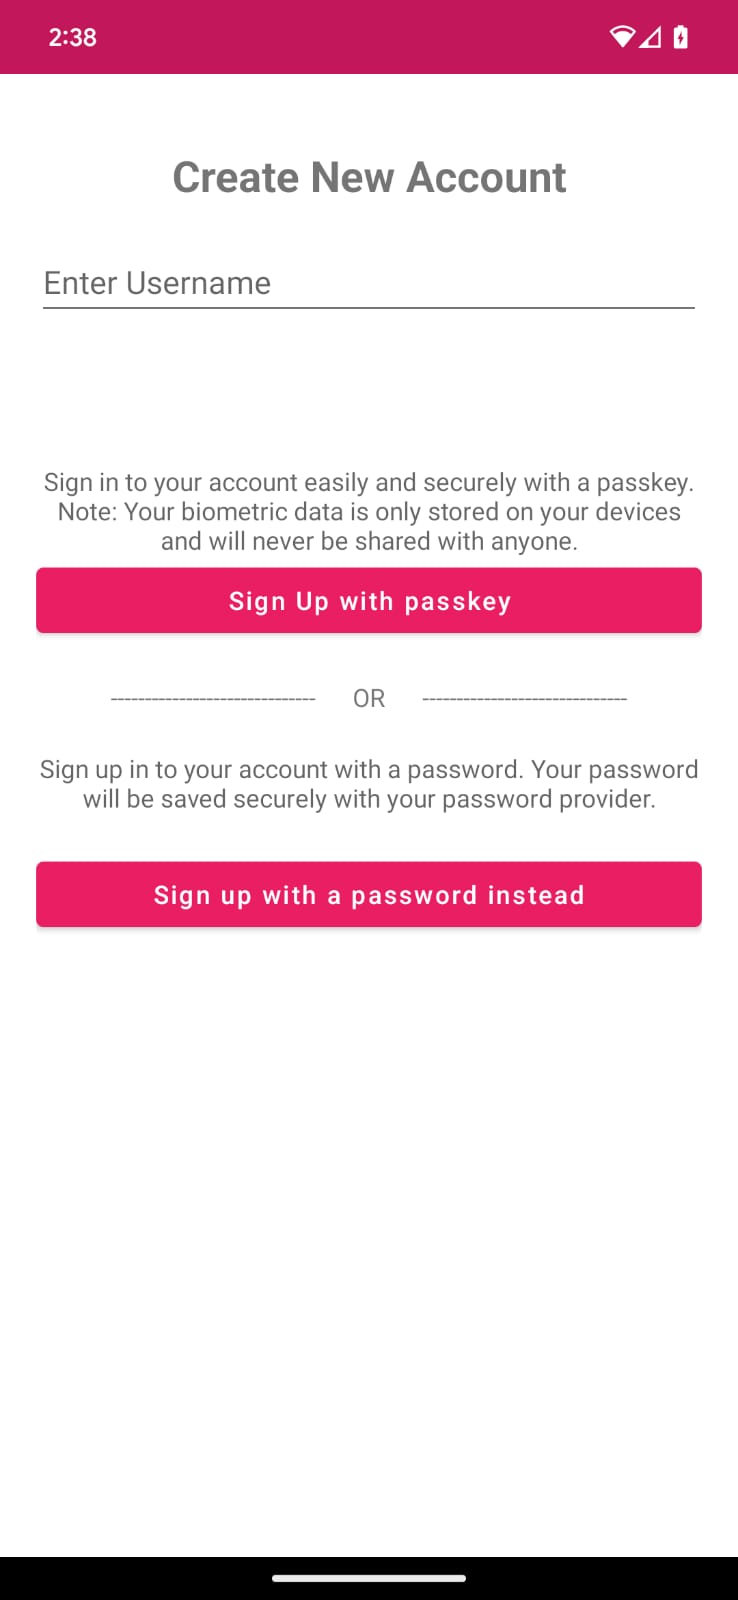
- Launch the app.
- You see a main screen with a sign up and sign in button. These buttons don't do anything yet, but we'll enable their functionality in the upcoming sections.

3. Add the ability to sign up using passkeys
When signing up for a new account on an Android app that uses the Credential Manager API, users can create a passkey for their account. This passkey will be securely stored on the user's chosen credential provider and used for future sign-ins, without requiring the user to enter their password each time.
Now, you will create a passkey and register user credentials using biometrics/screen lock.
Sign up with passkey
The code inside CredentialManager/app/src/main/java/com/google/credentialmanager/sample/SignUpScreen.kt defines a text field "username" and a button to sign up with a passkey.
Define createCredential() lambda for use in View Models
Credential manager objects require an Activity to be passed in, which is associated with a Screen. However, Credential manager operations are usually triggered in View Models, and it's not recommended to reference Activities within View Models. Therefore, we define Credential manager functions in a separate file CredentialManagerUtil.kt and reference them in the appropriate Screens, which then pass them to their View Models as callbacks through lambda functions.
Locate the TODO comment in the createCredential() function in CredentialManagerUtil.kt and call the CredentialManager.create() function:
CredentialManagerUtil.kt
suspend fun createCredential(
    activity: Activity,
    request: CreateCredentialRequest
): CreateCredentialResponse {
    TODO("Create a CredentialManager object and call createCredential() with a CreateCredentialRequest")
    val credentialManager = CredentialManager.create(activity)
    return credentialManager.createCredential(activity, request)
}
Pass the challenge and other json response to a createPasskey() call
Before a passkey is created, you need to request from the server the necessary information to be passed to the Credential Manager API during createCredential() call.
You already have a mock response in your project's assets, called RegFromServer.txt, which returns the necessary parameters in this codelab.
- In your app, navigate to the
SignUpViewModel.kt, Find thesignUpWithPasskeysmethod where you will write the logic for creating a passkey and letting the user in. You can find the method in the same class. - Locate the
TODOcomment block tocreate a CreatePublicKeyCredentialRequest()and replace with the following code:
SignUpViewModel.kt
TODO("Create a CreatePublicKeyCredentialRequest() with necessary registration json from server")
    val request = CreatePublicKeyCredentialRequest(
        jsonProvider.fetchRegistrationJson()
            .replace("<userId>", getEncodedUserId())
            .replace("<userName>", _username.value)
            .replace("<userDisplayName>", _username.value)
            .replace("<challenge>", getEncodedChallenge())
    )
The jsonProvider.fetchRegistrationJsonFromServer() method reads an emulated server PublicKeyCredentialCreationOptions JSON response from assets and returns the registration JSON to be passed while creating the passkey. We replace some of the placeholder values with user entries from our app and some mocked fields:
- This JSON is incomplete and has 4 fields that need to be replaced.
- UserId needs to be unique so that a user can create multiple passkeys (if required). Replace
<userId>with the generateduserIdvalue. <challenge>also needs to be unique so you will be generating a random unique challenge. The method is already in your code.
A real server PublicKeyCredentialCreationOptions response may return more options. An example of some of these fields is given below:
{
  "challenge": String,
  "rp": {
    "name": String,
    "id": String
  },
  "user": {
    "id": String,
    "name": String,
    "displayName": String
  },
  "pubKeyCredParams": [
    {
      "type": "public-key",
      "alg": -7
    },
    {
      "type": "public-key",
      "alg": -257
    }
  ],
  "timeout": 1800000,
  "attestation": "none",
  "excludeCredentials": [],
  "authenticatorSelection": {
    "authenticatorAttachment": "platform",
    "requireResidentKey": true,
    "residentKey": "required",
    "userVerification": "required"
  }
}
The following table explains some of the important parameters in a PublicKeyCredentialCreationOptions object:
Parameters | Descriptions |
A server-generated random string that contains enough entropy to make guessing it infeasible. It should be at least 16 bytes long. This is required but unused during registration unless doing attestation. | |
A user's unique ID. This value must not include personally identifying information, for example, e-mail addresses or usernames. A random, 16-byte value generated per account will work well. | |
This field should hold a unique identifier for the account that the user will recognise, like their email address or username. This will be displayed in the account selector. (If using a username, use the same value as in password authentication.) | |
This field is an optional, more user-friendly name for the account. | |
The Relying Party Entity corresponds to your application details. It has the following attributes:
| |
List of allowed algorithms and key types. This list must contain at least one element. | |
The user trying to register a device may have registered other devices. To limit the creation of multiple credentials for the same account on a single authenticator, you can then ignore these devices. The | |
Indicates if the device should be attached on the platform, or not or if there is no requirement to do so. Set this value to | |
| indicate the value |
Create a credential
- Once you create a
CreatePublicKeyCredentialRequest(), you need to call thecreateCredential()call with the created request.
SignUpViewModel.kt
try {
   TODO("Call createCredential() with createPublicKeyCredentialRequest")
   createCredential(request)
   TODO("Complete the registration process after sending public key credential to your server and let the user in")

} catch (e: CreateCredentialException) {
   handlePasskeyFailure(e)
}
- You handle the rendered views visibility and handle the exceptions if the request fails or unsuccessful due to some reason. Here the error messages are logged and shown on the app in an error dialog. You can check the full error logs through Android studio or the
adb debugcommand.
- Finally, you need to complete the registration process. The app sends a public key credential to the server which registers it to the current user.
Here, we have used a mock server, so we just return true indicating that server has saved the registered public key for future authentication and validation purposes. You can read more about server-side passkey registration for your own implementation.
Inside signUpWithPasskeys() method, find relevant comment and replace with following code:
SignUpViewModel.kt
try {
    createCredential(request)
    TODO("Complete the registration process after sending public key credential to your server and let the user in")
registerResponse()
    DataProvider.setSignedInThroughPasskeys(true)
    _navigationEvent.emit(NavigationEvent.NavigateToHome(signedInWithPasskeys = true))
} catch (e: CreateCredentialException) {
   handlePasskeyFailure(e)
}
registerResponse()returnstrueindicating the mock server has saved the public key for future use.- Set
setSignedInThroughPasskeysflag totrue. - Once logged in, you redirect your user to the home screen.
A real PublicKeyCredential may contain more fields. An example of these fields is shown below:
{
  "id": String,
  "rawId": String,
  "type": "public-key",
  "response": {
    "clientDataJSON": String,
    "attestationObject": String,
  }
}
The following table explains some of the important parameters in a PublicKeyCredential object:
Parameters | Descriptions |
A Base64URL encoded ID of the created passkey. This ID helps the browser determine whether a matching passkey is in the device upon authentication. This value must be stored in the database on the backend. | |
An | |
An | |
An |
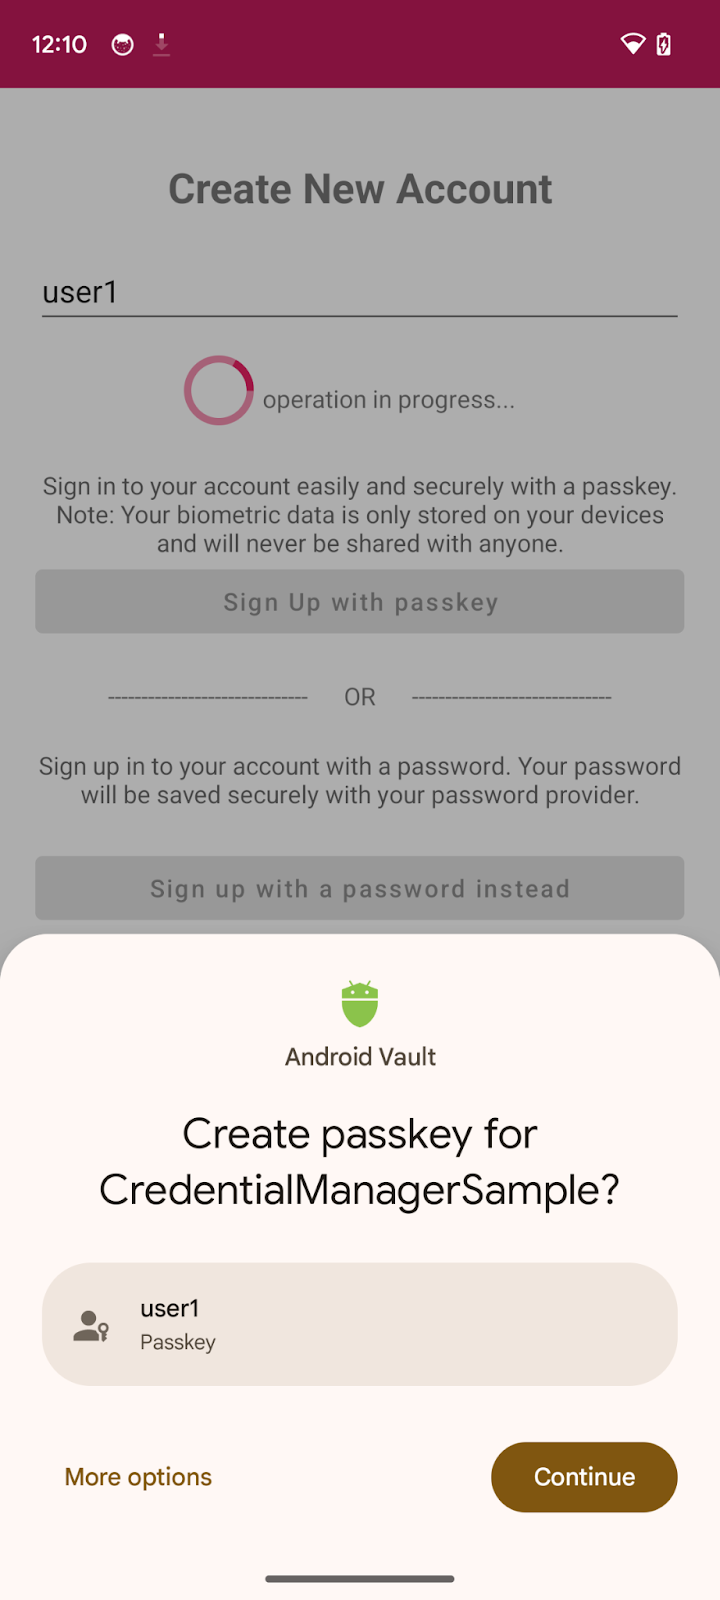
Run the app, and you will be able to click on the Sign up with passkeys button and create a passkey.
4. Save a password in Credential Provider
In this app, inside your SignUp screen, you already have a sign up with username and password implemented for demonstration purposes.
To save the user password credential with their password provider, you will implement a CreatePasswordRequest to pass to createCredential() to save the password.
- Find
signUpWithPassword()method, replace the TODO with acreatePasswordcall:
SignUpViewModel.kt
TODO("CreatePasswordRequest with entered username and password")
    val passwordRequest = CreatePasswordRequest(_username.value, _password.value)
- Next, create a credential with a create password request and save the user password credential with their password provider. Then, log the user in. We catch exceptions that occur in this flow more generically. Replace the TODO with following code:
SignUpViewModel.kt
TODO("Create credential with created password request and log the user in")
    try {
        createCredential(passwordRequest)
        simulateServerDelayAndLogIn()
    } catch (e: Exception) {
        val errorMessage = "Exception Message : " + e.message
        Log.e("Auth", errorMessage)
        _passwordCreationError.value = errorMessage
        _isLoading.value = false
    }
Now you have successfully saved the password credential with the user's password provider to authenticate with a password in just one-tap.
5. Add the ability to authenticate with a passkey or password
Now you are ready to use it as a way to authenticate to your app safely.
Define getCredential() lambda for use in View Models
As before, we'll call Credential manager's getCredential() in a separate file CredentialManagerUtil.kt for reference in the appropriate Screens and passing to their View Models as callbacks through lambda functions.
Locate the TODO comment in the getCredential() function in CredentialManagerUtil.kt and call the CredentialManager.get() function:
suspend fun getCredential(
    activity: Activity,
    request: GetCredentialRequest
): GetCredentialResponse {
    TODO("Create a CredentialManager object and call getCredential() with a GetCredentialRequest")
    val credentialManager = CredentialManager.create(activity)
    return credentialManager.getCredential(activity, request)
}
Obtain the challenge and other options to pass to getPasskey() call
Before you ask the user to authenticate, you need to request parameters to pass in WebAuthn JSON from the server, including a challenge.
You already have a mock response in your assets (AuthFromServer.txt) which returns such parameters in this codelab.
- In your app, navigate to the SignInViewModel.kt, find the
signInWithSavedCredentialsmethod where you will write the logic for authenticating through saved passkey or password and let the user in: - Create a GetPublicKeyCredentialOption() with necessary parameters required to get credentials from your credential provider.
SignInViewModel.kt
TODO("Create a GetPublicKeyCredentialOption() with necessary authentication json from server")
    val getPublicKeyCredentialOption =
        GetPublicKeyCredentialOption(jsonProvider.fetchAuthJson(), null)
The fetchAuthJsonFromServer() method reads the authentication JSON response from assets and returns authentication JSON to retrieve all the passkeys associated with this user account.
The 2nd parameter of GetPublicKeyCredentialOption() is clientDataHash - a hash that is used to verify the relying party identity. Set this only if you have set the GetCredentialRequest.origin. For the sample app, this is set to null.
Note : This codelab's server is designed to return a JSON that is as similar as possible to the PublicKeyCredentialRequestOptions dictionary that's passed to API's getCredential() call. The following code snippet includes a few example options that you could receive in a real response:
{
  "challenge": String,
  "rpId": String,
  "userVerification": "",
  "timeout": 1800000
}
The following table explains some of the important parameters in a PublicKeyCredentialRequestOptions object:
Parameters | Descriptions |
A server-generated challenge in an | |
An RP ID is a domain. A website can specify either its domain or a registrable suffix. This value must match the |
- Next you need to create a
PasswordOption()object to retrieve all the saved passwords saved in your password provider through the Credential Manager API for this user account. InsidegetSavedCredentials()method, find the TODO and replace with the following:
SigninViewModel.kt
TODO("Create a PasswordOption to retrieve all the associated user's password")

val getPasswordOption = GetPasswordOption()
Combine these into a GetCredentialRequest.
SigninViewModel.kt
TODO("Combine requests into a GetCredentialRequest")
    val request = GetCredentialRequest(
        listOf(
            getPublicKeyCredentialOption,
            getPasswordOption
        )
    )
Get credentials
Next you need to call getCredential() request with all the above options to retrieve the associated credentials:
SignInViewModel.kt
try {
    TODO("Call getCredential() with required credential options")
    val result = getCredential(request)

    val data = when (result.credential) {
        is PublicKeyCredential -> {
            val cred = result.credential as PublicKeyCredential
            DataProvider.setSignedInThroughPasskeys(true)
            "Passkey: ${cred.authenticationResponseJson}"
        }

        is PasswordCredential -> {
            val cred = result.credential as PasswordCredential
            DataProvider.setSignedInThroughPasskeys(false)
            "Got Password - User:${cred.id} Password: ${cred.password}"
        }

        is CustomCredential -> {
            //If you are also using any external sign-in libraries, parse them here with the utility functions provided.
            null
        }

        else -> null
    }

    TODO("Complete the authentication process after validating the public key credential to your server and let the user in.")
    } catch (e: Exception) {
        Log.e("Auth", "getCredential failed with exception: " + e.message.toString())
        _signInError.value =
            "An error occurred while authenticating: " + e.message.toString()
    } finally {
        _isLoading.value = false
    }
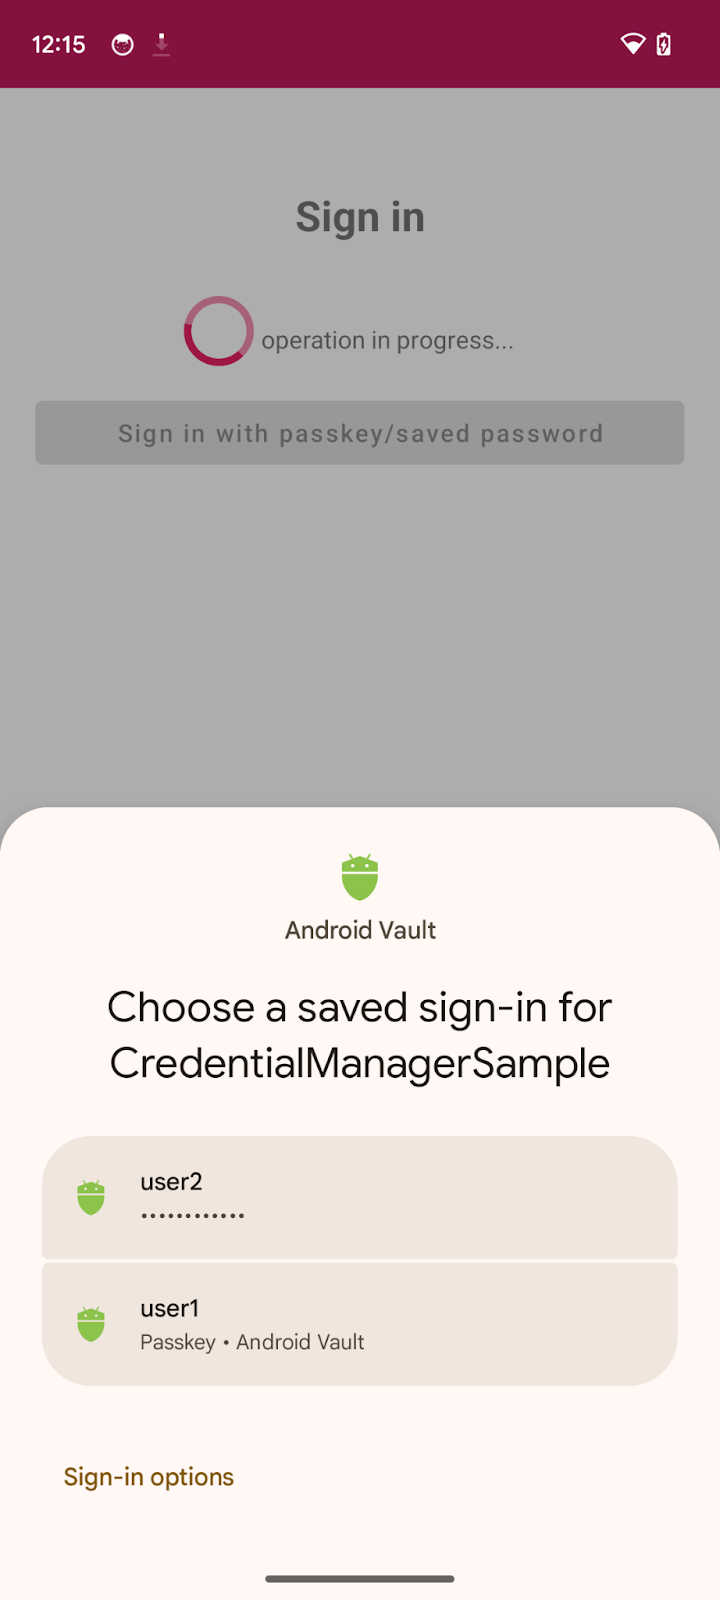
- You pass the required information to
getCredential(). This takes the list of credential options and an activity context to render the options in the bottomsheet in that context. - Once the request is successful, you will see a bottomsheet on your screen listing all the created credentials for the associated account.
- Now users can verify their identity through biometrics or screen lock etc to authenticate the chosen credential.
- If the chosen credential is a
PublicKeyCredential, Set thesetSignedInThroughPasskeysflag astrue. Otherwise, set it tofalse.
The following code snippet includes an example PublicKeyCredential object:
{
  "id": String
  "rawId": String
  "type": "public-key",
  "response": {
    "clientDataJSON": String
    "authenticatorData": String
    "signature": String
    "userHandle": String
  }
}
The following table isn't exhaustive, but it contains the important parameters in the PublicKeyCredential object:
Parameters | Descriptions |
The Base64URL encoded ID of the authenticated passkey credential. | |
An | |
An | |
An | |
An | |
An |
- Finally, you need to complete the authentication process. Normally, after the user completes passkey authentication the app sends a public key credential containing an authentication assertion to the server which verifies the assertion and authenticates the user.
Here, we have used a mock server, so we just return true indicating that server has verified the assertion. You can read more about server-side passkey authentication for your own implementation.
Inside the signInWithSavedCredentials() method, find the relevant comment and replace with the following code:
SignInViewModel.kt
TODO("Complete the authentication process after validating the public key credential to your server and let the user in.")
    if (data != null) {
        sendSignInResponseToServer()
        _navigationEvent.emit(NavigationEvent.NavigateToHome(signedInWithPasskeys = DataProvider.isSignedInThroughPasskeys()))
    }
sendSigninResponseToServer()returns true indicating (mock) server has validated the public key for future use.- Once logged in, you redirect your user to the home screen.
Run the app and navigate to sign in > Sign in with passkeys/saved password, and try signing in using saved credentials.
Try it
You implemented the creation of passkeys, saving password in Credential Manager, and authentication through passkeys or saved password using Credential Manager API on your Android app.
6. Congratulations!
You finished this codelab! If you want to check the final solution, which is available at https://github.com/android/identity-samples/tree/main/CredentialManager
If you have any questions, ask them on StackOverflow with a passkey tag.