
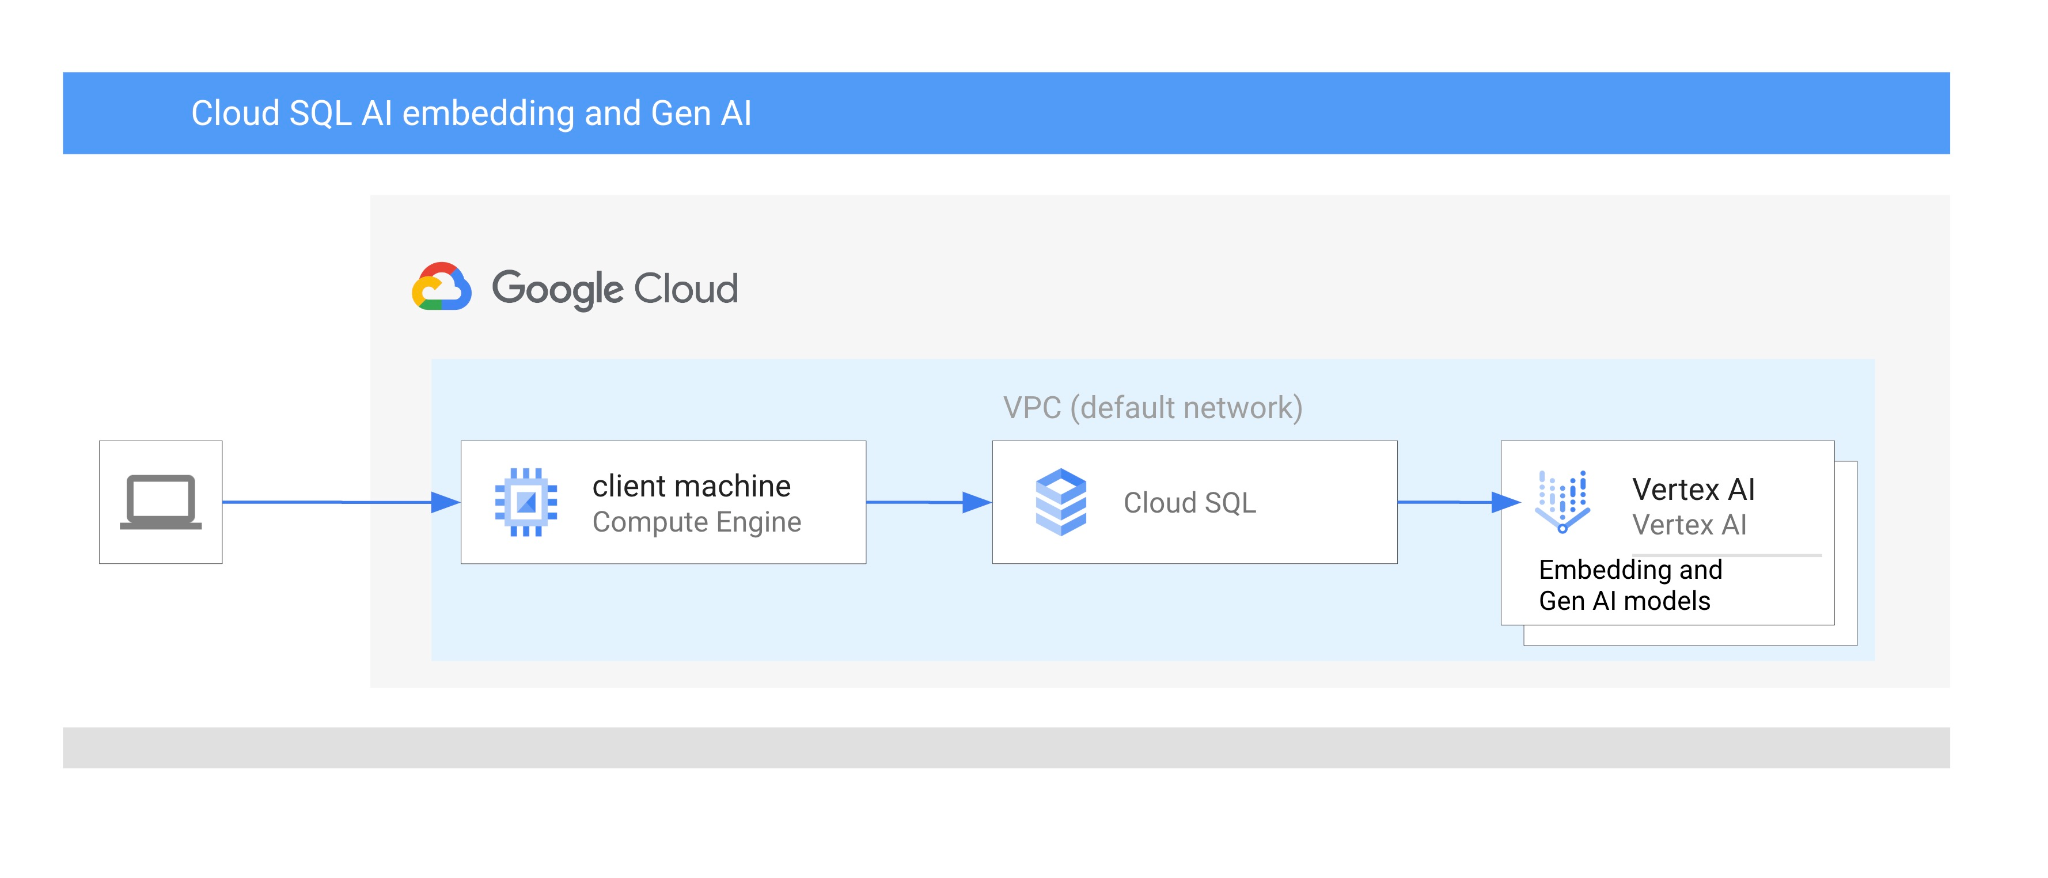
1. 소개
이 Codelab에서는 벡터 검색과 Vertex AI 임베딩을 결합하여 MySQL용 Cloud SQL Vertex AI 통합을 사용하는 방법을 알아봅니다.
기본 요건
- Google Cloud, 콘솔에 관한 기본적인 이해
- 명령줄 인터페이스 및 Cloud Shell의 기본 기술
학습할 내용
- PostgreSQL용 Cloud SQL 인스턴스를 배포하는 방법
- 데이터베이스를 만들고 Cloud SQL AI 통합을 사용 설정하는 방법
- 데이터베이스에 데이터를 로드하는 방법
- Cloud SQL Studio 사용 방법
- Cloud SQL에서 Vertex AI 임베딩 모델을 사용하는 방법
- Vertex AI Studio 사용 방법
- Vertex AI 생성형 모델을 사용하여 결과를 보강하는 방법
- 벡터 색인을 사용하여 성능을 개선하는 방법
필요한 항목
- Google Cloud 계정 및 Google Cloud 프로젝트
- Google Cloud 콘솔 및 Cloud Shell을 지원하는 웹브라우저(예: Chrome)
2. 설정 및 요구사항
프로젝트 설정
- Google Cloud 콘솔에 로그인합니다. 아직 Gmail이나 Google Workspace 계정이 없는 경우 계정을 만들어야 합니다.
직장 또는 학교 계정 대신 개인 계정을 사용하세요.
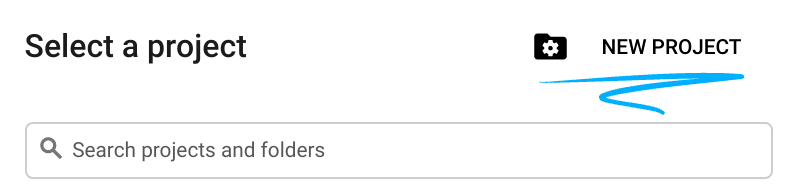
- 새 프로젝트를 만들거나 기존 프로젝트를 재사용합니다. Google Cloud 콘솔에서 새 프로젝트를 만들려면 헤더에서 프로젝트 선택 버튼을 클릭하여 팝업 창을 엽니다.

프로젝트 선택 창에서 새 프로젝트 버튼을 누르면 새 프로젝트 대화상자가 열립니다.
대화상자에서 원하는 프로젝트 이름을 입력하고 위치를 선택합니다.
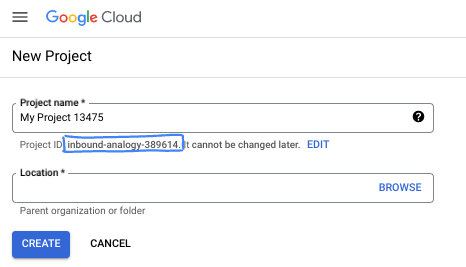
- 프로젝트 이름은 이 프로젝트 참가자의 표시 이름입니다. 프로젝트 이름은 Google API에서 사용되지 않으며 언제든지 변경할 수 있습니다.
- 프로젝트 ID는 모든 Google Cloud 프로젝트에서 고유하며, 변경할 수 없습니다 (설정된 후에는 변경할 수 없음). Google Cloud 콘솔에서 고유 ID를 자동으로 생성하지만 맞춤설정할 수 있습니다. 생성된 ID가 마음에 들지 않으면 다른 임의 ID를 생성하거나 자체 ID를 제공하여 사용 가능 여부를 확인할 수 있습니다. 대부분의 Codelab에서는 프로젝트 ID를 참조해야 합니다. 프로젝트 ID는 일반적으로 PROJECT_ID 자리표시자로 식별됩니다.
- 참고로 세 번째 값은 일부 API에서 사용하는 프로젝트 번호입니다. 이 세 가지 값에 대한 자세한 내용은 문서를 참고하세요.
결제 사용 설정
결제를 사용 설정하는 방법에는 두 가지가 있습니다. 개인 결제 계정을 사용하거나 다음 단계에 따라 크레딧을 사용할 수 있습니다.
Google Cloud 크레딧 사용 (선택사항)
이 워크숍을 진행하려면 크레딧이 있는 결제 계정이 필요합니다. 이 Codelab 상단의 배너에 있는 크레딧을 사용하여 시작하세요. 이미 결제 계정에 연결되어 있다면 이 단계를 건너뛰어도 됩니다.
개인 결제 계정 설정
Google Cloud 크레딧을 사용하여 결제를 설정한 경우 이 단계를 건너뛸 수 있습니다.
개인 결제 계정을 설정하려면 Cloud 콘솔에서 여기에서 결제를 사용 설정하세요.
참고 사항:
- 이 실습을 완료하는 데 드는 Cloud 리소스 비용은 미화 3달러 미만입니다.
- 이 실습이 끝나면 단계에 따라 리소스를 삭제하여 추가 요금이 발생하지 않도록 할 수 있습니다.
- 신규 사용자는 미화$300 상당의 무료 체험판을 이용할 수 있습니다.
Cloud Shell 시작
Google Cloud를 노트북에서 원격으로 실행할 수 있지만, 이 Codelab에서는 Cloud에서 실행되는 명령줄 환경인 Google Cloud Shell을 사용합니다.
Google Cloud Console의 오른쪽 상단 툴바에 있는 Cloud Shell 아이콘을 클릭합니다.

또는 G를 누른 다음 S를 누릅니다. Google Cloud 콘솔에 있거나 이 링크를 사용하는 경우 이 시퀀스를 통해 Cloud Shell이 활성화됩니다.
환경을 프로비저닝하고 연결하는 데 몇 분 정도 소요됩니다. 완료되면 다음과 같이 표시됩니다.

가상 머신에는 필요한 개발 도구가 모두 들어있습니다. 영구적인 5GB 홈 디렉터리를 제공하고 Google Cloud에서 실행되므로 네트워크 성능과 인증이 크게 개선됩니다. 이 Codelab의 모든 작업은 브라우저 내에서 수행할 수 있습니다. 아무것도 설치할 필요가 없습니다.
3. 시작하기 전에
API 사용 설정
Cloud SQL, Compute Engine, 네트워킹 서비스, Vertex AI를 사용하려면 Google Cloud 프로젝트에서 각 API를 사용 설정해야 합니다.
Cloud Shell 터미널 내에 프로젝트 ID가 설정되어 있는지 확인합니다.
gcloud config set project [YOUR-PROJECT-ID]
환경 변수 PROJECT_ID를 설정합니다.
PROJECT_ID=$(gcloud config get-value project)
필요한 모든 서비스를 사용 설정합니다.
gcloud services enable sqladmin.googleapis.com \
                       compute.googleapis.com \
                       cloudresourcemanager.googleapis.com \
                       servicenetworking.googleapis.com \
                       aiplatform.googleapis.com
예상 출력
student@cloudshell:~ (test-project-001-402417)$ gcloud config set project test-project-001-402417
Updated property [core/project].
student@cloudshell:~ (test-project-001-402417)$ PROJECT_ID=$(gcloud config get-value project)
Your active configuration is: [cloudshell-14650]
student@cloudshell:~ (test-project-001-402417)$
student@cloudshell:~ (test-project-001-402417)$ gcloud services enable sqladmin.googleapis.com \
                       compute.googleapis.com \
                       cloudresourcemanager.googleapis.com \
                       servicenetworking.googleapis.com \
                       aiplatform.googleapis.com
Operation "operations/acat.p2-4470404856-1f44ebd8-894e-4356-bea7-b84165a57442" finished successfully.
API 소개
- Cloud SQL Admin API (
sqladmin.googleapis.com)를 사용하면 프로그래매틱 방식으로 Cloud SQL 인스턴스를 만들고, 구성하고, 관리할 수 있습니다. MySQL, PostgreSQL, SQL Server를 지원하는 Google의 완전 관리형 관계형 데이터베이스 서비스의 컨트롤 플레인을 제공하여 프로비저닝, 백업, 고가용성, 확장과 같은 작업을 처리합니다. - Compute Engine API (
compute.googleapis.com)를 사용하면 가상 머신 (VM), 영구 디스크, 네트워크 설정을 만들고 관리할 수 있습니다. 워크로드를 실행하고 여러 관리형 서비스의 기본 인프라를 호스팅하는 데 필요한 핵심 서비스로서의 인프라 (IaaS) 기반을 제공합니다. - Cloud Resource Manager API (
cloudresourcemanager.googleapis.com)를 사용하면 Google Cloud 프로젝트의 메타데이터와 구성을 프로그래매틱 방식으로 관리할 수 있습니다. 이를 통해 리소스를 구성하고, ID 및 액세스 관리 (IAM) 정책을 처리하고, 프로젝트 계층 구조 전반에서 권한을 검증할 수 있습니다. - Service Networking API (
servicenetworking.googleapis.com)를 사용하면 가상 프라이빗 클라우드 (VPC) 네트워크와 Google의 관리형 서비스 간의 비공개 연결 설정을 자동화할 수 있습니다. AlloyDB와 같은 서비스가 다른 리소스와 안전하게 통신할 수 있도록 비공개 IP 액세스를 설정해야 합니다. - Vertex AI API (
aiplatform.googleapis.com)를 사용하면 애플리케이션에서 머신러닝 모델을 빌드, 배포, 확장할 수 있습니다. 생성형 AI 모델 (예: Gemini) 및 맞춤 모델 학습에 대한 액세스를 비롯한 모든 Google Cloud AI 서비스의 통합 인터페이스를 제공합니다.
4. Cloud SQL 인스턴스 만들기
Vertex AI와 데이터베이스 통합을 사용하여 Cloud SQL 인스턴스를 만듭니다.
데이터베이스 비밀번호 만들기
기본 데이터베이스 사용자의 비밀번호를 정의합니다. 직접 비밀번호를 정의하거나 무작위 함수를 사용하여 비밀번호를 생성할 수 있습니다.
export CLOUDSQL_PASSWORD=`openssl rand -hex 12`
생성된 비밀번호 값을 확인합니다.
echo $CLOUDSQL_PASSWORD
MySQL용 Cloud SQL 인스턴스 만들기
인스턴스를 만들 때 cloudsql_vector 플래그를 사용 설정할 수 있습니다. 벡터 지원은 현재 MySQL 8.0 R20241208.01_00 이상에서 사용할 수 있습니다.
Cloud Shell 세션에서 다음을 실행합니다.
gcloud sql instances create my-cloudsql-instance \
--database-version=MYSQL_8_4 \
--tier=db-custom-2-8192 \
--region=us-central1 \
--enable-google-ml-integration \
--edition=ENTERPRISE \
--root-password=$CLOUDSQL_PASSWORD
Cloud Shell에서 실행하여 연결을 확인할 수 있습니다.
gcloud sql connect my-cloudsql-instance --user=root
명령어를 실행하고 연결할 준비가 되면 메시지에 비밀번호를 입력합니다.
예상 출력:
$gcloud sql connect my-cloudsql-instance --user=root
Allowlisting your IP for incoming connection for 5 minutes...done.
Connecting to database with SQL user [root].Enter password:
Welcome to the MySQL monitor.  Commands end with ; or \g.
Your MySQL connection id is 71
Server version: 8.4.4-google (Google)

Copyright (c) 2000, 2025, Oracle and/or its affiliates.

Oracle is a registered trademark of Oracle Corporation and/or its
affiliates. Other names may be trademarks of their respective
owners.

Type 'help;' or '\h' for help. Type '\c' to clear the current input statement.

mysql>
지금은 ctrl+d 단축키를 사용하거나 exit 명령어를 실행하여 mysql 세션을 종료합니다.
exit
Vertex AI 통합 사용 설정
Vertex AI 통합을 사용할 수 있도록 내부 Cloud SQL 서비스 계정에 필요한 권한을 부여합니다.
Cloud SQL 내부 서비스 계정 이메일을 찾아 변수로 내보냅니다.
SERVICE_ACCOUNT_EMAIL=$(gcloud sql instances describe my-cloudsql-instance --format="value(serviceAccountEmailAddress)")
echo $SERVICE_ACCOUNT_EMAIL
Cloud SQL 서비스 계정에 Vertex AI 액세스 권한을 부여합니다.
gcloud projects add-iam-policy-binding $PROJECT_ID \
  --member="serviceAccount:$SERVICE_ACCOUNT_EMAIL" \
  --role="roles/aiplatform.user"
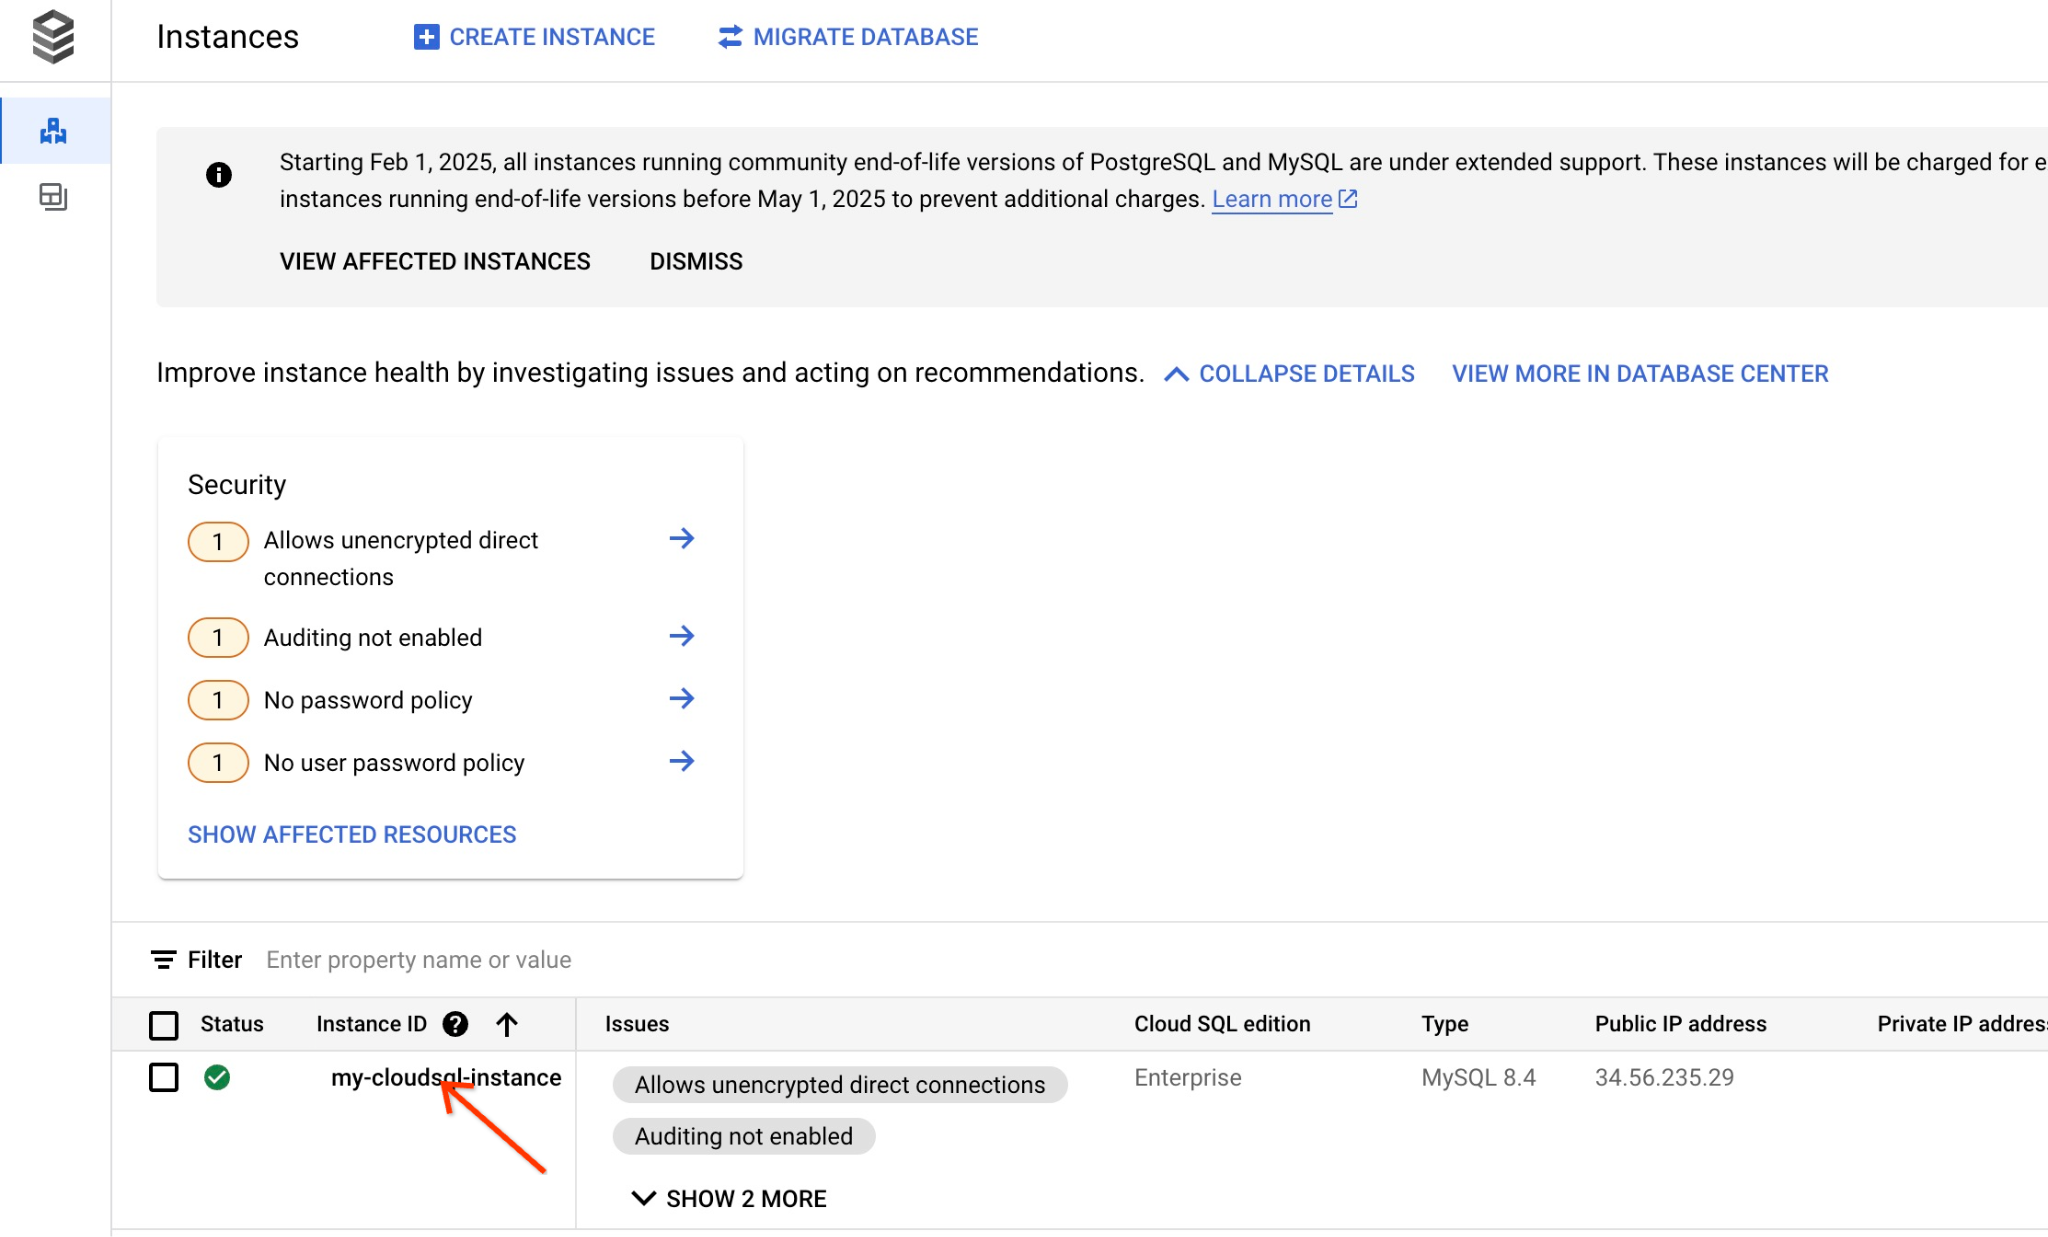
인스턴스 생성 및 구성에 대한 자세한 내용은 Cloud SQL 문서 여기를 참고하세요.
5. 데이터베이스 준비
이제 데이터베이스를 만들고 벡터 지원을 사용 설정해야 합니다.
데이터베이스 만들기
quickstart_db라는 이름의 데이터베이스를 만듭니다 .이렇게 하려면 MySQL용 mysql과 같은 명령줄 데이터베이스 클라이언트, SDK 또는 Cloud SQL Studio와 같은 다양한 옵션을 사용할 수 있습니다. 데이터베이스를 만드는 데 SDK (gcloud)를 사용합니다.
Cloud Shell에서 명령어를 실행하여 데이터베이스를 만듭니다.
gcloud sql databases create quickstart_db --instance=my-cloudsql-instance
6. 데이터 로드
이제 데이터베이스에서 객체를 만들고 데이터를 로드해야 합니다. 가상의 Cymbal Store 데이터를 사용합니다. 데이터는 SQL (스키마용) 및 CSV 형식 (데이터용)으로 제공됩니다.
Cloud Shell은 데이터베이스에 연결하고, 모든 객체를 만들고, 데이터를 로드하는 기본 환경입니다.
먼저 Cloud SQL 인스턴스의 승인된 네트워크 목록에 Cloud Shell 공개 IP를 추가해야 합니다. Cloud Shell에서 다음을 실행합니다.
gcloud sql instances patch my-cloudsql-instance --authorized-networks=$(curl ifconfig.me)
세션이 손실되었거나, 재설정되었거나, 다른 도구에서 작업하는 경우 CLOUDSQL_PASSWORD 변수를 다시 내보냅니다.
export CLOUDSQL_PASSWORD=...your password defined for the instance...
이제 데이터베이스에서 필요한 모든 객체를 만들 수 있습니다. 이를 위해 공개 소스에서 데이터를 가져오는 curl 유틸리티와 함께 MySQL mysql 유틸리티를 사용합니다.
Cloud Shell에서 다음을 실행합니다.
export INSTANCE_IP=$(gcloud sql instances describe my-cloudsql-instance --format="value(ipAddresses.ipAddress)")
curl -LJ https://raw.githubusercontent.com/GoogleCloudPlatform/devrel-demos/main/infrastructure/cymbal-store-embeddings/cymbal_mysql_schema.sql | mysql --host=$INSTANCE_IP --user=root --password=$CLOUDSQL_PASSWORD quickstart_db
이전 명령어에서 정확히 어떤 작업을 수행했나요? 데이터베이스에 연결하고 다운로드한 SQL 코드를 실행하여 테이블, 색인, 시퀀스를 만들었습니다.
다음 단계는 cymbal_products 데이터를 로드하는 것입니다. 동일한 curl 및 mysql 유틸리티를 사용합니다.
curl -LJ https://raw.githubusercontent.com/GoogleCloudPlatform/devrel-demos/main/infrastructure/cymbal-store-embeddings/cymbal_products.csv | mysql --enable-local-infile --host=$INSTANCE_IP --user=root --password=$CLOUDSQL_PASSWORD quickstart_db -e "LOAD DATA LOCAL INFILE '/dev/stdin' INTO TABLE cymbal_products FIELDS TERMINATED BY ',' OPTIONALLY ENCLOSED BY '\"' LINES TERMINATED BY '\n' IGNORE 1 LINES;"
그런 다음 cymbal_stores를 계속 진행합니다.
curl -LJ https://raw.githubusercontent.com/GoogleCloudPlatform/devrel-demos/main/infrastructure/cymbal-store-embeddings/cymbal_stores.csv | mysql --enable-local-infile --host=$INSTANCE_IP --user=root --password=$CLOUDSQL_PASSWORD quickstart_db -e "LOAD DATA LOCAL INFILE '/dev/stdin' INTO TABLE cymbal_stores FIELDS TERMINATED BY ',' OPTIONALLY ENCLOSED BY '\"' LINES TERMINATED BY '\n' IGNORE 1 LINES;"
각 매장의 각 제품 수를 나타내는 cymbal_inventory로 완료합니다.
curl -LJ https://raw.githubusercontent.com/GoogleCloudPlatform/devrel-demos/main/infrastructure/cymbal-store-embeddings/cymbal_inventory.csv | mysql --enable-local-infile --host=$INSTANCE_IP --user=root --password=$CLOUDSQL_PASSWORD quickstart_db -e "LOAD DATA LOCAL INFILE '/dev/stdin' INTO TABLE cymbal_inventory FIELDS TERMINATED BY ',' OPTIONALLY ENCLOSED BY '\"' LINES TERMINATED BY '\n' IGNORE 1 LINES;"
자체 샘플 데이터와 Cloud 콘솔에서 제공되는 Cloud SQL 가져오기 도구와 호환되는 CSV 파일이 있는 경우 제시된 방법 대신 이를 사용할 수 있습니다.
7. 임베딩 만들기
다음 단계는 Google Vertex AI의 textembedding-005 모델을 사용하여 제품 설명의 임베딩을 빌드하고 cymbal_products 테이블의 새 열에 저장하는 것입니다.
벡터 데이터를 저장하려면 Cloud SQL 인스턴스에서 벡터 기능을 사용 설정해야 합니다. Cloud Shell에서 다음을 실행합니다.
gcloud sql instances patch my-cloudsql-instance \
--database-flags=cloudsql_vector=on
데이터베이스에 연결합니다.
mysql --host=$INSTANCE_IP --user=root --password=$CLOUDSQL_PASSWORD quickstart_db
임베딩 함수를 사용하여 cymbal_products 테이블에 새 열 embedding을 만듭니다. 새 열에는 product_description 열의 텍스트를 기반으로 하는 벡터 임베딩이 저장됩니다.
ALTER TABLE cymbal_products ADD COLUMN embedding vector(768) using varbinary;
UPDATE cymbal_products SET embedding = mysql.ml_embedding('text-embedding-005', product_description);
2, 000개 행의 벡터 삽입을 생성하는 데는 일반적으로 5분이 채 걸리지 않지만, 약간 더 오래 걸릴 수도 있고 훨씬 더 빨리 완료되는 경우도 많습니다.
8. 유사성 검색 실행
이제 설명에 대해 계산된 벡터 값과 동일한 임베딩 모델을 사용하여 요청에 대해 생성된 벡터 값을 기반으로 유사성 검색을 사용하여 검색을 실행할 수 있습니다.
SQL 쿼리는 동일한 명령줄 인터페이스에서 실행하거나 Cloud SQL Studio에서 실행할 수 있습니다. 여러 행으로 구성된 복잡한 쿼리는 Cloud SQL Studio에서 관리하는 것이 좋습니다.
사용자 만들기
Cloud SQL Studio를 사용할 수 있는 신규 사용자가 필요합니다. 루트 사용자에 사용한 것과 동일한 비밀번호를 사용하여 기본 제공 유형 사용자 학생을 생성합니다.
Cloud Shell에서 다음을 실행합니다.
gcloud sql users create student --instance=my-cloudsql-instance --password=$CLOUDSQL_PASSWORD --host=%
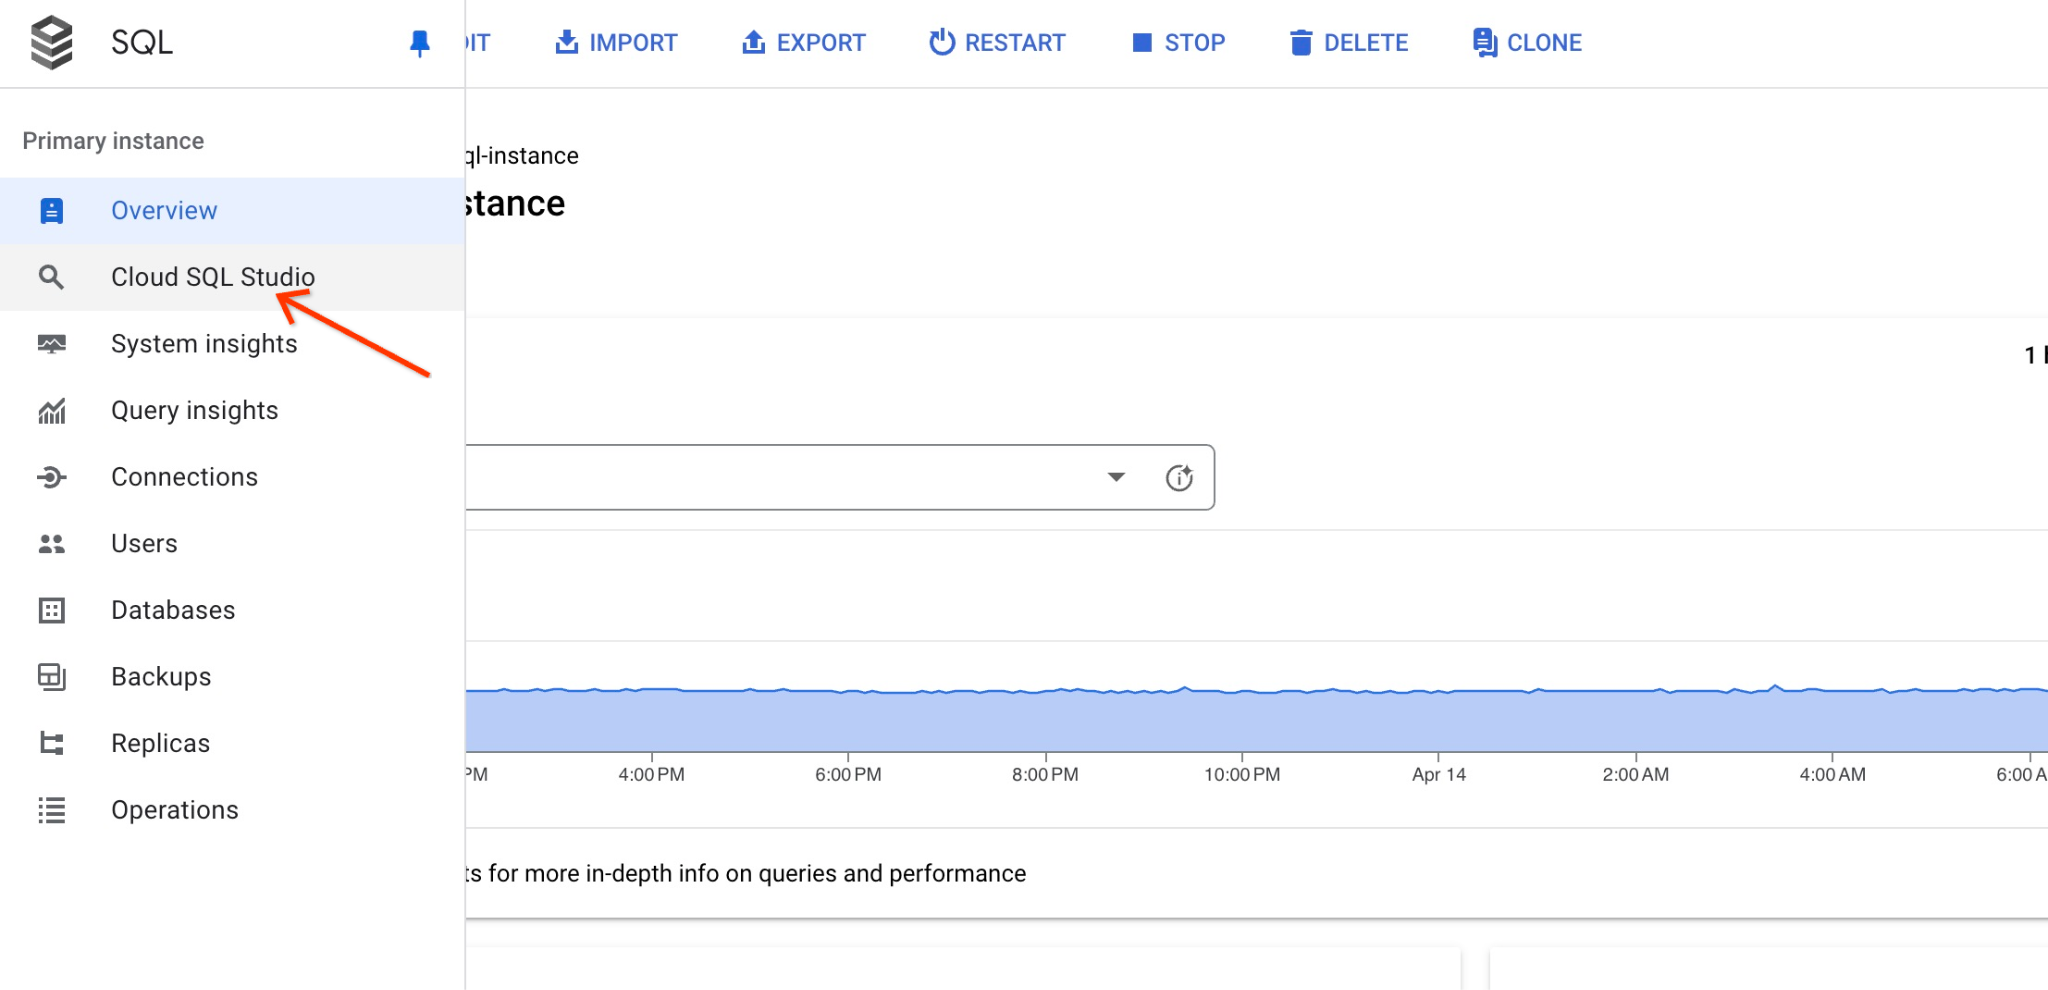
Cloud SQL Studio 시작
콘솔에서 이전에 만든 Cloud SQL 인스턴스를 클릭합니다.
오른쪽 패널에서 열면 Cloud SQL Studio가 표시됩니다. 이 탭을 클릭하세요.
데이터베이스 이름과 사용자 인증 정보를 제공하는 대화상자가 열립니다.
- 데이터베이스: quickstart_db
- 사용자: student
- 비밀번호: 사용자에 대해 기록한 비밀번호
'인증' 버튼을 클릭합니다.
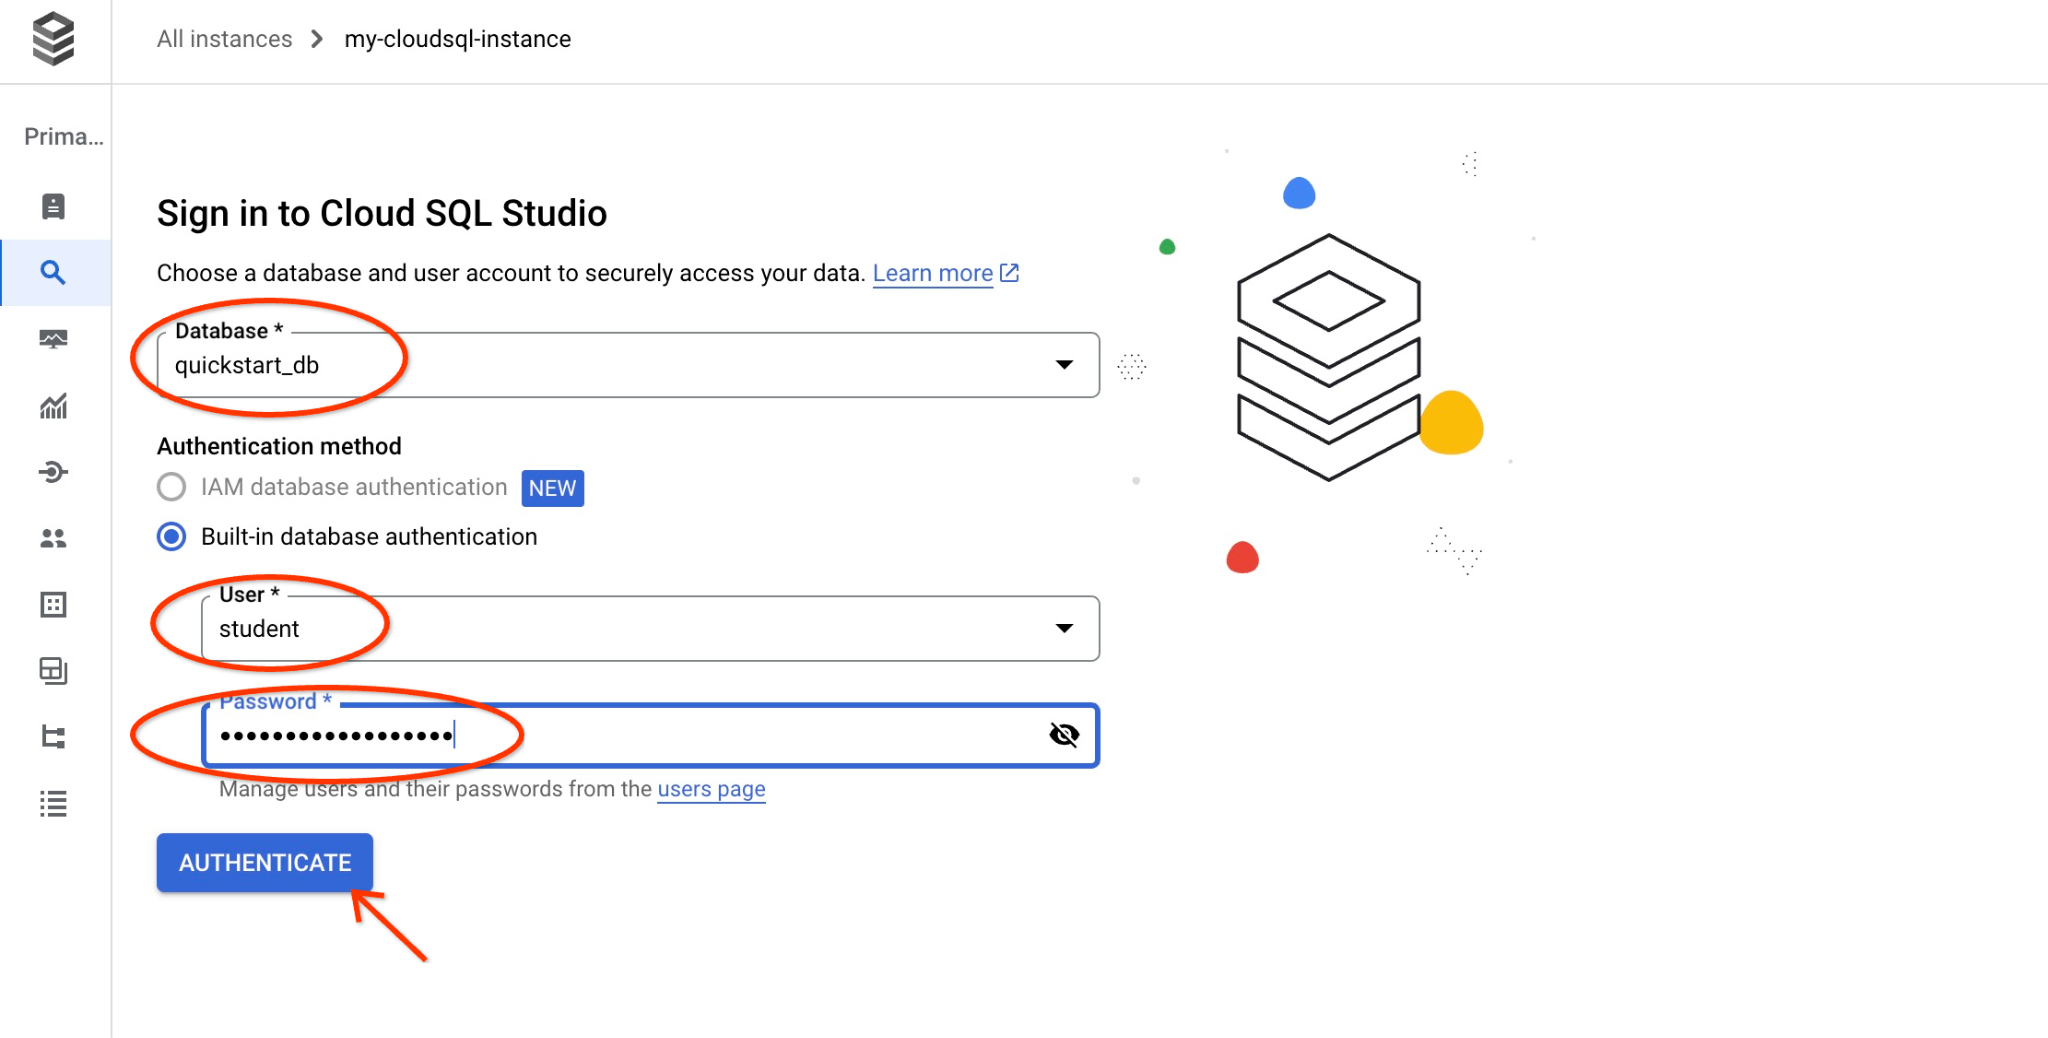
그러면 다음 창이 열리고 오른쪽의 '편집기' 탭을 클릭하여 SQL 편집기를 엽니다.
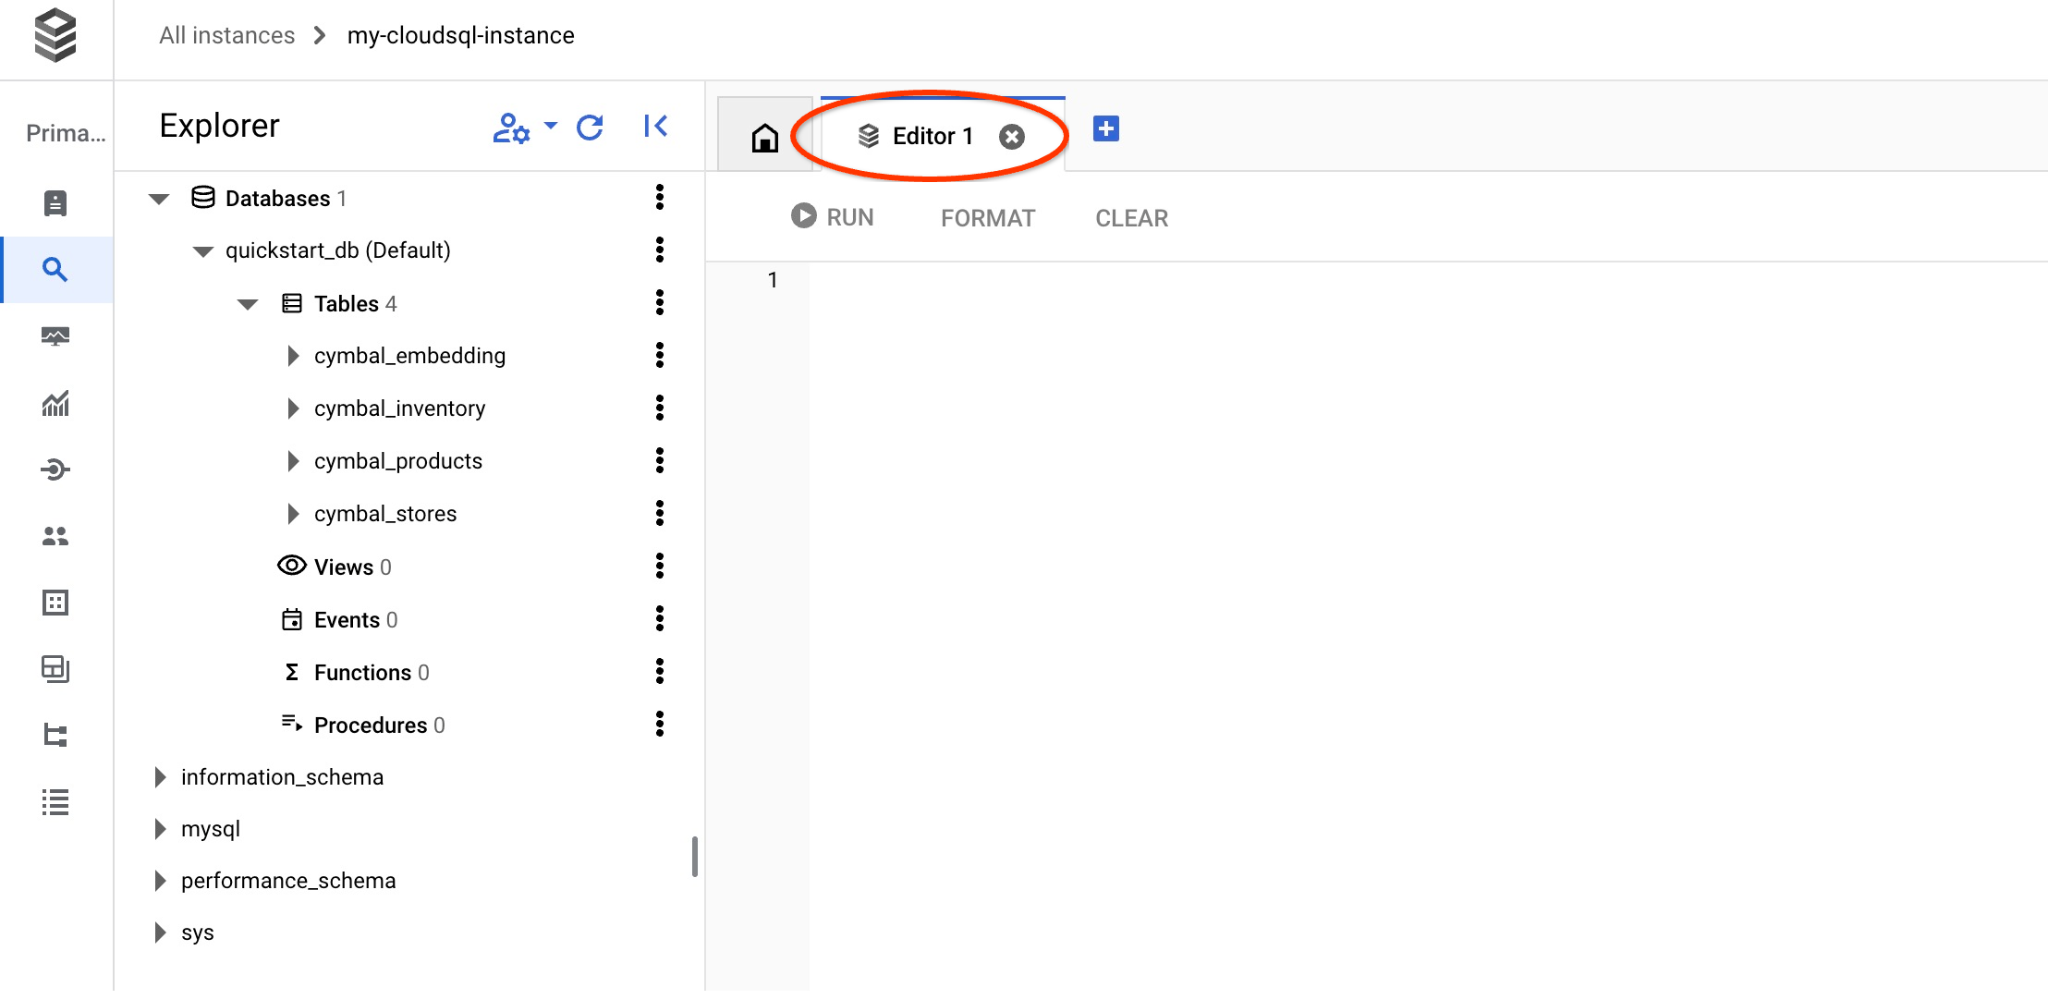
이제 쿼리를 실행할 준비가 되었습니다.
쿼리 실행
클라이언트의 요청과 가장 관련성이 높은 사용 가능한 제품 목록을 가져오는 쿼리를 실행합니다. 벡터 값을 가져오기 위해 Vertex AI에 전달할 요청은 '여기에서 잘 자라는 과일 나무는 무엇인가요?'와 같습니다.
KNN (정확한) 벡터 검색을 위해 cosine_distance로 쿼리 실행
다음은 cosine_distance 함수를 사용하여 요청에 가장 적합한 상위 5개 항목을 선택하기 위해 실행할 수 있는 쿼리입니다.
SELECT mysql.ML_EMBEDDING('text-embedding-005','What kind of fruit trees grow well here?') into @query_vector;
SELECT
        cp.product_name,
        left(cp.product_description,80) as description,
        cp.sale_price,
        cs.zip_code,
        cosine_distance(cp.embedding ,@query_vector) as distance
FROM
        cymbal_products cp
JOIN cymbal_inventory ci on
        ci.uniq_id=cp.uniq_id
JOIN cymbal_stores cs on
        cs.store_id=ci.store_id
        AND ci.inventory>0
        AND cs.store_id = 1583
ORDER BY
        distance ASC
LIMIT 5;
쿼리를 복사하여 Cloud SQL Studio 편집기에 붙여넣고 '실행' 버튼을 누르거나 quickstart_db 데이터베이스에 연결된 명령줄 세션에 붙여넣습니다.
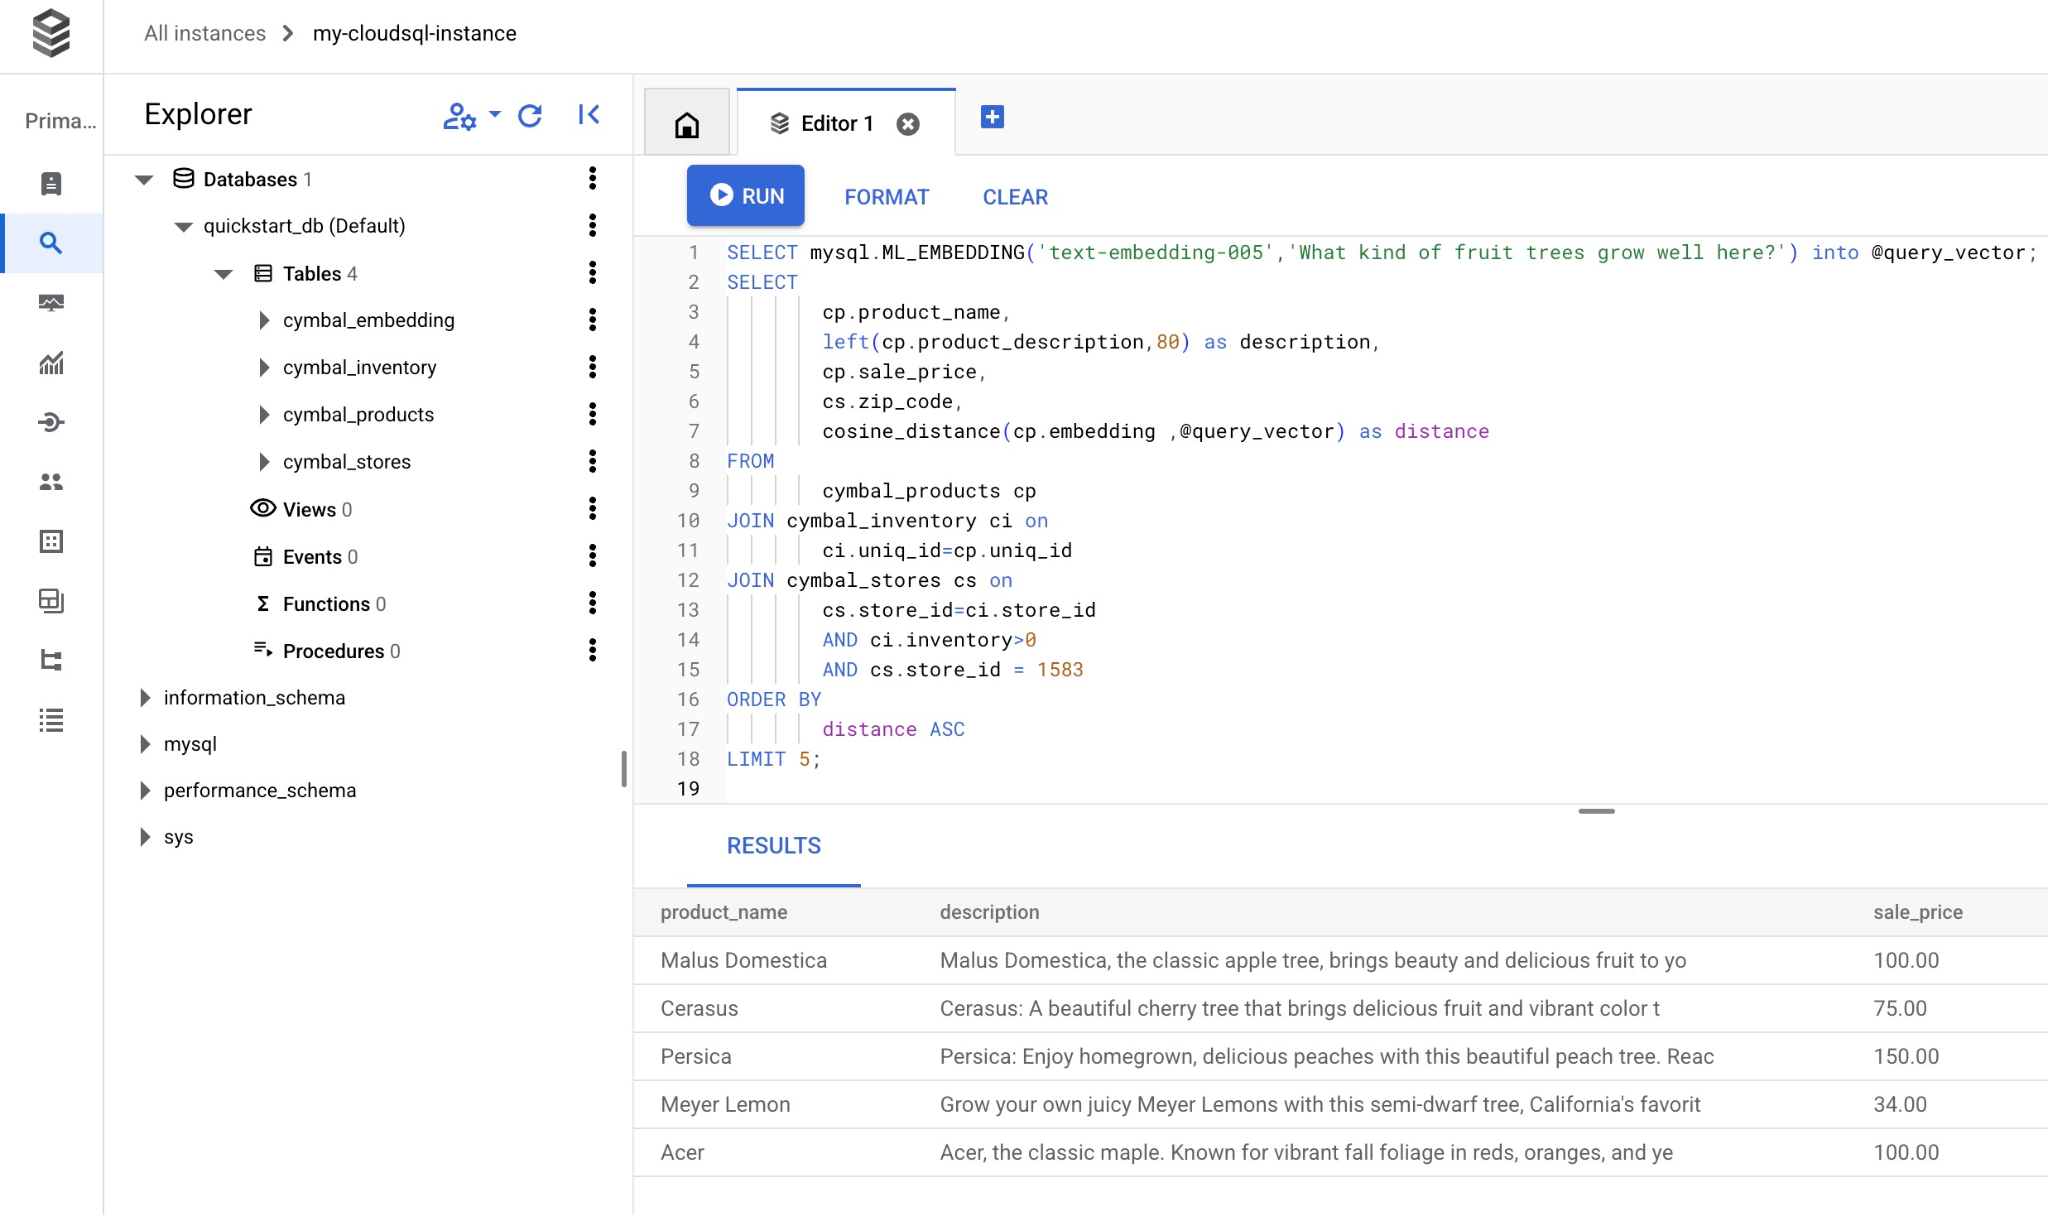
다음은 쿼리와 일치하도록 선택된 제품 목록입니다.
+-----------------+----------------------------------------------------------------------------------+------------+----------+---------------------+
| product_name    | description                                                                      | sale_price | zip_code | distance            |
+-----------------+----------------------------------------------------------------------------------+------------+----------+---------------------+
| Malus Domestica | Malus Domestica, the classic apple tree, brings beauty and delicious fruit to yo |     100.00 |    93230 | 0.37740096545831603 |
| Cerasus         | Cerasus: A beautiful cherry tree that brings delicious fruit and vibrant color t |      75.00 |    93230 |   0.405704177142419 |
| Persica         | Persica: Enjoy homegrown, delicious peaches with this beautiful peach tree. Reac |     150.00 |    93230 | 0.41031799106722877 |
| Meyer Lemon     | Grow your own juicy Meyer Lemons with this semi-dwarf tree, California's favorit |      34.00 |    93230 | 0.42823360959352186 |
| Acer            | Acer, the classic maple. Known for vibrant fall foliage in reds, oranges, and ye |     100.00 |    93230 | 0.42953897057301615 |
+-----------------+----------------------------------------------------------------------------------+------------+----------+---------------------+
5 rows in set (0.13 sec)
코사인_거리 함수를 사용한 쿼리 실행에 0.13초가 걸렸습니다.
KNN (정확한) 벡터 검색을 위해 approx_distance로 쿼리 실행
이제 approx_distance 함수를 사용하여 KNN 검색을 사용하는 동일한 쿼리를 실행합니다. 삽입을 위한 ANN 색인이 없는 경우 백그라운드에서 정확한 검색으로 자동 복귀합니다.
SELECT mysql.ML_EMBEDDING('text-embedding-005','What kind of fruit trees grow well here?') into @query_vector;
SELECT
        cp.product_name,
        left(cp.product_description,80) as description,
        cp.sale_price,
        cs.zip_code,
        approx_distance(cp.embedding ,@query_vector, 'distance_measure=cosine') as distance
FROM
        cymbal_products cp
JOIN cymbal_inventory ci on
        ci.uniq_id=cp.uniq_id
JOIN cymbal_stores cs on
        cs.store_id=ci.store_id
        AND ci.inventory>0
        AND cs.store_id = 1583
ORDER BY
        distance ASC
LIMIT 5;
다음은 쿼리에서 반환된 제품 목록입니다.
+-----------------+----------------------------------------------------------------------------------+------------+----------+---------------------+
| product_name    | description                                                                      | sale_price | zip_code | distance            |
+-----------------+----------------------------------------------------------------------------------+------------+----------+---------------------+
| Malus Domestica | Malus Domestica, the classic apple tree, brings beauty and delicious fruit to yo |     100.00 |    93230 | 0.37740096545831603 |
| Cerasus         | Cerasus: A beautiful cherry tree that brings delicious fruit and vibrant color t |      75.00 |    93230 |   0.405704177142419 |
| Persica         | Persica: Enjoy homegrown, delicious peaches with this beautiful peach tree. Reac |     150.00 |    93230 | 0.41031799106722877 |
| Meyer Lemon     | Grow your own juicy Meyer Lemons with this semi-dwarf tree, California's favorit |      34.00 |    93230 | 0.42823360959352186 |
| Acer            | Acer, the classic maple. Known for vibrant fall foliage in reds, oranges, and ye |     100.00 |    93230 | 0.42953897057301615 |
+-----------------+----------------------------------------------------------------------------------+------------+----------+---------------------+
5 rows in set, 1 warning (0.12 sec)
쿼리 실행에 걸린 시간은 0.12초에 불과합니다. cosine_distance 함수와 동일한 결과를 얻었습니다.
9. 검색된 데이터를 사용하여 LLM 응답 개선
실행된 쿼리의 결과를 사용하여 클라이언트 애플리케이션에 대한 생성형 AI LLM 응답을 개선하고, 제공된 쿼리 결과를 Vertex AI 생성형 기반 언어 모델에 대한 프롬프트의 일부로 사용하여 의미 있는 출력을 준비할 수 있습니다.
이를 위해 벡터 검색 결과를 포함하는 JSON을 생성한 다음 생성된 JSON을 Vertex AI의 LLM 모델 프롬프트에 추가하여 의미 있는 출력을 생성해야 합니다. 첫 번째 단계에서 JSON을 생성하고, 두 번째 단계에서 Vertex AI Studio에서 테스트하고, 마지막 단계에서 애플리케이션에서 사용할 수 있는 SQL 문에 통합합니다.
JSON 형식으로 출력 생성
JSON 형식으로 출력을 생성하고 Vertex AI에 전달할 행을 하나만 반환하도록 쿼리를 수정합니다.
다음은 ANN 검색을 사용하는 쿼리의 예입니다.
SELECT mysql.ML_EMBEDDING('text-embedding-005','What kind of fruit trees grow well here?') into @query_vector;
WITH trees as (
SELECT
        cp.product_name,
        left(cp.product_description,80) as description,
        cp.sale_price,
        cs.zip_code,
        cp.uniq_id as product_id
FROM
        cymbal_products cp
JOIN cymbal_inventory ci on
        ci.uniq_id=cp.uniq_id
JOIN cymbal_stores cs on
        cs.store_id=ci.store_id
        AND ci.inventory>0
        AND cs.store_id = 1583
ORDER BY
        (approx_distance(cp.embedding ,@query_vector, 'distance_measure=cosine')) ASC
LIMIT 1)
SELECT json_arrayagg(json_object('product_name',product_name,'description',description,'sale_price',sale_price,'zip_code',zip_code,'product_id',product_id)) FROM trees;
출력에서 예상되는 JSON은 다음과 같습니다.
[{"zip_code": 93230, "product_id": "23e41a71d63d8bbc9bdfa1d118cfddc5", "sale_price": 100.00, "description": "Malus Domestica, the classic apple tree, brings beauty and delicious fruit to yo", "product_name": "Malus Domestica"}]
Vertex AI Studio에서 프롬프트 실행
생성된 JSON을 사용하여 Vertex AI Studio의 생성형 AI 텍스트 모델에 프롬프트의 일부로 제공할 수 있습니다.
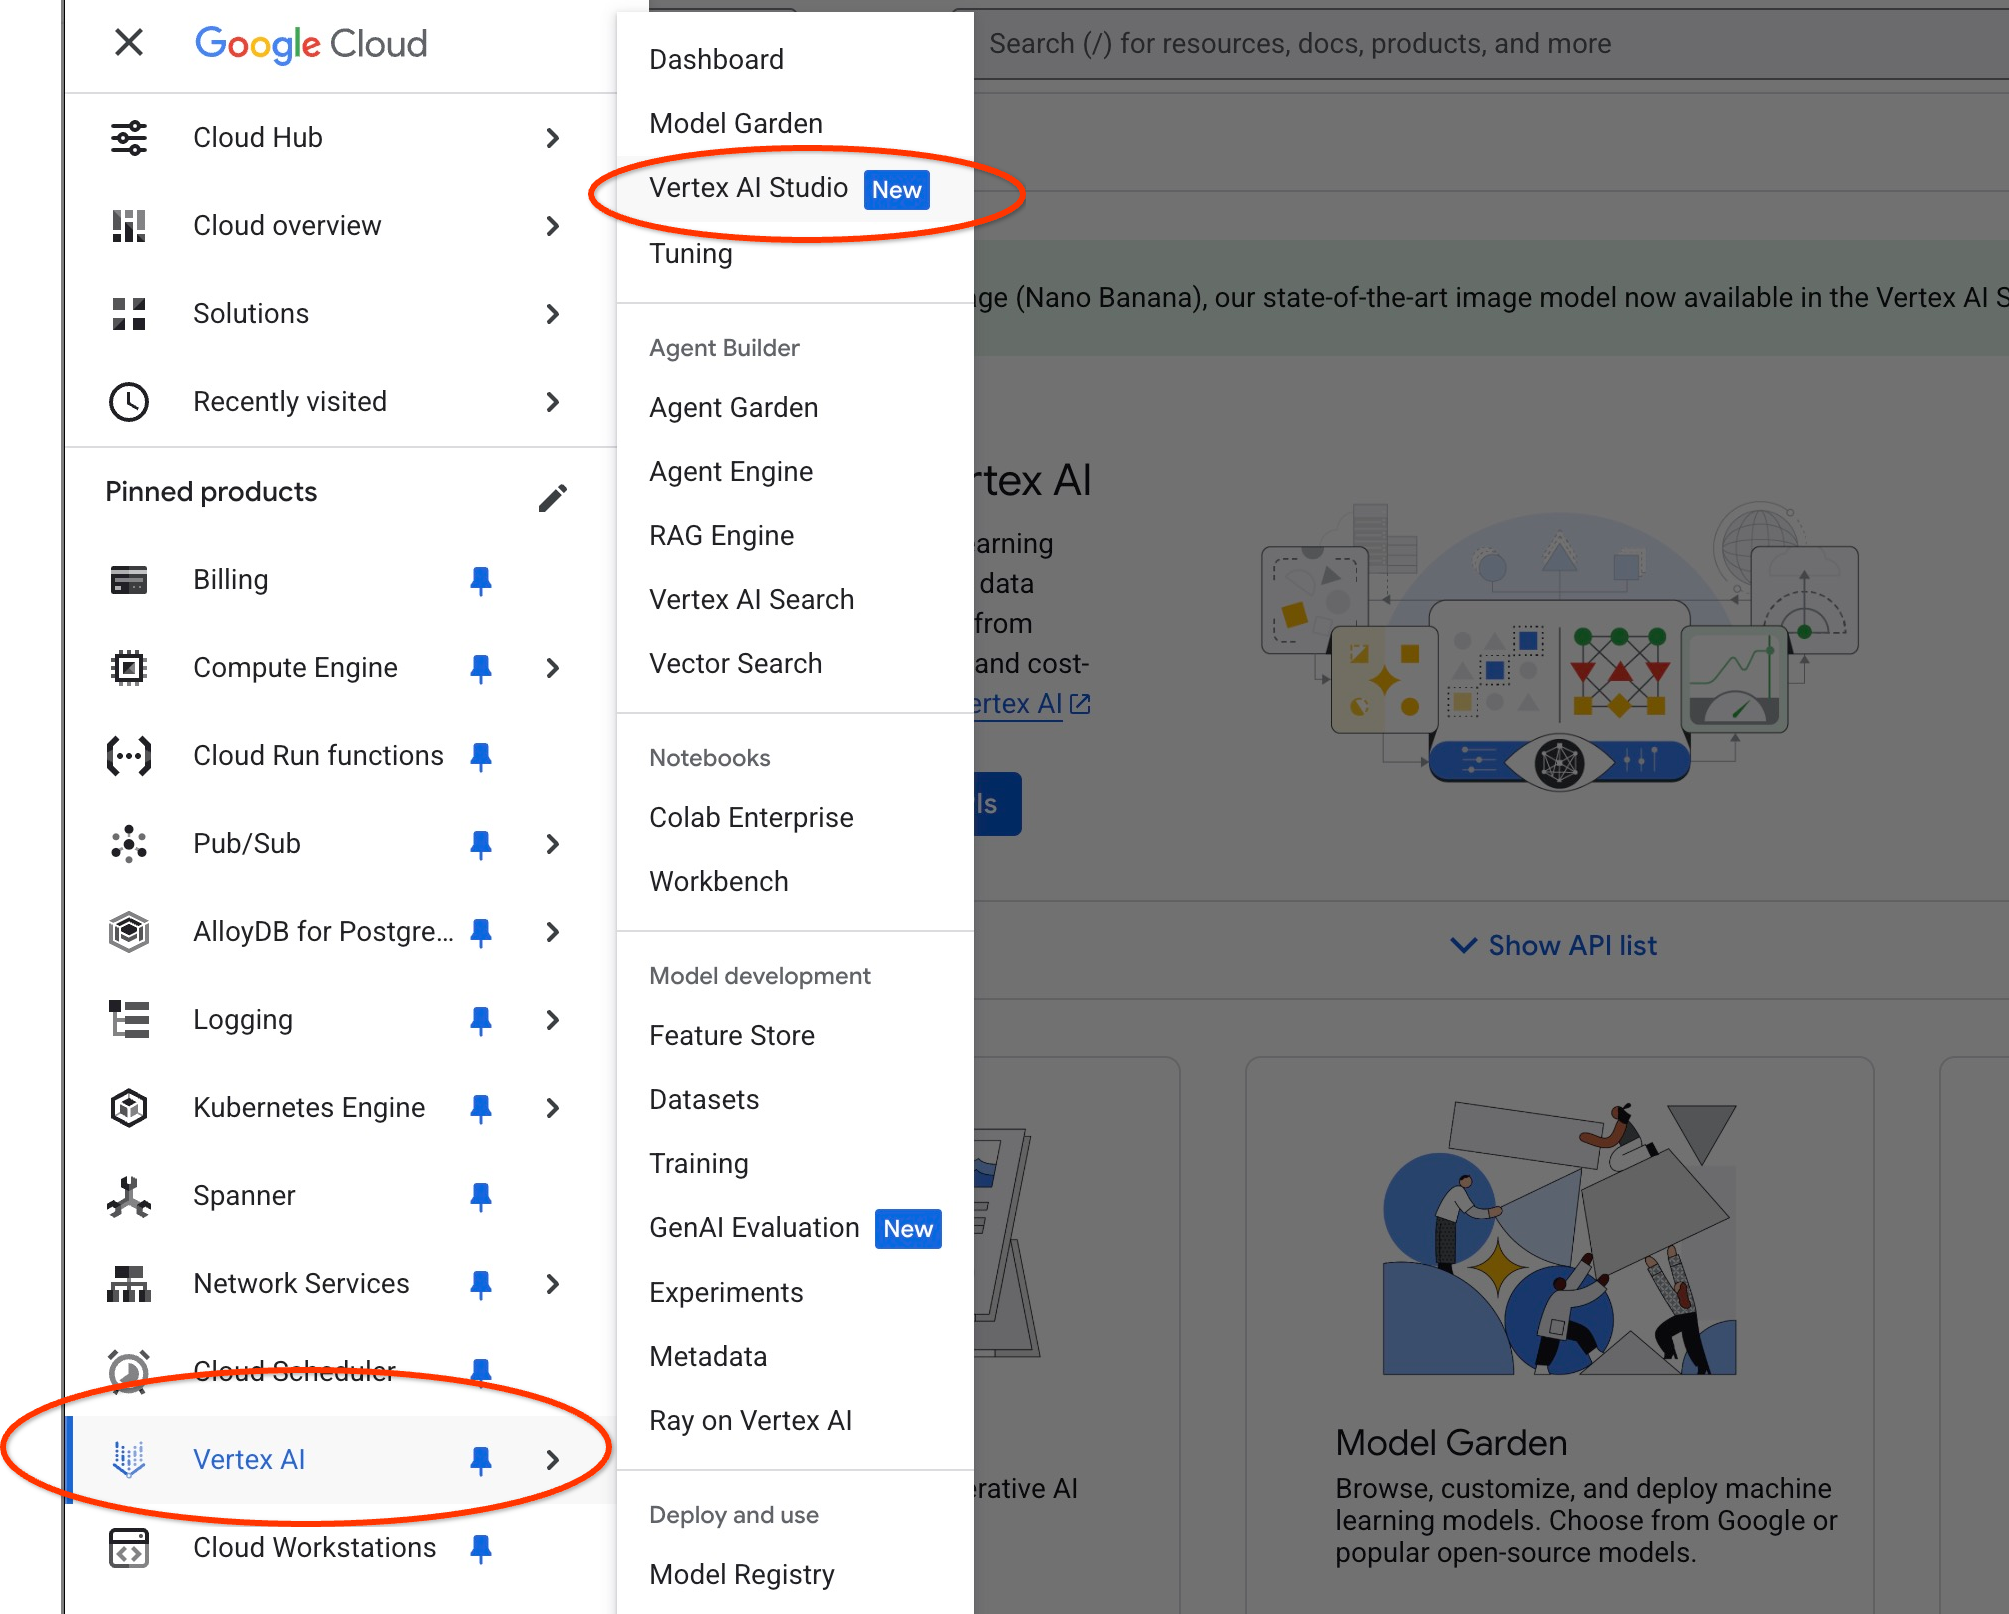
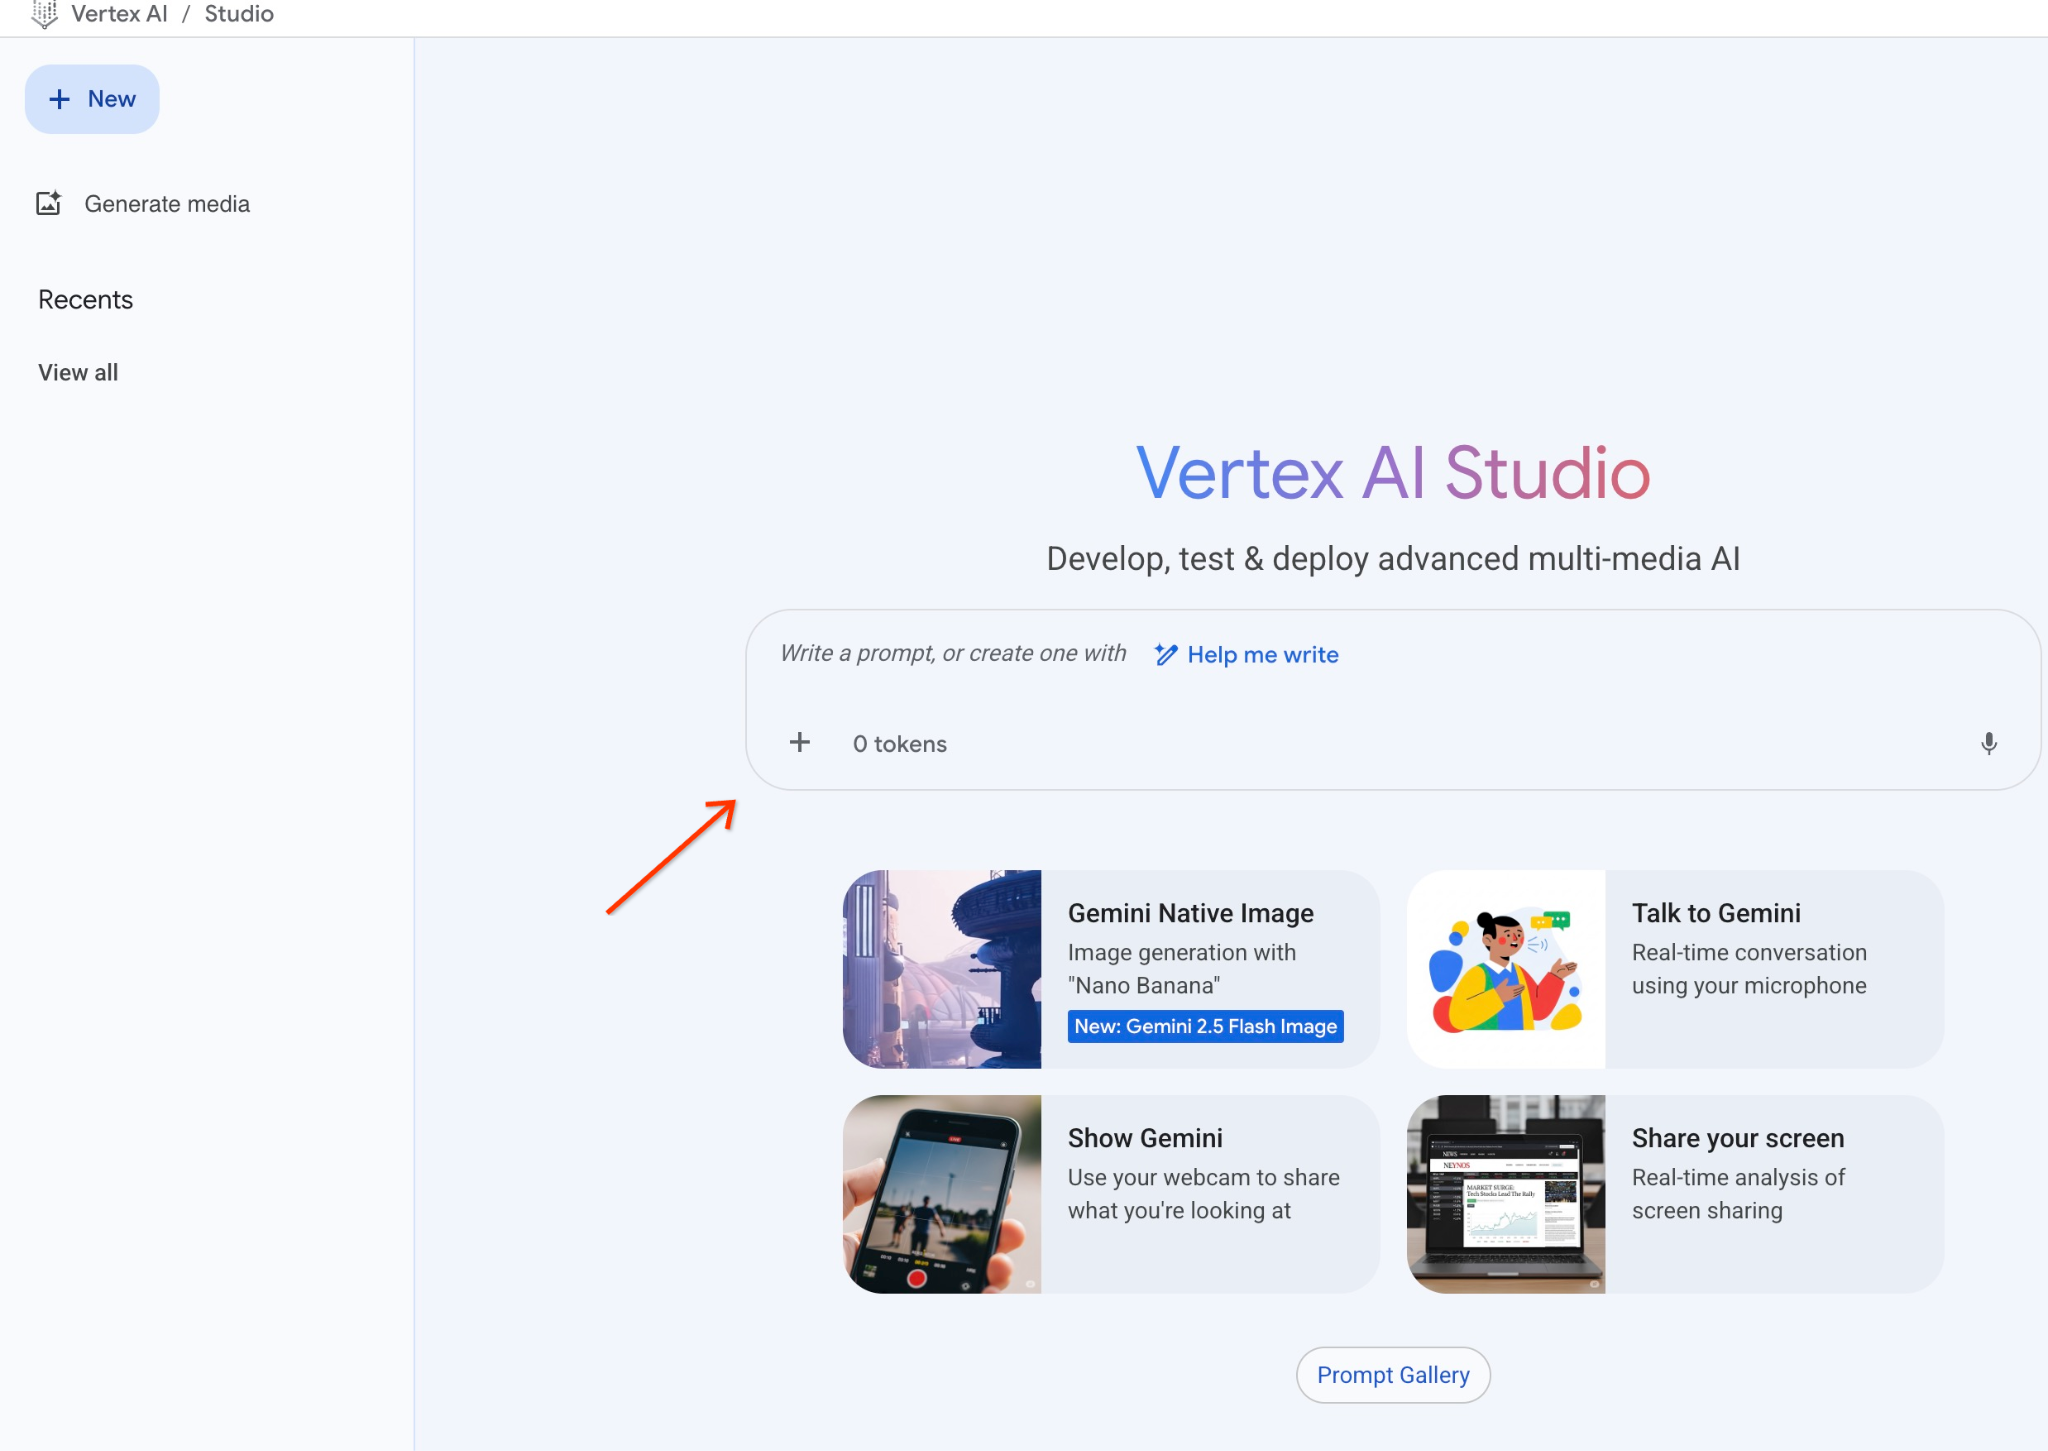
클라우드 콘솔에서 Vertex AI Studio 프롬프트를 엽니다.
추가 API를 사용 설정하라는 메시지가 표시될 수 있지만 요청을 무시해도 됩니다. 실습을 완료하는 데 추가 API는 필요하지 않습니다.
스튜디오에 프롬프트를 입력합니다.
사용할 프롬프트는 다음과 같습니다.
You are a friendly advisor helping to find a product based on the customer's needs.
Based on the client request we have loaded a list of products closely related to search.
The list in JSON format with list of values like {"product_name":"name","description":"some description","sale_price":10,"zip_code": 10234, "produt_id": "02056727942aeb714dc9a2313654e1b0"}
Here is the list of products:
[place your JSON here]
The customer asked "What tree is growing the best here?"
You should give information about the product, price and some supplemental information.
Do not ask any additional questions and assume location based on the zip code provided in the list of products.
다음은 JSON 자리표시자를 쿼리의 응답으로 바꾼 모습입니다.
You are a friendly advisor helping to find a product based on the customer's needs.
Based on the client request we have loaded a list of products closely related to search.
The list in JSON format with list of values like {"product_name":"name","description":"some description","sale_price":10,"zip_code": 10234, "produt_id": "02056727942aeb714dc9a2313654e1b0"}
Here is the list of products:
{"zip_code": 93230, "product_id": "23e41a71d63d8bbc9bdfa1d118cfddc5", "sale_price": 100.00, "description": "Malus Domestica, the classic apple tree, brings beauty and delicious fruit to yo", "product_name": "Malus Domestica"}
The customer asked "What tree is growing the best here?"
You should give information about the product, price and some supplemental information.
Do not ask any additional questions and assume location based on the zip code provided in the list of products.
JSON 값을 사용하여 gemini-2.5-flash 모델로 프롬프트를 실행한 결과는 다음과 같습니다.
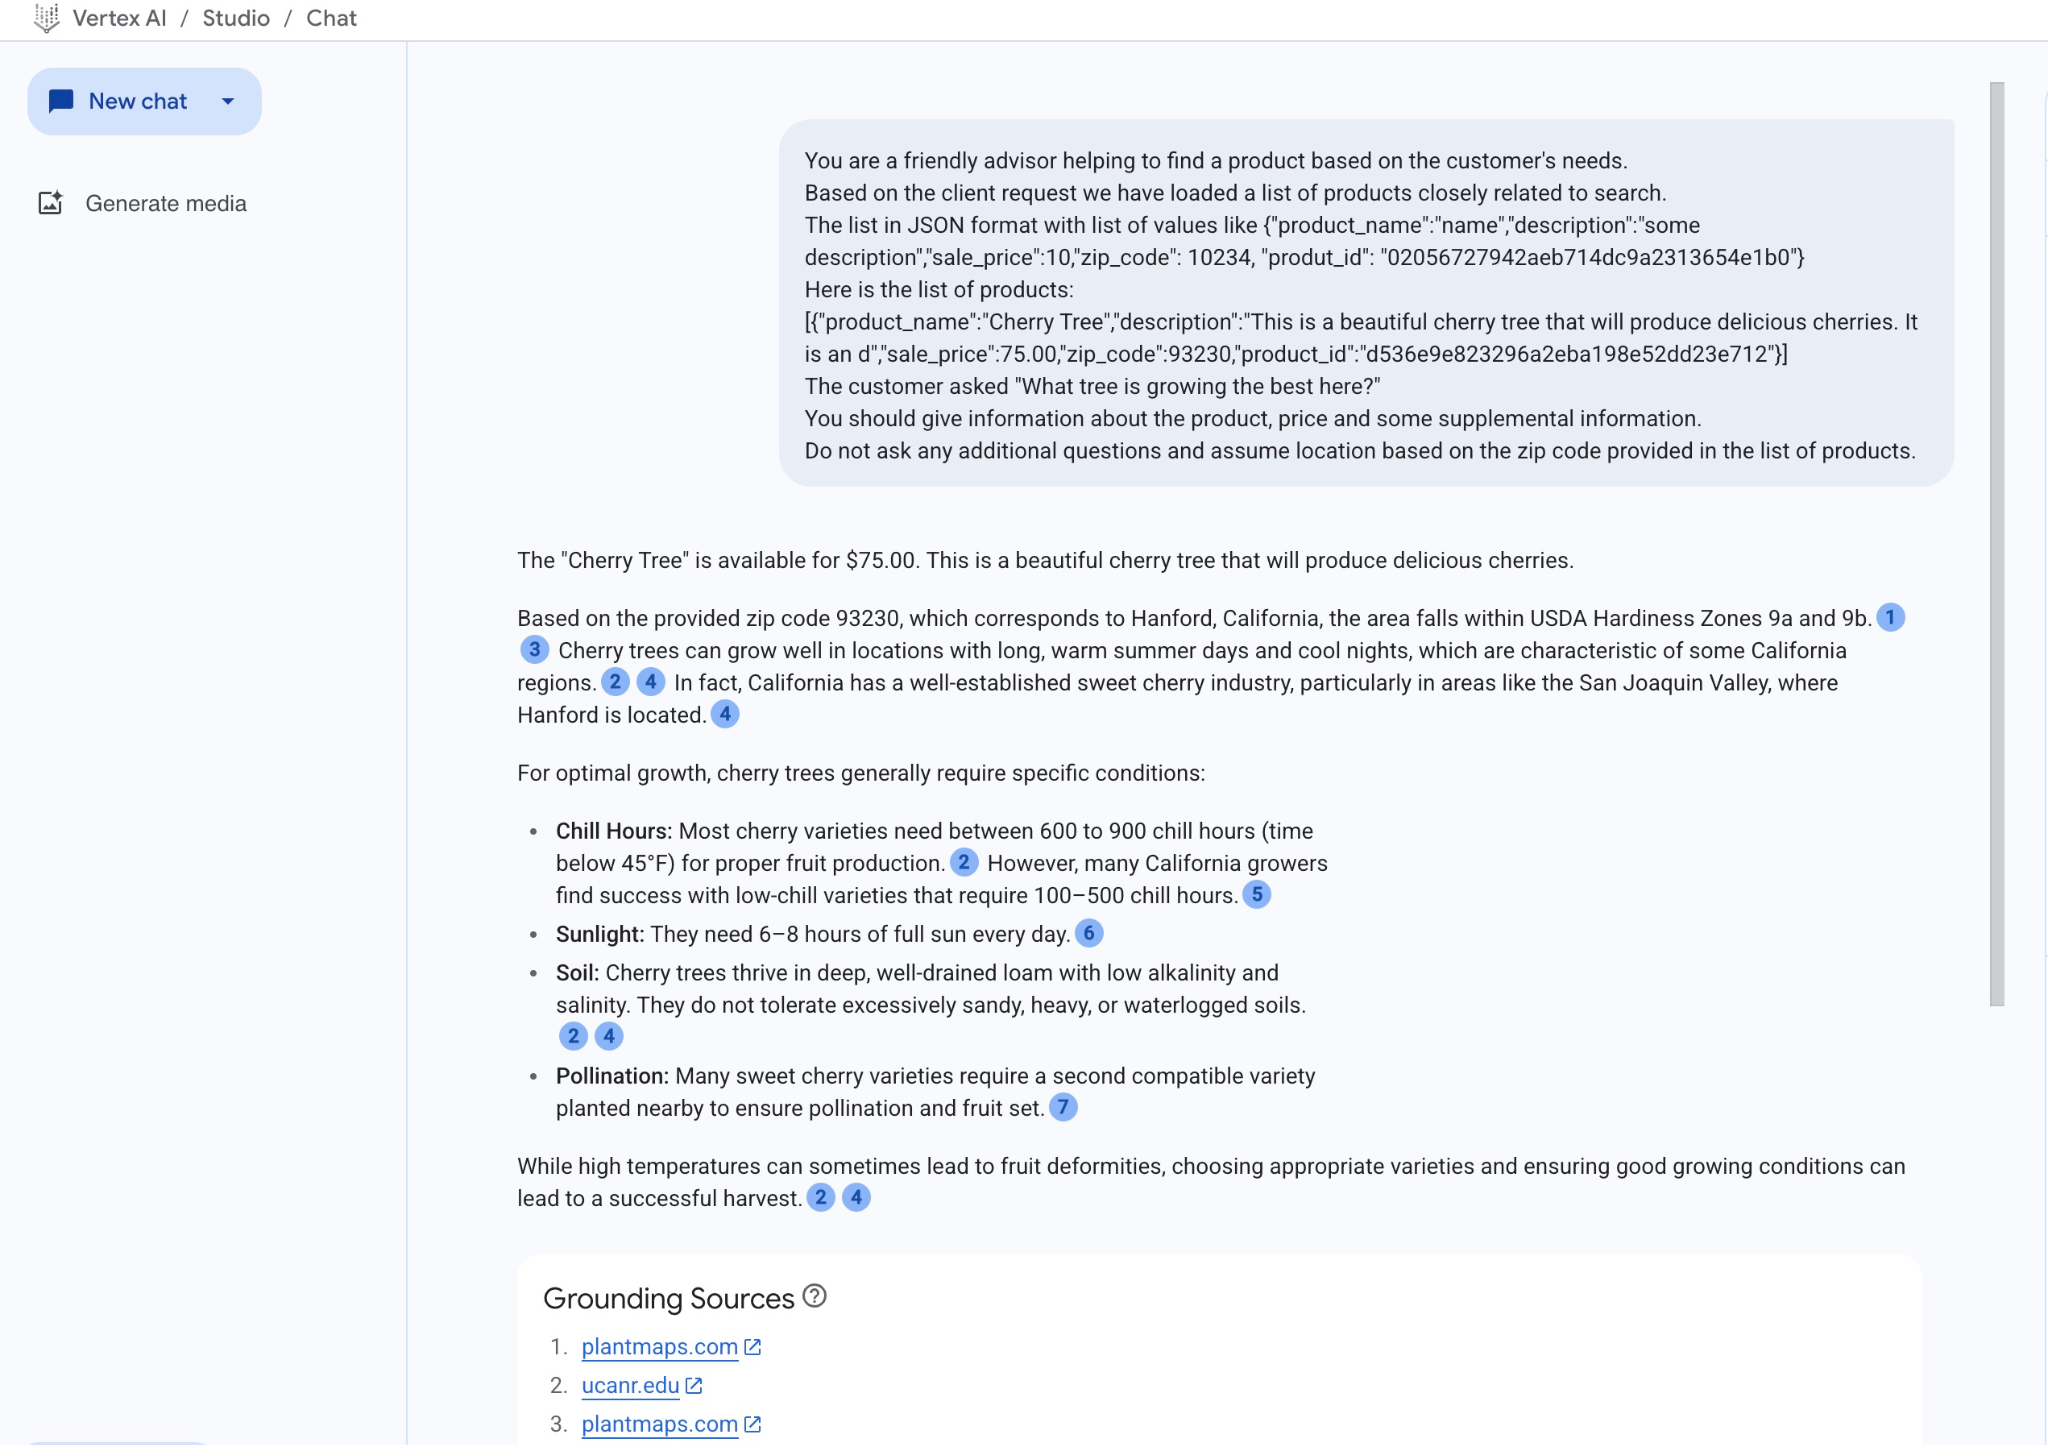
이 예시에서 모델이 얻은 답변은 시맨틱 검색 결과와 언급된 우편번호에서 사용할 수 있는 가장 일치하는 제품을 사용한 것입니다.
SQL에서 프롬프트 실행
또한 Vertex AI와의 Cloud SQL AI 통합을 사용하여 데이터베이스에서 직접 SQL을 사용하여 생성형 모델에서 유사한 응답을 가져올 수도 있습니다.
이제 JSON 결과와 함께 하위 쿼리에서 생성된 결과를 사용하여 SQL을 통해 생성형 AI 텍스트 모델에 프롬프트의 일부로 제공할 수 있습니다.
데이터베이스에 대한 mysql 또는 Cloud SQL Studio 세션에서 쿼리를 실행합니다.
SELECT mysql.ML_EMBEDDING('text-embedding-005','What kind of fruit trees grow well here?') into @query_vector;
WITH trees AS (
SELECT
        cp.product_name,
        cp.product_description AS description,
        cp.sale_price,
        cs.zip_code,
        cp.uniq_id AS product_id
FROM
        cymbal_products cp
JOIN cymbal_inventory ci ON
        ci.uniq_id = cp.uniq_id
JOIN cymbal_stores cs ON
        cs.store_id = ci.store_id
        AND ci.inventory>0
        AND cs.store_id = 1583
ORDER BY
         (approx_distance(cp.embedding ,@query_vector, 'distance_measure=cosine')) ASC
LIMIT 1),
prompt AS (
SELECT
       CONCAT( 'You are a friendly advisor helping to find a product based on the customer''s needs.
Based on the client request we have loaded a list of products closely related to search.
The list in JSON format with list of values like {"product_name":"name","product_description":"some description","sale_price":10}
Here is the list of products:', json_arrayagg(json_object('product_name',trees.product_name,'description',trees.description,'sale_price',trees.sale_price,'zip_code',trees.zip_code,'product_id',trees.product_id)) , 'The customer asked "What kind of fruit trees grow well here?"
You should give information about the product, price and some supplemental information') AS prompt_text
FROM
        trees),
response AS (
SELECT
       mysql.ML_PREDICT_ROW('publishers/google/models/gemini-2.0-flash-001:generateContent',
        json_object('contents',
        json_object('role',
        'user',
        'parts',
        json_array(
        json_object('text',
        prompt_text))))) AS resp
FROM
        prompt)
SELECT
JSON_EXTRACT(resp, '$.candidates[0].content.parts[0].text')
FROM
        response;
샘플 출력은 다음과 같습니다. 모델 버전과 매개변수에 따라 출력이 다를 수 있습니다.
"Okay, I see you're looking for fruit trees that grow well in your area. Based on the available product, the **Malus Domestica** (Apple Tree) is a great option to consider!\n\n* **Product:** Malus Domestica (Apple Tree)\n* **Description:** This classic apple tree grows to about 30 feet tall and provides beautiful seasonal color with green leaves in summer and fiery colors in the fall. It's known for its strength and provides good shade. Most importantly, it produces delicious apples!\n* **Price:** \\$100.00\n* **Growing Zones:** This particular apple tree is well-suited for USDA zones 4-8. Since your zip code is 93230, you are likely in USDA zone 9a or 9b. While this specific tree is rated for zones 4-8, with proper care and variety selection, apple trees can still thrive in slightly warmer climates. You may need to provide extra care during heat waves.\n\n**Recommendation:** I would recommend investigating varieties of Malus Domestica suited to slightly warmer climates or contacting a local nursery/arborist to verify if it is a good fit for your local climate conditions.\n"
출력은 마크다운 형식으로 제공됩니다.
10. 최근접 이웃 색인 만들기
데이터 세트가 비교적 작으며 응답 시간은 주로 AI 모델과의 상호작용에 따라 달라집니다. 하지만 벡터가 수백만 개에 달하면 벡터 검색이 응답 시간의 상당 부분을 차지하고 시스템에 높은 부하를 가할 수 있습니다. 이를 통해 벡터 위에 색인을 빌드할 수 있습니다.
ScaNN 색인 만들기
테스트에는 ScANN 색인 유형을 사용해 보겠습니다.
임베딩 열의 색인을 빌드하려면 임베딩 열의 거리 측정항목을 정의해야 합니다. 매개변수에 대한 자세한 내용은 문서를 참고하세요.
CREATE VECTOR INDEX cymbal_products_embedding_idx ON cymbal_products(embedding) USING SCANN DISTANCE_MEASURE=COSINE;
응답 비교
이제 벡터 검색 쿼리를 다시 실행하여 결과를 확인할 수 있습니다.
SELECT mysql.ML_EMBEDDING('text-embedding-005','What kind of fruit trees grow well here?') into @query_vector;
SELECT
        cp.product_name,
        left(cp.product_description,80) as description,
        cp.sale_price,
        cs.zip_code,
        approx_distance(cp.embedding ,@query_vector, 'distance_measure=cosine') as distance
FROM
        cymbal_products cp
JOIN cymbal_inventory ci on
        ci.uniq_id=cp.uniq_id
JOIN cymbal_stores cs on
        cs.store_id=ci.store_id
        AND ci.inventory>0
        AND cs.store_id = 1583
ORDER BY
        distance ASC
LIMIT 5;
예상 출력:
+-----------------+----------------------------------------------------------------------------------+------------+----------+---------------------+
| product_name    | description                                                                      | sale_price | zip_code | distance            |
+-----------------+----------------------------------------------------------------------------------+------------+----------+---------------------+
| Malus Domestica | Malus Domestica, the classic apple tree, brings beauty and delicious fruit to yo |     100.00 |    93230 | 0.37740096545831603 |
| Cerasus         | Cerasus: A beautiful cherry tree that brings delicious fruit and vibrant color t |      75.00 |    93230 |   0.405704177142419 |
| Persica         | Persica: Enjoy homegrown, delicious peaches with this beautiful peach tree. Reac |     150.00 |    93230 | 0.41031799106722877 |
| Meyer Lemon     | Grow your own juicy Meyer Lemons with this semi-dwarf tree, California's favorit |      34.00 |    93230 | 0.42823360959352186 |
| Acer            | Acer, the classic maple. Known for vibrant fall foliage in reds, oranges, and ye |     100.00 |    93230 | 0.42953897057301615 |
+-----------------+----------------------------------------------------------------------------------+------------+----------+---------------------+
5 rows in set (0.08 sec)
실행 시간이 약간만 다른 것을 확인할 수 있지만, 이렇게 작은 데이터 세트에서는 예상되는 결과입니다. 수백만 개의 벡터가 있는 대규모 데이터 세트의 경우 훨씬 더 눈에 띕니다.
EXPLAIN 명령어를 사용하여 실행 계획을 확인할 수 있습니다.
SELECT mysql.ML_EMBEDDING('text-embedding-005','What kind of fruit trees grow well here?') into @query_vector;
EXPLAIN ANALYZE SELECT
        cp.product_name,
        left(cp.product_description,80) as description,
        cp.sale_price,
        cs.zip_code,
        approx_distance(cp.embedding ,@query_vector, 'distance_measure=cosine') as distance
FROM
        cymbal_products cp
JOIN cymbal_inventory ci on
        ci.uniq_id=cp.uniq_id
JOIN cymbal_stores cs on
        cs.store_id=ci.store_id
        AND ci.inventory>0
        AND cs.store_id = 1583
ORDER BY
        distance ASC
LIMIT 5;
실행 계획 (발췌):
...
-> Nested loop inner join  (cost=443 rows=5) (actual time=1.14..1.18 rows=5 loops=1)
                                -> Vector index scan on cp  (cost=441 rows=5) (actual time=1.1..1.1 rows=5 loops=1)
                                -> Single-row index lookup on cp using PRIMARY (uniq_id=cp.uniq_id)  (cost=0.25 rows=1) (actual time=0.0152..0.0152 rows=1 loops=5)

...
cp (cymbal_products 테이블의 별칭)에서 벡터 색인 스캔을 사용하고 있습니다.
자체 데이터를 실험하거나 다양한 검색어를 테스트하여 MySQL에서 시맨틱 검색이 어떻게 작동하는지 확인할 수 있습니다.
11. 환경 정리
Cloud SQL 인스턴스를 삭제합니다.
실습을 마치면 Cloud SQL 인스턴스를 폐기합니다.
연결이 끊어지고 이전 설정이 모두 손실된 경우 Cloud Shell에서 프로젝트와 환경 변수를 정의합니다.
export INSTANCE_NAME=my-cloudsql-instance
export PROJECT_ID=$(gcloud config get-value project)
인스턴스를 삭제합니다.
gcloud sql instances delete $INSTANCE_NAME --project=$PROJECT_ID
예상되는 콘솔 출력:
student@cloudshell:~$ gcloud sql instances delete $INSTANCE_NAME --project=$PROJECT_ID
All of the instance data will be lost when the instance is deleted.

Do you want to continue (Y/n)?  y

Deleting Cloud SQL instance...done.
Deleted [https://sandbox.googleapis.com/v1beta4/projects/test-project-001-402417/instances/my-cloudsql-instance].
12. 축하합니다
축하합니다. Codelab을 완료했습니다.
Google Cloud 학습 과정
이 실습은 Google Cloud를 사용한 프로덕션 레디 AI 학습 과정의 일부입니다.
- 전체 교육과정을 살펴보고 프로토타입에서 프로덕션으로 전환하세요.
#ProductionReadyAI해시태그를 사용하여 진행 상황을 공유하세요.
학습한 내용
- PostgreSQL용 Cloud SQL 인스턴스를 배포하는 방법
- 데이터베이스를 만들고 Cloud SQL AI 통합을 사용 설정하는 방법
- 데이터베이스에 데이터를 로드하는 방법
- Cloud SQL Studio 사용 방법
- Cloud SQL에서 Vertex AI 임베딩 모델을 사용하는 방법
- Vertex AI Studio 사용 방법
- Vertex AI 생성형 모델을 사용하여 결과를 보강하는 방법
- 벡터 색인을 사용하여 성능을 개선하는 방법
AlloyDB Codelab 또는 Postgres용 Cloud SQL Codelab을 사용해 보세요.
13. 설문조사
결과: