
1. はじめに
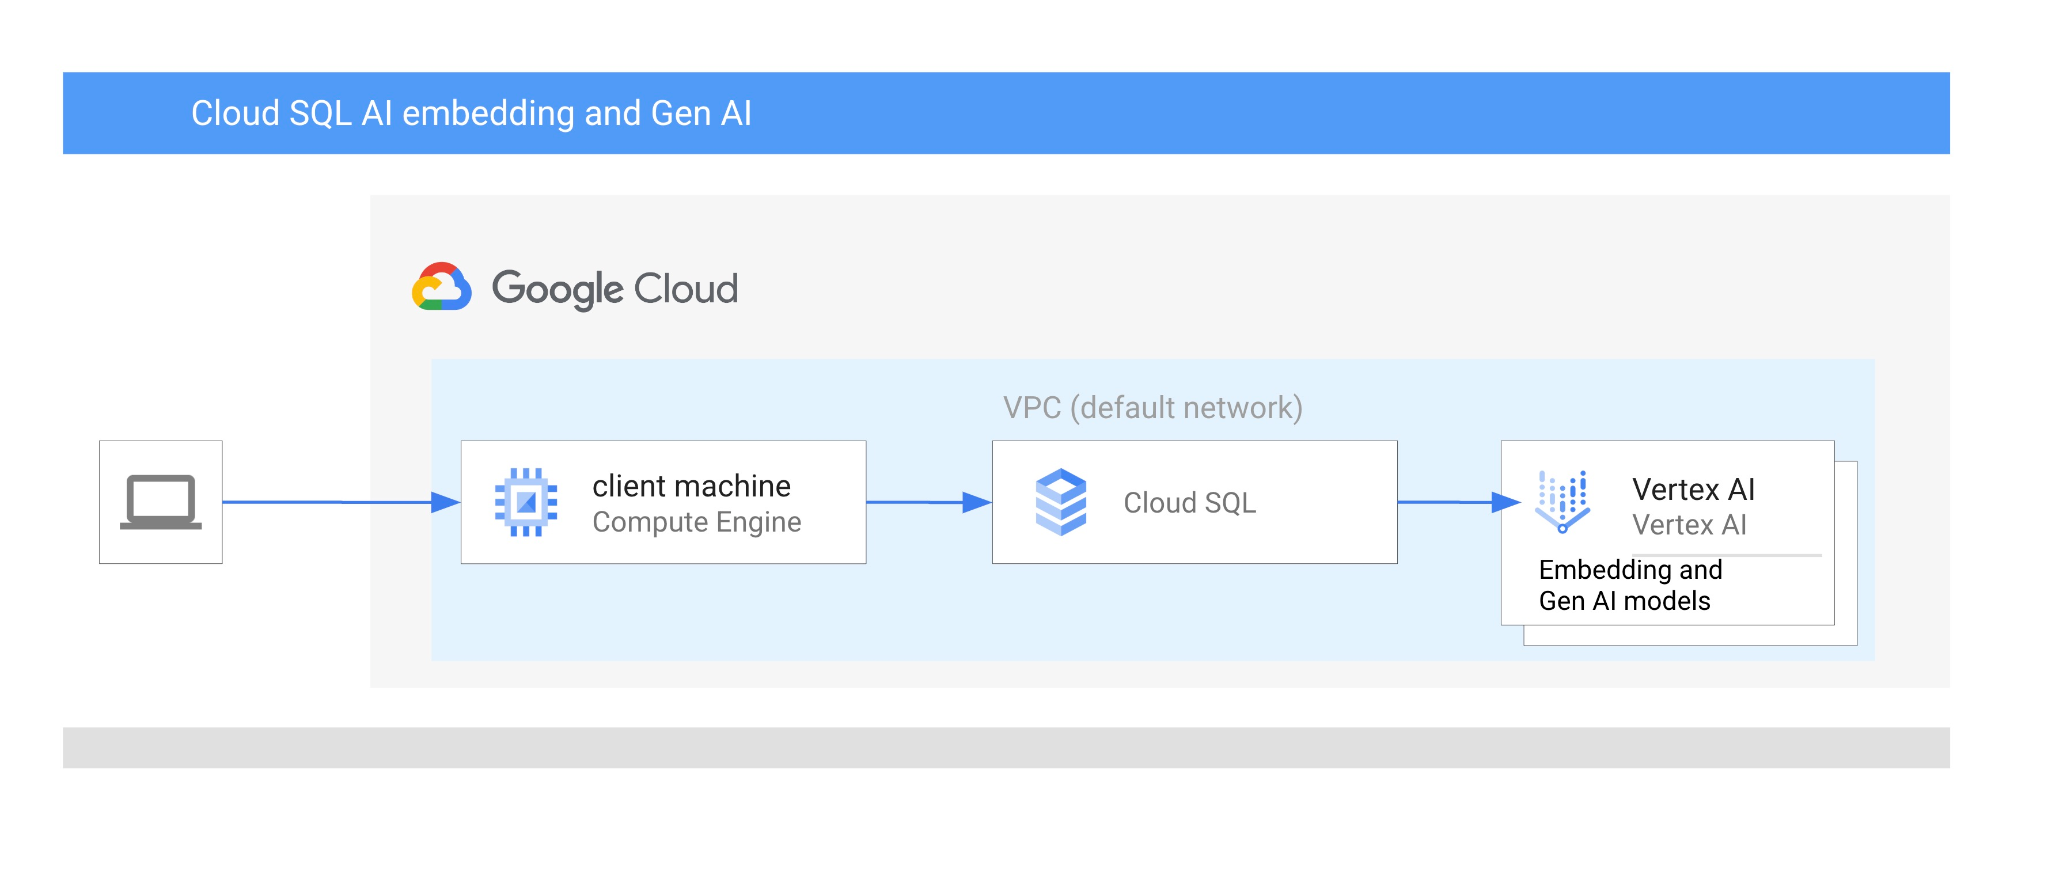
この Codelab では、ベクトル検索と Vertex AI エンベディングを組み合わせて Cloud SQL for PostgreSQL AI 統合を使用する方法について説明します。
前提条件
- Google Cloud とコンソールの基本的な知識
- コマンドライン インターフェースと Cloud Shell の基本的なスキル
学習内容
- PostgreSQL 用 Cloud SQL インスタンスをデプロイする方法
- データベースを作成して Cloud SQL AI 統合を有効にする方法
- データベースにデータを読み込む方法
- Cloud SQL Studio の使用方法
- Cloud SQL で Vertex AI エンベディング モデルを使用する方法
- Vertex AI Studio の使用方法
- Vertex AI 生成モデルを使用して結果を拡充する方法
- ベクトル インデックスを使用してパフォーマンスを改善する方法
必要なもの
- Google Cloud アカウントと Google Cloud プロジェクト
- Google Cloud コンソールと Cloud Shell をサポートするウェブブラウザ(Chrome など)
2. 設定と要件
プロジェクトのセットアップ
- Google Cloud コンソールにログインします。Gmail アカウントも Google Workspace アカウントもまだお持ちでない場合は、アカウントを作成してください。
仕事用または学校用のアカウントではなく、個人用のアカウントを使用します。
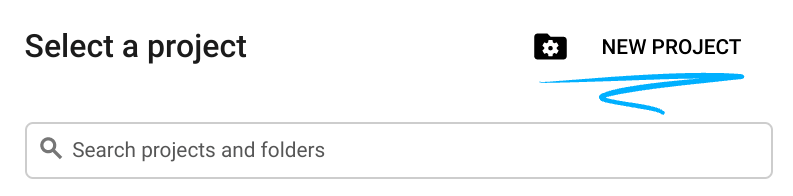
- 新しいプロジェクトを作成するか、既存のプロジェクトを再利用します。Google Cloud コンソールで新しいプロジェクトを作成するには、ヘッダーで [プロジェクトを選択] ボタンをクリックします。ポップアップ ウィンドウが開きます。

[プロジェクトを選択] ウィンドウで [新しいプロジェクト] ボタンを押すと、新しいプロジェクトのダイアログ ボックスが開きます。
ダイアログ ボックスで、任意のプロジェクト名を入力し、ロケーションを選択します。
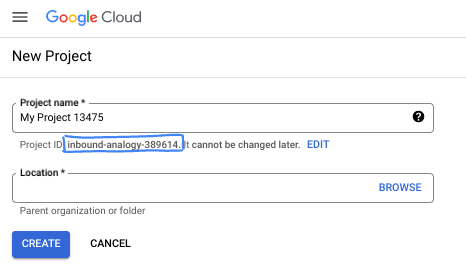
- プロジェクト名は、このプロジェクトの参加者に表示される名称です。プロジェクト名は Google API では使用されず、いつでも変更できます。
- プロジェクト ID は、すべての Google Cloud プロジェクトにおいて一意でなければならず、不変です(設定後は変更できません)。Google Cloud コンソールでは一意の ID が自動的に生成されますが、カスタマイズすることもできます。生成された ID が気に入らない場合は、別のランダムな ID を生成するか、独自の ID を指定して使用可能かどうかを確認できます。ほとんどの Codelab では、プロジェクト ID を参照する必要があります。通常、プロジェクト ID はプレースホルダ PROJECT_ID で識別されます。
- なお、3 つ目の値として、一部の API が使用するプロジェクト番号があります。これら 3 つの値について詳しくは、こちらのドキュメントをご覧ください。
課金を有効にする
課金を有効にするには、次の 2 つの方法があります。個人用の請求先アカウントを使用するか、次の手順でクレジットを利用できます。
Google Cloud クレジットを利用する(省略可)
このワークショップを実施するには、クレジットが設定された請求先アカウントが必要です。この Codelab の上部にあるバナーのクレジットを使用して、開始します。請求先アカウントにすでに接続している場合は、この手順をスキップできます。
個人用の請求先アカウントを設定する
Google Cloud クレジットを使用して課金を設定した場合は、この手順をスキップできます。
個人用の請求先アカウントを設定するには、Cloud コンソールでこちらに移動して課金を有効にします。
注意事項:
- このラボを完了するのにかかる Cloud リソースの費用は 3 米ドル未満です。
- このラボの最後の手順に沿ってリソースを削除すると、それ以上の料金は発生しません。
- 新規ユーザーは、300 米ドル分の無料トライアルをご利用いただけます。
Cloud Shell の起動
Google Cloud はノートパソコンからリモートで操作できますが、この Codelab では、Google Cloud Shell(Cloud 上で動作するコマンドライン環境)を使用します。
Google Cloud Console で、右上のツールバーにある Cloud Shell アイコンをクリックします。

または、G キーを押してから S キーを押します。このシーケンスは、Google Cloud コンソール内からアクセスした場合、またはこのリンクを使用した場合に Cloud Shell をアクティブにします。
プロビジョニングと環境への接続にはそれほど時間はかかりません。完了すると、次のように表示されます。

この仮想マシンには、必要な開発ツールがすべて用意されています。永続的なホーム ディレクトリが 5 GB 用意されており、Google Cloud で稼働します。そのため、ネットワークのパフォーマンスと認証機能が大幅に向上しています。この Codelab での作業はすべて、ブラウザ内から実行できます。インストールは不要です。
3. はじめに
API を有効にする
出力:
Cloud SQL、Compute Engine、ネットワーキング サービス、Vertex AI を使用するには、Google Cloud プロジェクトでそれぞれの API を有効にする必要があります。
Cloud Shell ターミナルで、プロジェクト ID が設定されていることを確認します。
gcloud config set project [YOUR-PROJECT-ID]
環境変数 PROJECT_ID を設定します。
PROJECT_ID=$(gcloud config get-value project)
必要なサービスをすべて有効にします。
gcloud services enable sqladmin.googleapis.com \
                       compute.googleapis.com \
                       cloudresourcemanager.googleapis.com \
                       servicenetworking.googleapis.com \
                       aiplatform.googleapis.com
想定される出力
student@cloudshell:~ (test-project-001-402417)$ gcloud config set project test-project-001-402417
Updated property [core/project].
student@cloudshell:~ (test-project-001-402417)$ PROJECT_ID=$(gcloud config get-value project)
Your active configuration is: [cloudshell-14650]
student@cloudshell:~ (test-project-001-402417)$
student@cloudshell:~ (test-project-001-402417)$ gcloud services enable sqladmin.googleapis.com \
                       compute.googleapis.com \
                       cloudresourcemanager.googleapis.com \
                       servicenetworking.googleapis.com \
                       aiplatform.googleapis.com
Operation "operations/acat.p2-4470404856-1f44ebd8-894e-4356-bea7-b84165a57442" finished successfully.
API の概要
- Cloud SQL Admin API(
sqladmin.googleapis.com)を使用すると、Cloud SQL インスタンスをプログラムで作成、構成、管理できます。Google のフルマネージド リレーショナル データベース サービス(MySQL、PostgreSQL、SQL Server をサポート)のコントロール プレーンを提供し、プロビジョニング、バックアップ、高可用性、スケーリングなどのタスクを処理します。 - Compute Engine API(
compute.googleapis.com)を使用すると、仮想マシン(VM)、永続ディスク、ネットワーク設定を作成して管理できます。これは、ワークロードの実行と、多くのマネージド サービスの基盤となるインフラストラクチャのホストに必要な、Infrastructure-as-a-Service(IaaS)の基盤となるものです。 - Cloud Resource Manager API(
cloudresourcemanager.googleapis.com)を使用すると、Google Cloud プロジェクトのメタデータと構成をプログラムで管理できます。これにより、リソースの整理、Identity and Access Management(IAM)ポリシーの処理、プロジェクト階層全体での権限の検証が可能になります。 - Service Networking API(
servicenetworking.googleapis.com)を使用すると、Virtual Private Cloud(VPC)ネットワークと Google のマネージド サービス間のプライベート接続の設定を自動化できます。AlloyDB などのサービスが他のリソースと安全に通信できるように、プライベート IP アクセスを確立するために必要です。 - Vertex AI API(
aiplatform.googleapis.com)を使用すると、アプリケーションで ML モデルを構築、デプロイ、スケーリングできます。これは、生成 AI モデル(Gemini など)へのアクセスやカスタムモデルのトレーニングなど、Google Cloud のすべての AI サービスに統合インターフェースを提供します。
4. Cloud SQL インスタンスを作成する
Vertex AI とのデータベース統合を使用して Cloud SQL インスタンスを作成します。
データベース パスワードを作成する
デフォルトのデータベース ユーザーのパスワードを定義します。独自のパスワードを定義することも、ランダム関数を使用してパスワードを生成することもできます。
export CLOUDSQL_PASSWORD=`openssl rand -hex 12`
生成されたパスワードの値をメモします。
echo $CLOUDSQL_PASSWORD
Cloud SQL for PostgreSQL インスタンスを作成する
Cloud SQL インスタンスは、Google Cloud コンソール、Terraform などの自動化ツール、Google Cloud SDK など、さまざまな方法で作成できます。このラボでは、主に Google Cloud SDK の gcloud ツールを使用します。他のツールを使用してインスタンスを作成する方法については、ドキュメントをご覧ください。
Cloud Shell セッションで、次のコマンドを実行します。
gcloud sql instances create my-cloudsql-instance \
--database-version=POSTGRES_17 \
--tier=db-custom-1-3840 \
--region=us-central1 \
--edition=ENTERPRISE \
--enable-google-ml-integration \
--database-flags cloudsql.enable_google_ml_integration=on
インスタンスを作成したら、インスタンスのデフォルト ユーザーのパスワードを設定し、そのパスワードで接続できるかどうかを確認する必要があります。
gcloud sql users set-password postgres \
    --instance=my-cloudsql-instance \
    --password=$CLOUDSQL_PASSWORD
ボックスに表示されているとおりに gcloud sql connect コマンドを実行し、接続の準備ができたらプロンプトにパスワードを入力します。
gcloud sql connect my-cloudsql-instance --user=postgres
Ctrl+D キーボード ショートカットを使用するか、exit コマンドを実行して、psql セッションを終了します。
exit
Vertex AI のインテグレーションを有効にする
Vertex AI 統合を使用できるように、内部 Cloud SQL サービス アカウントに必要な権限を付与します。
Cloud SQL 内部サービス アカウントのメールアドレスを確認し、変数としてエクスポートします。
SERVICE_ACCOUNT_EMAIL=$(gcloud sql instances describe my-cloudsql-instance --format="value(serviceAccountEmailAddress)")
echo $SERVICE_ACCOUNT_EMAIL
Cloud SQL サービス アカウントに Vertex AI へのアクセス権を付与します。
PROJECT_ID=$(gcloud config get-value project)
gcloud projects add-iam-policy-binding $PROJECT_ID \
  --member="serviceAccount:$SERVICE_ACCOUNT_EMAIL" \
  --role="roles/aiplatform.user"
インスタンスの作成と構成の詳細については、Cloud SQL ドキュメントのこちらをご覧ください。
5. データベースを準備する
次に、データベースを作成してベクトル サポートを有効にする必要があります。
データベースを作成
quickstart_db という名前のデータベースを作成します。これを行うには、PostgreSQL の psql などのコマンドライン データベース クライアント、SDK、Cloud SQL Studio などのさまざまなオプションがあります。データベースの作成とインスタンスへの接続には、SDK(gcloud)を使用します。
Cloud Shell でコマンドを実行してデータベースを作成する
gcloud sql databases create quickstart_db --instance=my-cloudsql-instance
拡張機能を有効にする
Vertex AI とベクトルを使用するには、作成したデータベースで 2 つの拡張機能を有効にする必要があります。
Cloud Shell でコマンドを実行して、作成したデータベースに接続します(パスワードの入力が必要です)。
gcloud sql connect my-cloudsql-instance --database quickstart_db --user=postgres
接続に成功したら、SQL セッションで次の 2 つのコマンドを実行する必要があります。
CREATE EXTENSION IF NOT EXISTS google_ml_integration CASCADE;
CREATE EXTENSION IF NOT EXISTS vector CASCADE;
SQL セッションを終了します。
exit;
6. データを読み込む
次に、データベースにオブジェクトを作成してデータを読み込む必要があります。架空の Cymbal Store のデータを使用します。データは、一般公開の Google Storage バケットで CSV 形式で利用できます。
まず、データベースに必要なオブジェクトをすべて作成する必要があります。これを行うには、すでに使用した gcloud sql connect コマンドと gcloud storage コマンドを使用して、スキーマ オブジェクトをダウンロードしてデータベースにインポートします。
Cloud Shell で実行し、インスタンスの作成時にメモしたパスワードを指定します。
gcloud storage cat gs://cloud-training/gcc/gcc-tech-004/cymbal_demo_schema.sql |gcloud sql connect my-cloudsql-instance --database quickstart_db --user=postgres
前のコマンドでは具体的に何を行ったのでしょうか?データベースに接続し、ダウンロードした SQL コードを実行して、テーブル、インデックス、シーケンスを作成しました。
次のステップは、データを読み込むことです。そのためには、Google Cloud Storage から CSV ファイルをダウンロードする必要があります。
gcloud storage cp gs://cloud-training/gcc/gcc-tech-004/cymbal_products.csv .
gcloud storage cp gs://cloud-training/gcc/gcc-tech-004/cymbal_inventory.csv .
gcloud storage cp gs://cloud-training/gcc/gcc-tech-004/cymbal_stores.csv .
次に、データベースに接続する必要があります。
gcloud sql connect my-cloudsql-instance --database quickstart_db --user=postgres
CSV ファイルからデータをインポートします。
\copy cymbal_products from 'cymbal_products.csv' csv header
\copy cymbal_inventory from 'cymbal_inventory.csv' csv header
\copy cymbal_stores from 'cymbal_stores.csv' csv header
独自のデータがあり、CSV ファイルが Cloud コンソールから利用できる Cloud SQL インポート ツールと互換性がある場合は、コマンドライン アプローチの代わりにこのツールを使用できます。
7. エンベディングを作成する
次のステップでは、Google Vertex AI の textembedding-004 モデルを使用して商品紹介文のエンベディングを構築し、ベクトルデータとして保存します。
データベースに接続します(終了した場合や、前のセッションが切断された場合)。
gcloud sql connect my-cloudsql-instance --database quickstart_db --user=postgres
また、エンベディング関数を使用して、cymbal_products テーブルに仮想列 embedding を作成します。このコマンドは、product_description 列に基づいて生成されたエンベディングを含むベクトルを格納する仮想列「embedding」を作成します。また、テーブル内の既存のすべての行のエンベディングも作成します。モデルはエンベディング関数の最初のパラメータとして定義され、ソースデータは 2 番目のパラメータとして定義されます。
ALTER TABLE cymbal_products ADD COLUMN embedding vector(768) GENERATED ALWAYS AS (embedding('text-embedding-005',product_description)) STORED;
時間がかかる場合がありますが、900 ~ 1,000 行であれば 5 分以上かかることはありません。通常はもっと早く完了します。
テーブルに新しい行を挿入するか、既存の行の product_description を更新すると、「embedding」列の仮想列データが「product_description」に基づいて再生成されます。
8. 類似性検索を実行する
これで、説明用に計算されたベクトル値とリクエストで取得したベクトル値に基づいて、類似性検索を使用して検索を実行できます。
SQL クエリは、gcloud sql connect を使用して同じコマンドライン インターフェースから実行できます。また、Cloud SQL Studio から実行することもできます。複数行の複雑なクエリは、Cloud SQL Studio で管理することをおすすめします。
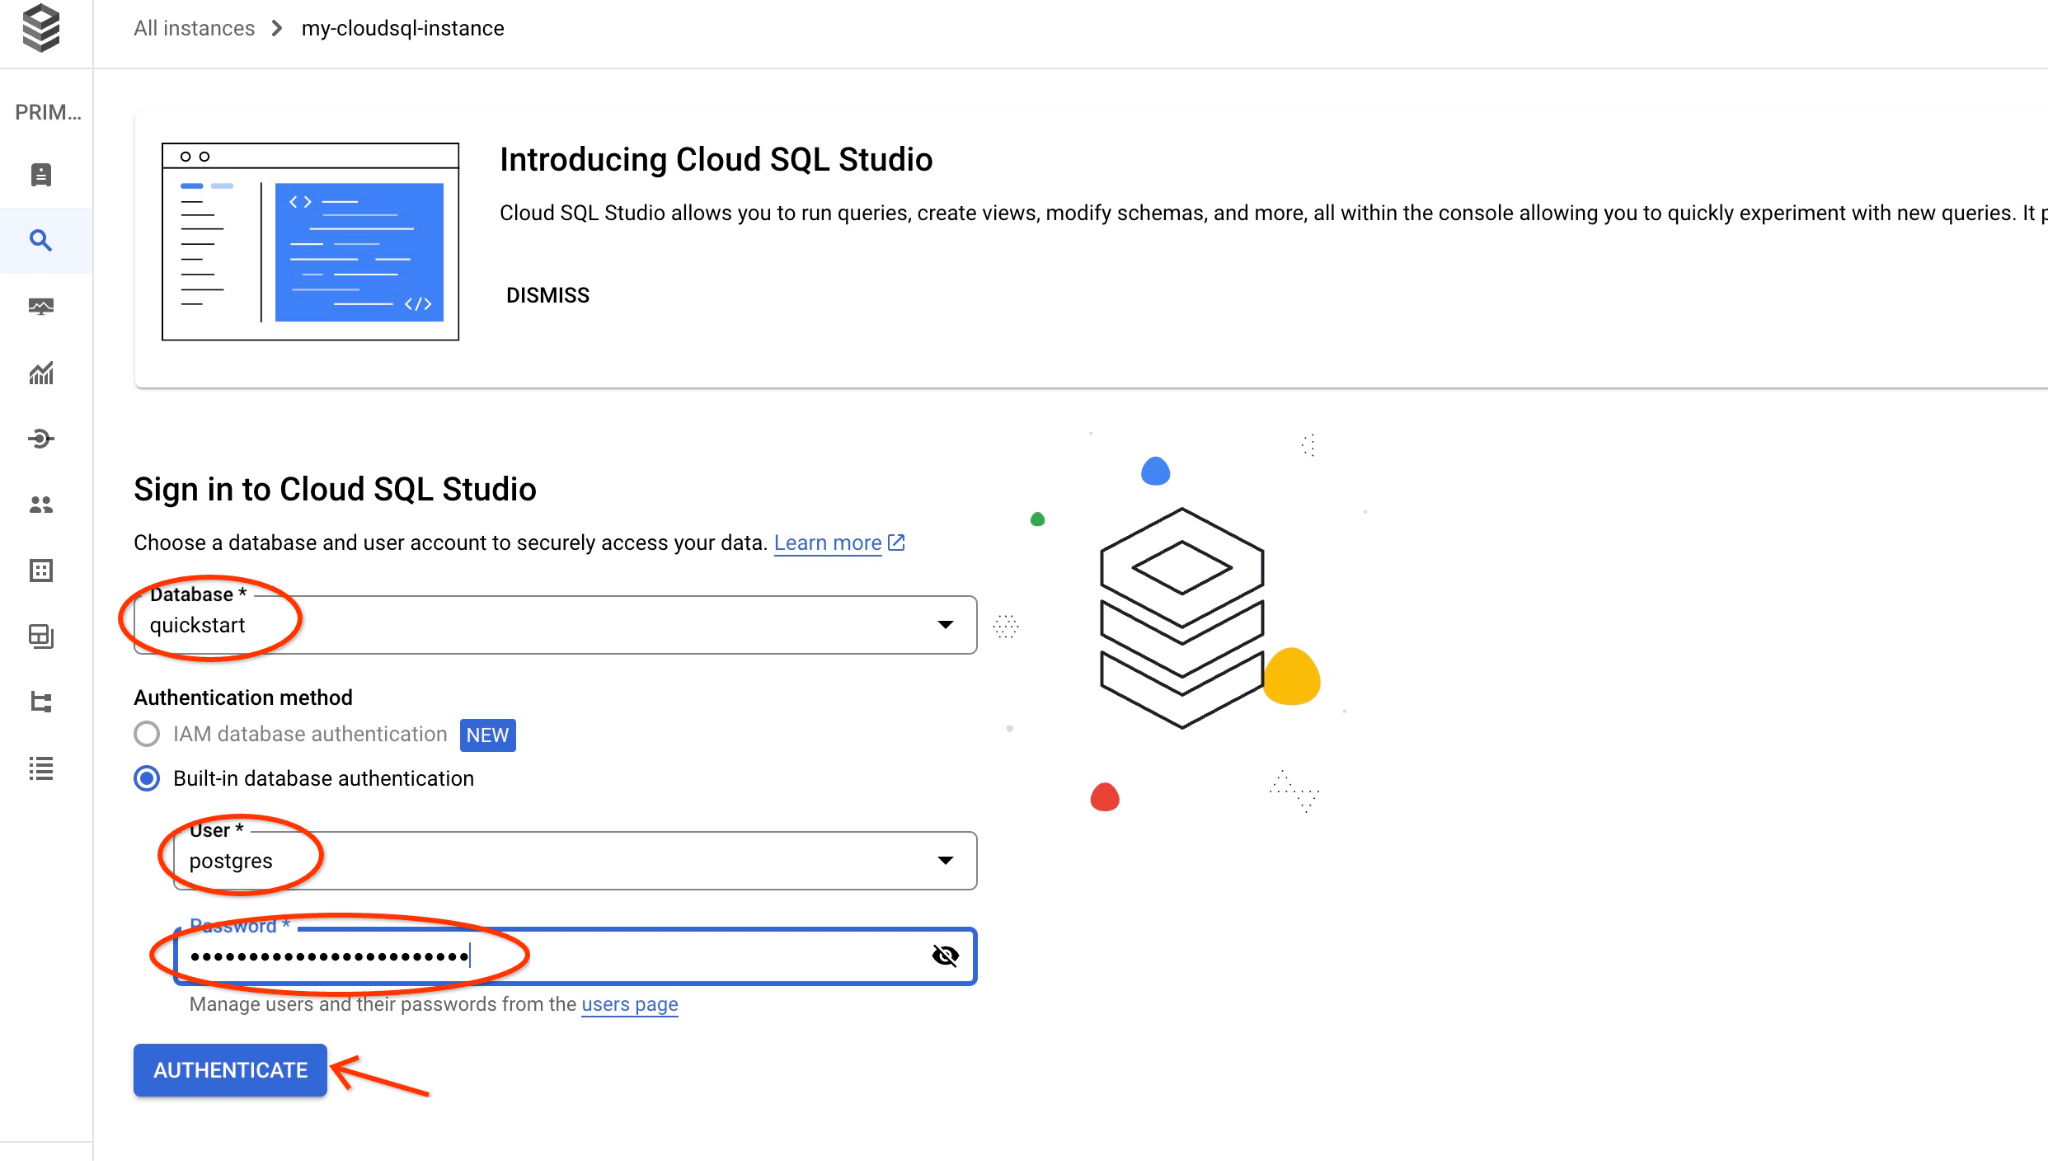
Cloud SQL Studio を起動する
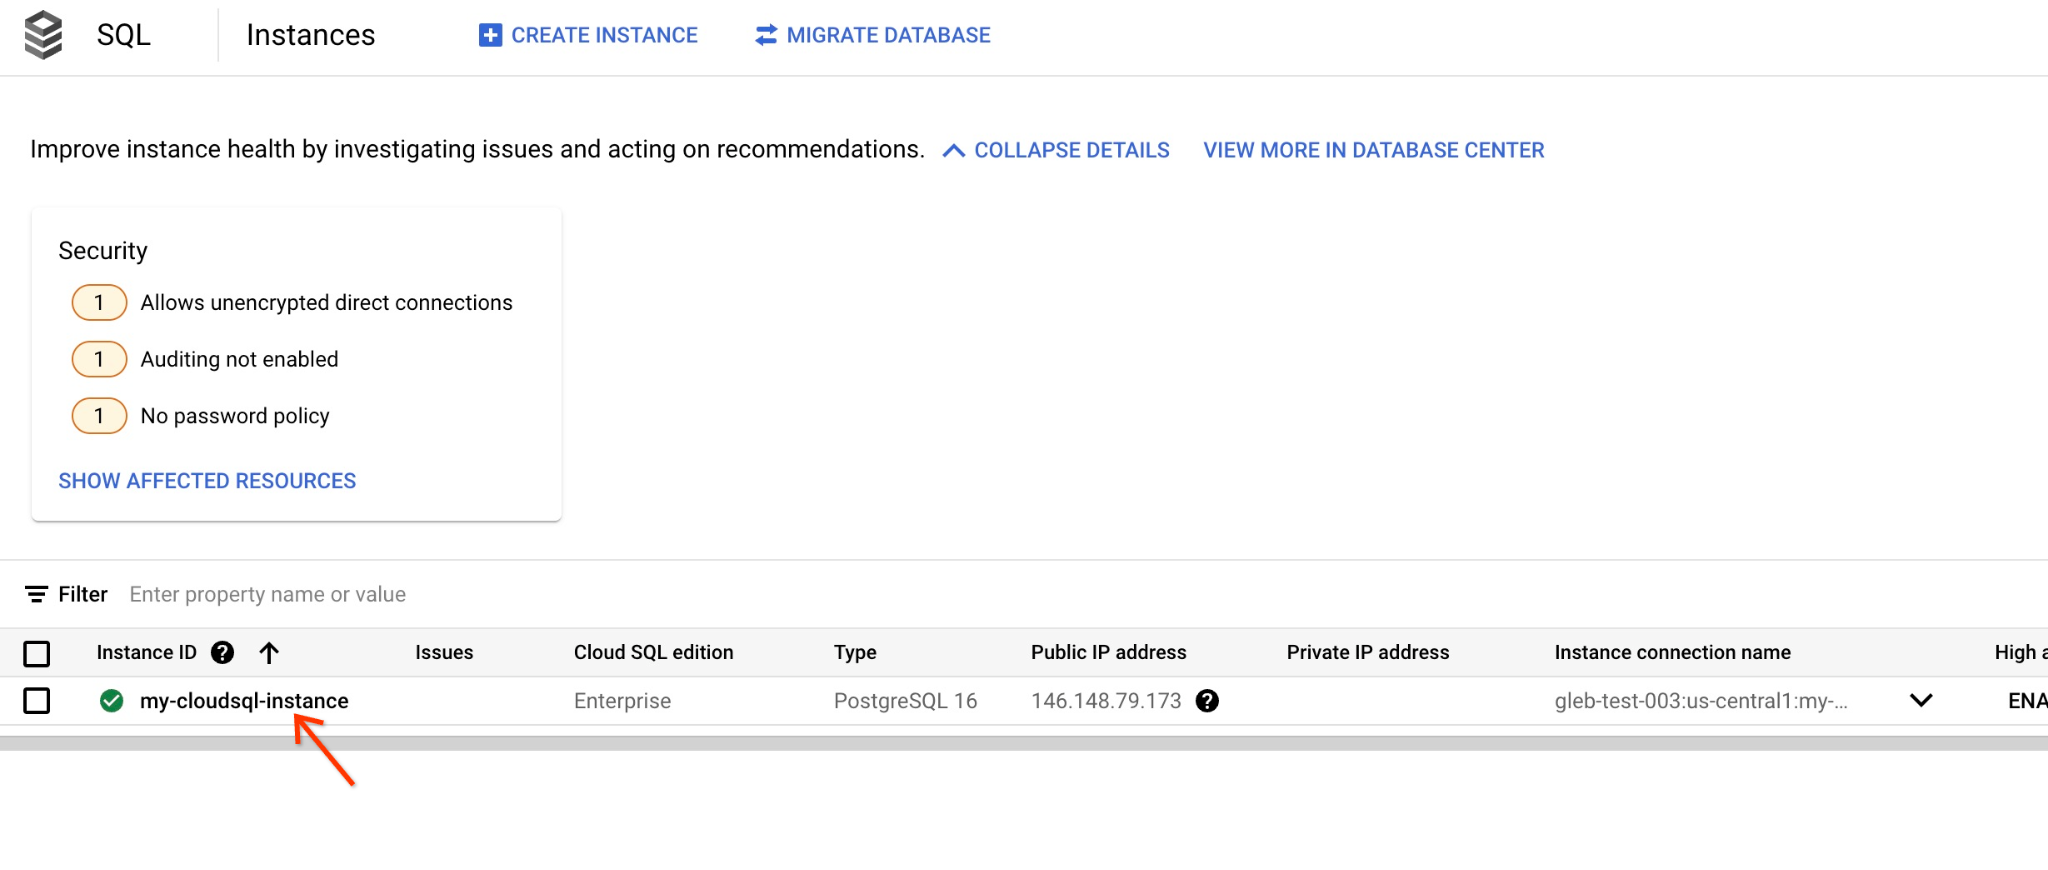
コンソールで、先ほど作成した Cloud SQL インスタンスをクリックします。
右側のパネルが開くと、Cloud SQL Studio が表示されます。クリックします。

データベース名と認証情報を入力するダイアログが開きます。
- データベース: quickstart_db
- ユーザー: postgres
- パスワード: メイン データベース ユーザー用にメモしたパスワード
[AUTHENTICATE] ボタンをクリックします。
次のウィンドウが開きます。右側の [エディタ] タブをクリックして SQL エディタを開きます。
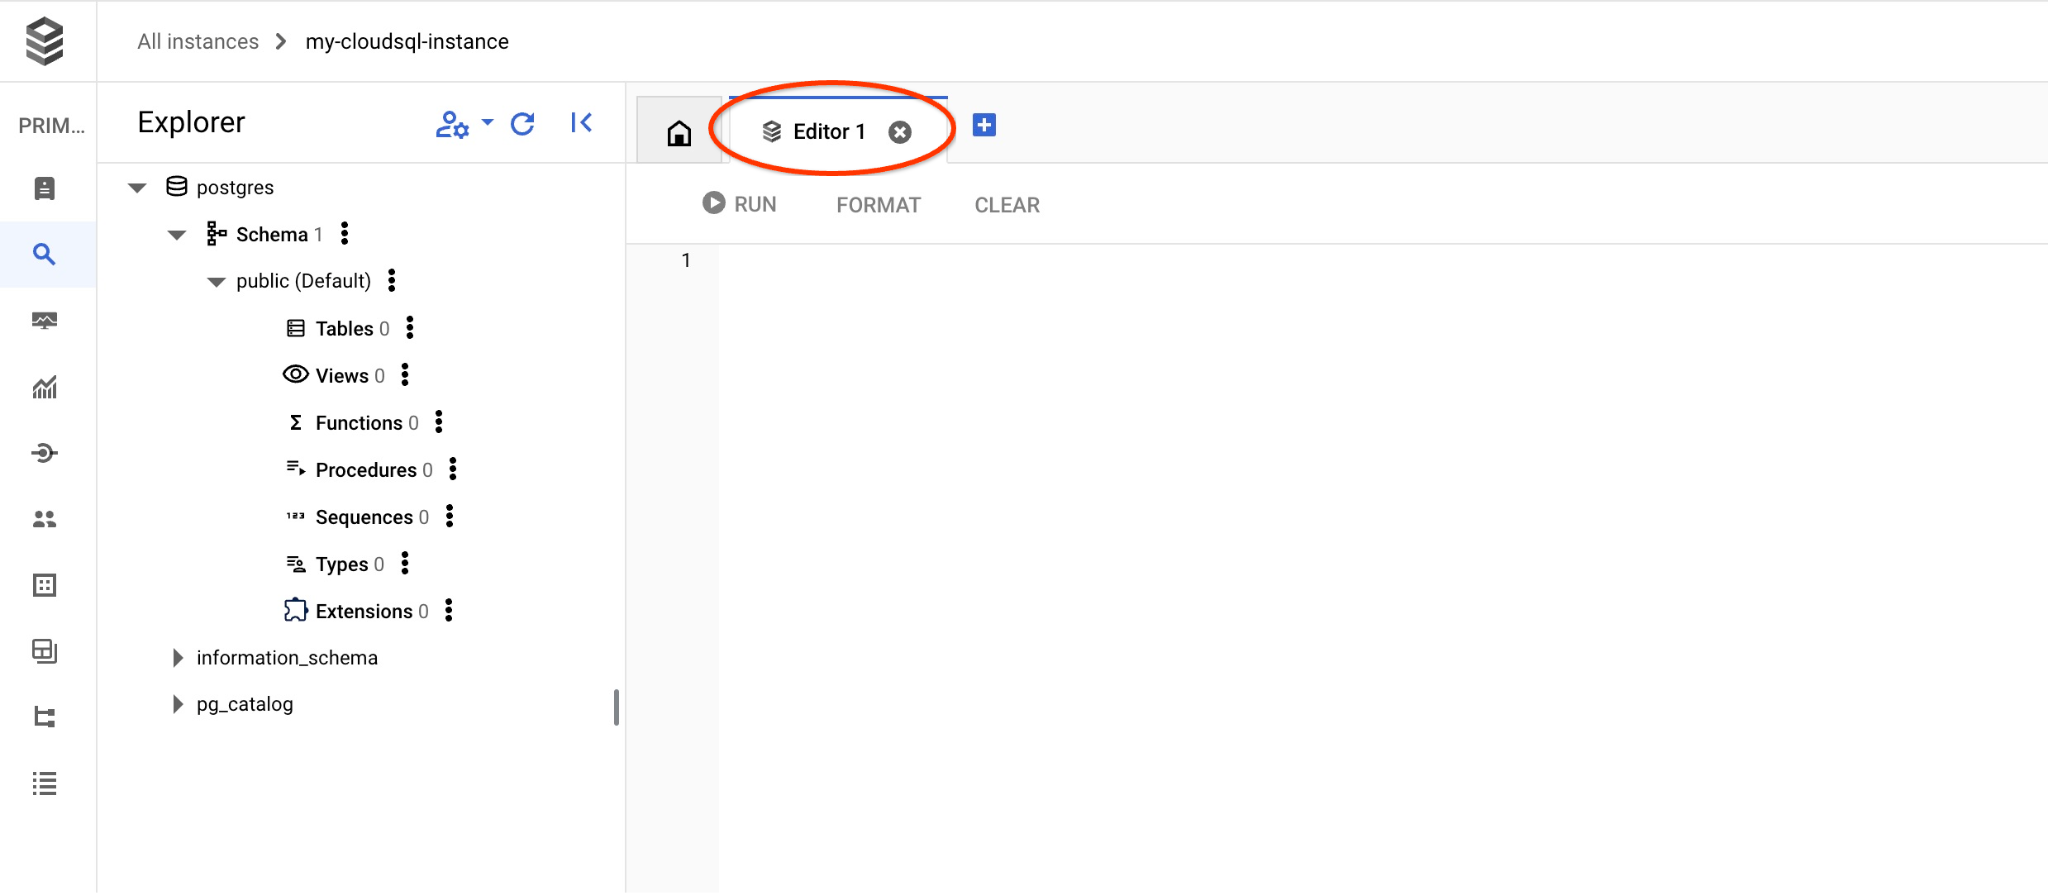
これで、クエリを実行する準備が整いました。
クエリを実行
クエリを実行して、クライアントのリクエストに最も関連性の高い利用可能な商品のリストを取得します。ベクトル値を取得するために Vertex AI に渡すリクエストは、「この場所でよく育つ果樹は何ですか?」のようなものです。
リクエストに最適な最初の 10 個のアイテムを選択するために実行できるクエリは次のとおりです。
SELECT
        cp.product_name,
        left(cp.product_description,80) as description,
        cp.sale_price,
        cs.zip_code,
        (cp.embedding <=> embedding('text-embedding-005','What kind of fruit trees grow well here?')::vector) as distance
FROM
        cymbal_products cp
JOIN cymbal_inventory ci on
        ci.uniq_id=cp.uniq_id
JOIN cymbal_stores cs on
        cs.store_id=ci.store_id
        AND ci.inventory>0
        AND cs.store_id = 1583
ORDER BY
        distance ASC
LIMIT 10;
クエリをコピーして Cloud SQL Studio エディタに貼り付け、[実行] ボタンを押すか、quickstart_db データベースに接続しているコマンドライン セッションに貼り付けます。
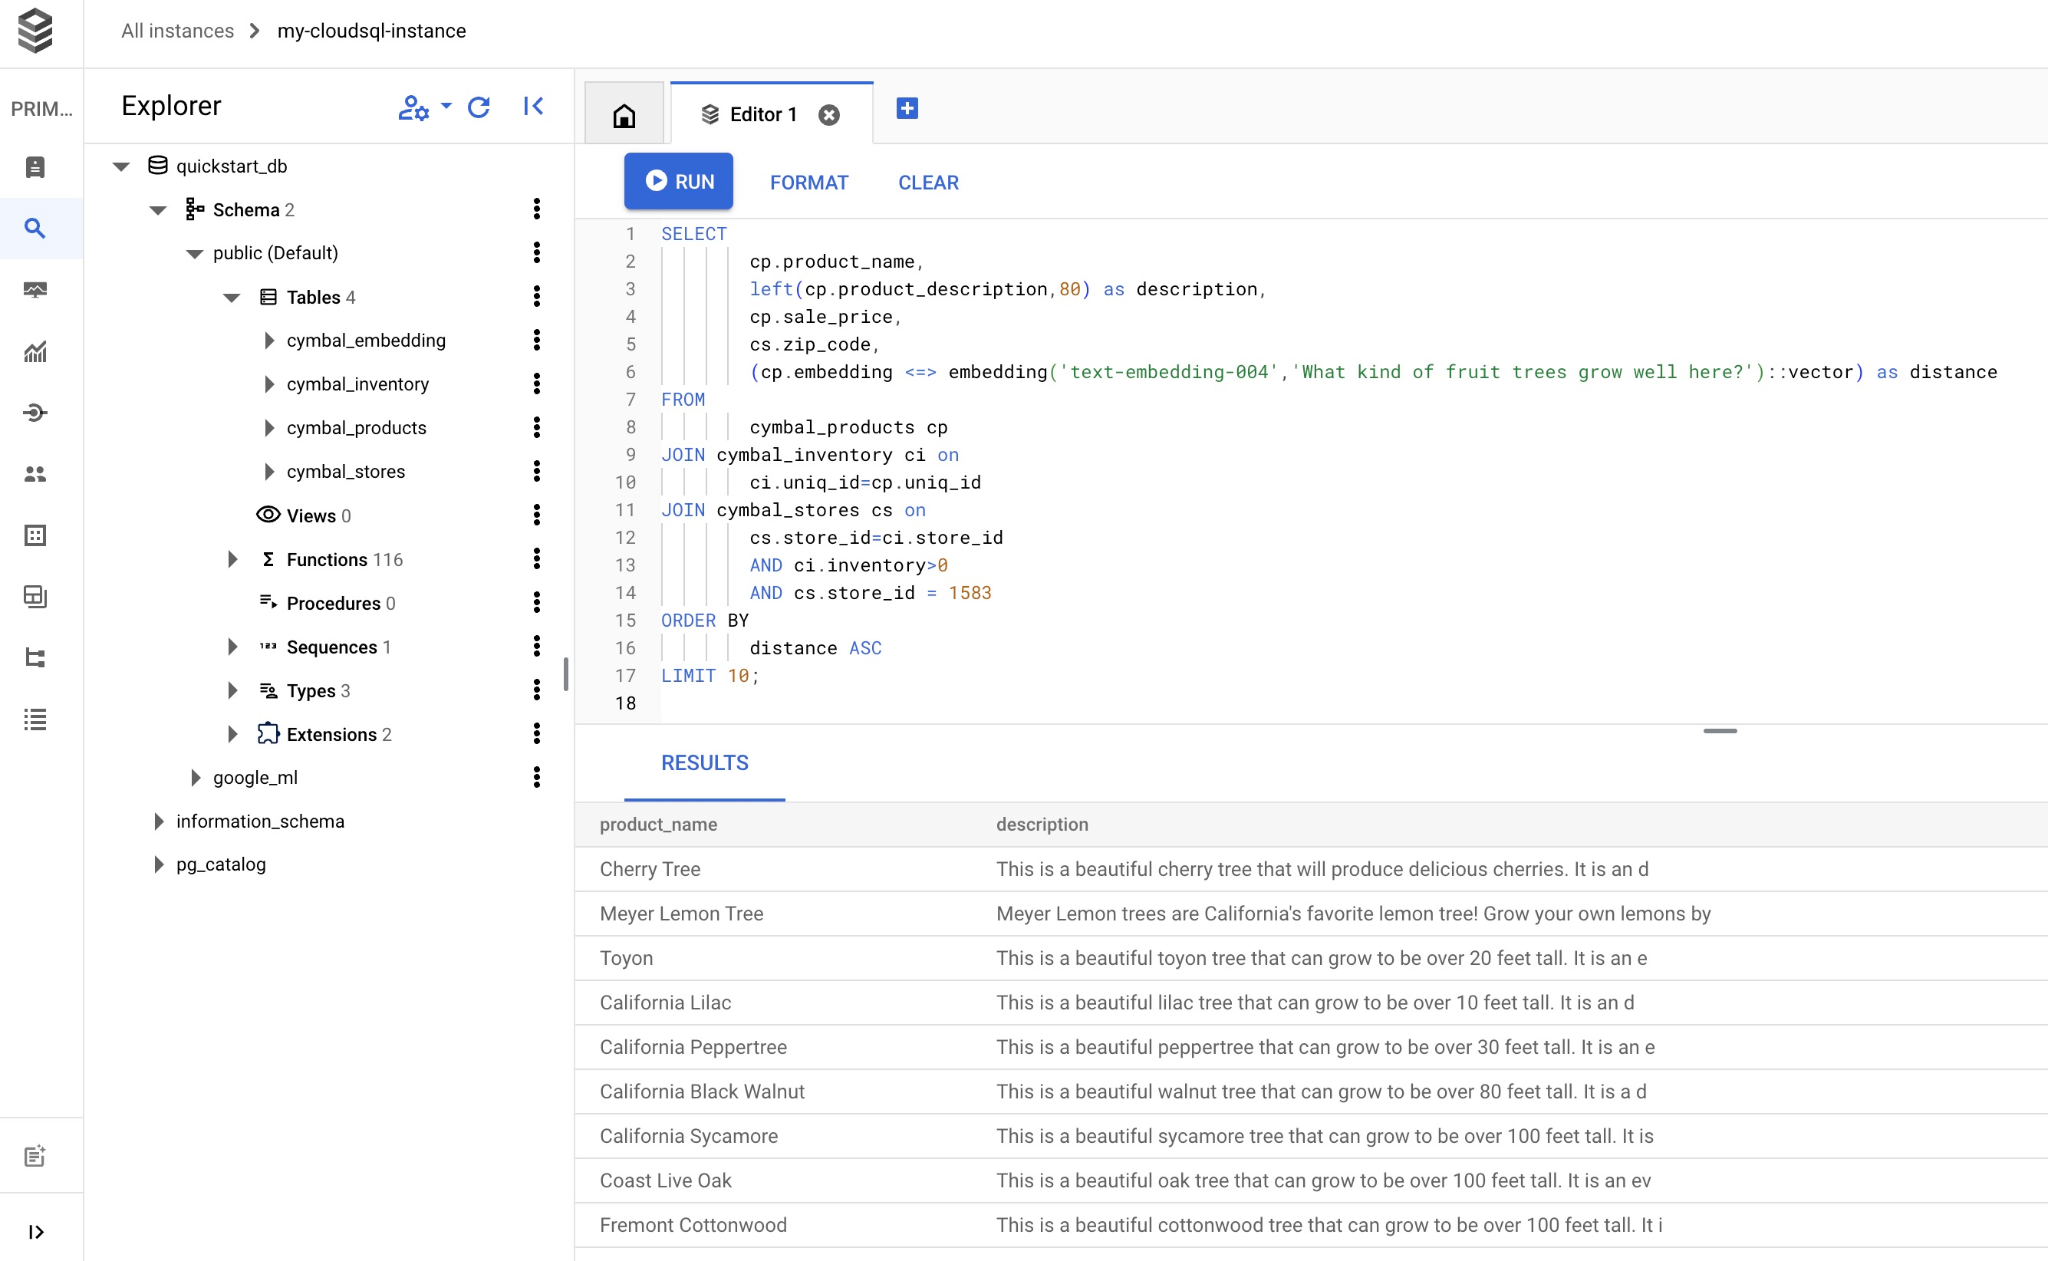
クエリに一致する選択された商品のリストは次のとおりです。
product_name       |                                   description                                    | sale_price | zip_code |      distance
-------------------------+----------------------------------------------------------------------------------+------------+----------+---------------------
 Cherry Tree             | This is a beautiful cherry tree that will produce delicious cherries. It is an d |      75.00 |    93230 | 0.43922018972266397
 Meyer Lemon Tree        | Meyer Lemon trees are California's favorite lemon tree! Grow your own lemons by  |         34 |    93230 |  0.4685112926118228
 Toyon                   | This is a beautiful toyon tree that can grow to be over 20 feet tall. It is an e |      10.00 |    93230 |  0.4835677149651668
 California Lilac        | This is a beautiful lilac tree that can grow to be over 10 feet tall. It is an d |       5.00 |    93230 |  0.4947204525907498
 California Peppertree   | This is a beautiful peppertree that can grow to be over 30 feet tall. It is an e |      25.00 |    93230 |  0.5054166905547247
 California Black Walnut | This is a beautiful walnut tree that can grow to be over 80 feet tall. It is a d |     100.00 |    93230 |  0.5084219510932597
 California Sycamore     | This is a beautiful sycamore tree that can grow to be over 100 feet tall. It is  |     300.00 |    93230 |  0.5140519790508755
 Coast Live Oak          | This is a beautiful oak tree that can grow to be over 100 feet tall. It is an ev |     500.00 |    93230 |  0.5143126438081371
 Fremont Cottonwood      | This is a beautiful cottonwood tree that can grow to be over 100 feet tall. It i |     200.00 |    93230 |  0.5174774727252058
 Madrone                 | This is a beautiful madrona tree that can grow to be over 80 feet tall. It is an |      50.00 |    93230 |  0.5227400803389093
(10 rows)
9. 取得したデータを使用して LLM のレスポンスを改善する
実行されたクエリの結果を使用して、クライアント アプリケーションに対する生成 AI LLM のレスポンスを改善し、提供されたクエリ結果を Vertex AI 生成基盤言語モデルへのプロンプトの一部として使用して、意味のある出力を準備できます。
そのためには、ベクトル検索の結果を含む JSON を生成し、その生成された JSON を Vertex AI の LLM モデルのプロンプトに追加して、意味のある出力を生成する必要があります。最初の手順で JSON を生成し、次の手順で Vertex AI Studio でテストします。最後の手順では、アプリケーションで使用できる SQL ステートメントに組み込みます。
JSON 形式で出力を生成する
クエリを変更して、JSON 形式で出力を生成し、Vertex AI に渡す行を 1 つだけ返します。
Cloud SQL for PostgreSQL
クエリの例を次に示します。
WITH trees as (
SELECT
        cp.product_name,
        left(cp.product_description,80) as description,
        cp.sale_price,
        cs.zip_code,
        cp.uniq_id as product_id
FROM
        cymbal_products cp
JOIN cymbal_inventory ci on
        ci.uniq_id=cp.uniq_id
JOIN cymbal_stores cs on
        cs.store_id=ci.store_id
        AND ci.inventory>0
        AND cs.store_id = 1583
ORDER BY
        (cp.embedding <=> embedding('text-embedding-005','What kind of fruit trees grow well here?')::vector) ASC
LIMIT 1)
SELECT json_agg(trees) FROM trees;
出力で想定される JSON は次のとおりです。
[{"product_name":"Cherry Tree","description":"This is a beautiful cherry tree that will produce delicious cherries. It is an d","sale_price":75.00,"zip_code":93230,"product_id":"d536e9e823296a2eba198e52dd23e712"}]
Vertex AI Studio でプロンプトを実行する
生成された JSON を使用して、Vertex AI Studio の生成 AI テキストモデルのプロンプトの一部として指定できます。
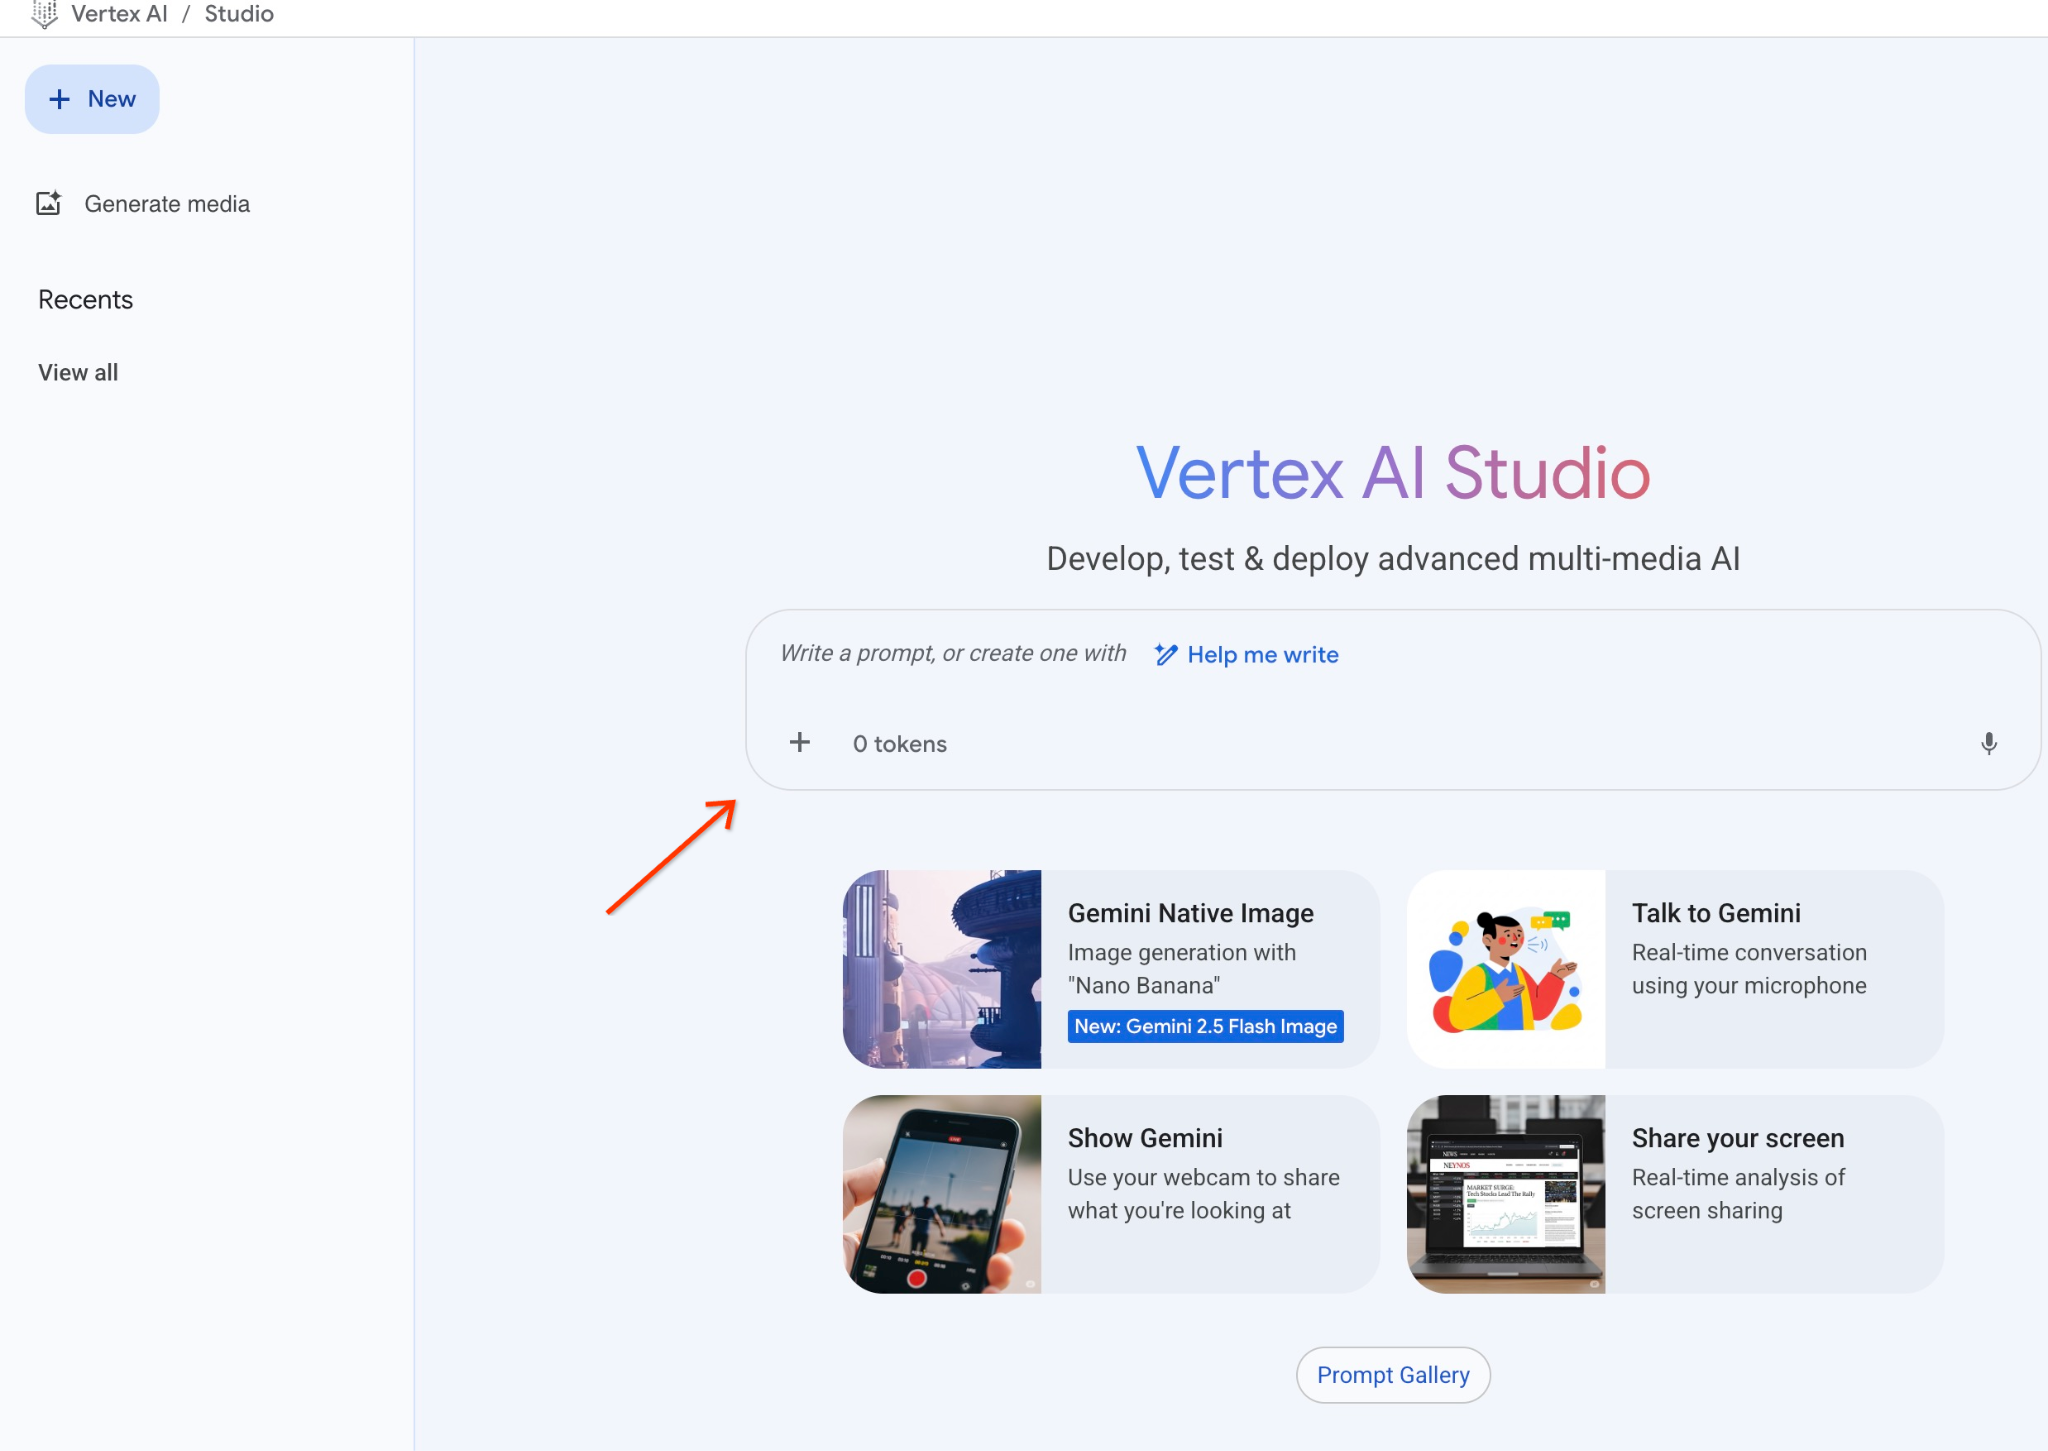
クラウド コンソールで Vertex AI Studio を開きます。

追加の API を有効にするよう求められることがありますが、このリクエストは無視してかまいません。ラボを完了するために追加の API は必要ありません。
Studio にプロンプトを入力します。
使用するプロンプトは次のとおりです。
You are a friendly advisor helping to find a product based on the customer's needs.
Based on the client request we have loaded a list of products closely related to search.
The list in JSON format with list of values like {"product_name":"name","description":"some description","sale_price":10,"zip_code": 10234, "produt_id": "02056727942aeb714dc9a2313654e1b0"}
Here is the list of products:
[place your JSON here]
The customer asked "What tree is growing the best here?"
You should give information about the product, price and some supplemental information.
Do not ask any additional questions and assume location based on the zip code provided in the list of products.
JSON プレースホルダをクエリのレスポンスに置き換えると、次のようになります。
You are a friendly advisor helping to find a product based on the customer's needs.
Based on the client request we have loaded a list of products closely related to search.
The list in JSON format with list of values like {"product_name":"name","description":"some description","sale_price":10,"zip_code": 10234, "produt_id": "02056727942aeb714dc9a2313654e1b0"}
Here is the list of products:
[{"product_name":"Cherry Tree","description":"This is a beautiful cherry tree that will produce delicious cherries. It is an d","sale_price":75.00,"zip_code":93230,"product_id":"d536e9e823296a2eba198e52dd23e712"}]
The customer asked "What tree is growing the best here?"
You should give information about the product, price and some supplemental information.
Do not ask any additional questions and assume location based on the zip code provided in the list of products.
JSON 値を使用してプロンプトを実行した結果は次のとおりです。
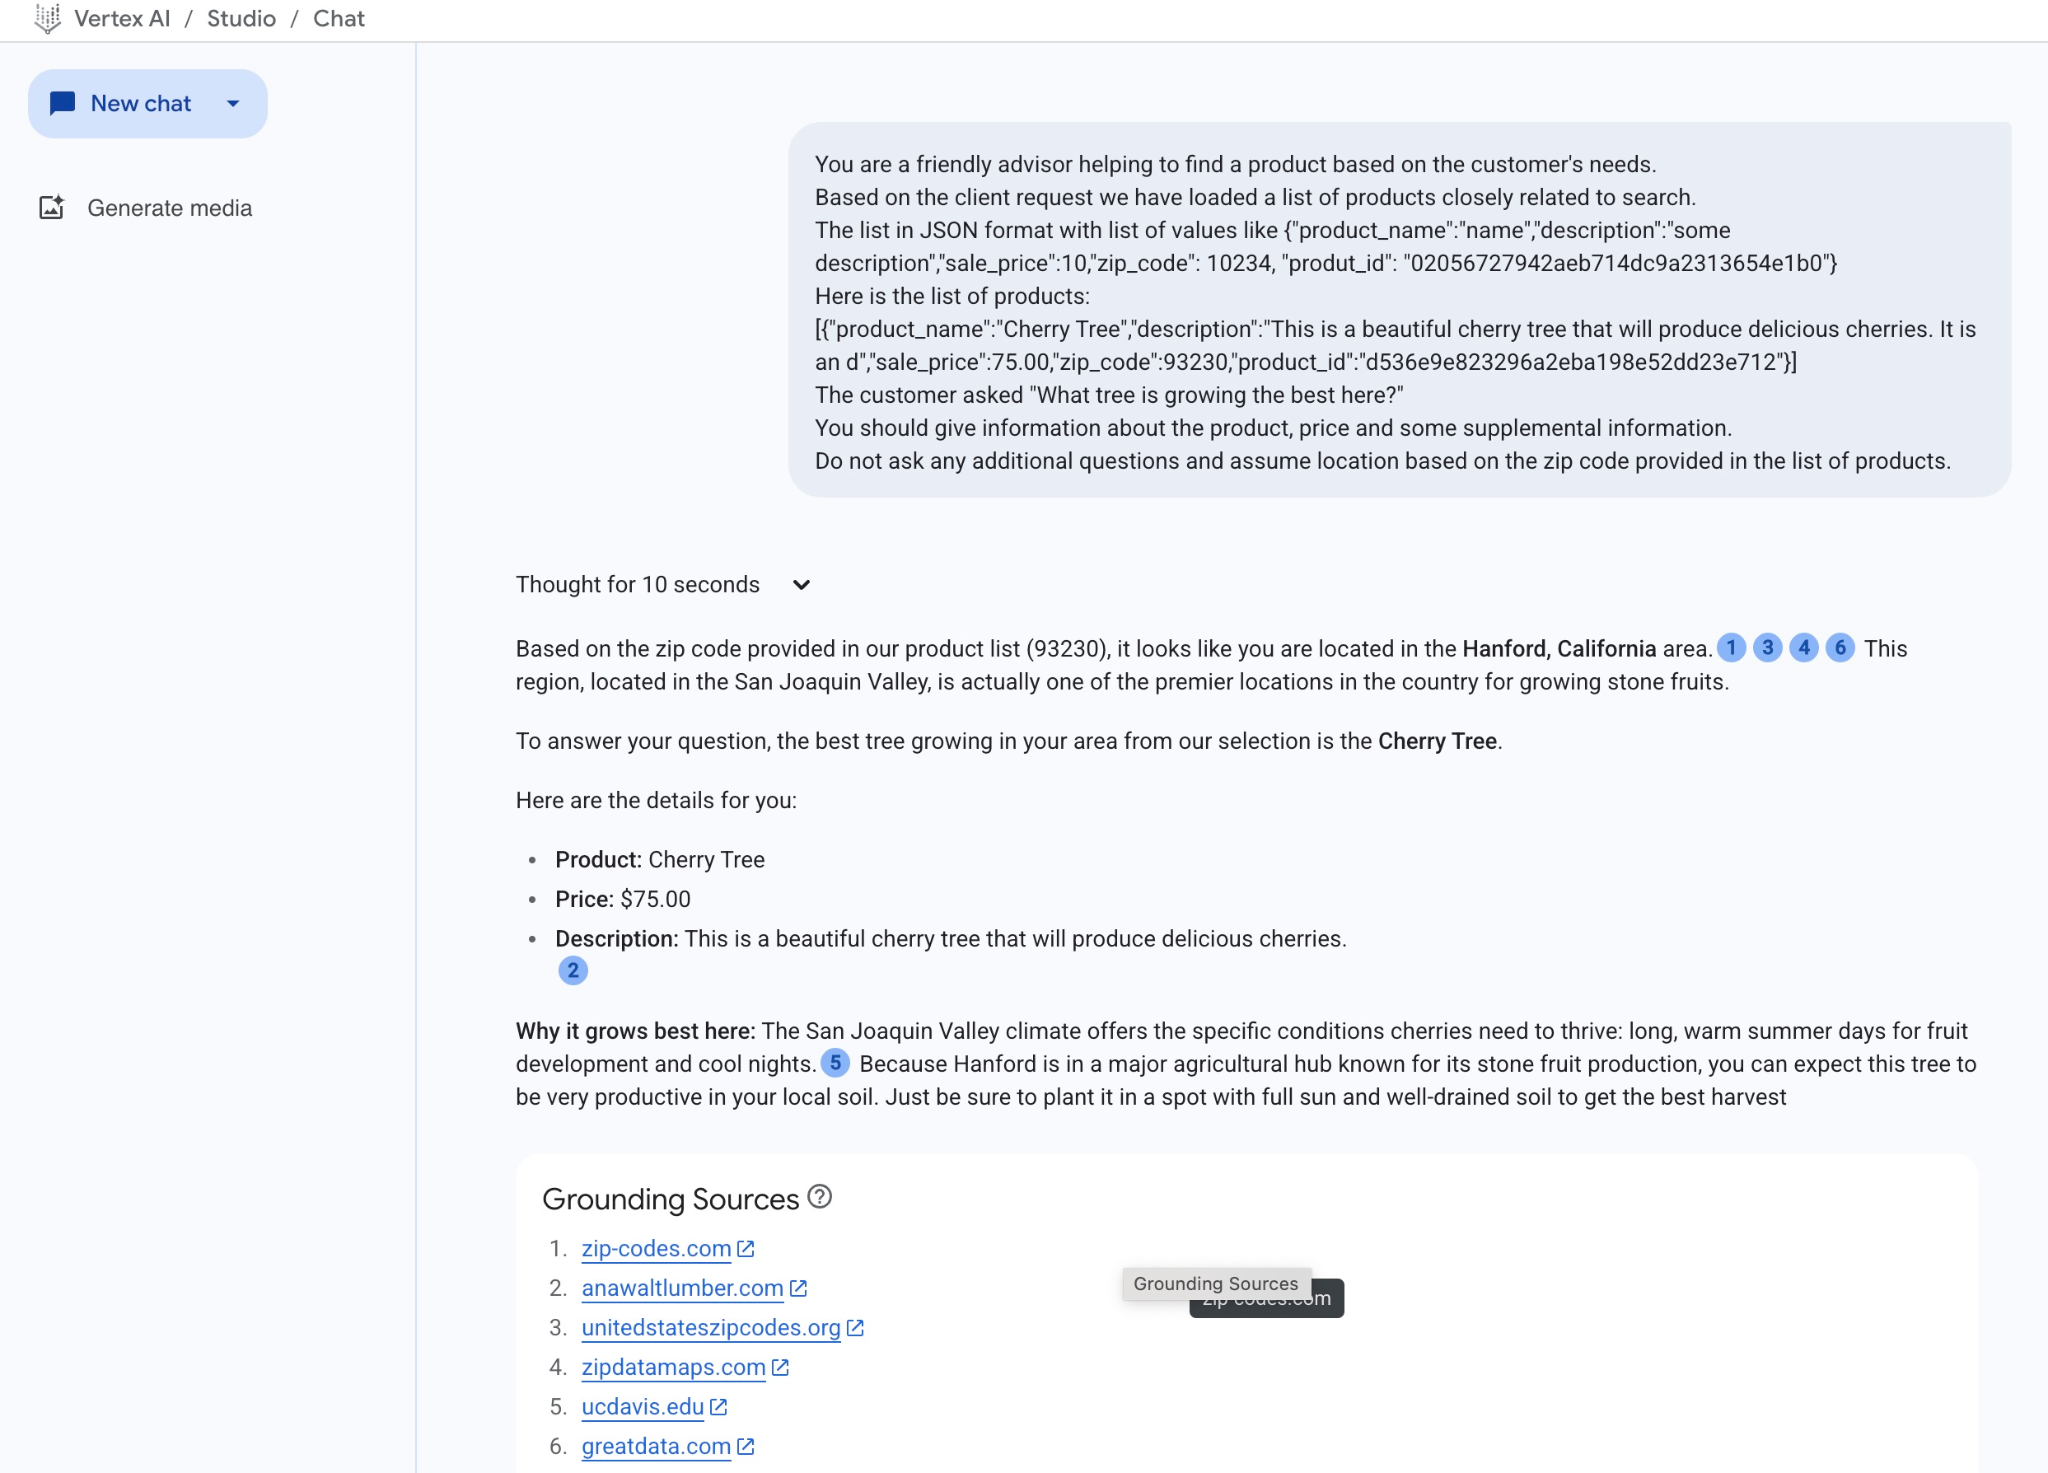
この例でモデルから得られた回答は次のとおりです。モデルとパラメータは時間の経過とともに変化するため、回答が異なる場合があります。
「商品リストに記載されている郵便番号(93230)から、お客様はカリフォルニア州ハンフォードにお住まいのようです。サンホアキン バレーにあるこの地域は、国内でも有数の核果類の栽培地です。
ご質問の件につきまして、お住まいの地域で育つ木として、弊社が選んだ中では桜の木が最適です。
詳細は以下のとおりです。
商品: 桜の木
価格: $75.00
説明: おいしいサクランボが実る美しい桜の木です。2
この地域でよく育つ理由: サンホアキン バレーの気候は、サクランボが育つために必要な条件(果実の成長に適した長く暖かい夏の日と涼しい夜)を満たしています。5 ハンフォードは、核果類の生産で知られる主要な農業の中心地であるため、この木は地元の土壌で非常に生産性が高いことが期待できます。収穫量を最大にするには、日当たりがよく、水はけのよい土壌に植えるようにしてください。」
PSQL でプロンプトを実行する
また、Cloud SQL AI と Vertex AI の統合を使用して、データベースで SQL を直接使用して生成モデルから同様のレスポンスを取得することもできます。ただし、gemini-2.0-flash-exp モデルを使用するには、まず登録する必要があります。
Cloud SQL for PostgreSQL で実行する
拡張機能をバージョン 1.4.2 以降にアップグレードします(現在のバージョンがそれより前の場合)。前に説明したように gcloud sql connect から quickstart_db データベースに接続し(または Cloud SQL Studio を使用)、次のコマンドを実行します。
SELECT extversion from pg_extension where extname='google_ml_integration';
返された値が 1.4.3 未満の場合は、次を実行します。
ALTER EXTENSION google_ml_integration UPDATE TO '1.4.3';
次に、google_ml_integration.enable_model_support データベース フラグを「オン」に設定する必要があります。現在の設定を確認するには、実行します。
show google_ml_integration.enable_model_support;
psql セッションの想定される出力は「on」です。
quickstart_db => show google_ml_integration.enable_model_support;
 google_ml_integration.enable_model_support
--------------------------------------------
 on
(1 row)
[オフ] と表示されている場合は、データベース フラグを更新する必要があります。これを行うには、ウェブ コンソール インターフェースを使用するか、次の gcloud コマンドを実行します。
gcloud sql instances patch my-cloudsql-instance \
--database-flags google_ml_integration.enable_model_support=on,cloudsql.enable_google_ml_integration=on
このコマンドはバックグラウンドで 1 ~ 3 分ほどで実行されます。その後、psql セッションで新しいフラグを確認するか、quickstart_db データベースに接続している Cloud SQL Studio を使用して確認できます。
show google_ml_integration.enable_model_support;
psql セッションの想定される出力は「on」です。
quickstart_db => show google_ml_integration.enable_model_support;
 google_ml_integration.enable_model_support
--------------------------------------------
 on
(1 row)
次に、2 つのモデルを登録する必要があります。1 つ目は、すでに使用されている text-embedding-005 モデルです。モデル登録機能を有効にしたため、登録する必要があります。
psql または Cloud SQL Studio でモデル実行を登録するには、次のコードを使用します。
CALL
  google_ml.create_model(
    model_id => 'text-embedding-005',
    model_provider => 'google',
    model_qualified_name => 'text-embedding-005',
    model_type => 'text_embedding',
    model_auth_type => 'cloudsql_service_agent_iam',
    model_in_transform_fn => 'google_ml.vertexai_text_embedding_input_transform',
    model_out_transform_fn => 'google_ml.vertexai_text_embedding_output_transform');
次に登録する必要があるモデルは gemini-2.0-flash-001 です。これは、ユーザーフレンドリーな出力を生成するために使用されます。
CALL
  google_ml.create_model(
    model_id => 'gemini-2.5-flash',
    model_request_url => 'https://us-central1-aiplatform.googleapis.com/v1/projects/$PROJECT_ID/locations/us-central1/publishers/google/models/gemini-2.5-flash:streamGenerateContent',
    model_provider => 'google',
    model_auth_type => 'cloudsql_service_agent_iam');
登録済みモデルのリストは、google_ml.model_info_view から情報を選択することでいつでも確認できます。
select model_id,model_type from google_ml.model_info_view;
出力例を次に示します。
quickstart_db=> select model_id,model_type from google_ml.model_info_view;
               model_id               |   model_type
--------------------------------------+----------------
 textembedding-gecko                  | text_embedding
 textembedding-gecko@001              | text_embedding
 gemini-1.5-pro:streamGenerateContent | generic
 gemini-1.5-pro:generateContent       | generic
 gemini-1.0-pro:generateContent       | generic
 text-embedding-005                   | text_embedding
 gemini-2.5-flash                     | generic
これで、生成されたサブクエリ JSON を使用して、SQL を使用して生成 AI テキストモデルにプロンプトの一部として提供できます。
データベースへの psql セッションまたは Cloud SQL Studio セッションでクエリを実行します。
WITH trees AS (
SELECT
        cp.product_name,
        cp.product_description AS description,
        cp.sale_price,
        cs.zip_code,
        cp.uniq_id AS product_id
FROM
        cymbal_products cp
JOIN cymbal_inventory ci ON
        ci.uniq_id = cp.uniq_id
JOIN cymbal_stores cs ON
        cs.store_id = ci.store_id
        AND ci.inventory>0
        AND cs.store_id = 1583
ORDER BY
        (cp.embedding <=> google_ml.embedding('text-embedding-005',
        'What kind of fruit trees grow well here?')::vector) ASC
LIMIT 1),
prompt AS (
SELECT
        'You are a friendly advisor helping to find a product based on the customer''s needs.
Based on the client request we have loaded a list of products closely related to search.
The list in JSON format with list of values like {"product_name":"name","product_description":"some description","sale_price":10}
Here is the list of products:' || json_agg(trees) || 'The customer asked "What kind of fruit trees grow well here?"
You should give information about the product, price and some supplemental information' AS prompt_text
FROM
        trees),
response AS (
SELECT
        json_array_elements(google_ml.predict_row( model_id =>'gemini-2.5-flash',
        request_body => json_build_object('contents',
        json_build_object('role',
        'user',
        'parts',
        json_build_object('text',
        prompt_text)))))->'candidates'->0->'content'->'parts'->0->'text' AS resp
FROM
        prompt)
SELECT
        string_agg(resp::text,
        ' ')
FROM
        response;
想定される出力は次のとおりです。出力は、モデルのバージョンとパラメータによって異なる場合があります。
"That's a great question! It sounds like you're looking to add some delicious fruit to your garden.\n\nBased on the products we have that are closely related to your search, I can tell you about a fantastic option:\n\n**Cherry Tree**" "\n* **Description:** This beautiful deciduous tree will produce delicious cherries. It grows to be about 15 feet tall, with dark green leaves in summer that turn a beautiful red in the fall. Cherry trees are known for their beauty, shade, and privacy. They prefer a cool, moist climate and sandy soil." "\n* **Price:** $75.00\n* **Grows well in:** USDA Zones 4-9.\n\nTo confirm if this Cherry Tree will thrive in your specific location, you might want to check which USDA Hardiness Zone your area falls into. If you're in zones 4-9, this" " could be a wonderful addition to your yard!"
10. 最近傍インデックスを作成する
データセットはかなり小さく、応答時間は主に AI モデルとのインタラクションに依存します。ただし、ベクトルが数百万個ある場合、ベクトル検索がレスポンス時間の大部分を占め、システムに高い負荷がかかる可能性があります。これを改善するために、ベクトル上にインデックスを構築できます。
HNSW インデックスを作成する
テストでは HNSW インデックス タイプを試します。HNSW は Hierarchical Navigable Small World の略で、多層グラフ インデックスを表します。
エンベディング列のインデックスを作成するには、エンベディング列、距離関数、必要に応じて m や ef_constructions などのパラメータを定義する必要があります。パラメータの詳細については、ドキュメントをご覧ください。
CREATE INDEX cymbal_products_embeddings_hnsw ON cymbal_products
  USING hnsw (embedding vector_cosine_ops)
  WITH (m = 16, ef_construction = 64);
予想される出力:
quickstart_db=> CREATE INDEX cymbal_products_embeddings_hnsw ON cymbal_products
  USING hnsw (embedding vector_cosine_ops)
  WITH (m = 16, ef_construction = 64);
CREATE INDEX
quickstart_db=>
回答を比較
これで、EXPLAIN モードでベクトル検索クエリを実行し、インデックスが使用されたかどうかを確認できます。
EXPLAIN (analyze)
WITH trees as (
SELECT
        cp.product_name,
        left(cp.product_description,80) as description,
        cp.sale_price,
        cs.zip_code,
        cp.uniq_id as product_id
FROM
        cymbal_products cp
JOIN cymbal_inventory ci on
        ci.uniq_id=cp.uniq_id
JOIN cymbal_stores cs on
        cs.store_id=ci.store_id
        AND ci.inventory>0
        AND cs.store_id = 1583
ORDER BY
        (cp.embedding <=> embedding('text-embedding-005','What kind of fruit trees grow well here?')::vector) ASC
LIMIT 1)
SELECT json_agg(trees) FROM trees;
予想される出力:
 Aggregate  (cost=779.12..779.13 rows=1 width=32) (actual time=1.066..1.069 rows=1 loops=1)
   ->  Subquery Scan on trees  (cost=769.05..779.12 rows=1 width=142) (actual time=1.038..1.041 rows=1 loops=1)
         ->  Limit  (cost=769.05..779.11 rows=1 width=158) (actual time=1.022..1.024 rows=1 loops=1)
               ->  Nested Loop  (cost=769.05..9339.69 rows=852 width=158) (actual time=1.020..1.021 rows=1 loops=1)
                     ->  Nested Loop  (cost=768.77..9316.48 rows=852 width=945) (actual time=0.858..0.859 rows=1 loops=1)
                           ->  Index Scan using cymbal_products_embeddings_hnsw on cymbal_products cp  (cost=768.34..2572.47 rows=941 width=941) (actual time=0.532..0.539 rows=3 loops=1)
                                 Order By: (embedding <=> '[0.008864171,0.03693164,-0.024245683,...
<redacted>
...,0.017593635,-0.040275685,-0.03914233,-0.018452475,0.00826032,-0.07372604
]'::vector)
                           ->  Index Scan using product_inventory_pkey on cymbal_inventory ci  (cost=0.42..7.17 rows=1 width=37) (actual time=0.104..0.104 rows=0 loops=3)
                                 Index Cond: ((store_id = 1583) AND (uniq_id = (cp.uniq_id)::text))
                                 Filter: (inventory > 0)
                                 Rows Removed by Filter: 1
                     ->  Materialize  (cost=0.28..8.31 rows=1 width=8) (actual time=0.133..0.134 rows=1 loops=1)
                           ->  Index Scan using product_stores_pkey on cymbal_stores cs  (cost=0.28..8.30 rows=1 width=8) (actual time=0.129..0.129 rows=1 loops=1)
                                 Index Cond: (store_id = 1583)
 Planning Time: 112.398 ms
 Execution Time: 1.221 ms
出力から、クエリが「cymbal_products_embeddings_hnsw を使用したインデックス スキャン」を使用していることが明確にわかります。
explain なしでクエリを実行すると、次のようになります。
WITH trees as (
SELECT
        cp.product_name,
        left(cp.product_description,80) as description,
        cp.sale_price,
        cs.zip_code,
        cp.uniq_id as product_id
FROM
        cymbal_products cp
JOIN cymbal_inventory ci on
        ci.uniq_id=cp.uniq_id
JOIN cymbal_stores cs on
        cs.store_id=ci.store_id
        AND ci.inventory>0
        AND cs.store_id = 1583
ORDER BY
        (cp.embedding <=> embedding('text-embedding-005','What kind of fruit trees grow well here?')::vector) ASC
LIMIT 1)
SELECT json_agg(trees) FROM trees;
想定される出力(モデルとインデックスによって出力が異なる場合があります):
[{"product_name":"Cherry Tree","description":"This is a beautiful cherry tree that will produce delicious cherries. It is an d","sale_price":75.00,"zip_code":93230,"product_id":"d536e9e823296a2eba198e52dd23e712"}]
結果は同じで、インデックスなしの検索で上位に表示された Cherry tree が返されています。パラメータとインデックス タイプによっては、結果が若干異なり、ツリーの最上位レコードが異なる場合があります。テストでは、インデックス登録されたクエリは 131.301 ミリ秒で結果を返しましたが、インデックスなしでは 167.631 ミリ秒でした。ただし、非常に小さなデータセットを扱っていたため、より大きなデータでは差が大きくなります。
ベクトルに使用できるさまざまなインデックスや、LangChain 統合を使用したラボと例については、ドキュメントをご覧ください。
11. 環境をクリーンアップする
Cloud SQL インスタンスを削除します。
ラボの終了時に Cloud SQL インスタンスを破棄します。
接続が切断され、以前の設定がすべて失われた場合は、Cloud Shell でプロジェクトと環境変数を定義します。
export INSTANCE_NAME=my-cloudsql-instance
export PROJECT_ID=$(gcloud config get-value project)
インスタンスを削除します。
gcloud sql instances delete $INSTANCE_NAME --project=$PROJECT_ID
想定されるコンソール出力:
student@cloudshell:~$ gcloud sql instances delete $INSTANCE_NAME --project=$PROJECT_ID
All of the instance data will be lost when the instance is deleted.

Do you want to continue (Y/n)?  y

Deleting Cloud SQL instance...done.
Deleted [https://sandbox.googleapis.com/v1beta4/projects/test-project-001-402417/instances/my-cloudsql-instance].
12. 完了
以上で、この Codelab は完了です。
このラボは、「Google Cloud でのプロダクション レディな AI の開発」学習プログラムの一部です。
- カリキュラム全体を確認して、プロトタイプから本番環境への移行をスムーズに進めましょう。
- ハッシュタグ
#ProductionReadyAIを使用して進捗状況を共有しましょう。
学習した内容
- PostgreSQL 用 Cloud SQL インスタンスをデプロイする方法
- データベースを作成して Cloud SQL AI 統合を有効にする方法
- データベースにデータを読み込む方法
- Cloud SQL Studio の使用方法
- Cloud SQL で Vertex AI エンベディング モデルを使用する方法
- Vertex AI Studio の使用方法
- Vertex AI 生成モデルを使用して結果を拡充する方法
- ベクトル インデックスを使用してパフォーマンスを改善する方法
HNSW ではなく ScaNN インデックスを使用して、同様の AlloyDB 用の Codelab を試す
13. アンケート
出力: