
1. Overview
Modern travelers expect conversational experiences. Instead of navigating complex UI filters, they want to ask, "Can I bring my dog on the 9 AM bus to Boston?" This requires an agent that can reason across unstructured data (PDF policies) and structured data (SQL schedules).
In this lab, we build the Cymbal Transit Agent using:
- LangChain4j: The premier Java framework for AI orchestration.
- AlloyDB: A high-performance, PostgreSQL-compatible database.
- MCP Toolbox Java SDK: A standardized way to connect Java agents to external tools and data sources.
What you'll build

Cymbal Bus Agent, a Java Spring Boot application consisting of:
- AlloyDB database and MCP Toolbox Java SDK for tools orchestration with the agents.
- Cloud Run for Toolbox Deployment and Application (agent deployment).
- LangChain4J library for the agent and LLM framework in a Spring Boot Application with Java 17.
What you'll learn
- How to use LangChain4J to create specialized agents and sub-agents orchestrated using MCP Toolbox for Databases Java SDK
- How to set up and use AlloyDB for data and AI.
- How to use MCP Toolbox to connect agents to AlloyDB data tools.
- How to deploy the solution using Cloud Run or run it locally.
The Architecture
- AlloyDB for PostgreSQL: Serves as the high-performance operational database holding our route, policies and bookings records. It powers the vector search and retrieval.
- MCP Toolbox for Databases Java SDK: Acts as the "Orchestration Maestro," exposing AlloyDB data as executable tools that the agents can call.
The MCP Toolbox Java SDK makes it possible to orchestrate agents with your database tools effortlessly for enterprise grade applications.
- LangChain4J: An open-source Java library that simplifies the integration of Large Language Models (LLMs) into Java applications. It provides tools and abstractions for building AI-powered applications, including chatbots, agents, and Retrieval-Augmented Generation (RAG) systems.
- Cloud Run: A fully managed SERVERLESS platform that allows you to effortlessly build & deploy apps or websites quickly in any language, any library, any binary. You can write code using your favorite language, framework, and libraries, package it up as a container, run "gcloud run deploy," and your app will be live—provided with everything it needs to run in production. Building a container is completely optional. If you're using Go, Node.js, Python, Java, .NET Core, or Ruby, you can use the source-based deployment option that builds the container for you, using the best practices for the language you're using.
Requirements
2. Before you begin
Create a project
- In the Google Cloud Console, on the project selector page, select or create a Google Cloud project.
- Make sure that billing is enabled for your Cloud project. Learn how to check if billing is enabled on a project.
- You'll use Cloud Shell, a command-line environment running in Google Cloud. Click Activate Cloud Shell at the top of the Google Cloud console.

- Once connected to Cloud Shell, you check that you're already authenticated and that the project is set to your project ID using the following command:
gcloud auth list
- Run the following command in Cloud Shell to confirm that the gcloud command knows about your project.
gcloud config list project
- If your project is not set, use the following command to set it:
gcloud config set project <YOUR_PROJECT_ID>
- Enable the required APIs: Follow the link and enable the APIs.
Alternatively you can use the gcloud command for this. Refer documentation for gcloud commands and usage.
Gotchas & Troubleshooting
The "Ghost Project" Syndrome | You ran |
The Billing Barricade | You enabled the project, but forgot the billing account. AlloyDB is a high-performance engine; it won't start if the "gas tank" (billing) is empty. |
API Propagation Lag | You clicked "Enable APIs," but the command line still says |
Quota Quags | If you're using a brand-new trial account, you might hit a regional quota for AlloyDB instances. If |
"Hidden" Service Agent | Sometimes the AlloyDB Service Agent isn't automatically granted the |
3. Database setup
At the heart of our application lies AlloyDB for PostgreSQL. We leveraged its powerful vector capabilities and integrated columnar engine to generate embeddings for 50,000+ SCM records. This enables near real-time vector analysis, allowing our agents to identify inventory anomalies or logistics risks across massive datasets in milliseconds.
In this lab we'll use AlloyDB as the database for the test data. It uses clusters to hold all of the resources, such as databases and logs. Each cluster has a primary instance that provides an access point to the data. Tables will hold the actual data.
Let's create an AlloyDB cluster, instance and table where the test dataset will be loaded.
- Click the button or Copy the link below to your browser where you have the Google Cloud Console user logged in.
Alternatively, you can go to Cloud Shell Terminal from your project where you have redeemed the billing account, and clone the github repo and navigate to the project using the commands below:
git clone https://github.com/AbiramiSukumaran/easy-alloydb-setup

cd easy-alloydb-setup
- Once this step is complete the repo will be cloned to your local cloud shell editor and you will be able to run the command below from with the project folder (important to make sure you are in the project directory):
sh run.sh
- Now use the UI (clicking the link in the terminal or clicking the "preview on web" link in the terminal.
- Enter your details for project id, cluster and instance names to get started.
- Go grab a coffee while the logs scroll & you can read about how it's doing this behind the scenes here.
Gotchas & Troubleshooting
The "Patience" Problem | Database clusters are heavy infrastructure. If you refresh the page or kill the Cloud Shell session because it "looks stuck," you might end up with a "ghost" instance that is partially provisioned and impossible to delete without manual intervention. |
Region Mismatch | If you enabled your APIs in |
Zombie Clusters | If you previously used the same name for a cluster and didn't delete it, the script might say the cluster name already exists. Cluster names must be unique within a project. |
Cloud Shell Timeout | If your coffee break takes 30 minutes, Cloud Shell might go to sleep and disconnect the |
4. Schema Provisioning
Once you have your AlloyDB cluster and instance running, head over to the AlloyDB Studio SQL editor to enable the AI extensions and provision the schema.
You may need to wait for your instance to finish being created. Once it is, sign into AlloyDB using the credentials you created when you created the cluster. Use the following data for authenticating to PostgreSQL:
- Username : "
postgres" - Database : "
postgres" - Password : "
alloydb" (or whatever you set at the time of creation)
Once you have authenticated successfully into AlloyDB Studio, SQL commands are entered in the Editor. You can add multiple Editor windows using the plus to the right of the last window.
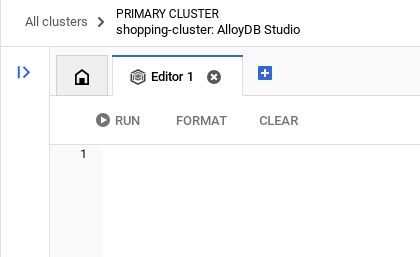
You'll enter commands for AlloyDB in editor windows, using the Run, Format, and Clear options as necessary.
Enable Extensions
For building this app, we will use the extensions pgvector and google_ml_integration. The pgvector extension allows you to store and search vector embeddings. The google_ml_integration extension provides functions you use to access Vertex AI prediction endpoints to get predictions in SQL. Enable these extensions by running the following DDLs:
CREATE EXTENSION IF NOT EXISTS google_ml_integration CASCADE;
CREATE EXTENSION IF NOT EXISTS vector;
Grant Permission
Run the below statement to grant execute on the "embedding" function:
GRANT EXECUTE ON FUNCTION embedding TO postgres;
Grant Vertex AI User ROLE to the AlloyDB service account
From Google Cloud IAM console, grant the AlloyDB service account (that looks like this: service-<<PROJECT_NUMBER>>@gcp-sa-alloydb.iam.gserviceaccount.com) access to the role "Vertex AI User". PROJECT_NUMBER will have your project number.
Alternatively you can run the below command from the Cloud Shell Terminal:
PROJECT_ID=$(gcloud config get-value project)


gcloud projects add-iam-policy-binding $PROJECT_ID \
  --member="serviceAccount:service-$(gcloud projects describe $PROJECT_ID --format="value(projectNumber)")@gcp-sa-alloydb.iam.gserviceaccount.com" \
--role="roles/aiplatform.user"
Create a table
You can create a table using the DDL statement below in the AlloyDB Studio:
DROP TABLE IF EXISTS transit_policies;
DROP TABLE IF EXISTS bus_schedules;
DROP TABLE IF EXISTS bookings;

-- Table 1: Transit Policies (Unstructured Data for RAG)
CREATE TABLE transit_policies (
    policy_id SERIAL PRIMARY KEY,
    category VARCHAR(50),
    policy_text TEXT,
    policy_embedding vector(768)
);

-- Table 2: Intercity Bus Schedules (Structured Data)
CREATE TABLE bus_schedules (
    trip_id UUID PRIMARY KEY DEFAULT gen_random_uuid(),
    origin_city VARCHAR(100),
    destination_city VARCHAR(100),
    departure_time TIMESTAMP,
    arrival_time TIMESTAMP,
    available_seats INT DEFAULT 50,
    ticket_price DECIMAL(6,2)
);

-- Table 3: Booking Ledger (Transactional Action Data)
CREATE TABLE bookings (
    booking_id UUID PRIMARY KEY DEFAULT gen_random_uuid(),
    trip_id UUID REFERENCES bus_schedules(trip_id),
    passenger_id VARCHAR(100),
    status VARCHAR(20) DEFAULT 'CONFIRMED',
    booking_time TIMESTAMP DEFAULT CURRENT_TIMESTAMP
);
The policy_embedding column will allow storage for the vector values of some of the text fields.
Data Ingestion
Run the below set of SQL statements to bulk insert records in the respective tables:
- Insert Unstructured Policies and GENERATE REAL EMBEDDINGS natively in AlloyDB
-- 1. Insert Unstructured Policies and GENERATE REAL EMBEDDINGS natively in AlloyDB

INSERT INTO transit_policies (category, policy_text, policy_embedding)
VALUES
('Pets', 'Service animals are always welcome. Small pets (under 25 lbs) are allowed in secure carriers for a $25 fee. Large dogs are not permitted on standard coaches.', embedding('text-embedding-005', 'Service animals are always welcome. Small pets (under 25 lbs) are allowed in secure carriers for a $25 fee. Large dogs are not permitted on standard coaches.')),
('Luggage', 'Each passenger is allowed one carry-on (up to 15 lbs) and two stowed bags (up to 50 lbs each) free of charge. Additional bags cost $15 each.', embedding('text-embedding-005', 'Each passenger is allowed one carry-on (up to 15 lbs) and two stowed bags (up to 50 lbs each) free of charge. Additional bags cost $15 each.')),
('Refunds', 'Tickets are fully refundable up to 24 hours before departure. Within 24 hours, tickets can be exchanged for travel credit only.', embedding('text-embedding-005', 'Tickets are fully refundable up to 24 hours before departure. Within 24 hours, tickets can be exchanged for travel credit only.'));
- Generate 200+ Realistic Schedules for 7 Days using generate_series
-- 2. Generate 200+ Realistic Schedules for the Next 7 Days using generate_series

INSERT INTO bus_schedules (origin_city, destination_city, departure_time, arrival_time, ticket_price, available_seats)
SELECT
    origin,
    destination,
    -- Generate departures every 4 hours starting from tomorrow
    (CURRENT_DATE + 1) + (interval '4 hours' * seq) AS dep_time,
    (CURRENT_DATE + 1) + (interval '4 hours' * seq) + interval '4.5 hours' AS arr_time,
    ROUND((RANDOM() * 30 + 25)::numeric, 2) AS price, -- Random price between $25 and $55
    FLOOR(RANDOM() * 50 + 1) AS seats -- Random seats between 1 and 50
FROM
    (VALUES
        ('New York', 'Boston'), ('Boston', 'New York'),
        ('Philadelphia', 'Washington DC'), ('Washington DC', 'Philadelphia'),
        ('Seattle', 'Portland'), ('Portland', 'Seattle')
    ) AS routes(origin, destination)
CROSS JOIN generate_series(1, 40) AS seq; -- 6 routes * 40 time slots = 240 distinct trips ingested!
Generate Embeddings
Embeddings is automatically covered in the insert statement into the transit_policies table using the function "embedding('text-embedding-005', '<<policytext>>')".
Gotchas & Troubleshooting
The "Password Amnesia" Loop | If you used the "One Click" setup and can't remember your password, go to the Instance basic information page in the console and click "Edit" to reset the |
The "Extension Not Found" Error | If |
The IAM Propagation Issues | You ran the
|
Vector Dimension Mismatch | The |
Project ID Typo | In the |
5. Tools & Toolbox Setup
MCP Toolbox for Databases is an open source MCP server for databases. It enables you to develop tools easier, faster, and more securely by handling the complexities such as connection pooling, authentication, and more. Toolbox helps you build Gen AI tools that let your agents access data in your database.
We use the Model Context Protocol (MCP) Toolbox for Databases as the "conductor." It acts as a standardized middleware between our agents and AlloyDB. By defining a tools.yaml configuration, the toolbox automatically exposes complex database operations as clean, executable tools like find-bus-schedules and routes or query-schedules for specific routes and execute autonomous actions like book-ticket. This eliminates the need for manual connection pooling or boilerplate SQL within the agent logic.
Installing the Toolbox server
From your Cloud Shell Terminal, create a folder for saving your new tools yaml file and the toolbox binary:
mkdir cymbal-bus-toolbox

cd cymbal-bus-toolbox
From within that new folder, run the following set of commands:
# see releases page for other versions
export VERSION=0.27.0
curl -L -o toolbox https://storage.googleapis.com/mcp-toolbox-for-databases/v$VERSION/linux/amd64/toolbox
chmod +x toolbox
Next create the tools.yaml file inside that new folder by navigating into the Cloud Shell Editor and copy the contents of this repo file into the tools.yaml file.
... (Refer to entire file in the repo)

tools:

   find-bus-schedules:
    kind: postgres-sql
    source: alloydb
    description: Find all available bus schedules.
    statement: |
      SELECT CAST(trip_id AS TEXT) trip_id, departure_time, arrival_time, ticket_price, available_seats , origin_city, destination_city
      FROM bus_schedules;

   query-schedules:
    kind: postgres-sql
    source: alloydb
    description: Find available bus schedules between an origin and destination city.
    parameters:
      - name: origin
        type: string
        description: The departure city name.
      - name: destination
        type: string
        description: The arrival city name.
    statement: |
      SELECT CAST(trip_id AS TEXT) trip_id, departure_time, arrival_time, ticket_price, available_seats
      FROM bus_schedules
      WHERE lower(origin_city) = lower($1)
        AND lower(destination_city) = lower($2)
        AND available_seats > 0
      ORDER BY departure_time ASC
      LIMIT 5;

   book-ticket:
    kind: postgres-sql
    source: alloydb
    description: Books a ticket for a specific trip, decrementing available seats and generating a confirmed booking record.
    parameters:
      - name: trip_id
        type: string
        description: The UUID of the trip schedule to book.
      - name: passenger_name
        type: string
        description: Name or ID of the passenger (Bound securely via backend or AuthToken).
        authServices:
          - name: google_auth
            field: sub
    statement: |
      WITH updated_schedule AS (
          UPDATE bus_schedules
          SET available_seats = available_seats - 1
          WHERE trip_id = CAST($1 AS UUID) AND available_seats > 0
          RETURNING trip_id
      )
      INSERT INTO bookings (trip_id, passenger_id)
      SELECT trip_id, $2
      FROM updated_schedule
      RETURNING CAST(booking_id as TEXT) as booking_id, trip_id, passenger_id, status, booking_time;

   search-policies:
    kind: postgres-sql
    source: alloydb
    description: Semantic search for transit policies regarding luggage, pets, refunds, and general rules.
    parameters:
      - name: search_query
        type: string
        description: The user's question about transit policies to be embedded and searched.
    statement: |
      SELECT category, policy_text
      FROM transit_policies
      ORDER BY policy_embedding <=> CAST(embedding('text-embedding-005', $1) AS vector(768))
      LIMIT 2;
Note:
- In the tools.yaml set up, do not forget to include ipType: "private" in the alloydb source configuration.
- Also remember to include the MCP Toolbox service URL in the clientId parameter for authServices configuration. You might get the link only after the initial deployment - so yes you'll have to run deployment steps twice to make sure authenticated tools use case works.
- The below options to test toolbox locally won't work if your AlloyDB connection is set private, you have to make it public to test it locally or use a proxy for connection. But do not worry about it. In our case, we'll directly deploy it to Cloud Run and then test.
To test the tools.yaml file in the local server:
./toolbox --tools-file "tools.yaml"
You can alternatively test it in the UI:
./toolbox --ui
Let's go ahead and deploy it in Cloud Run as follows.
Cloud Run Deployment
- Set the PROJECT_ID environment variable:
export PROJECT_ID="my-project-id"
- Initialize gcloud CLI:
gcloud init
gcloud config set project $PROJECT_ID
- You must have the following APIs enabled:
gcloud services enable run.googleapis.com \
                       cloudbuild.googleapis.com \
                       artifactregistry.googleapis.com \
                       iam.googleapis.com \
                       secretmanager.googleapis.com
- Create a backend service account if you don't already have one:
gcloud iam service-accounts create toolbox-identity
- Grant permissions to use secret manager:
gcloud projects add-iam-policy-binding $PROJECT_ID \
    --member serviceAccount:toolbox-identity@$PROJECT_ID.iam.gserviceaccount.com \
    --role roles/secretmanager.secretAccessor
- Grant additional permissions to the service account that are specific to our AlloyDB source (roles/alloydb.client and roles/serviceusage.serviceUsageConsumer)
gcloud projects add-iam-policy-binding $PROJECT_ID \
    --member serviceAccount:toolbox-identity@$PROJECT_ID.iam.gserviceaccount.com \
    --role roles/alloydb.client


gcloud projects add-iam-policy-binding $PROJECT_ID \
    --member serviceAccount:toolbox-identity@$PROJECT_ID.iam.gserviceaccount.com \
    --role roles/serviceusage.serviceUsageConsumer
- Upload tools.yaml as a secret:
gcloud secrets create tools-cymbal-transit --data-file=tools.yaml
- If you already have a secret and want to update the secret version, execute the following:
gcloud secrets versions add tools-cymbal-transit --data-file=tools.yaml
- Set an environment variable to the container image that you want to use for cloud run:
export IMAGE=us-central1-docker.pkg.dev/database-toolbox/toolbox/toolbox:latest
- Deploy Toolbox to Cloud Run using the following command:
If you have enabled public access in your AlloyDB instance, follow the command below for deployment to Cloud Run:
gcloud run deploy toolbox-cymbal-transit \
    --image $IMAGE \
    --service-account toolbox-identity \
    --region us-central1 \
    --set-secrets "/app/tools.yaml=tools-cymbal-transit:latest" \
    --args="--tools-file=/app/tools.yaml","--address=0.0.0.0","--port=8080" \
    --allow-unauthenticated
If you are using a VPC network, use the command below:
gcloud run deploy toolbox-cymbal-transit \
    --image $IMAGE \
    --service-account toolbox-identity \
    --region us-central1 \
    --set-secrets "/app/tools.yaml=tools-cymbal-transit:latest" \
    --args="--tools-file=/app/tools.yaml","--address=0.0.0.0","--port=8080" \
    --network <<YOUR_NETWORK_NAME>> \
    --subnet <<YOUR_SUBNET_NAME>> \
    --allow-unauthenticated
Note: Once deployed go to the Cloud Run service list and make sure that in the security tab of that service, "Allow public access" is selected.
6. Agent Application Setup
Clone this repo into your project and let's walk through it.
To clone this, from your Cloud Shell Terminal (in the root directory or from wherever you want to create this project), run the following command:
git clone https://github.com/googleapis/mcp-toolbox-sdk-java
This above command actually clones the entire mcp-toolbox-sdk-java. We only need the sample project from it. So navigate into the project's root directory inside the repo:
cd mcp-toolbox-sdk-java/demo-applications/cymbal-transit
- This should create the project and you can verify that in the Cloud Shell Editor.
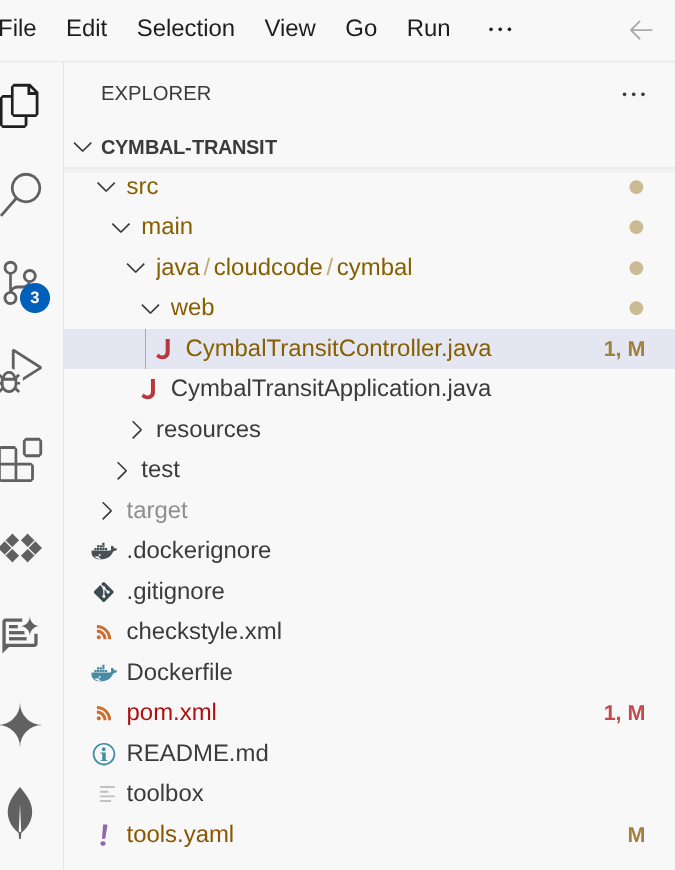
- Open CymbalTransitController.java and set environment variables:
- GCP_PROJECT_ID
- GCP_REGION
- GEMINI_MODEL_NAME
- MCP_TOOLBOX_URL
Alternatively (only for development purposes) you can also replace the respective fallback value placeholders.
7. Code Walkthrough
The CymbalTransitController acts as the entry point for our Cloud Run service. It manages the conversation flow and ensures the agent has access to the user's current request.
The implementation follows a layered architecture that separates AI orchestration, tool bridging, and low-level MCP communication.
1. AI Agent Configuration (AgentConfiguration)
This class uses Spring's @Configuration to bootstrap the AI components. It initializes the VertexAiGeminiChatModel and binds it to our Agent interface.
@Bean
ChatLanguageModel geminiChatModel() {
    return VertexAiGeminiChatModel.builder()
        .project(projectId)
        .location(region)
        .modelName(modelName)
        .build();
}

@Bean
TransitAgent transitAgent(ChatLanguageModel chatLanguageModel, TransitAgentTools tools) {
    return AiServices.builder(TransitAgent.class)
        .chatLanguageModel(chatLanguageModel)
        .chatMemoryProvider(memoryId -> MessageWindowChatMemory.withMaxMessages(20))
        .tools(tools)
        .build();
}
Significance: AiServices binds the interface to the LLM. The MessageWindowChatMemory ensures the agent remembers user preferences (like a pet carrier mentioned earlier) for up to 20 messages within a single session.
2. The AI Agent Interface (TransitAgent)
The @SystemMessage annotation defines the "Persona" and operational constraints, specifically a Routing Strategy.
@SystemMessage({
    "You are the Cymbal Transit Concierge.",
    "CRITICAL INSTRUCTION: On your very first interaction, you MUST use the 'findAllSchedules' tool to fetch and memorize the broad bus routes.",
    "ONLY if the user asks a specifically narrowed-down question... should you route to the specific tools like 'querySchedules', 'bookTicket', 'searchPolicies'.",
    "Don't show any asterisks while listing results. Keep it formatted and numbered or bulleted."
})
String chat(@MemoryId String sessionId, @UserMessage String userMessage);
Significance: This strategy minimizes latency. By fetching broad data first, the agent can answer general routing questions using its internal context without making redundant backend calls.
3. The Toolbox Bridge (TransitAgentTools)
This service acts as the "hands" of the agent, translating LangChain4j tool calls into execution logic.
@Tool("Fetches the initial, broad dataset of all available bus schedules and routes.")
public String findAllSchedules() {
    return mcpService.findAllSchedules().join();
}


@Tool("Book a ticket for a passenger using a specific trip ID.")
public String bookTicket(String tripId, String passengerName) {
    return mcpService.bookTicket(tripId, passengerName).join();
}
Synchronous Execution: While MCP calls are asynchronous (returning CompletableFuture), the LLM requires a result before it can continue its "thought" process. We use .join() to provide synchronous results back to the agent.
4. The MCP Toolbox Service (McpToolboxService)
This is the communication layer using the MCP Toolbox Java SDK to interact with the AlloyDB backend.
// Identity Management: Fetching OIDC ID Token for Auth
GoogleCredentials credentials = GoogleCredentials.getApplicationDefault();
this.idToken = ((IdTokenProvider) credentials)
    .idTokenWithAudience(targetUrl, Collections.emptyList())
    .getTokenValue();

// Dynamic Invocation: Executing a tool by name
public CompletableFuture<String> findAllSchedules() {
    return mcpClient.invokeTool("find-bus-schedules", Collections.emptyMap()).thenApply(result -> {
        return result.content().stream()
            .map(content -> content.text())
            .collect(Collectors.joining(", ", "[", "]"));
    });
}
Significance: McpToolboxClient handles the heavy lifting of JSON-RPC communication. The bookTicket method specifically showcases the SDK's ability to bind complex parameters dynamically.
5. The REST Controller (TransitAgentController)
The final endpoint is radically simplified because LangChain4j manages the state and logic.
@PostMapping("/chat")
public ResponseEntity<String> handleUserChat(@RequestBody String userMessage, HttpSession session) {
    String sessionId = session.getId();
    String agentResponse = transitAgent.chat(sessionId, userMessage);
    return ResponseEntity.ok(agentResponse);
}
Significance: By mapping the HttpSession ID to @MemoryId, we ensure that different users don't have their travel plans mixed up, all while keeping the controller code clean and readable.
8. MCP Toolbox: Significance and Java SDK
What is MCP?
Think of the Model Context Protocol (MCP) as a universal translator for AI. Created to standardize how AI models connect to external tools and datasets, MCP replaces custom, fragmented integration scripts with a secure, universal protocol. Whether your agent needs to execute a transactional SQL query, search through thousands of policy documents, or trigger a REST API, MCP provides a single, unified interface.
MCP Toolbox for Databases
Engineering teams are moving beyond simple chatbots to build agentic systems that interact directly with mission critical databases. However, building these enterprise agents often means hitting an integration wall of custom glue code, brittle APIs, and complex database logic.
To replace these hardcoded bottlenecks with a secure, unified control plane, we are thrilled to announce the Java SDK for the Model Context Protocol (MCP) Toolbox for Databases. This release brings first-class, typesafe agent orchestration to the world's most widely adopted enterprise ecosystem. Java's mature architecture is purpose-built for these rigorous demands, providing the high concurrency, strict transactional integrity, and robust state management required to safely scale mission-critical AI agents in production.
Why the Java SDK?
The MCP Toolbox Java SDK allows Java developers to:
- Consume Tools: Connect to an MCP server (like the MCP Toolbox for AlloyDB) and automatically turn its capabilities into Java methods that LangChain4j understands.
- Type Safety: Leverage Java's strong typing for tool parameters, reducing runtime "hallucination" errors in tool calls.
- Enterprise Readiness: Easily integrate with Spring Boot, Quarkus, Micronaut etc.
- Connect Effortlessly: Avoid writing boilerplate JSON-RPC code.
- Standardize Auth: Native support for Google Cloud OIDC tokens ensures secure tool execution.
and so much more.
Dependencies: pom.xml Configuration
Add the following dependency to your Maven project to include the latest MCP Toolbox Java SDK:
   <dependency>
        <groupId>com.google.cloud.mcp</groupId>
        <artifactId>mcp-toolbox-sdk-java</artifactId>
        <version>0.2.0</version>
    </dependency>
Add the following dependency to your Maven project to include the LangChain4j artifact:
     <!-- LangChain4j Core & Gemini -->
    <dependency>
        <groupId>dev.langchain4j</groupId>
        <artifactId>langchain4j</artifactId>
        <version>0.35.0</version>
    </dependency>
That is it!!! We have successfully cloned the project and walked through the details of the agent, MCP Toolbox Java SDK and context.
9. Running Locally
To test the agent on your machine, you need to point it to your deployed MCP Toolbox server.
- Set environment variables:
export GCP_PROJECT_ID="<<YOUR_PROJECT_ID>>"
export GCP_REGION="us-central1"
export GEMINI_MODEL_NAME="gemini-2.5-flash"
export MCP_TOOLBOX_URL="<<YOUR_TOOLBOX_ENDPOINT_URL>>/mcp"
- Run with Maven:
mvn compile

mvn spring-boot:run
This should start your agent locally and you should be able to test it.
10. Let's deploy it to Cloud Run
Deploy it on Cloud Run by running the following command from the Cloud Shell Terminal where the project is cloned and make sure you are inside the project's root folder.
IF YOU ARE NOT IN OUR CURRENT PROJECT's ROOT FOLDER, run this in your Cloud Shell terminal:
cd cymbal-transit
If you are already in the cymbal-transit root, run the below command to directly deploy the app on Cloud Run:
gcloud run deploy cymbal-transit --source . --set-env-vars GCP_PROJECT_ID=<<YOUR_PROJECT_ID>>,GCP_REGION=us-central1,GEMINI_MODEL_NAME=gemini-2.5-flash,MCP_TOOLBOX_URL=<<YOUR_MCP_TOOLBOX_URL>> --allow-unauthenticated
Replace the values for placeholders <<YOUR_PROJECT>> and <<YOUR_MCP_TOOLBOX_URL>>
Once the command finishes, it will spit out a Service URL. Copy it.
Grant the AlloyDB Client role to the Cloud Run service account.This allows your serverless application to securely tunnel into the database.
Run this in your Cloud Shell terminal:
# 1. Get your Project ID and Project Number
PROJECT_ID=$(gcloud config get-value project)
PROJECT_NUMBER=$(gcloud projects describe $PROJECT_ID --format="value(projectNumber)")

# 2. Grant the AlloyDB Client role
gcloud projects add-iam-policy-binding $PROJECT_ID \
--member="serviceAccount:$PROJECT_NUMBER-compute@developer.gserviceaccount.com" \
--role="roles/alloydb.client"
Note: Once deployed go to the Cloud Run service list and make sure that in the security tab of that service, "Allow public access" is selected.
Now use the service URL (Cloud Run endpoint you copied earlier) and test the app.
Note: If you encounter a service issue, and it cites memory as the reason, try increasing the allocated memory limit to 1 GiB to test it.
11. Demo
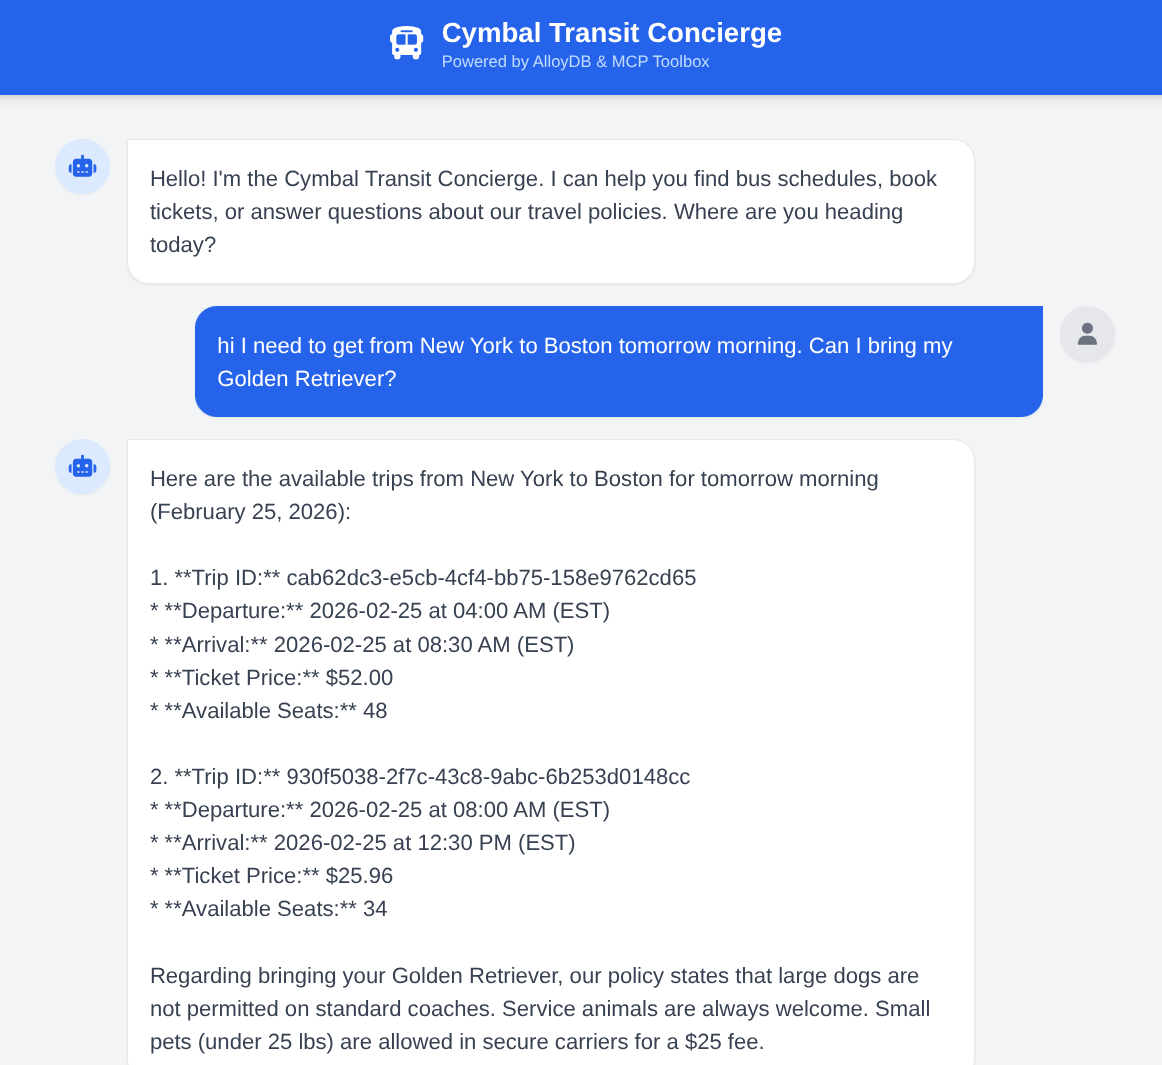
Ask the agent: "I need to get from New York to Boston tomorrow morning. Can I bring my Golden Retriever?" Observe how the agent:
- Searches policies for large dogs.
- Finds specific schedules.
- Summarizes the fastest trip with a Trip ID.
- Also books a ticket if you follow up with that action request.
12. Clean up
Once this lab is done, do not forget to delete alloyDB cluster and instance.
It should clean up the cluster along with its instance(s).
13. Congratulations
You have successfully built a sophisticated Java-based transit agent. By leveraging LangChain4j for orchestration and the MCP Toolbox Java SDK for data connectivity, you've created a system that can reason across agents, tools and data sources. If you would like to get started with orchestrating your agentic applications with MCP Toolbox for Databases across multiple databases, even across platforms, get started with the Java SDK today! Here is the launch announcement blog that gives more detailed information about the library. If you would like to build more such applications hands-on, for free at your own pace and instructor-lead, sign up for Code Vipassana at https://codevipassana.dev!!!