
1. Overview
In the era of generative AI, the barrier between an idea and a working prototype has effectively vanished, giving rise to the "vibe coders". By leveraging natural language and high-level intent, creators can now manifest complex applications in minutes, focusing entirely on the creative flow rather than manual syntax. However, this momentum often hits a wall at the deployment stage, where traditional infrastructure hurdles — like containerization, configuration, server handling, maintenance — reintroduce the very friction that AI was meant to eliminate.
This codelab explores how to maintain your creative velocity by turning deployment into a natural extension of the vibe coding process. We will dive deep into how you can deploy your application from Gemini CLI and Anitgravity to Cloud Run using the Cloud Run MCP Server. With this, you can now ask the AI application to deploy your application to Cloud Run, a production-ready serverless service that does all the heavy-lifting related to infrastructure management.
What you'll build
As part of this lab, you will:
- Install Cloud Run MCP Server as a Gemini CLI Extension
- Build a simple application via vibe-coding on Gemini CLI
- Deploy the application to Cloud Run using the Cloud Run MCP Server
- Enable Cloud Run MCP Server on Antigravity
- Deploy the same application to Cloud Run from Antigravity using the Cloud Run MCP Server
Requirements
- A Google Cloud project with billing enabled.
- gcloud, Gemini CLI and Antigravity installed.
2. Before you begin
Create a project
- In the Google Cloud Console, on the project selector page, select or create a Google Cloud project.
- Make sure that billing is enabled for your Cloud project. Learn how to check if billing is enabled on a project.
Login from terminal
Login using gcloud is required while using Cloud Run MCP server on both Gemini CLI and Antigravity.
- You'll use
gcloudinstalled on your machine. On your terminal, log in to your Google Cloud account using the command:
gcloud auth login
- Set up application credentials using the command:
gcloud auth application-default login
- Run the following command to confirm that the
gcloudcommand knows about your project.
gcloud config list project
- If your project is not set, use the following command to set it:
gcloud config set project <YOUR_PROJECT_ID>
Generate Gemini API Key
- On your browser, navigate to API Keys page.
- Click on the Create API Key button on the top right corner of the page.
- On the Create a new key popup that appears, provide an appropriate name for your key, and choose the Google Cloud project under which the key will be created.
- Click on the Create key button. The new key will be generated.
- Copy the newly generated key.
- In your terminal (either local or Cloud Shell), set the environment variable for this key as follows:
export GOOGLE_API_KEY=<YOUR_API_KEY>
export GEMINI_API_KEY=<YOUR_API_KEY>
3. Introduction
Introduction to MCP Server
An MCP Server (Model Context Protocol Server) acts as a standardized bridge that connects AI assistants to external systems and tools. Think of it as a universal driver or a "USB-C port" for Artificial Intelligence; instead of developers needing to build a unique integration for every single data source (like Google Drive, Gmail, or a local database) to talk to every specific AI model, MCP provides a common language they all understand. This server typically runs locally on your machine or remotely, listening for requests from an "AI Client" (such as AI Studio, Gemini CLI, Antigravity) to securely access information that exists outside the AI's training data.
The primary purpose of an MCP Server is to transform a passive chatbot into an active agent by exposing specific capabilities, technically defined as resources, tools, and prompts. By connecting a server, you grant the AI the ability to perform real tasks — such as reading live log files, querying a SQL database, or executing code scripts.
Cloud Run MCP Server
Cloud Run MCP server enables MCP-compatible AI agents to integrate with Cloud Run, and perform different actions on it. Cloud Run MCP server comes with rich set of tools and prompts.
Tools
Tools are executable capabilities that enable the AI to interact with external systems and perform actual work.
- deploy-file-contents: Deploys files to Cloud Run by providing their contents directly.
- list-services: Lists Cloud Run services in a given project and region.
- get-service: Gets details for a specific Cloud Run service.
- get-service-log: Gets Logs and Error Messages for a specific Cloud Run service.
- deploy-local-folder: Deploys a local folder to a Google Cloud Run service.
- list-projects: Lists available GCP projects.
- create-project: Creates a new GCP project and attach it to the first available billing account. A project ID can be optionally specified.
Prompts
Prompts are natural language commands that can be used to perform common tasks. They are shortcuts for executing tool calls with pre-filled arguments.
- deploy: Deploys the current working directory to Cloud Run. If a service name is not provided, it will use the DEFAULT_SERVICE_NAME environment variable, or the name of the current working directory.
- logs: Gets the logs for a Cloud Run service. If a service name is not provided, it will use the DEFAULT_SERVICE_NAME environment variable, or the name of the current working directory.
4. Install Run MCP Server for Gemini CLI
Gemini CLI Extension
Gemini CLI Extensions are modular packages that bundle MCP servers, context files, and custom commands into a single installable unit. They serve as "shipping containers" for capabilities, allowing you to instantly equip the Gemini CLI with specialized skills for specific platforms like GitHub, Firebase, or Google Cloud.
Installing Cloud Run MCP Server as Gemini CLI Extension
To install Cloud Run MCP Server as a Gemini CLI extension, run the following command:
gemini extensions install https://github.com/GoogleCloudPlatform/cloud-run-mcp
Ensuring Successful Installation
Open the Gemini CLI by running the following command on your terminal:
gemini
Once the terminal enters in the Gemini CLI mode, run the following command to ensure the Cloud Run MCP Server shows up in the Ready state.
/mcp list
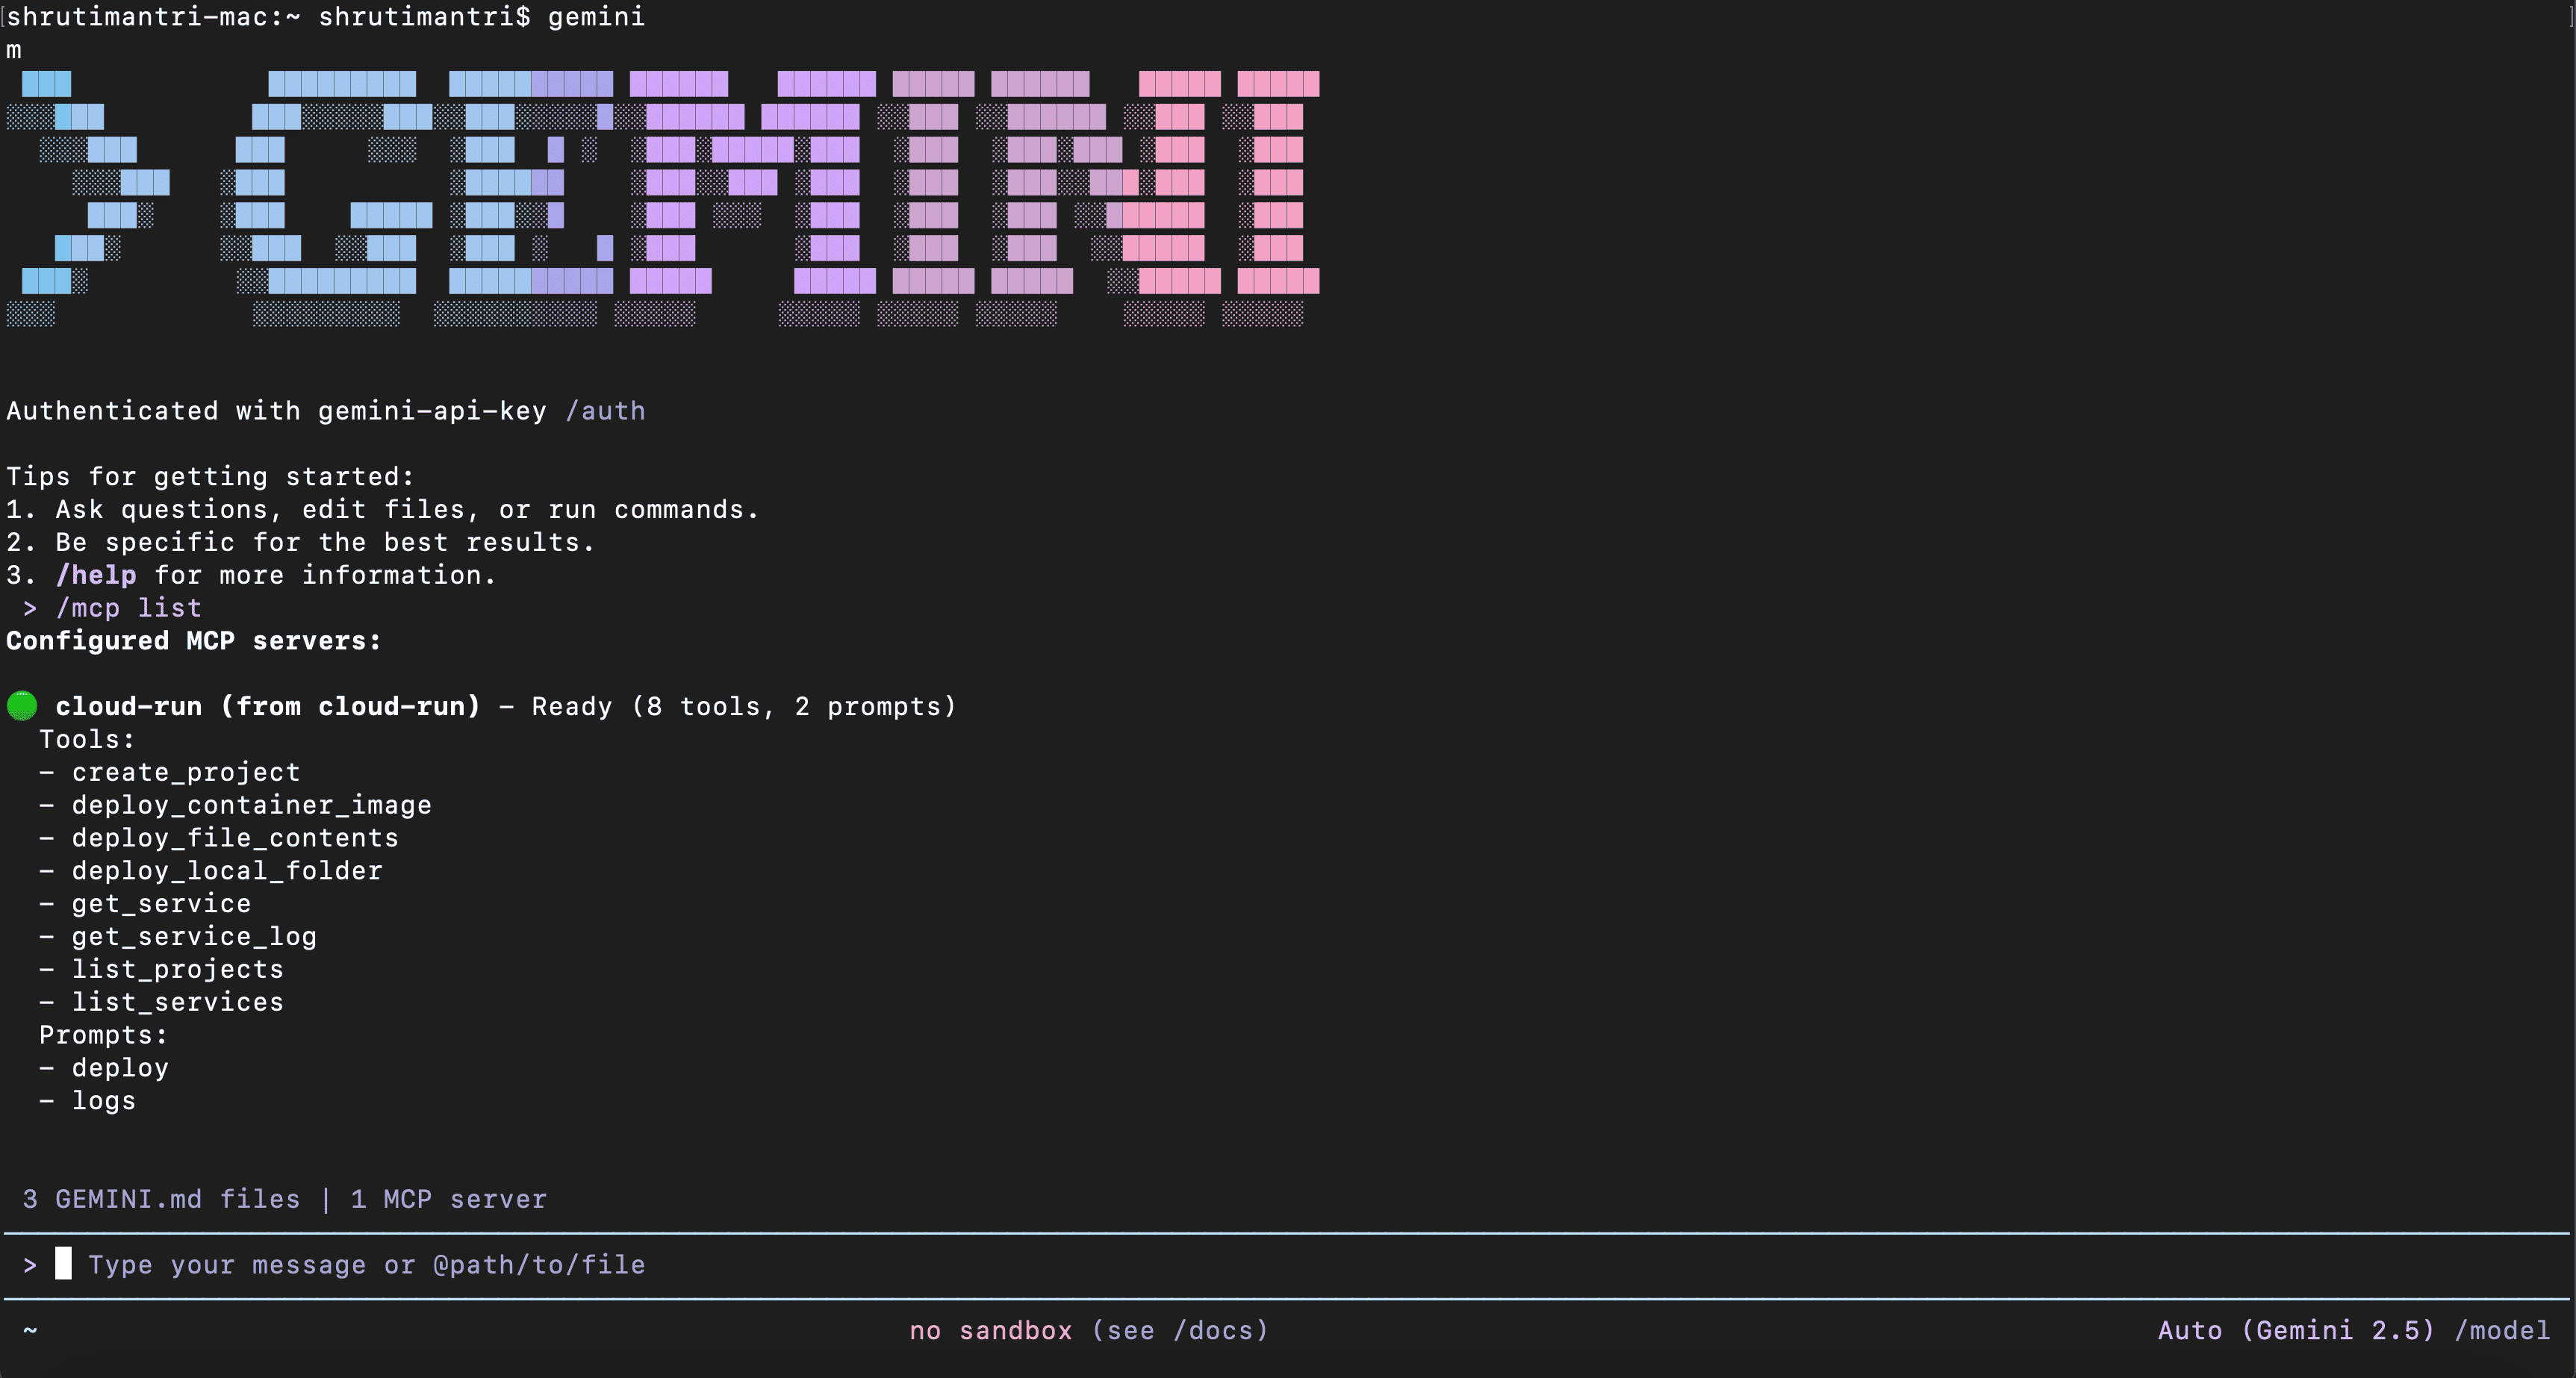
Also, you need to authenticate to use Gemini Code Assist for vibe coding. For this, run the following in your Gemini CLI:
/auth login
Choose the option Use Gemini API Key. This will automatically log you in as you have already set the GEMINI_API_KEY environment variable.
5. Vibe-Coding in Gemini CLI
We will now create a vibe-coded web application using Gemini CLI, and then deploy it to Cloud Run using the MCP server.
- Ensure you are in the Gemini CLI terminal.
- Use the prompt to create a web application. Here is one such sample prompt:
Build a NodeJS-based neon-themed Tic-Tac-Toe web app where the grid glows and players X (cyan) and O (magenta) pulse with light against a dark background. The UI must focus on immersion, using CSS shadows and transitions to make the board feel responsive and alive.

Program the game logic in NodeJS in a new folder `neon-tic-tac-toe`, that handles turn switching, win detection, and a dramatic 'Game Over' announcement at the top of the screen.

Once the application is ready, tell me how to run it locally so that I can try it out before deploying on the server.
It is likely that the Gemini CLI will ask for your inputs at multiple points in the process of creating the web application. Provide the appropriate inputs so that the Gemini CLI can proceed ahead, and implement the web application.
- Once the application is ready, run it locally as specified by Gemini CLI. Try out the functionalities in the application.
- Optionally, you can prompt Gemini CLI to perform any change in the application.
6. Deploying to Cloud Run from Gemini CLI
- Once you are satisfied with the web application's working, we will now deploy the application to Cloud Run using the following prompt:
Deploy the neon-tic-tac-toe folder as Cloud Run service in the project <project-id> in us-west1 region.
Change the placeholder with your Google Cloud project id. Optionally, you can change the region to the region of your choice.
Note that Gemini CLI invokes the deploy_local_folder tool of the Cloud Run MCP Server. Allow Gemini CLI to proceed with running this tool.
- It will take a couple of minutes to deploy the application to Cloud Run. As soon as the deployment is complete, you will get the Cloud Console URL and the Service URL. Copy and paste the Service URL on the browser.

- You have successfully deployed the web application on to Cloud Run from Gemini CLI using Cloud Run MCP Server.
7. Vibe-Coding in Antigravity
- Open the Antigravity application.
- You can now choose to open the
neon-tic-tac-toefolder created in the last section, or a new folder wherein you can vibe code a web application. - Ensure the Agent Manager panel is open within Antigravity as shown in the image below.
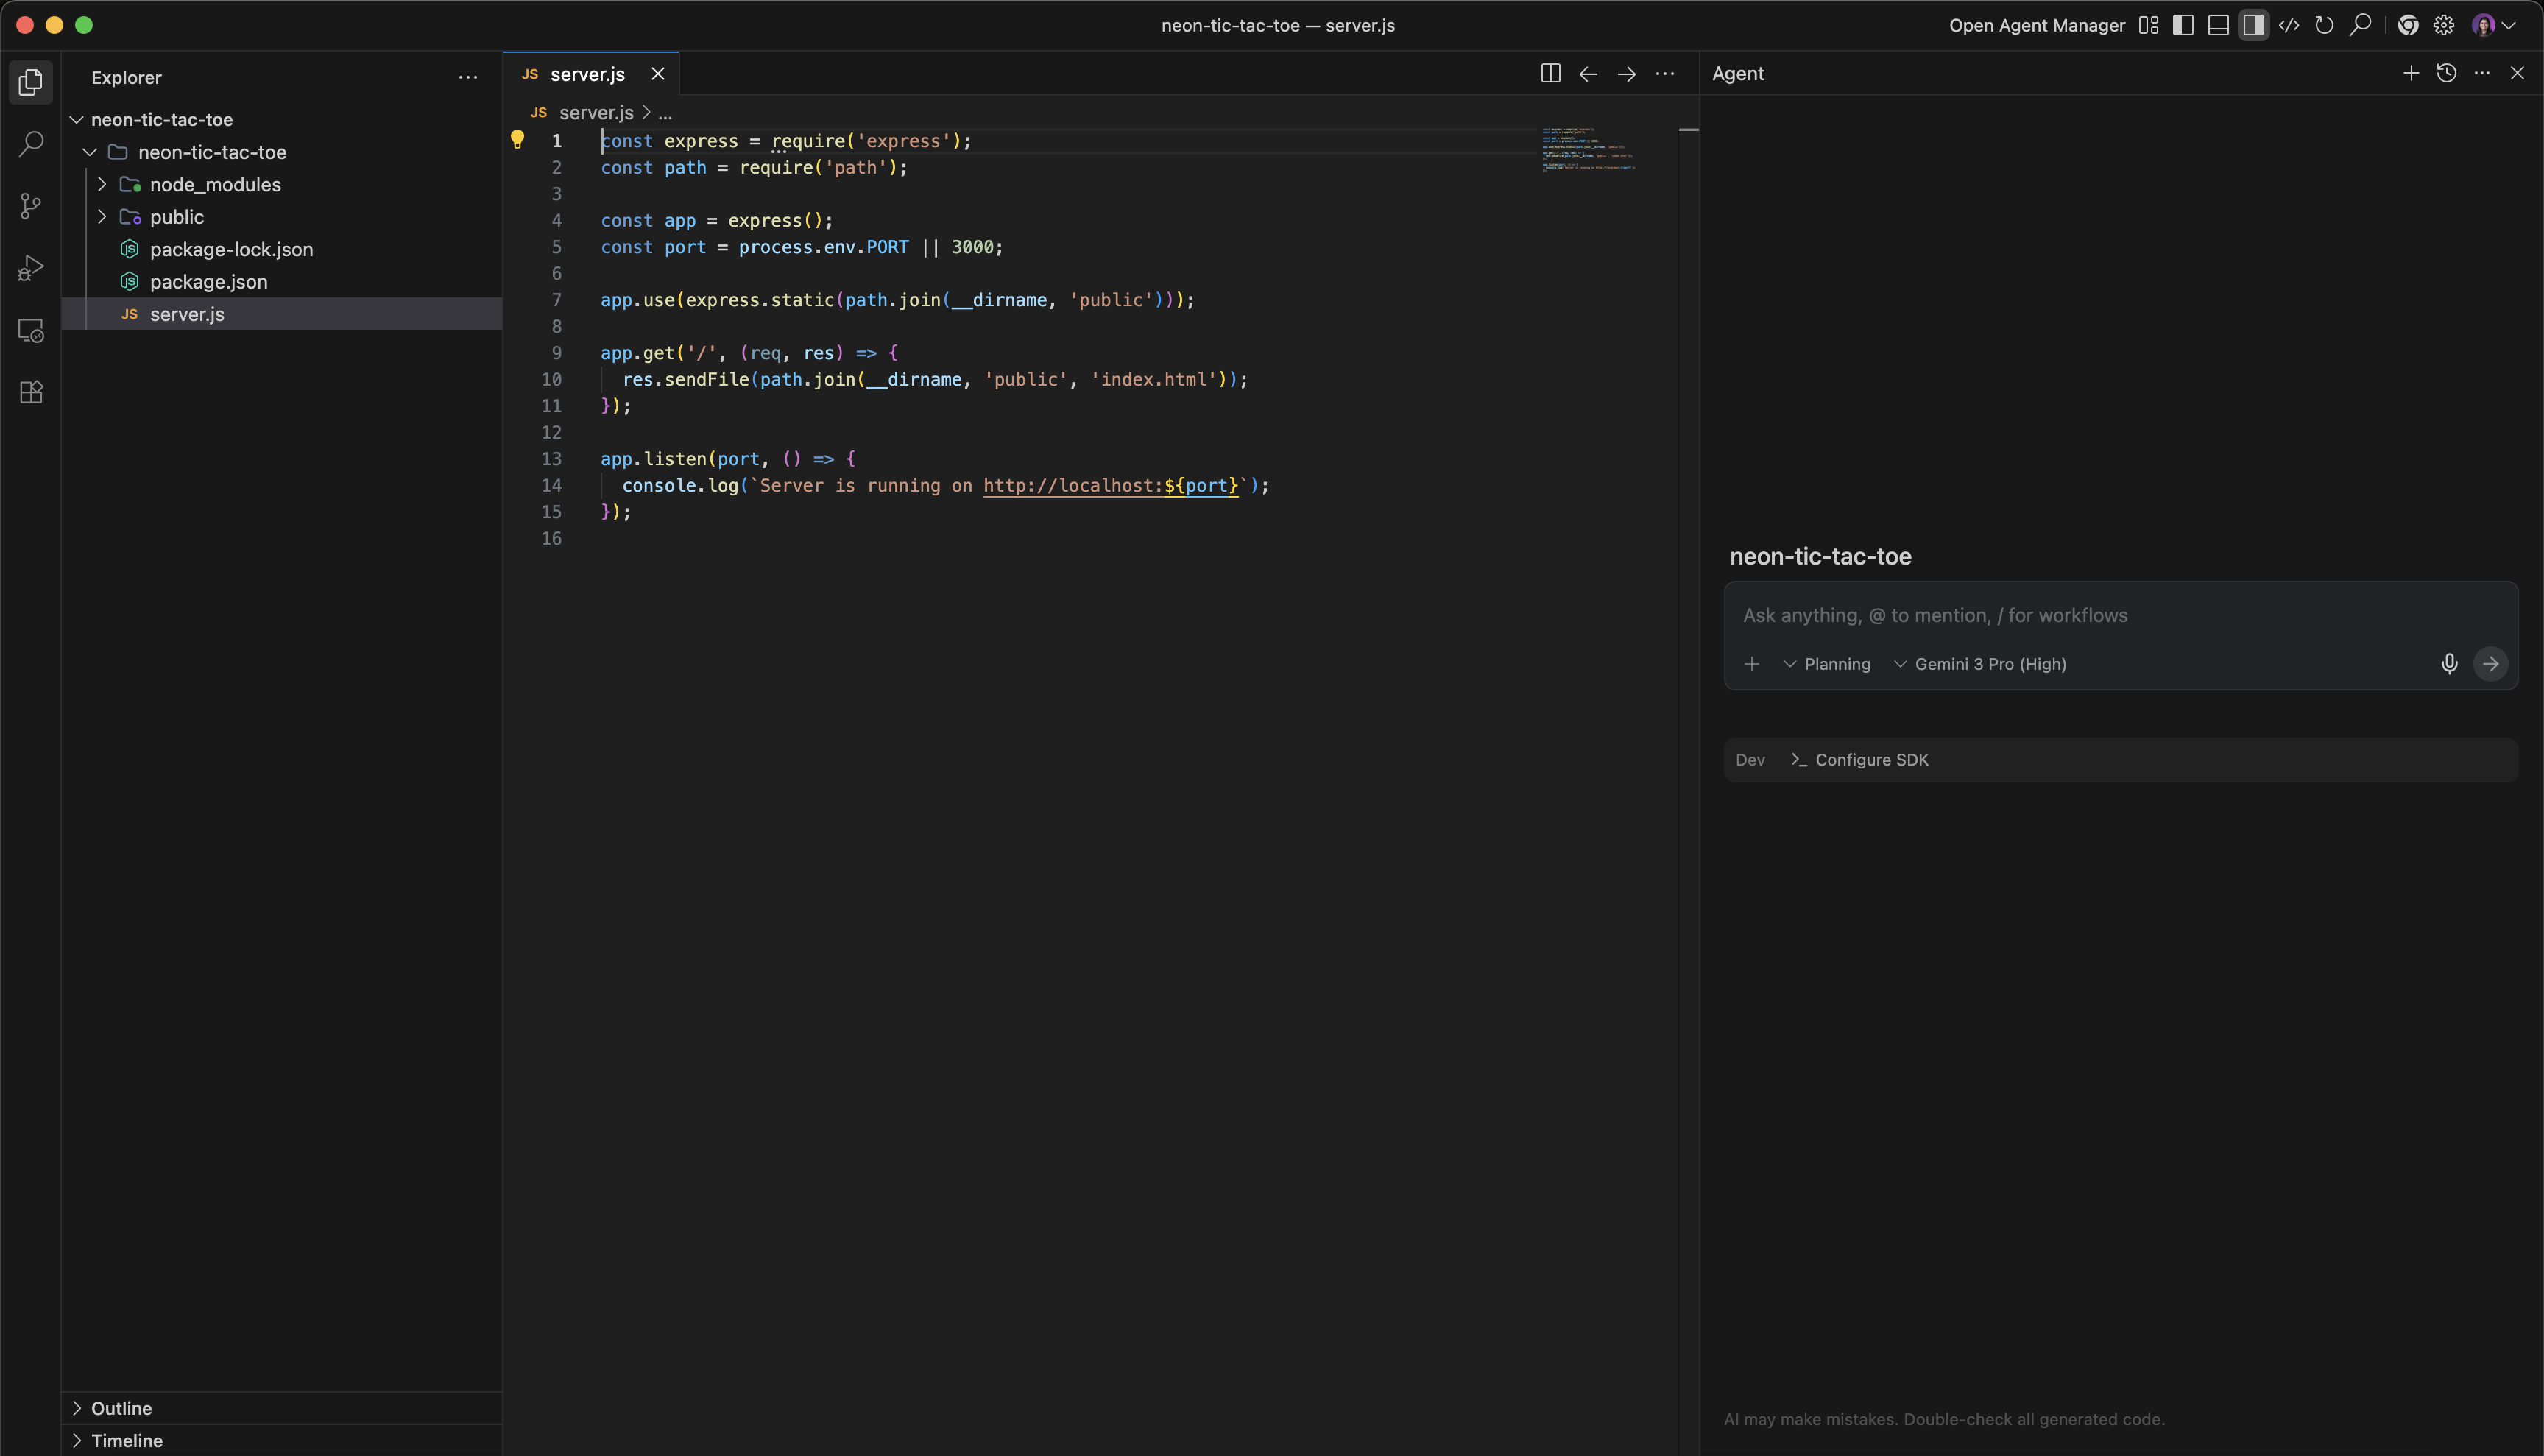
- If you have opened a new folder, provide the prompt instructions to create the web application in the Agent Manager panel. Take appropriate actions to ensure the web application gets created as expected. You can also run the application locally, and check if the application is running as expected.
8. Deploying to Cloud Run from Antigravity
We will now install the Cloud Run MCP Server.
- Click on the three dots (...) at the top right corner of the Agent Manager panel. From the dropdown, click on the MCP Servers option.

- Search for
Cloud Runin the search textbox on the MCP Store. Hover on the Cloud Run MCP server, and click on the Install button that appears to the right.
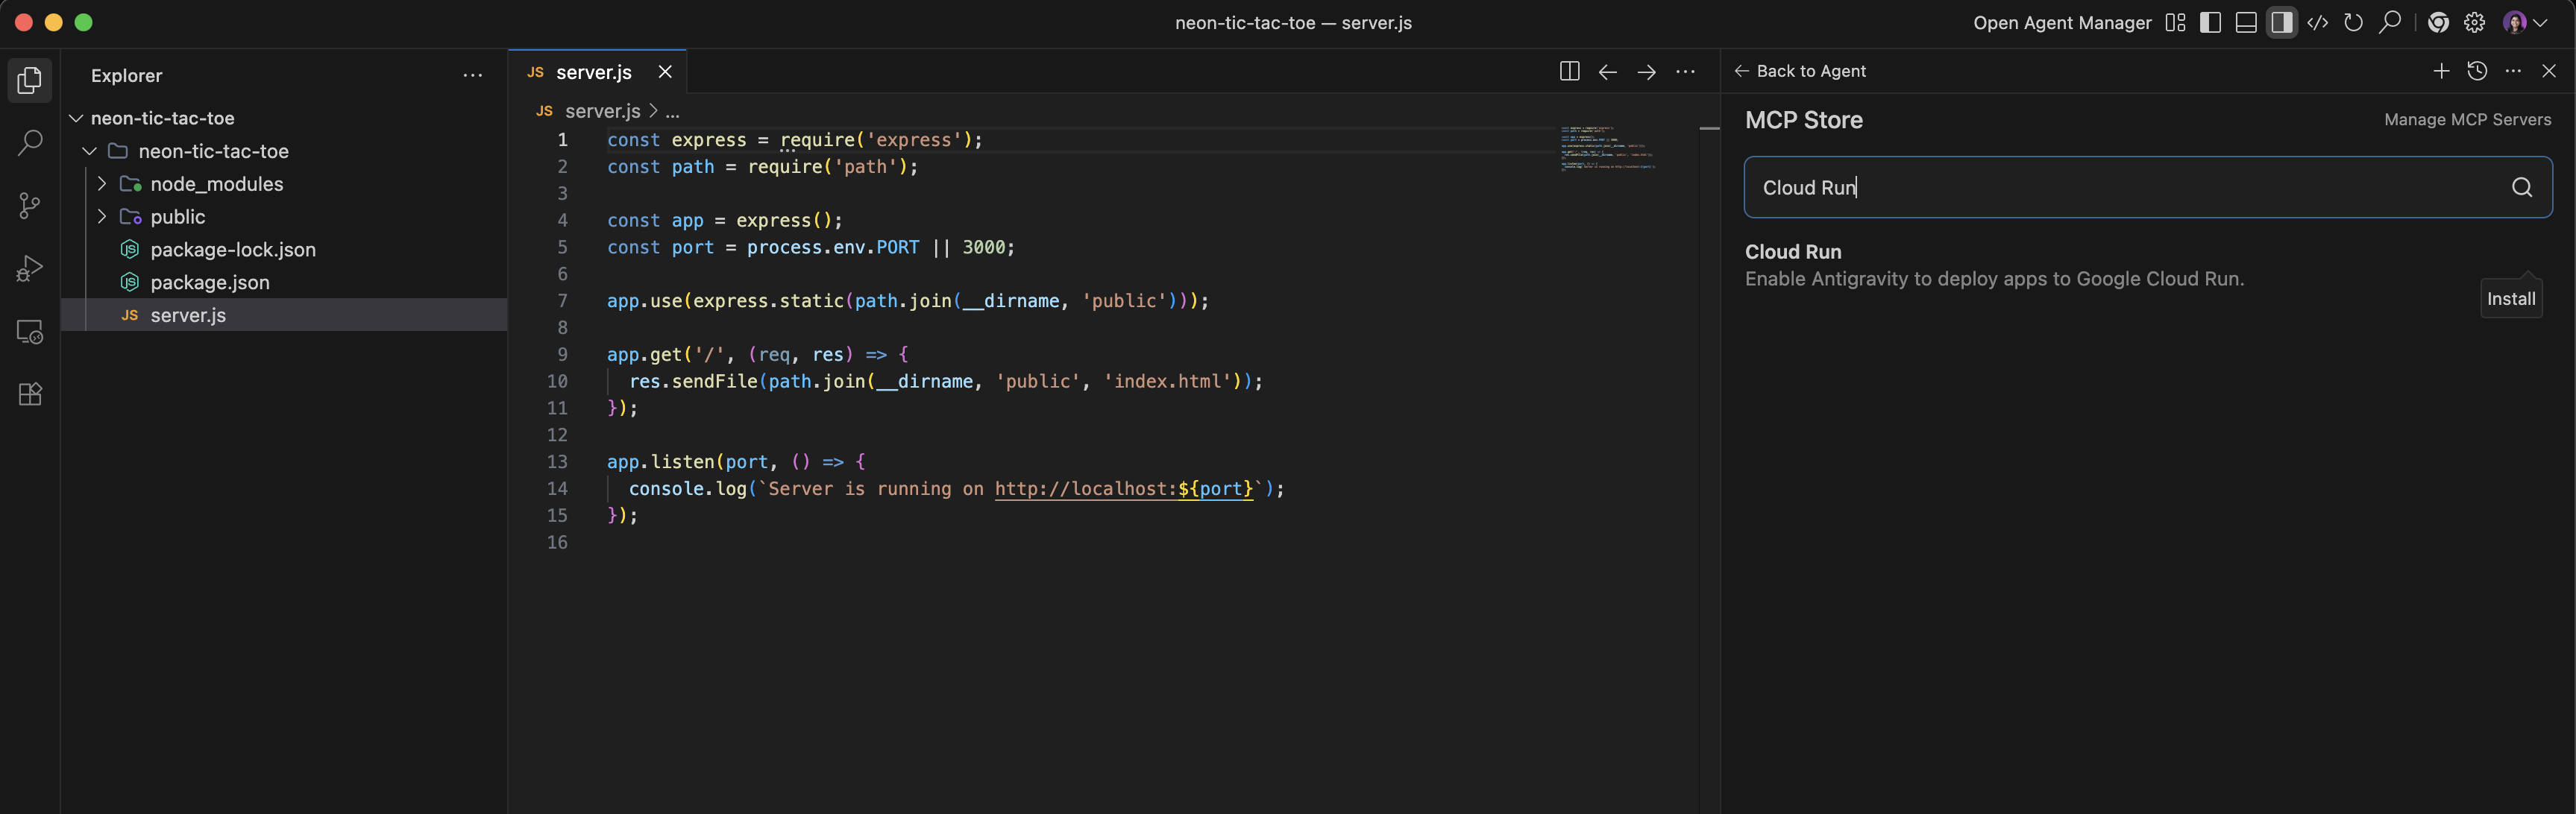
- Once installed, click on the Back to Agent button at the top of the Agent Manager panel.
- On the Agent Manager panel, we will now prompt to deploy this folder as Cloud Run service on the Google Cloud project as follows:
Deploy this folder as Cloud Run service in the project <project-id> in us-west1 region.
Note that the deploy_local_folder tool of Cloud Run MCP server gets invoked. It will take the name of the folder as the Cloud Run service name.
Optionally, you can change the region to the region of your choice.
- It will take a couple of minutes to deploy the application to Cloud Run. As soon as the deployment is complete, you will get the Cloud Console URL and the Service URL. Copy and paste the Service URL on the browser.

- You have successfully deployed the web application on to Cloud Run from Antigravity using Cloud Run MCP Server.
9. Clean up
To avoid incurring charges to your Google Cloud account for the resources used in this post, follow these steps:
- In the Google Cloud console, go to the Manage resources page.
- In the project list, select the project that you want to delete, and then click Delete.
- In the dialog, type the project ID, and then click Shut down to delete the project.
10. Congratulations
Congratulations! You have successfully completed vibe-coding an application and deploying it to Cloud Run via the Cloud Run MCP server on Gemini CLI and Antigravity!!
Gemini CLI and Antigravity are go-to applications for developing and testing applications, allowing users to immediately put their ideas to life.
The seamless integration of these tools with Cloud Run via the Cloud Run MCP server enables users to effortlessly deploy their applications directly onto Google Cloud. Utilizing Cloud Run grants all the inherent benefits of a serverless environment, abstracting away the complexities and overhead of infrastructure management.