
1. Before you begin
Welcome to the first part of the "Building AI Agents with ADK" series! In this hands-on codelab series, you'll embark on an exciting journey to create your very own intelligent AI agent using Google's Agent Development Kit (ADK).
We'll start with the absolute essentials, guiding you through setting up your development environment and crafting a foundational conversational agent. By the end of this codelab, you'll have built your first interactive AI, ready to be expanded upon in subsequent parts of this series as you transform it into a sophisticated Multi-Agent System (MAS).
You can complete this codelab in either your local environment or on Google Cloud. For the most consistent experience, we recommend using the Cloud Shell from Google Cloud environment. Cloud Shell also provides 5 GB of persistent storage in the $HOME directory. This is useful to store scripts, configuration files, or cloned repositories.
You can also access this codelab via this shortened URL: goo.gle/adk-foundation.
Prerequisites
- An understanding of the Generative AI concepts
- A basic proficiency in Python programming
- Familiarity with command line / terminal
What you'll learn
- How to set up a Python environment
- How to create a simple Personal Assistant Agent using ADK
- How to run, test, and debug the agent
What you'll need
- A working computer and reliable wifi
- A browser, such as Chrome, to access Google Cloud Console
- A curious mind and eagerness to learn
2. Introduction
The world of Generative AI (GenAI) is evolving rapidly, and AI Agents are currently a hot topic. An AI agent is a smart computer program designed to act on your behalf, much like a personal assistant. It can perceive its digital environment, make decisions, and take actions to achieve specific goals without direct human control. Think of it as a proactive, autonomous entity that can learn and adapt to get things done.
At its core, an AI agent uses a large language model (LLM) as its "brain" to understand and reason. This allows it to process information from various sources, such as text, images, and sounds. The agent then uses this understanding to create a plan and execute a series of tasks to reach a predefined objective.
You can now easily build your own AI agents, even without deep expertise, due to ready-to-use frameworks like the Agent Development Kit (ADK). You will start this journey by constructing a personal assistant agent to help you with your tasks. Let's begin!
3. Configure Google Cloud Services
Create a Google Cloud project
Begin by creating a new Google Cloud project so that the activities from this codelab are isolated within this new project only.
- Navigate to console.cloud.google.com/projectcreate
- Enter the required information:
- Project name - you can input any name you desired (e.g. genai-workshop)
- Location - leave it as No Organization
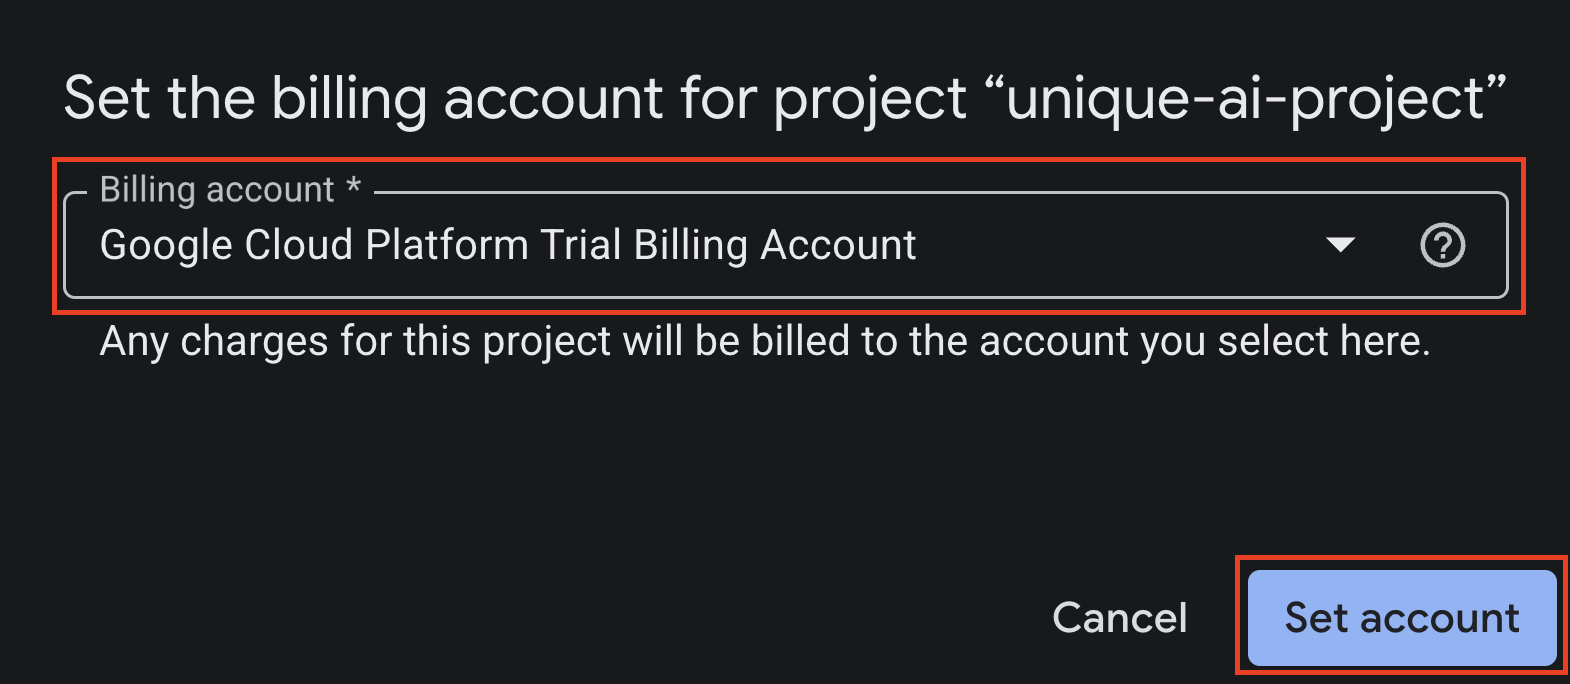
- Billing account - If you see this option, select Google Cloud Platform Trial Billing Account. Don't worry if you don't see this option. Just proceed to the next step.
- Copy down the generated Project ID, you will need it later.
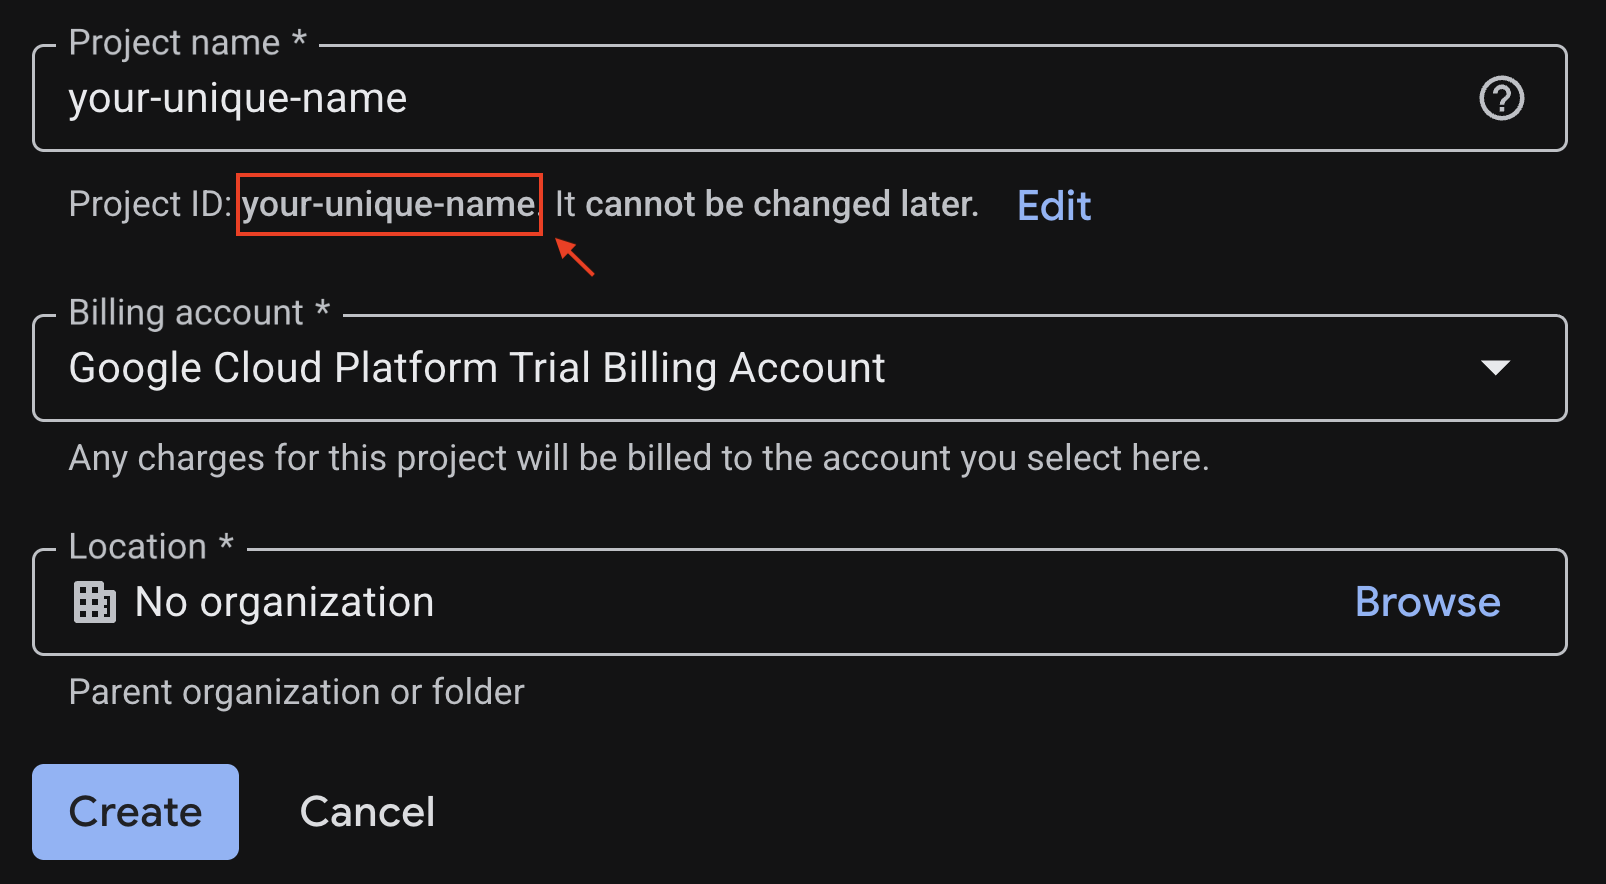
- If everything is fine, click on Create button
Configure Cloud Shell
Once your project is created successfully, do the following steps to set up Cloud Shell.
1. Launch Cloud Shell
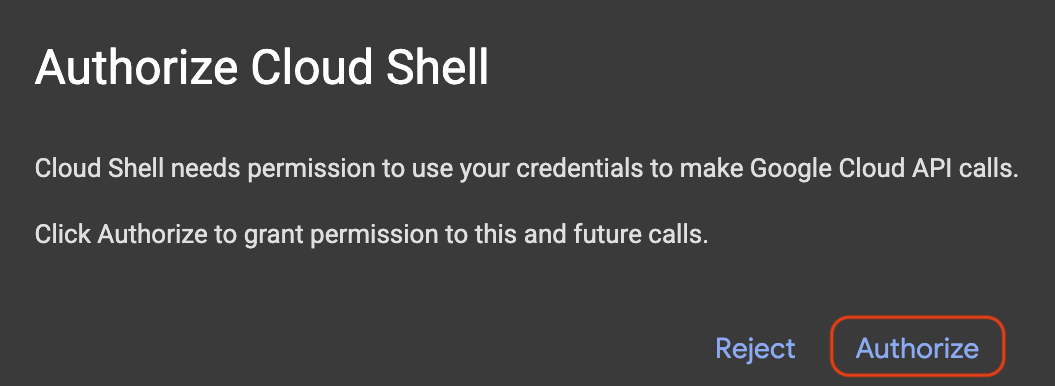
Navigate to shell.cloud.google.com and if you see a popup asking you to authorize, click on Authorize.
2. Set Project ID
Execute the following command in the Cloud Shell terminal to set the correct Project ID. Replace <your-project-id> with your actual Project ID copied from the project creation step above.
gcloud config set project <your-project-id>
You should now see that the correct project is selected within the Cloud Shell terminal. The selected Project ID is highlighted in yellow.

3. Enable required APIs
To use Google Cloud services, you must first activate their respective APIs for your project. Run the commands below in the Cloud Shell terminal to enable the services for this Codelab:
gcloud services enable aiplatform.googleapis.com
If the operation was successful, you'll see Operation/... finished successfully printed in your terminal.
4. Create a Python virtual environment
Before starting any Python project, it's good practice to create a virtual environment. This isolates the project's dependencies, preventing conflicts with other projects or the system's global Python packages.
1. Create project directory and navigate into it:
mkdir -p ai-agents-adk
cd ai-agents-adk
2. Create and activate a virtual environment:
uv venv --python 3.12
source .venv/bin/activate
You'll see (ai-agents-adk) prefixing your terminal prompt, indicating the virtual environment is active.

3. Install adk page
uv pip install google-adk
5. Create an agent
With your environment ready, it's time to create your AI agent's foundation. ADK requires a few files to define your agent's logic and configuration:
agent.py: Contains your agent's primary Python code, defining its name, the LLM it uses, and core instructions.__init__.py: Marks the directory as a Python package, helping ADK discover and load your agent definition..env: Stores sensitive information and configuration variables like API key, Project ID, and location.
This command will create a new directory named personal_assistant containing the three essential files.
adk create personal_assistant
Once the command is executed, you will be asked to choose a few options to configure your agent.
For the first step, choose option 1 to use the gemini-3.5-flash model, a fast and efficient model perfect for conversational tasks.
Choose a model for the root agent:
1. gemini-3.5-flash
2. Other models (fill later)
Choose model (1, 2): 1
For the second step, choose Vertex AI (option 2), Google Cloud's powerful, managed AI platform, as the backend service provider.
1. Google AI
2. Vertex AI
Choose a backend (1, 2): 2
After that, you need to verify that the Project ID shown in the brackets [...] is set correctly. If it is, press Enter. If not, key in the correct Project ID in the following prompt:
Enter Google Cloud project ID [your-project-id]:
Finally, enter global and press Enter at the next question, to use the global endpoint for this codelab.
Enter Google Cloud region [us-central1]: global
You should see a similar output in your terminal.
Agent created in /home/<your-username>/ai-agent-adk/personal_assistant:
- .env
- __init__.py
- agent.py
6. Explore agent codes
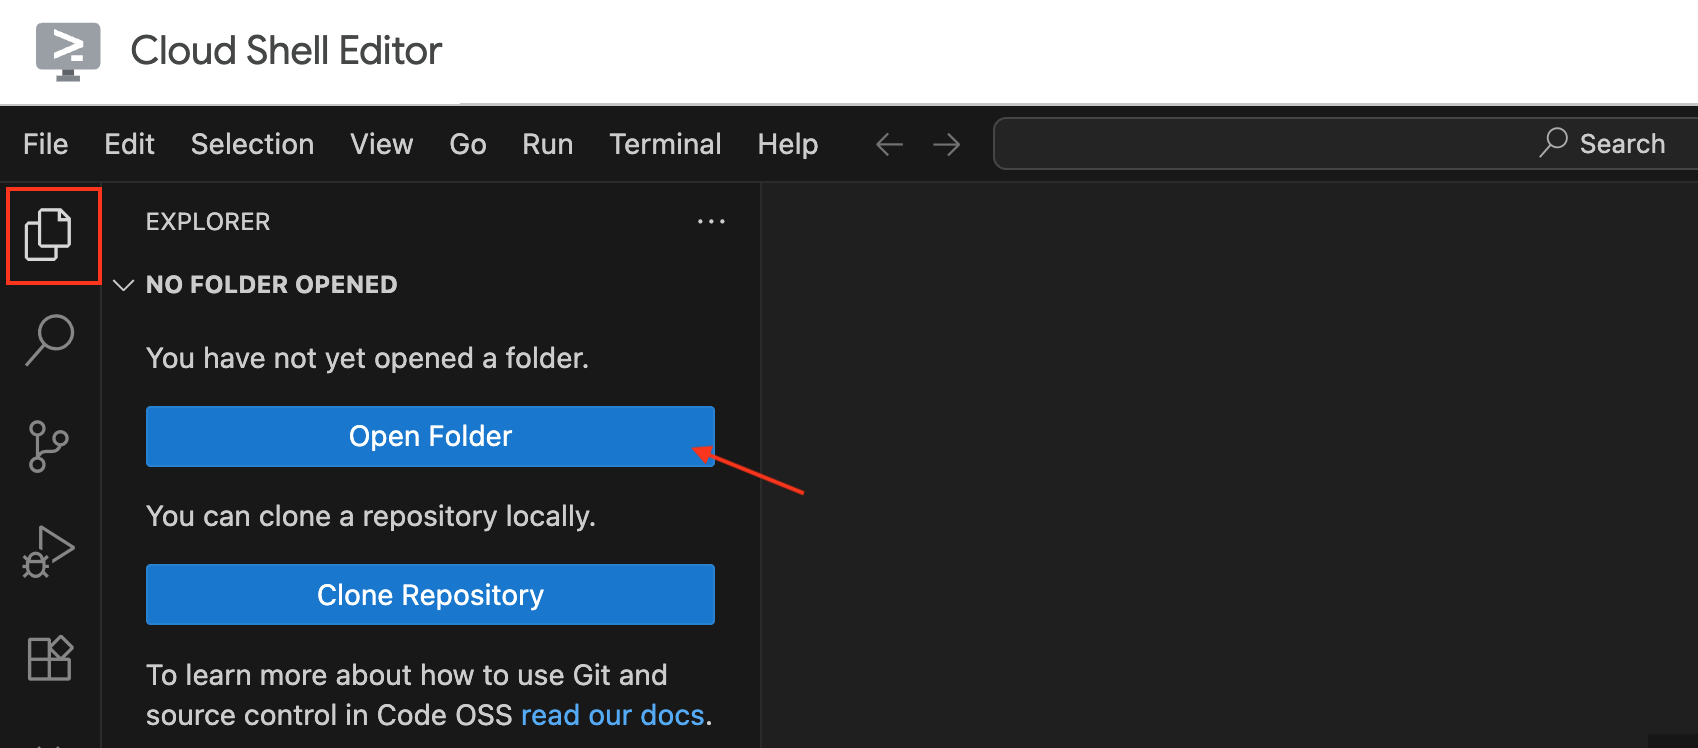
To view the created files, open the ai-agents-adk folder in the Cloud Shell Editor.
- Click File > Open Folder... in the top menu.
- Find and select the
ai-agents-adkfolder - Click OK.
If the top menu bar doesn't appear for you, you can also click on the folders icon and choose Open Folder.
Once the Editor window is fully loaded, navigate to the personal-assistant folder. You will see the necessary files as mentioned above (agent.py, __init__.py, and .env).
The .env file is often hidden by default. To make it visible in the Cloud Shell Editor:
- go to the menu bar at the top,
- click on View, and
- select Toggle Hidden Files.

Explore the content of each file.
agent.py
This file instantiates your agent using the Agent class from the google.adk.agents library.
from google.adk.agents import Agent

root_agent = Agent(
    model='gemini-3.5-flash',
    name='root_agent',
    description='A helpful assistant for user questions.',
    instruction='Answer user questions to the best of your knowledge',
)
from google.adk.agents import Agent: This line imports the necessaryAgentclass from the ADK library.root_agent = Agent(...): Here, you're creating an instance of your AI agent.name="root_agent": A unique identifier for your agent. This is how ADK will recognize and refer to your agent.model="gemini-3.5-flash": This crucial parameter specifies which Large Language Model (LLM) your agent will use as its underlying "brain" for understanding, reasoning, and generating responses.gemini-3.5-flashis a fast and efficient model suitable for conversational tasks.description="...": This provides a concise summary of the agent's purpose or capabilities. The description is more for human understanding or for other agents in a multi-agent system to understand what this particular agent does. It's often used for logging, debugging, or when displaying information about the agent.instruction="...": This is the system prompt that guides your agent's behavior and defines its persona. It tells the LLM how it should act and what its primary purpose is. In this case, it establishes the agent as a "helpful assistant." This instruction is key to shaping the agent's conversational style and capabilities.
__init__.py
This file is necessary for Python to recognize personal-assistant as a package, allowing ADK to correctly import your agent.py file.
from . import agent
from . import agent: This line performs a relative import, telling Python to look for a module namedagent(which corresponds toagent.py) within the current package (personal-assistant). This simple line ensures that when ADK tries to load yourpersonal-assistantagent, it can find and initialize theroot_agentdefined inagent.py. Even if empty, the presence of__init__.pyis what makes the directory a Python package.
.env
This file holds environment-specific configurations and sensitive credentials.
GOOGLE_GENAI_USE_VERTEXAI=1
GOOGLE_CLOUD_PROJECT=YOUR_PROJECT_ID
GOOGLE_CLOUD_LOCATION=YOUR_PROJECT_LOCATION
GOOGLE_GENAI_USE_VERTEXAI: This tells the ADK that you intend to use Google's Vertex AI service for your Generative AI operations. This is important for leveraging Google Cloud's managed services and advanced models.GOOGLE_CLOUD_PROJECT: This variable will hold the unique identifier of your Google Cloud Project. ADK needs this to correctly associate your agent with your cloud resources and to enable billing.GOOGLE_CLOUD_LOCATION: This specifies the Google Cloud region where your Vertex AI resources are located (e.g.,us-central1). Using the correct location ensures your agent can communicate effectively with the Vertex AI services in that region.
7. Run the agent on the Terminal
With all three files in place, you're ready to run the agent directly from the terminal. To do this, run the following adk run command in the terminal:
adk run personal_assistant
If everything's set up correctly, you'll see similar output in your terminal. Don't worry about the warnings for now, as long as you see [user]: you are good to proceed.
...
Running agent personal_assistant, type exit to exit.
[user]:
...
Go ahead and chat with the agent! Type something like "hello. What can you do for me?" and you should get back a reply.
...
Running agent personal_assistant, type exit to exit.
[user]: hello. What can you do for me?
[personal_assistant]: Hello! I am a large language model, trained by Google. I can do many things to help you, such as:
...
You'll notice the output is sometimes formatted with Markdown, which can be difficult to read in the terminal. In the next step, you will use the Development UI for a much richer, chat-application-like experience.
Troubleshooting
This API method requires billing to be enabled
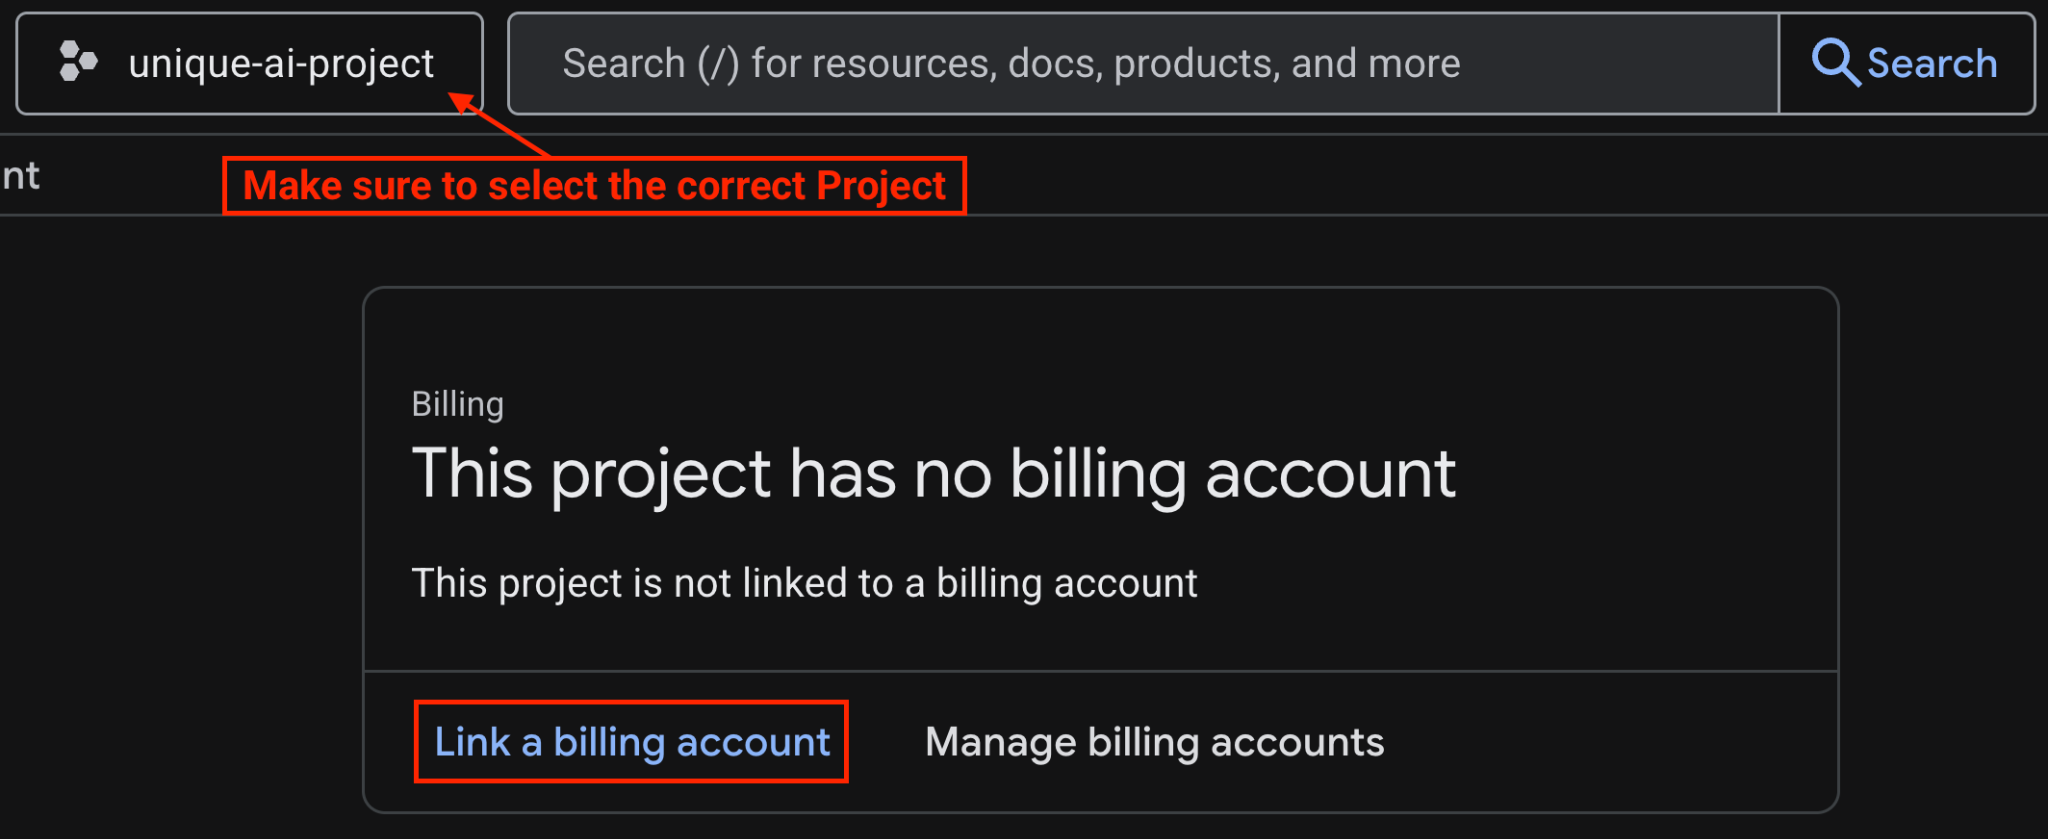
If you receive a message saying {‘message': ‘This API method requires billing to be enabled'}, do the following:
- Check if you are using the correct Project ID in
.envfile - Go to linked billing account page and see if the billing account is already linked
- If not, choose Google Cloud Platform Trial Biling Account from the option
Vertex AI API has not been used in project
If you receive an error message containing {'message': 'Vertex AI API has not been used in project...'}, enable the Vertex AI API by typing this in the terminal:
gcloud services enable aiplatform.googleapis.com
If the operation was successful, you'll see Operation/... finished successfully printed in your terminal.
Other Errors
If you receive any other errors that are not mentioned above, try reloading the Cloud Shell tab in the browser (and reauthorize if prompted).
8. Run the agent on the Development Web UI
The Agent Development Kit also offers a convenient way to launch your agent as a chat application using its development UI. Simply use the command adk web instead of adk run.
If your terminal is still running adk run, type exit to close it before typing the command.
adk web --allow_origins "regex:https://.*\.cloudshell\.dev"
Your terminal should display an output similar to this:
...
INFO:     Started server process [4978]
INFO:     Waiting for application startup.
+------------------------------------------------------+
| ADK Web Server started                               |
|                                                      |
| For local testing, access at http://localhost:8000.  |
+------------------------------------------------------+
INFO:     Application startup complete.
INFO:     Uvicorn running on http://127.0.0.1:8000 (Press CTRL+C to quit)
You can access the development UI using either of these two methods:
- Directly via Terminal: Use Ctrl + Click (or Cmd + Click) on the provided link, such as
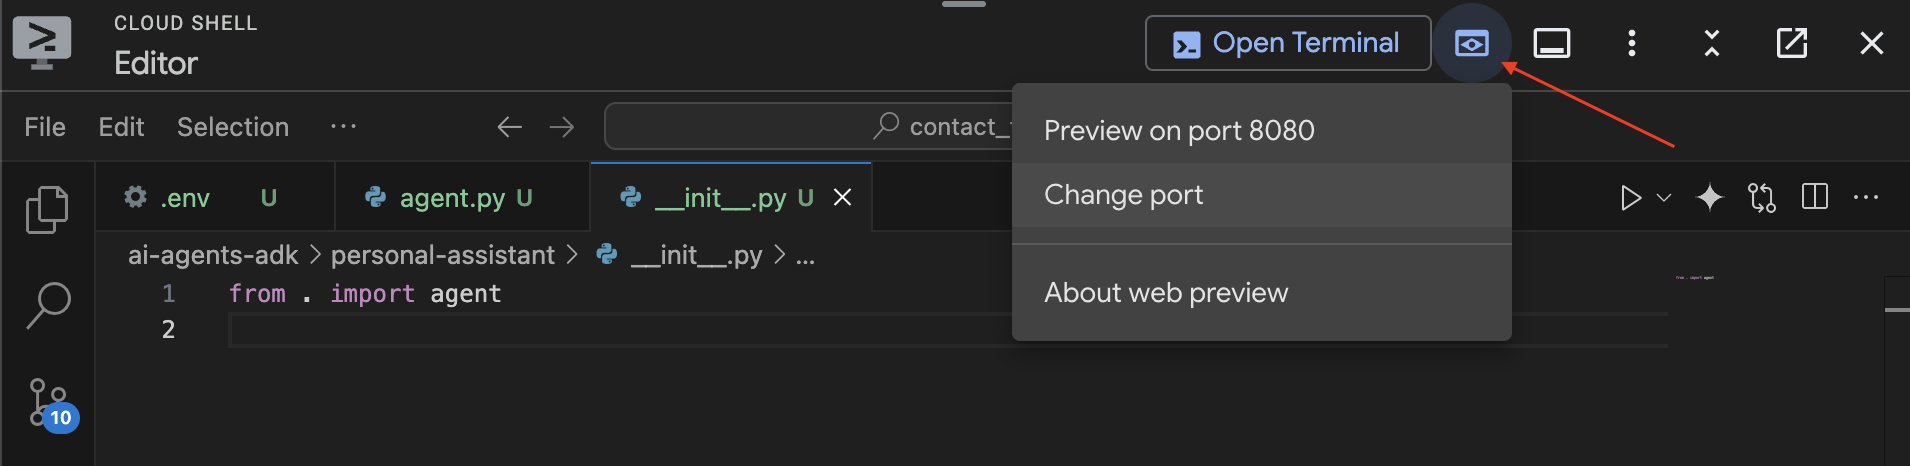
http://localhost:8000. - Using Web Preview:
- Click the Web Preview button.
- Select Change Port.
- Input the port number (for example, 8000).
- Click Change and Preview.
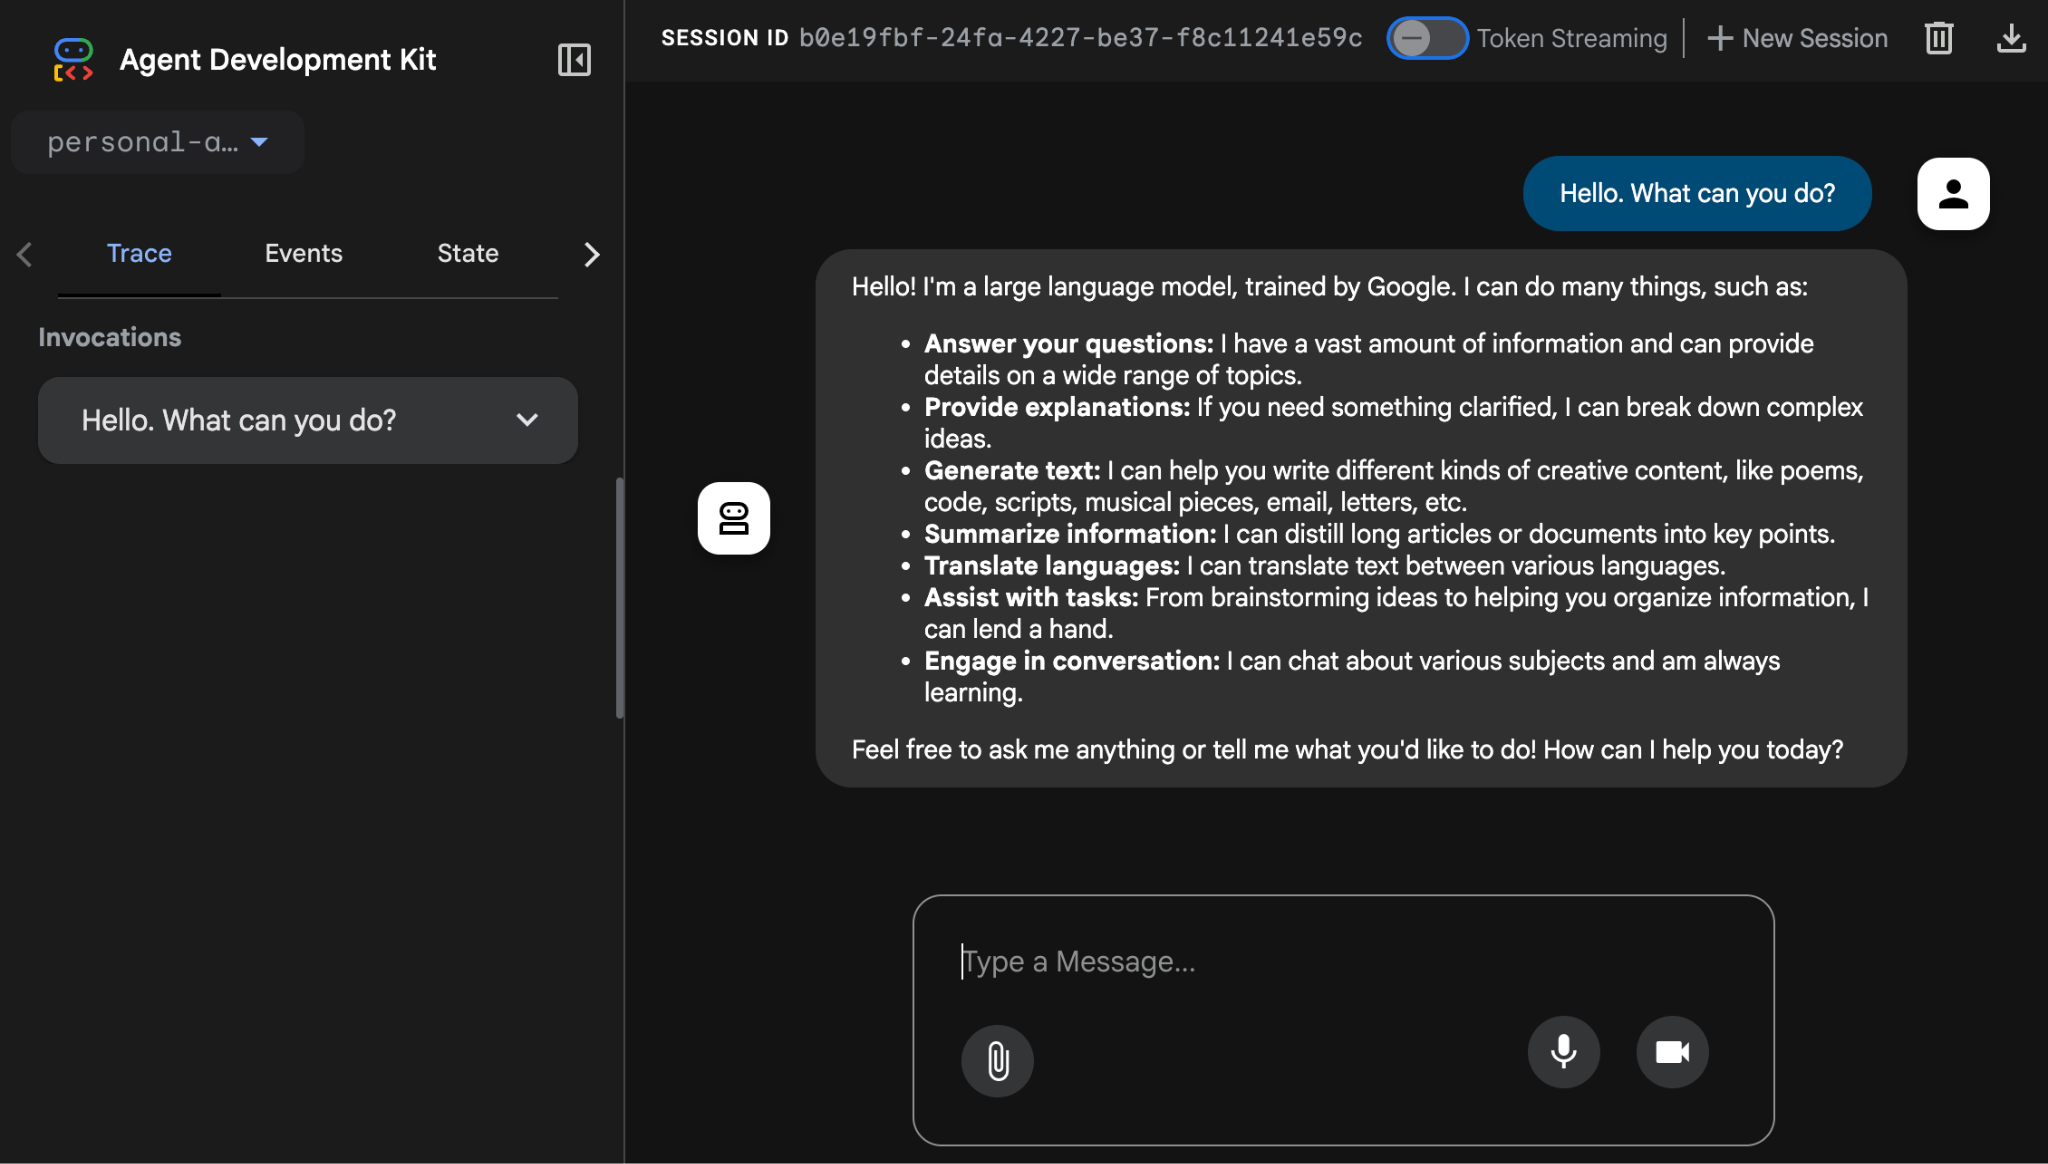
You'll then see the chat application-like UI appear in your browser. Go ahead and chat with your personal assistant through this interface!
You'll notice that Markdown formatting now displays correctly, and this UI also lets you debug and investigate each messaging event, the agent's state, user requests, and much more. Happy chatting!
9. Clean Up (Optional)
Since this codelab doesn't involve any long-running products, simply stopping your active agent sessions (e.g., the adk web instance in your terminal) by pressing Ctrl + C or Cmd + C in the terminal is sufficient.
Delete Agent Project Folders and Files
If you only want to remove the code from your Cloud Shell environment, use the following commands:
cd ~
rm -rf ai-agents-adk
Disable Vertex AI API
To disable the Vertex AI API that was enabled earlier, run this command:
gcloud services disable aiplatform.googleapis.com
Shut Down the Entire Google Cloud Project
If you wish to fully shut down your Google Cloud project, refer to the official guide for detailed instructions.
10. Conclusion
Congratulations! You've successfully built a simple personal assistant agent using the Agent Development Kit (ADK). You now have a solid foundation and understanding of the core components of an ADK agent.
As a next step, you can expand your agent's capabilities significantly by giving it tools to access real-time information and interact with external services. If you'd like to continue your journey, the next codelab in this series, Building AI Agents with ADK: Empowering with Tools, will guide you through this process.