

1. 總覽
如要滿足多重限制的旅遊要求 (例如規劃京都一日遊,預算不超過 $100 美元,重點是歷史悠久的寺廟和當地美食,不含現代藝術畫廊),就必須擷取限制、同時研究景點和餐飲、彙整分項行程,並審核最終計畫。如果只依賴單一大型代理,並搭配多項工具,可能會略過驗證步驟或違反排除條件,因此自動調度管理會透過確定性工作流程控制器,協調專用子代理。
在「使用 ADK 建構 AI 代理」系列的第三部分,您將使用 Agent Development Kit (ADK) 2 工作流程控制器 (SequentialAgent、ParallelAgent 和 LoopAgent),在 Agent Platform 建構獨立的多代理旅遊規劃工具。您將在三個漸進階段 (不需設定第 1 部分或第 2 部分的工作區) 協調六個由 gemini-3.8-flash 驅動的專業代理,並使用共用工作階段狀態 (output_key)、並行 google_search 執行,以及疊代式製作者-檢查者修正迴圈。
必要條件
- 瞭解生成式 AI 概念
- 具備 Python 程式設計的基本能力
- 熟悉 AI 代理基礎知識和 Google ADK
課程內容
- 如何從頭開始建構多代理 ADK 2 專案
- 如何使用
output_key設計一組共用工作階段狀態的專用代理 - 如何使用
SequentialAgent,在確定性逐步管道中執行子代理 - 如何使用
ParallelAgent同時執行獨立研究代理,縮短延遲時間 - 如何使用
LoopAgent和ToolContext升級,實作反覆的製作者-檢查者修正迴圈 - 如何將循序、平行和迴圈模式,組合成階層式多代理工作流程
需求條件
- Google 帳戶 (如要申請工作坊抵免額,請使用個人
@gmail.com帳戶) - 講師提供的研討會抵免額連結 (以及用於掃描 QR code 的手機相機),或有效的 Cloud Billing 帳戶
- Google Chrome (建議使用無痕視窗,避免混用個人和公司帳戶)
2. 領取 Google Cloud 抵免額 (選用)
如果您參加的工作坊提供活動抵免額連結,請領取 Google Developer Program 抵免額,即可在不使用信用卡的情況下佈建帳單帳戶。
領取活動抵免額
- 在無痕視窗中開啟工作坊抵免額連結,並使用
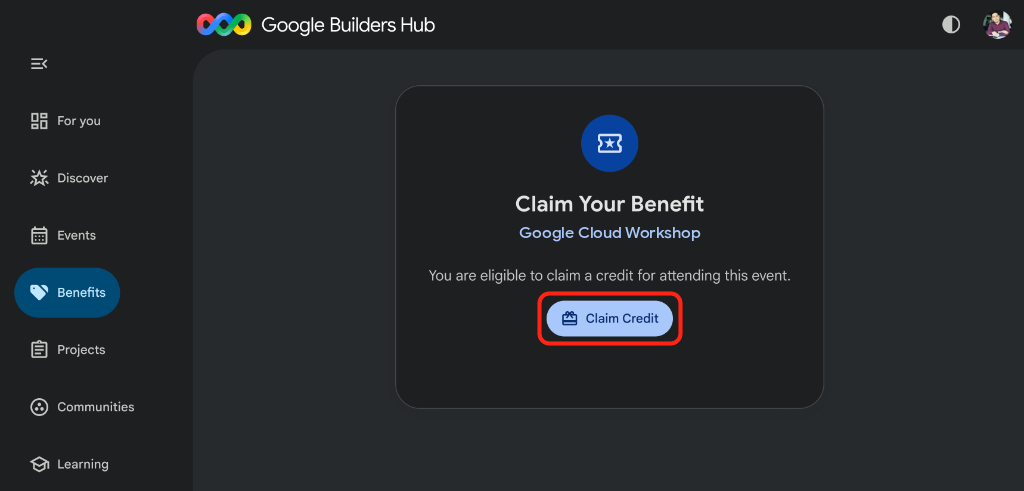
@gmail.com帳戶登入。 - 在「Claim Your Benefit」頁面,點選「Claim Credit」:
- 如果系統提示您建立 Google Developer Program 設定檔,請填寫表單。
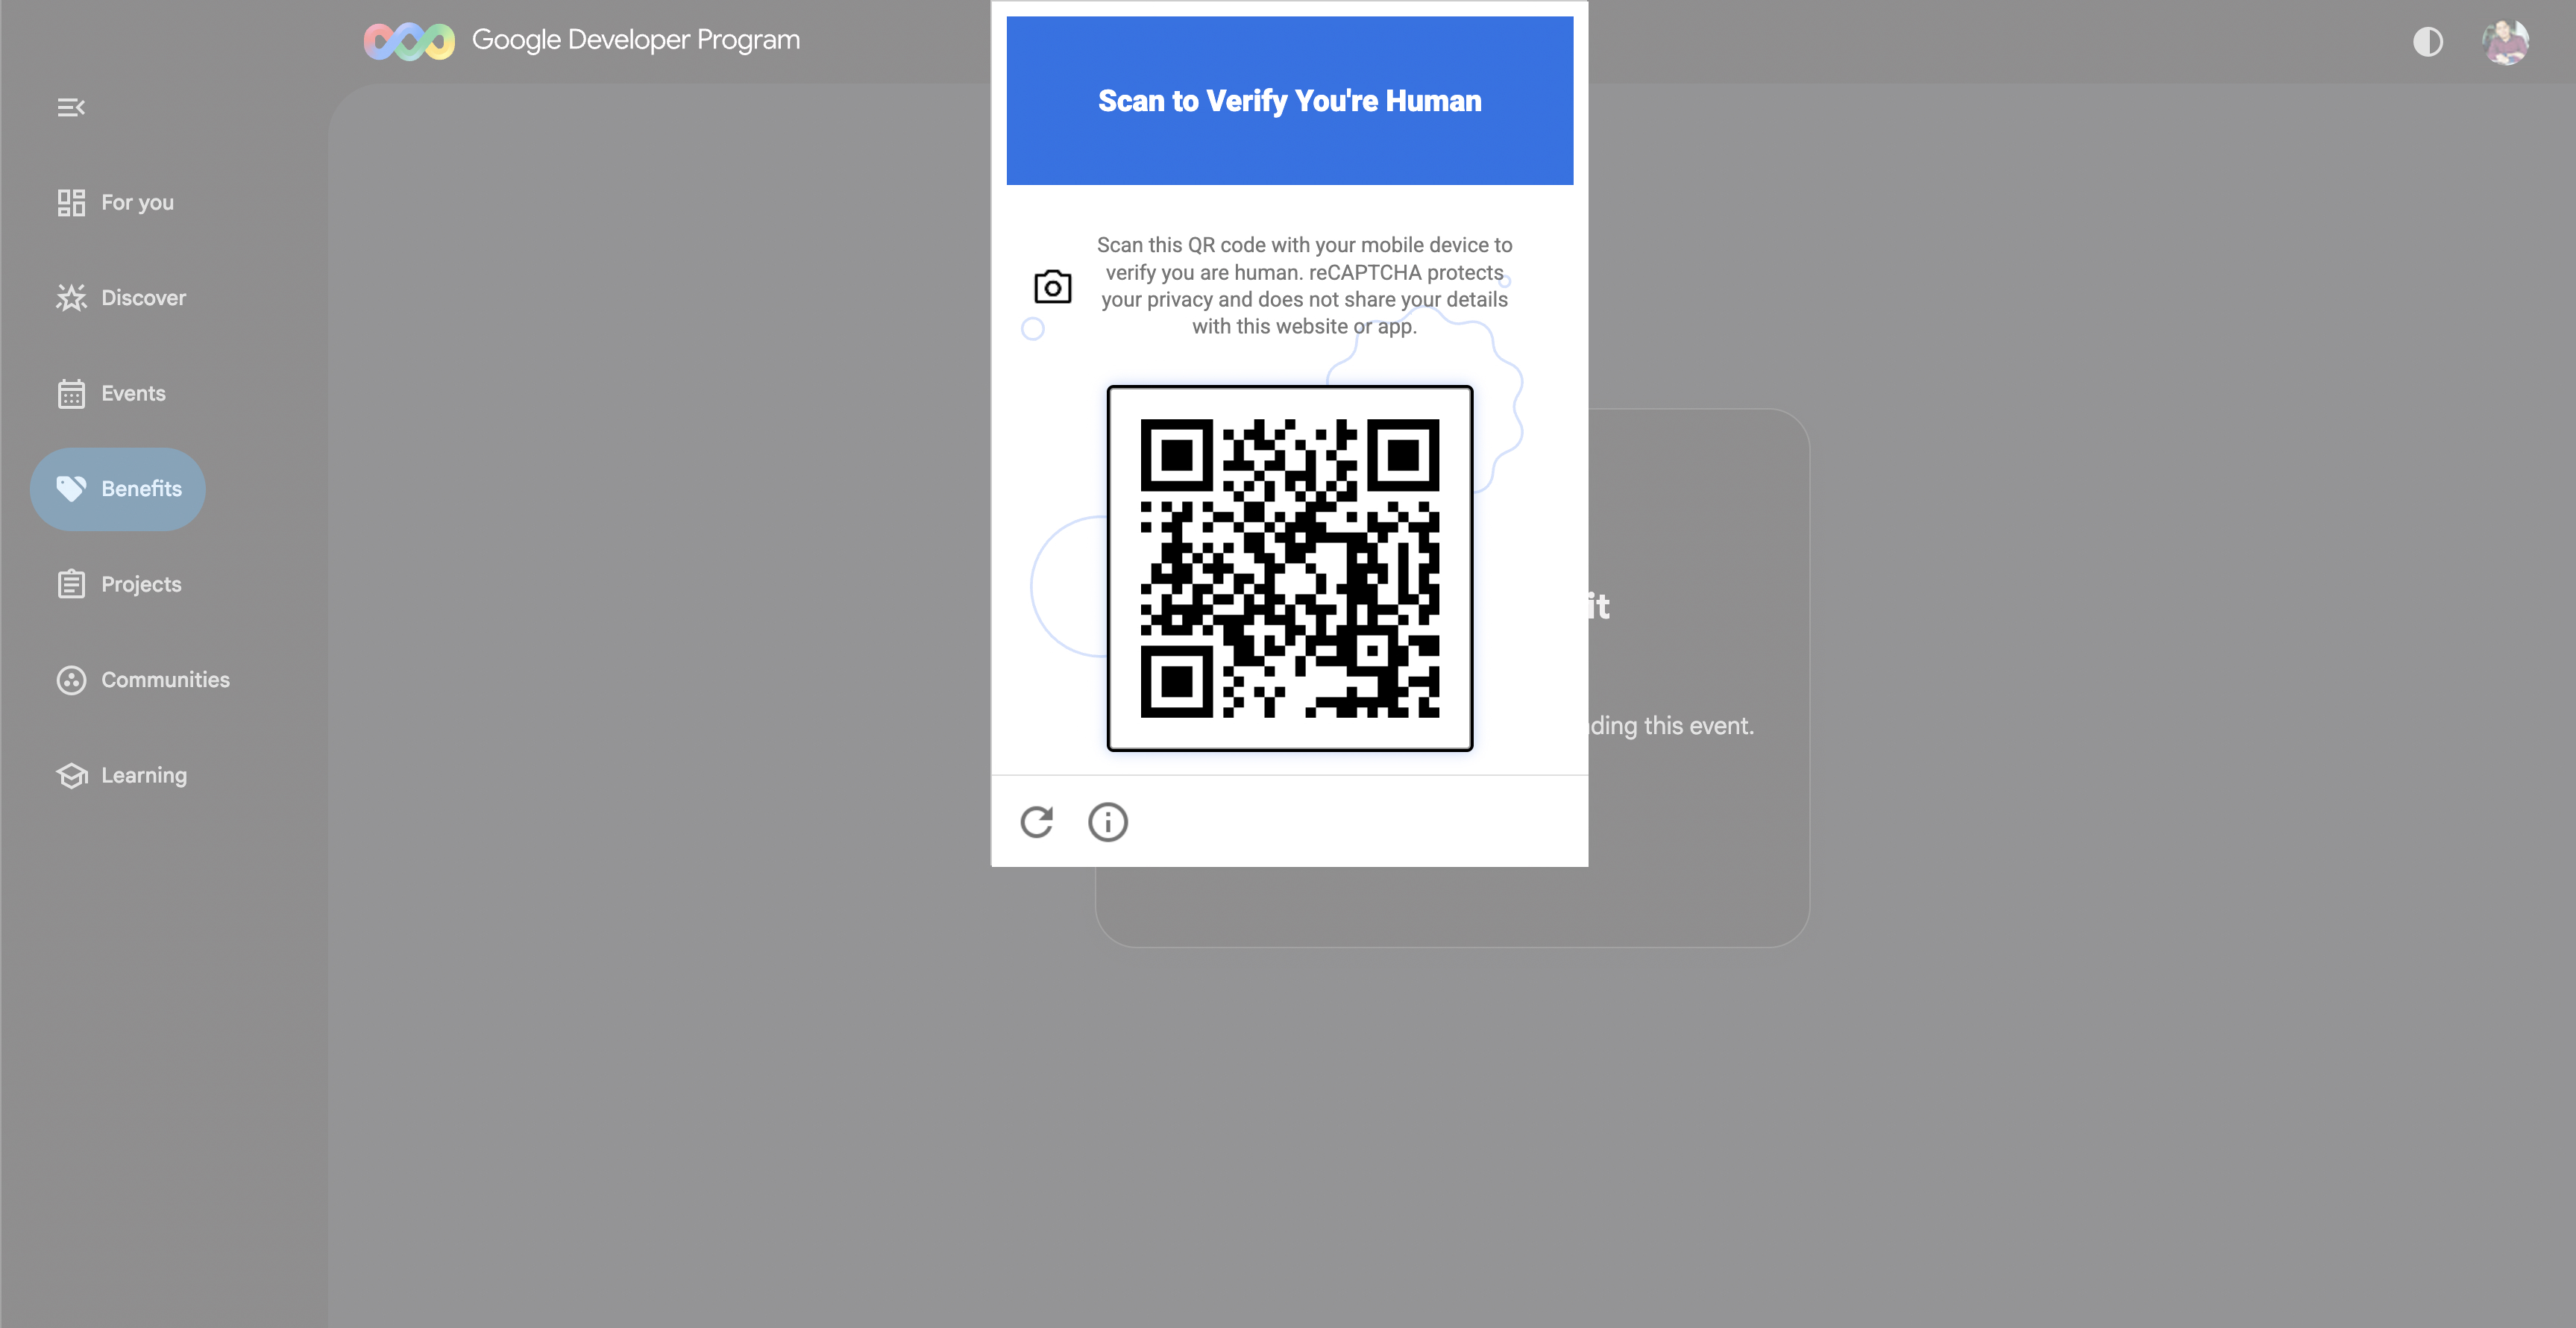
- 看到「掃描以驗證您是真人」時,請用手機掃描 QR code 並完成驗證 (如果沒有看到 QR code,請重新整理並再次點選「領取抵免額」):
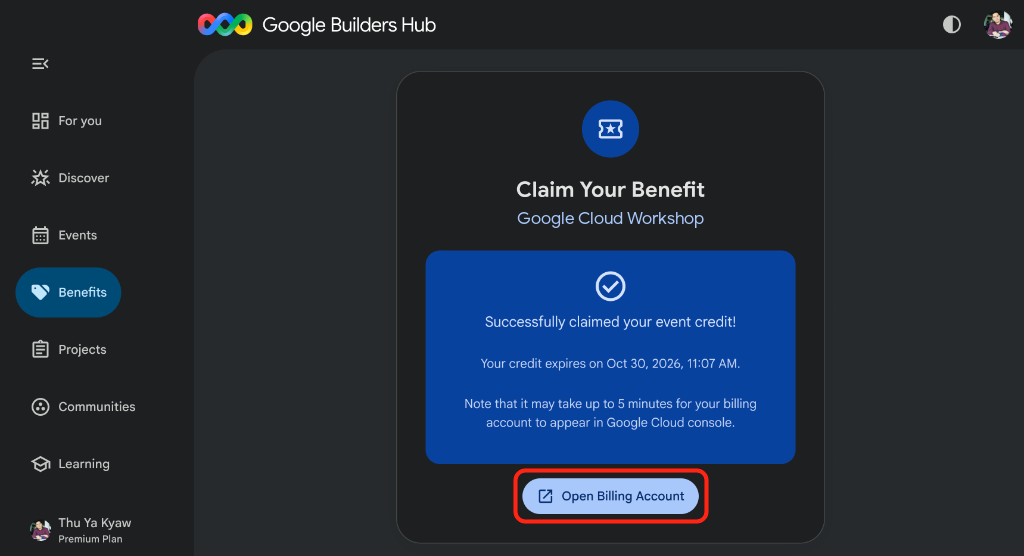
- 確認畫面顯示「Successfully claimed your event credit!」,然後點選「Open Billing Account」:
🔍 檢查成果
帳單帳戶設定最多需要 3 分鐘:
- 開啟 Google Cloud Billing (或將網址複製到無痕視窗),然後選取「您的帳單帳戶」:
https://console.cloud.google.com/billing
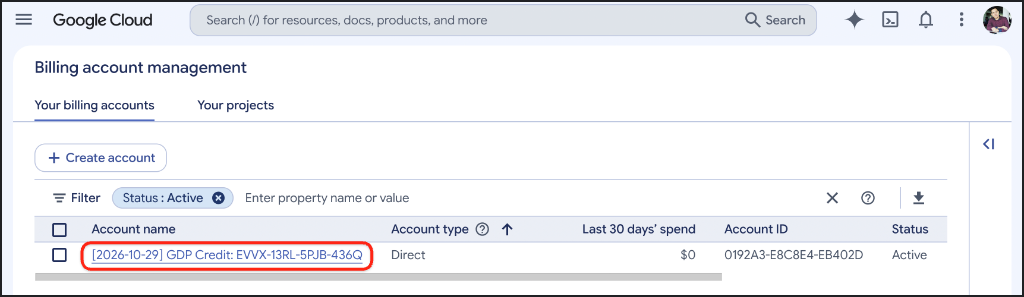
- 重新整理,直到
GDP Credit帳戶顯示「Active」狀態:
3. 建立 Google Cloud 專案 (選用)
建立專屬的 Google Cloud 雲端專案,讓這個程式碼實驗室的所有資源保持獨立,方便清理。
- 開啟「建立專案」頁面 (或將網址複製到無痕視窗):
https://console.cloud.google.com/projectcreate
- 輸入專案詳細資料:
- 專案名稱:例如
google-cloud-workshop - 帳單帳戶(如有顯示):選取
GDP Credit(或有效的帳單帳戶) - Parent resource (上層資源):No organization (無組織) (或視需要選取您的組織)
- 專案名稱:例如
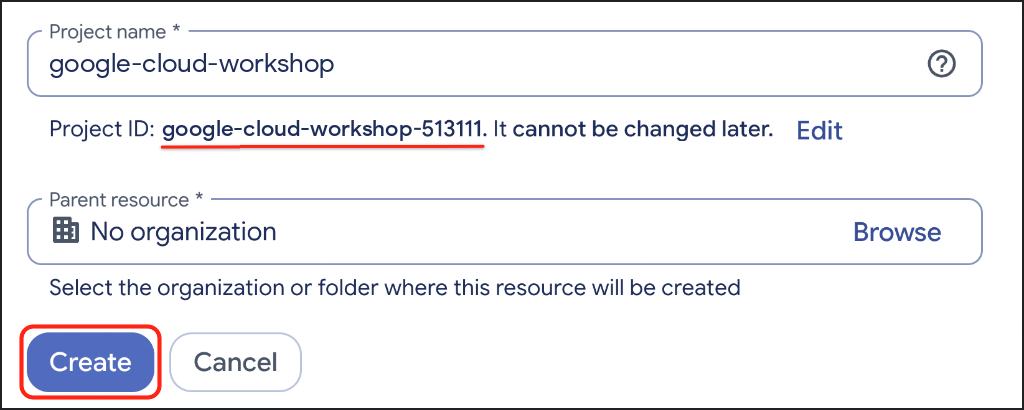
- 記下專案名稱下方產生的專案 ID,然後點選「建立」:
🔍 檢查成果
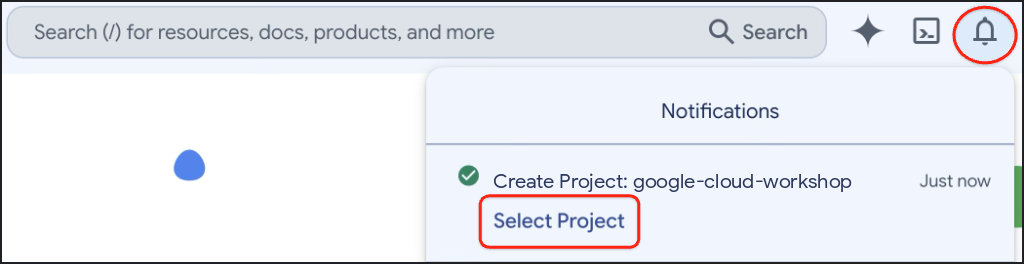
專案建立完成後,按一下右上角工具列中的「通知」,然後點選「選取專案」:
4. 設定環境
設定 Google Cloud Shell、啟用 Agent Platform API,並使用 uv 建立獨立的 Python 3.12 虛擬環境。
設定 Cloud Shell
- 點選 Google Cloud 控制台工具列中的「啟用 Cloud Shell」圖示
>_,或直接開啟 Google Cloud Shell (或將網址複製到無痕視窗):
https://shell.cloud.google.com/?show=ide,terminal

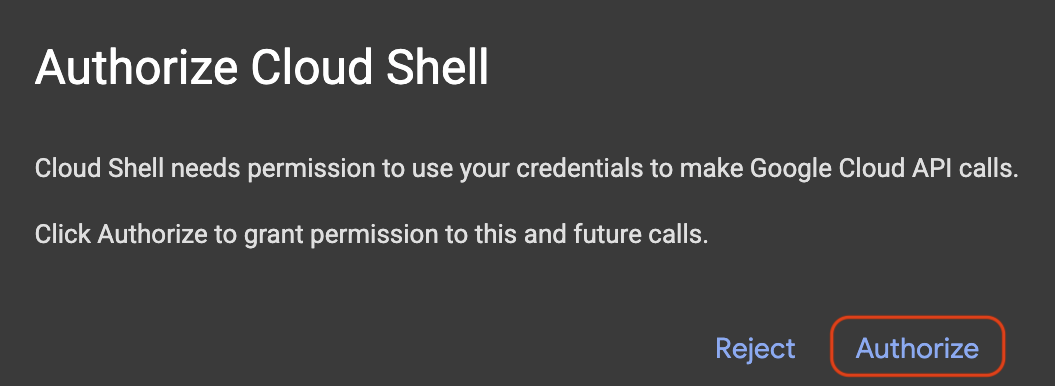
- 如果出現提示訊息,請點選「授權」:
- 在終端機的編號選單中,選取有效的 Google Cloud 專案 ID:
unset CLOUDSDK_CORE_PROJECT
PS3="Select your project (e.g. 1): "
select PROJECT_ID in $(gcloud projects list --format="value(projectId)"); do
  [ -n "$PROJECT_ID" ] && gcloud config set project "$PROJECT_ID" && break
done
畫面會顯示類似以下的輸出 (未標記的專案也會顯示 [environment: untagged] 資訊行):
1) google-cloud-workshop-4210
2) my-cloud-project-8812
Select your project (e.g. 1): 1
Updated property [core/project].
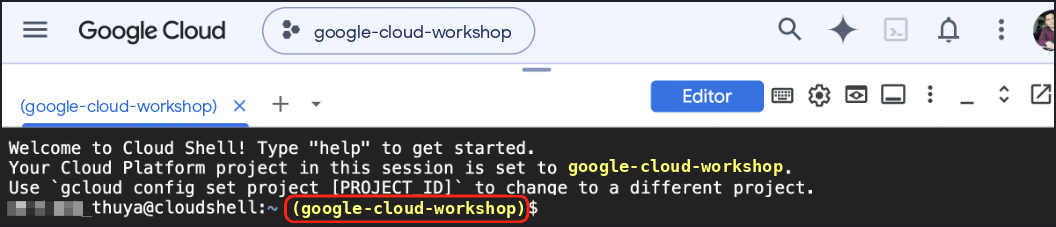
確認所選專案 ID 在 Cloud Shell 提示中以黃色醒目顯示:
啟用必要的 API
啟用 Agent Platform API,讓 ADK 代理叫用 Gemini 模型:
gcloud services enable aiplatform.googleapis.com
畫面會顯示類似以下的輸出:
Operation "operations/acat.p2-..." finished successfully.
建立 Python 虛擬環境並安裝 ADK
建立 ~/adk-agents 工作區,並啟用 Python 3.12 虛擬環境:
cd ~
mkdir -p adk-agents && cd ~/adk-agents

which uv >/dev/null 2>&1 || curl -LsSf https://astral.sh/uv/install.sh | sh
export PATH="$HOME/.local/bin:$PATH"

uv venv .venv --python 3.12
source .venv/bin/activate
確認終端機提示詞的開頭顯示 (.venv) 前置字元:

在啟動的虛擬環境中安裝 ADK 2:
uv pip install --no-cache "google-adk==2.14.0"
🔍 檢查成果
驗證已安裝的 adk CLI 版本:
adk --version
畫面會顯示類似以下的輸出:
adk, version 2.14.0
5. 建構旅遊規劃代理的架構
環境準備就緒後,請使用 ADK 內建的 adk create 指令,為 travel_planner 代理套件生成範例檔案。
生成入門套件
從 ~/adk-agents 目錄執行 adk create:
cd ~/adk-agents
adk create travel_planner
終端機顯示提示時,請選取下列設定選項 (如果首次執行時出現 Enable telemetry? [Y/n]: 提示,請按下 Enter 鍵,或輸入 n 並按下 Enter 鍵):
- 選擇根代理的模型:輸入
2選取gemini-3.8-flash(選項1會選取gemini-3.5-flash),然後按下 Enter 鍵。 - Choose a backend:輸入
2選取 Google Cloud Agent Platform 後端 (下方 CLI 選單中的選項2),然後按下 Enter 鍵。 - 輸入 Google Cloud 專案 ID:按下 Enter 鍵,確認括號中顯示的專案 ID。
- Enter Google Cloud region:輸入
global,然後按下 Enter 鍵。
adk create 會將 GOOGLE_GENAI_USE_ENTERPRISE=1、您的專案 ID 和 GOOGLE_CLOUD_LOCATION=global 寫入 travel_planner/.env,因此當您稍後更新 agent.py 時,憑證仍會保持設定狀態。
🔍 檢查成果
畫面會顯示類似以下的輸出:
Choose a model for the root agent:
1. gemini-3.5-flash
2. gemini-3.8-flash
3. Other models (fill later)
Choose model (1, 2, 3): 2
1. Google AI
2. Vertex AI
3. Login with Google
Choose a backend (1, 2, 3): 2

You need an existing Google Cloud account and project, check out this link for details:
https://google.github.io/adk-docs/get-started/quickstart/#gemini---google-cloud-vertex-ai

Enter Google Cloud project ID [google-cloud-workshop-4210]:
Enter Google Cloud region [us-central1]: global

Agent created in /home/your_username/adk-agents/travel_planner:
- .env
- .gitignore
- __init__.py
- agent.py

⚠️  WARNING: Secrets (like GOOGLE_API_KEY) are stored in .env.

Next steps:
- Chat with your agent in the terminal: adk run travel_planner
- Or in the browser: adk web .
- Have your coding agent evaluate and deploy it: uvx google-agents-cli setup
  (other install options: https://adk.dev/get-started/agents-cli/)
在 Cloud Shell 程式碼編輯器中開啟目前的資料夾,以便在終端機旁檢查及編輯檔案:
which cloudshell >/dev/null 2>&1 && cloudshell workspace ~/adk-agents || true
cd ~/adk-agents
source .venv/bin/activate
測試預設的單一代理
建構多代理工作流程前,請先啟動 ADK 開發 UI,觀察預設的單一代理如何回應廣泛的旅遊規劃查詢:
cd ~/adk-agents
adk web --allow_origins "*"
使用 Cloud Shell 網頁預覽功能,在瀏覽器中開啟開發 UI:
- 點選 Cloud Shell 右上方工具列的「網頁預覽」圖示。
- 選取「變更通訊埠」,輸入
8000,然後點選「變更並預覽」。
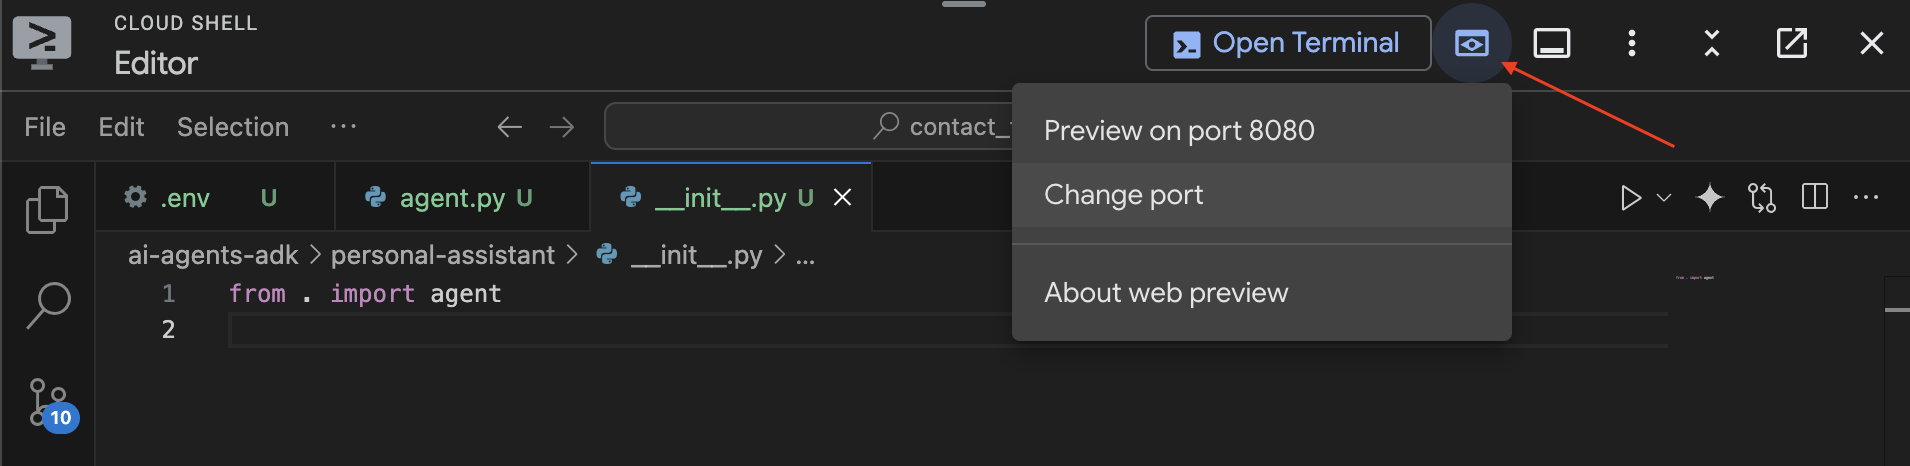
ADK 網頁版 UI 載入後,請傳送問候語,例如 "hello, what can you do?" 或 "Help me plan a trip to Japan":
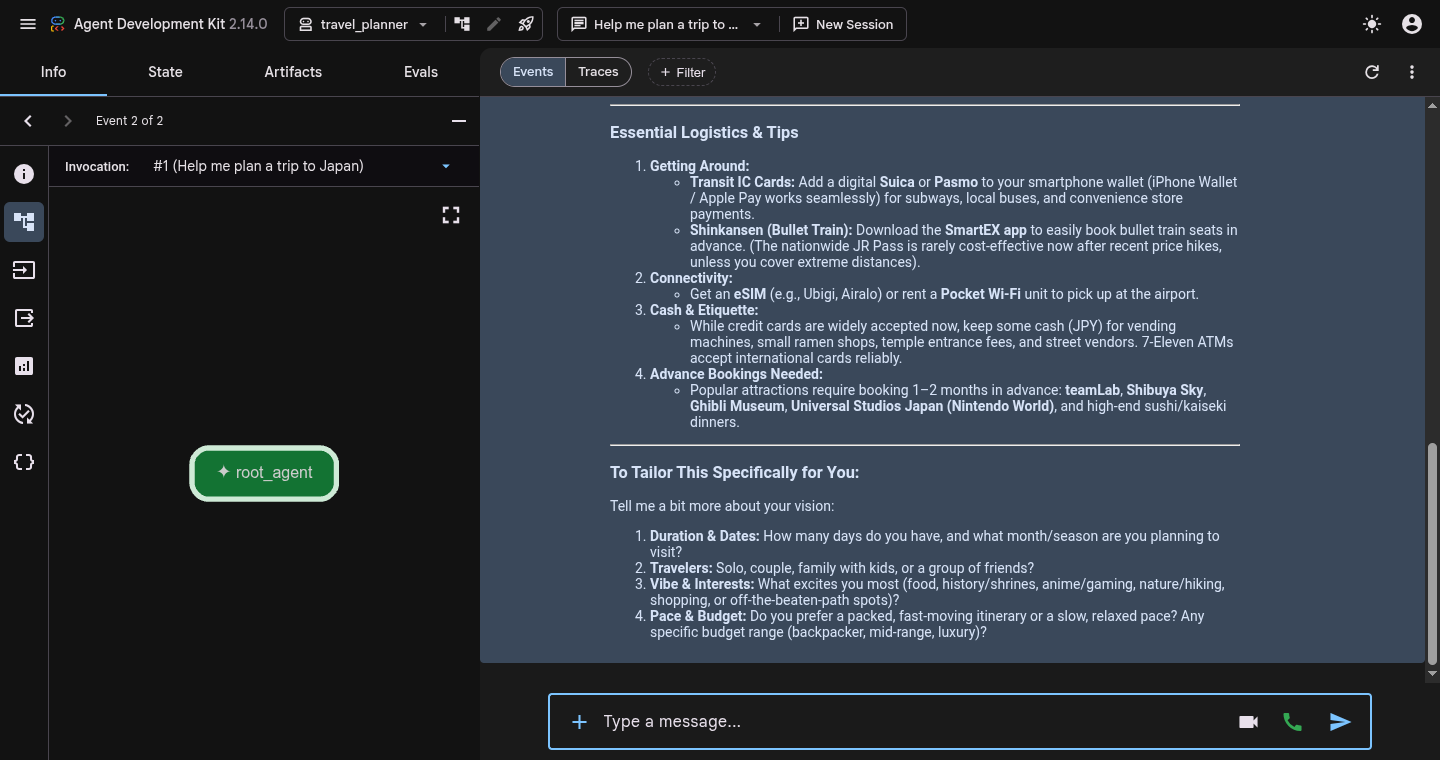
請注意,單一 root_agent 會直接在一次傳遞中回答,不需擷取結構化偏好設定、進行即時網路研究或驗證預算。
測試完成後,在 Cloud Shell 終端機按下 Ctrl + C,停止 adk web 伺服器並返回命令提示字元。
6. 建構 SequentialAgent 工作流程
現在,您將建構第一個自動化調度管理模式:由 SequentialAgent 驅動的線性工作流程。在依序管道中,子代理會嚴格按照順序執行。第一位專家會擷取結構化參數,並使用 output_key="user_preferences" 將參數儲存至共用工作階段狀態,第二位專家則會從共用狀態讀取 {user_preferences},以便擬定行程。
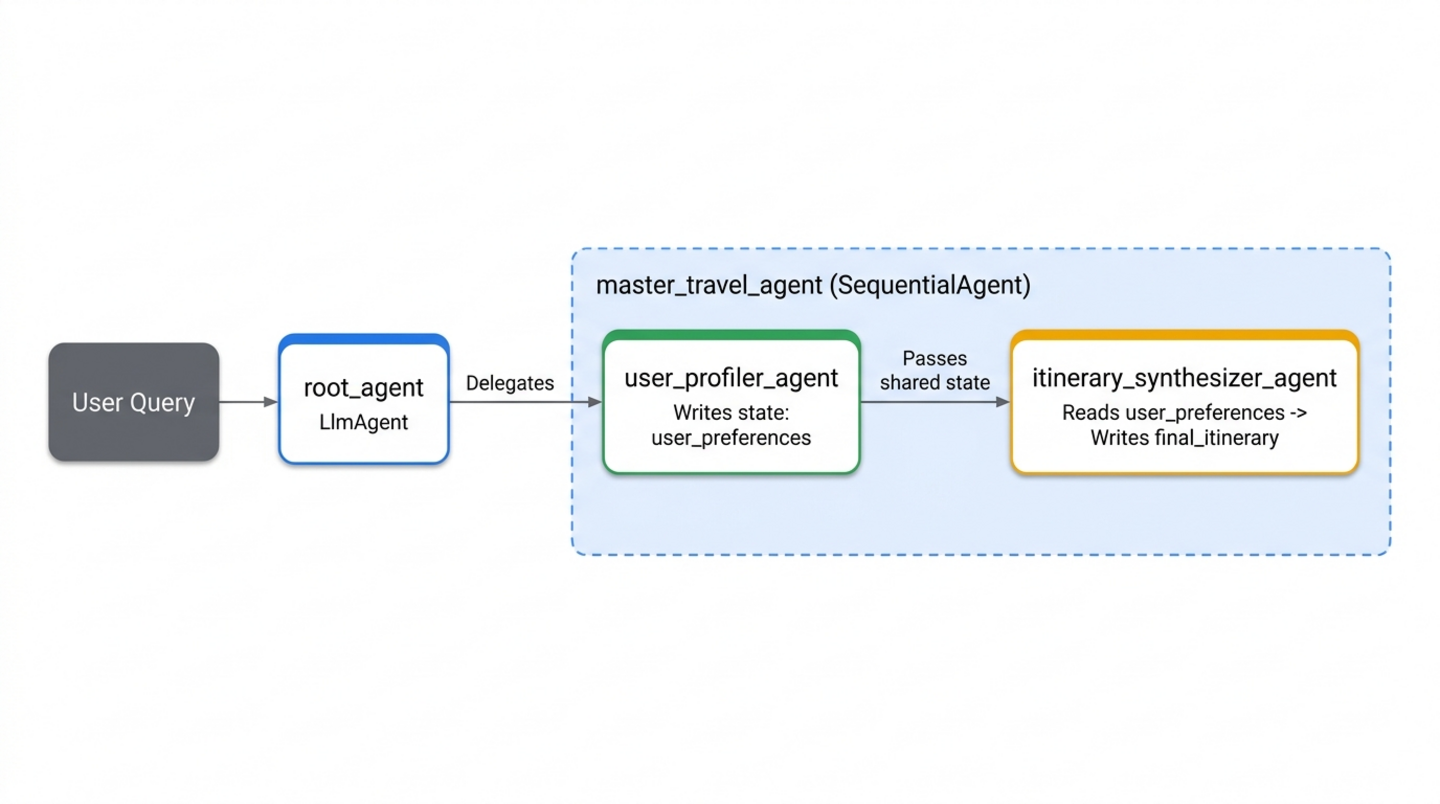
建立初始專家 (specialists.py)
在 travel_planner/ 中開啟名為 specialists.py 的新檔案:
cloudshell edit ~/adk-agents/travel_planner/specialists.py
將下列程式碼貼到 travel_planner/specialists.py 中,定義 user_profiler_agent 和 itinerary_synthesizer_agent (預先匯入 ToolContext 和 google_search,以便進行後續步驟):
from google.adk import Agent
from google.adk.tools import ToolContext, google_search

# --- Specialist 1: The User Profiler ---
user_profiler_agent = Agent(
    name="user_profiler_agent",
    description="Extracts travel preferences and constraints from user input.",
    instruction="""
        Extract destination, duration (default 1 day), budget, interests, and exclusions.
        Return a single JSON object with keys: "destination", "duration", "budget", "interests", "exclusions".
    """,
    output_key="user_preferences",  # Saves output to state['user_preferences']
)

# --- Specialist 2: The Synthesizer ---
itinerary_synthesizer_agent = Agent(
    name="itinerary_synthesizer_agent",
    description="Compiles preferences and research into a final Markdown itinerary.",
    instruction="""
        You are an elite Travel Concierge. Write a Markdown itinerary with an itemized USD and local currency cost breakdown using:
        - User Preferences: {user_preferences}
        - Activities (if available): {activity_recommendations?}
        - Restaurants (if available): {restaurant_recommendations?}
    """,
    output_key="final_itinerary",
)
連結依序管道 (workflows.py)
在 travel_planner/ 中建立名為 workflows.py 的新檔案,用於協調專家:
cloudshell edit ~/adk-agents/travel_planner/workflows.py
在 travel_planner/workflows.py 中新增下列 SequentialAgent 定義:
from google.adk.agents import SequentialAgent
from .specialists import (
    user_profiler_agent,
    itinerary_synthesizer_agent,
)

# 1. SEQUENTIAL PHASE: A linear two-step workflow
master_travel_agent = SequentialAgent(
    name="master_travel_agent",
    description="Orchestrates the end-to-end travel planning process for trip and itinerary requests.",
    sub_agents=[
        user_profiler_agent,         # Step 1: Extract constraints into user_preferences
        itinerary_synthesizer_agent,  # Step 2: Draft itinerary from user_preferences
    ],
)
將工作流程連結至 root_agent (agent.py)
現在,請將 master_travel_agent 註冊為 root_agent 的子代理。開啟 travel_planner/agent.py:
cloudshell edit ~/adk-agents/travel_planner/agent.py
將 travel_planner/agent.py 的內容替換為下列程式碼:
from google.adk import Agent
from .workflows import master_travel_agent

MODEL = "gemini-3.8-flash"

root_agent = Agent(
    model=MODEL,
    name="root_agent",
    description="A helpful assistant for user questions.",
    instruction=(
        "Greet the user and delegate any travel or trip planning requests "
        "to master_travel_agent."
    ),
    sub_agents=[master_travel_agent],
)
🔍 檢查成果
從終端機啟動 ADK 網頁 UI:
cd ~/adk-agents
adk web --allow_origins "*"
在通訊埠 8000 開啟網頁預覽,然後輸入提示:
Help me plan a trip to Kyoto
「Events」(事件) 檢視畫面中應會顯示類似下列執行流程的輸出內容:
1. root_agent -> calls transfer_to_agent(agent_name="master_travel_agent")
2. user_profiler_agent -> outputs JSON {"destination": "Kyoto", "duration": "1 day", ...} to state['user_preferences']
3. itinerary_synthesizer_agent -> reads {user_preferences} and outputs the formatted Markdown itinerary
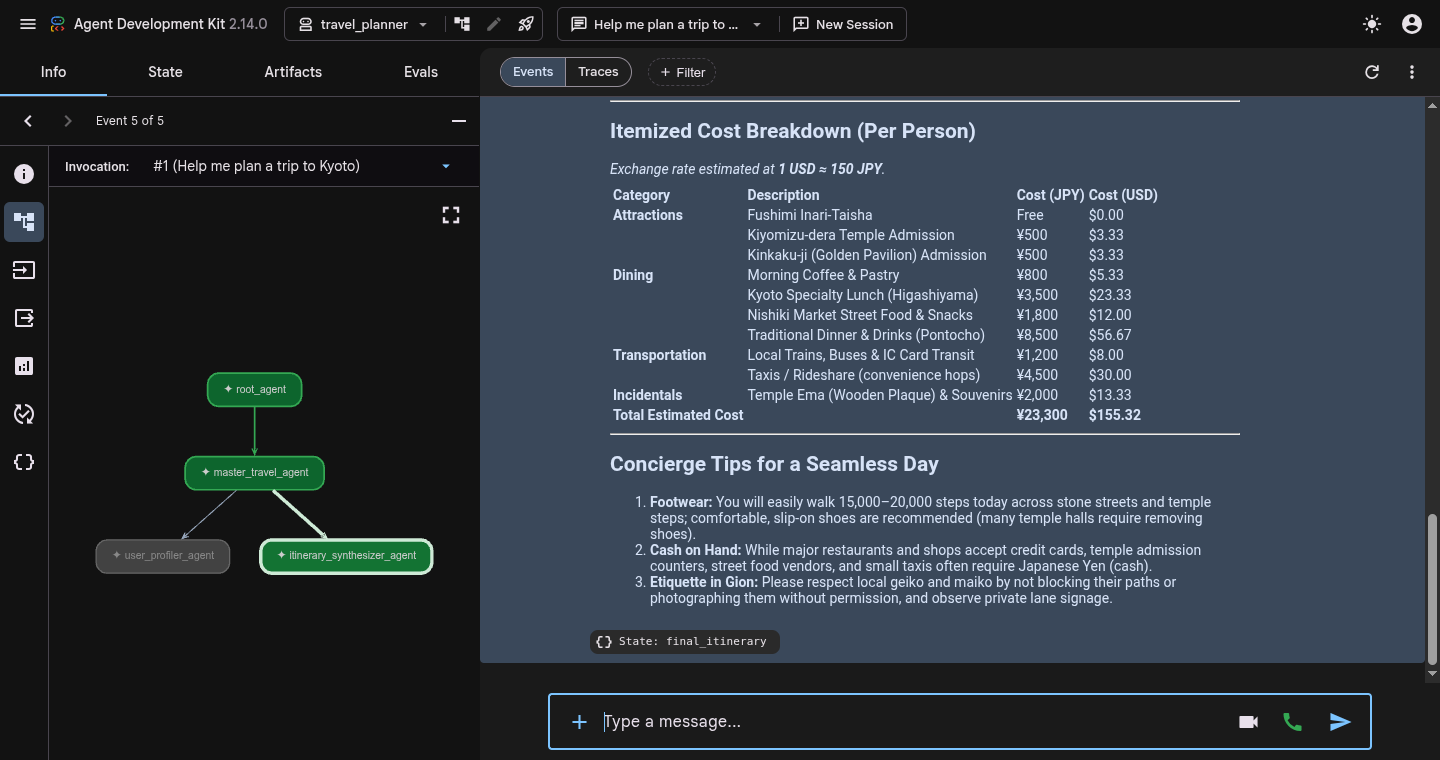
按一下任何事件徽章 (或 State: final_itinerary 晶片),然後切換至左側檢查器面板中的「State」分頁,確認 user_preferences 和 final_itinerary 都已填入工作階段狀態。
檢查完追蹤記錄後,請在終端機中按下 Ctrl + C 停止 adk web。
7. 使用 ParallelAgent 執行研究
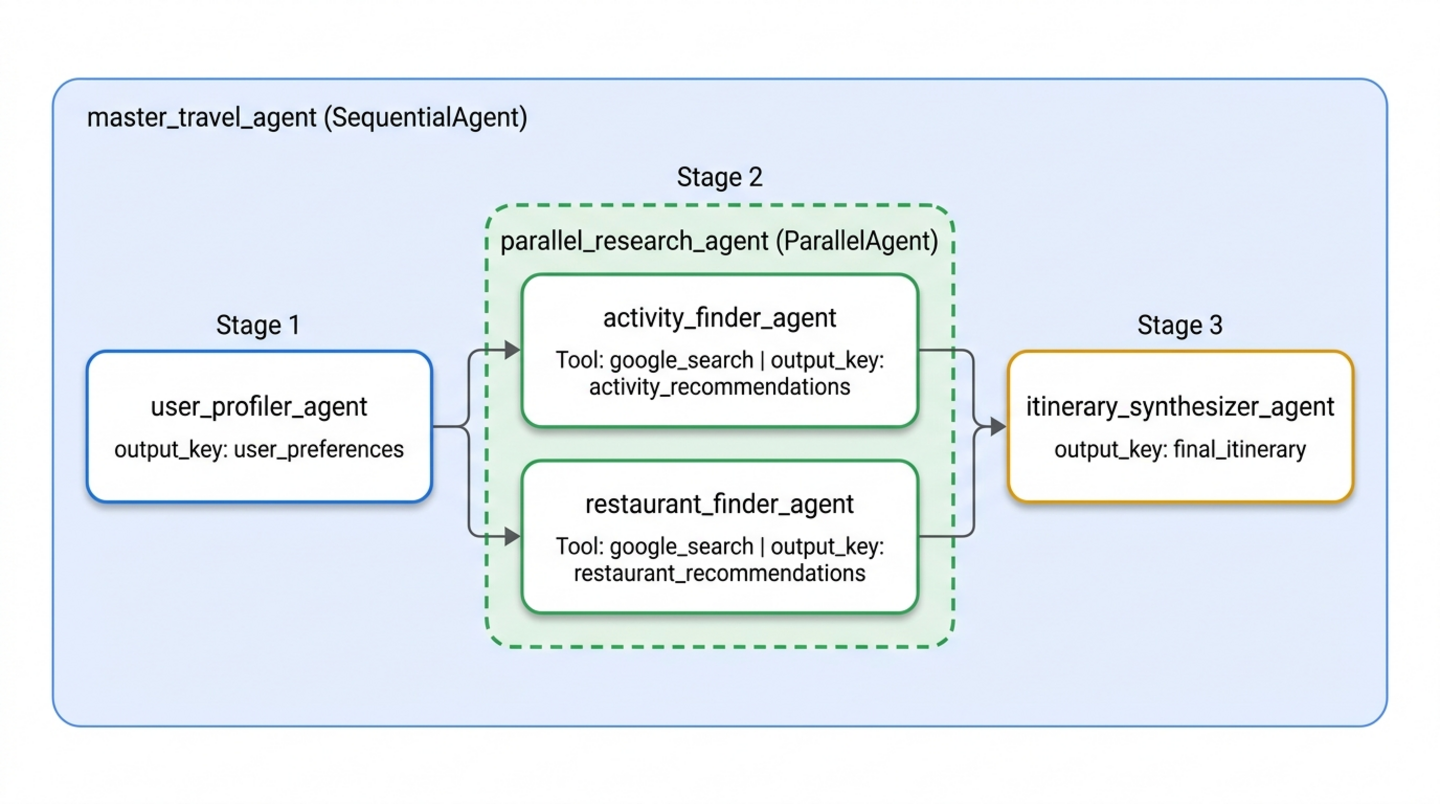
雖然依序工作流程能清楚區分偏好擷取和行程草稿,但建議仍完全仰賴模型的靜態訓練知識。你可以新增兩位研究員,並使用內建的 google_search 工具,根據即時網路資料建立行程:
activity_finder_agent:根據使用者的目的地和興趣,找出 3 個特定景點,並提供預估票價。restaurant_finder_agent:找出 3 間評價良好的當地餐廳,以及每人預估費用。
由於研究景點和研究餐廳互不相依,因此依序執行會浪費時間。您需要將這兩位研究員包裝在 ParallelAgent (parallel_research_agent) 中,讓 ADK 同時執行兩項 Google 搜尋工作流程,並在交給 itinerary_synthesizer_agent 之前填入 {activity_recommendations?} 和 {restaurant_recommendations?}。
將平行研究專家附加到 specialists.py
開啟 travel_planner/specialists.py:
cloudshell edit ~/adk-agents/travel_planner/specialists.py
將下列兩位 Google 搜尋專家附加到 travel_planner/specialists.py 的底部 (緊接在 itinerary_synthesizer_agent 下方):
# --- Specialist 3: The Activity Finder ---
activity_finder_agent = Agent(
    name="activity_finder_agent",
    description="Finds 3 attractions matching the user's destination and interests.",
    instruction="""
        Based on {user_preferences}, use google_search to find 3 specific attractions (including budget-friendly options).
        Return a JSON list with keys: "attraction_name", "estimated_cost_local", "estimated_cost_usd", "notes".
    """,
    tools=[google_search],
    output_key="activity_recommendations",
)

# --- Specialist 4: The Restaurant Finder ---
restaurant_finder_agent = Agent(
    name="restaurant_finder_agent",
    description="Finds 3 restaurants matching the destination and budget.",
    instruction="""
        Based on {user_preferences}, use google_search to find 3 highly-rated restaurants across price points.
        Return a JSON list with keys: "restaurant_name", "cuisine", "estimated_cost_local", "estimated_cost_usd".
    """,
    tools=[google_search],
    output_key="restaurant_recommendations",
)
將 ParallelAgent 插入 workflows.py
開啟 travel_planner/workflows.py:
cloudshell edit ~/adk-agents/travel_planner/workflows.py
更新 travel_planner/workflows.py,使用 ParallelAgent 定義 parallel_research_agent,並將其置於 user_profiler_agent 和 itinerary_synthesizer_agent 之間:
from google.adk.agents import ParallelAgent, SequentialAgent
from .specialists import (
    activity_finder_agent,
    itinerary_synthesizer_agent,
    restaurant_finder_agent,
    user_profiler_agent,
)

# Parallel branch: Run activity and restaurant research simultaneously
parallel_research_agent = ParallelAgent(
    name="parallel_research_agent",
    description="Runs activity and restaurant research concurrently.",
    sub_agents=[
        activity_finder_agent,
        restaurant_finder_agent,
    ],
)

# Master pipeline: Profile -> Parallel Research -> Synthesize
master_travel_agent = SequentialAgent(
    name="master_travel_agent",
    description="Orchestrates the end-to-end travel planning process for trip and itinerary requests.",
    sub_agents=[
        user_profiler_agent,          # Step 1: Extract constraints
        parallel_research_agent,      # Step 2: Research activities & restaurants in parallel
        itinerary_synthesizer_agent,  # Step 3: Synthesize into an itinerary
    ],
)
🔍 檢查成果
再次啟動 adk web,測試平行研究管道:
cd ~/adk-agents
adk web --allow_origins "*"
在網頁預覽 UI 中,傳送下列提示:
Help me plan a trip to Kyoto focused on historic temples and ramen
「Events」檢視畫面中應會顯示類似下列序列的輸出內容:
1. user_profiler_agent -> writes state['user_preferences']
2. parallel_research_agent -> fans out concurrently:
   - activity_finder_agent invokes google_search -> writes state['activity_recommendations']
   - restaurant_finder_agent invokes google_search -> writes state['restaurant_recommendations']
3. itinerary_synthesizer_agent -> merges all three state keys into state['final_itinerary']
- 「追蹤記錄」檢視畫面:按一下對話窗格頂端的「追蹤記錄」(位於「事件」旁),然後檢查您的回合。在
parallel_research_agent下方,您會看到activity_finder_agent和restaurant_finder_agent的時間軸重疊,與依序執行相比,網路研究的總延遲時間幾乎縮短了一半。 - 「State」分頁:按一下左側檢查器面板中的「State」分頁,即可檢查即時工作階段字典 (
user_preferences、activity_recommendations、restaurant_recommendations和final_itinerary)。
測試完成後,在終端機按下 Ctrl + C 鍵來停止 adk web。
8. 使用 LoopAgent 潤飾草稿
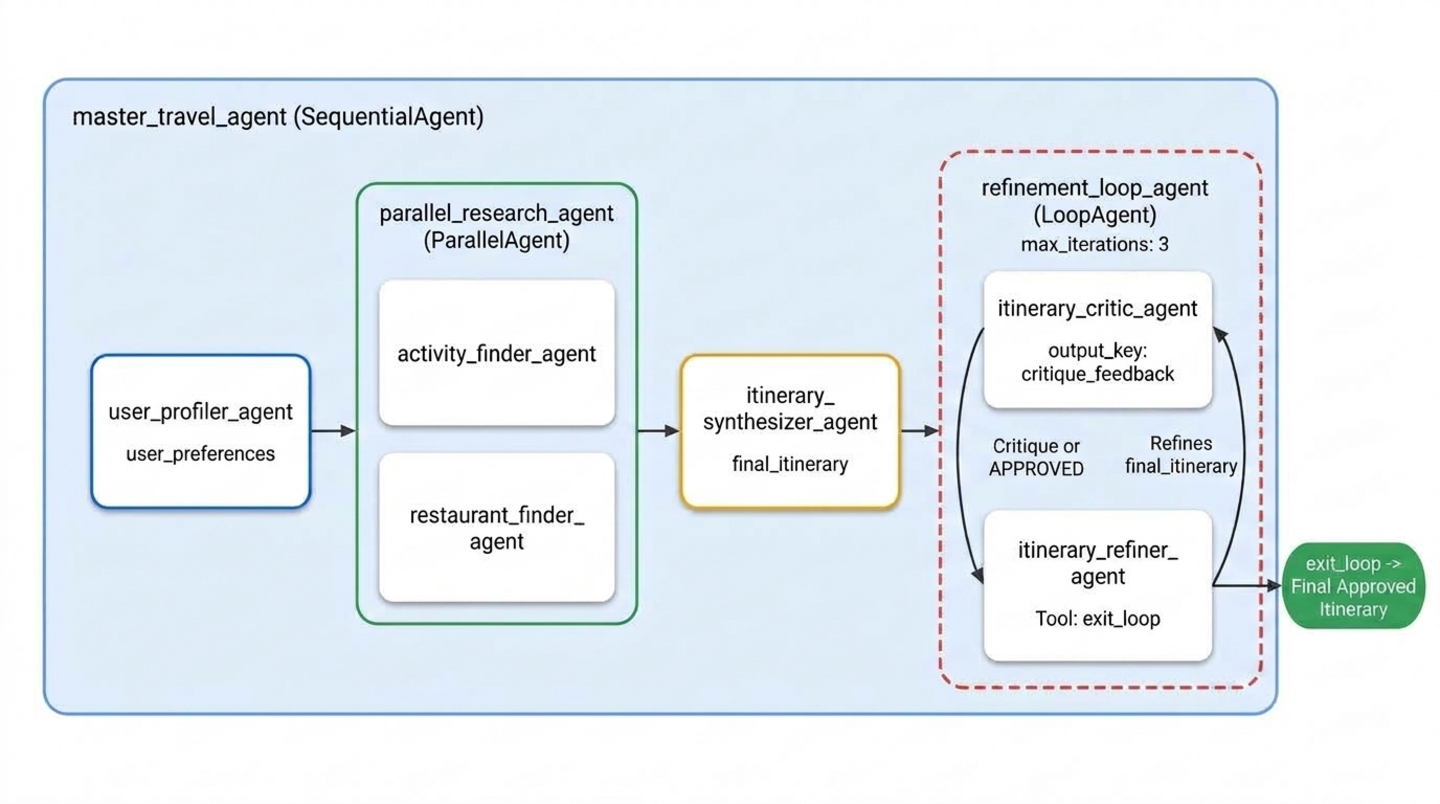
即使有即時搜尋結果,itinerary_synthesizer_agent 產生的初始草稿仍可能超出使用者的總預算,或不小心納入排除的類別 (例如使用者要求排除現代藝術畫廊,但草稿仍包含這類地點)。
為確保符合限制,您將使用 LoopAgent 在管道結尾新增製作者-檢查者修正迴圈:
itinerary_critic_agent(檢查工具):根據{user_preferences}稽核{final_itinerary}。它會加總預估成本、檢查每項負面限制,然後將特定修訂指示寫入critique_feedback,或以確切詞組"APPROVED"回應。itinerary_refiner_agent(創造者/退出者):讀音為{critique_feedback}。如果評論等於"APPROVED",則會叫用exit_loop工具 (tool_context.actions.escalate = True),立即跳出LoopAgent。否則,系統會修改{final_itinerary}來修正標記的問題,並覆寫final_itinerary,以便在下一次執行時使用。
將 exit_loop、Critic 和 Refiner 附加至 specialists.py
開啟 travel_planner/specialists.py:
cloudshell edit ~/adk-agents/travel_planner/specialists.py
將 exit_loop 工具 (ToolContext)、itinerary_critic_agent 和 itinerary_refiner_agent 附加到 travel_planner/specialists.py 的底部:
def exit_loop(tool_context: ToolContext) -> dict:
    """Call ONLY when the critique is APPROVED to exit the refinement loop."""
    print(f"[Tool Call] exit_loop triggered by {tool_context.agent_name}")
    tool_context.actions.escalate = True
    return {"status": "approved", "message": "Itinerary approved. Exiting refinement loop."}


# --- Specialist 5: The Budget & Constraint Critic (Inside LoopAgent) ---
itinerary_critic_agent = Agent(
    name="itinerary_critic_agent",
    include_contents="none",
    description="Audits the itinerary draft against budget and negative constraints.",
    instruction="""
        Audit Current Itinerary ({final_itinerary}) against User Preferences ({user_preferences}).
        Verify that the USD total stays within the user's budget and no excluded venue types appear.
        If all checks pass, respond EXACTLY with the single word "APPROVED".
        Otherwise, output 1-2 concise revision instructions explaining what to swap or adjust.
    """,
    output_key="critique_feedback",
)

# --- Specialist 6: The Itinerary Refiner / Exiter (Inside LoopAgent) ---
itinerary_refiner_agent = Agent(
    name="itinerary_refiner_agent",
    include_contents="none",
    description="Refines the itinerary from critique feedback, or calls exit_loop when APPROVED.",
    instruction="""
        Review Auditor Critique ({critique_feedback}) for Current Itinerary ({final_itinerary}).
        If the critique is EXACTLY "APPROVED", call `exit_loop` immediately and return the itinerary unchanged.
        Otherwise, revise the draft using {activity_recommendations} and {restaurant_recommendations}
        so all USD budget and exclusion rules pass, and output ONLY the updated Markdown itinerary.
    """,
    tools=[exit_loop],
    output_key="final_itinerary",
)
為「workflows.py」新增「LoopAgent」。
開啟 travel_planner/workflows.py:
cloudshell edit ~/adk-agents/travel_planner/workflows.py
更新 travel_planner/workflows.py,將 itinerary_critic_agent 和 itinerary_refiner_agent 包裝在 LoopAgent (max_iterations=3) 中,並附加為 master_travel_agent 的第四個階段:
from google.adk.agents import LoopAgent, ParallelAgent, SequentialAgent
from .specialists import (
    activity_finder_agent,
    itinerary_critic_agent,
    itinerary_refiner_agent,
    itinerary_synthesizer_agent,
    restaurant_finder_agent,
    user_profiler_agent,
)

# Stage 2: Parallel research branch
parallel_research_agent = ParallelAgent(
    name="parallel_research_agent",
    description="Runs activity and restaurant research concurrently.",
    sub_agents=[
        activity_finder_agent,
        restaurant_finder_agent,
    ],
)

# Stage 4: Iterative Maker-Checker refinement loop
refinement_loop_agent = LoopAgent(
    name="refinement_loop_agent",
    description="Iteratively audits and refines the itinerary until constraints and budget are approved.",
    sub_agents=[
        itinerary_critic_agent,
        itinerary_refiner_agent,
    ],
    max_iterations=3,
)

# Master pipeline: Profile -> Parallel Research -> Synthesize -> Refinement Loop
master_travel_agent = SequentialAgent(
    name="master_travel_agent",
    description="Orchestrates the end-to-end travel planning process for trip and itinerary requests.",
    sub_agents=[
        user_profiler_agent,          # Stage 1: Extract constraints
        parallel_research_agent,      # Stage 2: Research activities & restaurants in parallel
        itinerary_synthesizer_agent,  # Stage 3: Draft initial itinerary
        refinement_loop_agent,        # Stage 4: Audit and refine until approved
    ],
)
🔍 檢查成果
啟動 adk web,測試完整的多代理工作流程:
cd ~/adk-agents
adk web --allow_origins "*"
在通訊埠 8000 開啟網頁預覽 UI,啟動「New Session」,然後使用下列京都多重限制提示詞測試完整系統:
Design a full-day itinerary for Kyoto with a total budget of $100. My main interests are historical landmarks, temples, and authentic local cuisine. Please do not include any modern art museums or galleries.
「事件」檢視畫面和終端機記錄中,應會顯示類似下列執行序列的輸出內容:
1. user_profiler_agent -> writes JSON with destination="Kyoto", budget="$100", exclusions=["modern art museums", "galleries"]
2. parallel_research_agent -> runs activity_finder_agent and restaurant_finder_agent in parallel
3. itinerary_synthesizer_agent -> produces initial draft in state['final_itinerary']
4. refinement_loop_agent:
   - itinerary_critic_agent -> audits USD budget and exclusions -> outputs "APPROVED" (or revision notes)
   - itinerary_refiner_agent -> triggers [Tool Call] exit_loop triggered by itinerary_refiner_agent and outputs the approved itinerary
- 事件檢視畫面:按一下
itinerary_critic_agent或itinerary_refiner_agent中的任何事件方塊,即可在左側的「資訊」分頁中檢查其酬載。當itinerary_refiner_agent叫用exit_loop時,請檢查事件,查看actions.escalate: true,這個信號會指示LoopAgent在達到max_iterations=3之前停止疊代。 - 「State」分頁:按一下「State」分頁,即可查看
state['critique_feedback']和state['final_itinerary']在各階段的更新情形。如果初始草稿超過$100 USD,critique_feedback會保留稽核員在第 1 輪的修訂指示,然後final_itinerary會更新為成本較低的替代方案,critique_feedback則會在第 2 輪變更為"APPROVED"。
測試完成後,在終端機按下 Ctrl + C 鍵來停止 adk web。
9. 清除
刪除本機專案檔案
如要從 Cloud Shell 主資料夾中移除 adk-agents 專案目錄和虛擬環境,請執行下列指令:
cd ~
rm -rf ~/adk-agents
停用 Agent Platform API
如果專案不再需要啟用 Agent Platform API,請使用 gcloud 停用:
gcloud services disable aiplatform.googleapis.com --quiet
刪除整個 Google Cloud 專案 (選用)
PROJECT_ID=$(gcloud config get-value project)
gcloud projects delete "$PROJECT_ID" --quiet
🔍 檢查成果
確認 ~/adk-agents 已移除:
test ! -d ~/adk-agents && echo "Workspace ~/adk-agents removed"
畫面會顯示類似以下的輸出:
Workspace ~/adk-agents removed
10. 恭喜
恭喜!您已使用 Google Agent Development Kit (ADK) 建構階層式多代理系統,可協調六個專用代理組成的團隊,執行循序、平行和疊代迴圈工作流程。
完成的目標
- 透過共用工作階段狀態 (
output_key和{state_variable}範本注入),在代理之間進行結構化通訊 - 使用
SequentialAgent建構確定性的逐步管道 - 使用
ParallelAgent同時執行獨立的 Google 搜尋研究代理 - 使用
LoopAgent和tool_context.actions.escalate = True實作自動化製作者-檢查者驗證迴圈
後續步驟
- 繼續閱讀本系列第 4 部分:使用 ADK 建構 AI 代理:自動調度管理圖表工作流程,瞭解如何使用 ADK 2 的統合
Workflow、JoinNode和確定性Event(route=...)週期,重新建構這個旅遊規劃工具 - 閱讀官方 ADK 工作流程代理說明文件
- 探索 ADK 中的多代理系統
- 加入 GEAR (Gemini Enterprise Agent Ready) 計畫和 Get Certified 計畫,參加實作工作坊和學習課程