
1. 簡介
在現今快速發展的數位世界中,時間就是金錢。YouTube 擁有豐富的資訊,但長片可能需要投入大量時間。這時 YouTube 摘要工具就展現用處了。這些工具可將長篇影片濃縮成簡明扼要的摘要,讓使用者不必觀看完整影片,就能快速掌握核心內容。這項功能特別適合學生、專業人士,以及想從線上影片內容有效擷取重要資訊的使用者。YouTube 摘要工具可協助使用者在最短時間內,盡可能吸收最多資訊和知識。
完成本實驗室後,您將擁有可從 YouTube 影片生成摘要的網頁應用程式。您也會進一步瞭解如何使用 Gemini API 和 Google Gen AI SDK,並整合兩者來建構網頁應用程式。
您的網頁應用程式會如下所示:

你只需要提供 YouTube 影片連結,Gemini 就會完成後續步驟。
2. 事前準備
本程式碼研究室假設您已擁有啟用計費功能的 Google Cloud 專案。如果尚未取得,請按照下列指示操作。
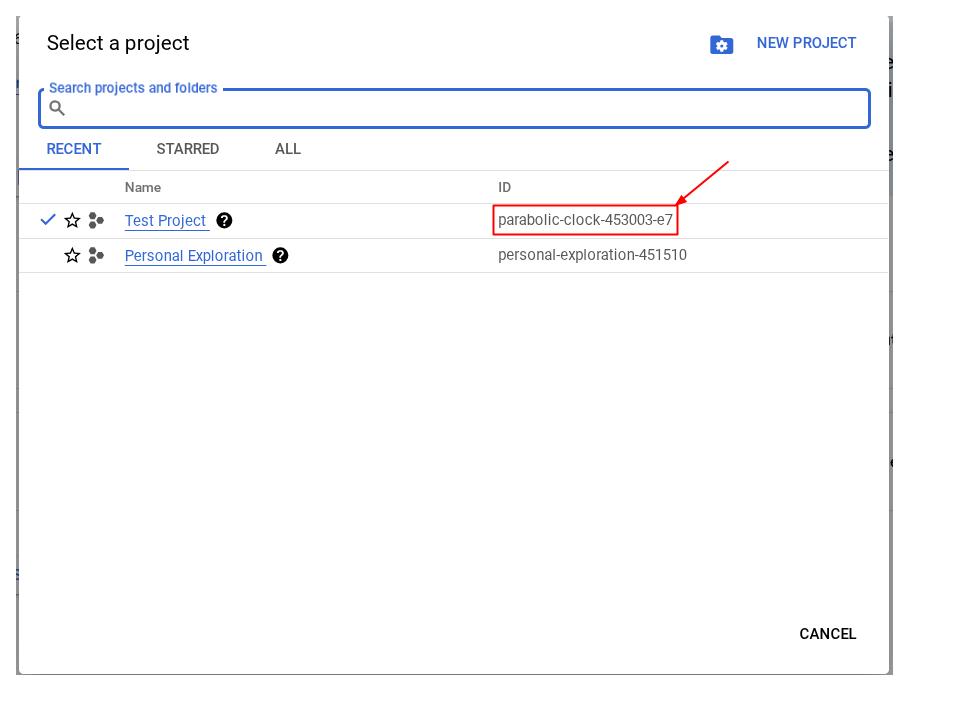
- 在 Google Cloud 控制台的專案選取器頁面中,選取或建立 Google Cloud 專案。
- 確保您的 Google Cloud 雲端專案有啟用計費服務。瞭解如何檢查專案是否已啟用計費功能。
- 您將使用 Cloud Shell,這是 Google Cloud 中執行的指令列環境。如要存取,請按一下 Google Cloud 控制台頂端的「啟用 Cloud Shell」。

- 連至 Cloud Shell 後,請使用下列指令確認驗證已完成,專案也已設為獲派的專案 ID:
gcloud auth list
- 在 Cloud Shell 中執行下列指令,確認 gcloud 指令已瞭解您的專案。
gcloud config list project
- 如果未設定專案,請使用下列指令來設定:
gcloud config set project <YOUR_PROJECT_ID>
或者,您也可以在控制台中查看 PROJECT_ID id

按一下該專案,右側就會顯示所有專案和專案 ID
- 請確認已啟用下列 API,並使用下列指令進行設定:
- Vertex AI API
- Cloud Run Admin API
- Cloud Build API
- Cloud Resource Manager API
gcloud services enable aiplatform.googleapis.com \
                           run.googleapis.com \
                           cloudbuild.googleapis.com \
                           cloudresourcemanager.googleapis.com
除了使用 gcloud 指令,您也可以透過這個連結前往控制台。如要瞭解 gcloud 指令和用法,請參閱說明文件。
必要條件
- 能夠讀取及編寫 Python 和 HTML 程式碼
- 熟悉 Gemini API 和 Google Gen AI SDK
- 瞭解基本全端開發作業
課程內容
- 如何使用 Flask API 程式庫建立 Gemini 支援的後端 API
- 如何建構生成式 AI 應用程式,並將前端和後端連結在一起
- 如何在 Cloud Run 部署開發的生成式 AI 應用程式
軟硬體需求
- 可正常運作的電腦和穩定的 Wi-Fi
- 好奇心
3. 在 Cloud Run 上建立 Python Flask 應用程式
我們將先使用 Cloud Shell 中自動產生的範本,在 Cloud Run 上建立 Python Flask 應用程式。
前往 Cloud Shell 終端機,然後點按「開啟編輯器」按鈕。
請確認 Cloud Shell 編輯器的左下角 (狀態列) 已設定 Cloud Code 專案,如下圖所示,且已設為啟用計費功能的有效 Google Cloud 專案。如果出現提示訊息,請點選「授權」。
注意:Cloud Shell 編輯器初始化並載入所有必要外掛程式後,可能需要一段時間,
Cloud Code - Sign In
按鈕,請耐心等候

按一下狀態列上的現用專案,等待 Cloud Code 快顯視窗開啟。在彈出式視窗中選取「New Application」(新應用程式)。
在應用程式清單中,選擇「Cloud Run Application」:

在第 2/2 頁,選取 Python Flask 範本:

提供您想要的專案名稱 (例如「amazing-gemini-app」),然後按一下「OK」:

系統會開啟您剛設定的新專案範本。

使用 Google Cloud Shell 在 Cloud Run 上建立 Python Flask 應用程式就是這麼簡單。
4. 建構前端
如先前所述,最終的網頁應用程式會如下所示:
當中包含輸入欄位,可供使用者輸入 YouTube 連結;另有選項可選擇其他模型系列、文字區域可視需要提供額外提示詞,以及提交表單的按鈕。
如果您喜歡挑戰,歡迎自行設計表單或編輯 CSS 屬性。您也可以複製下方的程式碼,並取代 templates 資料夾中 index.html 檔案的內容。
<!DOCTYPE html>
<html>
 <head>
   <title>YouTube Summarizer</title>
   <style>
     body {
       font-family: sans-serif;
       display: flex;
       justify-content: center;
       align-items: center;
       min-height: 100vh;
       background-color: #f4f4f4;
     }
     .container {
       background-color: white;
       padding: 30px;
       border-radius: 8px;
       box-shadow: 0 2px 5px rgba(0, 0, 0, 0.1);
       text-align: center;
     }
     h2 {
       text-align: center;
       margin-bottom: 20px;
     }
     input[type="text"], textarea, select {
       width: 100%;
       padding: 10px;
       margin-bottom: 15px;
       border: 1px solid #ccc;
       border-radius: 4px;
       box-sizing: border-box;
     }
     button {
       background-color: #4CAF50;
       color: white;
       padding: 12px 20px;
       border: none;
       border-radius: 4px;
       cursor: pointer;
     }
   </style>
 </head>
 <body>
   <div class="container">
     <h2>YouTube Summarizer</h2>
     <form action="/summarize" target="_blank" method="post">
       <input type="text" name="youtube_link" placeholder="Enter YouTube Link">
       <select name="model">
         <option value="gemini-2.0-flash-001">Gemini 2.0 Flash</option>
       </select>
       <textarea name="additional_prompt" placeholder="Write your additional prompt here. For example: 'explain to me like I am five years old'"></textarea>
       <button type="submit">Summarize</button>
     </form>
   </div>
 </body>
</html>
如要測試您是否已正確完成這個步驟,請在 app.py 上按一下滑鼠右鍵,然後選擇「在終端機中執行 Python 檔案」。

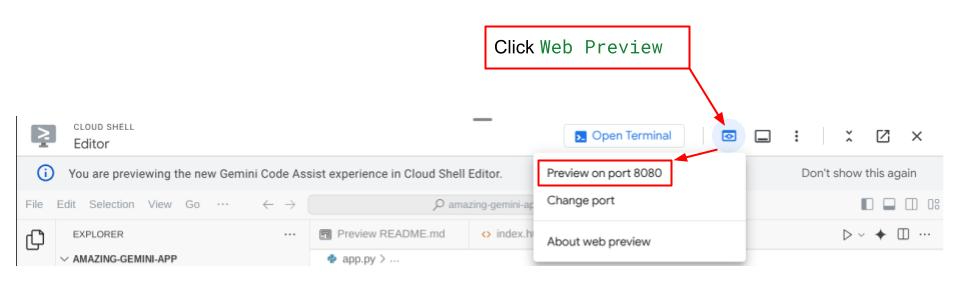
如果一切順利,您應該可以點選 Cloud Editor 右上方的 Web Preview 按鈕,然後選取 Preview on port 8080,存取網頁應用程式。
5. 建構後端
設定前端後,您需要建立後端服務,使用 Gemini 模型摘要使用者提供的 YouTube 影片。請注意,您將覆寫 app.py 來完成這項工作。
變更程式碼前,您需要建立虛擬環境,並安裝執行 Gemini 元件所需的程式庫。
首先,您需要將 Google Gen AI SDK 程式庫新增至 requirements.txt 檔案。內容應該會類似這樣:
Flask==2.3.3
requests==2.31.0
debugpy # Required for debugging.
google-genai==1.2.0
其次,您需要建立虛擬環境,並從 requirements.txt 安裝套件,才能順利執行後端程式碼。
- 按一下左上角的三橫線,然後依序選擇「Terminal」>「New Terminal」 ( 或者,您也可以按
Ctrl + Shift + C開啟新的終端機)
 2. 在終端機中輸入指令來建立虛擬環境,並等待安裝完成
python -m venv venv
source venv/bin/activate
pip install -r requirements.txt
您也可以自行使用 Flask API 建立 Gemini 端點。app.py 中的程式碼應與下方提供的程式碼類似。
import os

from flask import Flask, render_template, request
from google import genai
from google.genai import types

app = Flask(__name__)

PROJECT_ID = "REPLACE_WITH_YOUR_PROJECT_ID"

client = genai.Client(
   vertexai=True,
   project=PROJECT_ID,
   location="us-central1",
)

# Define the home page route.
@app.route('/', methods=['GET'])
def index():
   '''
   Renders the home page.
   Returns:The rendered template.
   '''
   return render_template('index.html')


def generate(youtube_link, model, additional_prompt):

   # Prepare youtube video using the provided link
   youtube_video = types.Part.from_uri(
       file_uri=youtube_link,
       mime_type="video/*",
   )

   # If addtional prompt is not provided, just append a space
   if not additional_prompt:
       additional_prompt = " "

   # Prepare content to send to the model
   contents = [
       youtube_video,
       types.Part.from_text(text="""Provide a summary of the video."""),
       additional_prompt,
   ]

   # Define content configuration
   generate_content_config = types.GenerateContentConfig(
       temperature = 1,
       top_p = 0.95,
       max_output_tokens = 8192,
       response_modalities = ["TEXT"],
   )

   return client.models.generate_content(
       model = model,
       contents = contents,
       config = generate_content_config,
   ).text

@app.route('/summarize', methods=['GET', 'POST'])
def summarize():
   '''
   Summarize the user provided YouTube video.
   Returns: Summary.
   '''

   # If the request is a POST request, process the form data.
   if request.method == 'POST':
       youtube_link = request.form['youtube_link']
       model = request.form['model']
       additional_prompt = request.form['additional_prompt']

       # Generate the summary.
       try:
           summary = generate(youtube_link, model, additional_prompt)
           return summary

       except ValueError as e:
           raise e

   # If the request is a GET request, redirect to the home page.
   else:
       return redirect('/')


if __name__ == '__main__':
   server_port = os.environ.get('PORT', '8080')
   app.run(debug=False, port=server_port, host='0.0.0.0')
基本上,這段程式碼會執行下列作業:
匯入必要程式庫:
- Flask:用於建立網頁應用程式。
- os:用於存取環境變數。
- google.genai:用於與 Google 的 Gemini AI 互動。
- google.genai.types:用於定義 Gemini 的資料結構。
初始化 Gemini 用戶端:
- 這項設定會建立與 Google Vertex AI 的連線,讓應用程式使用 Gemini AI 模型。請務必將「REPLACE_WITH_YOUR_PROJECT_ID」替換為您的專案 ID。
定義 generate 函式:
- 這個函式會將 YouTube 影片連結、Gemini 模型 ID 和額外提示做為輸入內容。接著,系統會將影片和提示詞傳送給 Gemini,並傳回生成的摘要文字。
定義首頁路徑 (/):
- 這個函式會算繪 index.html 範本,顯示供使用者輸入 YouTube 連結的表單。
定義摘要路徑 (/summarize):
- 這個函式會處理提交的表單內容。這個函式會從表單擷取 YouTube 連結、模型和提示詞,呼叫生成函式來取得摘要,然後在 result.html 範本中顯示摘要。
執行應用程式:
- 這個檔案會從環境變數擷取伺服器通訊埠,並啟動 Flask 網路伺服器。
您可以從終端機執行 app.py 來測試程式碼。與測試前端相同的方法。在「app.py」上按一下滑鼠右鍵,然後選擇「Run Python File in Terminal」。
請繼續測試應用程式。現在應該可以正常運作。
6. 部署網頁應用程式
現在您已擁有可運作的 GenAI 應用程式,接下來請將應用程式部署至 Cloud Run,與親友和同事分享。
前往 Cloud Shell 終端機,確認目前專案已設為有效專案。如果不是,請使用 gcloud configure 指令設定專案 ID:
gcloud config set project [PROJECT_ID]
請記得將 [PROJECT_ID] 替換為您自己的專案 ID。確認終端機中的目前工作目錄為 **amazing-gemini-app**,然後依序輸入下列指令:
gcloud run deploy --source .
系統會提示您輸入服務名稱,假設為「youtube-summarizer」。選擇「us-central1」地區的對應編號。系統詢問是否要允許未經驗證的叫用要求時,請說「y」。請注意,我們在這裡允許未經驗證的存取要求,因為這是示範應用程式。建議您為企業和正式版應用程式使用適當的驗證方式。
部署完成後,您會取得類似下方的連結:
https://amazing-gemini-app-*******.a.run.app/
請繼續在無痕視窗或行動裝置上使用應用程式。這項功能應該已經上線。
7. 競賽項目
現在正是大顯身手的好時機。您是否具備變更程式碼的能力,以便直接從電腦上傳影片?
8. 清理
如要避免系統向您的 Google Cloud 帳戶收取本程式碼研究室所用資源的費用,請按照下列步驟操作: