
1. Introduction
In this codelab, you will build an application in the form of a chat web interface, in which you can communicate with it, upload some documents or images and discuss them. The application itself is separated into 2 services: frontend and backend; enabling you to build a quick prototype and try what it feels like, and also understand how the API contract looks to integrate both of them.
Through the codelab, you will employ a step by step approach as follows:
- Prepare your Google Cloud project and Enable all the required API on it
- Build the frontend service - chat interface using Gradio library
- Build the backend service - HTTP server using FastAPI which will reformat the incoming data to the Gemini SDK standard and enable communication with the Gemini API
- Manage environment variables and setup required files needed to deploy the application to the Cloud Run
- Deploy the application to the Cloud Run
Architecture Overview

Prerequisites
- Comfortable working with Gemini API and Google Gen AI SDK
- An understanding of basic full-stack architecture using HTTP service
What you'll learn
- How to use Gemini SDK to submit text and other data type (multimodal) and generate text response
- How to structure chat history into Gemini SDK to maintain conversation context
- Frontend web prototyping with Gradio
- Backend service development with FastAPI and Pydantic
- Manage environment variables in YAML file with Pydantic-settings
- Deploy application to Cloud Run using Dockerfile and provide environment variables with YAML file
What you'll need
- Chrome web browser
- A Gmail account
- A Cloud Project with billing enabled
This codelab, designed for developers of all levels (including beginners), uses Python in its sample application. However, Python knowledge isn't required for understanding the concepts presented.
2. Before you begin
Setup Cloud Project in Cloud Shell Editor
This codelab assumes that you already have a Google Cloud project with billing enabled. If you do not have it yet, you can follow the instructions below to get started.
- 2In the Google Cloud Console, on the project selector page, select or create a Google Cloud project.
- Make sure that billing is enabled for your Cloud project. Learn how to check if billing is enabled on a project .
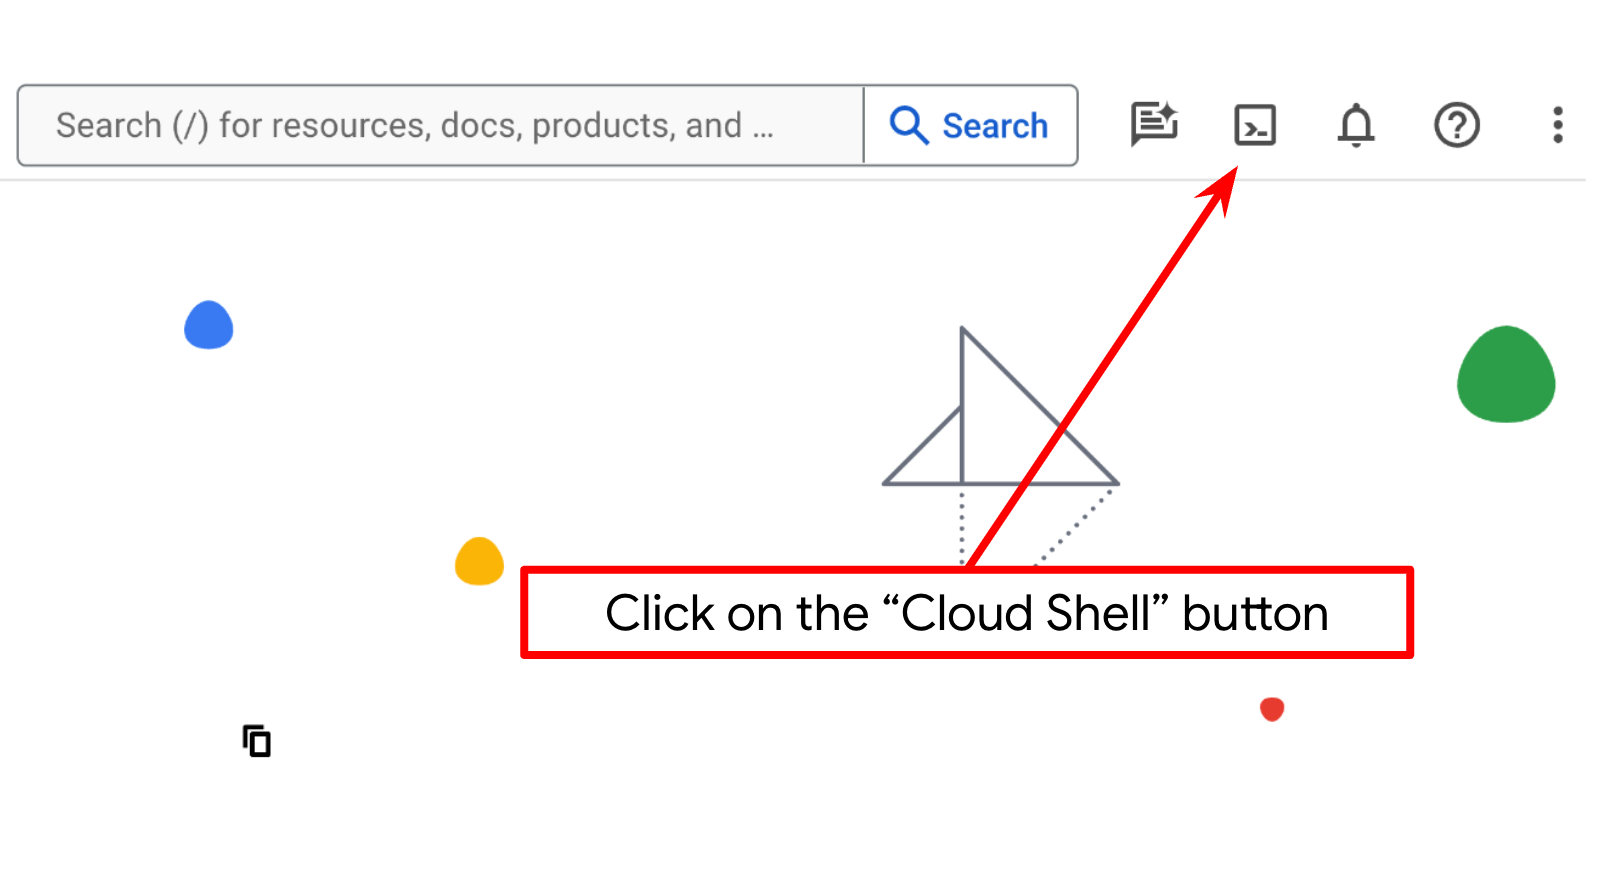
- You'll use Cloud Shell, a command-line environment running in Google Cloud that comes preloaded with bq. Click Activate Cloud Shell at the top of the Google Cloud console.
- Once connected to Cloud Shell, you check that you're already authenticated and that the project is set to your project ID using the following command:
gcloud auth list
- Run the following command in Cloud Shell to confirm that the gcloud command knows about your project.
gcloud config list project
- If your project is not set, use the following command to set it:
gcloud config set project <YOUR_PROJECT_ID>
Alternatively, you also can see the PROJECT_ID id in the console

Click it and you will all of your project and the project ID on the right side

- Enable the required APIs via the command shown below. This could take a few minutes, so please be patient.
gcloud services enable aiplatform.googleapis.com \
                           run.googleapis.com \
                           cloudbuild.googleapis.com \
                           cloudresourcemanager.googleapis.com
On successful execution of the command, you should see a message similar to the one shown below:
Operation "operations/..." finished successfully.
The alternative to the gcloud command is through the console by searching for each product or using this link.
If any API is missed, you can always enable it during the course of the implementation.
Refer documentation for gcloud commands and usage.
Setup Application Working Directory
- Click on the Open Editor button, this will open a Cloud Shell Editor, we can write our code here

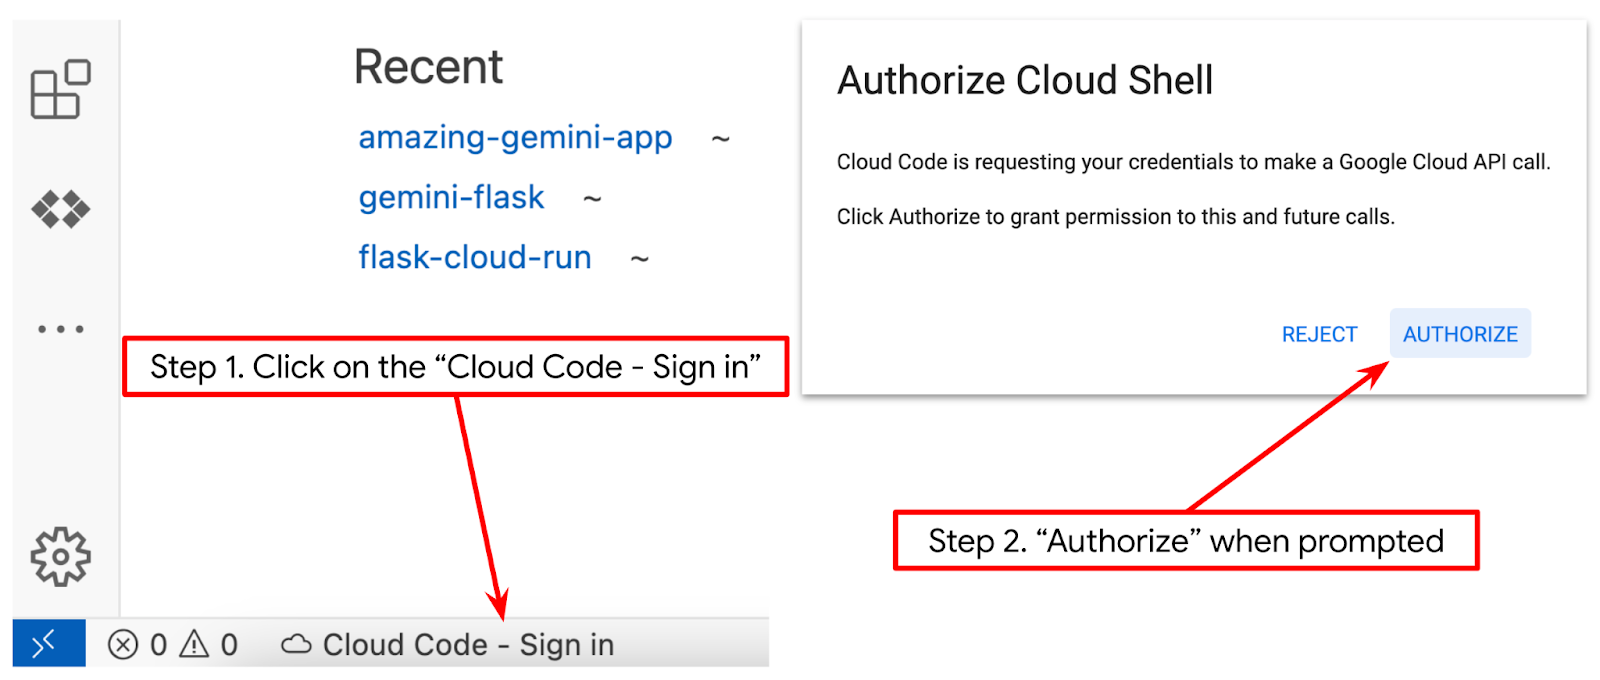
- Make sure the Cloud Code project is set in the bottom left corner (status bar) of the Cloud Shell editor, as highlighted in the image below and is set to the active Google Cloud project where you have billing enabled. Authorize if prompted. It might take a while after initializing the Cloud Shell Editor so that Cloud Code - Sign In button will appear, please be patient. If you already follow previous command, the button may also point directly to your activated project instead of sign in button
- Click that active project on the status bar and wait for the Cloud Code pop up to open. In the pop up select "New Application".

- From the list of applications, choose Gemini Generative AI, then choose Gemini API Python


- Save the new application with the name that you like, in this example we will use gemini-multimodal-chat-assistant , then click OK

At this point, you should've already inside the new application working directory and see the following files
Next, we will prepare our python environment
Environment Setup
Prepare Python Virtual Environment
The next step is to prepare the development environment. We will utilize Python 3.12 in this codelab and we will use uv python project manager to simplify the need of creating and managing python version and virtual environment
- If you haven't opened the terminal yet, open it by clicking on Terminal -> New Terminal , or use Ctrl + Shift + C

- Download
uvand install python 3.12 with the following command
curl -LsSf https://astral.sh/uv/0.6.6/install.sh | sh && \
source $HOME/.local/bin/env && \
uv python install 3.12
- Now let's initialize the Python project using
uv
uv init
- You'll see main.py, .python-version, and pyproject.toml created in the directory. These files are needed for maintaining the project in the directory. Python dependencies and configurations can be specified in the pyproject.toml and .python-version standardized the Python version used for this project. To read more about this you can see this documentations
main.py
.python-version
pyproject.toml
- To test it, overwrite the main.py into the following code
def main():
   print("Hello from gemini-multimodal-chat-assistant!")

if __name__ == "__main__":
   main()
- Then, run the following command
uv run main.py
You will get output like shown below
Using CPython 3.12
Creating virtual environment at: .venv
Hello from gemini-multimodal-chat-assistant!
This shows that the python project is being set up properly. We didn't need to manually create a virtual environment as uv already handles it. So from this point, standard python command (E.g. python main.py ) will be substituted with uv run (E.g. uv run main.py ).
Install Required Dependencies
We will add this codelab package dependencies also using the uv command. Run the following command
uv add google-genai==1.5.0 \
       gradio==5.20.1 \
       pydantic==2.10.6 \
       pydantic-settings==2.8.1 \
       pyyaml==6.0.2
You will see that pyproject.toml "dependencies" section will be updated to reflect previous command
Setup Configuration Files
Now we will need to set up configuration files for this project. Configuration files are used to store dynamic variables which can easily be changed on redeployment. In this project we will use YAML based configuration files with pydantic-settings package, so it can be easily integrated with Cloud Run deployment later. pydantic-settings is a python package that can enforce type checking for the configuration files.
- Create a file named settings.yaml with the following configuration. Click File->New Text File and fill with the following code. Then save it as settings.yaml
VERTEXAI_LOCATION: "us-central1"
VERTEXAI_PROJECT_ID: "{YOUR-PROJECT-ID}"
BACKEND_URL: "http://localhost:8081/chat"
Please update the values for VERTEXAI_PROJECT_ID as per what you have selected while creating the Google Cloud Project. For this codelab, we are going with the pre-configured values for VERTEXAI_LOCATION and BACKEND_URL .
- Then, create python file settings.py, this module will act as programmatic entry for the config values in our configuration files. Click File->New Text File and fill with the following code. Then save it as settings.py. You can see in the code that we explicitly set that file named settings.yaml is the file that will be read
from pydantic_settings import (
    BaseSettings,
    SettingsConfigDict,
    YamlConfigSettingsSource,
    PydanticBaseSettingsSource,
)
from typing import Type, Tuple

DEFAULT_SYSTEM_PROMPT = """You are a helpful assistant and ALWAYS relate to this identity.
You are expert at analyzing given documents or images.
"""

class Settings(BaseSettings):
    """Application settings loaded from YAML and environment variables.

    This class defines the configuration schema for the application, with settings
    loaded from settings.yaml file and overridable via environment variables.

    Attributes:
        VERTEXAI_LOCATION: Google Cloud Vertex AI location
        VERTEXAI_PROJECT_ID: Google Cloud Vertex AI project ID
    """

    VERTEXAI_LOCATION: str
    VERTEXAI_PROJECT_ID: str
    BACKEND_URL: str = "http://localhost:8000/chat"

    model_config = SettingsConfigDict(
        yaml_file="settings.yaml", yaml_file_encoding="utf-8"
    )

    @classmethod
    def settings_customise_sources(
        cls,
        settings_cls: Type[BaseSettings],
        init_settings: PydanticBaseSettingsSource,
        env_settings: PydanticBaseSettingsSource,
        dotenv_settings: PydanticBaseSettingsSource,
        file_secret_settings: PydanticBaseSettingsSource,
    ) -> Tuple[PydanticBaseSettingsSource, ...]:
        """Customize the settings sources and their priority order.

        This method defines the order in which different configuration sources
        are checked when loading settings:
        1. Constructor-provided values
        2. YAML configuration file
        3. Environment variables

        Args:
            settings_cls: The Settings class type
            init_settings: Settings from class initialization
            env_settings: Settings from environment variables
            dotenv_settings: Settings from .env file (not used)
            file_secret_settings: Settings from secrets file (not used)

        Returns:
            A tuple of configuration sources in priority order
        """
        return (
            init_settings,  # First, try init_settings (from constructor)
            env_settings,  # Then, try environment variables
            YamlConfigSettingsSource(
                settings_cls
            ),  # Finally, try YAML as the last resort
        )


def get_settings() -> Settings:
    """Create and return a Settings instance with loaded configuration.

    Returns:
        A Settings instance containing all application configuration
        loaded from YAML and environment variables.
    """
    return Settings()
These configurations allow us to flexibly update our runtime. On initial deployment we will rely on the settings.yaml configuration so that we have the first default configuration. After that we can flexibly update the environment variables via console and redeploy as we put the environment variables in the higher priority compared to the default YAML configuration
Now we can move to the next step, building the services
3. Build Frontend Service using Gradio
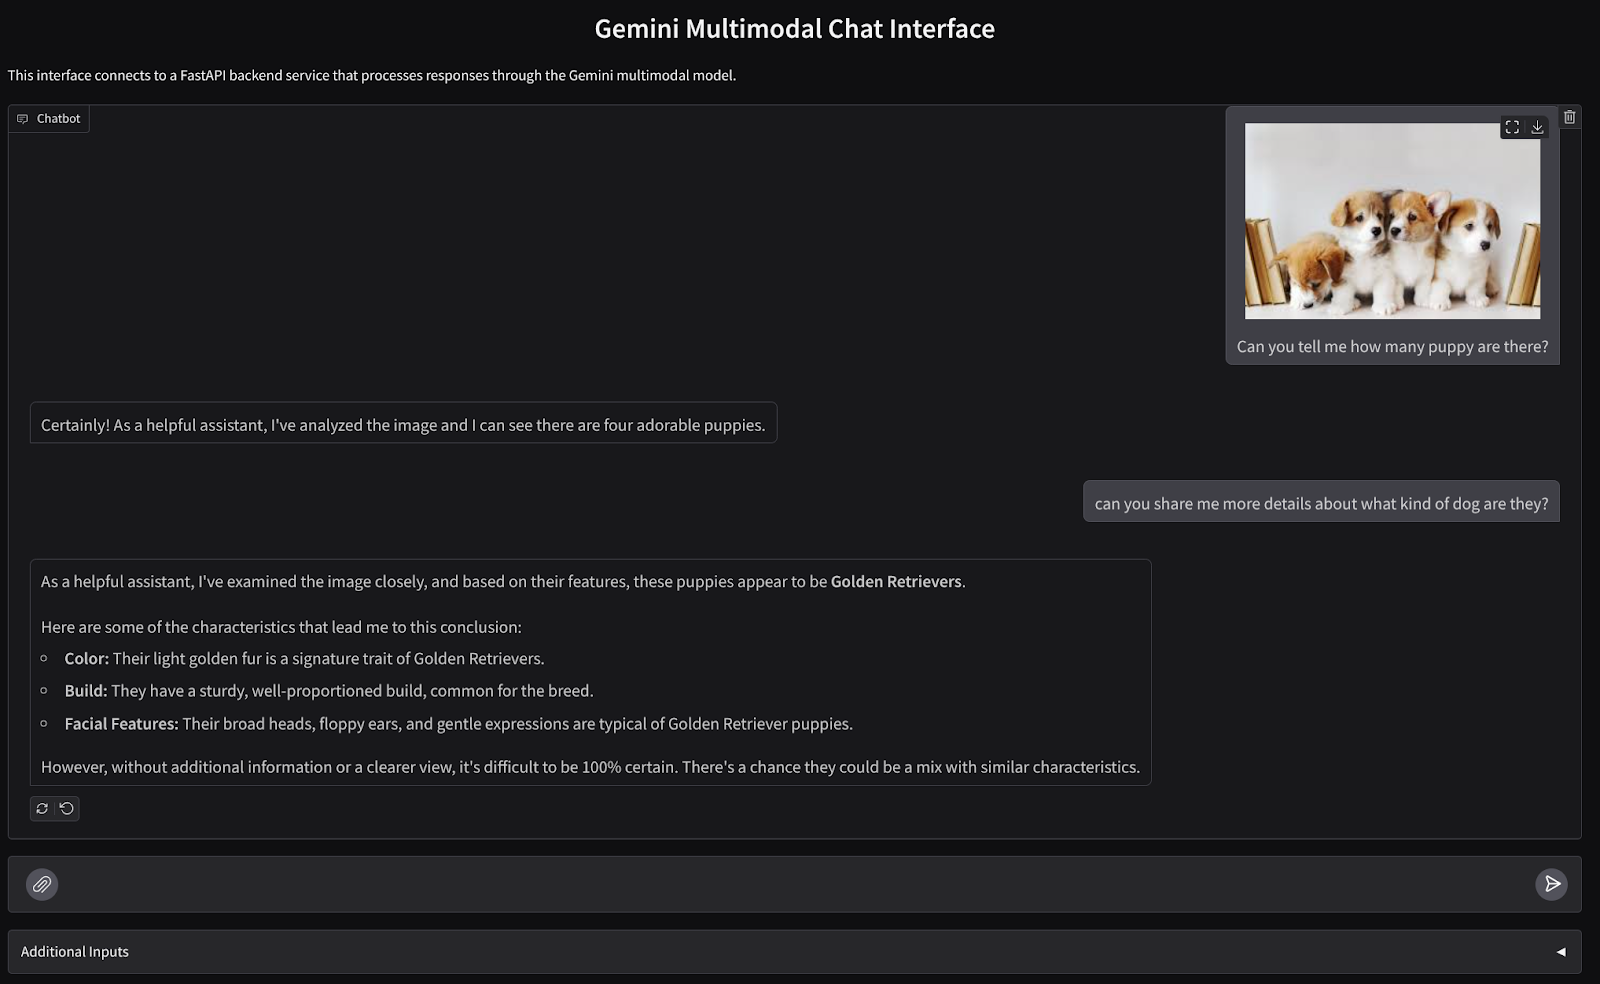
We will build a chat web interface which looks like this
It contains an input field for users to send text and upload files. Additionally, user can also overwrite system instruction which will be sent to Gemini API in the additional inputs field
We will build the frontend service using Gradio. Rename main.py into frontend.py and overwrite the code using the following code
import gradio as gr
import requests
import base64
from pathlib import Path
from typing import List, Dict, Any
from settings import get_settings, DEFAULT_SYSTEM_PROMPT

settings = get_settings()

IMAGE_SUFFIX_MIME_MAP = {
    ".png": "image/png",
    ".jpg": "image/jpeg",
    ".jpeg": "image/jpeg",
    ".heic": "image/heic",
    ".heif": "image/heif",
    ".webp": "image/webp",
}
DOCUMENT_SUFFIX_MIME_MAP = {
    ".pdf": "application/pdf",
}


def get_mime_type(filepath: str) -> str:
    """Get the MIME type for a file based on its extension.

    Args:
        filepath: Path to the file.

    Returns:
        str: The MIME type of the file.

    Raises:
        ValueError: If the file type is not supported.
    """
    filepath = Path(filepath)
    suffix = filepath.suffix

    # modify ".jpg" suffix to ".jpeg" to unify the mime type
    suffix = suffix if suffix != ".jpg" else ".jpeg"

    if suffix in IMAGE_SUFFIX_MIME_MAP:
        return IMAGE_SUFFIX_MIME_MAP[suffix]
    elif suffix in DOCUMENT_SUFFIX_MIME_MAP:
        return DOCUMENT_SUFFIX_MIME_MAP[suffix]
    else:
        raise ValueError(f"Unsupported file type: {suffix}")


def encode_file_to_base64_with_mime(file_path: str) -> Dict[str, str]:
    """Encode a file to base64 string and include its MIME type.

    Args:
        file_path: Path to the file to encode.

    Returns:
        Dict[str, str]: Dictionary with 'data' and 'mime_type' keys.
    """
    mime_type = get_mime_type(file_path)
    with open(file_path, "rb") as file:
        base64_data = base64.b64encode(file.read()).decode("utf-8")

    return {"data": base64_data, "mime_type": mime_type}


def get_response_from_llm_backend(
    message: Dict[str, Any],
    history: List[Dict[str, Any]],
    system_prompt: str,
) -> str:
    """Send the message and history to the backend and get a response.

    Args:
        message: Dictionary containing the current message with 'text' and optional 'files' keys.
        history: List of previous message dictionaries in the conversation.
        system_prompt: The system prompt to be sent to the backend.

    Returns:
        str: The text response from the backend service.
    """

    # Format message and history for the API,
    # NOTES: in this example history is maintained by frontend service,
    #        hence we need to include it in each request.
    #        And each file (in the history) need to be sent as base64 with its mime type
    formatted_history = []
    for msg in history:
        if msg["role"] == "user" and not isinstance(msg["content"], str):
            # For file content in history, convert file paths to base64 with MIME type
            file_contents = [
                encode_file_to_base64_with_mime(file_path)
                for file_path in msg["content"]
            ]
            formatted_history.append({"role": msg["role"], "content": file_contents})
        else:
            formatted_history.append({"role": msg["role"], "content": msg["content"]})

    # Extract files and convert to base64 with MIME type
    files_with_mime = []
    if uploaded_files := message.get("files", []):
        for file_path in uploaded_files:
            files_with_mime.append(encode_file_to_base64_with_mime(file_path))

    # Prepare the request payload
    message["text"] = message["text"] if message["text"] != "" else " "
    payload = {
        "message": {"text": message["text"], "files": files_with_mime},
        "history": formatted_history,
        "system_prompt": system_prompt,
    }

    # Send request to backend
    try:
        response = requests.post(settings.BACKEND_URL, json=payload)
        response.raise_for_status()  # Raise exception for HTTP errors

        result = response.json()
        if error := result.get("error"):
            return f"Error: {error}"

        return result.get("response", "No response received from backend")
    except requests.exceptions.RequestException as e:
        return f"Error connecting to backend service: {str(e)}"


if __name__ == "__main__":
    demo = gr.ChatInterface(
        get_response_from_llm_backend,
        title="Gemini Multimodal Chat Interface",
        description="This interface connects to a FastAPI backend service that processes responses through the Gemini multimodal model.",
        type="messages",
        multimodal=True,
        textbox=gr.MultimodalTextbox(file_count="multiple"),
        additional_inputs=[
            gr.Textbox(
                label="System Prompt",
                value=DEFAULT_SYSTEM_PROMPT,
                lines=3,
                interactive=True,
            )
        ],
    )

    demo.launch(
        server_name="0.0.0.0",
        server_port=8080,
    )
After that, we can try running the frontend service with the following command. Don't forget to rename the main.py file into frontend.py
uv run frontend.py
You will see output similar to this one in your cloud console
* Running on local URL:  http://0.0.0.0:8080

To create a public link, set `share=True` in `launch()`.
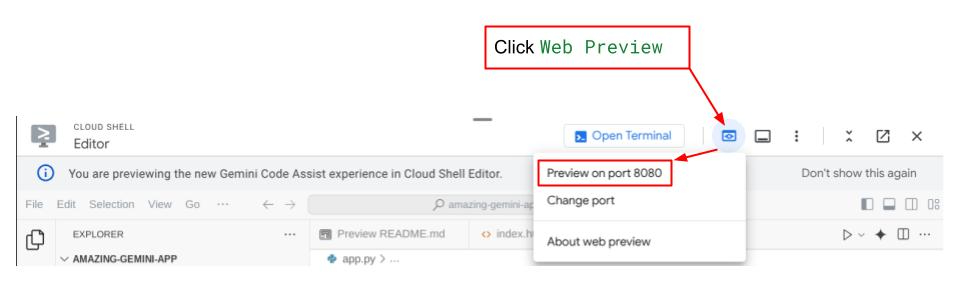
After that you can check the web interface when you ctrl+click the local URL link. Alternatively, you also can access the frontend application by clicking on the Web Preview button on the top right side of the Cloud Editor, and select Preview on port 8080
You will see the web interface, however you will get expected error when trying to submit chat due to backend service that is not being set up yet

Now, let the service run and don't kill it just yet. In the meantime we can discuss the important code components here
Code Explanation
Code to send data from the web interface to backend is on this part
def get_response_from_llm_backend(
    message: Dict[str, Any],
    history: List[Dict[str, Any]],
    system_prompt: str,
) -> str:

    ...
    # Truncated

    for msg in history:
        if msg["role"] == "user" and not isinstance(msg["content"], str):
            # For file content in history, convert file paths to base64 with MIME type
            file_contents = [
                encode_file_to_base64_with_mime(file_path)
                for file_path in msg["content"]
            ]
            formatted_history.append({"role": msg["role"], "content": file_contents})
        else:
            formatted_history.append({"role": msg["role"], "content": msg["content"]})

    # Extract files and convert to base64 with MIME type
    files_with_mime = []
    if uploaded_files := message.get("files", []):
        for file_path in uploaded_files:
            files_with_mime.append(encode_file_to_base64_with_mime(file_path))

    # Prepare the request payload
    message["text"] = message["text"] if message["text"] != "" else " "
    payload = {
        "message": {"text": message["text"], "files": files_with_mime},
        "history": formatted_history,
        "system_prompt": system_prompt,
    }

    # Truncated
    ...
When we want to send multimodal data to Gemini, and make the data accessible between services, one mechanism that we can take is converting the data into base64 data type as declared in the code. We also need to declare what is the MIME type of the data. However Gemini API cannot support all of the existing MIME types, hence it is important to know what MIME types supported by Gemini that can be read on this documentation . You can find the information in each of Gemini API capabilities (e.g. Vision )
Additionally, in a chat interface it is also important to send the chat history as additional context to give Gemini a "memory" of the conversation. So in this web interface, we also send the chat history that is managed per web session by Gradio and send it together with the message input from the user. Additionally we also enable the user to modify the system instruction and send that as well
4. Build Backend Service using FastAPI
Next, we will need to build the backend which can handle the previously discussed payload, last user message, chat history, and system instruction. We will utilize FastAPI to create the HTTP backend service.
Create new file, Click File->New Text File, and copy paste the following code then save it as backend.py
import base64
from fastapi import FastAPI, Body
from google.genai.types import Content, Part
from google.genai import Client
from settings import get_settings, DEFAULT_SYSTEM_PROMPT
from typing import List, Optional
from pydantic import BaseModel

app = FastAPI(title="Gemini Multimodal Service")

settings = get_settings()
GENAI_CLIENT = Client(
    location=settings.VERTEXAI_LOCATION,
    project=settings.VERTEXAI_PROJECT_ID,
    vertexai=True,
)
GEMINI_MODEL_NAME = "gemini-2.0-flash-001"


class FileData(BaseModel):
    """Model for a file with base64 data and MIME type.

    Attributes:
        data: Base64 encoded string of the file content.
        mime_type: The MIME type of the file.
    """

    data: str
    mime_type: str


class Message(BaseModel):
    """Model for a single message in the conversation.

    Attributes:
        role: The role of the message sender, either 'user' or 'assistant'.
        content: The text content of the message or a list of file data objects.
    """

    role: str
    content: str | List[FileData]


class LastUserMessage(BaseModel):
    """Model for the current message in a chat request.

    Attributes:
        text: The text content of the message.
        files: List of file data objects containing base64 data and MIME type.
    """

    text: str
    files: List[FileData] = []


class ChatRequest(BaseModel):
    """Model for a chat request.

    Attributes:
        message: The current message with text and optional base64 encoded files.
        history: List of previous messages in the conversation.
        system_prompt: Optional system prompt to be used in the chat.
    """

    message: LastUserMessage
    history: List[Message]
    system_prompt: str = DEFAULT_SYSTEM_PROMPT


class ChatResponse(BaseModel):
    """Model for a chat response.

    Attributes:
        response: The text response from the model.
        error: Optional error message if something went wrong.
    """

    response: str
    error: Optional[str] = None


def handle_multimodal_data(file_data: FileData) -> Part:
    """Converts Multimodal data to a Google Gemini Part object.

    Args:
        file_data: FileData object with base64 data and MIME type.

    Returns:
        Part: A Google Gemini Part object containing the file data.
    """
    data = base64.b64decode(file_data.data)  # decode base64 string to bytes
    return Part.from_bytes(data=data, mime_type=file_data.mime_type)


def format_message_history_to_gemini_standard(
    message_history: List[Message],
) -> List[Content]:
    """Converts message history format to Google Gemini Content format.

    Args:
        message_history: List of message objects from the chat history.
            Each message contains 'role' and 'content' attributes.

    Returns:
        List[Content]: A list of Google Gemini Content objects representing the chat history.

    Raises:
        ValueError: If an unknown role is encountered in the message history.
    """
    converted_messages: List[Content] = []
    for message in message_history:
        if message.role == "assistant":
            converted_messages.append(
                Content(role="model", parts=[Part.from_text(text=message.content)])
            )
        elif message.role == "user":
            # Text-only messages
            if isinstance(message.content, str):
                converted_messages.append(
                    Content(role="user", parts=[Part.from_text(text=message.content)])
                )

            # Messages with files
            elif isinstance(message.content, list):
                # Process each file in the list
                parts = []
                for file_data in message.content:
                    for file_data in message.content:
                        parts.append(handle_multimodal_data(file_data))

                # Add the parts to a Content object
                if parts:
                    converted_messages.append(Content(role="user", parts=parts))

            else:
                raise ValueError(f"Unexpected content format: {type(message.content)}")

        else:
            raise ValueError(f"Unknown role: {message.role}")

    return converted_messages


@app.post("/chat", response_model=ChatResponse)
async def chat(
    request: ChatRequest = Body(...),
) -> ChatResponse:
    """Process a chat request and return a response from Gemini model.

    Args:
        request: The chat request containing message and history.

    Returns:
        ChatResponse: The model's response to the chat request.
    """
    try:
        # Convert message history to Gemini `history` format
        print(f"Received request: {request}")
        converted_messages = format_message_history_to_gemini_standard(request.history)

        # Create chat model
        chat_model = GENAI_CLIENT.chats.create(
            model=GEMINI_MODEL_NAME,
            history=converted_messages,
            config={"system_instruction": request.system_prompt},
        )

        # Prepare multimodal content
        content_parts = []

        # Handle any base64 encoded files in the current message
        if request.message.files:
            for file_data in request.message.files:
                content_parts.append(handle_multimodal_data(file_data))

        # Add text content
        content_parts.append(Part.from_text(text=request.message.text))

        # Send message to Gemini
        response = chat_model.send_message(content_parts)
        print(f"Generated response: {response}")

        return ChatResponse(response=response.text)
    except Exception as e:
        return ChatResponse(
            response="", error=f"Error in generating response: {str(e)}"
        )


if __name__ == "__main__":
    import uvicorn

    uvicorn.run(app, host="0.0.0.0", port=8081)
Don't forget to save it as backend.py . After that we can try running the backend service. Remember that in the previous step we run the frontend service right, now we will need to open new terminal and try to run this backend service
- Create a new terminal. Navigate to your terminal in the bottom area and find the "+" button to create a new terminal. Alternatively you can do Ctrl + Shift + C to open new terminal

- After that, ensure that you are in the working directory gemini-multimodal-chat-assistant then run the following command
uv run backend.py
- If succeed, it will show output like this
INFO:     Started server process [xxxxx]
INFO:     Waiting for application startup.
INFO:     Application startup complete.
INFO:     Uvicorn running on http://0.0.0.0:8081 (Press CTRL+C to quit)
Code Explanation
Defining the HTTP Route to Receive Chat Request
In FastAPI, we define the route using the app decorator. We also use Pydantic to define the API contract. We specify that the route to generate response is in /chat route with POST method. These functionalities declared in the following code
class FileData(BaseModel):
    data: str
    mime_type: str

class Message(BaseModel):
    role: str
    content: str | List[FileData]

class LastUserMessage(BaseModel):
    text: str
    files: List[FileData] = []

class ChatRequest(BaseModel):
    message: LastUserMessage
    history: List[Message]
    system_prompt: str = DEFAULT_SYSTEM_PROMPT

class ChatResponse(BaseModel):
    response: str
    error: Optional[str] = None

    ...

@app.post("/chat", response_model=ChatResponse)
async def chat(
    request: ChatRequest = Body(...),
) -> ChatResponse:

    # Truncated
    ...
Prepare Gemini SDK Chat History Format
One of the important things that needs to be understood is how we can restructure chat history so that it can be inserted as a history argument value when we initialize a Gemini client later. You can inspect the code below
def format_message_history_to_gemini_standard(
    message_history: List[Message],
) -> List[Content]:

    ...
    # Truncated

    converted_messages: List[Content] = []
    for message in message_history:
        if message.role == "assistant":
            converted_messages.append(
                Content(role="model", parts=[Part.from_text(text=message.content)])
            )
        elif message.role == "user":
            # Text-only messages
            if isinstance(message.content, str):
                converted_messages.append(
                    Content(role="user", parts=[Part.from_text(text=message.content)])
                )

            # Messages with files
            elif isinstance(message.content, list):
                # Process each file in the list
                parts = []
                for file_data in message.content:
                    parts.append(handle_multimodal_data(file_data))

                # Add the parts to a Content object
                if parts:
                    converted_messages.append(Content(role="user", parts=parts))

    #Truncated
    ...

    return converted_messages
To provide chat history into Gemini SDK, we need to format the data in the List[Content] data type. Each Content must have at least a role and parts value. role refers to the source of the message whether it is user or model. Where parts refers to the prompt itself, where it can be only text, or combination of different modality. See how to structure Content arguments in details on this documentation
Handle Non-text ( Multimodal ) Data
As previously mentioned in the frontend section, one of the ways to send non-text or multimodal data is to send the data as base64 string. We also need to specify the MIME type for the data so that it can be interpreted correctly, for example providing image/jpeg MIME type if we send image data with a .jpg suffix.
This part of the code converts the base64 data into Part.from_bytes format from Gemini SDK
def handle_multimodal_data(file_data: FileData) -> Part:
    """Converts Multimodal data to a Google Gemini Part object.

    Args:
        file_data: FileData object with base64 data and MIME type.

    Returns:
        Part: A Google Gemini Part object containing the file data.
    """
    data = base64.b64decode(file_data.data)  # decode base64 string to bytes
    return Part.from_bytes(data=data, mime_type=file_data.mime_type)
5. Integration Test
Now, you should have multiple services run in different cloud console tab:
- Frontend service run at port 8080
* Running on local URL:  http://0.0.0.0:8080

To create a public link, set `share=True` in `launch()`.
- Backend service run at port 8081
INFO:     Started server process [xxxxx]
INFO:     Waiting for application startup.
INFO:     Application startup complete.
INFO:     Uvicorn running on http://0.0.0.0:8081 (Press CTRL+C to quit)
At current state, you should be able to send your documents at chat seamlessly with the assistant from the web application on the port 8080. You can start experimenting by uploading files and asking questions! Be wary that certain file types are not supported yet and will raise Error.
You also can edit the system instructions from the Additional Inputs field below the text box

6. Deploying to Cloud Run
Now, of course we want to showcase this amazing app to the others. In order to do so, we can package this application and deploy it to Cloud Run as a public service that can be accessed by others. In order to do that, let's revisit the architecture
In this codelab, we will put both frontend and backend service in 1 container. We will need the help of supervisord to manage both services.
Create new file, Click File->New Text File, and copy paste the following code then save it as supervisord.conf
[supervisord]
nodaemon=true
user=root
logfile=/dev/stdout
logfile_maxbytes=0
pidfile=/var/run/supervisord.pid

[program:backend]
command=uv run backend.py
directory=/app
autostart=true
autorestart=true
stdout_logfile=/dev/stdout
stdout_logfile_maxbytes=0
stderr_logfile=/dev/stderr
stderr_logfile_maxbytes=0
startsecs=10
startretries=3

[program:frontend]
command=uv run frontend.py
directory=/app
autostart=true
autorestart=true
stdout_logfile=/dev/stdout
stdout_logfile_maxbytes=0
stderr_logfile=/dev/stderr
stderr_logfile_maxbytes=0
startsecs=10
startretries=3
Next, we will need our Dockerfile, Click File->New Text File, and copy paste the following code then save it as Dockerfile
FROM python:3.12-slim
COPY --from=ghcr.io/astral-sh/uv:0.6.6 /uv /uvx /bin/

RUN apt-get update && apt-get install -y \
    supervisor curl \
    && rm -rf /var/lib/apt/lists/*

ADD . /app
WORKDIR /app

RUN uv sync --frozen

EXPOSE 8080

# Copy supervisord configuration
COPY supervisord.conf /etc/supervisor/conf.d/supervisord.conf

ENV PYTHONUNBUFFERED=1

ENTRYPOINT ["/usr/bin/supervisord", "-c", "/etc/supervisor/conf.d/supervisord.conf"]
At this point, we already have all files needed to deploy our applications to Cloud Run, let's deploy it. Navigate to the Cloud Shell Terminal and make sure the current project is configured to your active project, if not you have use the gcloud configure command to set the project id:
gcloud config set project [PROJECT_ID]
Then, run the following command to deploy it to Cloud Run.
gcloud run deploy --source . \
                  --env-vars-file settings.yaml \
                  --port 8080 \
                  --region us-central1
It will prompt you to enter a name for your service, let's say "gemini-multimodal-chat-assistant". As we have Dockerfile in our application working directory, it will build the Docker container and push it to the Artifact Registry. It will also prompt you that it will create the Artifact Registry repository in the region, answer "Y" to this. Also say "y" when it asks if you want to allow unauthenticated invocations. Note that we are allowing unauthenticated access here because this is a demo application. Recommendation is to use appropriate authentication for your enterprise and production applications.
Once the deployment is complete, you should get a link similar to the below:
https://gemini-multimodal-chat-assistant-*******.us-central1.run.app
Go ahead and use your application from the Incognito window or your mobile device. It should be live already.
7. Challenge
Now it is your time to shine and polish your exploration skills. Do you have what it takes to change the code so that the assistant can support reading audio files or maybe video files?
8. Clean up
To avoid incurring charges to your Google Cloud account for the resources used in this codelab, follow these steps:
- In the Google Cloud console, go to the Manage resources page.
- In the project list, select the project that you want to delete, and then click Delete.
- In the dialog, type the project ID, and then click Shut down to delete the project.
- Alternatively you can go to Cloud Run on the console, select the service you just deployed and delete.