
1. Overview
In this codelab, you will build a scalable Knowledge Base search application. Instead of managing a complex ETL pipeline with Python scripts and loops to generate vector embeddings, you will use AlloyDB AI to handle embedding generation natively within the database using a single SQL command.

What you'll build
A high-performance "searchable" knowledge base database application.
What you'll learn
You will learn how to:
- Provision an AlloyDB Cluster and enable AI extensions.
- Generate synthetic data (50,000+ rows) using SQL.
- Backfill vector embeddings for the entire dataset using Batch Processing.
- Set up Real-Time Incremental Triggers to auto-embed new data.
- Perform Hybrid Search (Vector + SQL Filters) for "Flexing Context."
Requirements
2. Before you begin
Create a project
- In the Google Cloud Console, on the project selector page, select or create a Google Cloud project.
- Make sure that billing is enabled for your Cloud project. Learn how to check if billing is enabled on a project.
- You'll use Cloud Shell, a command-line environment running in Google Cloud. Click Activate Cloud Shell at the top of the Google Cloud console.

- Once connected to Cloud Shell, you check that you're already authenticated and that the project is set to your project ID using the following command:
gcloud auth list
- Run the following command in Cloud Shell to confirm that the gcloud command knows about your project.
gcloud config list project
- If your project is not set, use the following command to set it:
gcloud config set project <YOUR_PROJECT_ID>
- Enable the required APIs: Follow the link and enable the APIs.
Alternatively you can use the gcloud command for this. Refer documentation for gcloud commands and usage.
gcloud services enable \
  alloydb.googleapis.com \
  compute.googleapis.com \
  cloudresourcemanager.googleapis.com \
  servicenetworking.googleapis.com \
  aiplatform.googleapis.com
Gotchas & Troubleshooting
The "Ghost Project" Syndrome | You ran |
The Billing Barricade | You enabled the project, but forgot the billing account. AlloyDB is a high-performance engine; it won't start if the "gas tank" (billing) is empty. |
API Propagation Lag | You clicked "Enable APIs," but the command line still says |
Quota Quags | If you're using a brand-new trial account, you might hit a regional quota for AlloyDB instances. If |
"Hidden" Service Agent | Sometimes the AlloyDB Service Agent isn't automatically granted the |
3. Database setup
In this lab we'll use AlloyDB as the database for the test data. It uses clusters to hold all of the resources, such as databases and logs. Each cluster has a primary instance that provides an access point to the data. Tables will hold the actual data.
Let's create an AlloyDB cluster, instance and table where the test dataset will be loaded.
- Click the button or Copy the link below to your browser where you have the Google Cloud Console user logged in.
- Once this step is complete the repo will be cloned to your local cloud shell editor and you will be able to run the command below from with the project folder (important to make sure you are in the project directory):
sh run.sh
- Now use the UI (clicking the link in the terminal or clicking the "preview on web" link in the terminal.
- Enter your details for project id, cluster and instance names to get started.
- Go grab a coffee while the logs scroll & you can read about how it's doing this behind the scenes here. It may take about 10-15 minutes.
Gotchas & Troubleshooting
The "Patience" Problem | Database clusters are heavy infrastructure. If you refresh the page or kill the Cloud Shell session because it "looks stuck," you might end up with a "ghost" instance that is partially provisioned and impossible to delete without manual intervention. |
Region Mismatch | If you enabled your APIs in |
Zombie Clusters | If you previously used the same name for a cluster and didn't delete it, the script might say the cluster name already exists. Cluster names must be unique within a project. |
Cloud Shell Timeout | If your coffee break takes 30 minutes, Cloud Shell might go to sleep and disconnect the |
4. Schema Provisioning
In this step, we'll cover the following:
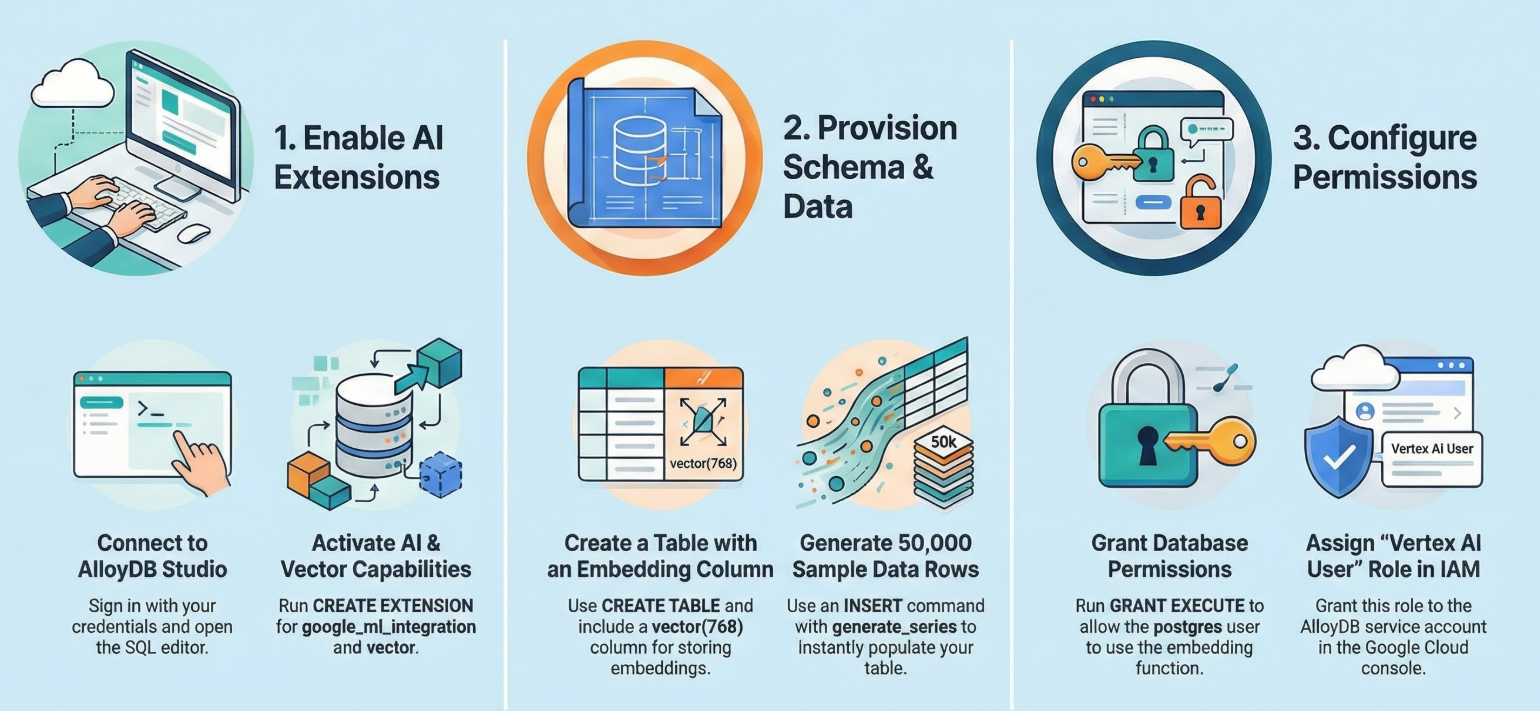
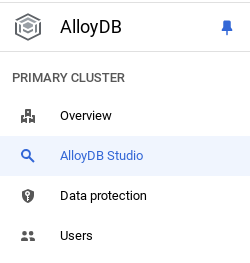
Once you have your AlloyDB cluster and instance running, head over to the AlloyDB Studio SQL editor to enable the AI extensions and provision the schema.
You may need to wait for your instance to finish being created. Once it is, sign into AlloyDB using the credentials you created when you created the cluster. Use the following data for authenticating to PostgreSQL:
- Username : "
postgres" - Database : "
postgres" - Password : "
alloydb" (or whatever you set at the time of creation)
Once you have authenticated successfully into AlloyDB Studio, SQL commands are entered in the Editor. You can add multiple Editor windows using the plus to the right of the last window.
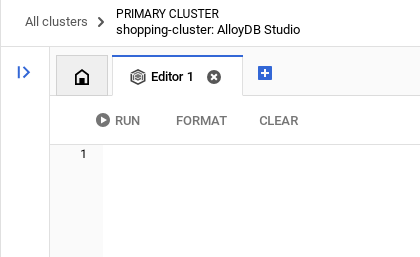
You'll enter commands for AlloyDB in editor windows, using the Run, Format, and Clear options as necessary.
Enable Extensions
For building this app, we will use the extensions pgvector and google_ml_integration. The pgvector extension allows you to store and search vector embeddings. The google_ml_integration extension provides functions you use to access Vertex AI prediction endpoints to get predictions in SQL. Enable these extensions by running the following DDLs:
CREATE EXTENSION IF NOT EXISTS google_ml_integration CASCADE;
CREATE EXTENSION IF NOT EXISTS vector;
Create a table
We need a dataset to demonstrate scale. Instead of importing a CSV, we will generate 50,000 rows of synthetic "Help Articles" instantly using SQL.
You can create a table using the DDL statement below in the AlloyDB Studio:
-- 1. Create the table
CREATE TABLE help_articles (
    id SERIAL PRIMARY KEY,
    title TEXT,
    category TEXT,
    product_version TEXT,
    content_body TEXT,
    embedding vector(768) -- Dimension for text-embedding-005
);

-- 2. Generate 50,000 rows of synthetic data
INSERT INTO help_articles (title, category, product_version, content_body)
SELECT
    'Help Article ' || i,
    CASE
        WHEN i % 3 = 0 THEN 'Billing'
        WHEN i % 3 = 1 THEN 'Technical'
        ELSE 'General'
    END,
    CASE
        WHEN i % 2 = 0 THEN '2.0'
        ELSE '1.0'
    END,
    'This article covers common issues regarding ' ||
    CASE
        WHEN i % 3 = 0 THEN 'payment failures, invoice disputes, and credit card updates.'
        WHEN i % 3 = 1 THEN 'connection timeouts, latency issues, and API errors.'
        ELSE 'account profile settings, password resets, and user roles.'
    END
FROM generate_series(1, 50000) AS i;
The item_vector column will allow storage for the vector values of the text.
Verify the data:
SELECT count(*) FROM help_articles;
-- Output: 50000
Enable Database Flags
Go to the Instance configuration console, click "Edit Primary", go to Advanced Configuration and click "Add Database Flags".
If not, enter it in the flags drop down and set it to "ON" and update instance.
If not, enter it in the flags drop down and set it to "ON" and update instance.
Steps to configure database flags:
- In the Google Cloud console, go to the Clusters page.
- Click a cluster in the Resource Name column.
- In the Overview page, go to Instances in your cluster, select an instance, and then click Edit.
- Add, modify, or delete a database flag from your instance:
Add a flag
- To add a database flag to your instance, click Add flag.
- Select a flag from the New database flag list.
- Provide a value for the flag.
- Click Done.
- Click Update instance.
- Verify that the google_ml_integration extension is version 1.5.2 or higher:
To check your extension version with the following command:
SELECT extversion FROM pg_extension WHERE extname = 'google_ml_integration';
If you need to update the extension to higher, use the command:
ALTER EXTENSION google_ml_integration UPDATE;
Grant Permission
- To let a user manage auto embedding generation, grant INSERT, UPDATE, and DELETE permissions on the google_ml.embed_gen_progress and google_ml.embed_gen_settings tables:
GRANT INSERT, UPDATE, DELETE ON google_ml.embed_gen_progress TO postgres;
‘postgres' is the USER_NAME for which the permissions are granted.
- Run the below statement to grant execute on the "embedding" function:
GRANT EXECUTE ON FUNCTION embedding TO postgres;
Grant Vertex AI User ROLE to the AlloyDB service account
From Google Cloud IAM console, grant the AlloyDB service account (that looks like this: service-<<PROJECT_NUMBER>>@gcp-sa-alloydb.iam.gserviceaccount.com) access to the role "Vertex AI User". PROJECT_NUMBER will have your project number.
Alternatively you can run the below command from the Cloud Shell Terminal:
PROJECT_ID=$(gcloud config get-value project)


gcloud projects add-iam-policy-binding $PROJECT_ID \
  --member="serviceAccount:service-$(gcloud projects describe $PROJECT_ID --format="value(projectNumber)")@gcp-sa-alloydb.iam.gserviceaccount.com" \
--role="roles/aiplatform.user"
Gotchas & Troubleshooting
The "Password Amnesia" Loop | If you used the "One Click" setup and can't remember your password, go to the Instance basic information page in the console and click "Edit" to reset the |
The "Extension Not Found" Error | If |
5. The "One-Shot" Vector Generation
This is the core of the lab. Instead of writing a Python loop to process these 50,000 rows, we will use the ai.initialize_embeddings function.
This single command does two things:
- Backfills all existing rows.
- Creates a Trigger to auto-embed future rows.
Run the below SQL statement from the AlloyDB Query Editor
CALL ai.initialize_embeddings(
  model_id => 'text-embedding-005',
  table_name => 'help_articles',
  content_column => 'content_body',
  embedding_column => 'embedding',
  incremental_refresh_mode => 'transactional'
);
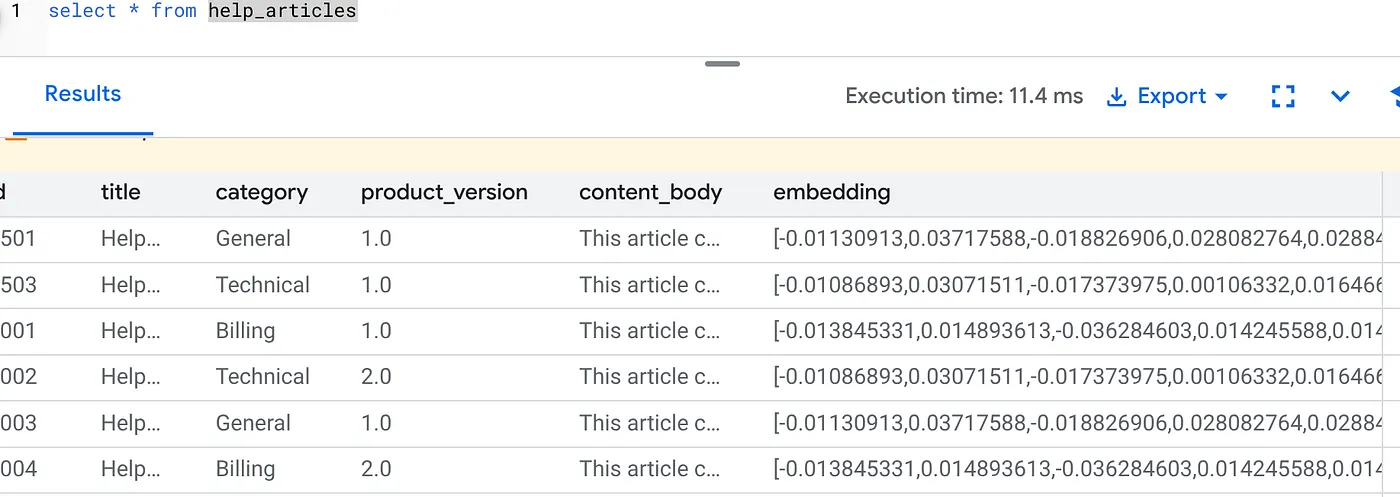
Verify the Embeddings
Check that the embedding column is now populated:
SELECT id, left(content_body, 30), substring(embedding::text, 1, 30) as vector_partial
FROM help_articles;
You should see a result similar to the below:
What just happened?
- Backfill at Scale: It automatically sweeps through your existing 50,000 rows and generates embeddings via Vertex AI.
- Automation: By setting incremental_refresh_mode => 'transactional', AlloyDB automatically sets up the internal triggers. Any new row inserted into help_articles will have its embedding generated instantly.
- You can optionally set the incremental_refresh_mode => ‘None' so you can only get the statement to do bulk updates and manually call ai.refresh_embeddings() for updating all rows embeddings.
You just replaced a Kafka queue, a Python worker, and a migration script with 6 lines of SQL. Here is the detailed official documentation for all attributes.
Real-Time Trigger Test
Let's verify that the "Zero Loop" automation works for new data.
- Insert a new row:
INSERT INTO help_articles (title, category, product_version, content_body)
VALUES ('New Scaling Guide', 'Technical', '2.0', 'How to scale AlloyDB to millions of transactions.');
- Check immediately:
SELECT embedding FROM help_articles WHERE title = 'New Scaling Guide';
Result:
You should see the vector generated instantly without running any external script.
Tuning Batch Size
Currently AlloyDB defaults batch size to 50 out of the box. While defaults work great out of the box, AlloyDB still gives users the control to tune the perfect configuration for your unique model and dataset.
CALL ai.initialize_embeddings(
  model_id => 'text-embedding-005',
  table_name => 'help_articles',
  content_column => 'content_body',
  embedding_column => 'embedding',
  incremental_refresh_mode => 'transactional',
  batch_size => 20
);
However users need to be aware of quota limits that can limit the performance. To review the recommended AlloyDB quotas, consult the "Before you begin" section in the documentation.
Gotchas & Troubleshooting
The IAM Propagation Gap | You ran the |
Vector Dimension Mismatch | The |
6. Flexing Context Search
Now we perform a Hybrid Search. We combine semantic understanding (Vector) with business logic (SQL Filters).
Run this query to find billing issues specifically for Product Version 2.0:
SELECT
  title,
  left(content_body, 100) as content_snippet,
  1 - (embedding <=> embedding('text-embedding-005', 'Invoice did not go through')::vector) as relevance
FROM help_articles
WHERE category = 'Billing'  -- Hard SQL Filter
  AND product_version = '2.0' -- Hard SQL Filter
ORDER BY relevance DESC
LIMIT 5;
This is Flexing Context. The search "flexes" to understand the user's intent ("billing issues") while respecting the rigid business constraints (Version 2.0).

Why this wins for Startups & Migrations
- Zero Infrastructure Debt: You didn't spin up a separate Vector DB (Pinecone/Milvus). You didn't write a separate ETL job. It's all in Postgres.
- Real-Time Updates: By using the 'transactional' mode, your search index is never stale. The moment data is committed, it is vector-ready.
- Scale: AlloyDB is built on Google's infrastructure. It can handle the bulk generation of millions of vectors faster than your Python script ever could.
Gotchas & Troubleshooting
Production Performance Gotcha | Problem: Fast for 50,000 rows. Very slow for 1 million rows if the category filter isn't selective enough.Solution:Add a Vector Index: For production scale, you must create an index:CREATE INDEX ON help_articles USING hnsw (embedding vector_cosine_ops);Verify Index Usage: Run |
The "Model Mismatch" Disaster | Problem: You initialized the column using text-embedding-005 in the CALL procedure. If you accidentally use a different model (e.g., text-embedding-004 or an OSS model) in the SELECT query function embedding('model-name', ...), the dimensions might match (768), but the vector space will be totally different.The query runs without error, but the results are completely irrelevant (garbage relevance scores).Troubleshooting:Ensure the model_id in ai.initialize_embeddings matches the model_id in your SELECT query exactly. |
The "Silent Empty" Result (Over-Filtering) | Problem: Hybrid search is an "AND" operation. It requires Semantic Match AND SQL Match.If a user searches for "Billing help" but the
|
4. Permission/Quota Errors (The 500 Error) | Problem:The
|
5. Null Embeddings | Problem:If you insert data before the model is fully initialized or if the background worker fails, some rows might have
|
7. Clean up
Once this lab is done, do not forget to delete alloyDB cluster and instance.
It should clean up the cluster along with its instance(s).
8. Congratulations
You've successfully built a scalable Knowledge Base search application. Instead of managing a complex ETL pipeline with Python scripts and loops to generate vector embeddings, you used AlloyDB AI to handle embedding generation natively within the database using a single SQL command.
What we covered
- We killed the "Python For-Loop" for data processing.
- We generated 50,000 vectors with one SQL command.
- We automated future vector generation with triggers.
- We performed Hybrid Search.
Next Steps
- Try this with your own dataset.
- Explore AlloyDB AI Documentation.
- Check out the Code Vipassana website for more workshops.