程式碼研究室簡介
1. 事前準備
Cloud Firestore 和 Cloud Functions 等無伺服器後端工具非常容易使用,但可能難以測試。透過 Firebase 本機模擬器套件,您可以在開發機器上執行這些服務的本機版本,以便快速安全地開發應用程式。
必要條件
- 簡易編輯器,例如 Visual Studio Code、Atom 或 Sublime Text
- Node.js 10.0.0 以上版本 (如要安裝 Node.js,請使用 nvm 來查看您的版本,請執行
node --version) - Java 7 以上版本 (如要安裝 Java,請使用這些操作說明來檢查您的版本,執行
java -version)
處理方式
在本程式碼研究室中,您將執行採用多項 Firebase 服務的簡易線上購物應用程式,並進行偵錯:
- Cloud Firestore:一種可擴充的無伺服器 NoSQL 資料庫,具備即時功能。
- Cloud Functions:因應事件或 HTTP 要求執行的無伺服器後端程式碼。
- Firebase 驗證:與其他 Firebase 產品整合的代管驗證服務。
- Firebase 代管:提供快速又安全的代管式網頁應用程式託管服務。
將應用程式連結至模擬器套件以啟用本機開發。
此外,還會說明如何:
- 如何將應用程式連線至模擬器套件,以及如何連結各種模擬器。
- Firebase 安全性規則的運作方式,以及如何在本機模擬器中測試 Firestore Security 規則。
- 如何編寫由 Firestore 事件觸發的 Firebase 函式,以及如何編寫針對模擬器套件執行的整合測試。
2. 設定
取得原始碼
在本程式碼研究室中,您將從幾乎完整的 Fire Store 範例開始,因此首先需要複製原始碼:
$ git clone https://github.com/firebase/emulators-codelab.git
然後移至程式碼研究室目錄,您將在此程式碼研究室的其餘部分:
$ cd emulators-codelab/codelab-initial-state
現在,請安裝依附元件,以便執行程式碼。如果網際網路連線速度較慢,可能需要一兩分鐘的時間:
# Move into the functions directory
$ cd functions

# Install dependencies
$ npm install

# Move back into the previous directory
$ cd ../
取得 Firebase CLI
模擬器套件屬於 Firebase CLI (指令列介面) 的一部分,您可以使用下列指令在機器中安裝:
$ npm install -g firebase-tools
接著,請確認您有最新版的 CLI。本程式碼研究室應適用於 9.0.0 以上版本,但後續版本包含更多錯誤修正。
$ firebase --version
9.6.0
連結至 Firebase 專案
如果您沒有 Firebase 專案,請在 Firebase 控制台建立新的 Firebase 專案。請記下您選擇的專案 ID,後續步驟將會用到。
現在我們要將這個程式碼連結至您的 Firebase 專案,首先,請執行下列指令登入 Firebase CLI:
$ firebase login
接著執行下列指令,建立專案別名。將 $YOUR_PROJECT_ID 替換為 Firebase 專案的 ID。
$ firebase use $YOUR_PROJECT_ID
您現在可以執行應用程式了!
3. 執行模擬器
在本節中,您將在本機執行應用程式。這表示可以啟動模擬器套件了。
啟動模擬器
在程式碼研究室的來源目錄中執行下列指令,啟動模擬器:
$ firebase emulators:start --import=./seed
輸出內容應如下所示:
$ firebase emulators:start --import=./seed
i  emulators: Starting emulators: auth, functions, firestore, hosting
⚠  functions: The following emulators are not running, calls to these services from the Functions emulator will affect production: database, pubsub
i  firestore: Importing data from /Users/samstern/Projects/emulators-codelab/codelab-initial-state/seed/firestore_export/firestore_export.overall_export_metadata
i  firestore: Firestore Emulator logging to firestore-debug.log
i  hosting: Serving hosting files from: public
✔  hosting: Local server: http://127.0.0.1:5000
i  ui: Emulator UI logging to ui-debug.log
i  functions: Watching "/Users/samstern/Projects/emulators-codelab/codelab-initial-state/functions" for Cloud Functions...
✔  functions[calculateCart]: firestore function initialized.

┌─────────────────────────────────────────────────────────────┐
│ ✔  All emulators ready! It is now safe to connect your app. │
│ i  View Emulator UI at http://127.0.0.1:4000                │
└─────────────────────────────────────────────────────────────┘

┌────────────────┬────────────────┬─────────────────────────────────┐
│ Emulator       │ Host:Port      │ View in Emulator UI             │
├────────────────┼────────────────┼─────────────────────────────────┤
│ Authentication │ 127.0.0.1:9099 │ http://127.0.0.1:4000/auth      │
├────────────────┼────────────────┼─────────────────────────────────┤
│ Functions      │ 127.0.0.1:5001 │ http://127.0.0.1:4000/functions │
├────────────────┼────────────────┼─────────────────────────────────┤
│ Firestore      │ 127.0.0.1:8080 │ http://127.0.0.1:4000/firestore │
├────────────────┼────────────────┼─────────────────────────────────┤
│ Hosting        │ 127.0.0.1:5000 │ n/a                             │
└────────────────┴────────────────┴─────────────────────────────────┘
  Emulator Hub running at 127.0.0.1:4400
  Other reserved ports: 4500

Issues? Report them at https://github.com/firebase/firebase-tools/issues and attach the *-debug.log files.
看到「All emulators started」訊息後,表示應用程式已可使用。
將網頁應用程式連結至模擬器
根據記錄中的表格,我們發現 Cloud Firestore 模擬器正在監聽通訊埠 8080,而驗證模擬器正在監聽通訊埠 9099。
┌────────────────┬────────────────┬─────────────────────────────────┐
│ Emulator       │ Host:Port      │ View in Emulator UI             │
├────────────────┼────────────────┼─────────────────────────────────┤
│ Authentication │ 127.0.0.1:9099 │ http://127.0.0.1:4000/auth      │
├────────────────┼────────────────┼─────────────────────────────────┤
│ Functions      │ 127.0.0.1:5001 │ http://127.0.0.1:4000/functions │
├────────────────┼────────────────┼─────────────────────────────────┤
│ Firestore      │ 127.0.0.1:8080 │ http://127.0.0.1:4000/firestore │
├────────────────┼────────────────┼─────────────────────────────────┤
│ Hosting        │ 127.0.0.1:5000 │ n/a                             │
└────────────────┴────────────────┴─────────────────────────────────┘
將前端程式碼連結至模擬器,而不要連結至實際工作環境。開啟 public/js/homepage.js 檔案,然後找出 onDocumentReady 函式。我們可以看到程式碼存取標準 Firestore 和 Auth 執行個體:
public/js/homepage.js
  const auth = firebaseApp.auth();
  const db = firebaseApp.firestore();
更新 db 和 auth 物件,指向本機模擬器:
public/js/homepage.js
  const auth = firebaseApp.auth();
  const db = firebaseApp.firestore();

  // ADD THESE LINES
  if (location.hostname === "127.0.0.1") {
    console.log("127.0.0.1 detected!");
    auth.useEmulator("http://127.0.0.1:9099");
    db.useEmulator("127.0.0.1", 8080);
  }
現在,當應用程式在本機電腦上執行 (由託管模擬器提供) 時,Firestore 用戶端也會指向本機模擬器,而非實際工作環境資料庫。
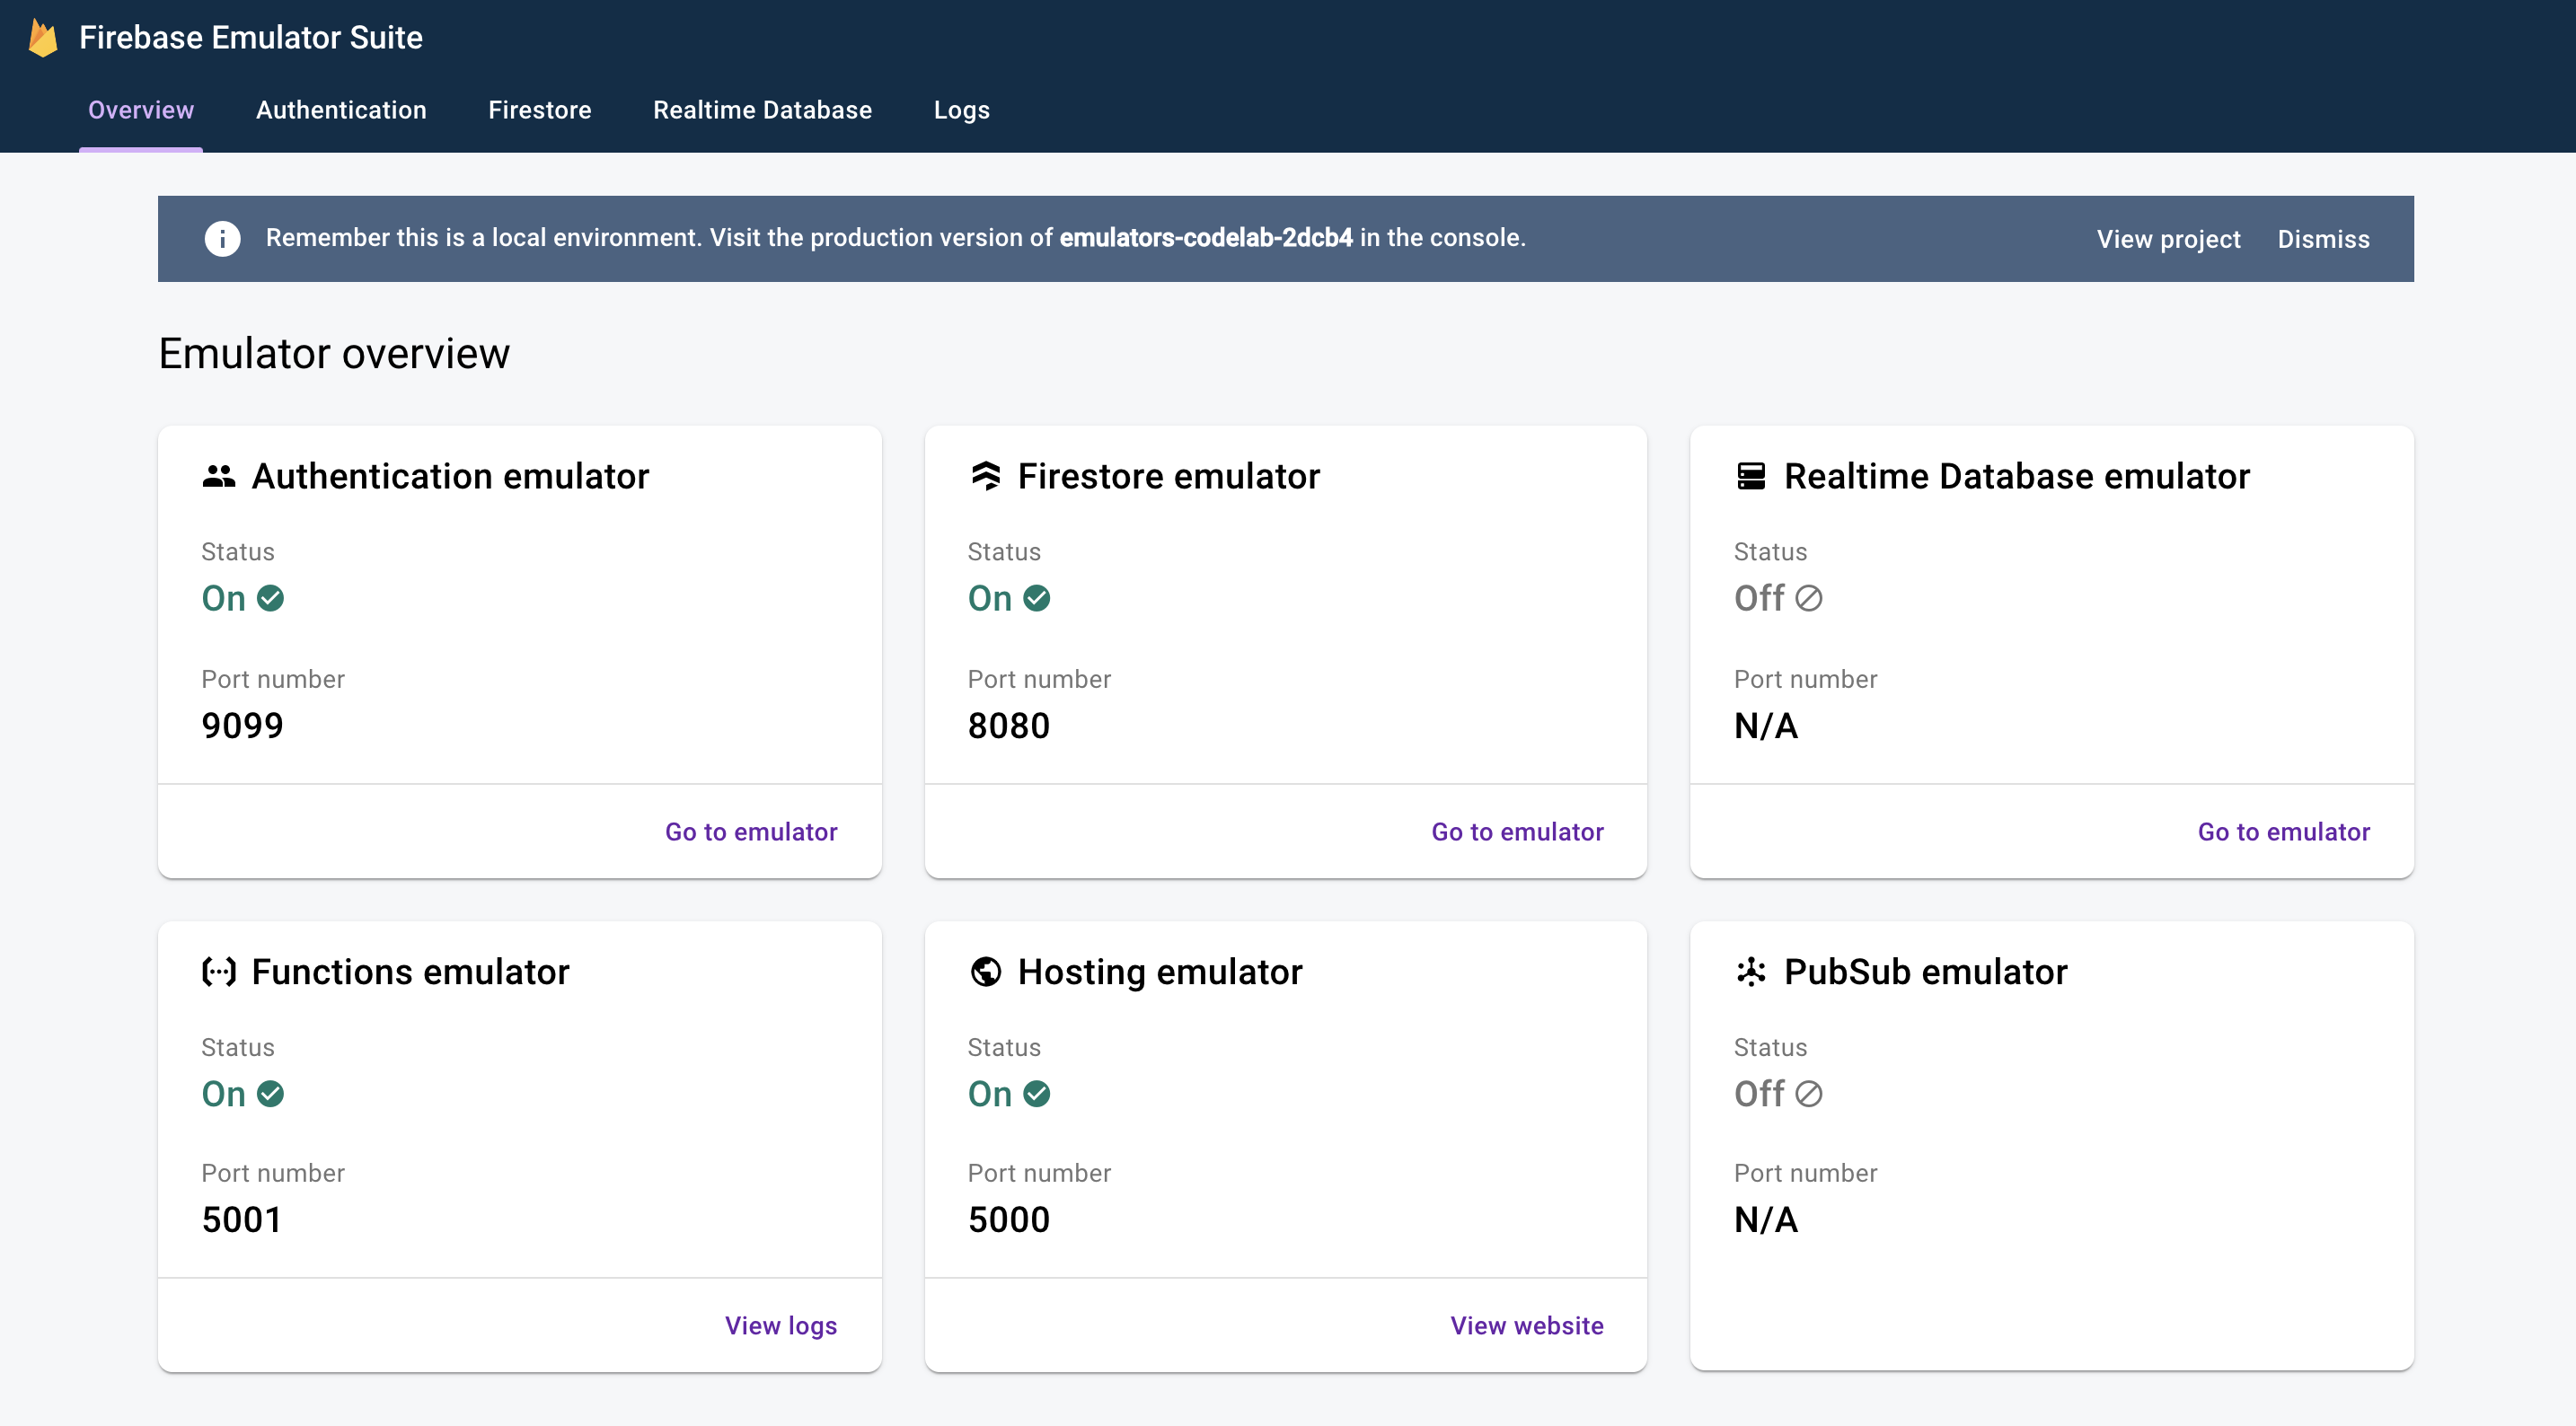
開啟 EmulatorUI
透過網路瀏覽器前往 http://127.0.0.1:4000/。您應該會看到 Emulator 套件 UI。
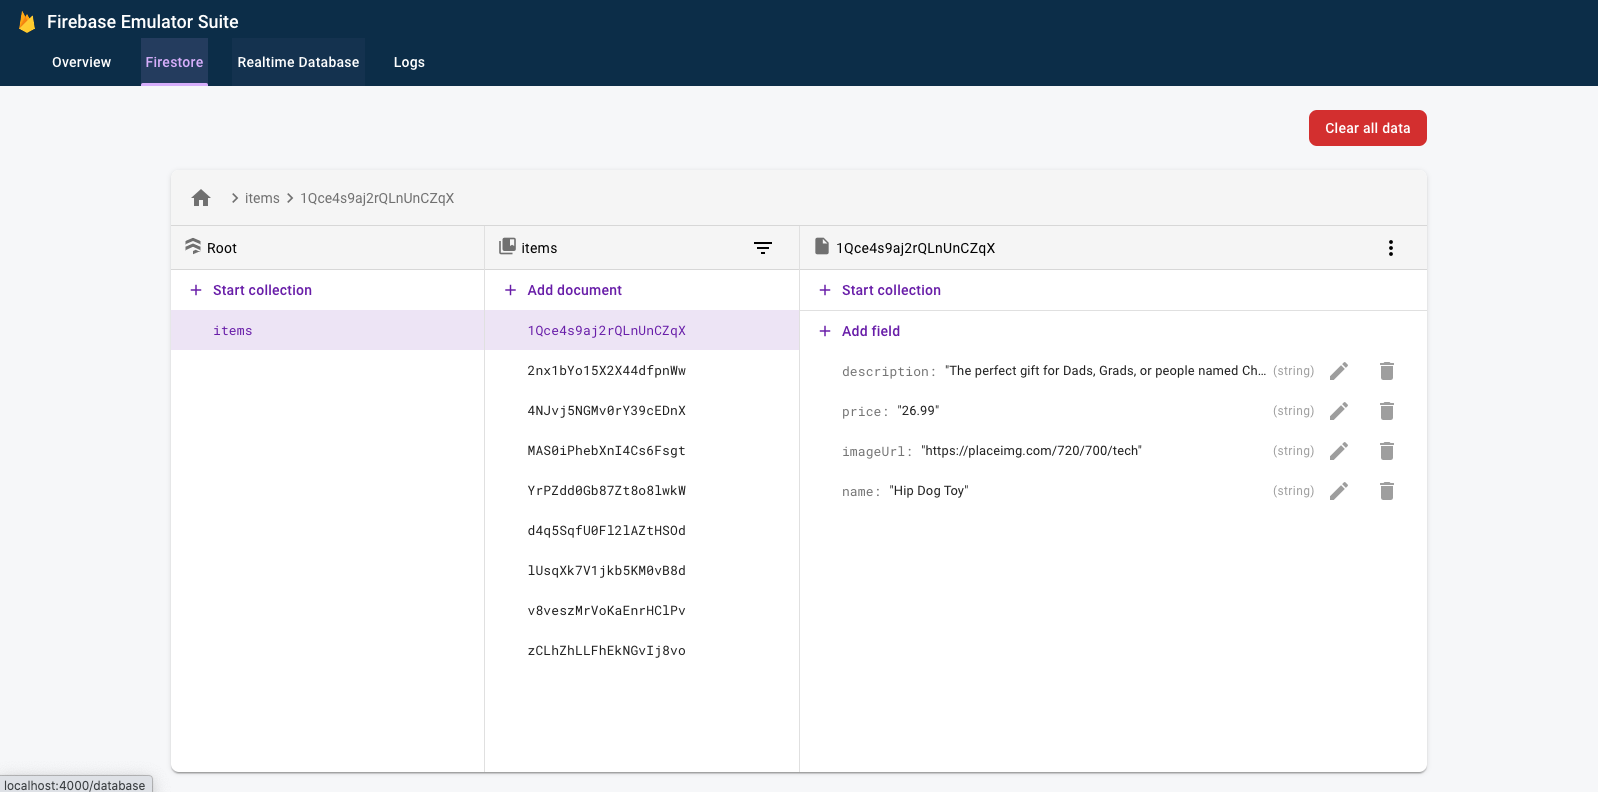
按一下即可查看 Firestore 模擬器的 UI。由於使用 --import 旗標匯入的資料,items 集合已包含資料。
4. 執行應用程式
開啟應用程式
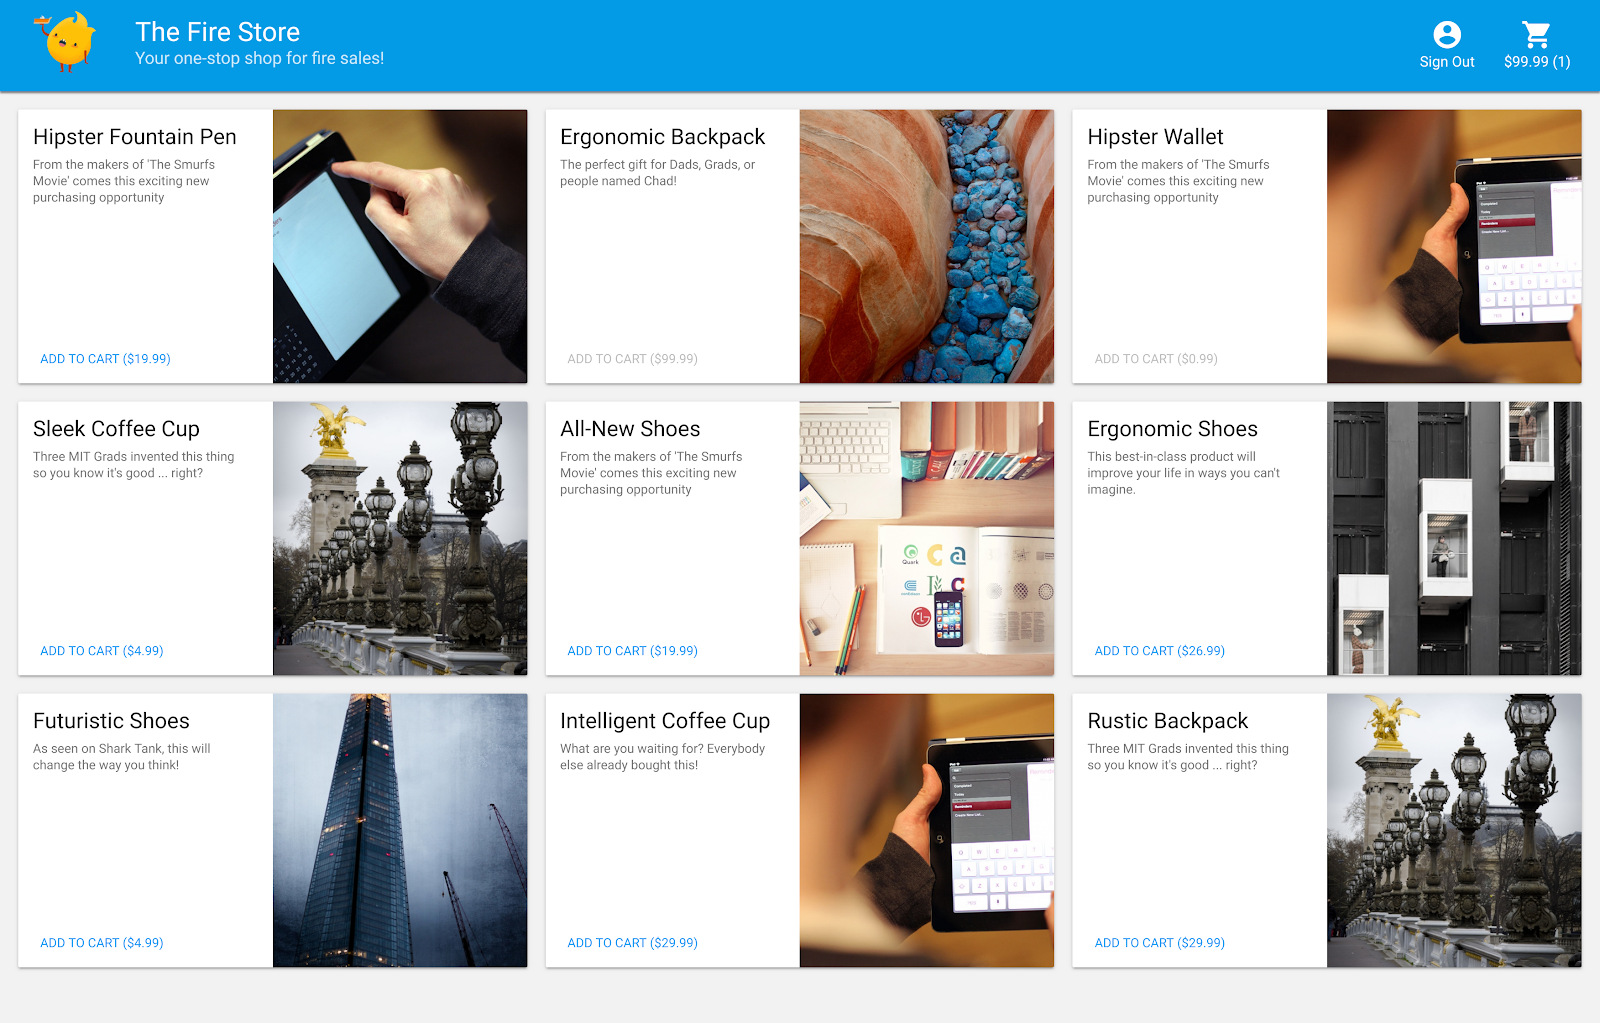
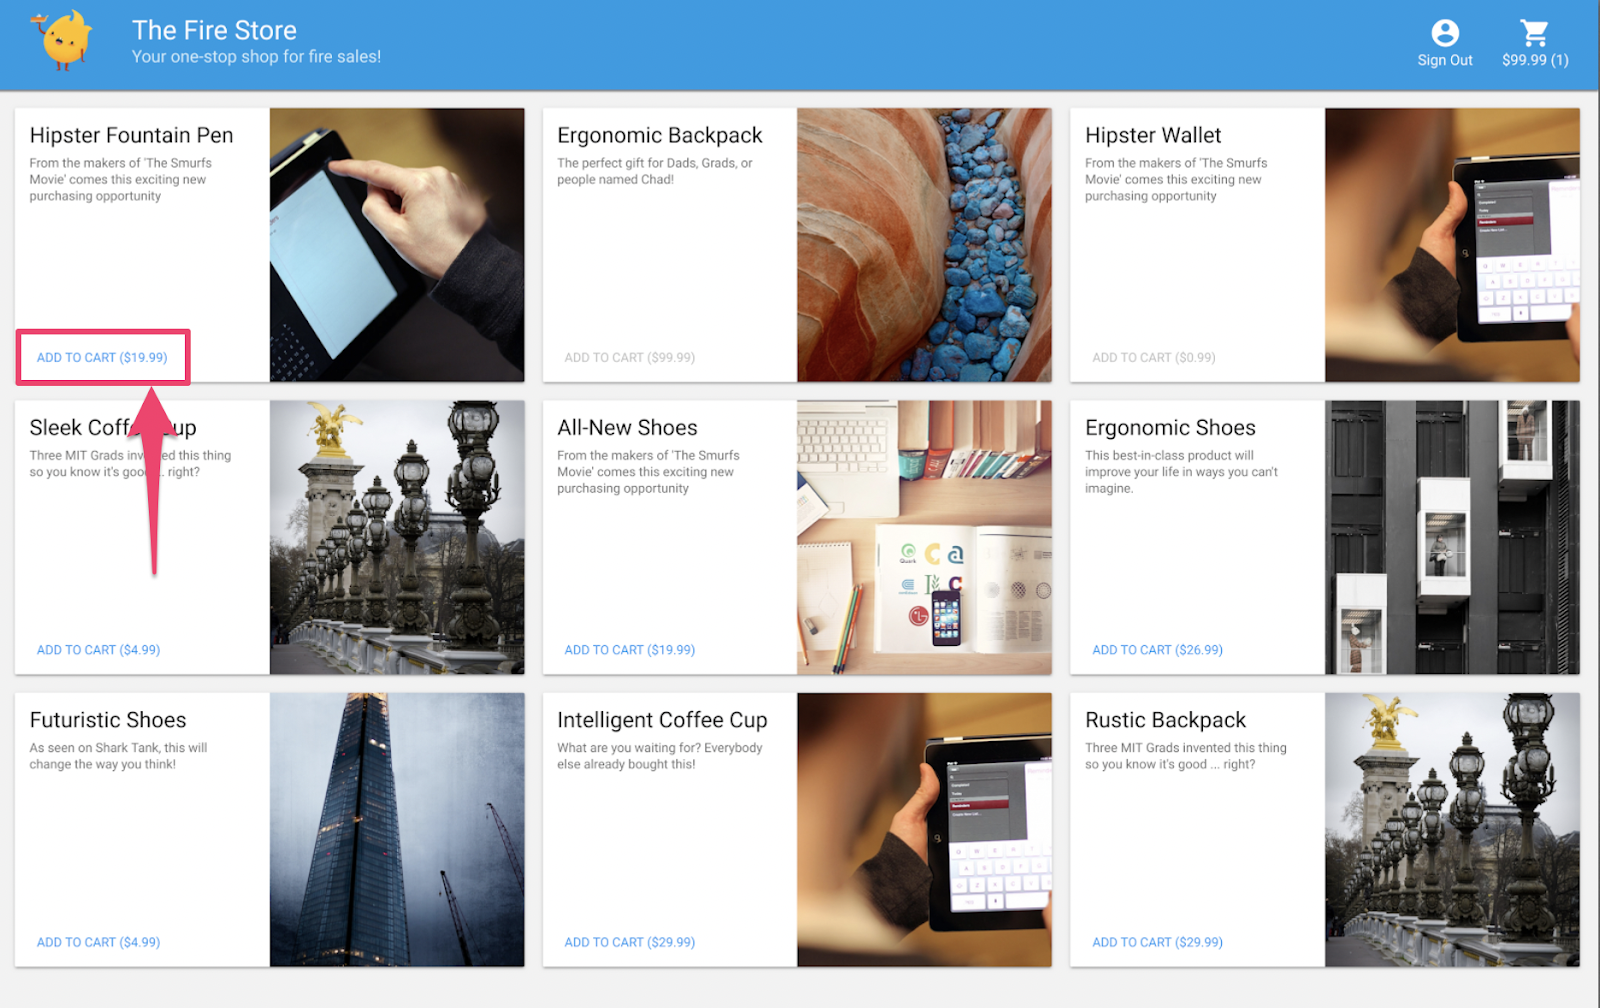
在網路瀏覽器中前往 http://127.0.0.1:5000,您應該會看到 The Fire Store 已經在本機執行!
使用應用程式
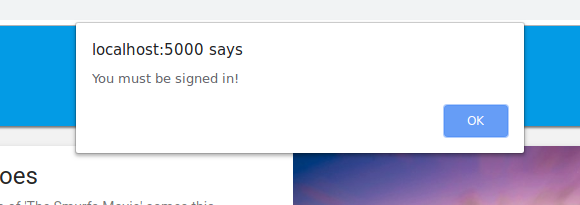
在首頁上挑選商品,然後按一下「加入購物車」。很抱歉,您可能會遇到以下錯誤:

讓我們修正這項錯誤!由於所有功能都在模擬器中執行,因此我們可以進行實驗,不必擔心影響實際資料。
5. 對應用程式進行偵錯
找出錯誤
來看看 Chrome 開發人員控制台。按下 Control+Shift+J (Windows、Linux、ChromeOS) 或 Command+Option+J (Mac) 即可在控制台中查看錯誤訊息:

addToCart 方法似乎發生錯誤,一起來看看。我們試著在哪裡存取該方法中名為 uid 的項目?為什麼它會是 null?現在,此方法在 public/js/homepage.js 中如下所示:
public/js/homepage.js
  addToCart(id, itemData) {
    console.log("addToCart", id, JSON.stringify(itemData));
    return this.db
      .collection("carts")
      .doc(this.auth.currentUser.uid)
      .collection("items")
      .doc(id)
      .set(itemData);
  }
啊!未登入應用程式。根據 Firebase 驗證文件,在未登入的情況下,auth.currentUser 為 null。一起來新增檢查:
public/js/homepage.js
  addToCart(id, itemData) {
    // ADD THESE LINES
    if (this.auth.currentUser === null) {
      this.showError("You must be signed in!");
      return;
    }

    // ...
  }
測試應用程式
接著,重新整理頁面,然後按一下「加入購物車」。這次應該會顯示較高品質的錯誤訊息:
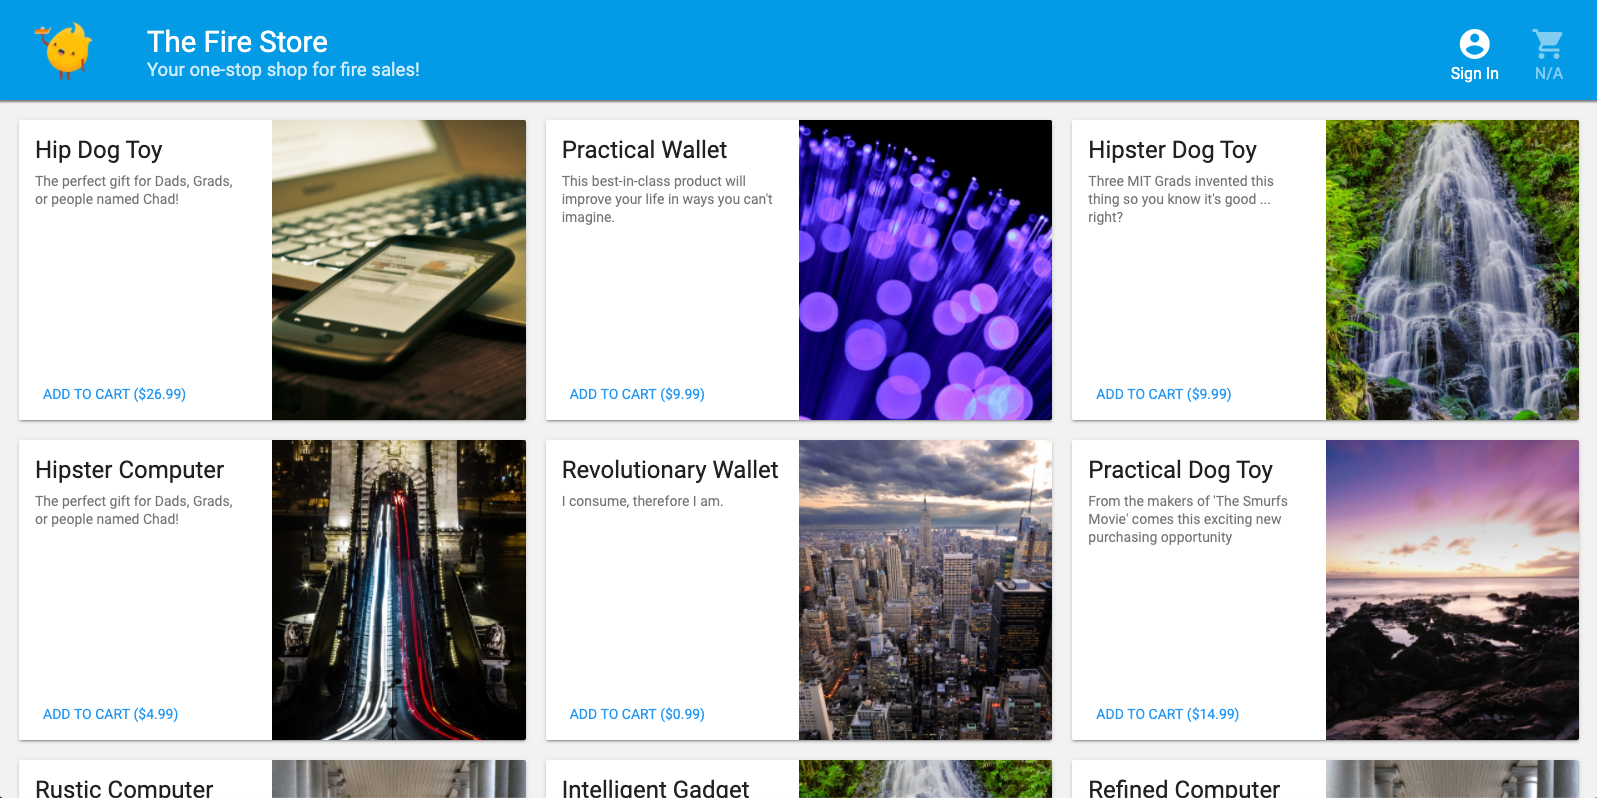
不過,如果你點選上方工具列中的「登入」,然後再次點按「加入購物車」,就會看到購物車已更新。
但是這些數據似乎不對:

請放心,我們會盡快修正該錯誤。我們先來深入瞭解將商品加入購物車後發生的情形。
6. 本機函式觸發條件
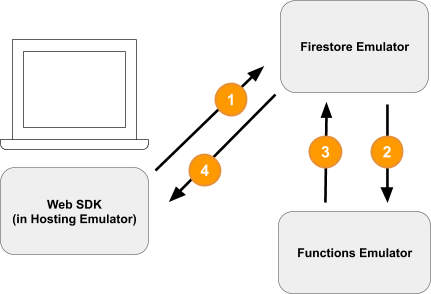
按一下「Add to Cart」可啟動涉及多個模擬器的事件鏈結。將商品加入購物車後,Firebase CLI 記錄檔中應會顯示下列訊息:
i  functions: Beginning execution of "calculateCart"
i  functions: Finished "calculateCart" in ~1s
發生四次重要事件,這些事件會產生這些記錄檔,以及您觀察到的 UI 更新:
1) Firestore 寫入 - 用戶端
新文件已新增至 Firestore 集合「/carts/{cartId}/items/{itemId}/」。您可以在 public/js/homepage.js 的 addToCart 函式中查看下列程式碼:
public/js/homepage.js
  addToCart(id, itemData) {
    // ...
    console.log("addToCart", id, JSON.stringify(itemData));
    return this.db
      .collection("carts")
      .doc(this.auth.currentUser.uid)
      .collection("items")
      .doc(id)
      .set(itemData);
  }
2) 已觸發 Cloud 函式
Cloud 函式 calculateCart 會使用 onWrite 觸發條件監聽購物車項目發生的任何寫入事件 (建立、更新或刪除),詳情請參閱 functions/index.js:
functions/index.js
exports.calculateCart = functions.firestore
    .document("carts/{cartId}/items/{itemId}")
    .onWrite(async (change, context) => {
      try {
        let totalPrice = 125.98;
        let itemCount = 8;

        const cartRef = db.collection("carts").doc(context.params.cartId);

        await cartRef.update({
          totalPrice,
          itemCount
        });
      } catch(err) {
      }
    }
);
3) Firestore 寫入 - 管理員
calculateCart 函式會讀取購物車中的所有商品,然後將總數量和價格加總,然後更新「購物車」文件內含新的總計 (請參閱上方的 cartRef.update(...))。
4) Firestore 讀取 - 用戶端
網路前端會訂閱以接收購物車變更的更新資訊。這會在 Cloud 函式寫入新的總計並更新 UI 後會即時更新,如 public/js/homepage.js 中所示:
public/js/homepage.js
this.cartUnsub = cartRef.onSnapshot(cart => {
   // The cart document was changed, update the UI
   // ...
});
重點回顧
做得好!只要設定一個完全本機應用程式,就能使用三種不同的 Firebase 模擬器進行完整本機測試。

等一下,還有更多功能!本節將說明:
- 如何編寫使用 Firebase Emulator 的單元測試。
- 如何使用 Firebase 模擬器對安全性規則偵錯。
7. 建立應用程式專屬的安全性規則
我們的網頁應用程式可讀取及寫入資料,但目前我們完全不擔心安全性的問題。Cloud Firestore 使用名為「安全性規則」的系統宣告誰具有讀取及寫入資料的存取權。模擬器套件是設計這些規則原型的絕佳方式。
在編輯器中開啟 emulators-codelab/codelab-initial-state/firestore.rules 檔案。這些規則包含三個主要部分:
rules_version = '2';
service cloud.firestore {
  match /databases/{database}/documents {
    // User's cart metadata
    match /carts/{cartID} {
      // TODO: Change these! Anyone can read or write.
      allow read, write: if true;
    }

    // Items inside the user's cart
    match /carts/{cartID}/items/{itemID} {
      // TODO: Change these! Anyone can read or write.
      allow read, write: if true;
    }

    // All items available in the store. Users can read
    // items but never write them.
    match /items/{itemID} {
      allow read: if true;
    }
  }
}
目前任何人都可以讀取我們的資料庫,並將資料寫入其中!我們希望確保只有有效的行動才能順利進行,且不洩漏任何機密資訊。
在這個程式碼研究室中,我們按照「最低權限原則」操作,鎖定所有文件並逐步新增存取權,直到所有使用者都擁有所需的全部存取權。讓我們將條件設為 false,更新前兩項以拒絕存取的規則:
rules_version = '2';
service cloud.firestore {
  match /databases/{database}/documents {
    // User's cart metadata
    match /carts/{cartID} {
      // UPDATE THIS LINE
      allow read, write: if false;
    }

    // Items inside the user's cart
    match /carts/{cartID}/items/{itemID} {
      // UPDATE THIS LINE
      allow read, write: if false;
    }

    // All items available in the store. Users can read
    // items but never write them.
    match /items/{itemID} {
      allow read: if true;
    }
  }
}
8. 執行模擬器和測試
啟動模擬器
在指令列中,請確認您目前位於 emulators-codelab/codelab-initial-state/。您在先前步驟中可能仍可執行模擬器。如果沒有,請再次啟動模擬器:
$ firebase emulators:start --import=./seed
模擬器執行後,您就可以在本機上執行測試。
執行測試
從 emulators-codelab/codelab-initial-state/ 目錄的新終端機分頁中,使用指令列
首先,請移至函式目錄 (我們稍後會留在本程式碼研究室的其餘部分):
$ cd functions
現在,在函式目錄中執行 Mocha 測試,然後捲動至輸出內容頂端:
# Run the tests
$ npm test

> functions@ test .../emulators-codelab/codelab-initial-state/functions
> mocha

  shopping carts
    1) can be created and updated by the cart owner
    2) can be read only by the cart owner

  shopping cart items
    3) can be read only by the cart owner
    4) can be added only by the cart owner

  adding an item to the cart recalculates the cart total.
    - should sum the cost of their items


  0 passing (364ms)
  1 pending
  4 failing
目前發生四次故障。建立規則檔案時,您可以觀察更多通過的測試,藉此評估進度。
9. 安全的購物車存取方式
前兩次失敗是「購物車」這些測試可達成以下目的:
- 使用者只能建立及更新自己的購物車
- 使用者只能讀取自己的購物車
functions/test.js
  it('can be created and updated by the cart owner', async () => {
    // Alice can create her own cart
    await firebase.assertSucceeds(aliceDb.doc("carts/alicesCart").set({
      ownerUID: "alice",
      total: 0
    }));

    // Bob can't create Alice's cart
    await firebase.assertFails(bobDb.doc("carts/alicesCart").set({
      ownerUID: "alice",
      total: 0
    }));

    // Alice can update her own cart with a new total
    await firebase.assertSucceeds(aliceDb.doc("carts/alicesCart").update({
      total: 1
    }));

    // Bob can't update Alice's cart with a new total
    await firebase.assertFails(bobDb.doc("carts/alicesCart").update({
      total: 1
    }));
  });

  it("can be read only by the cart owner", async () => {
    // Setup: Create Alice's cart as admin
    await admin.doc("carts/alicesCart").set({
      ownerUID: "alice",
      total: 0
    });

    // Alice can read her own cart
    await firebase.assertSucceeds(aliceDb.doc("carts/alicesCart").get());

    // Bob can't read Alice's cart
    await firebase.assertFails(bobDb.doc("carts/alicesCart").get());
  });
現在讓我們來通過這些測試。在編輯器中開啟安全性規則檔案 firestore.rules,然後更新 match /carts/{cartID} 中的陳述式:
firestore.rules
rules_version = '2';
service cloud.firestore {
    // UPDATE THESE LINES
    match /carts/{cartID} {
      allow create: if request.auth.uid == request.resource.data.ownerUID;
      allow read, update, delete: if request.auth.uid == resource.data.ownerUID;
    }

    // ...
  }
}
這些規則現在只允許購物車擁有者讀取和寫入權限。
為驗證傳入的資料和使用者驗證,我們會使用各規則內容中的兩個物件:
request物件包含所嘗試作業的資料和中繼資料。- 如果 Firebase 專案使用 Firebase 驗證,
request.auth物件會說明發出要求的使用者。
10. 測試購物車存取權
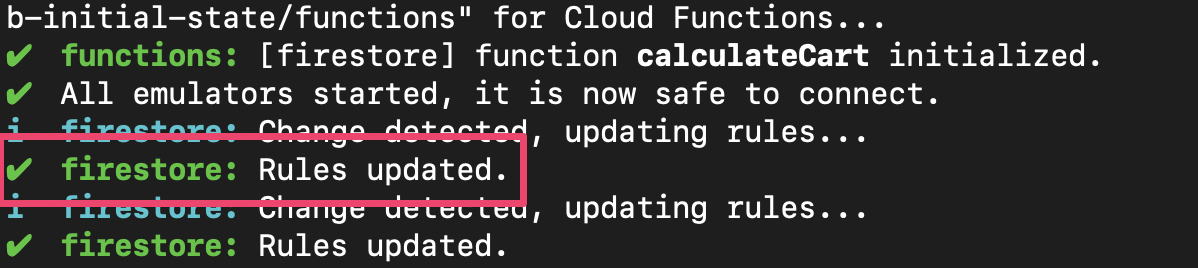
每次儲存 firestore.rules 時,模擬器套件都會自動更新規則。如要確認模擬器已更新規則,您可以在執行模擬器的分頁中查看 Rules updated 訊息:
重新執行測試,檢查前兩項測試現在是否通過:
$ npm test

> functions@ test .../emulators-codelab/codelab-initial-state/functions
> mocha

  shopping carts
    ✓ can be created and updated by the cart owner (195ms)
    ✓ can be read only by the cart owner (136ms)

  shopping cart items
    1) can be read only by the cart owner
    2) can be added only by the cart owner

  adding an item to the cart recalculates the cart total.
    - should sum the cost of their items

  2 passing (482ms)
  1 pending
  2 failing
做得好!您現在可以安全存取購物車。讓我們繼續下一個失敗的測試。
11. 檢查「加入購物車」使用者介面流程
目前,購物車擁有者無法讀取或寫入購物車中的個別商品,無法讀取或寫入購物車中的個別商品。這是因為擁有者雖然可以存取購物車文件,卻無法存取購物車的商品子集合。
使用者無法再使用這個狀態。
返回在 http://127.0.0.1:5000, 上執行的網頁使用者介面,然後嘗試將商品加入購物車。系統會顯示 Permission Denied 錯誤,內容會顯示在偵錯控制台中,這是因為我們尚未授權使用者存取「items」子集合中建立的文件。
12. 允許存取購物車項目
以下兩項測試確認使用者只能將商品加入購物車,或閱讀購物車中的商品:
  it("can be read only by the cart owner", async () => {
    // Alice can read items in her own cart
    await firebase.assertSucceeds(aliceDb.doc("carts/alicesCart/items/milk").get());

    // Bob can't read items in alice's cart
    await firebase.assertFails(bobDb.doc("carts/alicesCart/items/milk").get())
  });

  it("can be added only by the cart owner",  async () => {
    // Alice can add an item to her own cart
    await firebase.assertSucceeds(aliceDb.doc("carts/alicesCart/items/lemon").set({
      name: "lemon",
      price: 0.99
    }));

    // Bob can't add an item to alice's cart
    await firebase.assertFails(bobDb.doc("carts/alicesCart/items/lemon").set({
      name: "lemon",
      price: 0.99
    }));
  });
這樣一來,如果目前使用者的 UID 與購物車文件上的擁有者 UID 相同,我們就可以編寫允許存取的規則。由於您不需要為 create, update, delete 指定不同的規則,因此您可以使用 write 規則,此規則適用於所有修改資料的要求。
更新項目子集合中文件的規則。條件中的 get 正在從 Firestore 讀取值,在本例中為購物車文件中的 ownerUID。
rules_version = '2';
service cloud.firestore {
  match /databases/{database}/documents {
    // ...

    // UPDATE THESE LINES
    match /carts/{cartID}/items/{itemID} {
      allow read, write: if get(/databases/$(database)/documents/carts/$(cartID)).data.ownerUID == request.auth.uid;
    }

    // ...
  }
}
13. 測試購物車項目存取權
現在,我們可以重新執行測試。捲動至輸出內容頂端,檢查是否有更多通過測試:
$ npm test

> functions@ test .../emulators-codelab/codelab-initial-state/functions
> mocha

  shopping carts
    ✓ can be created and updated by the cart owner (195ms)
    ✓ can be read only by the cart owner (136ms)

  shopping cart items
    ✓ can be read only by the cart owner (111ms)
    ✓ can be added only by the cart owner


  adding an item to the cart recalculates the cart total.
    - should sum the cost of their items


  4 passing (401ms)
  1 pending
太好了!現在所有測試都通過了。有一項未完成的測試,但只要幾個步驟就能達成。
14. 勾選「加入購物車」再流程一次
返回網路前端 ( http://127.0.0.1:5000),然後將商品加入購物車。這個步驟非常重要,可確保我們的測試和規則符合用戶端所需的功能。(別忘了,我們上次嘗試 UI 使用者無法將商品加入購物車時!)
儲存 firestore.rules 後,用戶端會自動重新載入規則。因此,請試著將商品加入購物車。
重點回顧
做得好!您剛剛改善了應用程式的安全性,這是在準備發布正式版的重要步驟!如果是正式版應用程式,我們可以將這些測試新增至持續整合管道。如此一來,即使其他人正在修改規則,購物車資料也會繼續擁有這些存取控制。

等一下,使用其他工具
您將會學到:
- 如何編寫由 Firestore 事件觸發的函式
- 如何建立適用於多個模擬器的測試
15. 設定 Cloud Functions 測試
目前為止,我們著重於網頁應用程式的前端和 Firestore 安全性規則。但這個應用程式也使用 Cloud Functions 來讓使用者的購物車保持在最新狀態,因此我們也想測試該程式碼。
模擬器套件可讓您輕鬆測試 Cloud Functions,包括使用 Cloud Firestore 和其他服務的函式。
在編輯器中開啟 emulators-codelab/codelab-initial-state/functions/test.js 檔案,然後捲動至檔案中的最後一個測試。目前標示為待處理:
//  REMOVE .skip FROM THIS LINE
describe.skip("adding an item to the cart recalculates the cart total. ", () => {
  // ...

  it("should sum the cost of their items", async () => {
    ...
  });
});
如要啟用測試,請移除 .skip,如下所示:
describe("adding an item to the cart recalculates the cart total. ", () => {
  // ...

  it("should sum the cost of their items", async () => {
    ...
  });
});
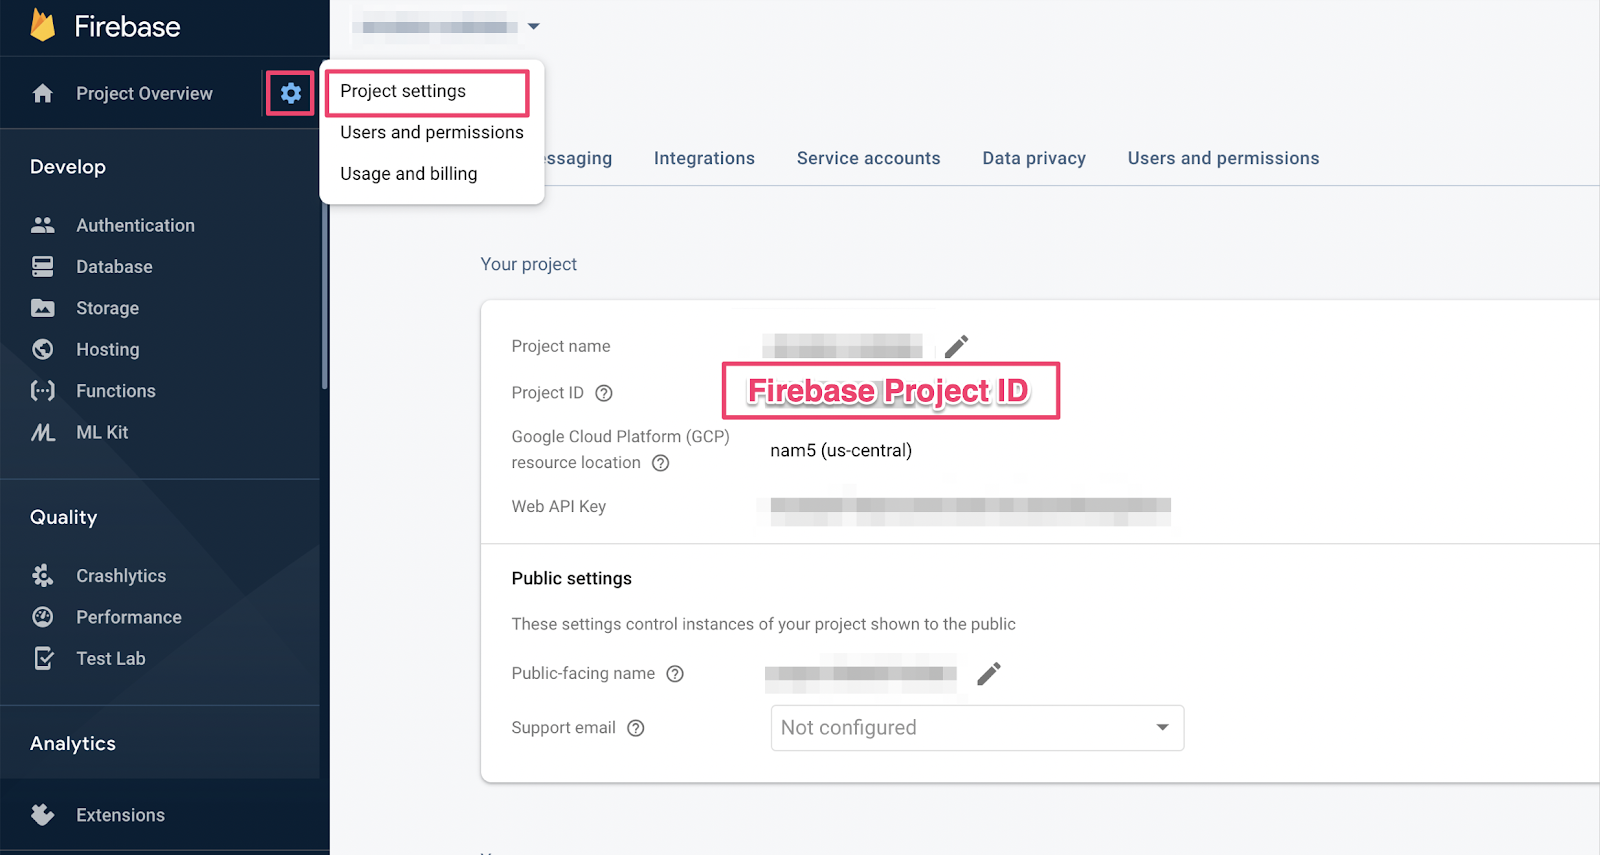
接著,在檔案頂端找出 REAL_FIREBASE_PROJECT_ID 變數,並將其變更為實際的 Firebase 專案 ID:
// CHANGE THIS LINE
const REAL_FIREBASE_PROJECT_ID = "changeme";
如果您忘記了專案 ID,可以在 Firebase 控制台的「專案設定」中找到 Firebase 專案 ID:
16. 逐步瞭解函式測試
由於這項測試會驗證 Cloud Firestore 和 Cloud Functions 之間的互動方式,因此所涉及的設定作業,比先前程式碼研究室中的測試更多。我們將逐步解說這項測試,讓您瞭解測試內容。
建立購物車
Cloud Functions 在受信任的伺服器環境中執行,可以使用 Admin SDK 使用的服務帳戶驗證。首先,請使用 initializeAdminApp (而非 initializeApp) 初始化應用程式。然後,您為購物車建立 DocumentReference,這會將商品加入購物車並初始化購物車:
it("should sum the cost of their items", async () => {
    const db = firebase
        .initializeAdminApp({ projectId: REAL_FIREBASE_PROJECT_ID })
        .firestore();

    // Setup: Initialize cart
    const aliceCartRef = db.doc("carts/alice")
    await aliceCartRef.set({ ownerUID: "alice", totalPrice: 0 });

    ...
  });
觸發函式
然後,將文件加入購物車文件的 items 子集合中,即可觸發函式。新增兩個項目,確保您要測試的新增項目是在函式中進行的新增。
it("should sum the cost of their items", async () => {
    const db = firebase
        .initializeAdminApp({ projectId: REAL_FIREBASE_PROJECT_ID })
        .firestore();

    // Setup: Initialize cart
    const aliceCartRef = db.doc("carts/alice")
    await aliceCartRef.set({ ownerUID: "alice", totalPrice: 0 });

    //  Trigger calculateCart by adding items to the cart
    const aliceItemsRef = aliceCartRef.collection("items");
    await aliceItemsRef.doc("doc1").set({name: "nectarine", price: 2.99});
    await aliceItemsRef.doc("doc2").set({ name: "grapefruit", price: 6.99 });

    ...
    });
  });
設定測試期望
如果購物車文件有任何變更,請使用 onSnapshot() 註冊事件監聽器。onSnapshot() 會傳回一個函式,您可以呼叫這個函式來取消註冊事件監聽器。
在這項測試中加入兩個售價 $9.98 美元的商品。接著,確認購物車中的商品是否有預期的 itemCount 和 totalPrice。如果是,表示函式已執行工作。
it("should sum the cost of their items", (done) => {
    const db = firebase
        .initializeAdminApp({ projectId: REAL_FIREBASE_PROJECT_ID })
        .firestore();

    // Setup: Initialize cart
    const aliceCartRef = db.doc("carts/alice")
    aliceCartRef.set({ ownerUID: "alice", totalPrice: 0 });

    //  Trigger calculateCart by adding items to the cart
    const aliceItemsRef = aliceCartRef.collection("items");
    aliceItemsRef.doc("doc1").set({name: "nectarine", price: 2.99});
    aliceItemsRef.doc("doc2").set({ name: "grapefruit", price: 6.99 });

    // Listen for every update to the cart. Every time an item is added to
    // the cart's subcollection of items, the function updates `totalPrice`
    // and `itemCount` attributes on the cart.
    // Returns a function that can be called to unsubscribe the listener.
    await new Promise((resolve) => {
      const unsubscribe = aliceCartRef.onSnapshot(snap => {
        // If the function worked, these will be cart's final attributes.
        const expectedCount = 2;
        const expectedTotal = 9.98;

        // When the `itemCount`and `totalPrice` match the expectations for the
        // two items added, the promise resolves, and the test passes.
        if (snap.data().itemCount === expectedCount && snap.data().totalPrice == expectedTotal) {
          // Call the function returned by `onSnapshot` to unsubscribe from updates
          unsubscribe();
          resolve();
        };
      });
    });
   });
 });
17. 執行測試
先前的測試可能仍會執行模擬器。如果沒有,請啟動模擬器。在指令列中執行
$ firebase emulators:start --import=./seed
開啟新的終端機分頁 (讓模擬器保持執行),然後移至函式目錄。您在安全性規則測試中可能仍有開啟這項功能。
$ cd functions
現在執行單元測試,您應該會看到共 5 項測試:
$ npm test

> functions@ test .../emulators-codelab/codelab-initial-state/functions
> mocha

  shopping cart creation
    ✓ can be created by the cart owner (82ms)

  shopping cart reads, updates, and deletes
    ✓ cart can be read by the cart owner (42ms)

  shopping cart items
    ✓ items can be read by the cart owner (40ms)
    ✓ items can be added by the cart owner

  adding an item to the cart recalculates the cart total.
    1) should sum the cost of their items

  4 passing (2s)
  1 failing
若查看特定失敗情形,這似乎是逾時錯誤。這是因為測試正在等待函式正確更新,但從未如此。現在,我們已準備好編寫函式以滿足測試。
18. 編寫函式
如要修正這項測試,您需要更新 functions/index.js 中的函式。這個函式雖然已寫入,但並不完整。函式目前看起來如下:
// Recalculates the total cost of a cart; triggered when there's a change
// to any items in a cart.
exports.calculateCart = functions
    .firestore.document("carts/{cartId}/items/{itemId}")
    .onWrite(async (change, context) => {
      console.log(`onWrite: ${change.after.ref.path}`);
      if (!change.after.exists) {
        // Ignore deletes
        return;
      }

      let totalPrice = 125.98;
      let itemCount = 8;
      try {

        const cartRef = db.collection("carts").doc(context.params.cartId);

        await cartRef.update({
          totalPrice,
          itemCount
        });
      } catch(err) {
      }
    });
這個函式已正確設定購物車參照,但不會計算 totalPrice 和 itemCount 的值,而是將其更新為硬式編碼。
透過
items 子集合
將新的常數 itemsSnap 初始化為 items 子集合。接著反覆瀏覽集合中的所有文件。
// Recalculates the total cost of a cart; triggered when there's a change
// to any items in a cart.
exports.calculateCart = functions
    .firestore.document("carts/{cartId}/items/{itemId}")
    .onWrite(async (change, context) => {
      console.log(`onWrite: ${change.after.ref.path}`);
      if (!change.after.exists) {
        // Ignore deletes
        return;
      }


      try {
        let totalPrice = 125.98;
        let itemCount = 8;

        const cartRef = db.collection("carts").doc(context.params.cartId);
        // ADD LINES FROM HERE
        const itemsSnap = await cartRef.collection("items").get();

        itemsSnap.docs.forEach(item => {
          const itemData = item.data();
        })
        // TO HERE

        return cartRef.update({
          totalPrice,
          itemCount
        });
      } catch(err) {
      }
    });
計算 totalPrice 和 itemCount
首先,請將 totalPrice 和 itemCount 的值初始化為零。
接著,將邏輯新增至疊代區塊。首先,請確認該商品提供價格。如果商品未指定數量,請預設為 1。然後將數量加入 itemCount 的跑步總值中。最後,將商品價格乘以數量,與 totalPrice 的執行總值相加:
// Recalculates the total cost of a cart; triggered when there's a change
// to any items in a cart.
exports.calculateCart = functions
    .firestore.document("carts/{cartId}/items/{itemId}")
    .onWrite(async (change, context) => {
      console.log(`onWrite: ${change.after.ref.path}`);
      if (!change.after.exists) {
        // Ignore deletes
        return;
      }

      try {
        // CHANGE THESE LINES
        let totalPrice = 0;
        let itemCount = 0;

        const cartRef = db.collection("carts").doc(context.params.cartId);
        const itemsSnap = await cartRef.collection("items").get();

        itemsSnap.docs.forEach(item => {
          const itemData = item.data();
          // ADD LINES FROM HERE
          if (itemData.price) {
            // If not specified, the quantity is 1
            const quantity = itemData.quantity ? itemData.quantity : 1;
            itemCount += quantity;
            totalPrice += (itemData.price * quantity);
          }
          // TO HERE
        })

        await cartRef.update({
          totalPrice,
          itemCount
        });
      } catch(err) {
      }
    });
您也可以新增記錄功能,協助偵錯成功和錯誤狀態:
// Recalculates the total cost of a cart; triggered when there's a change
// to any items in a cart.
exports.calculateCart = functions
    .firestore.document("carts/{cartId}/items/{itemId}")
    .onWrite(async (change, context) => {
      console.log(`onWrite: ${change.after.ref.path}`);
      if (!change.after.exists) {
        // Ignore deletes
        return;
      }

      let totalPrice = 0;
      let itemCount = 0;
      try {
        const cartRef = db.collection("carts").doc(context.params.cartId);
        const itemsSnap = await cartRef.collection("items").get();

        itemsSnap.docs.forEach(item => {
          const itemData = item.data();
          if (itemData.price) {
            // If not specified, the quantity is 1
            const quantity = (itemData.quantity) ? itemData.quantity : 1;
            itemCount += quantity;
            totalPrice += (itemData.price * quantity);
          }
        });

        await cartRef.update({
          totalPrice,
          itemCount
        });

        // OPTIONAL LOGGING HERE
        console.log("Cart total successfully recalculated: ", totalPrice);
      } catch(err) {
        // OPTIONAL LOGGING HERE
        console.warn("update error", err);
      }
    });
19. 重新執行測試
在指令列中,確認模擬器仍在執行中並重新執行測試。您不需要重新啟動模擬器,因為模擬器會自動接收函式的變更。您應該會看到所有通過的測試:
$ npm test
> functions@ test .../emulators-codelab/codelab-initial-state/functions
> mocha

  shopping cart creation
    ✓ can be created by the cart owner (306ms)

  shopping cart reads, updates, and deletes
    ✓ cart can be read by the cart owner (59ms)

  shopping cart items
    ✓ items can be read by the cart owner
    ✓ items can be added by the cart owner

  adding an item to the cart recalculates the cart total.
    ✓ should sum the cost of their items (800ms)


  5 passing (1s)
太棒了!
20. 透過店面使用者介面試用
進行最終測試時,請返回網頁應用程式 ( http://127.0.0.1:5000/),並將商品加入購物車。
確認購物車更新為正確的總金額。太棒了!
重點回顧
您已逐步瞭解 Cloud Functions for Firebase 和 Cloud Firestore 之間的複雜測試案例。您編寫了 Cloud 函式來通過測試。您也確認使用者介面中的新功能運作正常!您已完成所有這些操作,也就是在自己的機器上執行模擬器。
您也建立了以本機模擬器執行的網路用戶端、量身打造的安全性規則,用於保護資料,並在本機模擬器測試安全性規則。