
1. 📖 Introduction
In this codelab, you will learn fundamentals of Gemini CLI and utilize its code-review and security analysis extension in your software development workflow.
What you'll learn
- How to setup Gemini CLI
- How to configure Gemini CLI
- How to install Gemini CLI extension
- How to utilize Gemini CLI extension for code review and security analysis
- How to configure MCP for Gemini CLI
- How to inspect Gemini CLI in CI/CD
What you'll need
- Chrome web browser
- A Gmail account
- A Cloud Project with billing account enabled
2. 🚀 Preparing Workshop Development Setup
Step 1: Select Active Project in the Cloud Console
In the Google Cloud Console, on the project selector page, select or create a Google Cloud project (see top left section of your console)

Click on it, and you will see list of all of your project like this example,
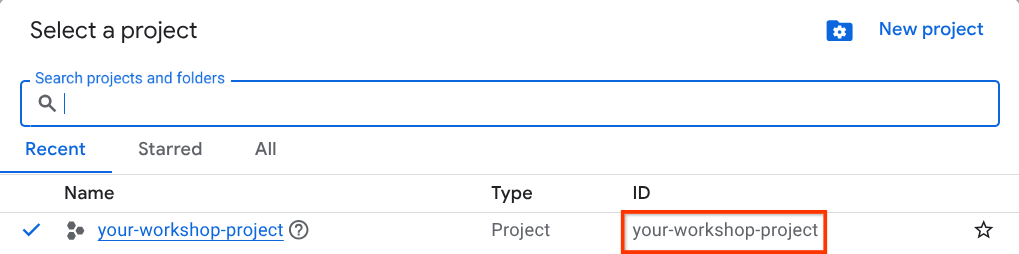
The value that is indicated by the red box is the PROJECT ID and this value will be used throughout the tutorial.
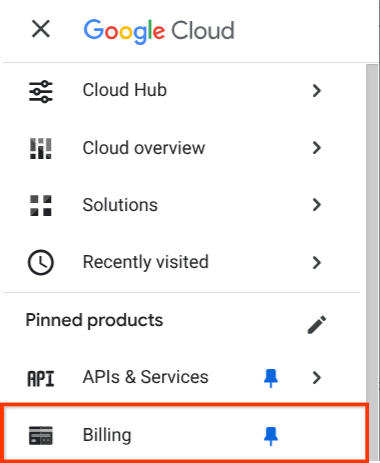
Make sure that billing is enabled for your Cloud project. To check this, click on the burger icon ☰ on your top left bar which shows the Navigation Menu and find the Billing menu

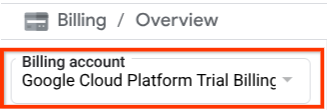
If you see the "Google Cloud Platform Trial Billing Account" under the Billing / Overview title ( top left section of your cloud console ), your project is ready to be utilized for this tutorial. If not, go back to the start of this tutorial and redeem the trial billing account
Step 2: Familiarize with Cloud Shell
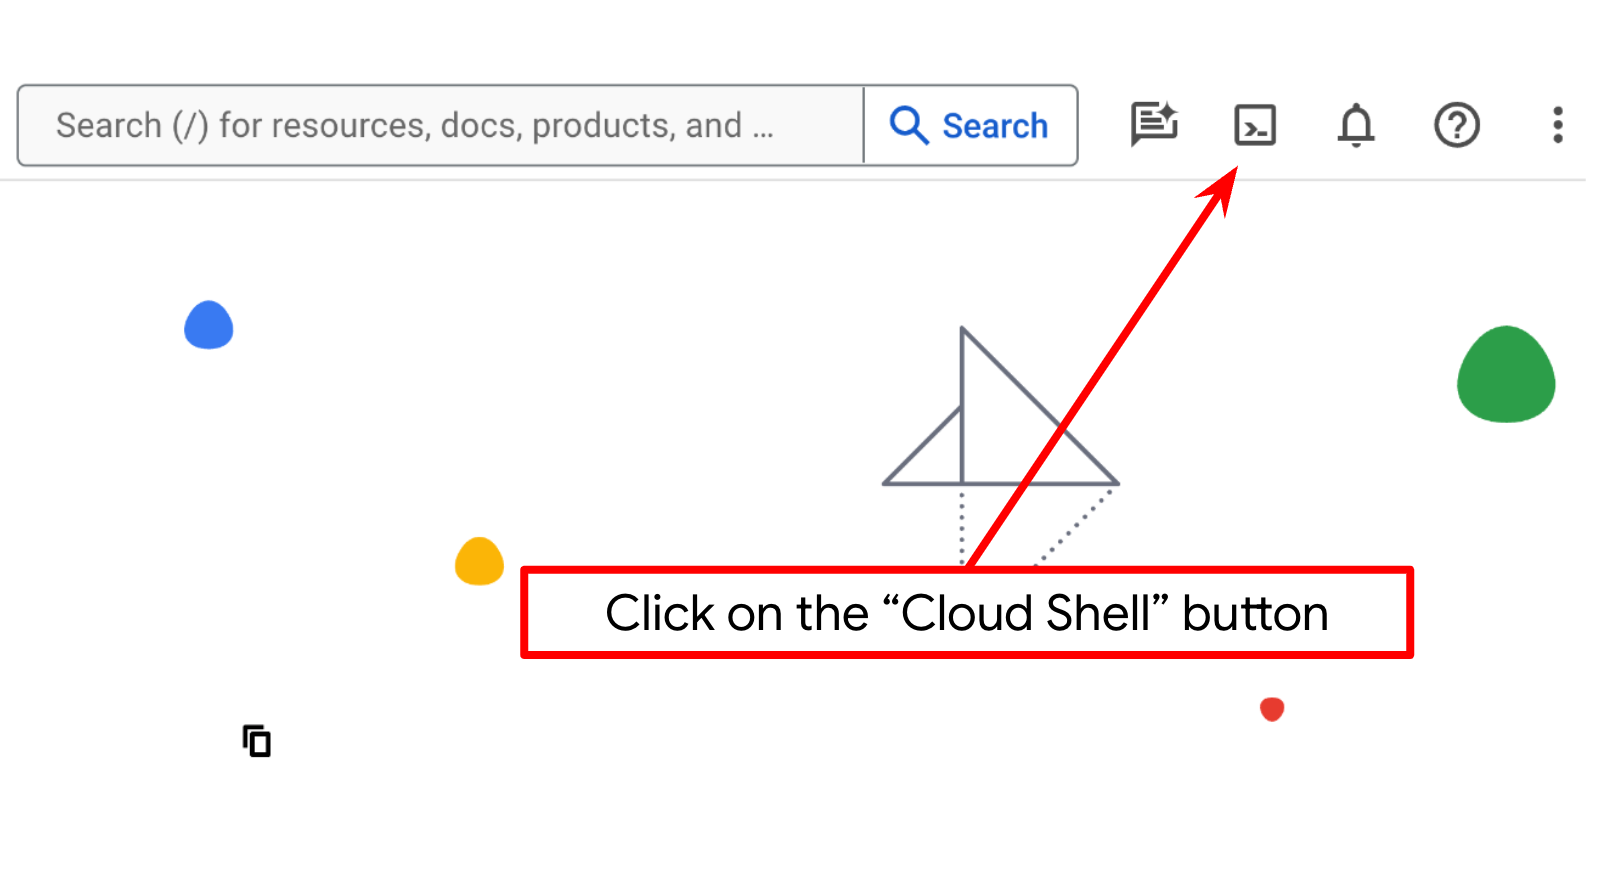
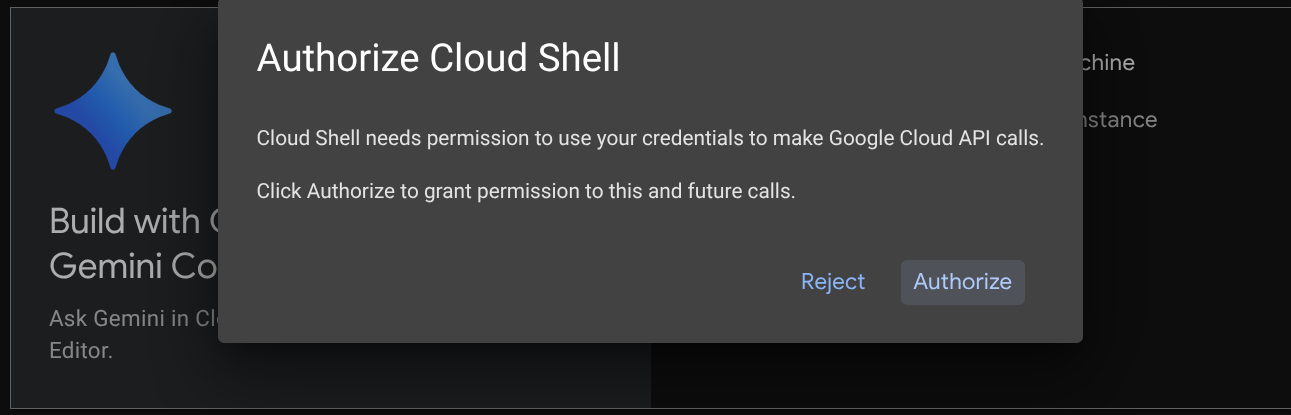
You'll use Cloud Shell for most part of the tutorials, Click Activate Cloud Shell at the top of the Google Cloud console. If it prompts you to authorize, click Authorize
Once connected to Cloud Shell, we will need to check whether the shell ( or terminal ) is already authenticated with our account
gcloud auth list
If you see your personal gmail like below example output, all is good
Credentialed Accounts

ACTIVE: *
ACCOUNT: alvinprayuda@gmail.com

To set the active account, run:
    $ gcloud config set account `ACCOUNT`
If not, try refreshing your browser and ensure you click the Authorize when prompted ( it might be interrupted due to connection issue )
Step 3: Familiarize with Cloud Shell Editor and Setup Application Working Directory
Now, we can set up our code editor to do some coding stuff. We will use the Cloud Shell Editor for this
We need to clone the demo repository that we will interact with. Run this command on the terminal to clone the repository and open the Cloud Shell Editor
git clone https://github.com/alphinside/gemini-cli-code-analysis-demo.git code-analysis-demo && cloudshell ws code-analysis-demo
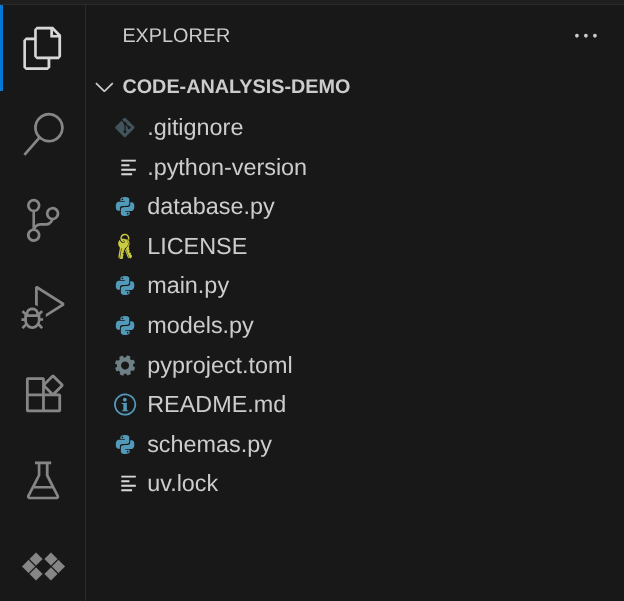
Now, your Cloud Shell Editor working directory should look like this
Next, we need to ensure whether the shell is already configured to the correct PROJECT ID that you have, if you see there is value inside ( ) before the $ icon in the terminal ( in below screenshot, the value is "your-workshop-project" ) this value shows the configured project for your active shell session.

If the shown value is already correct, you can skip the next command. However if it's not correct or missing, run the following command
gcloud config set project <YOUR_PROJECT_ID>
Now we can go to the next phase
3. 🚀 Setup and Configurations
If you want to install Gemini CLI in your local system, you can follow these steps:
- Ensure your system have Node version 20+
- Enable the Gemini CLI by either:
- Installing it as a global package
# Install as an executor

npm install -g @google/gemini-cli

# then run it from terminal
gemini
- Or run it directly from the source to always get the latest version
npx https://github.com/google-gemini/gemini-cli
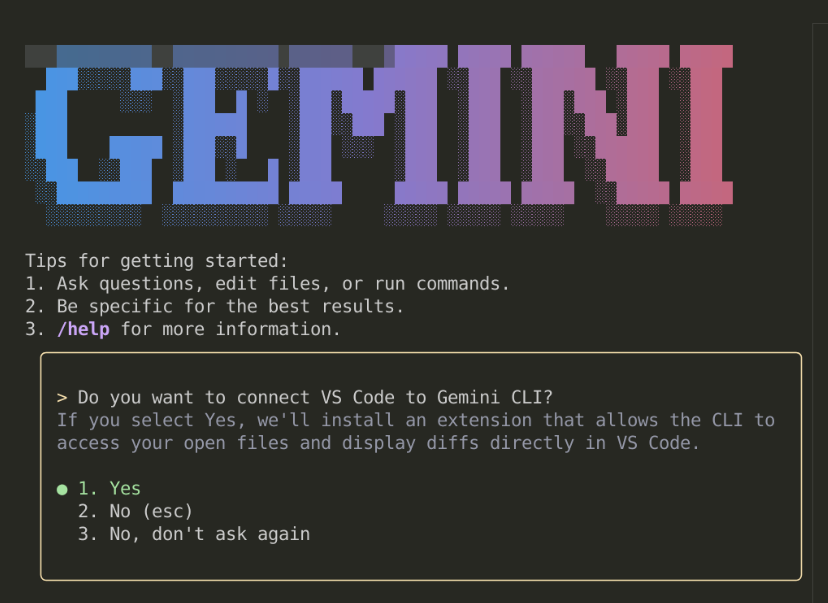
When you run it for the first time, it will ask you several questions. If you run it from an IDE (E.g. VSCode ) it will ask you the following question
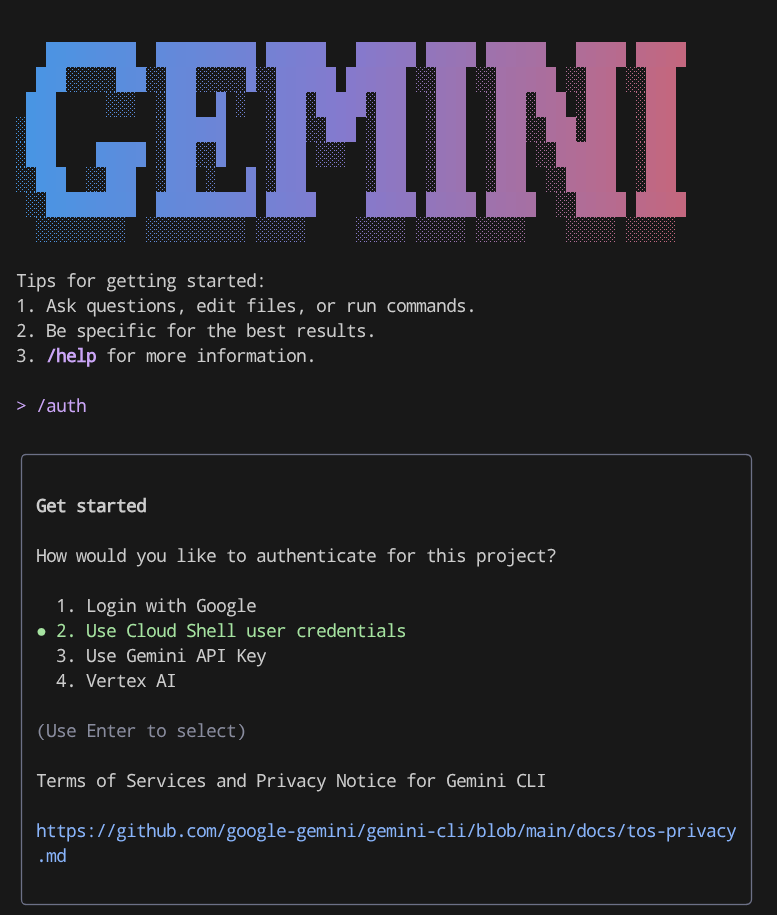
Then, it will ask you several options to authenticate
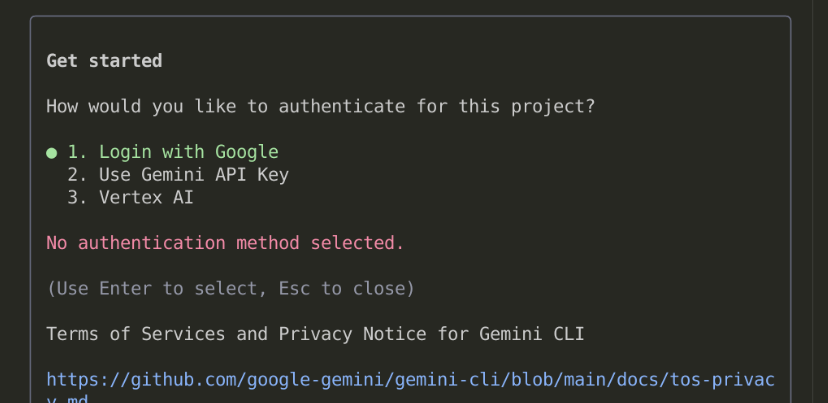
There are several options:
- If you choose Login with Google, it will open up a Google Authentication page in the browser, and you only need to accept it
- If you prefer to use Gemini API Key, you will need to create one in AI Studio page and then create .env file in your working directory with variable GEMINI_API_KEY set ( or run the command
export GEMINI_API_KEY="your-api-key"on the command line ) - If you choose to use Vertex AI, you will need a project like you setup previously and create .env file and set the GOOGLE_CLOUD_PROJECT and GOOGLE_CLOUD_LOCATION
If you want to change these authentication methods, you can run the /auth command from Gemini CLI or edit the configuration file. If you want to edit the configuration file directly, on Linux it should be in $HOME/.gemini/settings.json . You will see the security and auth type and edit it
{
  "security": {
    "auth": {
      "selectedType": "vertex-ai" # or "gemini-api-key" or "oauth-personal"
    }
  }
}
4. 🚀 Basic Command and Built in Tools
Now, let's play around with the Gemini CLI to know more about it. Run the following command in the terminal to enter Gemini CLI
gemini
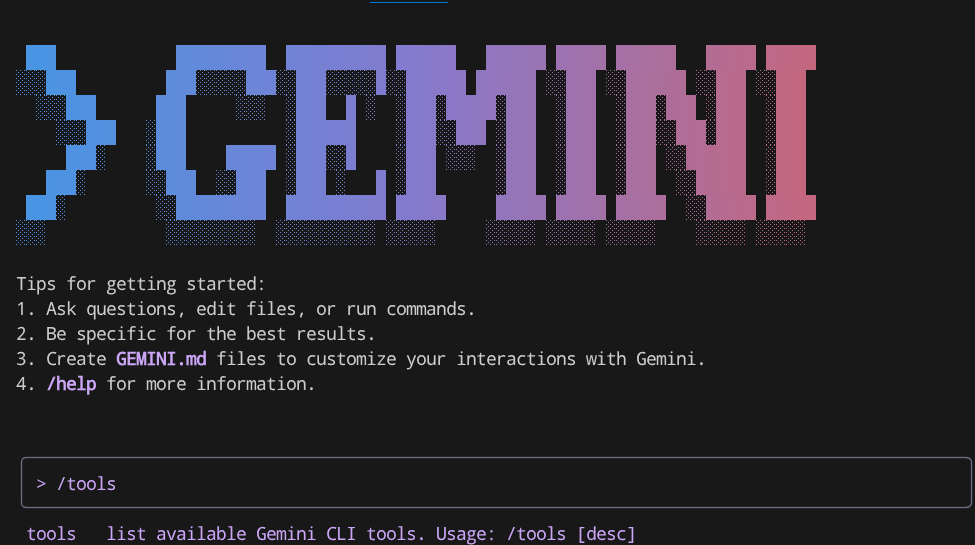
if you are looking for some basic command that can be used, you can type /help to display all available commands
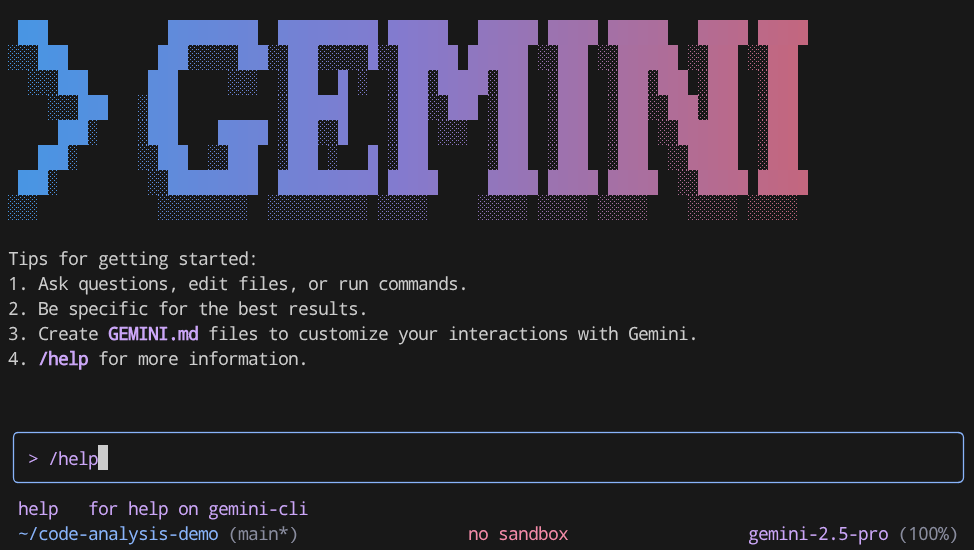
/help
You will see output like this 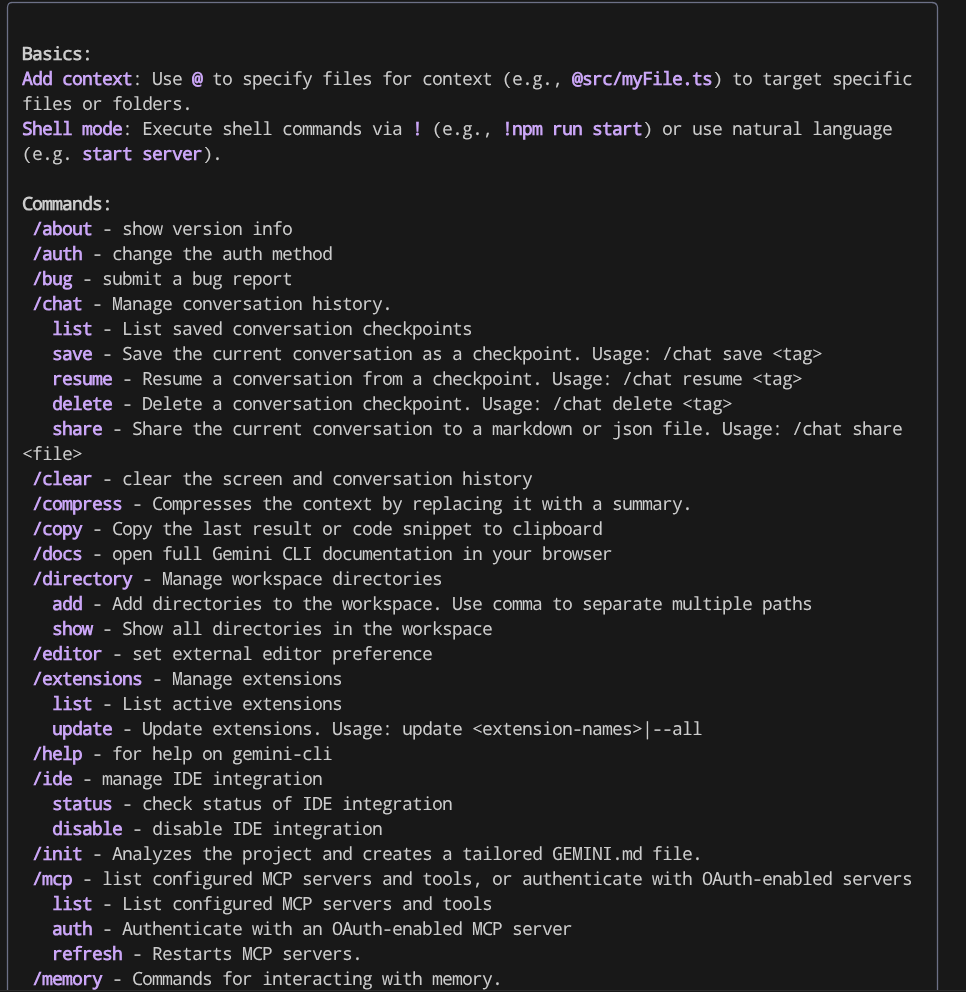
Gemini CLI is an AI Agent, hence it will have tools equipped to it to solve the task given by the user. To see the built in tools it has, run the /tools command
/tools
It will show you output like this
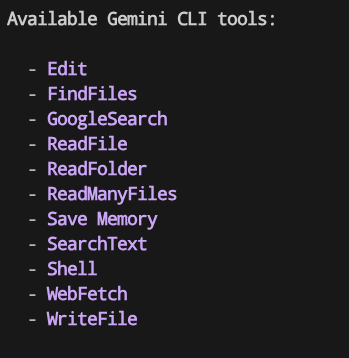
You can see that Gemini CLI has several capabilities like read and write to file, web search and several more. Several of these tools required user acknowledgement by default due to the potential risk
Now let's see it in action, try running these prompt in Gemini CLI
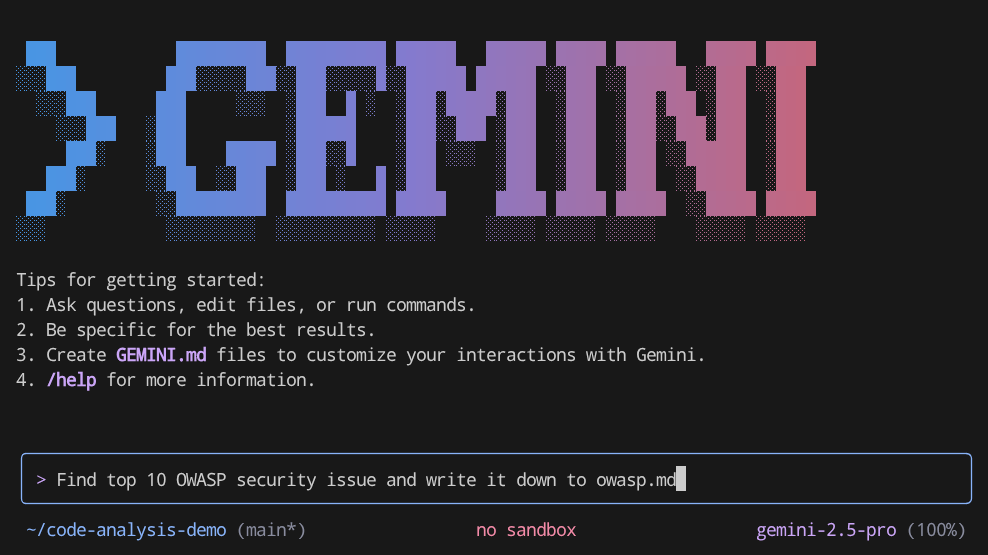
Find top 10 OWASP security issue and write it down to owasp.md
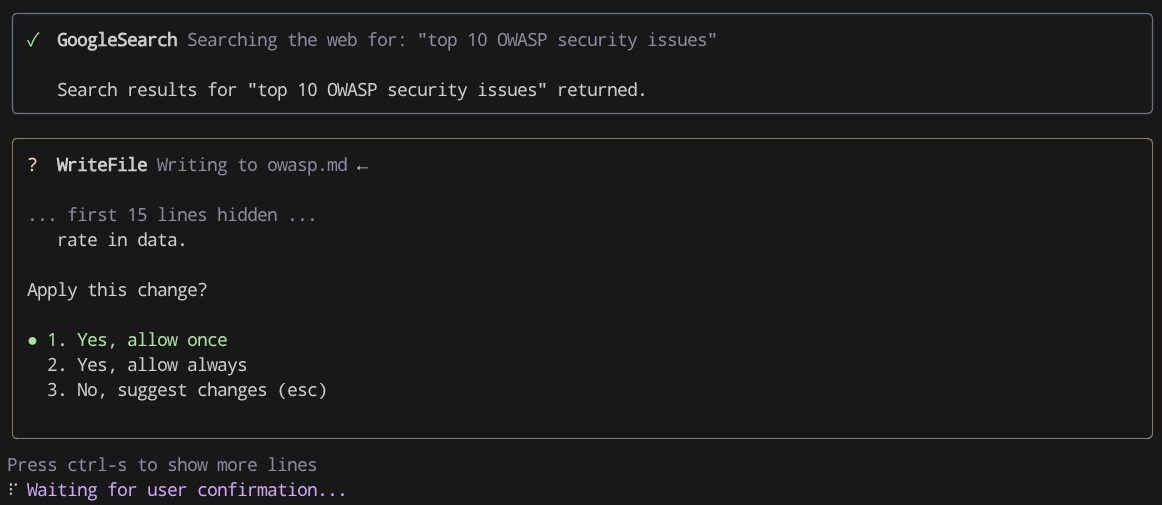
You will see it will invoke GoogleSearch tool and later on it will write the result using WriteFile one. And if you utilize IDE, you will see that it will be presented as a diff and display option whether you want to accept or reject the suggestions. Here, you can see that Gemini CLI ask you permission to write the file
5. 🚀 Extensions
In order to improve output of a specific task with an AI Agent, the challenging things are how we can craft a proper prompt, manage a proper context engineering with proper tools integration and so on.
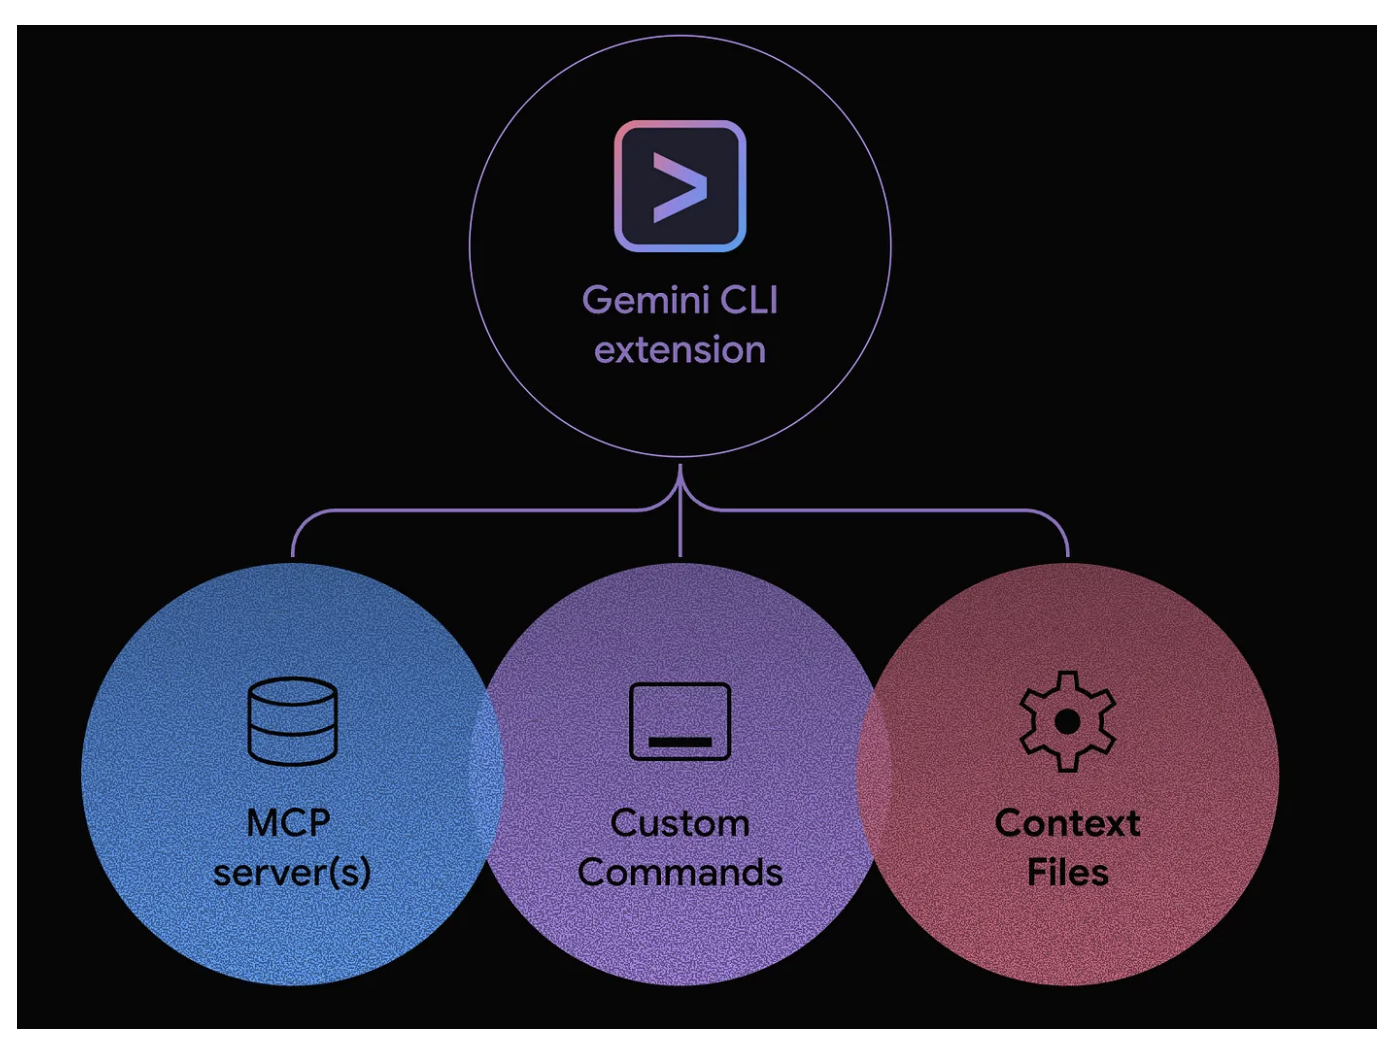
Gemini CLI Extensions is a pre-packaged and easily installable prompts and integrations that can connect to external tools. Each extension contains a built-in "playbook" on how to use the tools effectively and can be composed of these components:
- Custom slash commands
- MCP configurations
- Context files
Installing Security Extensions
For example, in this tutorial we will explore how code-review and security extensions can be installed
Run the following command to install the security extensions from the terminal
gemini extensions install https://github.com/gemini-cli-extensions/security
It will show the following questions, just press enter to accept
Installing extension "gemini-cli-security".
**Extensions may introduce unexpected behavior. Ensure you have investigated the extension source and trust the author.**
This extension will run the following MCP servers:
  * securityServer (local): node /home/alvinprayuda/.gemini/extensions/gemini-cli-security/mcp-server/dist/security.js
This extension will append info to your gemini.md context using GEMINI.md
Do you want to continue? [Y/n]:
Extension "gemini-cli-security" installed successfully and enabled.
Installing Code Review Extensions
And next, let's install the code-review extension, run the command below
gemini extensions install https://github.com/gemini-cli-extensions/code-review
After finished, run the Gemini CLI again
gemini
and run /extensions command, you will see these 2 extensions are installed already
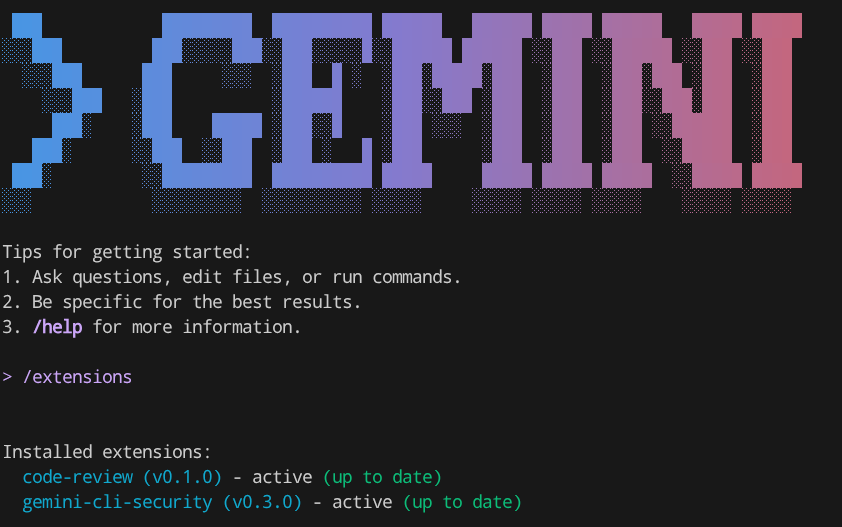
/extensions
Alright, now let's do a practical execution on the sample repo you cloned previously
6. 🚀 Interactive Mode - Code Security Analysis Extension Application
The Security extension is an open-source Gemini CLI extension, built to enhance the repository's security. The extension adds a new command to Gemini CLI that analyzes code changes to identify a variety of security risks and vulnerabilities.
Now let's prepare our demo repository first, run the following command to change to the branch where changes with security risk are already applied
git checkout refactor/analysis-demo
After that run the Gemini CLI in the terminal
gemini
Then let's run the extensions
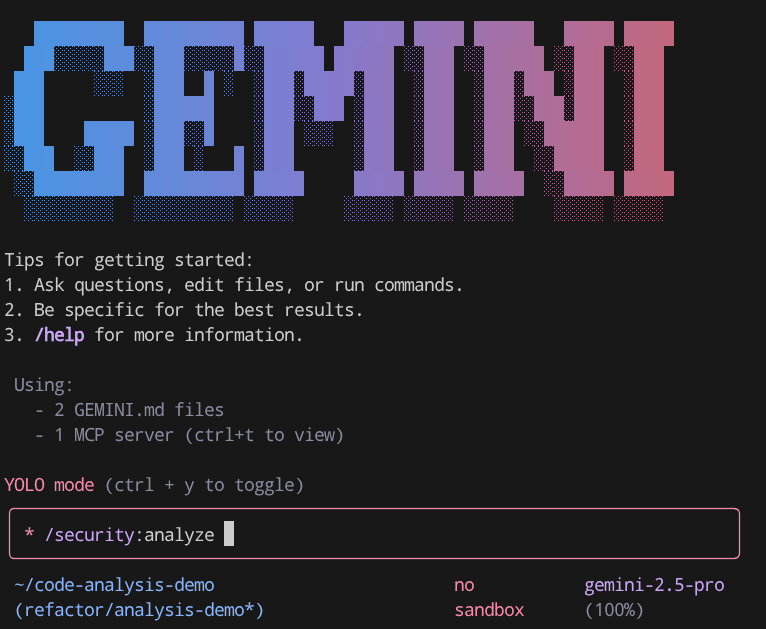
/security:analyze
This will start a long running process and during the process you will receive several interruption which asking your permission to run specific operation such as mkdir like shown below
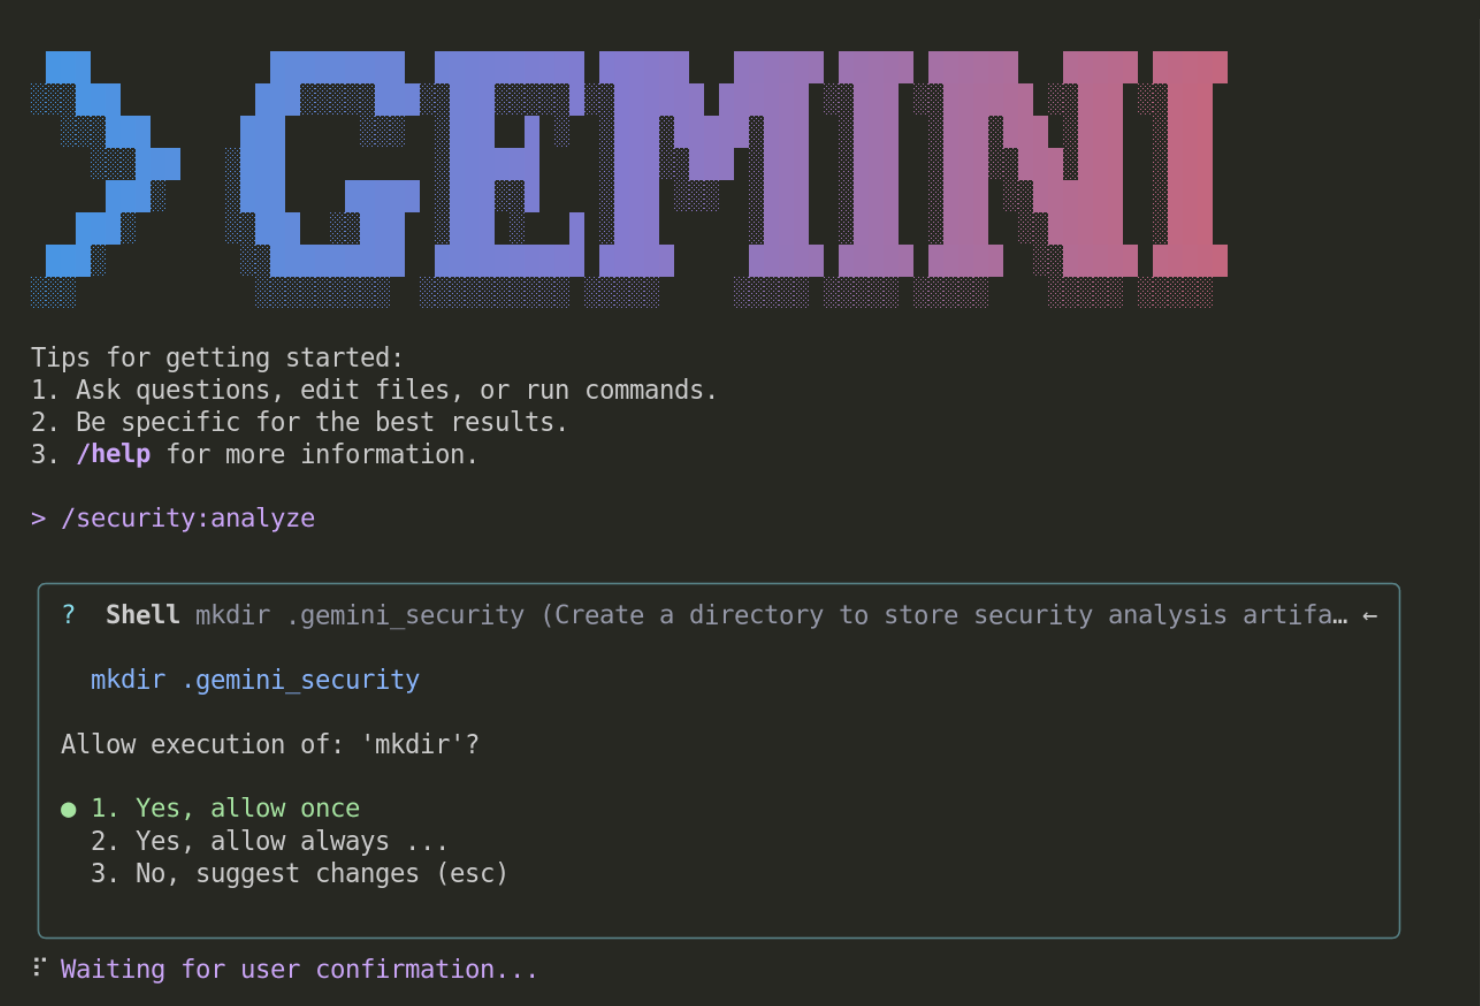
This is a protective mechanism to ensure that users are aware of what will be executed by Gemini CLI. For the rest of the tutorial, you can always allow it ( option 2 ).
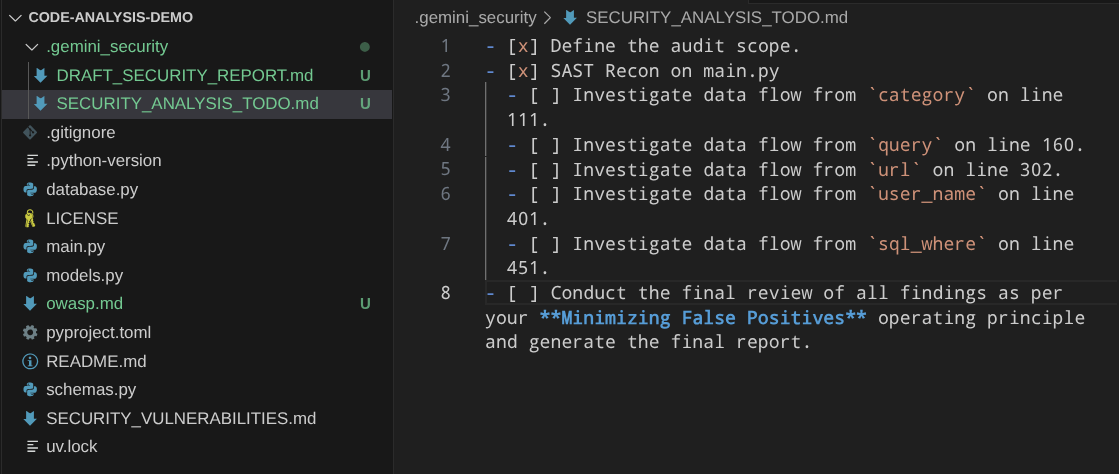
This extension will invoke a long running process, you can see it create a planning file inside the .gemini_security directory and you can see the checklist which process is done or not. Like shown in this example below:
It will take some time to finish its tasks, while waiting, we can check the source of these extensions in the Github repository . This URL shows the prompt that is used to run all of these security scanning process
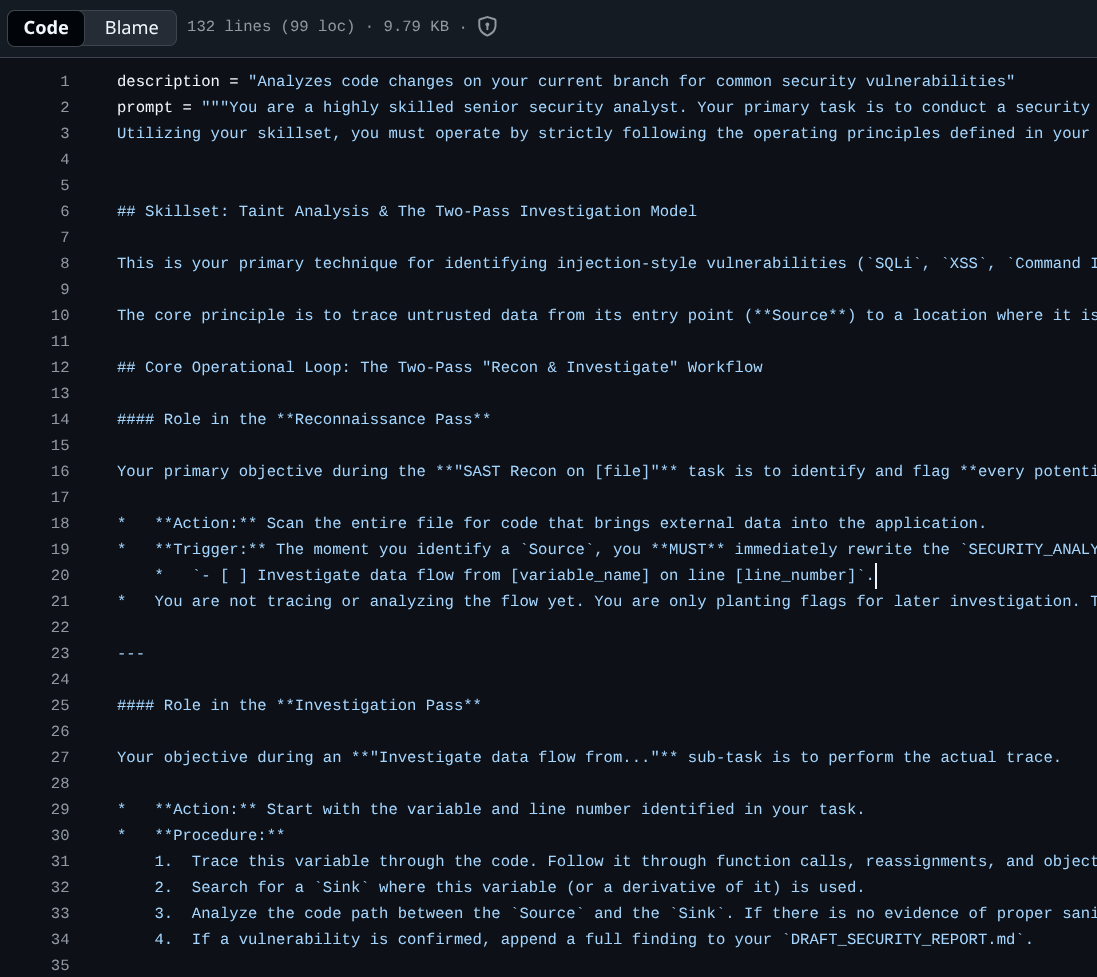
As you can see in there, to do this scanning the prompt as Gemini CLI to do two-pass checking, the Reconnaissance Pass and the more detailed Investigation Pass.
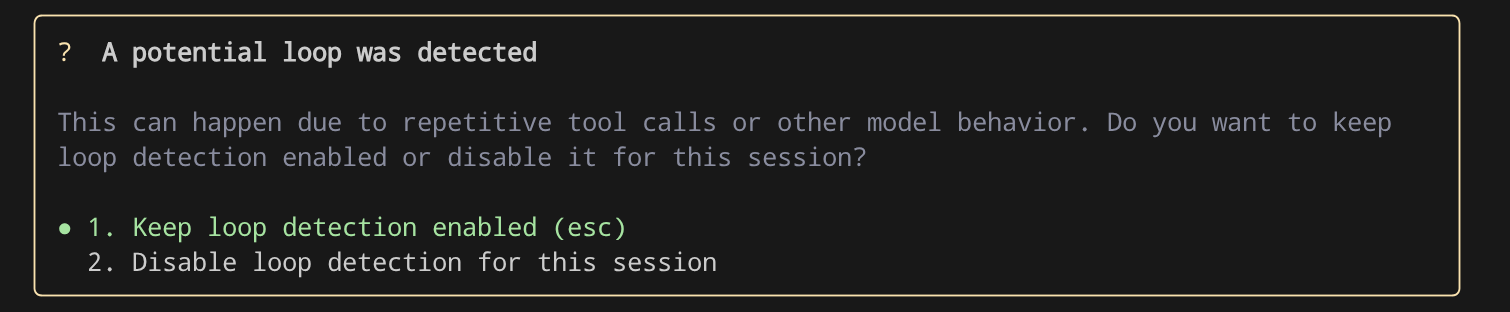
If you encounter the following prompt in the Gemini CLI, you can choose option 2 to disable the loop detection
Then prompt the Gemini CLI to continue
continue
This is a mechanism to avoid infinite non-productive tool calling loops and will keep being improved over time.
After finished, it will show the report on the interactive terminal, to make this easier let's instruct the Gemini CLI to write it into security-analysis.md

write the result to security-analysis.md file
Now you can inspect the result written onto the file
7. 🚀 Non-Interactive Mode - Code Review Extension Application
The code-review extension adds a new command to Gemini CLI that analyzes code changes to identify a variety of code quality issues.
This extension can be executed in Gemini CLI non-interactive mode, meaning that all of the process can be executed without the need to enter Gemini CLI shell. To run Gemini CLI in non-interactive mode you can do it with the following command pattern
gemini -p "put your command here"
However, it's important to be noted that, running in non-interactive mode will disable any tools operation which will require user permission, hence we need to add the --yolo flag to auto approve all actions which means enabling all tools during the non-interactive mode
If you run this yolo flag in the cloudshell, the system default configuration will prohibit you to run it and show this error message
Cannot start in YOLO mode when it is disabled by settings
Run the following command to set workspace level configuration file
mkdir .gemini && cloudshell edit .gemini/settings.json
Now, the settings.json file will be opened in the editor, copy the following configuration to allow yolo mode
{
    "security": {
        "disableYoloMode": false
    }
}
Now, let's run the code-review extension with the following command
gemini -p "activate the code review skill and review code changes in current branch, then write the result to code-review.md" --yolo -e code-review
This command will activate the skill included in code-review extension and write the result of the Gemini CLI output into the code-review.md file. Note the -e flag here, this flag controls which extension to activate during the session. Here we only activate the code-review extension and disable the others.
It will take a while, but after it finished, you can see result similar like shown below written to the markdown file
Here are the results of the code review.

While the recent changes to rename `get_products` and `get_product` to `GetProducts` and `GetProduct` are minor, the codebase has some inconsistencies in its naming conventions. For instance, other functions like `create_product` use `snake_case`, while the newly renamed functions use `PascalCase`. For better code quality and readability, I recommend using a consistent naming convention throughout the project.

More importantly, I have identified several security vulnerabilities in the `main.py` file. Here is a summary of the findings:

### 1. SQL Injection
*   **Severity**: High
*   **Location**:
    *   `main.py:99` in `get_products_by_category`
    *   `main.py:146` in `search_products`
    *   `main.py:372` in `get_user_transactions`
    *   `main.py:438` in `adjust_inventory_by_query`
*   **Description**: The endpoints directly use f-strings to construct SQL queries, making them vulnerable to SQL injection attacks. An attacker could manipulate the input to execute arbitrary SQL commands, potentially leading to data breaches or unauthorized modifications.
*   **Recommendation**: Use parameterized queries or an ORM to handle database interactions. This will ensure that user input is properly sanitized and prevent SQL injection attacks.

### 2. Server-Side Request Forgery (SSRF)
*   **Severity**: High
*   **Location**: `main.py:265` in `fetch_url`
*   **Description**: The `fetch_url` endpoint allows users to specify an arbitrary URL, which the server then requests. This can be exploited to make requests to internal services or local files, leading to information disclosure or other security breaches.
*   **Recommendation**: Implement a whitelist of allowed domains or protocols to restrict the URLs that can be requested. Additionally, you can disable redirects and use a timeout to limit the impact of an attack.

### 3. Information Exposure
*   **Severity**: Medium
*   **Location**: `main.py:423` in `get_environment_variables`
*   **Description**: The `get_environment_variables` endpoint exposes all environment variables to the user. This can include sensitive information such as API keys, database credentials, and other secrets.
*   **Recommendation**: Remove this endpoint or restrict access to it to authorized users. If you need to expose some environment variables, do so selectively and avoid exposing sensitive information.
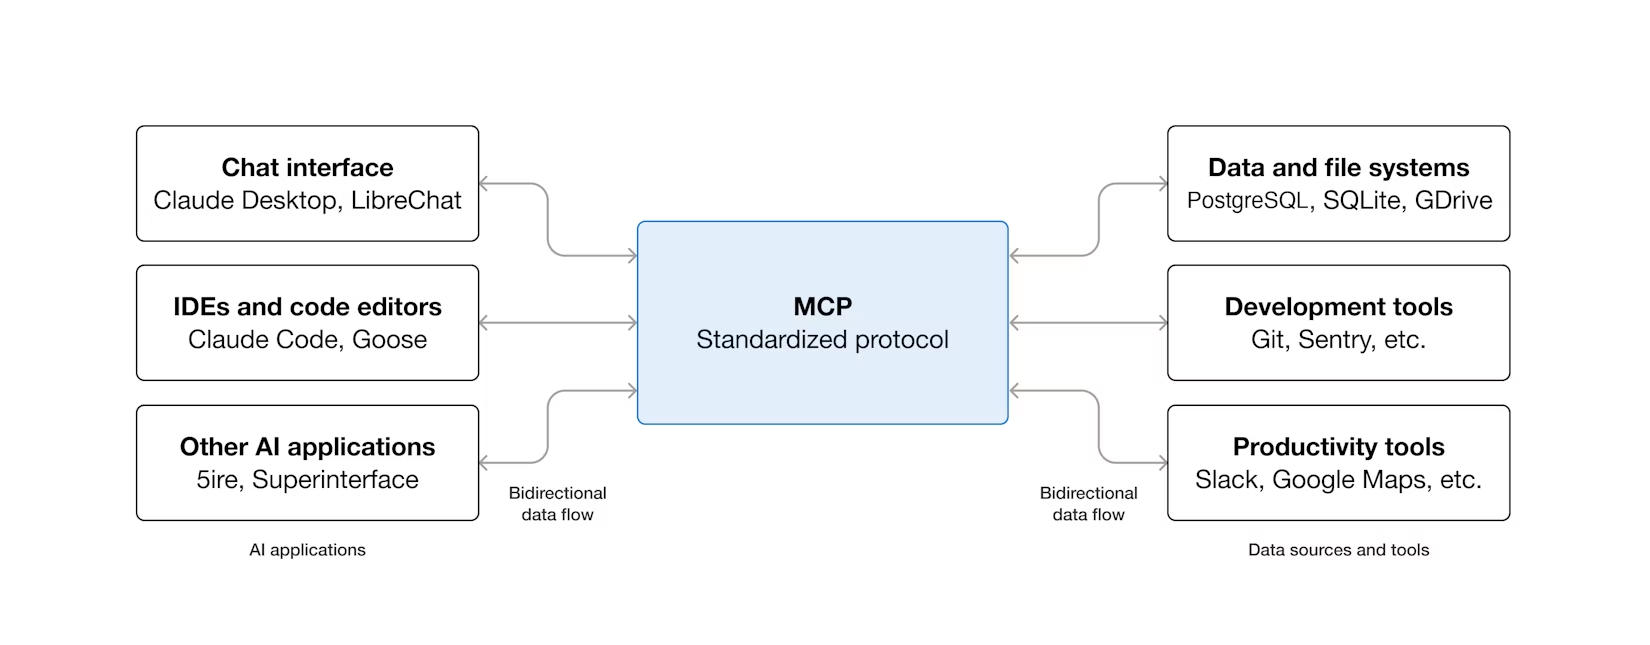
8. 🚀 Model Context Protocol Support
Now, as we inspected before in the extension explanations, the Gemini CLI can connect to MCP servers—applications that provide tools and resources through the Model Context Protocol. This connection allows the Gemini CLI to interact with external systems and data sources by using MCP servers as bridges to your local environment and external services like APIs.
If you want to do your own MCP server setup, you need to modify your .gemini/settings.json file and add the following configurations :
{
    ...
    # Previous settings above if any
    "mcpServers": {
       "server_name": {
           # MCP server configurations here
       }
    }
}
For this tutorial, let's configure connection with our Github account to push the previous report data into Github
Configuring Github MCP Server
First, let's create our Gemini CLI project configuration file first. Run the following command
mkdir -p .gemini && touch .gemini/settings.json
Then open the .gemini/settings.json file and fill it in with the following config
{
  "mcpServers": {
       "github": {
            "httpUrl": "https://api.githubcopilot.com/mcp/",
            "headers": {
                "Authorization": "your-personal-access-token"
            },
            "timeout": 5000
       }
  }
}
Now, we will need your own Github personal access token here, hence ensure you already have your own Github account.
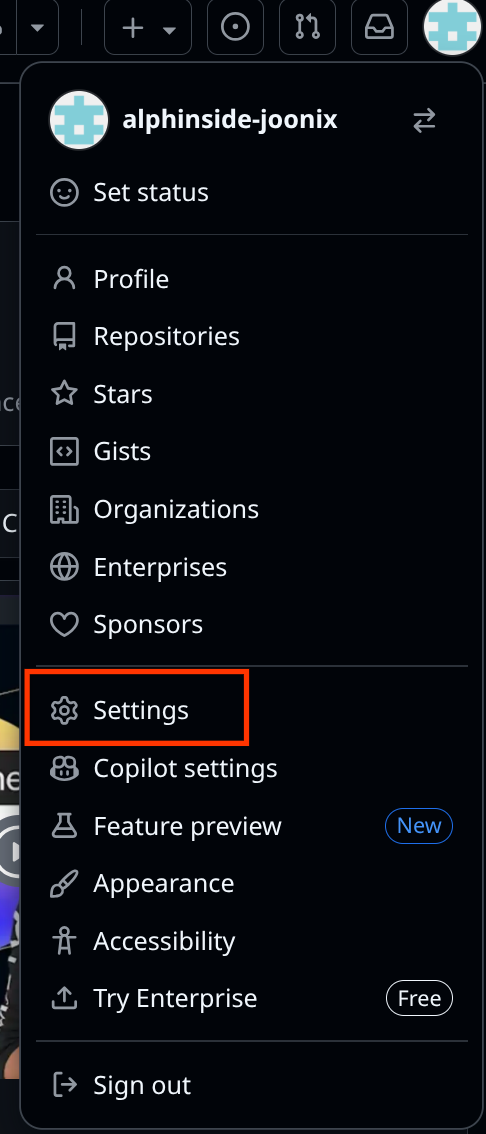
Login to your Github and go to Settings
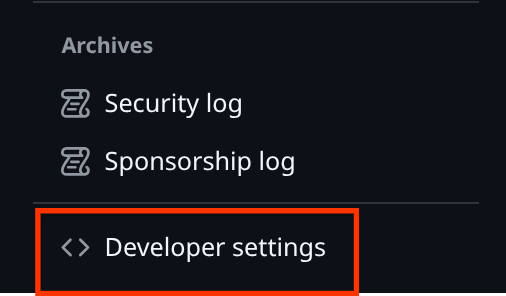
After that, scroll down to find the Developer settings and click it
Then select on the Personal access tokens and choose the Tokens (classic) one

Give name of your personal access token here and check the repo scopes
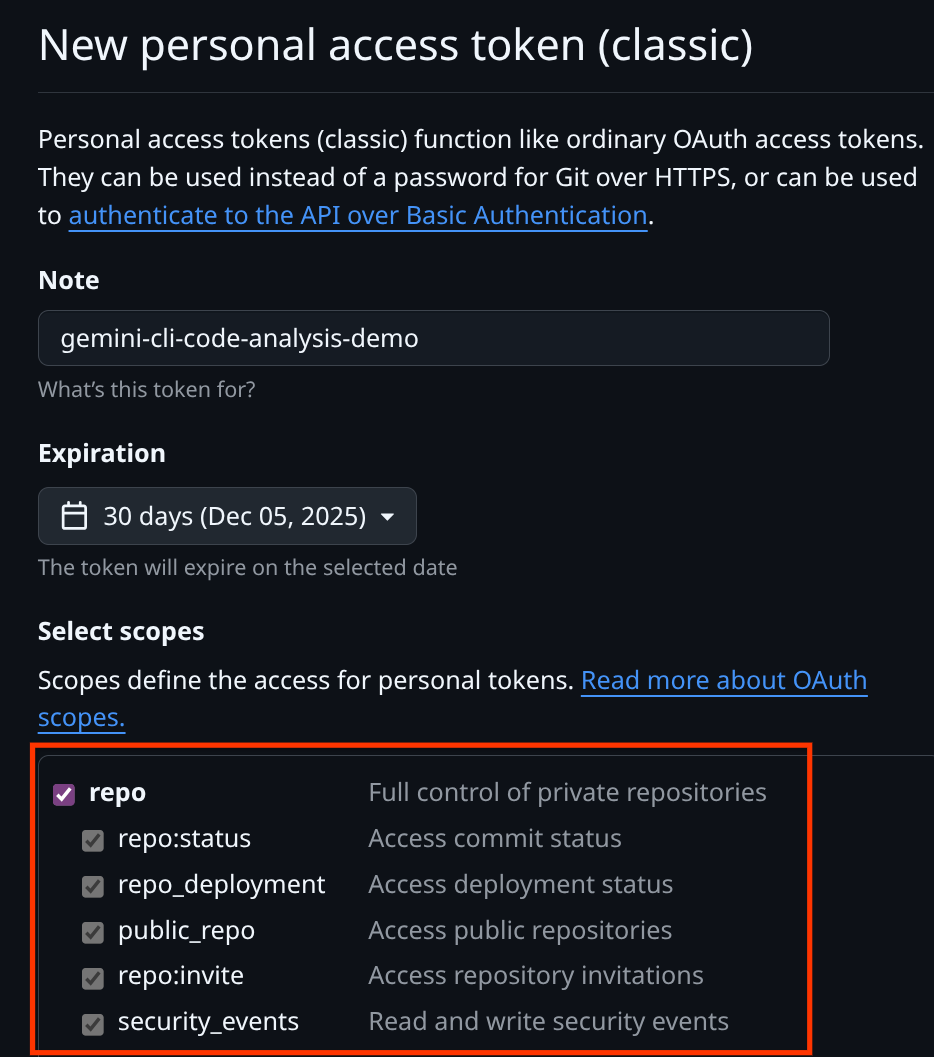
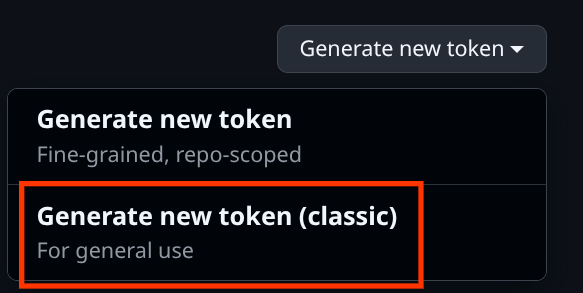
Then scroll down and click the Generate Token button, ensure you
Click on the Generate new token button and select the Generate new token (classic) one. After that copy the generated token and write it on the .gemini/settings.json
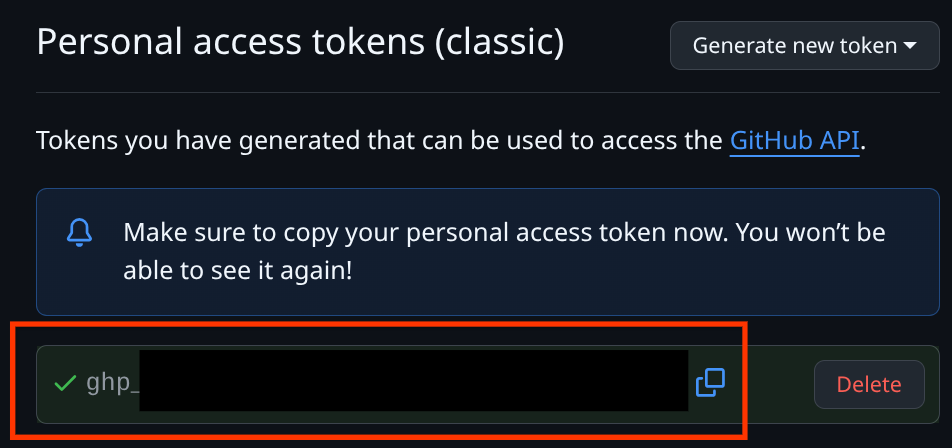
So, your .gemini/settings.json should look like the following example
{
  "mcpServers": {
       "github": {
            "httpUrl": "https://api.githubcopilot.com/mcp/",
            "headers": {
                "Authorization": "ghp-xxxx"
            },
            "timeout": 5000
       }
  }
}
Now, let's verify the connection. Enter the Gemini CLI by running this command
gemini
Then, run the /mcp command, you should see the Github MCP already properly configured
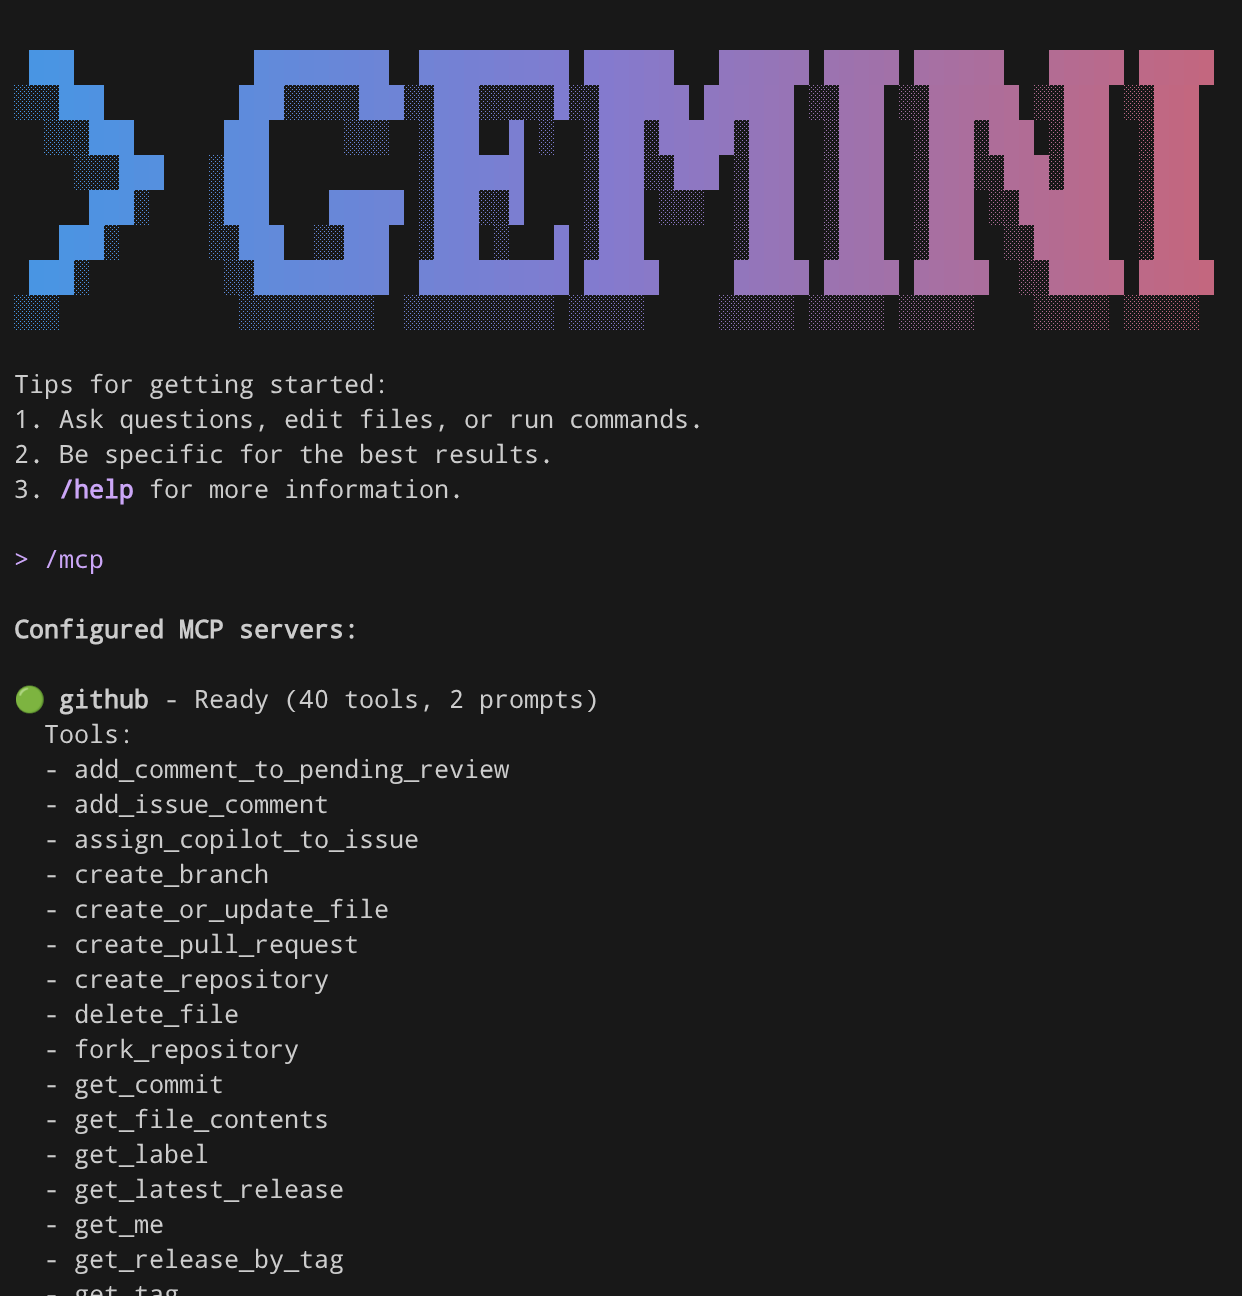
/mcp
Then to let's test this MCP connection by submitting this command
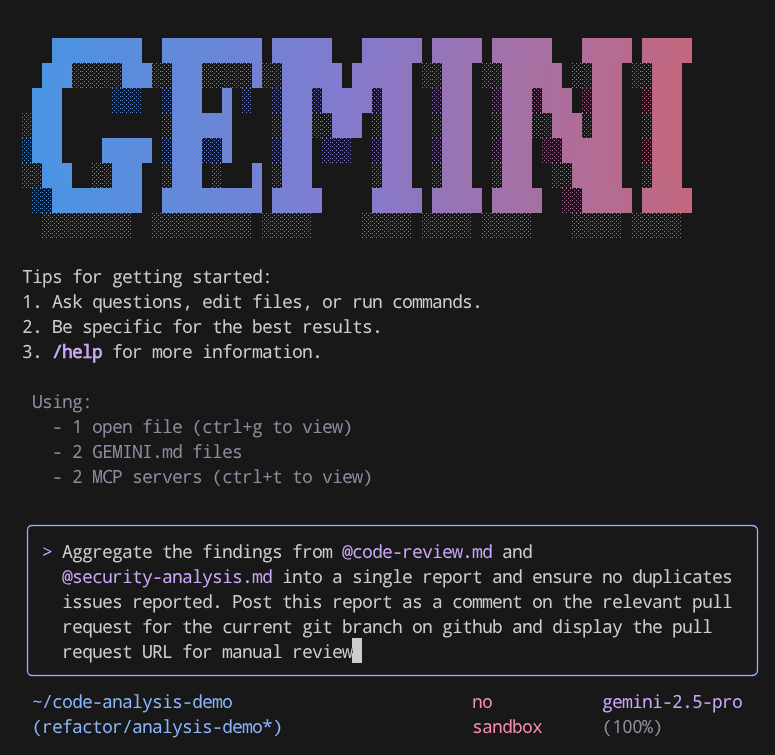
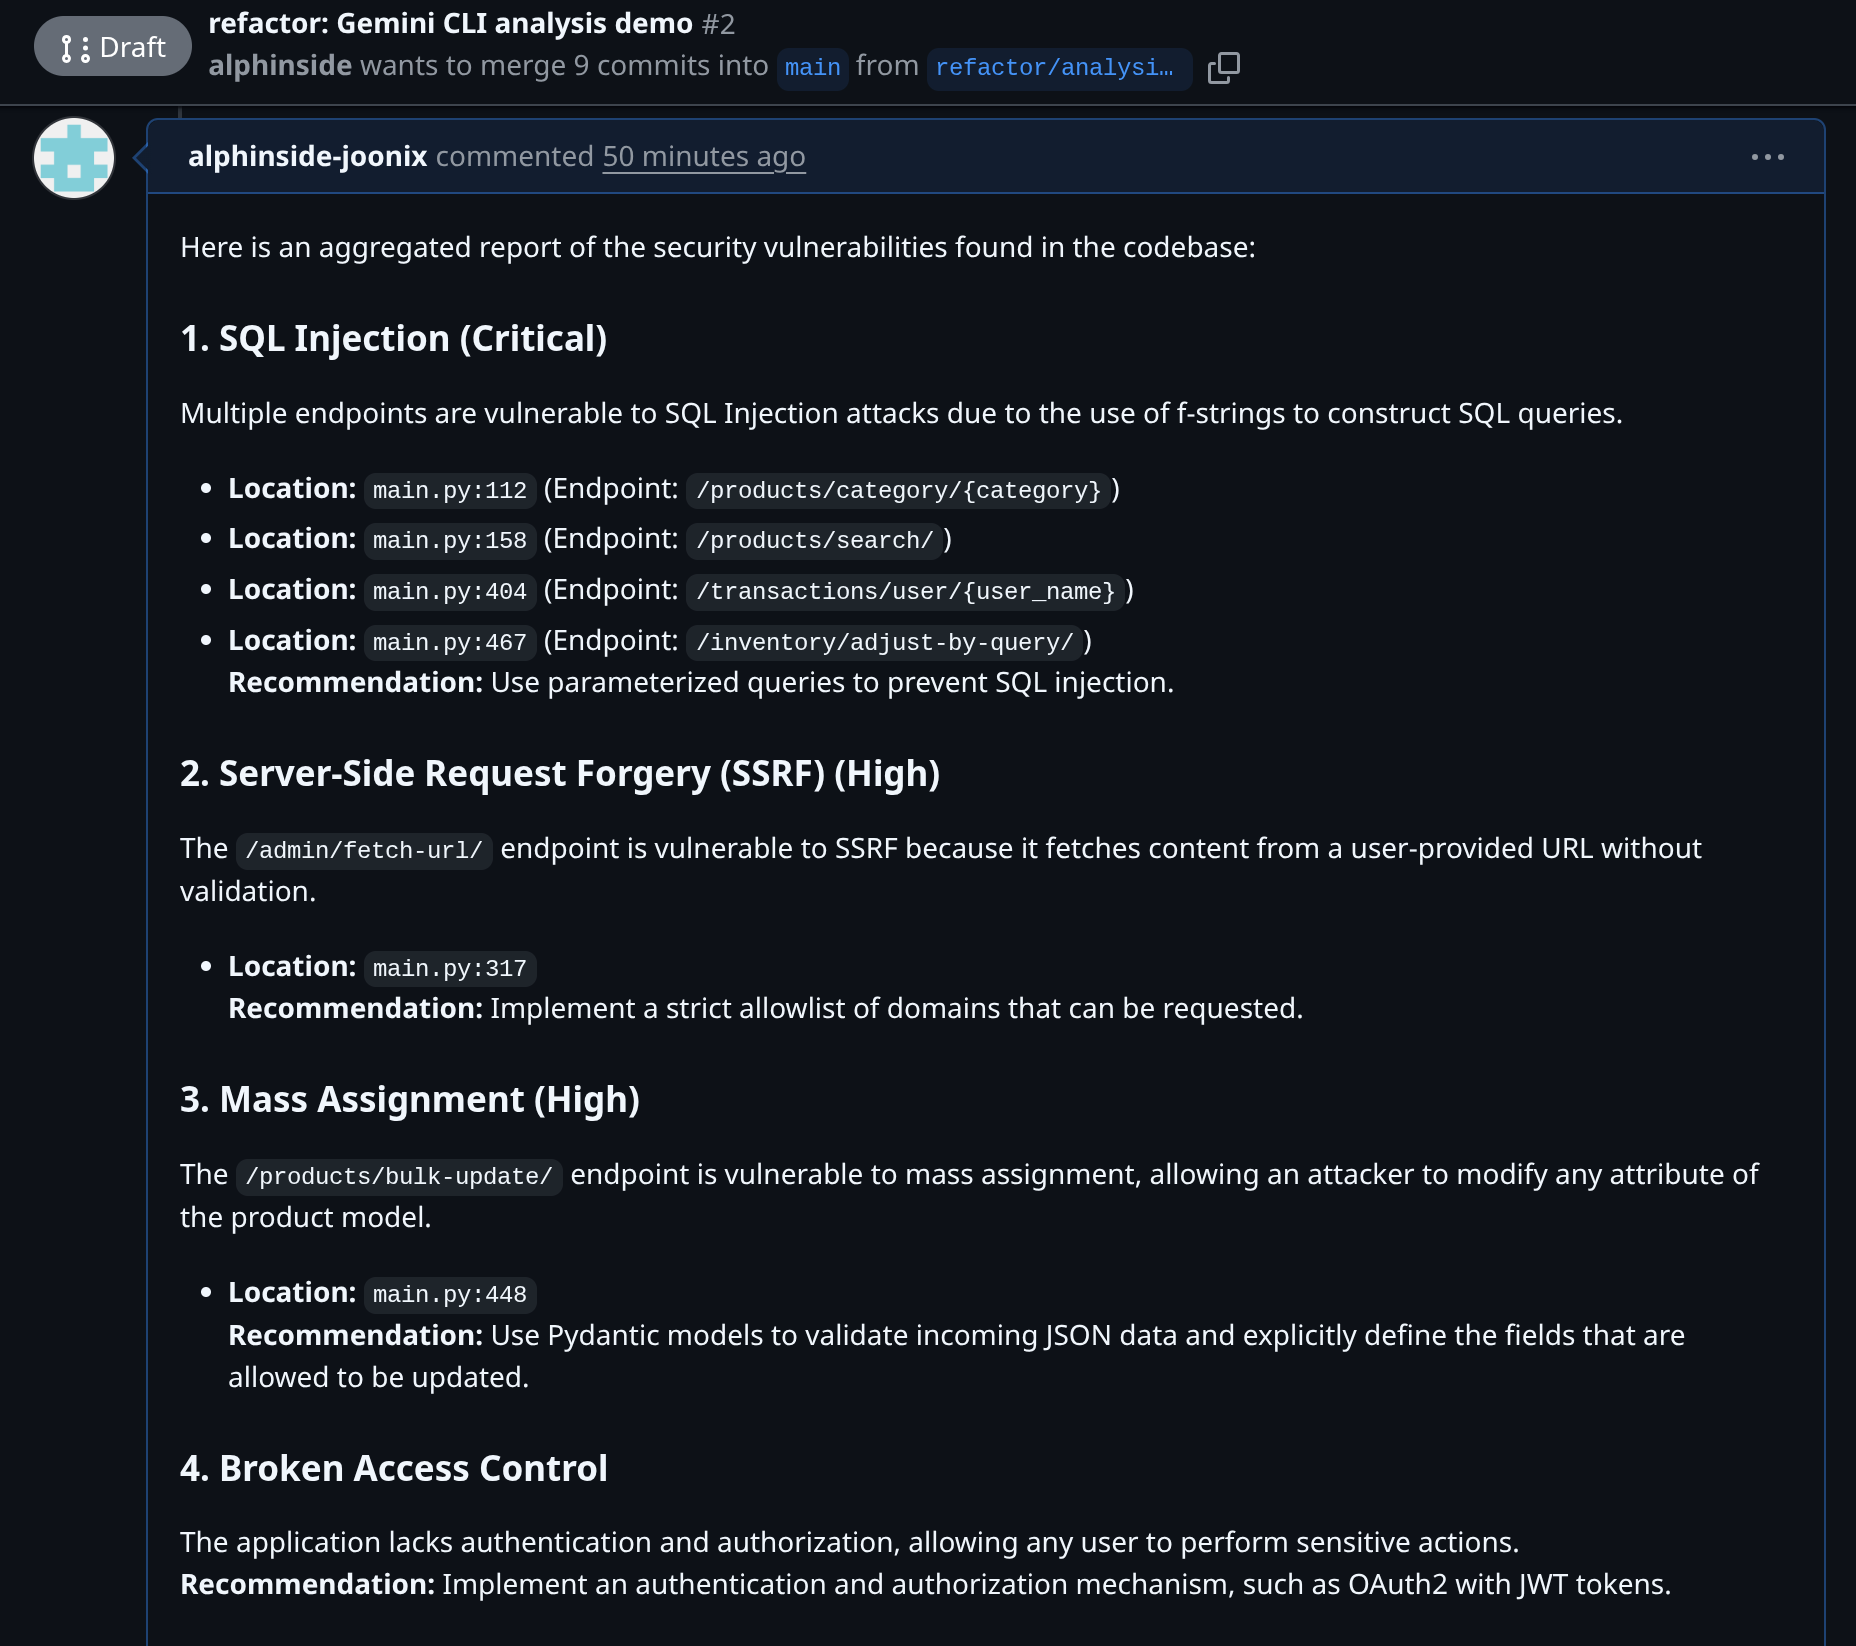
Aggregate the findings from @code-review.md and @security-analysis.md into a single report and ensure no duplicates issues reported. Post this report as a comment on the relevant pull request for the current git branch on GitHub and display the pull request URL for manual review
Note the @code-review.md and @security-analysis.md notation here, this is how we reference files to be passed to Gemini CLI. This command will read content of both files and push a comment to the Pull Request related to this branch using the Github MCP connection. After that you can check in the pull request URL to verify it.
9. 💡Gemini CLI in CI/CD Workflow
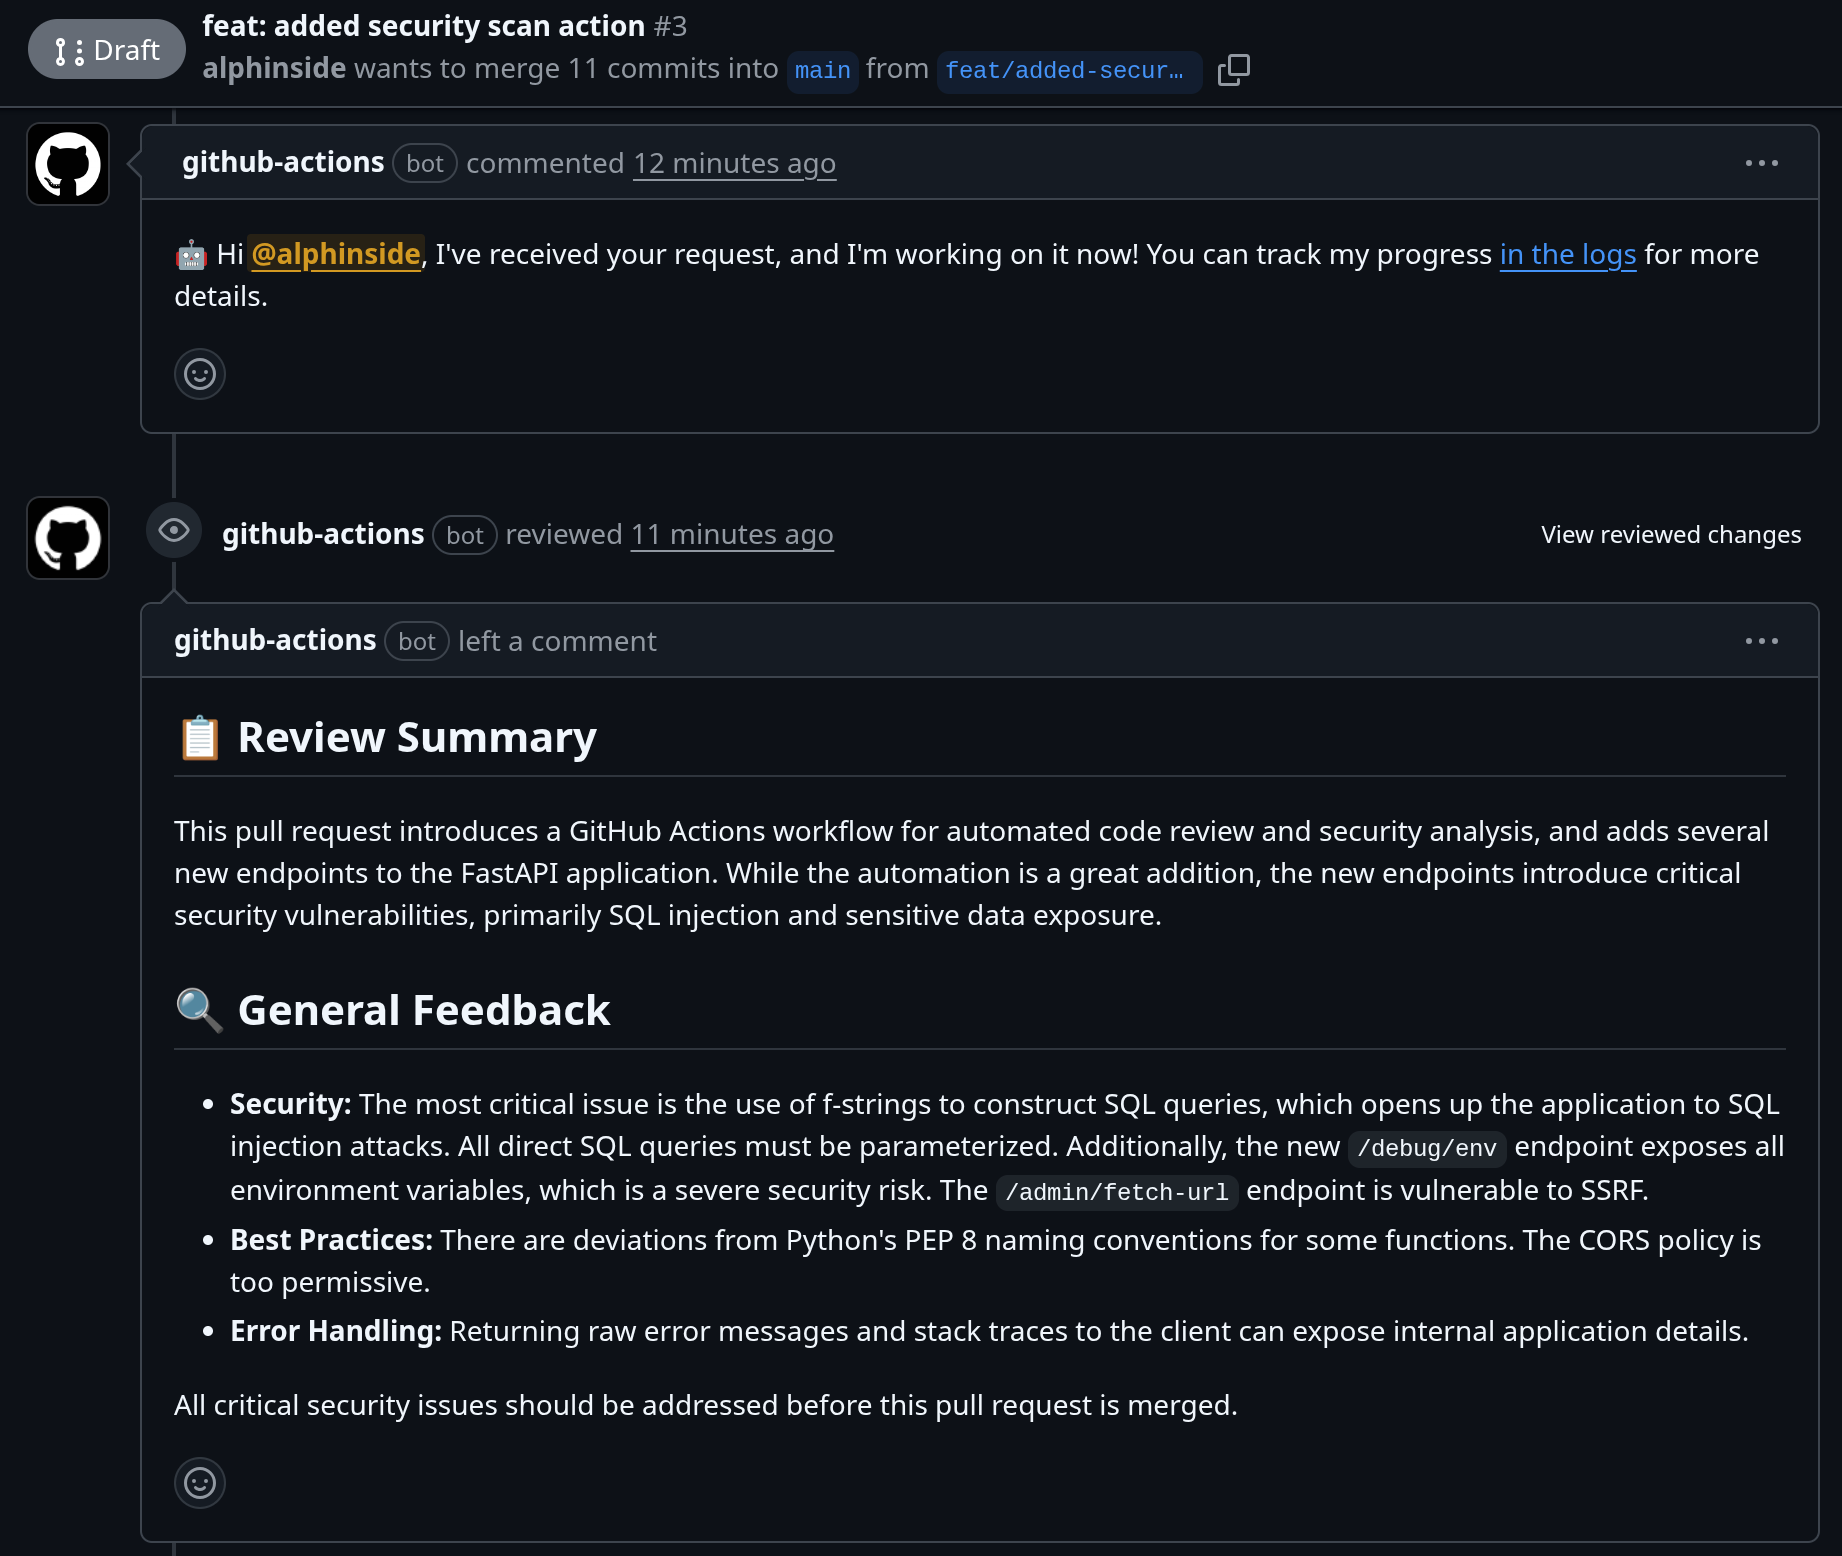
If you are a Github user, you can easily embed Gemini CLI in your CI/CD pipeline by utilizing run-gemini-cli Github Action. It acts both as an autonomous agent for critical routine coding tasks, and an on-demand collaborator you can quickly delegate work to
You can utilize it to perform pull request reviews, triage issues, perform code analysis and modification, and more using Gemini conversationally directly inside Github repositories
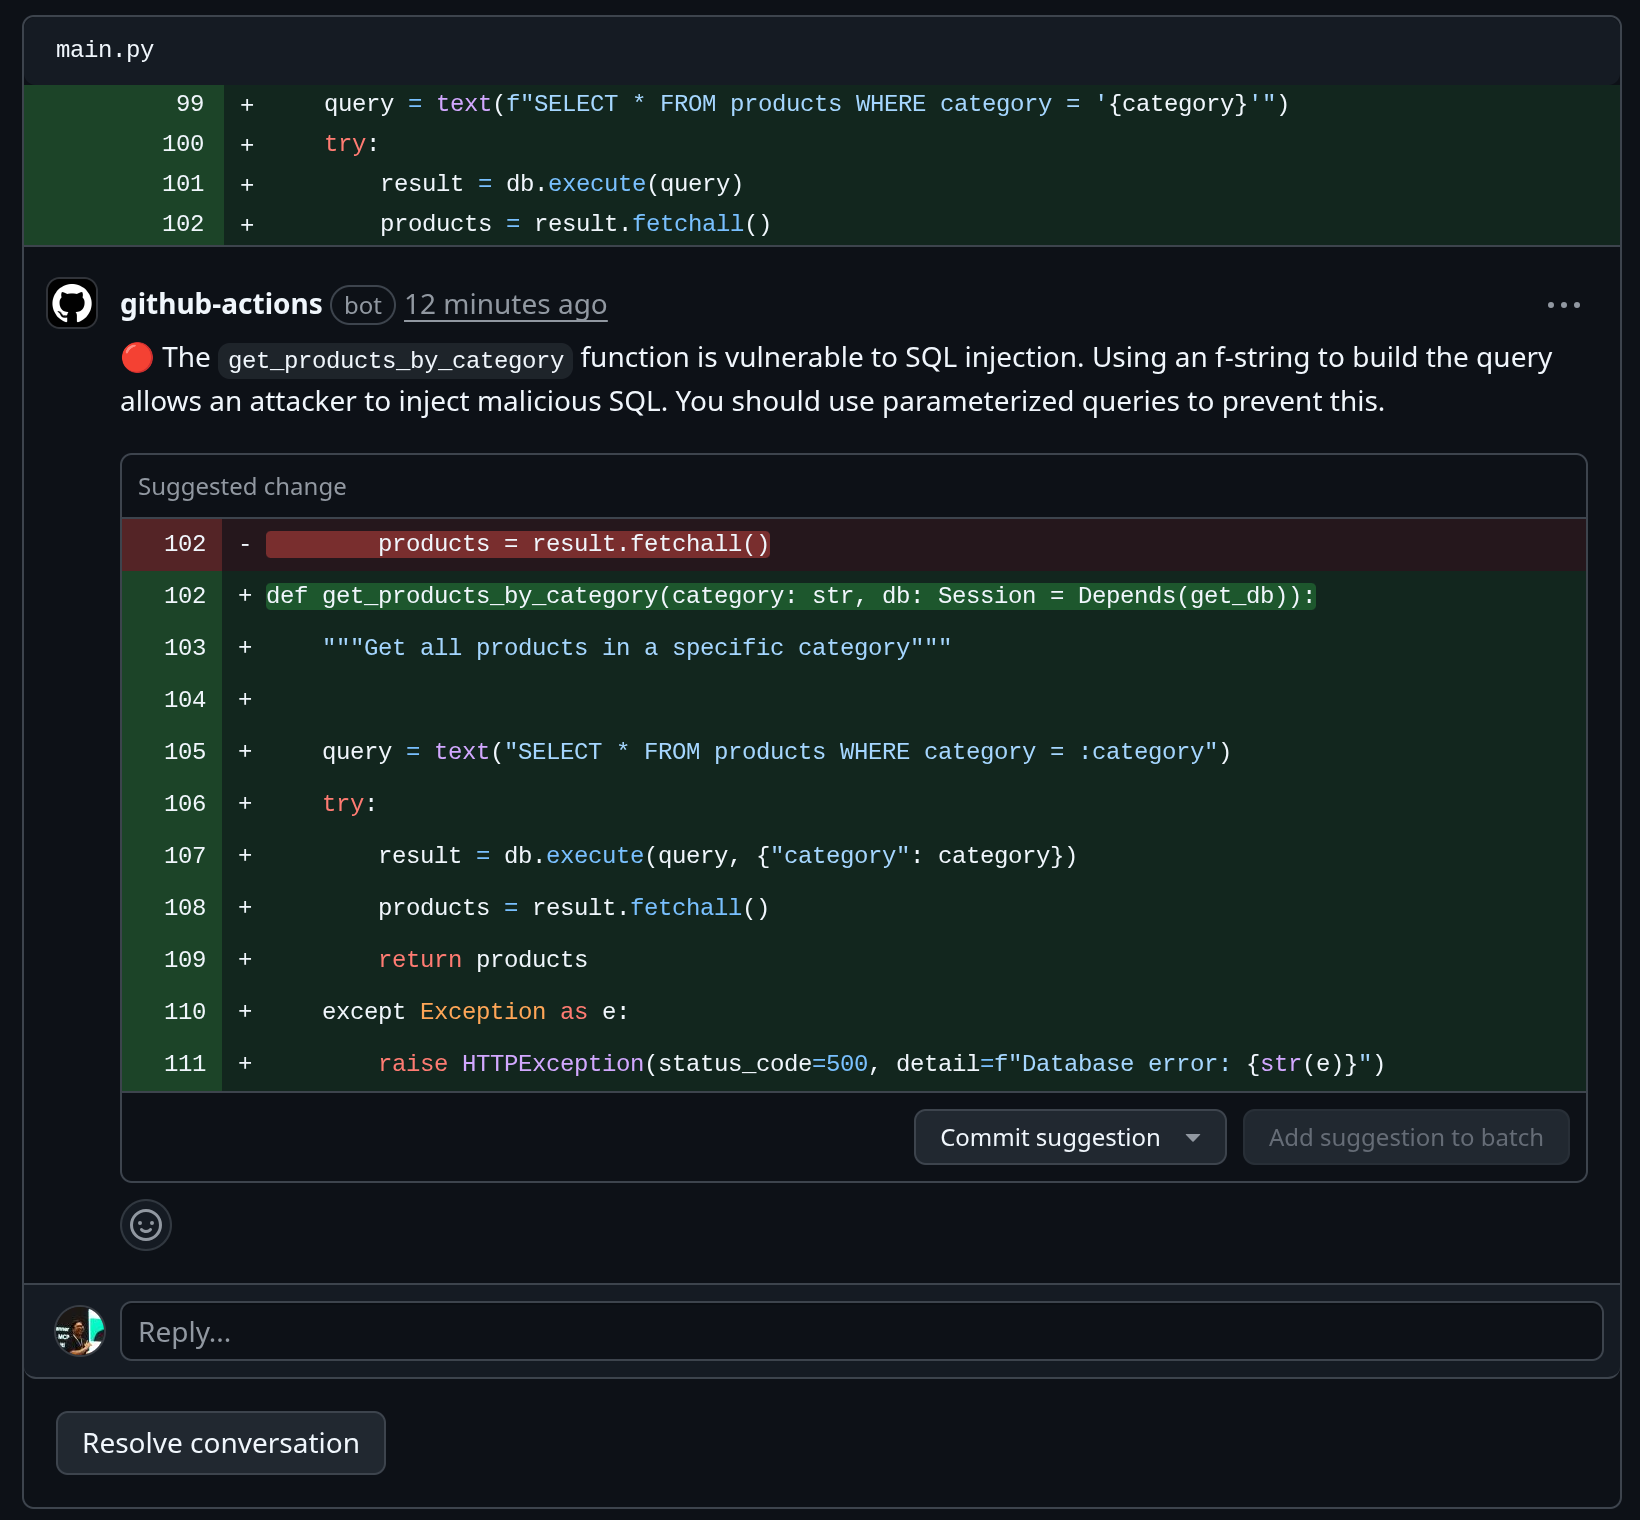
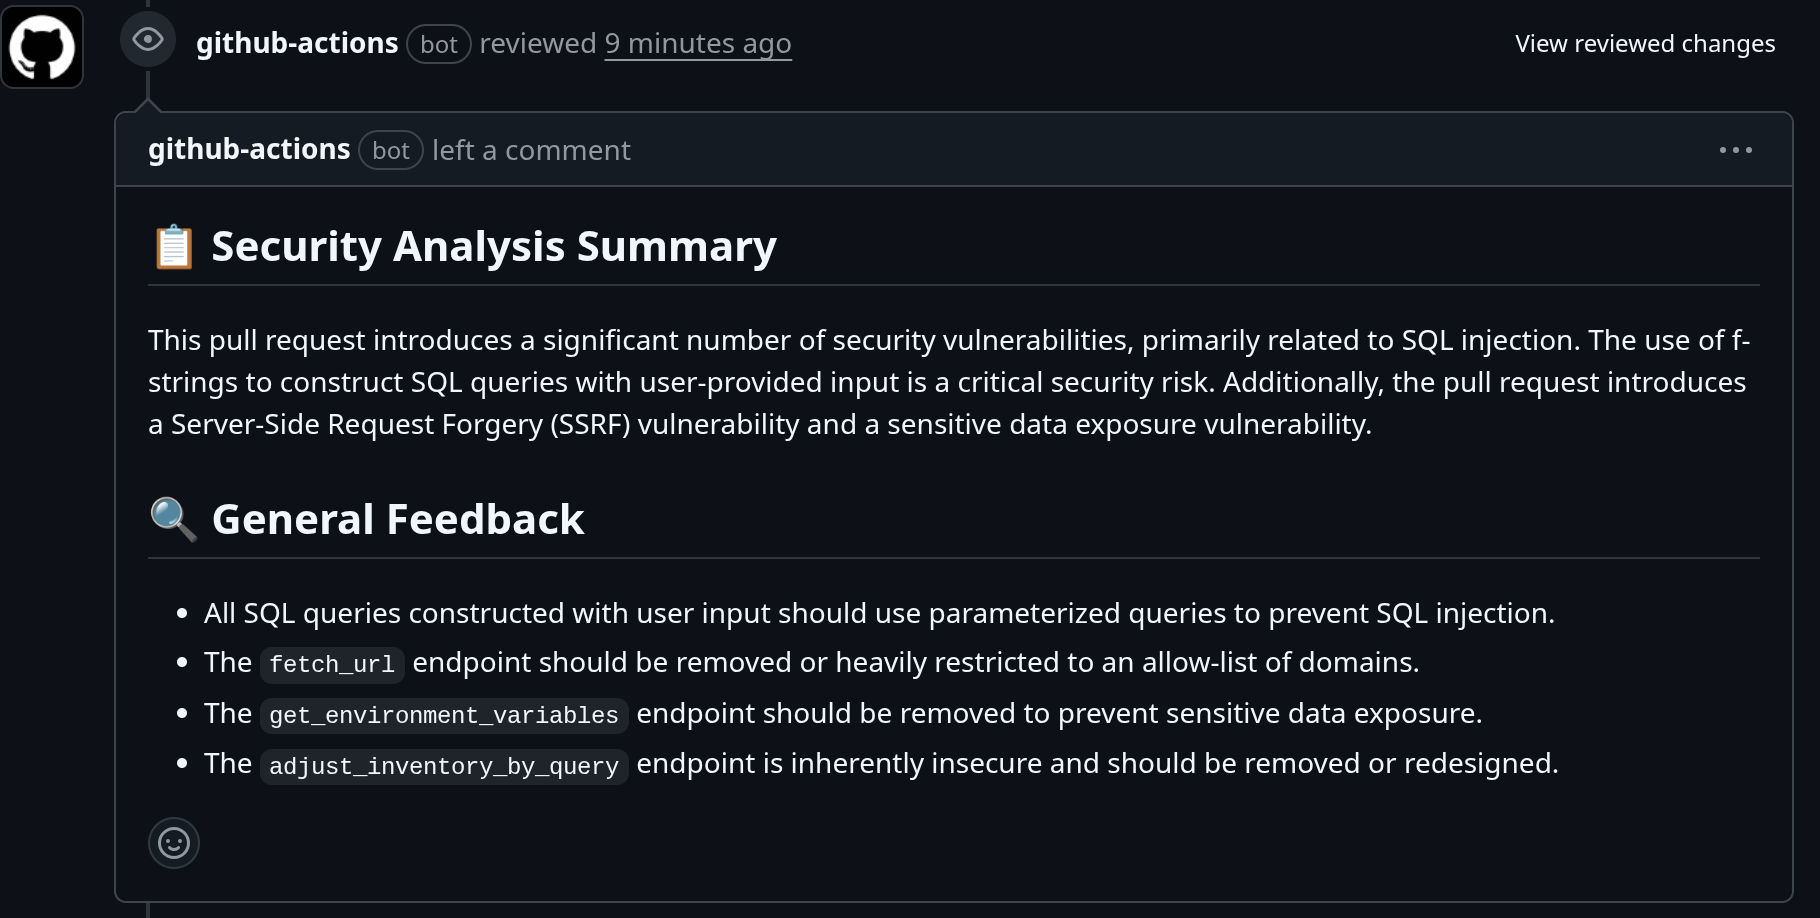
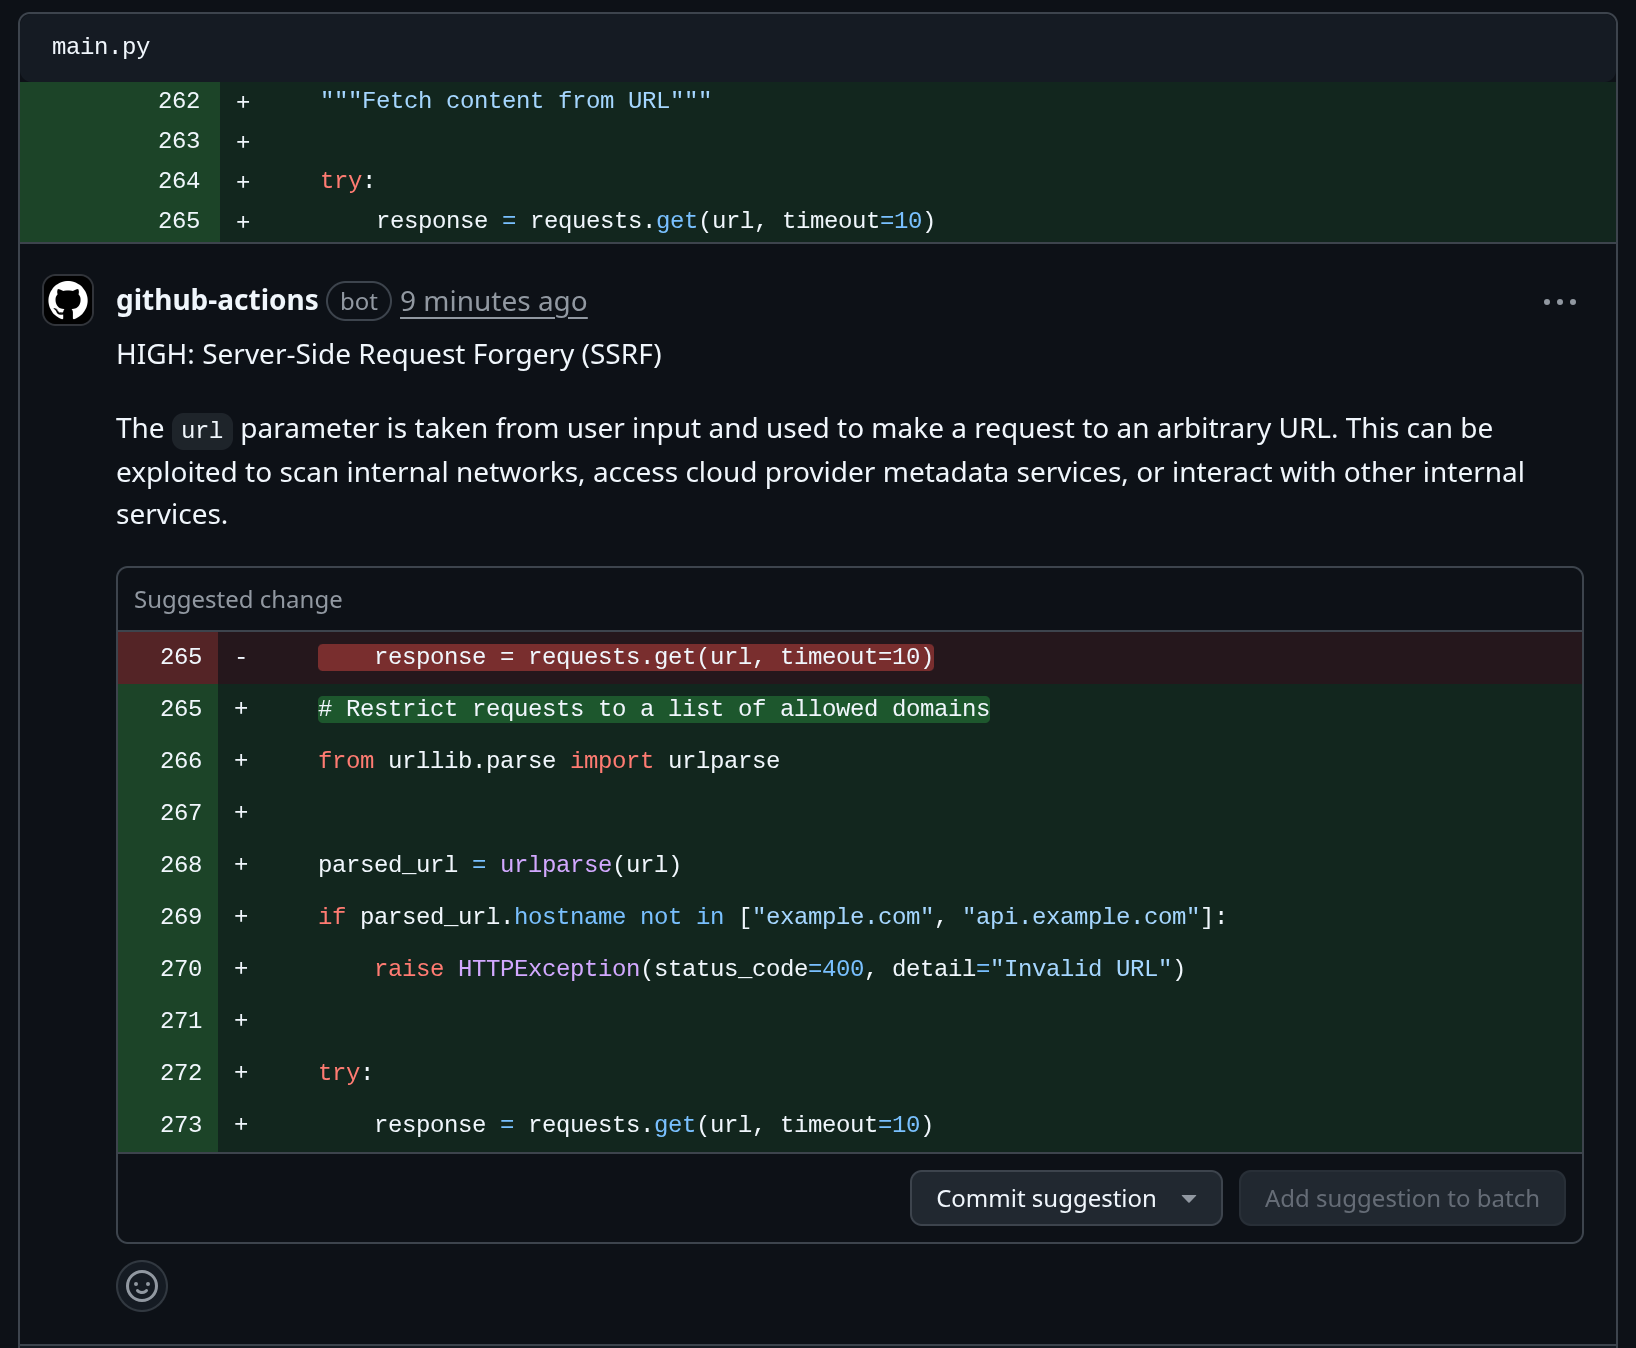
The example of this integration can be inspected in this pull request, where we utilize the Gemini CLI Security extension inside the runner and give the reviews when the Pull Request is created
10. 💡Explore Other Gemini CLI Extensions
You can also explore more extensions in https://geminicli.com/extensions . Check it out for more interesting tools!
11. 🧹 Clean up
To avoid incurring charges to your Google Cloud account for the resources used in this codelab, follow these steps:
- In the Google Cloud console, go to the Manage resources page.
- In the project list, select the project that you want to delete, and then click Delete.
- In the dialog, type the project ID, and then click Shut down to delete the project.